


 本文档详细介绍了在CentOS7.6环境下,如何安装配置Zabbix服务器,包括部署LAMP环境,设置数据库,授权用户,安装Zabbix服务端软件,导入监控数据库,解决乱码问题,启动Zabbix服务,并进行网页配置。此外,还涉及了数据库的初始化,权限设置,以及验证PHP和MySQL的联动性。
Zabbix安装配置及邮件报警
环境
zabbix   192.168.80.4/24  centos7.6
linux    192.168.80.1/24  centos7.6
windows  192.168.80.50/24
一、zabbix服务器的安装
1.部署LAMP架构
1.1 安装依赖包
[root@zabbix ~]# yum install -y httpd mariadb-server mariadb php php-mysql php-gd libjpeg* php-ldap php-odbc php-pear php-xml php-xmlrpc php-mhash
1.2 修改配置文件
vim /etc/httpd/conf/httpd.conf
95 ServerName www.my.com:80
164 <IfModule dir_module>
165     DirectoryIndex index.html index.php
166 </IfModule>
vim /etc/php.ini
878 date.timezone = PRC
1.3 启动apache和mariadb
[root@zabbix ~]# systemctl start httpd.service
[root@zabbix ~]# systemctl start mariadb.service
[root@zabbix ~]# netstat -antp | grep 80
tcp        0      0 192.168.80.4:22         192.168.80.100:53566    ESTABLISHED 89143/sshd: root@pt
tcp        0     52 192.168.80.4:22         192.168.80.100:65438    ESTABLISHED 95371/sshd: root@pt
tcp6       0      0 :::80                   :::*                    LISTEN      102264/httpd
[root@zabbix ~]# netstat -antp | grep 3306
tcp        0      0 0.0.0.0:3306            0.0.0.0:*               LISTEN      102596/mysqld
1.4 初始化数据库
[root@zabbix ~]# mysql_secure_installation

NOTE: RUNNING ALL PARTS OF THIS SCRIPT IS RECOMMENDED FOR ALL MariaDB
      SERVERS IN PRODUCTION USE!  PLEASE READ EACH STEP CAREFULLY!

In order to log into MariaDB to secure it, we'll need the current
password for the root user.  If you've just installed MariaDB, and
you haven't set the root password yet, the password will be blank,
so you should just press enter here.

Enter current password for root (enter for none):  //初次运行直接回车
OK, successfully used password, moving on...

Setting the root password ensures that nobody can log into the MariaDB
root user without the proper authorisation.

Set root password? [Y/n] n   //是否设置密码
 ... skipping.

By default, a MariaDB installation has an anonymous user, allowing anyone
to log into MariaDB without having to have a user account created for
them.  This is intended only for testing, and to make the installation
go a bit smoother.  You should remove them before moving into a
production environment.

Remove anonymous users? [Y/n] n  //是否删除匿名用户
 ... skipping.

Normally, root should only be allowed to connect from 'localhost'.  This
ensures that someone cannot guess at the root password from the network.

Disallow root login remotely? [Y/n] y   //是否禁止root用户远程登录
 ... Success!

By default, MariaDB comes with a database named 'test' that anyone can
access.  This is also intended only for testing, and should be removed
before moving into a production environment.

Remove test database and access to it? [Y/n] n  //是否删除test库
 ... skipping.

Reloading the privilege tables will ensure that all changes made so far
will take effect immediately.

Reload privilege tables now? [Y/n] y   //是否重载权限表
 ... Success!

Cleaning up...

All done!  If you've completed all of the above steps, your MariaDB
installation should now be secure.

Thanks for using MariaDB!
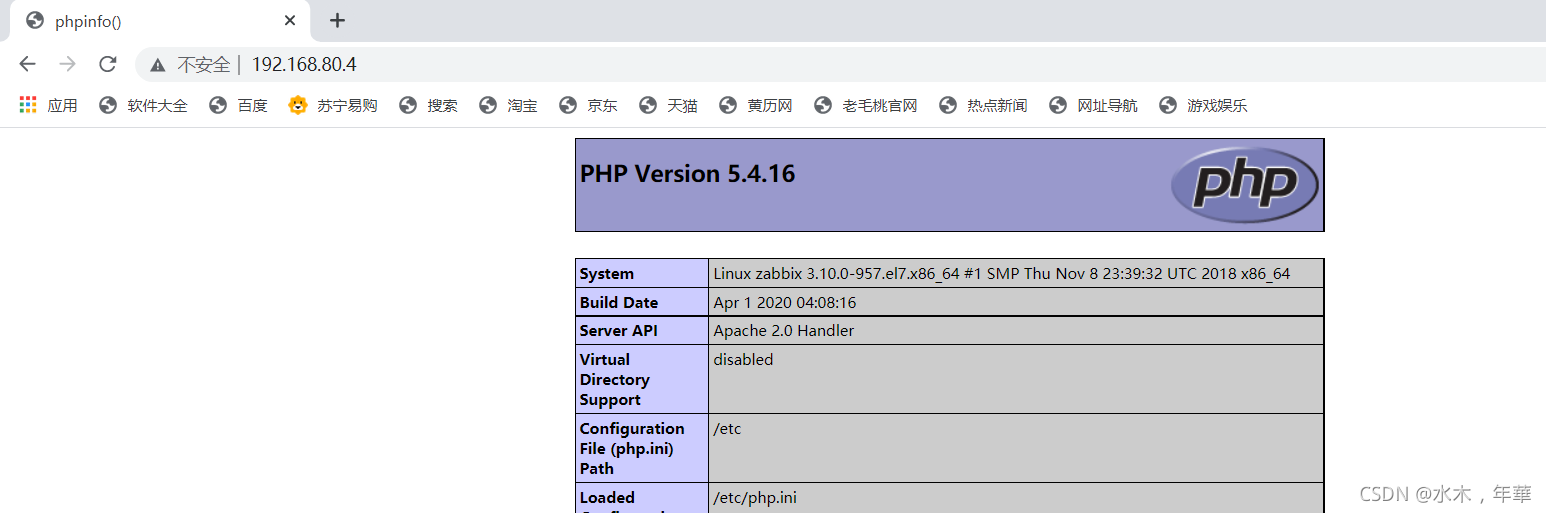
1.5 验证php网页是否可以打开
vi /var/www/html/index.php
<?php
phpinfo();
?>
1.6 对zabbix用户授权
[root@zabbix ~]# mysql
Welcome to the MariaDB monitor.  Commands end with ; or \g.
Your MariaDB connection id is 5
Server version: 5.5.68-MariaDB MariaDB Server

Copyright (c) 2000, 2018, Oracle, MariaDB Corporation Ab and others.

Type 'help;' or '\h' for help. Type '\c' to clear the current input statement.

MariaDB [(none)]> CREATE DATABASE zabbix character set utf8 collate utf8_bin;
Query OK, 1 row affected (0.00 sec)

MariaDB [(none)]> GRANT all ON zabbix.* TO 'zabbix'@'%' IDENTIFIED BY 'admin123';
Query OK, 0 rows affected (0.00 sec)

MariaDB [(none)]> GRANT all ON zabbix.* TO 'zabbix'@'zabbix' IDENTIFIED BY 'admin123';
Query OK, 0 rows affected (0.00 sec)

MariaDB [(none)]> flush privileges;
Query OK, 0 rows affected (0.00 sec)

MariaDB [(none)]>
1.7 验证php和mysql的联动性
[root@zabbix httpd]# vi /var/www/html/index.php
<?php
$link=mysql_connect('192.168.80.4','zabbix','admin123');
if($link) echo "<h1>Success!!</h1>";
else echo "Fail!!";
mysql_close();
?>

2.部署zabbix服务器
2.1 添加zabbix源
[root@zabbix yum.repos.d]# wget -O /etc/yum.repos.d/CentOS-Base.repo http://mirrors.aliyun.com/repo/Centos-7.repo
[root@zabbix yum.repos.d]# wget -O /etc/yum.repos.d/epel.repo http://mirrors.aliyun.com/repo/epel-7.repo  //下载阿里云源
[root@zabbix yum.repos.d]# vi /etc/yum.repos.d/zabbix.repo
[zabbix]
name=Zabbix Official Repository - \$basearch
baseurl=https://mirrors.aliyun.com/zabbix/zabbix/4.0/rhel/7/\$basearch/
enabled=1
gpgcheck=0

[zabbix-non-supported]
name=Zabbix Official Repository non-supported - \$basearch
baseurl=https://mirrors.aliyun.com/zabbix/non-supported/rhel/7/\$basearch/
enabled=1
gpgcheck=0

[root@zabbix yum.repos.d]#  yum clean all   //清理缓存
[root@zabbix yum.repos.d]#  yum makecake   //添加缓存
2.2 安装zabbix服务端软件
[root@localhost ~]# yum install -y php-mbstring php-bcmath   //添加必要插件
[root@localhost ~]# rpm -ivh http://repo.zabbix.com/zabbix/4.0/rhel/7/x86_64/zabbix-release-3.5-1.el7.noarch.rpm                                 //获取Zabbix安装源
[root@localhost ~]# yum install zabbix-server-mysql zabbix-web-mysql  -y  --nogpgcheck
2.3 导入zabbix监控数据库
root@localhost ~]# zcat /usr/share/doc/zabbix-server-mysql-4.0.33/create.sql.gz | mysql -uzabbix -padmin123 zabbix  //导入zabbix监控数据库
[root@localhost ~]# grep -n '^'[a-Z] /etc/zabbix/zabbix_server.conf  //查看zabbix未注释的生效行
38:LogFile=/var/log/zabbix/zabbix_server.log
49:LogFileSize=0
72:PidFile=/var/run/zabbix/zabbix_server.pid
82:SocketDir=/var/run/zabbix
100:DBName=zabbix
116:DBUser=zabbix
124:DBPassword=admin123
356:SNMPTrapperFile=/var/log/snmptrap/snmptrap.log
471:Timeout=4
514:AlertScriptsPath=/usr/lib/zabbix/alertscripts
525:ExternalScripts=/usr/lib/zabbix/externalscripts
561:LogSlowQueries=3000
2.4 解决乱码问题
vi /etc/httpd/conf.d/zabbix.conf
php_value date.timezone Asia/Shanghai      //修改时区,将此行注释去掉修改即可
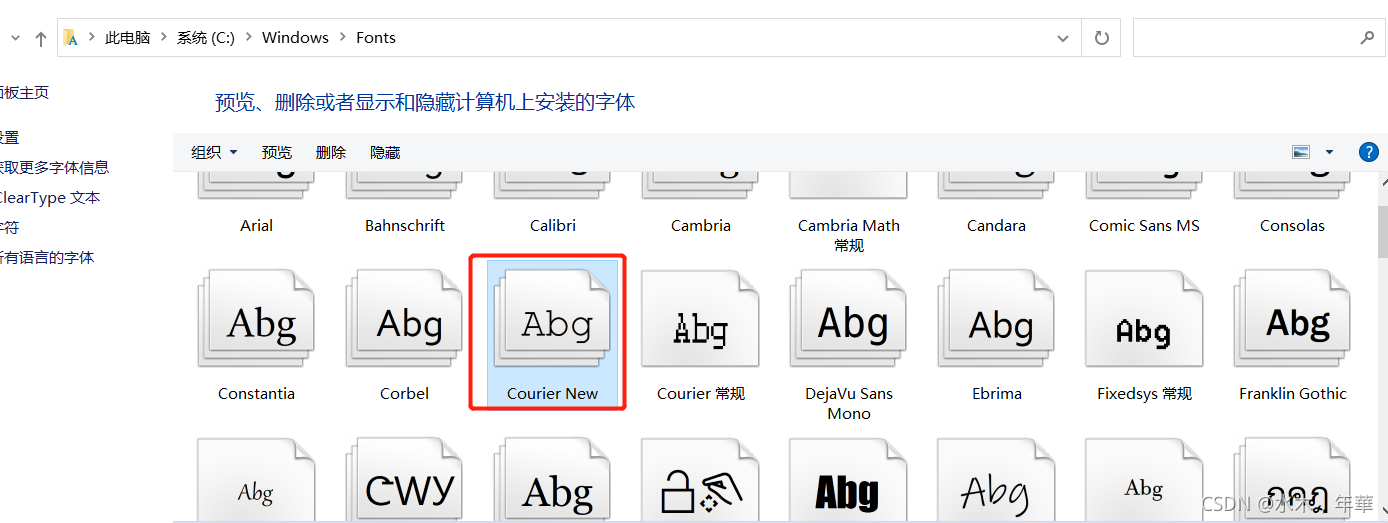
[root@localhost fonts]# vim /usr/share/zabbix/include/defines.inc.php
[root@localhost ~]# cd /usr/share/zabbix/assets/fonts/
[root@localhost fonts]# ls
graphfont.ttf
[root@localhost fonts]# rz -E
rz waiting to receive.
[root@localhost fonts]# ls  #从微软系统C:\Windows\Fonts下复制相应的字体文件到 /usr/share/zabbix/assets/fonts 目录中注意字体名称要对应配置文件改为simkai.ttf,且注意大小写
 COUR.TTF  graphfont.ttf
[root@localhost fonts]# mv COUR.TTF simkai.ttf
[root@localhost fonts]# ls
graphfont.ttf  simkai.ttf
2.5 启动zabbix
systemctl enable zabbix-server
systemctl start zabbix-server
netstat -anpt | grep zabbix   //监听在10051端口上
systemctl restart httpd.service

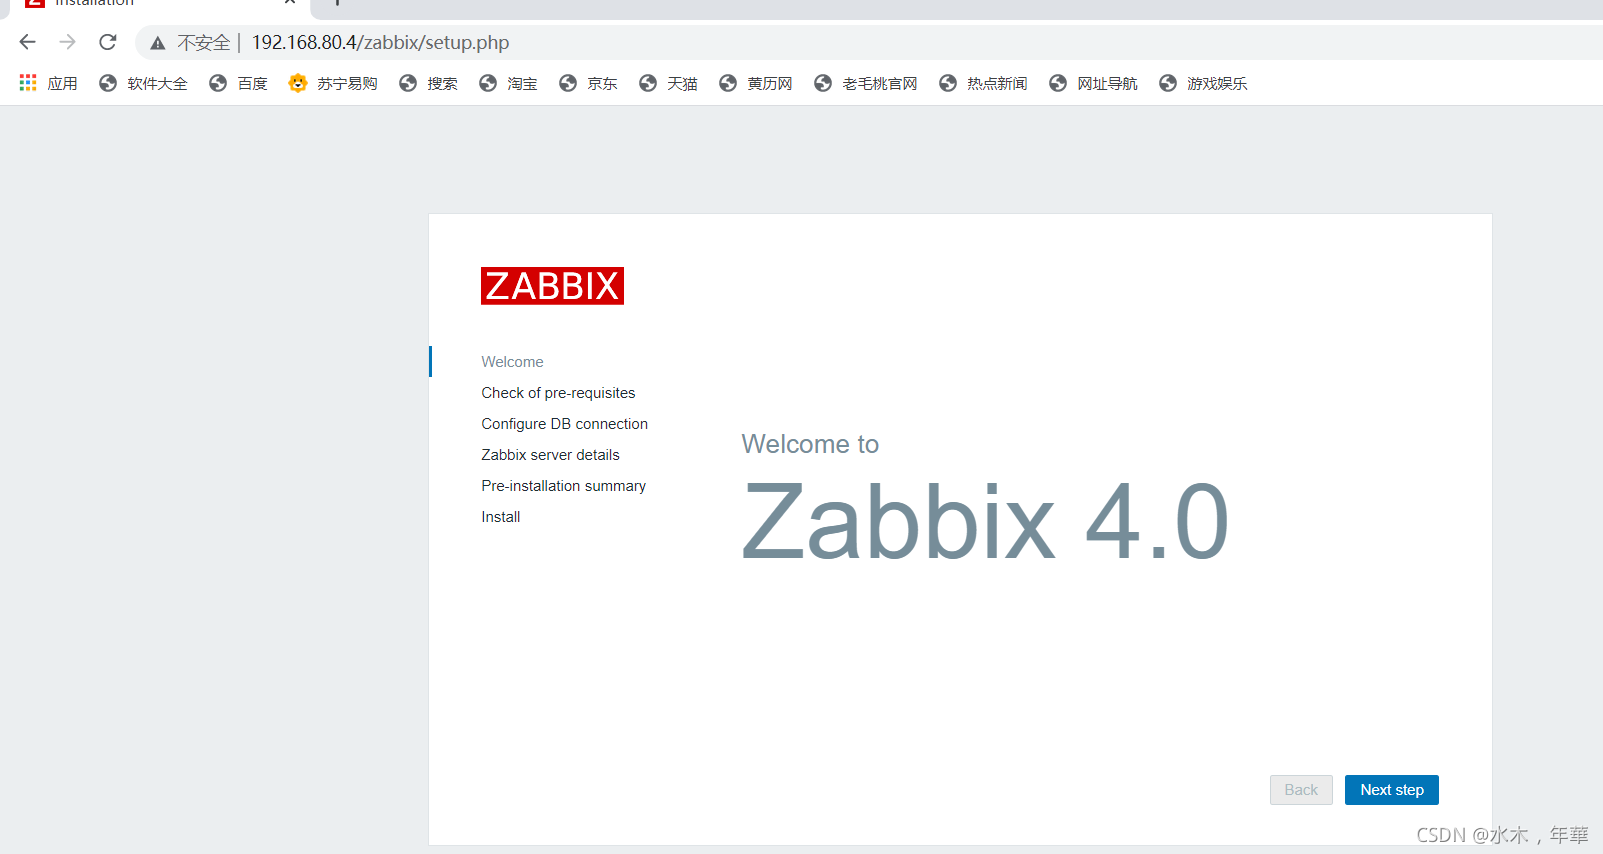
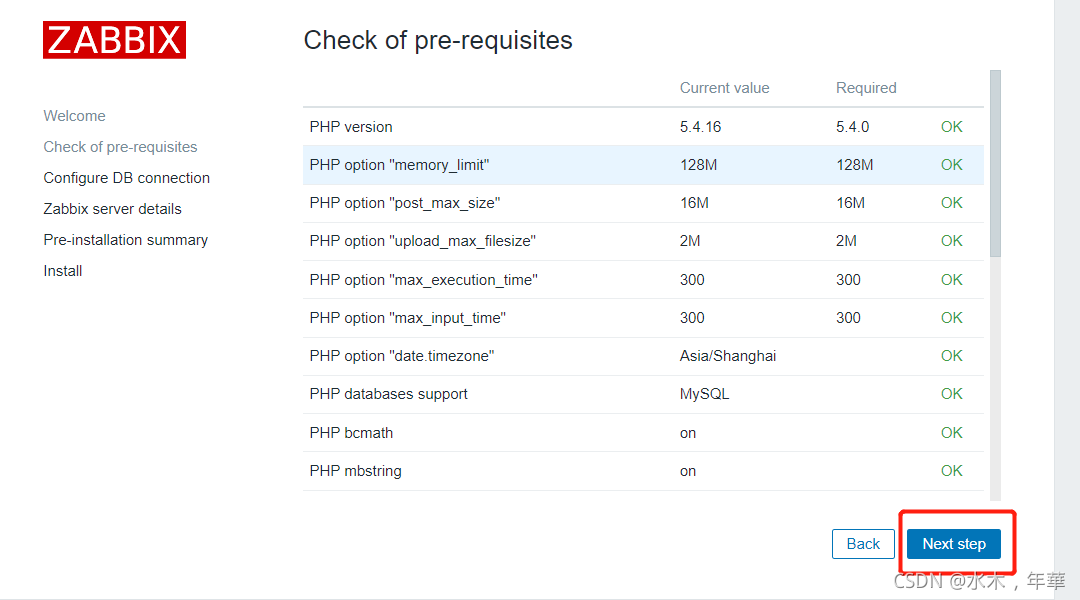
3.zabnix网页配置
状态检查
连接数据库

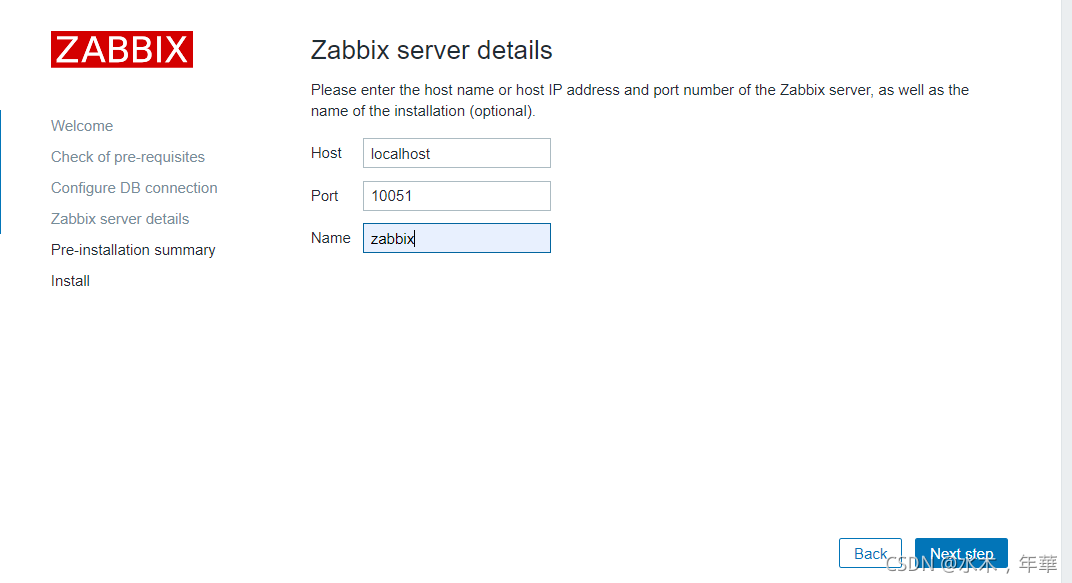
起zabbix服务器名称
信息总览

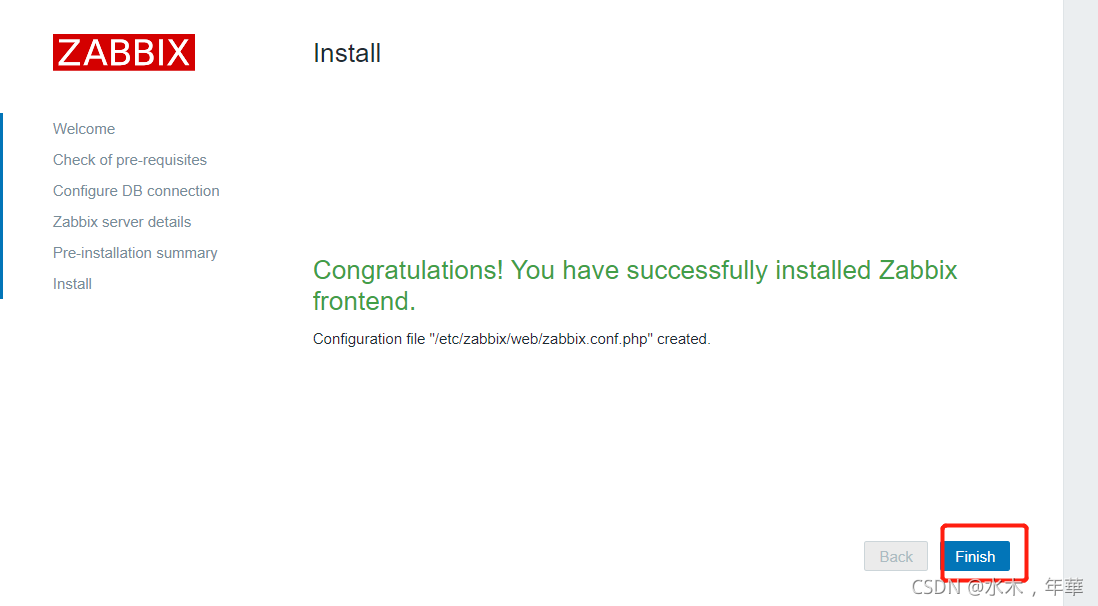
完成
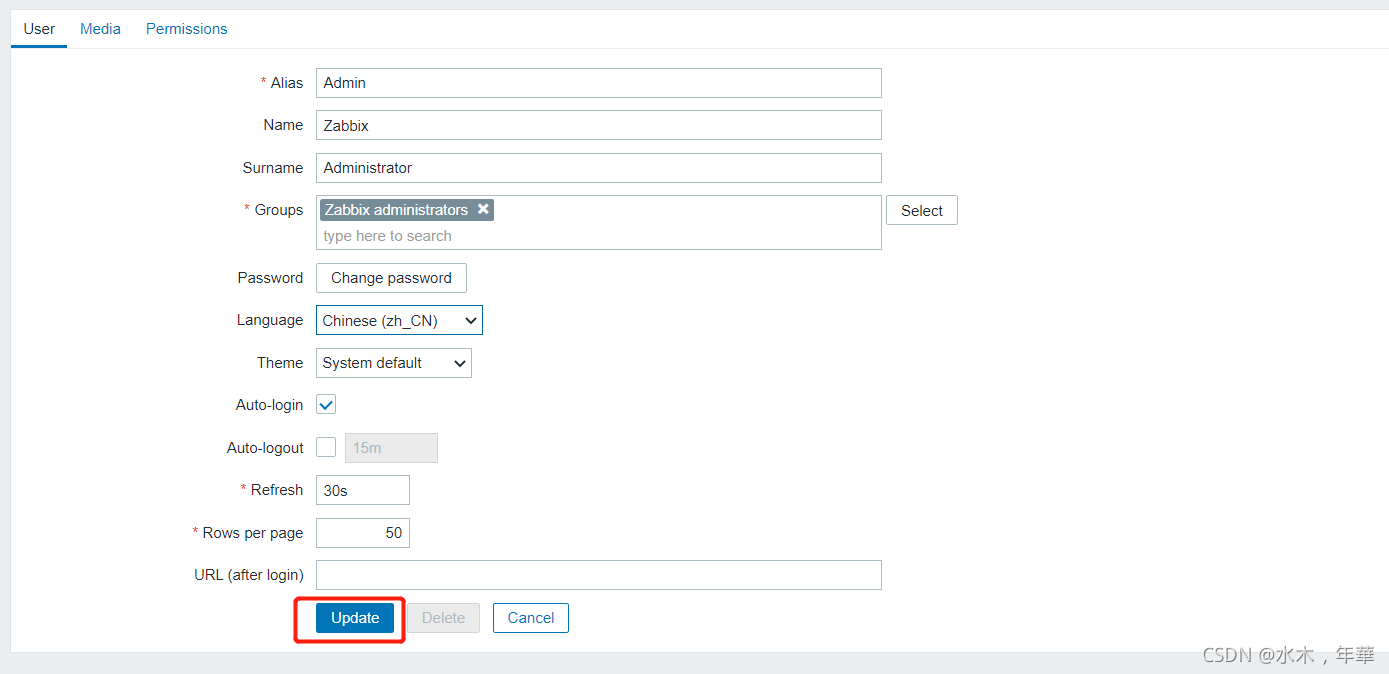
修改zabbix的监控语言

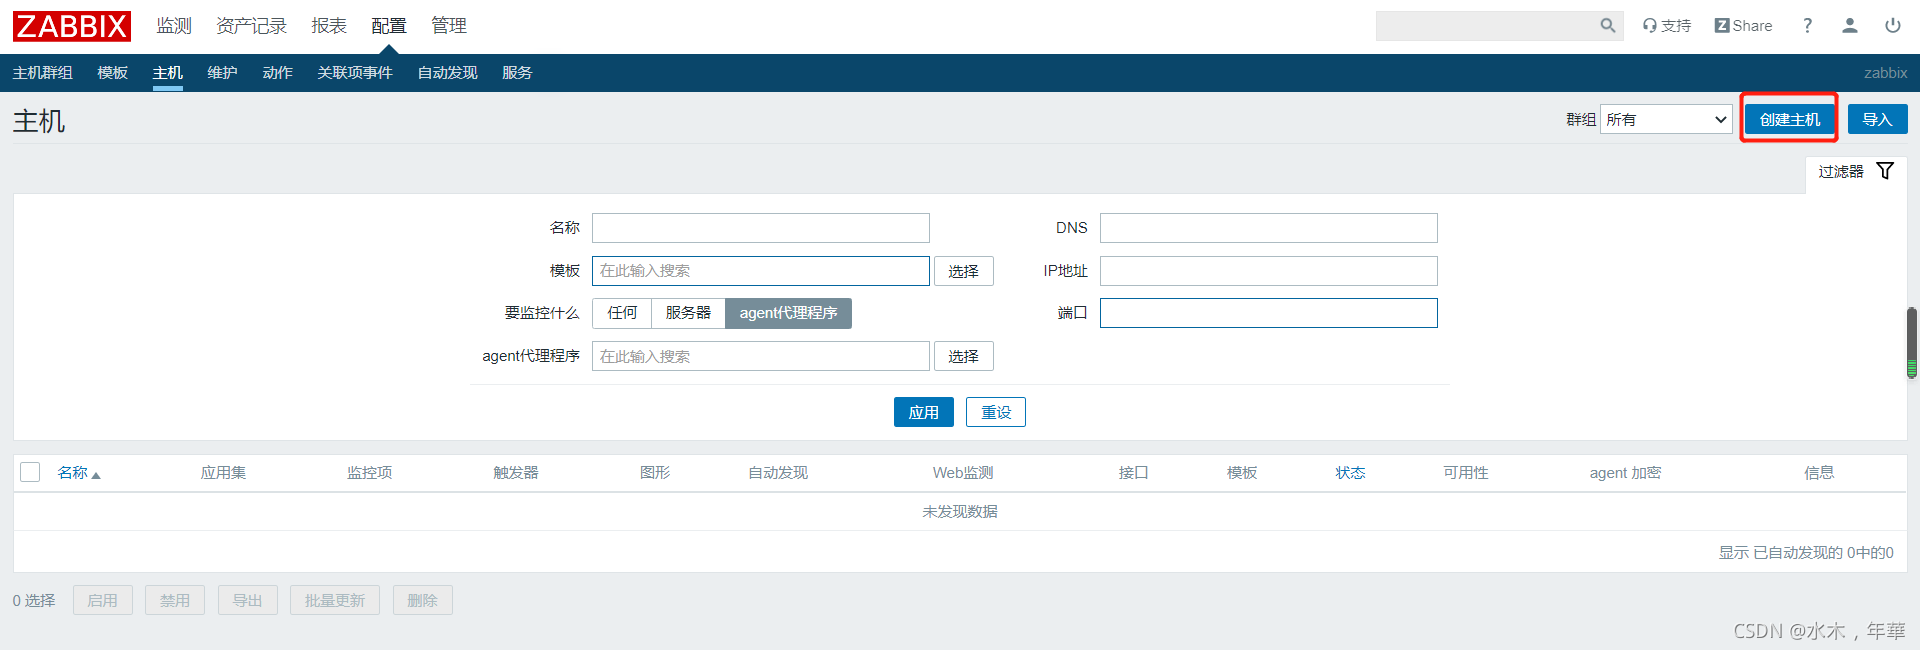
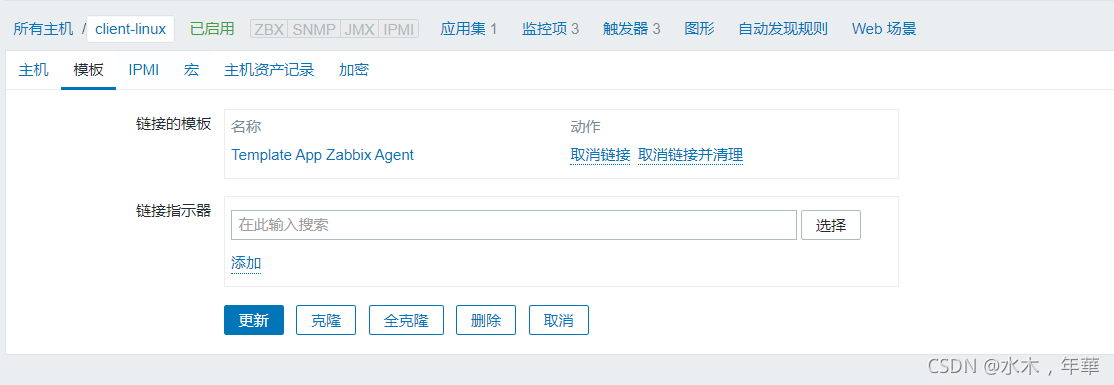
4.3 web创建被控主机


 1568
1568

 被折叠的 条评论
为什么被折叠?
被折叠的 条评论
为什么被折叠?
 到【灌水乐园】发言


