


 该文详细介绍了如何使用CubeMX创建基础工程并移植FreeRTOS操作系统,包括下载FreeRTOS源码、选择必要的文件、配置FreeRTOSConfig.h以及添加中断处理函数。同时,文中展示了如何在STM32F1xx的usart.c文件中添加串口调试功能,并在main.c中创建任务和调度。
目标:基于STM32HAL库移植FreeRTOS操作系统
目标:掌握FreeRTO的移植,后期将直接使用配置工具进行开发
内容:
- 使用CubeMX创建基础工程
- 移植FreeRTOS
- 了解三个参数的作用
步骤:
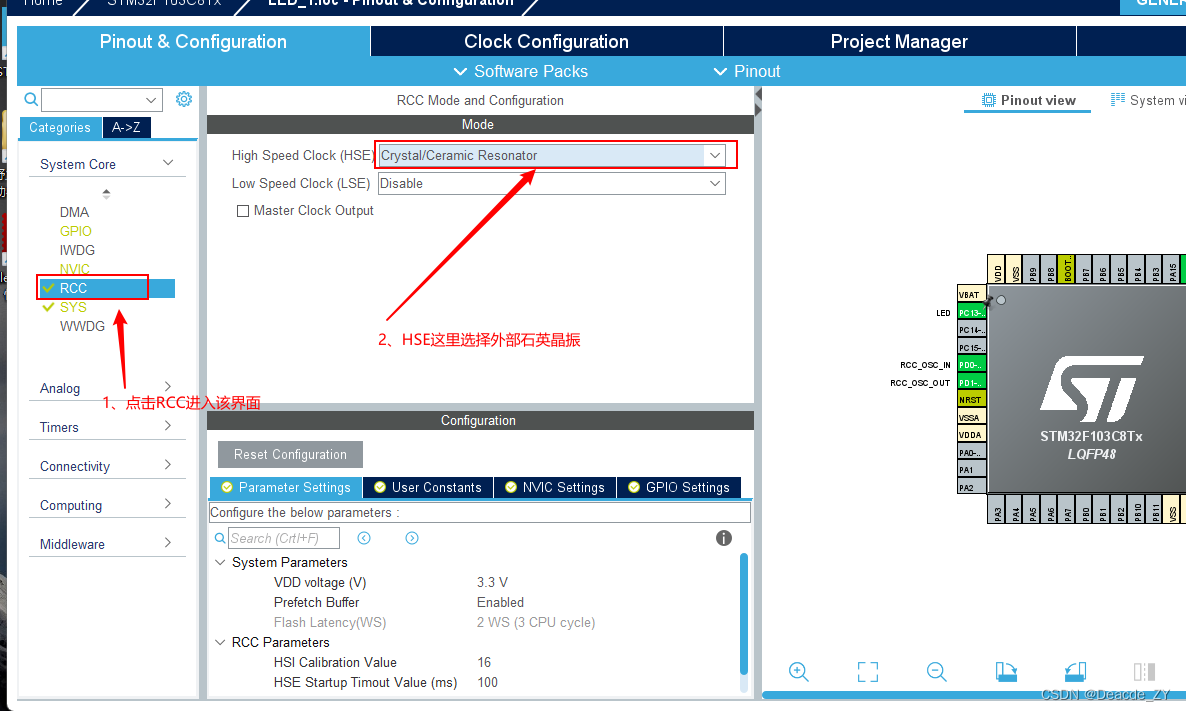
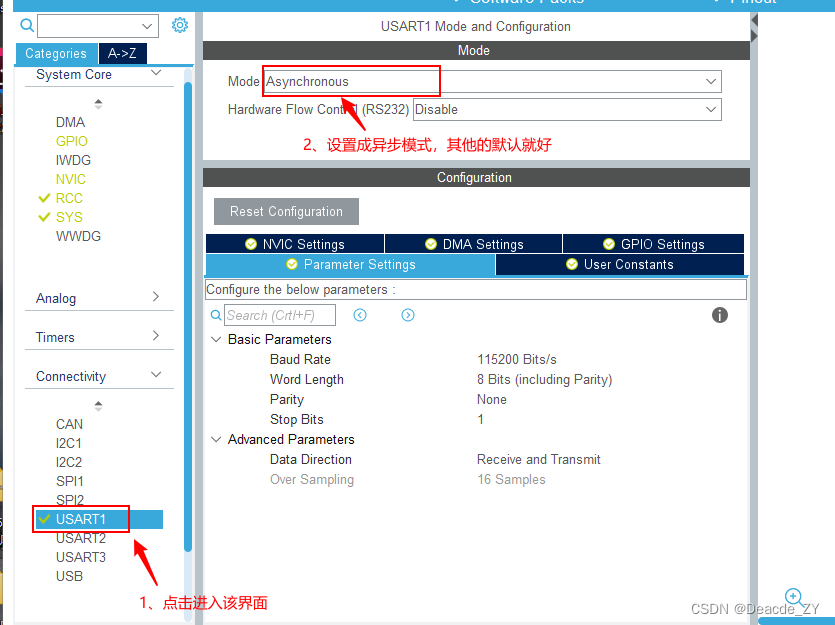
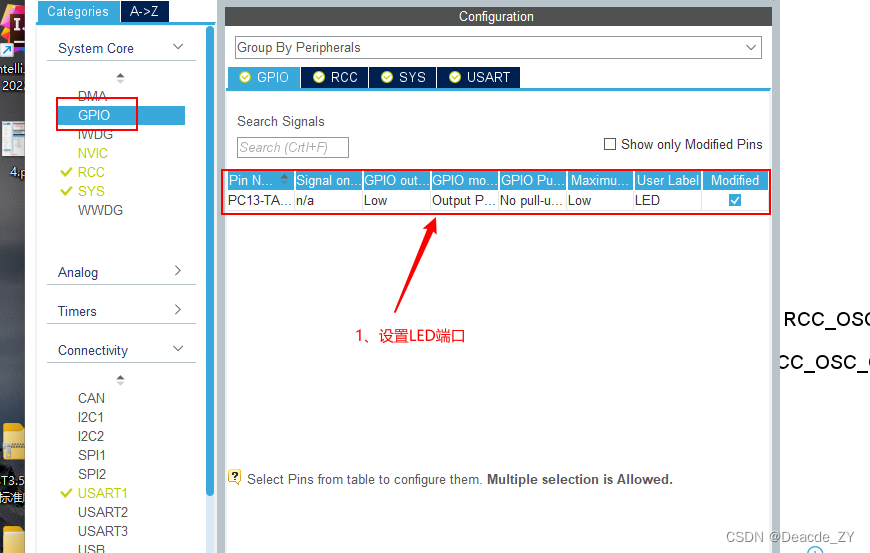
1、使用CubeMX创建基础工程


2、移植FreeRTOS
FreeRTOS下载地址:https://www.freertos.org/zh-cn-cmn-s/a00104.html
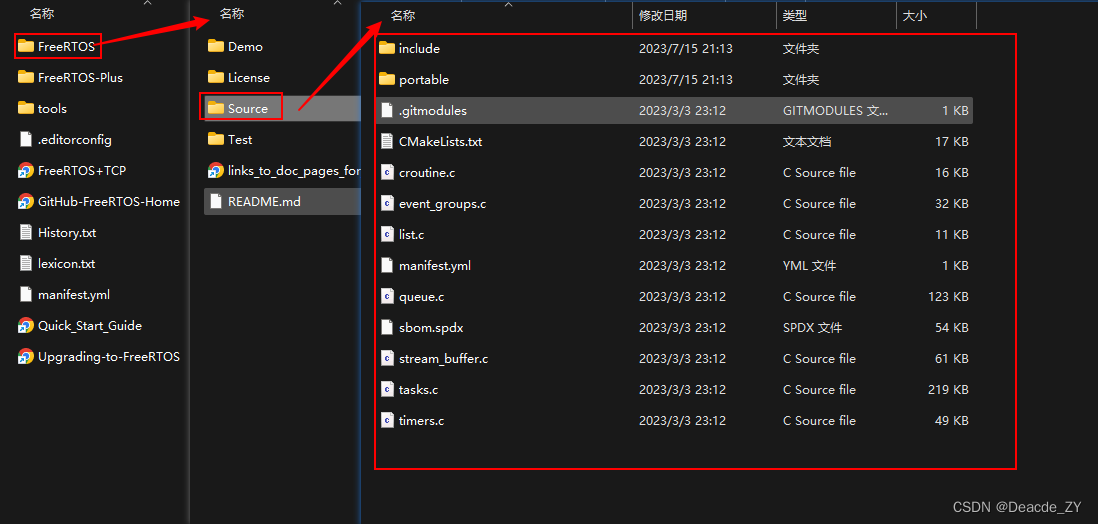
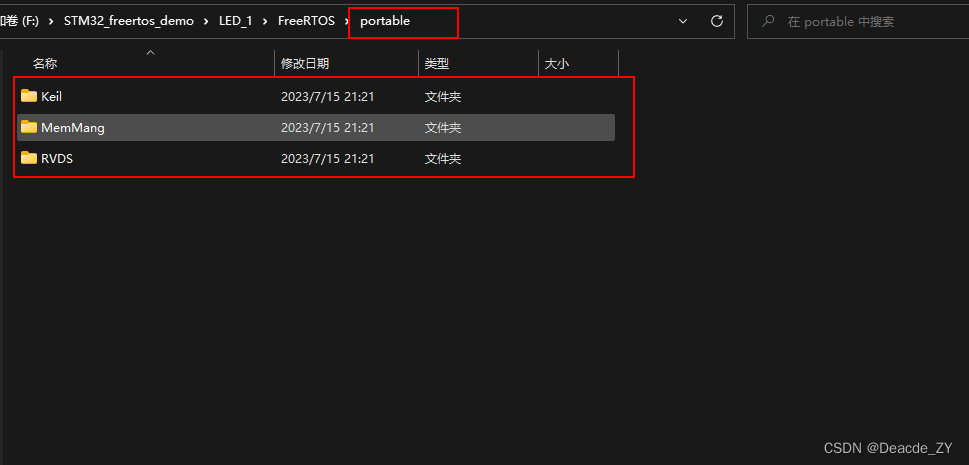
下载解压后根据下图进入如下位置
1、将Source文件夹中的文件复制到你工程里的新建的FreeRTOS文件夹
1、portable文件夹中只保留下图中的三个文件夹。
MemMang是内存管理文件
RVDS是FreeRTOS适配STM32的文件
然后在工程里面添加这些文件,还有一个FreeRTOS配置文件(FreeRTOSConfig.h),别忘了添加文件的路径
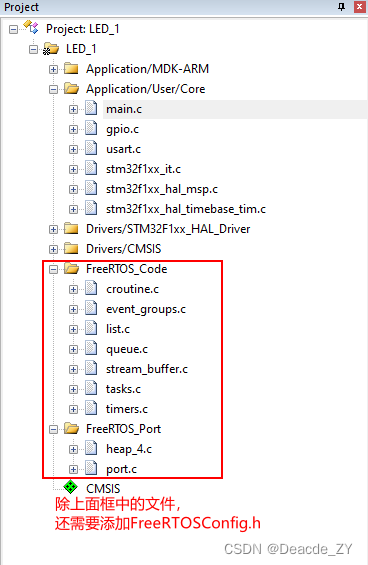
FreeRTOSConfig.h的配置如下所示:
#ifndef FREERTOS_CONFIG_H__
#define FREERTOS_CONFIG_H__
// 设置为1使用抢占式
#define configUSE_PREEMPTION										1
//使用时间片轮转调度
#define configUSE_TIME_SLICING     							1
//使用空闲任务调度
#define configIDLE_SHOULD_YIELD									1
// 设置为1使能低功耗tickless模式,为0保持系统节拍(tick)中断一直运行。
#define configUSE_TICKLESS_IDLE                 0
// 系统时钟主频
#define configCPU_CLOCK_HZ                      ( ( unsigned long ) 72000000 )
// 系统节拍中断的频率,即1s进中断的次数,配置为1000就是一秒进1000次中断,系统节拍就是1s。
#define configTICK_RATE_HZ                      ( ( TickType_t ) 1000 )
// 任务最大优先级,对于STM32来说最大不要超过32
#define configMAX_PRIORITIES                    32
// 任务最小栈大小
#define configMINIMAL_STACK_SIZE                ( ( unsigned short ) 128 )

// FreeRTOR堆空间大小
#define configTOTAL_HEAP_SIZE                   ( ( size_t ) ( 17 * 1024 ) )

// 任务名称最大长度
#define configMAX_TASK_NAME_LEN
最低0.47元/天 解锁文章


 642
642

 被折叠的 条评论
为什么被折叠?
被折叠的 条评论
为什么被折叠?
 到【灌水乐园】发言


