


要安装elasticsearch就要安装1.8版本以上的java的JDK
我是在windows下安装的elasticsearch
下载java的1.8以上的JDK,elasticsearch,kibana,ik分词的链接
kibana的下载地址
elasticsearch6.5.4的下载地址
ik分词器下载
java1.8JDK下载地址
java下载完后需要配置环境变量,我是在win7下配置的,下面是配置流程
配置java环境变量
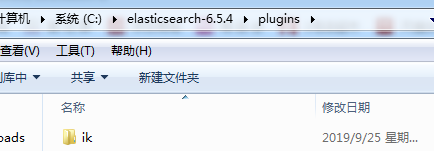
文件下载完之后记得解压
然后把ik分词的文件夹放入elasticsearch的plugins文件夹下面

批处理文件启动elasticsearch
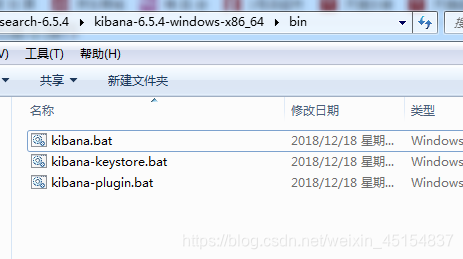
启动kibana的批处理文件
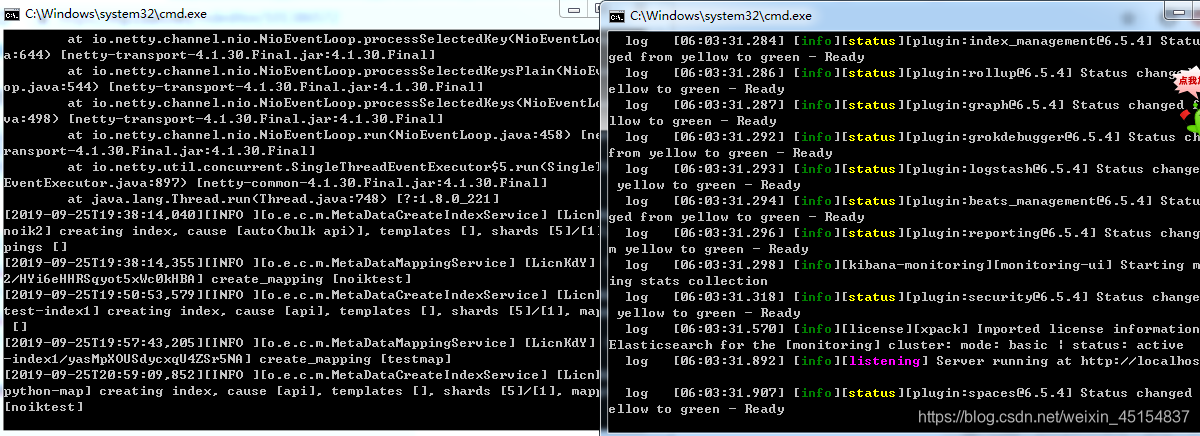
两个启动之后是这样的
然后访问127.0.0.1:9200
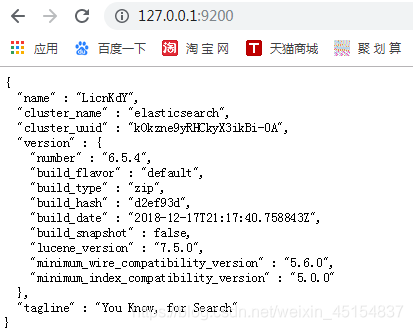
得出这样的结果就证明elasticsearch启动成功
再访问127.0.0.1:5601

得出这样的页面就算kibana启动成功
接下来我们可以在这里面进行elasticsearch的语法操作了
ok,我们先行一下简单的
增删改查:
增:
PUT test1/type1/1  #无则新增,有则更新,test1代表索引,type1代表文档,1则为数据的_id
{
  "name":"kevin",  #字段属性
  "age":18
}
#put也可以用post代替
POST cloth/logo/1
{
  "name":"adidas",
  "price":1500,
  "size":"xxxl",
  "color":["blue","blank","red"]
}

PUT cloth/logo/2
{
  "name":"adidas",
  "price":1200,
  "size":"xxl",
  "color":["blue","blank"]
}

PUT cloth/logo/3
{
  "name":"adidas",
  "price":1300,
  "size":"xxxxxl",
  "color":["blue","red"]
}

PUT cloth/logo/4
{
  "name":"adidas",
  "price":1400,
  "size":"sl",
  "color":["blank","red"]
}

PUT cloth/logo/5
{
  "name":"kappa",
  "price":1500,
  "size":"l",
  "color":["blue","blank","red"]
}
这里我新增了几条数据
当然,put如果更新数据,会覆盖掉指点的数据,比如我只更新name而不写age,则该索引更新后结果只会有age
用post来更新则是在原有的字段属性上进行修改,当然,post也能用来更新,和上面的用法一样
查:
GET test1/type1/1  #查询id=1的数据
GET test1/type1/_search  #查询所有
{
	"query":{
		"match_all":{}
}
}
GET test1/type1/_search  #条件筛选查询
{
	"query":{
		"match":{
			“name”:"kevin"
}
}
}
GET cloth/logo/_search  #排序查询,有两个查询条件,当第一个排序条件出现相同情况使用第二个排序条件
{
  "query": {
    "match_all": {}
  },
  "sort": [
    {
      "price": {
        "order": "desc"
      }
    },
    {
      "_id": {
        "order": "asc"
      }
    }
  ]
}


GET cloth/logo/_search  #排序并分页,from代表起点,size代表偏移量
{
  "query": {
    "match": {
      "name": "adidas"
    }
  },
  "sort": [
    {
      "price": {
        "order": "desc"
      }
    }
  ],
  "from": 2,
  "size": 2
}


GET cloth/logo/_search  #查询相关字段
{
  "query":{
    "match": {
      "name": "adidas"
    }
  },
  "_source": ["size","price"]
}

GET cloth/logo/_search  #这里使用了bool判断,must代表and,两个match相当于两个条件
{
  "query": {
    "bool": {
      "must": [
        {
          "match": {
            "name": "adidas"
          }
        },
        {
          "match": {
            "size": "xxl"
          }
        }
      ]
    }
  }
}


GET cloth/logo/_search  #should相当于or条件,filter指的是是必须满足的条件
{
  "query": {
    "bool": {
      "should": [
        {
          "match": {
            "name": "adidas"
          }
        }
      ],
      "filter": {
        "range": {
          "price":{
            "gte":1400
          }
        }
      }
    }
  }
}

GET cloth/logo/_search  #查询值为数组的方法,是一个字符串,中间用空格隔开
{
  "query": {
    "match": {
      "color": "blank blue"
    }
  }
}

GET cloth/logo/_search  #代码高亮
{
  "query": {
    "match": {
      "name": "adidas"
    }
  },
  "highlight": {
    "pre_tags": "<b style='color:red' class='key'>",
    "post_tags": "</b>",
    "fields": {
      "name": {}
    }
  }
}


GET cloth/logo/_search  #聚合函数,求平均值
{
  "size": 0,
   "aggs": {
    "avg_price": {
      "avg": {
        "field": "price"
      }
    }
  }
}

GET cloth/logo/_search  #聚合函数进阶之分组求和
{
  "size": 0,
  "aggs": {
    "group": {
      "range": {
        "field": "price",
        "ranges": [
          {
            "from": 500,
            "to": 1000
          },
          {
            "from":1000,
            "to":1300
          },
          {
            "from": 1300,
            "to":1600
          }
        ]
      },
      "aggs": {
        "sum_price": {
          "sum": {
            "field": "price"
          }
        }
      }
    }
  }
}
改:
POST /cloth/logo/1/_update  #在原有数据上新增一条prices
{
  "doc":{
    "prices":1001
  }
}

POST /cloth/logo/1/_update  #更改price的值
{
  "doc":{
    "price":1002
  }
}
删:
DELETE cloth/logo/1  #删除id为1 的文档
DELETE cloth  #删除索引
中途扩展一下:
mapping的创建
PUT index3   #创建mapping, 自动或手动为index中的type建立的一种数据结构和相关配置,简称为mapping
{
  "mappings": {
    "testmap":{
      "dynamic":"strict",
      "properties":{
        "name":{
          "type":"text"
        },
        "age":{
          "type":"long"
        }
      }
    }
  }
}
PUT index3/testmap/1  #这种数据符合条件
{
  "name":"kevin",
  "age":18
}
PUT index3/testmap/2  #多余了一个sex字段属性,在dynamic为strict的情况下不允许插入数据
{
  "name":"kevin",
  "age":18,
  "sex":"男"
}
dynamic:
false-动态属性不会去建立索引,通过动态创建的属性不能为查询关键字,但通过其他索引查出来的数据其动态属性会展示出来
true-动态属性可以去创建索引
strict-插入数据时只能使用指定的属性,否则报错


PUT index4
{
  "mappings":{
    "testmap":{
      "dynamic":false,
      "properties":{
        "book":{
          "type":"text",
          "copy_to":"all"
        },
        "author":{
          "type":"text",
          "copy_to":"all"
        },
        "all":{
          "type":"text"
        }
      }
    }
  }
}


PUT index4/testmap/1
{
  "book":"python",
  "author":"kevin"
}

GET index4/testmap/_search
{
  "query":{
    "match": {
      "all": "python"
    }
  }
}

#注意:copy_to会把当前属性的值赋给指定属性

PUT index5
{
  "mappings":{
    "testmap":{
      "dynamic":false,
      "properties":{
        "book":{
          "type":"text",
          "index":true
        },
        "author":{
          "type":"text",
          "index":false
        }
      }
    }
  }
}

PUT index5/testmap/1
{
  "book":"django",
  "author":"kevin"
}


GET index5/testmap/_search  #也就是说,你只有搜索book:django才能搜出结果
{
  "query": {
    "match": {
      "book": "django"
    }
  }
}

#注意:index在属性中为false,则不会为这个属性创建索引

PUT index6/testmap/1
{
  "name":"kevin",
  "addr":{
    "address":"beijing",
    "tel":12323232323
  }
}

GET index6/testmap/_search
{
  "query": {
    "match": {
      "addr.tel": 12323232323
    }
  }
}


#注意,这里的addr是一个对象属性
ik分词:
PUT ik1  #创建mapping以及指定分词器
{
  "mappings": {
    "iktest":{
      "dynamic":false,
      "properties":{
        "content":{
          "type":"text",
          "analyzer":"ik_max_word"
        }
      }
    }
  }
}


PUT ik1/iktest/1  #王ik1索引插入数据
{
  "content":"我爱北京天安门"
}

GET ik1/iktest/_search  #查询京字出不来,只能查北京,属于粗粒度
{
  "query": {
    "match": {
      "content": "北京"
    }
  }
}


PUT noik1  #设置一个mapping
{
  "mappings": {
    "noiktest":{
      "dynamic":false,
      "properties":{
        "content":{
          "type":"text"
        }
      }
    }
  }
}


PUT noik1/noiktest/1  #插入同样数据
{
  "content":"我爱北京天安门"
}


GET noik1/noiktest/_search  #不使用分词器,一个京字都能查出来,粒度小
{
  "query": {
    "match": {
      "content": "京"
    }
  }
}

#注意:自带的分词会把词分为一个一个的,不会像ik那样根据词义分词

PUT ik2/iktest/_mapping  #ik分词的第二种模式ik_smart,分词粒度更大
{
  "iktest":{
    "_all":{
      "analyzer":"ik_smart"
    },
    "properties":{
      "content":{
        "type":"text"
      }
    }
  }
}

PUT ik2/iktest/1
{
  "content":"我爱上你订撒娇的年纪是你弟家安贝斯的挤奶神经病蒂萨举办地解散吧第九三班蒂萨纪念币的"
}

PUT ik2/iktest/2
{
  "content":"我在北京天安门纪念币"
}

GET ik2

GET ik2/iktest/_search
{
  "query":{
    "match":{
      "content": "纪念"
    }
  }
}
#ik_smart > ik_max_word>elasticsearch自带分词器
查询已有的索引
GET _cat/indices?v
简单的分词器指定:
GET /_analyze
{
  "analyzer": "ik_max_word",
  "text":"我要做你爸爸"
}

运行看一看:
{
  "tokens" : [
    {
      "token" : "我",
      "start_offset" : 0,
      "end_offset" : 1,
      "type" : "CN_CHAR",
      "position" : 0
    },
    {
      "token" : "要做",
      "start_offset" : 1,
      "end_offset" : 3,
      "type" : "CN_WORD",
      "position" : 1
    },
    {
      "token" : "做你",
      "start_offset" : 2,
      "end_offset" : 4,
      "type" : "CN_WORD",
      "position" : 2
    },
    {
      "token" : "爸爸",
      "start_offset" : 4,
      "end_offset" : 6,
      "type" : "CN_WORD",
      "position" : 3
    }
  ]
}

#分成了以上样子
elasticsearch与python交互:
先安装
pip install elasticsearch
然后可以建立连接,创建索引和文档数据
from elasticsearch import Elasticsearch  #导入模块

con = Elasticsearch(['127.0.0.1:9200'])  #建立连接
con.indices.create(index='test-index1',ignore=400)  #创建索引

#创建一个文档
con.index(index='test-index1',doc_type='testmap',id=1,body={"name":"kevin"})
#也可以不指定id,id会自动生成
con.index(index='test-index1',doc_type='testmap',body={"name":"kevin"})
def query1():  #查询id为1 的文档数据
    result = con.get(index='test-index1',doc_type='testmap',id=1)
    return result

def query2():  #查询该索引所有数据
    body = {
        'query':{
            'match_all':{}
        }
    }
    result = con.search(index='test-index1',body=body)
    return result

def query3():  #条件过滤查询,要是用search
    body = {

            "query": {
                "bool": {
                    "must": [
                        {
                            "match": {
                                "name": "adidas"
                            }
                        }
                    ],
                    "filter": {
                        "range": {
                            "price": {
                                "gte": 1400
                            }
                        }
                    }
                }
            }

    }
    result = con.search(index='cloth',body=body)
    return result


def query4():  #查询出content中有我在的内容然后删除该数据
    body = {
        "query": {
            "match_phrase": {
                "content": "我在"
            }
        }
    }
    result = con.delete_by_query(index='ik2',body=body)
    return result

def query5():  #创建yi个mapping
    body = {
              "mappings": {
                "noiktest":{
                  "dynamic":False,
                  "properties":{
                    "content":{
                      "type":"text"
                    }
                  }
                }
              }
            }
    result = con.indices.create(index='python-map',body=body)
    return result


if __name__ == "__main__":
    print(query5())
以上就是elasticsearch的语法的基本操作了


 被折叠的 条评论
为什么被折叠?
被折叠的 条评论
为什么被折叠?
 到【灌水乐园】发言


