


 本文深入解析了BHuman机器人足球项目的代码结构和执行流程,介绍了各文件夹功能,如Build、Config、Src等,并详细解读了源码中的Modules、Representations及核心策略文件。通过分析Soccer.h和相关options,展示了机器人如何响应不同状态和行为。
在电脑上配置完Bhuman后打开的文件夹如图
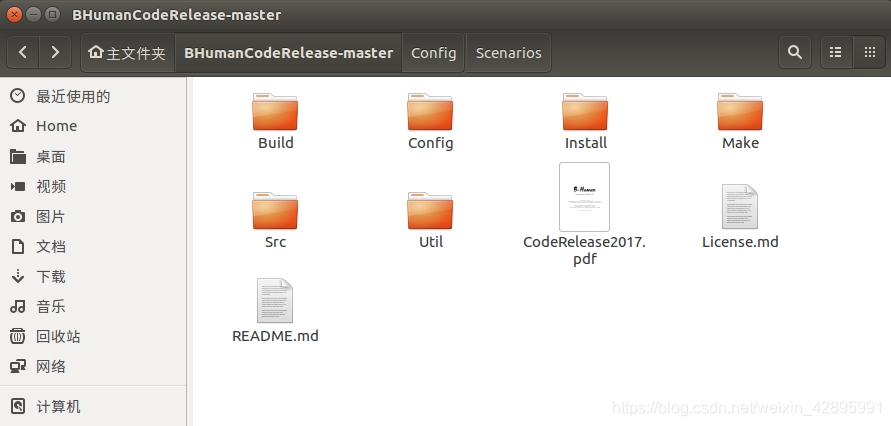
介绍一下各个文件夹
Build文件夹中包含编译好的程序,bush,simRobot等工具。
Config文件夹中有许多程序的配置和脚本文件,如哨声识别的参考模型,机器人能播放的Sounds,simRobot中读取的场景文件以及连接机器人的网络配置等等。
Install和Make文件夹主要用向实体Nao机器人创建、安装bhuman,编译程序等。
Src中包含了Bhuman所有的源码,是我们研究的主体。
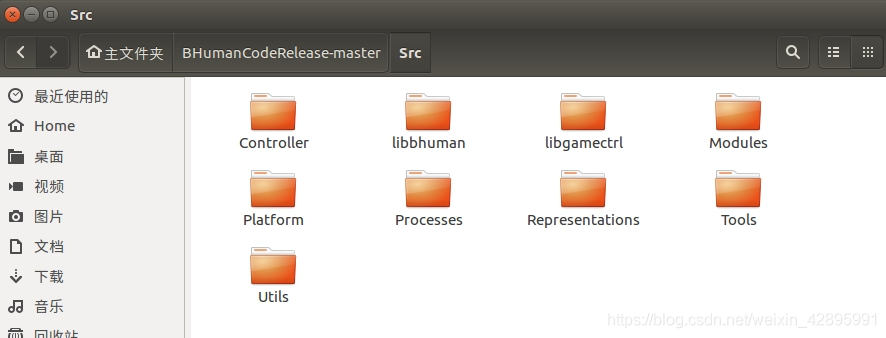
打开Src可以看到源码分成上图中的几个部分,根据自己的需求使用BHuman主要是修改Modules和Representations两个文件夹中的内容。个人理解这两个部分,Modulels是烧录到Nao中最终Nao执行的模块,Modules里的内容是只要Nao开机就是在不停运行的(当然要满足执行条件),Representations是Bhuman写好的各种接口函数,即Modules中通过调用Representation中的接口以及编写逻辑控制来实现Nao的某些行为。
在看源码之前安利大家一款Linux下很好用的编辑软件CLion,有多好用你用了就知道(手动滑稽)
安装连接:http://www.jetbrains.com/clion/
安装破解不会的话自己百度下吧,很简单。
Clion可以直接打开一个文件夹,给出文件夹里的树形结构,我们用Clion打开Bhuman文件夹。
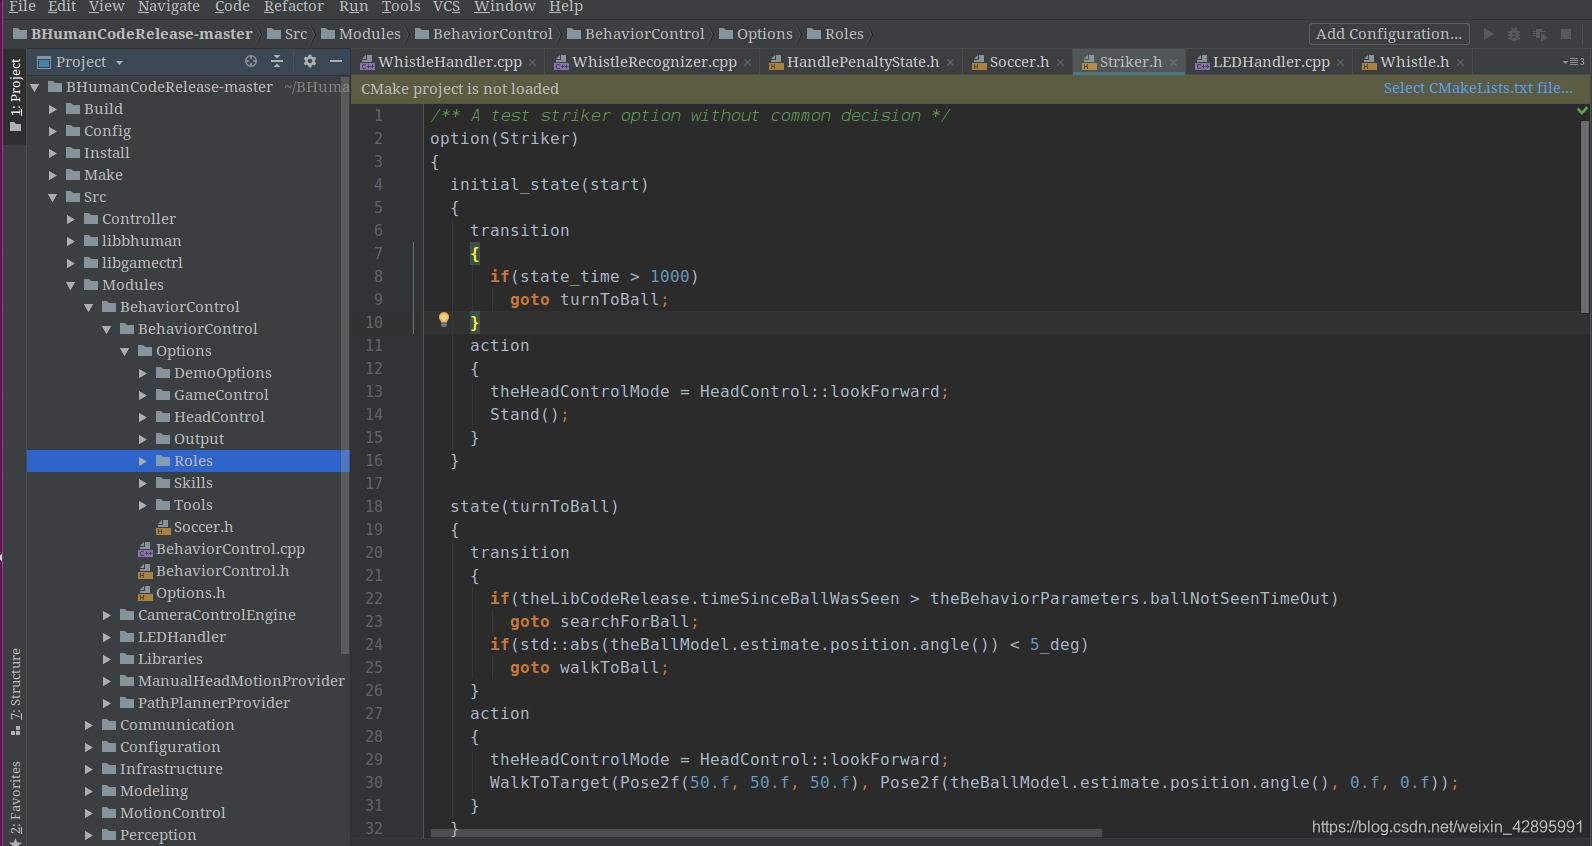
接下来说代码,所有机器人比赛执行的策略文件都在Modules/BehaviorControl/BehaviorControl/Options下,Roles中包含了Bhuman源码中自带的一个前锋demo,可以仿照Skriker.h的格式创建自己的角色完成需要的功能。
Soccer.h是Bhuman代码执行的根目录,不知道用main函数的概念形容这个Soccer.h合不合适,Nao开机后就会执行Soccer中的代码。从Soccer中的内容我们可以和机器人的行为对应上
/** The robot stands up and starts to play when stand was executed. */
  state(standUp)
  {
    transition
    {
      if(action_done)
        goto playSoccer;
    }
    action
    {
      Activity(BehaviorStatus::gettingUp);
      LookForward();
      Stand();
    }
  }

  /**
   * The main state that triggers the actual soccer behavior.
   * It also checks whether the chest button was pressed.
   */
  state(playSoccer)
  {
    transition
    {
      if(action_done) // chest button pressed and released once
        goto waitForSecondButtonPress;
    }
    action
    {
      HandlePenaltyState();
      HeadControl();
      ButtonPressedAndReleased(KeyStates::chest, 1000, 200);
    }
  }

  /** The following two states check whether the chest button is quickly pressed another two times. */
  state(waitForSecondButtonPress)
  {
    transition
    {
      if(action_done) // chest button pressed and released for the second time
        goto waitForThirdButtonPress;
      else if(action_aborted) // too slow -> abort
        goto playSoccer;
    }
    action
    {
      HandlePenaltyState();
      HeadControl();
      ButtonPressedAndReleased(KeyStates::chest, 1000, 200);
    }
  }

  state(waitForThirdButtonPress)
  {
    transition
    {
      if(action_done) // chest button pressed and released for the third time
        goto sitDown;
      else if(action_aborted) // too slow -> abort
        goto playSoccer;
    }
    action
    {
      HandlePenaltyState();
      HeadControl();
      ButtonPressedAndReleased(KeyStates::chest, 1000, 200);
    }
  }

  /** The robot sits down and turns off all joints afterwards. */
  state(sitDown)
  {
    transition
    {
      if(action_done)
        goto playDeadDoNotRecover;
    }
    action
    {
      Activity(BehaviorStatus::unknown);
      LookForward();
      SpecialAction(SpecialActionRequest::sitDown);
    }
  }

  /** After pressing the chest button thrice we don't want the robot to recover */
  state(playDeadDoNotRecover)
  {
    transition
    {
      if(action_done)// chest button pressed and released
        goto standUp;
    }
    action
    {
      Activity(BehaviorStatus::unknown);
      SpecialAction(SpecialActionRequest::playDead);
      ButtonPressedAndReleased(KeyStates::chest, 1000, 0);
    }
  }
按一次胸口Nao站起来,两次进入惩罚模式,三个非惩罚,开始执行前锋的代码
在HandlePenaltyState,h中找到处理非惩罚模式时会进入HandleGameState()
option(HandlePenaltyState)
{
  /** By default, the robot is not penalized and plays soccer according to the current game state.
  The chestbutton has to be pushed AND released to manually penalize a robot */
  initial_state(notPenalized)
  {
    transition
    {
      if(theRobotInfo.penalty != PENALTY_NONE)
        goto penalized;
    }
    action
    {
      HandleGameState();
    }
在HandleGameState.h中找到,如果机器人进入STATE_PLAYING会执行
 /** Play soccer! */
  state(playing)
  {
    action
    {
      PlayingState();
    }
  }
再找PlayingState,打开发现执行的是Demo()
option(PlayingState)
{
  initial_state(demo)
  {
    action
    {
      Demo();
    }
  }
}
打开Demo可以看到
option(Demo)
{
  common_transition
  {
    switch(theLibDemo.demoGameState)
    {
      case LibDemo::waving:
        goto waving;
      case LibDemo::normal:
        goto normal;
      default:
        FAIL("Unknown demo game state.");
    }
  }

  initial_state(normal)
  {
    action
    {
      Striker();
      theHeadControlMode = HeadControl::lookForward;
    }
  }
可以看到Demo中执行Striker(),即自带的前锋的例子,这就是bhuman代码的大致的执行流程。
Options中的代码和普通的C++稍有不同,具体参考PDF第六章,option里的语法是CABSL结构(这些语法都是通过宏来实现的),可以理解成一种图结构的代码,每一个option就是一个图,个人认为可以理解成Choregraphe中的一个盒子。或者从ROS的角度理解,每个option发布节点,相应的option去订阅执行。
option中的程序结构有以下几个部分,以demo为例
option(Demo)
{
  common_transition
  {
    switch(theLibDemo.demoGameState)
    {
      case LibDemo::waving:
        goto waving;
      case LibDemo::normal:
        goto normal;
      default:
        FAIL("Unknown demo game state.");
    }
  }

  initial_state(normal)
  {
    action
    {
      Striker();
      theHeadControlMode = HeadControl::lookForward;
    }
  }

  state(waving)
  {
    action
    {
      Activity(BehaviorStatus::waving);
      theHeadControlMode = HeadControl::lookForward;
      Waving();
    }
  }
}
option(Demo)
括号里的东西即这个“盒子”的名字,在盒子里
  common_transition
  {
    switch(theLibDemo.demoGameState)
    {
      case LibDemo::waving:
        goto waving;
      case LibDemo::normal:
        goto normal;
      default:
        FAIL("Unknown demo game state.");
    }
  }
common_transition是随着图执行就在不停运行的逻辑判断,不管当前执行到该option的哪一个state,一旦满足条件就会结束当前行为,goto相应的state
 state(waving)
  {
  	transition
      {
  		if(xxxxx)
  			goto yyyyy;
      }
    action
    {
      Activity(BehaviorStatus::waving);
      theHeadControlMode = HeadControl::lookForward;
      Waving();
    }
  }
state()是某种状态,相当于“大盒子”里的“小盒子”,只能通过goto 盒子名字进入,state中可以有普通的transition,这里的transition只在当前的state中判断,满足条件xxxxx,goto yyyyy state。
action是当前state执行的行为,可以是某些函数或者跳到别的option中。
 initial_state(normal)
  {
    action
    {
      Striker();
      theHeadControlMode = HeadControl::lookForward;
    }
  }
initial_state是进option中的初始化状态,自动执行 initial_state中的行为。
一般还会在transition中看到action_done和action_aborted,action_done表示state中的action执行完毕,在transition中判断action_done可以再state动作执行完后跳到别的state中,action_aborted表示动作未执行完或者意外终止。
还需要注意的是这几个文件
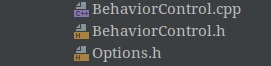
Options.h中包含BehaviorControl中所有的option头文件,通过Options.h将Options中所有的文件串联起来
/** All option files that belong to the current behavior have to be included by this file. */
如果你创新了一个新的roles,则需要在这个文件中包含新建.h的路径。
BehaviorControl.h中包含了所有调用的Representation中接口的头文件,如果你要使用Representation中别的接口则需要包含使用的类的头文件,此外还要在REQUIRES()中添加这个类,或者PROVIDES()这个类,为该类提供更新。这一块内容会在后面说。
这里只是个人对bhuman代码的理解,个人使用无误,如果有什么错误或者问题欢迎指出。


 708
708

 被折叠的 条评论
为什么被折叠?
被折叠的 条评论
为什么被折叠?
 到【灌水乐园】发言


