


 本文详细介绍了在MacOS上安装Java Development Kit (JDK) 的步骤。首先,选择并下载适合Mac的JDK版本,如11.0.2。然后,通过指南安装JDK,并配置环境变量,设置JAVA_HOME、PATH和CLASSPATH。最后,通过终端检查环境是否配置成功。
How to install Java on macOS
The first step in coding java on macOS
Recently,I change my PC from Dell to MacBook,so the system also changes from windows to macOS.It`s time to install jdk ? .
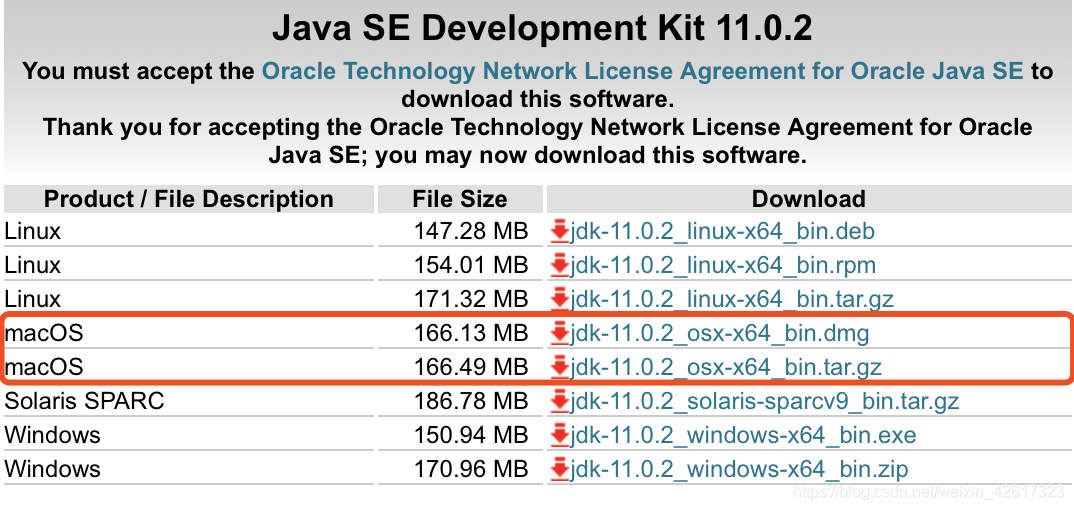
1.Download jdk
Choose jdk version that you like.The version that I choose is 11.0.2(the latest one).
jdk-resource-link: Java SE Development Kit 11 Downloads(remember to tick the option=> Accept License Agreement)
There are two options that are suitable for Mac User.
2.Install jdk
Download the first one and install jdk by guildes.
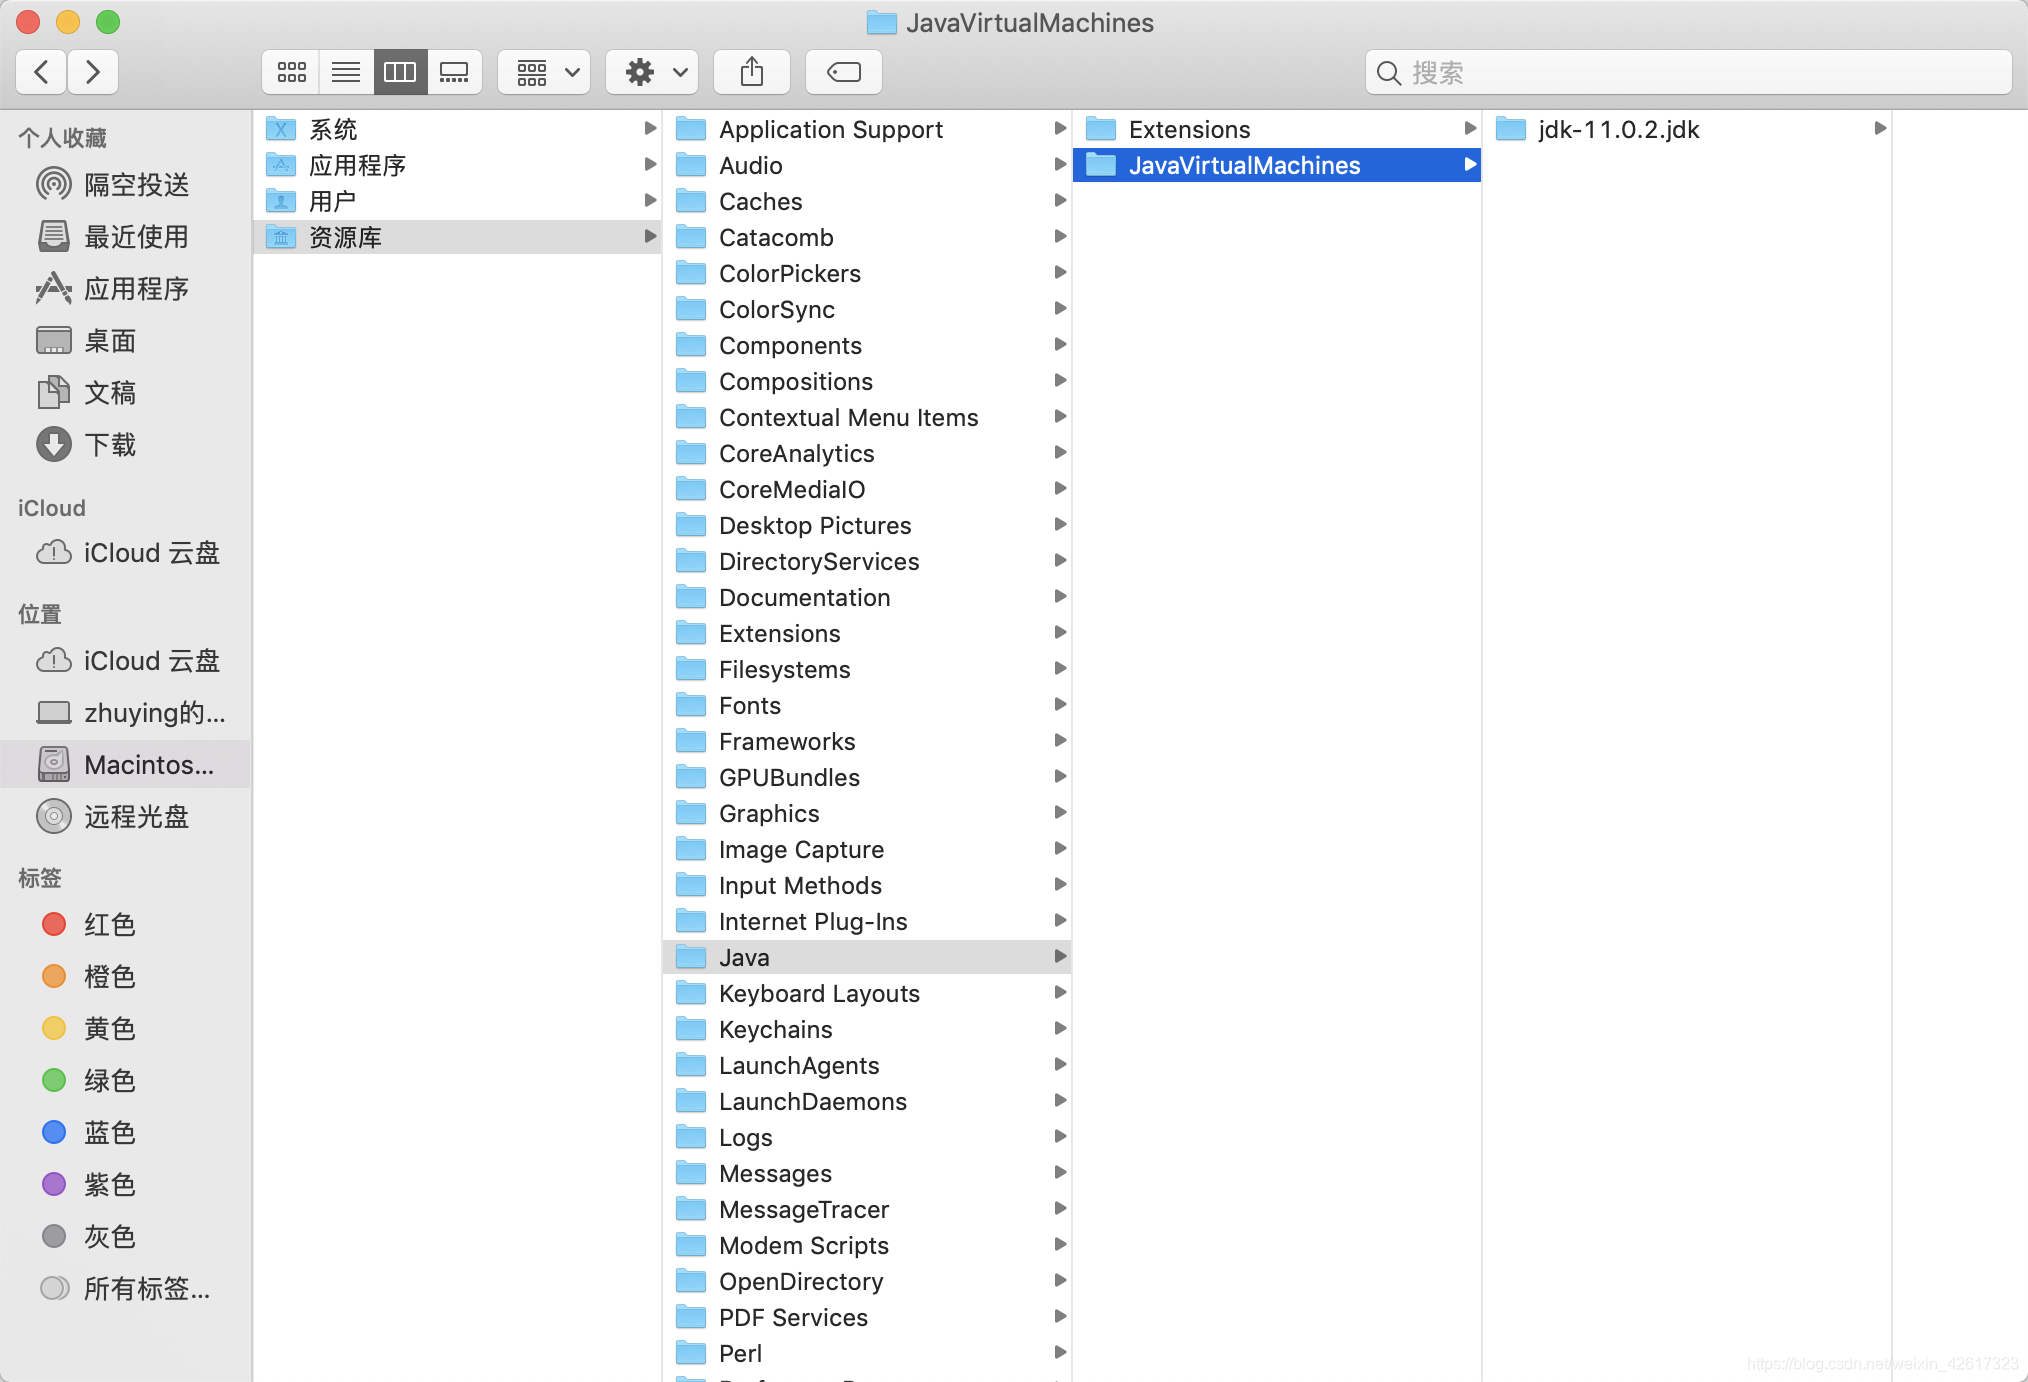
The java default path is as follows:
3.Configure environment
Create a file named .bash_profileat home directory then input some commands:
export JAVA_HOME=/Library/Java/JavaVirtualMachines/jdk-11.0.2.jdk/Contents/Home(It`s default path)
export PATH=$PATH:$JAVA_HOME/bin
export CLASSPATH=$JAVA_HOME/lib
4.Check environment
Execute command java and javac in terminal.
It works when you see the following response:
用法:java [options] <主类> [args...]
           (执行类)
   或  java [options] -jar <jar 文件> [args...]
           (执行 jar 文件)
   或  java [options] -m <模块>[/<主类>] [args...]
       java [options] --module <模块>[/<主类>] [args...]
           (执行模块中的主类)
   或  java [options] <源文件> [args]
           (执行单个源文件程序)

 将主类、源文件、-jar <jar 文件>、-m 或
 --module <模块>/<主类> 后的参数作为参数
 传递到主类。
...more
用法: javac <options> <source files>
其中, 可能的选项包括:
  @<filename>                  从文件读取选项和文件名
  -Akey[=value]                传递给注释处理程序的选项
  --add-modules <模块>(,<模块>)*
        除了初始模块之外要解析的根模块; 如果 <module>
                为 ALL-MODULE-PATH, 则为模块路径中的所有模块。
  --boot-class-path <path>, -bootclasspath <path>
        覆盖引导类文件的位置
  --class-path <path>, -classpath <path>, -cp <path>
        指定查找用户类文件和注释处理程序的位置
  -d <directory>               指定放置生成的类文件的位置
  -deprecation                 输出使用已过时的 API 的源位置
  --enable-preview             启用预览语言功能。要与 -source 或 --release 一起使用。
  -encoding <encoding>         指定源文件使用的字符编码
  -endorseddirs <dirs>         覆盖签名的标准路径的位置
  -extdirs <dirs>              覆盖所安装扩展的位置
  -g                           生成所有调试信息
  ....more
5.The End
Happy coding with Java ?.


 2457
2457

 被折叠的 条评论
为什么被折叠?
被折叠的 条评论
为什么被折叠?
 到【灌水乐园】发言


