


 本文介绍了如何在Python环境下通过conda和pip安装PyTorch 1.10.0+cu111、torchvision、torchaudio及MMDetection,包括CUDA版本匹配、MMCV的选择和安装流程,还提供了安装验证和测试示例。
如题,记录一下pytorch,mmdetection的安装,以及注意事项
conda 基础操作
# 创建 name=mmlab
conda create -n mmlab python=3.8
# 删除
conda remove -n mmlab --all
# 激活
conda activate mmlab
# 退出
conda deactivate
Pytorch安装
在pytorch官网选择符合自己环境的版本,我的CUDA Version==11.2,可用使用下面的代码查询。
nvidia-smi
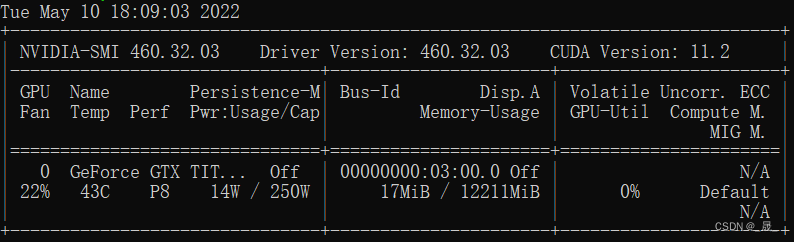
注意高版本的CUDA兼容低版本的CUDA,比如说CUDA 11.2,是可以安装11.1的
至于为什么,可以看这个链接 pytorch稳定版本
# CUDA 11.1
pip install torch==1.10.0+cu111 torchvision==0.11.0+cu111 torchaudio==0.10.0 -f https://download.pytorch.org/whl/torch_stable.html
在选择torch版本的时候要注意,需要先查看mmcv-full的链接能否访问,比如说下面对应cu111,torch1.10 ,如果可以访问,放心大胆的安装,如果不能访问,更改版本直至可以访问才能安装,不然以后不知道会报什么错https://download.openmmlab.com/mmcv/dist/cu111/torch1.10/index.html
用下面代码来查询是否安装成功
(mmlab) wsy@mvl-ThinkStation-S30:~$ python
Python 3.8.13 | packaged by conda-forge | (default, Mar 25 2022, 06:04:18)
[GCC 10.3.0] on linux
Type "help", "copyright", "credits" or "license" for more information.
>>> import torch
>>> torch.__version__
'1.10.0+cu111'
>>> torch.cuda.is_available()
True
>>> exit()
(mmlab) wsy@mvl-ThinkStation-S30:~$ conda list torchvision
# packages in environment at /media/Store/wsy/miniconda3/envs/mmlab:
# Name                    Version                   Build  Channel
torchvision               0.11.0+cu111             pypi_0    pypi
MMCV安装
最强安装说明 官方安装说明
mmcv-full: 完整版,包含所有的特性以及丰富的开箱即用的CUDA 算子。 注意完整版本可能需要更长时间来编译。
mmcv: 精简版,不包含CUDA 算子但包含其余所有特性和功能,类似MMCV 1.0 之前的版本。 如果你不需要使用CUDA 算子的话,精简版可以作为一个考虑选项。
安装mmcv-full 版本 要对应
pip install mmcv-full -f https://download.openmmlab.com/mmcv/dist/{cu_version}/{torch_version}/index.html

pip install mmcv-full -f https://download.openmmlab.com/mmcv/dist/cu111/torch1.10.0/index.html
注意这个链接https://download.openmmlab.com/mmcv/dist/cu111/torch1.10.0/index.html
要与上面pytorch的版本相对应,同时要确保这个链接可以访问。
MMDetection安装
首先从github上下载mmdetection的源码,然后根据requirements.txt安装所需的依赖库,最后执行setup.py安装mmdetection。
git clone https://github.com/open-mmlab/mmdetection.git
cd mmdetection
pip install -r requirements/build.txt
pip install -v -e .  # or "python setup.py develop"
样例测试
将 官方安装文档中的测试样例创建并运行
from mmdet.apis import init_detector, inference_detector
config_file = 'configs/faster_rcnn/faster_rcnn_r50_fpn_1x_coco.py'
# 从 model zoo 下载 checkpoint 并放在 `checkpoints/` 文件下
# 网址为: http://download.openmmlab.com/mmdetection/v2.0/faster_rcnn/faster_rcnn_r50_fpn_1x_coco/faster_rcnn_r50_fpn_1x_coco_20200130-047c8118.pth
checkpoint_file = 'checkpoints/faster_rcnn_r50_fpn_1x_coco_20200130-047c8118.pth'
device = 'cuda:0'
# 初始化检测器
model = init_detector(config_file, checkpoint_file, device=device)
# 推理演示图像
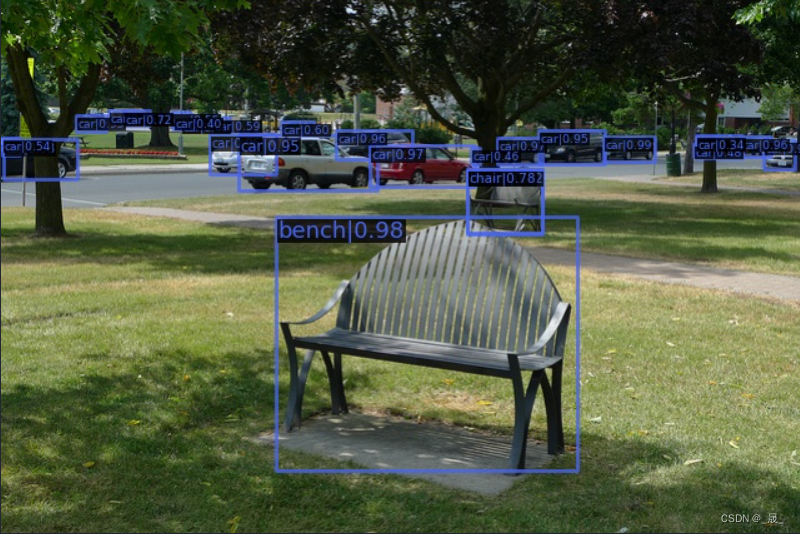
inference_detector(model, 'demo/demo.jpg')
看到这张图就代表成功了!


 1307
1307

 被折叠的 条评论
为什么被折叠?
被折叠的 条评论
为什么被折叠?
 到【灌水乐园】发言


