 Claude Code用uvx执行chroma - mcp分析


背景
在 claude code 使用中,频频会看到 uvx 和 npx 两个指令,前者是基于 python 语言的 uv 工具库,后者是基于 npm 的,这样说完全不理解,换句话说,就跟 git flow 一样,就是一堆指令集的组合调用,要很好的理解 uvx 是个啥,那就先了解下 npx 的用途和用法
npx 使用场景:npx 有什么作用跟意义?为什么要有 npx?什么场景使用?-优快云博客
概括起来就是:
-
沙盒环境运行指令,用完即焚,不留痕迹,无论是本地库还是远程库中的 bin/xxx 都可以 npx 运行,有的用本地,没有的去下载;
-
发布的项目必须有 package.json,且必须配置入口文件,以便让库在下载后可执行;
uvx 指令
背景讲到了 npx 的几个特性,其中一个就是可以直接拉 github 上的代码下来,依靠 package.json 配置,自动 npm install,然后运行入口文件,这个也是我比较在意的点,并且最好的就是运行完毕后,直接丢弃,一次性用具,不存在清理和污染的风险,非常方便,针对于 python 写得小工具来说,无论是在 windows,还是 linux 都能拿来即用。
常见的基于 git 仓库运行的一个 demo
uvx --from git+https://gitee.com/sen2020/mcp-servers.git@feature/uvx-win-cmd-mcp win-cmd-server这个指令就是使用 git,从 mcp-servers feature/uvx-win-cmd-mcp 分支拉取代码,并执行 win-cmd-server 命令
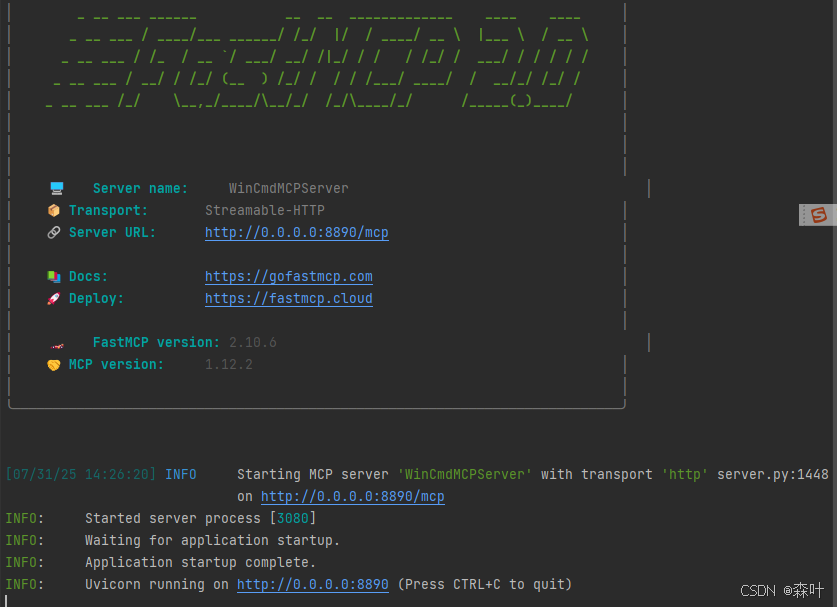
win-cmd-mcp 可以在 windows powershell 中启动,它可以执行 windows 相关指令,让claude可以看到windows文件,以及进行相应的修改操作,展开claude的手脚,在wsl体系下,该操作还是很有必要的
uvx 的必要 pyproject.toml 文件
[build-system]
requires = ["hatchling"]
build-backend = "hatchling.build"

[project]
name = "win-cmd-server"
version = "0.1.0"
description = "Windows Command Execution MCP Server"
readme = "README.md"
authors = [
    {name = "MCP Community", email = "mcp@example.com"},
]
license = "MIT"
dependencies = [
    "fastmcp>=2.10.0",   # Updated to allow newer versions
    "psutil>=6.0.0",     # Updated for Python 3.11 compatibility
    "pydantic>=2.8.0",   # Updated to a more recent version with Python 3.11 support
]
requires-python = ">=3.11"
keywords = ["mcp", "server", "windows", "cmd", "command"]
classifiers = [
    "Development Status :: 3 - Alpha",
    "Intended Audience :: Developers",
    "License :: OSI Approved :: MIT License",
    "Programming Language :: Python :: 3",
    "Programming Language :: Python :: 3.11",
    "Programming Language :: Python :: 3.12",
    "Operating System :: Microsoft :: Windows",
]

[project.urls]
Homepage = "https://gitee.com/sen2020/mcp-servers"
Repository = "https://gitee.com/sen2020/mcp-servers"
Issues = "https://gitee.com/sen2020/mcp-servers/issues"

[project.scripts]
win-cmd-server = "win_cmd_server.server:main"

[project.optional-dependencies]
dev = [
    "pytest>=8.0.0",
    "pytest-asyncio>=0.24.0",
    "black>=24.8.0",
    "isort>=5.13.0",
    "mypy>=1.11.0",
]

[tool.hatch.build.targets.wheel]
packages = ["src/win_cmd_server"]

[tool.hatch.build.targets.sdist]
include = [
    "src/",
    "README.md",
    "LICENSE",
]

[tool.black]
line-length = 88
target-version = ['py311']

[tool.isort]
profile = "black"
line_length = 88

[tool.mypy]
python_version = "3.11"
warn_return_any = true
warn_unused_configs = true
disallow_untyped_defs = true
[build-system] - 构建系统配置
[build-system]
requires = ["hatchling"]
build-backend = "hatchling.build"-
requires: 指定构建项目时需要的工具,这里使用hatchling作为构建工具 -
build-backend: 指定具体的构建后端,用于打包和分发
[project] - 项目基本信息
name = "win-cmd-server"  # 项目名称
version = "0.1.0"        # 版本号
description = "Windows Command Execution MCP Server"  # 项目描述
readme = "README.md"     # README文件路径
作者和许可证信息:
authors = [
    {name = "MCP Community", email = "mcp@example.com"},
]
license = "MIT"  # 开源许可证类型
依赖管理:
dependencies = [
    "fastmcp>=2.10.0",   # 核心MCP框架,版本>=2.10.0
    "psutil>=6.0.0",     # 系统和进程工具库,用于系统监控
    "pydantic>=2.8.0",   # 数据验证库,用于数据模型定义
]
requires-python = ">=3.11"  # 要求Python版本3.11或更高
项目分类和关键词:
keywords = ["mcp", "server", "windows", "cmd", "command"]  # 搜索关键词
classifiers = [
    "Development Status :: 3 - Alpha",              # 开发状态:Alpha版本
    "Intended Audience :: Developers",              # 目标用户:开发者
    "License :: OSI Approved :: MIT License",       # 许可证类型
    "Programming Language :: Python :: 3",          # 编程语言
    "Programming Language :: Python :: 3.11",       # 支持的Python版本
    "Programming Language :: Python :: 3.12",
    "Operating System :: Microsoft :: Windows",      # 目标操作系统
]
[project.urls] - 项目链接
Homepage = "https://gitee.com/sen2020/mcp-servers"      # 项目主页
Repository = "https://gitee.com/sen2020/mcp-servers"    # 代码仓库
Issues = "https://gitee.com/sen2020/mcp-servers/issues" # 问题追踪
[project.scripts] - 命令行脚本
win-cmd-server = "win_cmd_server.server:main"定义了一个命令行工具win-cmd-server,当执行时会调用win_cmd_server.server模块的main函数
[project.optional-dependencies] - 可选依赖
dev = [
    "pytest>=8.0.0",        # 测试框架
    "pytest-asyncio>=0.24.0", # 异步测试支持
    "black>=24.8.0",         # 代码格式化工具
    "isort>=5.13.0",         # import语句排序工具
    "mypy>=1.11.0",          # 静态类型检查工具
]这些是开发时需要的工具,可以通过pip install -e .[dev]安装
[tool.hatch.*] - Hatchling构建配置
[tool.hatch.build.targets.wheel]
packages = ["src/win_cmd_server"]  # 指定要打包的源码目录

[tool.hatch.build.targets.sdist]
include = [
    "src/",
    "README.md",
    "LICENSE",
]  # 源码分发包要包含的文件
工具配置部分
Black代码格式化:
[tool.black]
line-length = 88           # 每行最大字符数
target-version = ['py311'] # 目标Python版本
isort导入排序:
[tool.isort]
profile = "black"    # 使用与black兼容的配置
line_length = 88     # 行长度与black保持一致
MyPy静态类型检查:
[tool.mypy]
python_version = "3.11"           # Python版本
warn_return_any = true            # 当函数返回Any类型时发出警告
warn_unused_configs = true        # 警告未使用的配置
disallow_untyped_defs = true      # 不允许无类型注解的函数定义
[project.scripts] - 命令行脚本
注意点:
-
入口文件必须最终由一个函数执行,不可直接用
"__main__":下就开始运行了 -
另外
win_cmd_server.server:mainwin_cmd_server.server 是 src/win_cmd_server/server.py 这种目录层级,而 pyproject.toml 是和 src 同级,如果你目录比较深,你可以继续点,这个提的人比较少,冒号后面的就是执行函数
再看 chroma-mcp 的 pyproject.toml
https://github.com/chroma-core/chroma-mcp/blob/main/pyproject.toml
现在再看 chroma-mcp 的配置你就一目了然了,对方给的命令意思就是 chroma-mcp 你要拉下来,拉下来之后,你根据里面的 pyproject.toml 配置,开始运行这个脚本,这一切都在临时文件中进行
"chroma": {
    "command": "uvx",
    "args": [
        "chroma-mcp",
        "--client-type",
        "persistent",
        "--data-dir",
        "/full/path/to/your/data/directory"
    ]
}

## 这里的 -- 是一个分隔符,就是避免命令参数较多,命令开始点不好确定而存在的
claude mcp add chroma -- uvx chroma-mcp --client-type persistent --data-dir /root/chroma-db


 2180
2180

 被折叠的 条评论
为什么被折叠?
被折叠的 条评论
为什么被折叠?
 到【灌水乐园】发言


