


 该博客介绍了如何在Visual Studio 2017上配置Intel RealSense D415相机的SDK以及OpenCV 4.0。首先,通过链接提供了配置OpenCV 4.0和VS2017的教程,然后详细说明了下载和安装RealSense SDK的过程,并提供了百度云的下载链接。安装完成后,解释了RealSense SDK的三个桌面图标的功能。最后,指导如何设置环境变量和VS2017的项目属性,包括包含目录、库目录和链接器输入的依赖项,以完成配置。
首先是Opencv 4.0 +VS2017的配置过程,网上已经有很多类似教程,这里不再累赘:https://www.cnblogs.com/xinxue/p/5766756.html
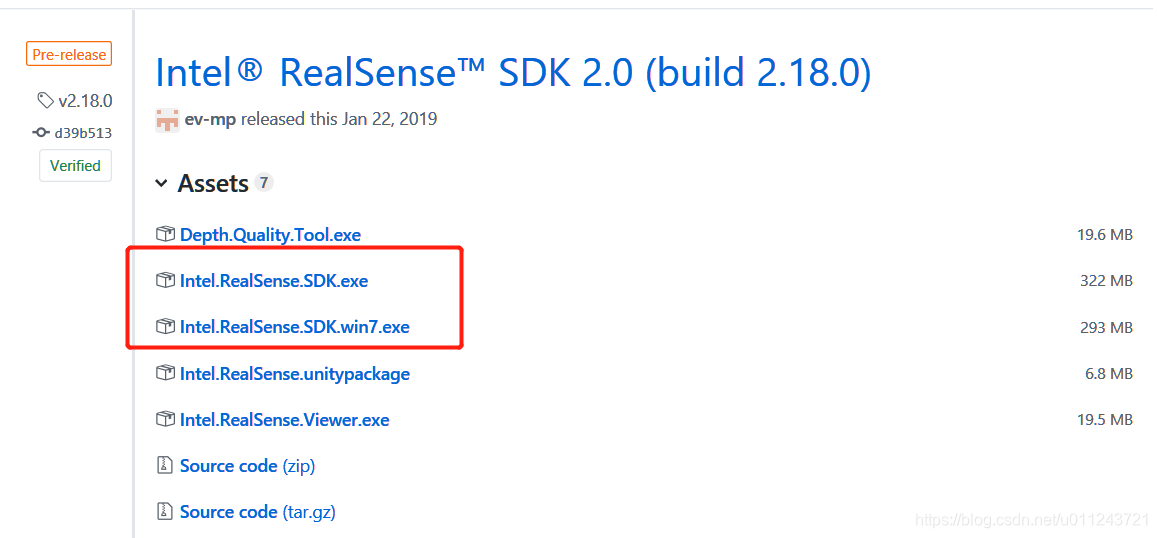
接下来开始配置D415的SDK,SDK可以在官方Guihub上下载:https://github.com/IntelRealSense/librealsense/releases
选择其一选择安装即可
鉴于外网的网速感人,或者百度云下载:https://pan.baidu.com/s/1QwJzIsNNcDWay0e93Iqu7A 提取码:wtn9
下载完后打开看到如下界面
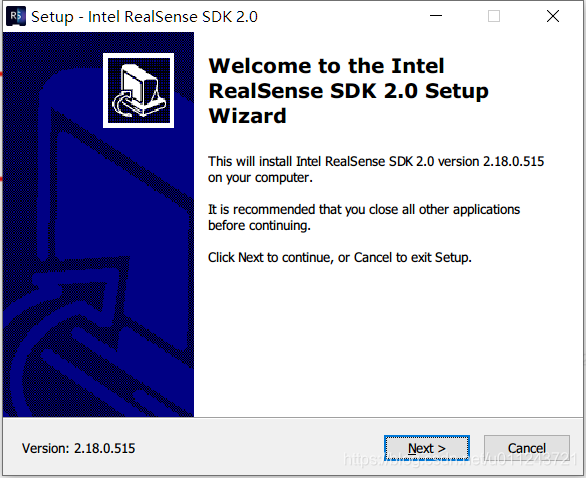
一路Next一下即可完成安装,完成后桌面会出现3个图标
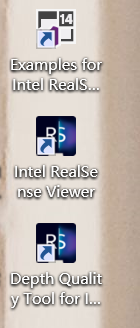
Examples for Intel RealSense SDK 2.0:可开发SDK解决方案,打开可以直接调用官方例程,但是这样并不方便实际开发
Intel RealSense Viewer和Depth Quality Tool for Intel RealSense Cameras都是摄像头的调试工具,打开可以直接调出深度和RGB图像
如果出现类似提示,直接确认就行了

配置全局的RealSense SDK 2.0,此处的方法和配置OpenCV类似:
我的电脑>>属性>>高级系统设置>>高级>>环境变量>>系统变量>>编辑、新建Path的值
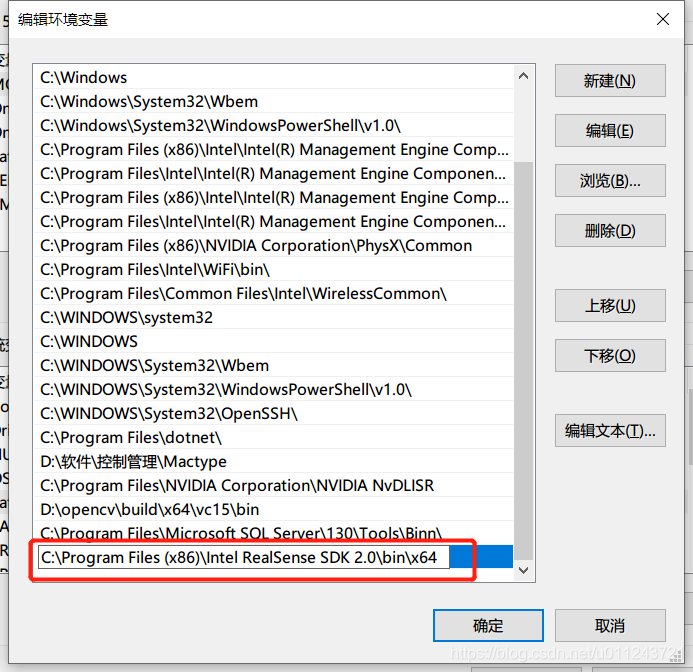
要注意电脑是64位还是32位的操作系统。
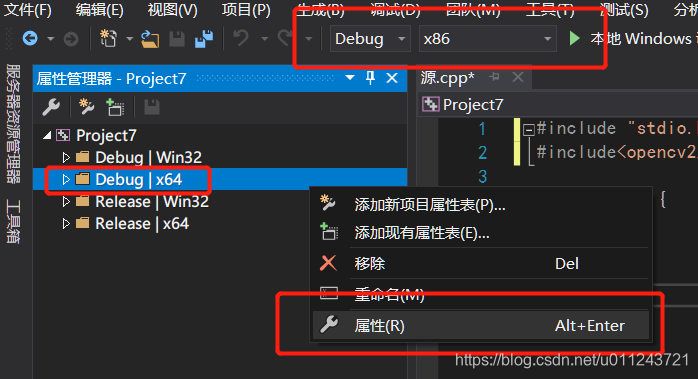
打开VS2017,新建一个工程,打开 属性管理器

根据当前不同编译方式选择修改不同属性的设置
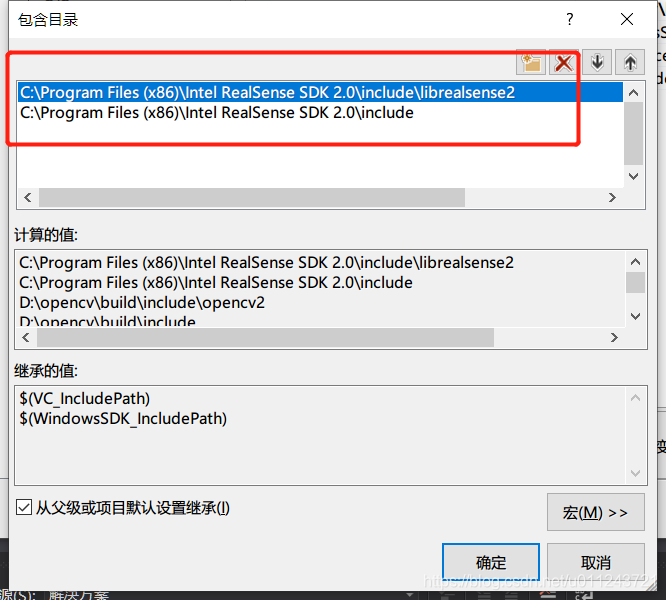
VC++目录>>包含目录
VC++目录>>库目录
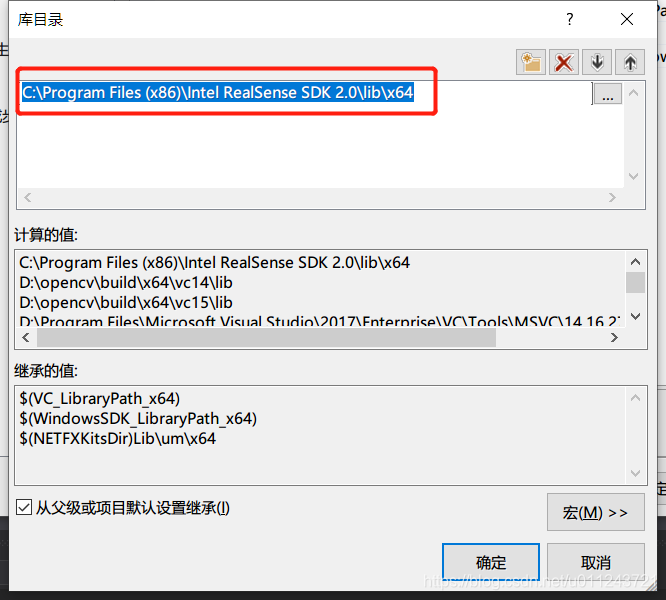
一样需要注意操作系统的位数
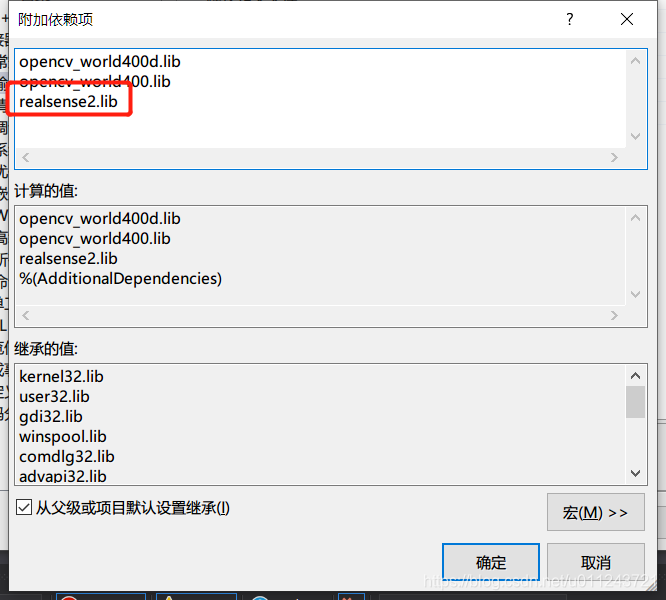
链接器>>输入>>添加依赖项
至此基本上已经完毕,附上一个测试程序:
// License: Apache 2.0. See LICENSE file in root directory.
// Copyright(c) 2017 Intel Corporation. All Rights Reserved.

#include <librealsense2/rs.hpp> // Include RealSense Cross Platform API
#include <opencv2/opencv.hpp>   // Include OpenCV API

int main(int argc, char * argv[]) try
{
	// Declare depth colorizer for pretty visualization of depth data
	rs2::colorizer color_map;

	// Declare RealSense pipeline, encapsulating the actual device and sensors
	rs2::pipeline pipe;
	// Start streaming with default recommended configuration
	pipe.start();

	using namespace cv;
	const auto window_name = "Display Image";
	namedWindow(window_name, WINDOW_AUTOSIZE);

	while (waitKey(1) < 0 )
	{
		rs2::frameset data = pipe.wait_for_frames(); // Wait for next set of frames from the camera
		rs2::frame depth = data.get_depth_frame().apply_filter(color_map);

		// Query frame size (width and height)
		const int w = depth.as<rs2::video_frame>().get_width();
		const int h = depth.as<rs2::video_frame>().get_height();

		// Create OpenCV matrix of size (w,h) from the colorized depth data
		Mat image(Size(w, h), CV_8UC3, (void*)depth.get_data(), Mat::AUTO_STEP);

		// Update the window with new data
		imshow(window_name, image);
	}

	return EXIT_SUCCESS;
}
catch (const rs2::error & e)
{
	std::cerr << "RealSense error calling " << e.get_failed_function() << "(" << e.get_failed_args() << "):\n    " << e.what() << std::endl;
	return EXIT_FAILURE;
}
catch (const std::exception& e)
{
	std::cerr << e.what() << std::endl;
	return EXIT_FAILURE;
}
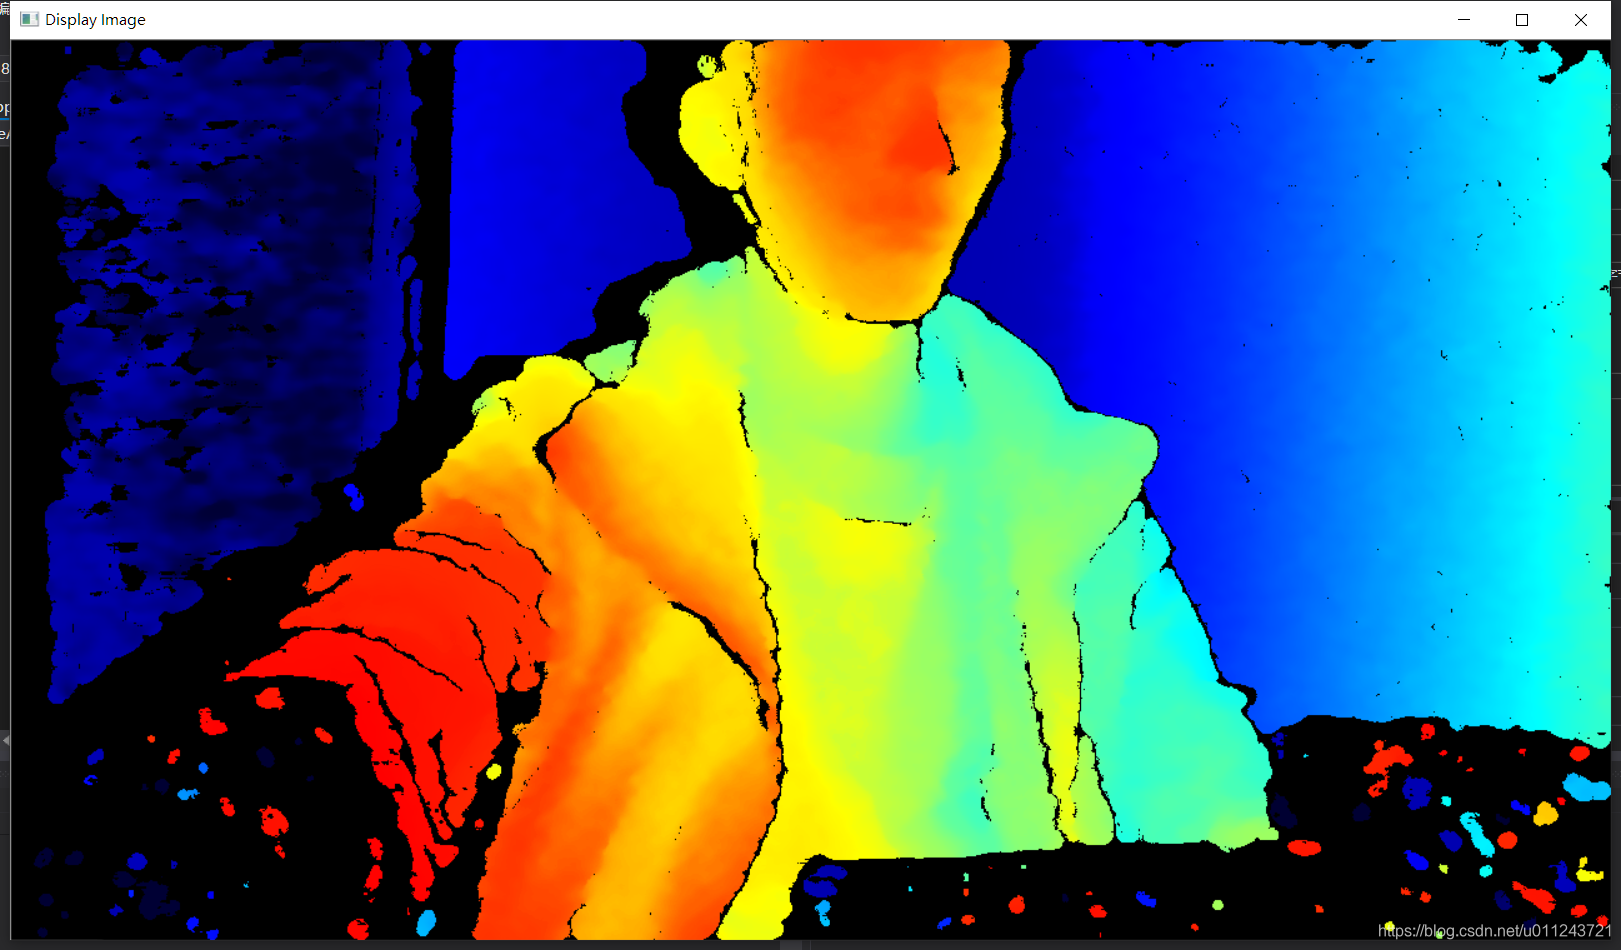
运行测试:(左/右下角画面的不正常是因为此处距离摄像头低于最低检测距离)


 1万+
1万+

 被折叠的 条评论
为什么被折叠?
被折叠的 条评论
为什么被折叠?
 到【灌水乐园】发言


