


目录
前言
在移动应用开发中,手势驱动的界面交互已成为现代用户体验的核心要素。Qt Quick Controls提供的 SwipeView 控件,通过原生支持的滑动手势,让开发者能够轻松创建类移动端的页面导航效果。
1. SwipeView特性速览

SwipeView 提供了一种导航模式,简化了水平分页滚动。底部的页面指示器显示当前处于活动状态的页面是哪一页。
- 手势驱动:支持左右滑动切换(移动端/触摸屏设备)
- 自动布局:子元素自动填充可用空间
- 无缝动画:内置平滑过渡动画
- 状态同步:与TabBar等控件自动索引绑定
- 样式定制:可深度自定义指示器和动画效果
2. 基础实现
下面这段代码使用 QML 定义了一个简单的用户界面,包含一个 SwipeView 和一个 PageIndicator。
import QtQuick
import QtQuick.Controls

Window {
    width: 640
    height: 480
    visible: true
    title: qsTr("Hello World")

    SwipeView {
        id: swipeView
        anchors.fill: parent
        currentIndex: 1  // 默认显示第二个页面

        Page {
            Label {
                anchors.centerIn: parent
                text: "This is Page1"
            }
        }

        Page {
            Switch {
                anchors.centerIn: parent
                text: "Dark Mode"
            }
        }

        Page {
            Label {
                anchors.centerIn: parent
                text: "This is Page3"
            }
        }
    }

    PageIndicator {
        id: indicator
        anchors.bottomMargin: 20

        count: swipeView.count
        currentIndex: swipeView.currentIndex

        anchors.bottom: swipeView.bottom
        anchors.horizontalCenter: parent.horizontalCenter
    }
}
2.1 运行效果
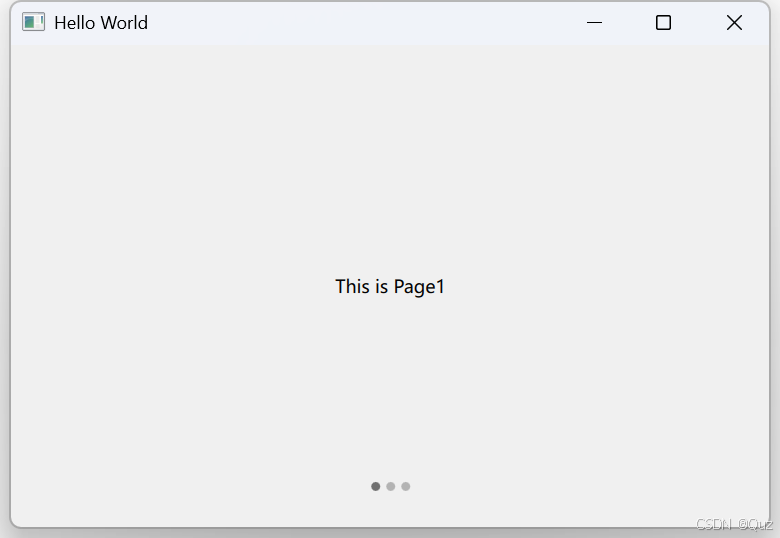
2.2 代码说明
SwipeView:
- 这是一个水平分页滚动视图,用户可以通过水平滑动来切换页面。
- currentIndex: 1 指定了默认显示的页面为索引 1(即第二个页面)。
Page:
SwipeView 包含三个页面(Page),每个页面都放置了一个简单的控件。
PageIndicator:
这是一个页面指示器,用于显示当前处于活动状态的页面。
- id: indicator 用于标识和引用这个指示器。
- count: swipeView.count 和 currentIndex: swipeView.currentIndex 表示页面指示器的页面数量和当前页面索引与 SwipeView 同步。
- anchors.bottom: swipeView.bottom 和 anchors.horizontalCenter: parent.horizontalCenter 设置页面指示器的位置,使其位于 SwipeView 的底部中间。
- anchors.bottomMargin: 20 设置了页面指示器与底部边缘的间距为 20。
SwipeView 用于实现水平分页滚动功能,PageIndicator 用于直观地显示当前处于哪个页面。
这个示例代码实现了一个简单的分页结构,可以通过触摸或拖动来切换页面,并通过页面指示器了解当前页面的位置。
3. 属性方法
| 属性/方法 | 类型 | 说明 |
|---|---|---|
| orientation | enum | 切换方向(Qt.Horizontal默认 / Qt.Vertical) |
| interactive | bool | 手势开关(编程控制时可禁用) |
| currentIndex | int | 支持双向绑定,动态修改可触发动画 |
| contentChildren | list | 动态操作子项(配合Loader实现懒加载) |
| position | real | 当前滑动进度(0-1范围,用于自定义动画) |
| incrementCurrentIndex | method | Container方法,增加索引 |
4. 其它应用
4.1 带标题栏的联动导航
import QtQuick
import QtQuick.Controls

Window {
    width: 640
    height: 480
    visible: true
    title: qsTr("Hello World")

    Column {
        anchors.fill: parent

        TabBar {
            id: tabBar
            currentIndex: swipeView.currentIndex
            TabButton { text: "Page1"; onClicked: swipeView.currentIndex = 0}
            TabButton { text: "Page2"; onClicked: swipeView.currentIndex = 1}
            TabButton { text: "Page3"; onClicked: swipeView.currentIndex = 2}
        }

        SwipeView {
            id: swipeView
            width: parent.width
            height: parent.height - tabBar.height

            Page {
                Label {
                    anchors.centerIn: parent
                    text: "This is Page1"
                }
            }

            Page {
                Switch {
                    anchors.centerIn: parent
                    text: "This is Page2"
                }
            }

            Page {
                Label {
                    anchors.centerIn: parent
                    text: "This is Page3"
                }
            }
        }
    }
}
这段代码创建了一个带有标签栏和SwipeView的窗口,通过TabBar和SwipeView实现了一个标签式界面,允许用户通过点击标签或水平滑动在三个页面(分别标记为“Page1”、“Page2”和“Page3”)之间切换。
运行效果:
5. 扩展应用
- 教学引导系统:结合PageIndicator实现步骤指示
- 图片浏览器:全屏滑动查看模式
- 数据仪表盘:多维度数据分页展示
- 游戏关卡选择:横向滑动关卡预览
以下使用SwipeView实现一个图片浏览器:
import QtQuick
import QtQuick.Controls

Window {
    width: 853
    height: 480
    visible: true
    title: qsTr("Hello World")

    SwipeView {
        id: swipeView
        anchors.fill: parent

        Page {Image { source: "qrc:/wallpaper/nz1.jpg"; anchors.fill: parent }}
        Page {Image { source: "qrc:/wallpaper/nz2.jpg"; anchors.fill: parent }}
        Page {Image { source: "qrc:/wallpaper/nz4.jpg"; anchors.fill: parent }}
    }

    PageIndicator {
        id: indicator
        count: swipeView.count
        currentIndex: swipeView.currentIndex
        anchors.bottom: swipeView.bottom
        anchors.horizontalCenter: swipeView.horizontalCenter
    }
}
运行效果:


 886
886

 被折叠的 条评论
为什么被折叠?
被折叠的 条评论
为什么被折叠?
 到【灌水乐园】发言


