


微信多端应用搭建:Tdesign UI集成、sass配置、主题切换
夸克资源分享:
表情包:https://pan.quark.cn/s/5b9ddeb237fe
工具箱:https://pan.quark.cn/s/aa2d6a730482,图吧、美蛋、路遥、入梦等
Fiddler Everywhere抓包:https://pan.quark.cn/s/6b1e2fbae019,
Adobe:https://pan.quark.cn/s/13e39cfeaadb,先看安装教程
JetBranis开发者工具:https://pan.quark.cn/s/16e94dcff1f7,先看安装教程下的jetbra教程
逆向工具:https://pan.quark.cn/s/50e93c8ca54c
前端项目搭建集锦:https://blog.youkuaiyun.com/randy521520/article/details/146998467
android模拟器调试官方文档:https://developers.weixin.qq.com/miniprogram/dev/platform-capabilities/miniapp/handbook/test/android-simulator.html
ios模拟器调试官方文档:https://developers.weixin.qq.com/miniprogram/dev/platform-capabilities/miniapp/handbook/test/ios-simulator.html
真机调试官方文档:https://developers.weixin.qq.com/miniprogram/dev/platform-capabilities/miniapp/handbook/test/device.html
本文讲解的功能代码只是简要说明,完整代码可通过下面文章链接下载,下载后请先看README.md文档说明,已踩过大部分坑:
https://blog.youkuaiyun.com/randy521520/article/details/146998467
一、初始化项目
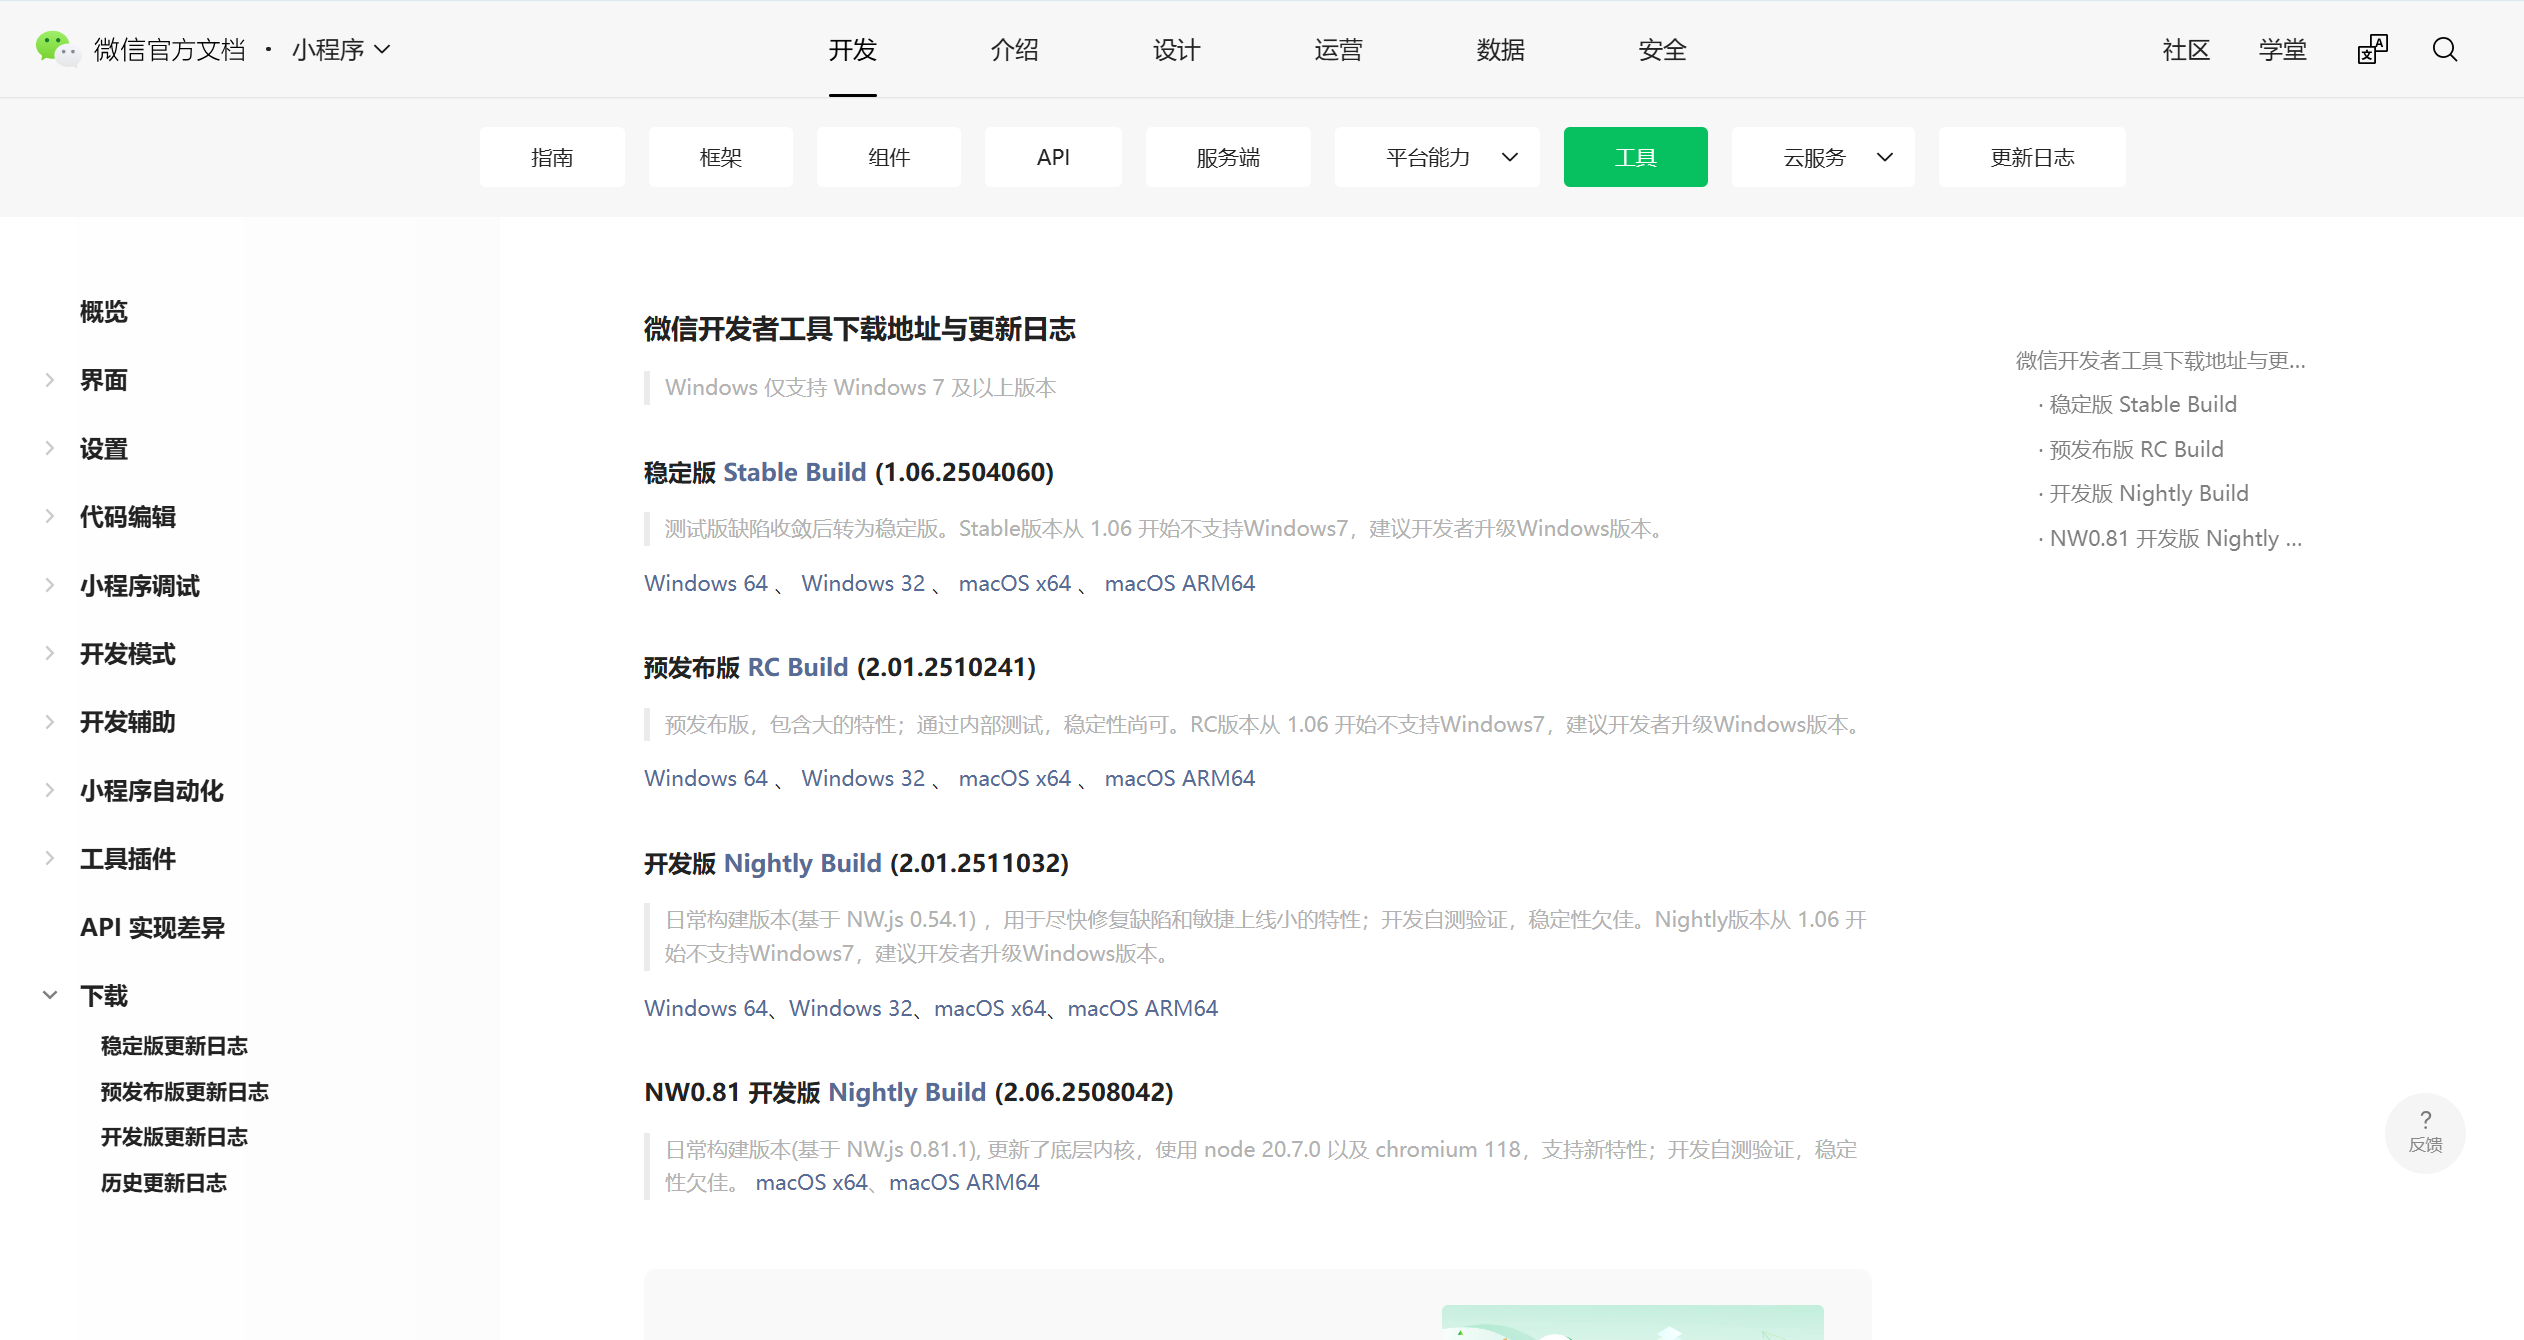
1.安卓微信开发者工具,下载微信开发者工具:https://developers.weixin.qq.com/miniprogram/dev/devtools/download.html,下载后直接安装即可
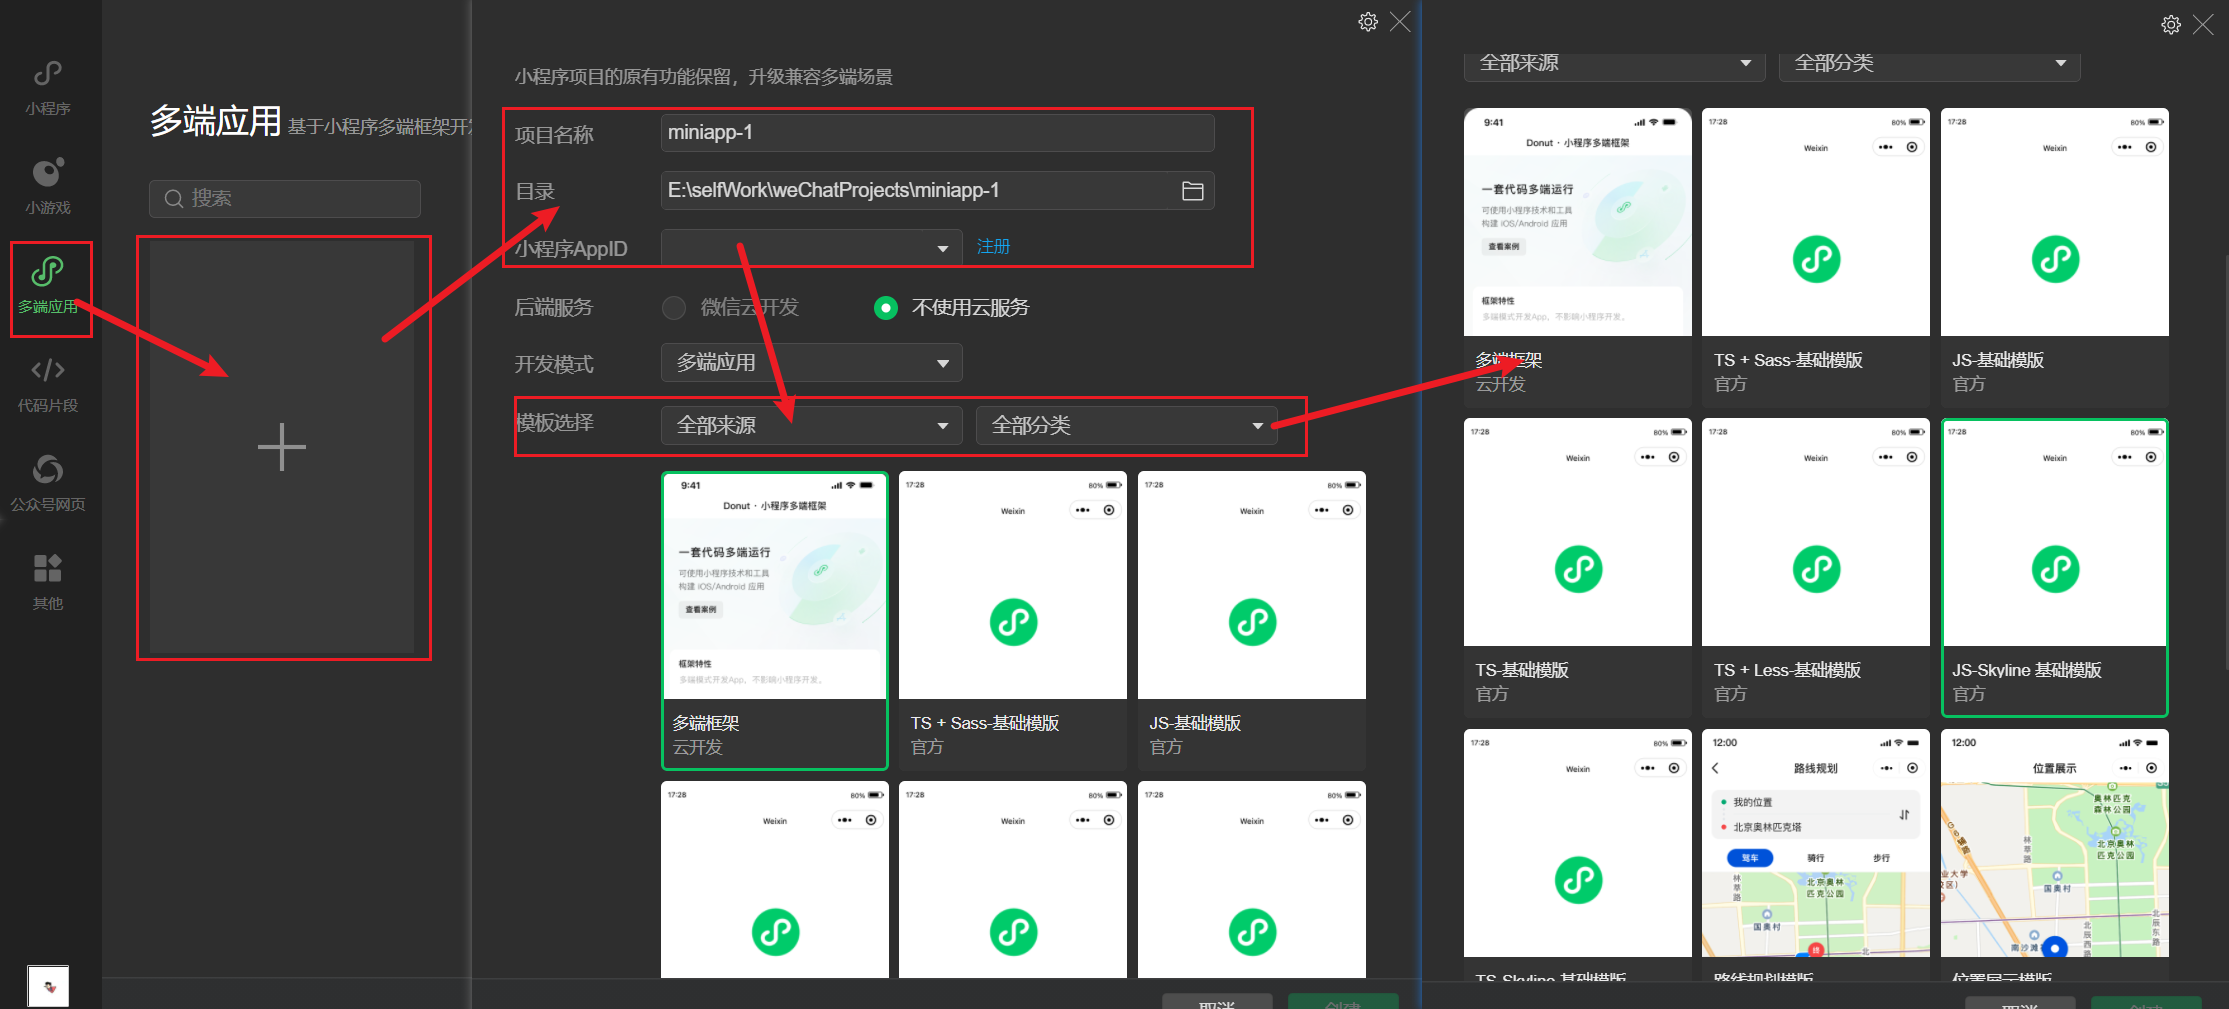
2.打开微信开发者工具,选择多端应用>点击添加应用>输入项目信息,并选择模板,虽然提供了多种模板,但是有些模板中的配置功能可能项目中并不需要,可以选项比较纯净的模板如:js、js-skyline、ts、ts-skyline等,skyline是是微信团队开发的新型渲染引擎,旨在替代传统的WebView渲染方式,提供更接近原生应用的性能和交互体验,skyline官网文档:https://developers.weixin.qq.com/miniprogram/dev/framework/runtime/skyline/introduction.html。由于接下来使用的UI框架与skyline渲染模式适配并不完善,所以该教程采用的是js基础模板,如需要迁移到Skyline可使用迁移工具:https://github.com/wechat-miniprogram/skylint
3.project.private.config.json项目私有配置文件调整,优先级高于project.config.json,官网文档:https://developers.weixin.qq.com/miniprogram/dev/devtools/projectconfig.html
{


  "description": "项目私有配置文件。此文件中的内容将覆盖 project.config.json 中的相同字段。项目的改动优先同步到此文件中。详见文档:https://developers.weixin.qq.com/miniprogram/dev/devtools/projectconfig.html",
  "projectname": "WeChatCommon",
  "libVersion": "3.11.1",
  "setting": {


    "compileHotReLoad": true,
    "urlCheck": true,
    "coverView": true,
    "lazyloadPlaceholderEnable": false,
    "skylineRenderEnable": false,
    "preloadBackgroundData": false,
    "autoAudits": false,
    "useApiHook": true,
    "useApiHostProcess": true,
    "showShadowRootInWxmlPanel": true,
    "useStaticServer": false,
    "useLanDebug": false,
    "showES6CompileOption": false,
    "bigPackageSizeSupport": true,
    "checkInvalidKey": true,
    "ignoreDevUnusedFiles": true
  }
}
4.优化project.config.json项目配置文件,用于开发者工具的个性化配置,官网文档:https://developers.weixin.qq.com/miniprogram/dev/devtools/projectconfig.html
{


  "compileType": "miniprogram",
  "libVersion": "trial",
  "packOptions": {


    "ignore": [],
    "include": []
  },
  "setting": {


    "urlCheck": false,
    "scopeDataCheck": false,
    "coverView": true,
    "es6": true,
    "postcss": true,
    "compileHotReLoad": true,
    "preloadBackgroundData": false,
    "minified": true,
    "autoAudits": false,
    "newFeature": true,
    "uglifyFileName": false,
    "uploadWithSourceMap": true,
    "useIsolateContext": true,
    "nodeModules": true,
    "enhance": false,
    "useCompilerModule": true,
    "userConfirmedUseCompilerModuleSwitch": false,
    "showShadowRootInWxmlPanel": true,
    "skylineRenderEnable": true,
    "bigPackageSizeSupport": true,
    "packNpmRelationList": [
    ],
    "ignoreUploadUnusedFiles": true,
    "babelSetting": {


      "ignore": [],
      "disablePlugins": [],
      "outputPath": ""
    },
    "condition": true,
    "compileWorklet": false,
    "packNpmManually": false,
    "minifyWXSS": true,
    "minifyWXML": true,
    "localPlugins": false,
    "swc": false,
    "disableSWC": true,
    "disableUseStrict": false,
    "useCompilerPlugins": false
  },
  "condition": {

   },
  "editorSetting": {


    "tabIndent": "auto",
    "tabSize": 2
  },
  "appid": "wxf65ebeae934e323d",
  "simulatorType": "wechat",
  "simulatorPluginLibVersion": {


    "wxext14566970e7e9f62": "3.6.5-41"
  },
  "projectArchitecture": "multiPlatform"
}
5.优化app.json文件小程序全局配置文件,官网文档:https://developers.weixin.qq.com/miniprogram/dev/reference/configuration/app.html
{


  "pages": [
    "pages/index/index",
    "pages/logs/logs"
  ],
  "window": {


    "navigationBarTextStyle": "black",
    "navigationBarTitleText": "WeChatCommon",
    "navigationBarBackgroundColor": "#ffffff"
  },
  "style": "v2",
  "componentFramework": "glass-easel",
  "sitemapLocation": "sitemap.json",
  "lazyCodeLoading": "requiredComponents"
}
二、集成UI框架:Tdesign(构建npm)
1.菜单栏找到工具,点击构建npm,可能会报下面的错误,这是因为微信开发者工具在构建项目时,无法找到所需的 npm 包

2.修改project.config.json配置,如果项目中有miniprogram目录,miniprogramNpmDistDir需要指定miniprogram目录
"packNpmManually": true,
"packNpmRelationList": [
    {


        "packageJsonPath": "./package.json",
        "miniprogramNpmDistDir": "./"
    }
]
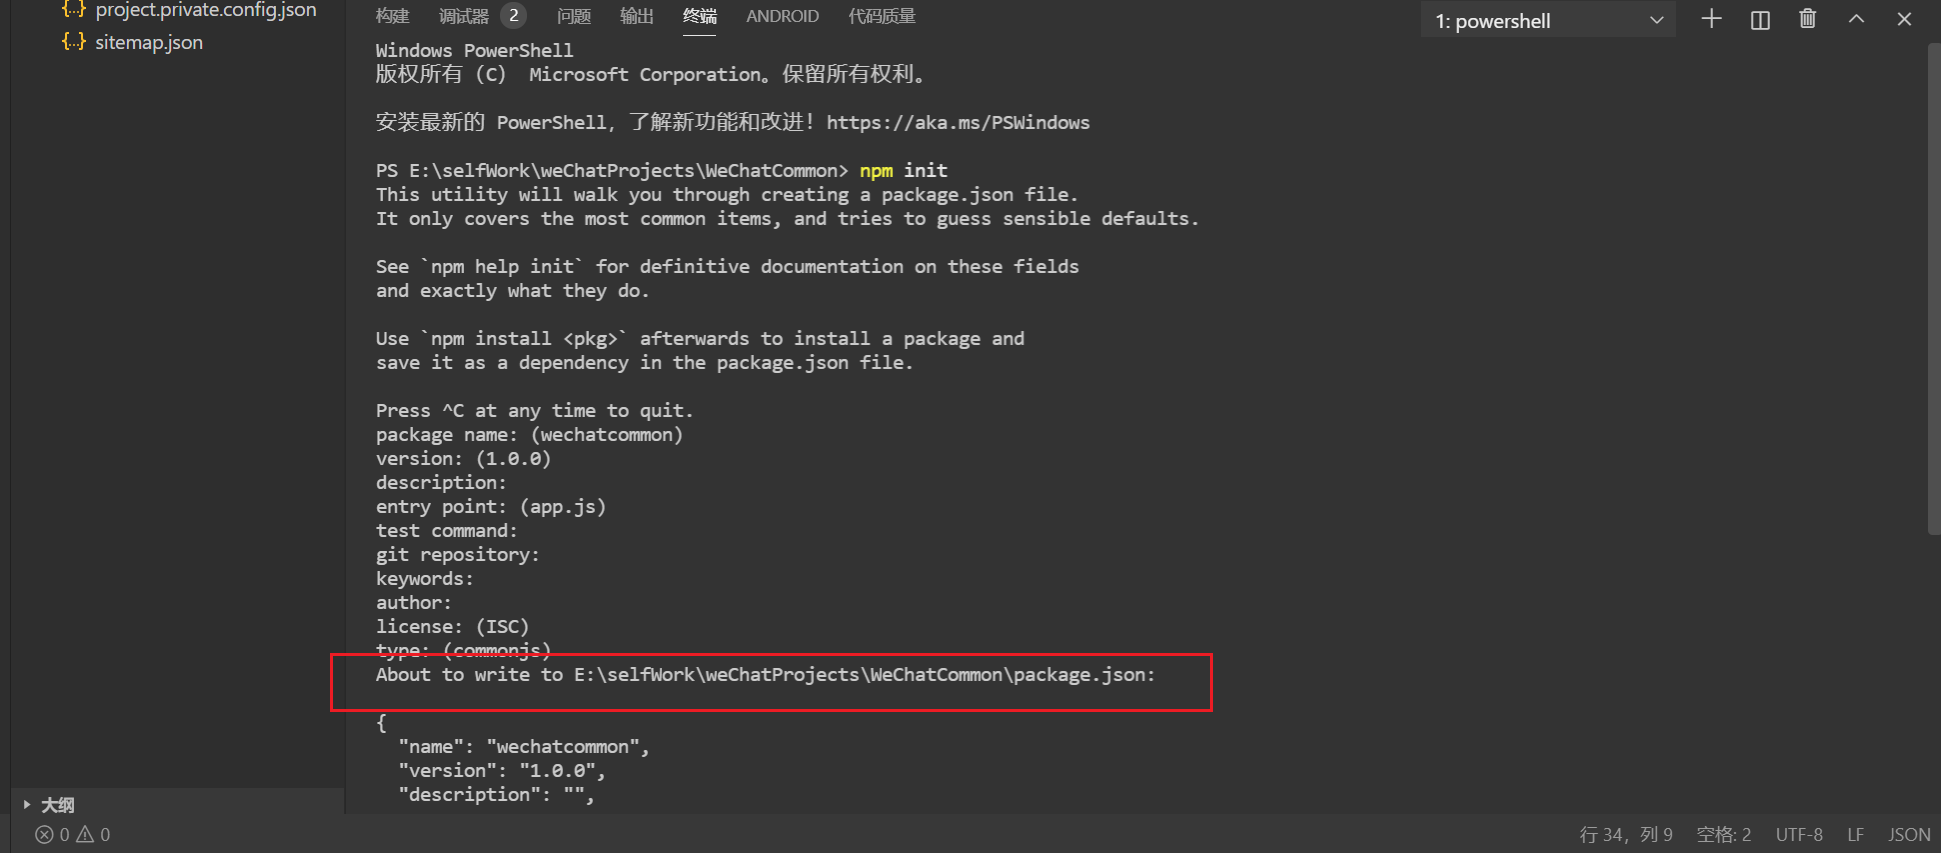
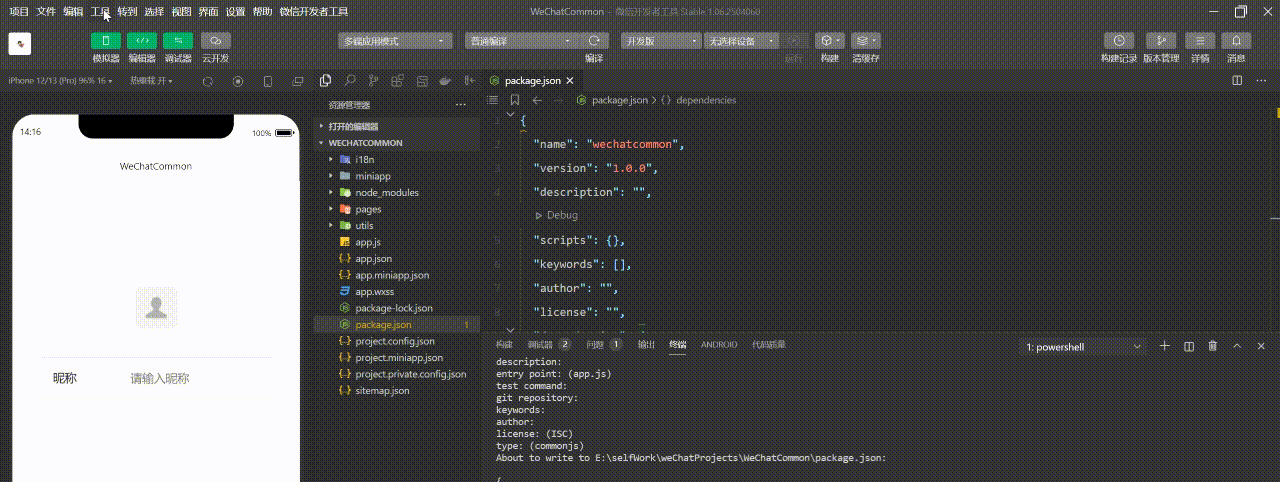
3.打开调试工具,切换到终端,运行npm init初始化package.json文件,此时会在项目根目录生成package.json
4.终端运行npm i tdesign-miniprogram -S --production安装Tdesign,官网:https://tdesign.tencent.com/miniprogram/overview

5.菜单栏找到工具,点击构建npm,等待构建完成,会在miniprogramNpmDistDir配置的目录生成miniprogram_npm目录,该目录就是npm安装包的目录
6.测试Tdesign是否安装成功:将 app.json 中的 “style”: “v2” 移除,该配置表示启用新版组件样式,将会导致 TDesign 的组件样式错乱
{


  "pages": [
    "pages/index/index",
    "pages/logs/logs"
  ],
  "window": {


    "navigationBarTextStyle": "black",
    "navigationBarTitleText": "WeChatCommon",
    "navigationBarBackgroundColor": "#ffffff"
  },
  "componentFramework": "glass-easel",
  "sitemapLocation": "sitemap.json",
  "lazyCodeLoading": "requiredComponents"
}
7.测试Tdesign是否安装成功:修改pages>index>index.json引入Tdesign按钮组件
{


  "usingComponents": {


    "t-button": "tdesign-miniprogram/button/button"
  }
}
8.测试Tdesign是否安装成功:修改pages>index>index.wxml使用t-button,按钮显示正常说明Tdesign安装成功

三、配置Sass
1.修改project.config.json中setting项的useCompilerPlugins
   "useCompilerPlugins": [
      "sass"
    ]
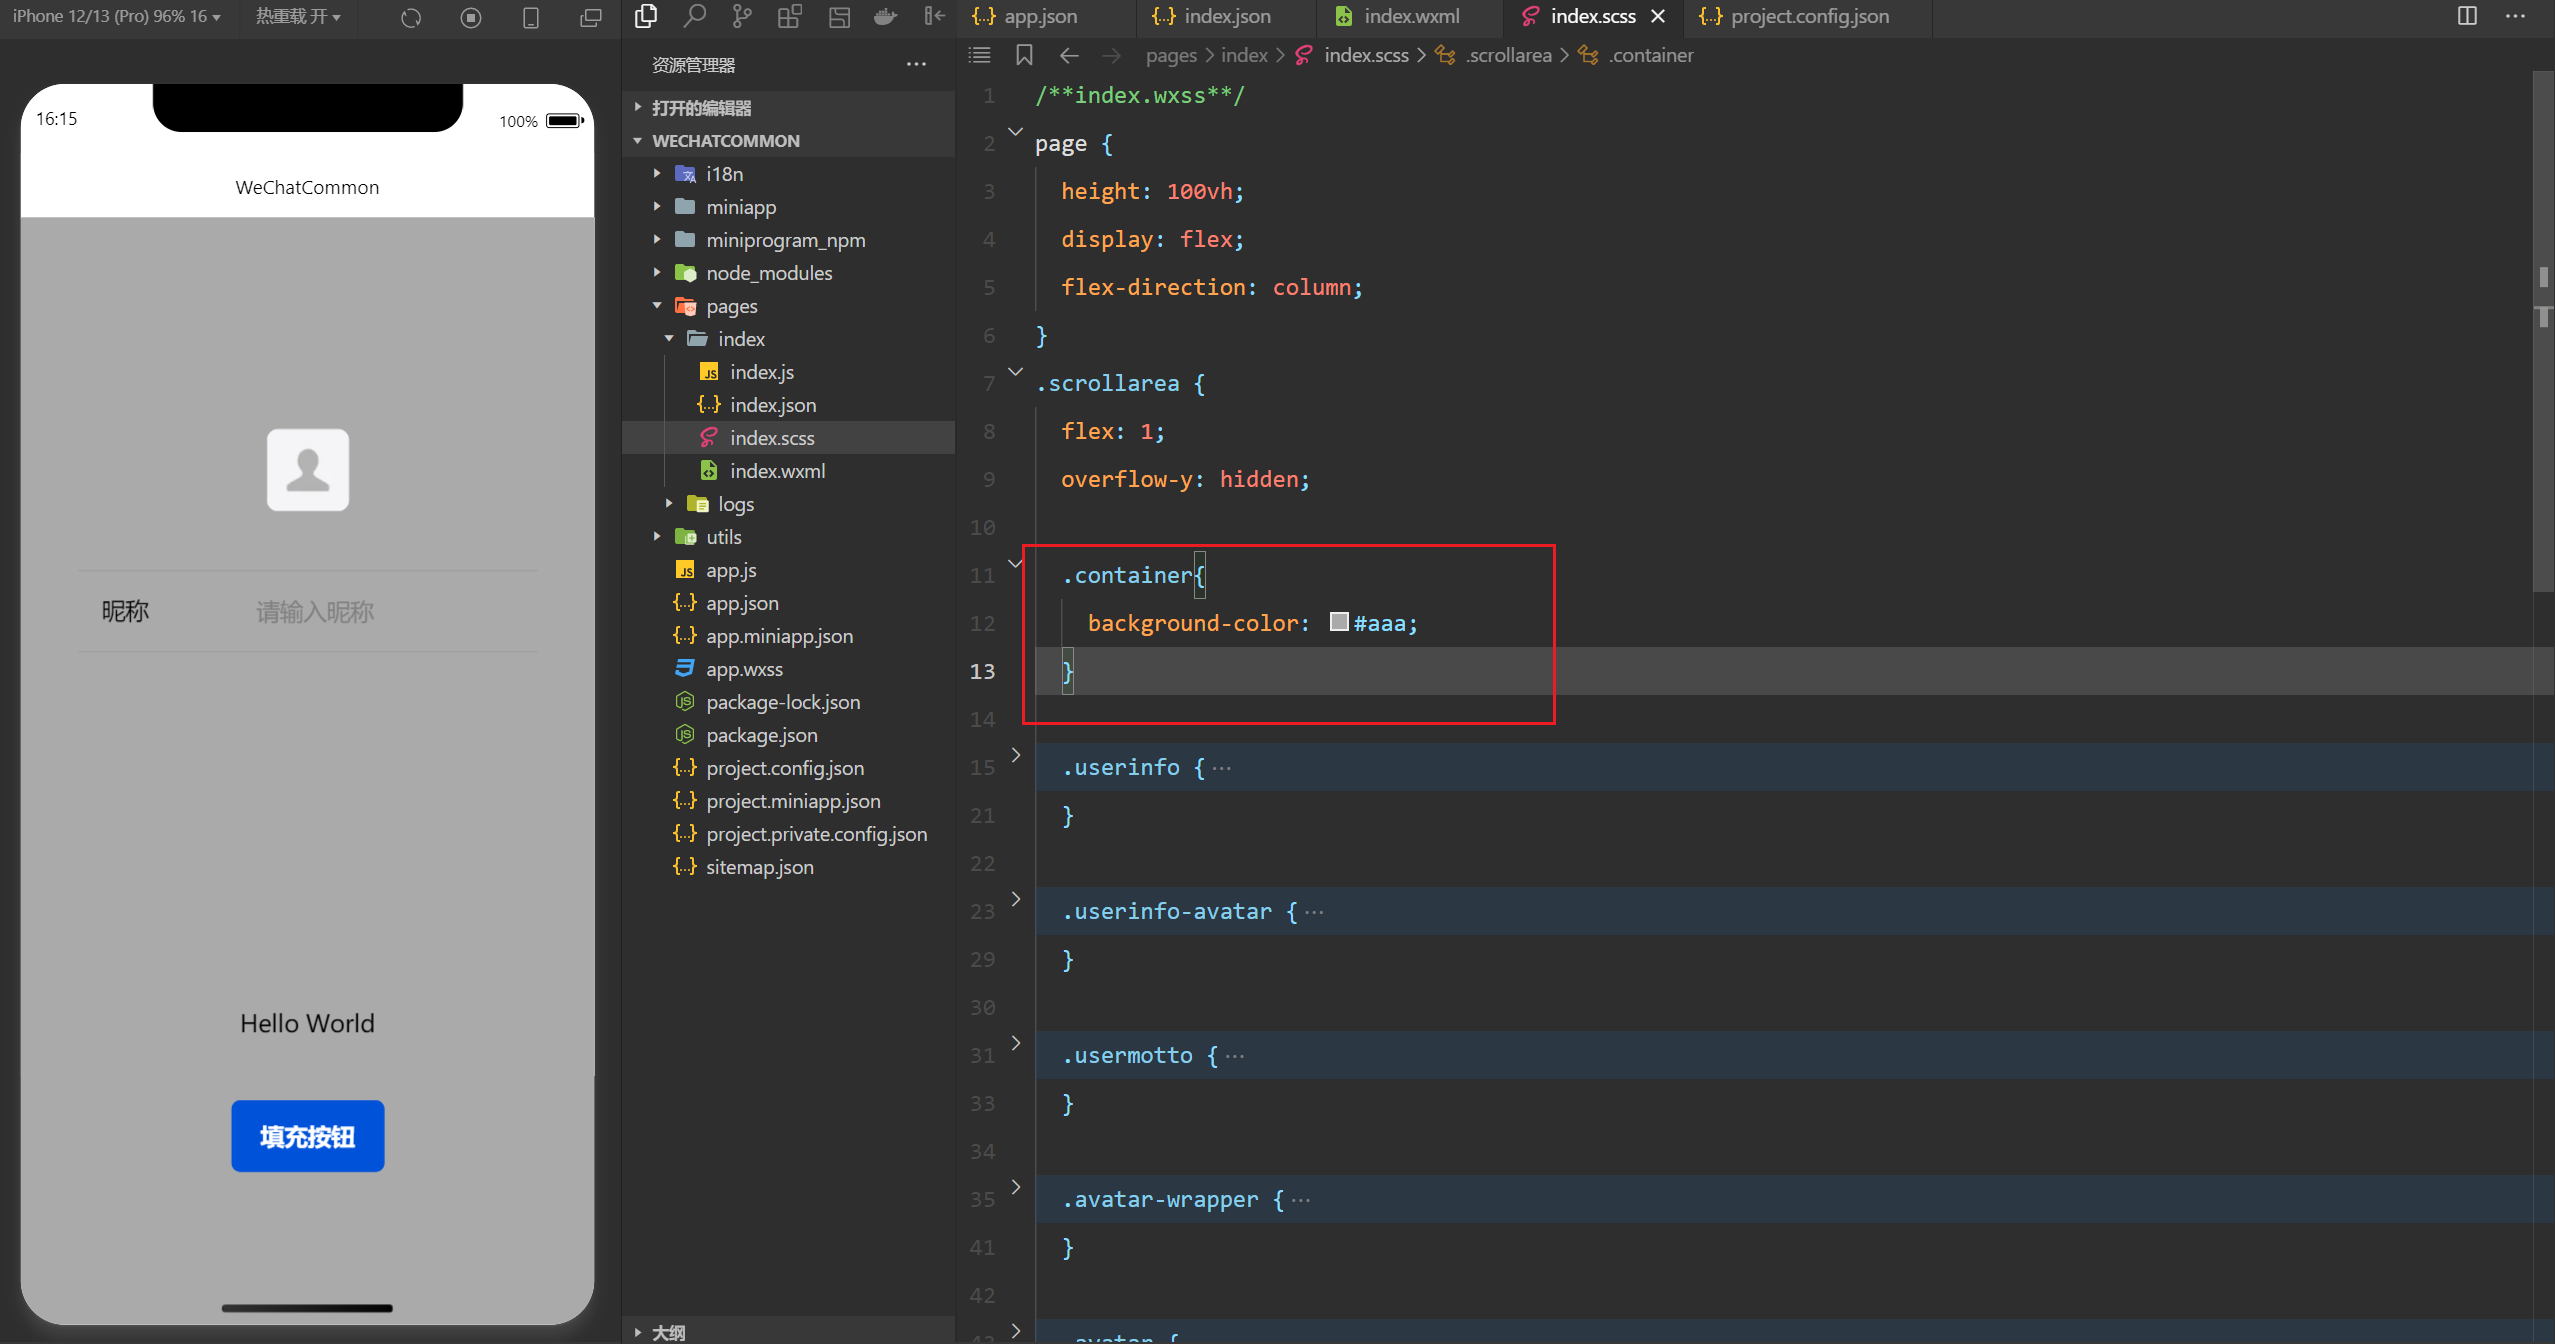
2.将pages>index>index.wxss命名为pages>index>index.scss,并修改index.scss代码,将所有class样式移动到.scrollarea中,并给container加个背景色,如果页面显示正常,说明sass配置成功
3.全局样式文件管理:新建assets>scss文件夹,并在该文件夹下新建globalVar.scs、globalMixin.scss、global.scss、iframe.scss
$primary-color: #FF950A;
@mixin half_radius($height){


  height: $height;
  border-radius: $height / 2;
}
.flex-hor-center {


  display: flex;
  justify-content: center;
}
@forward "globalVar";
@forward "globalMixin";
@forward "global";
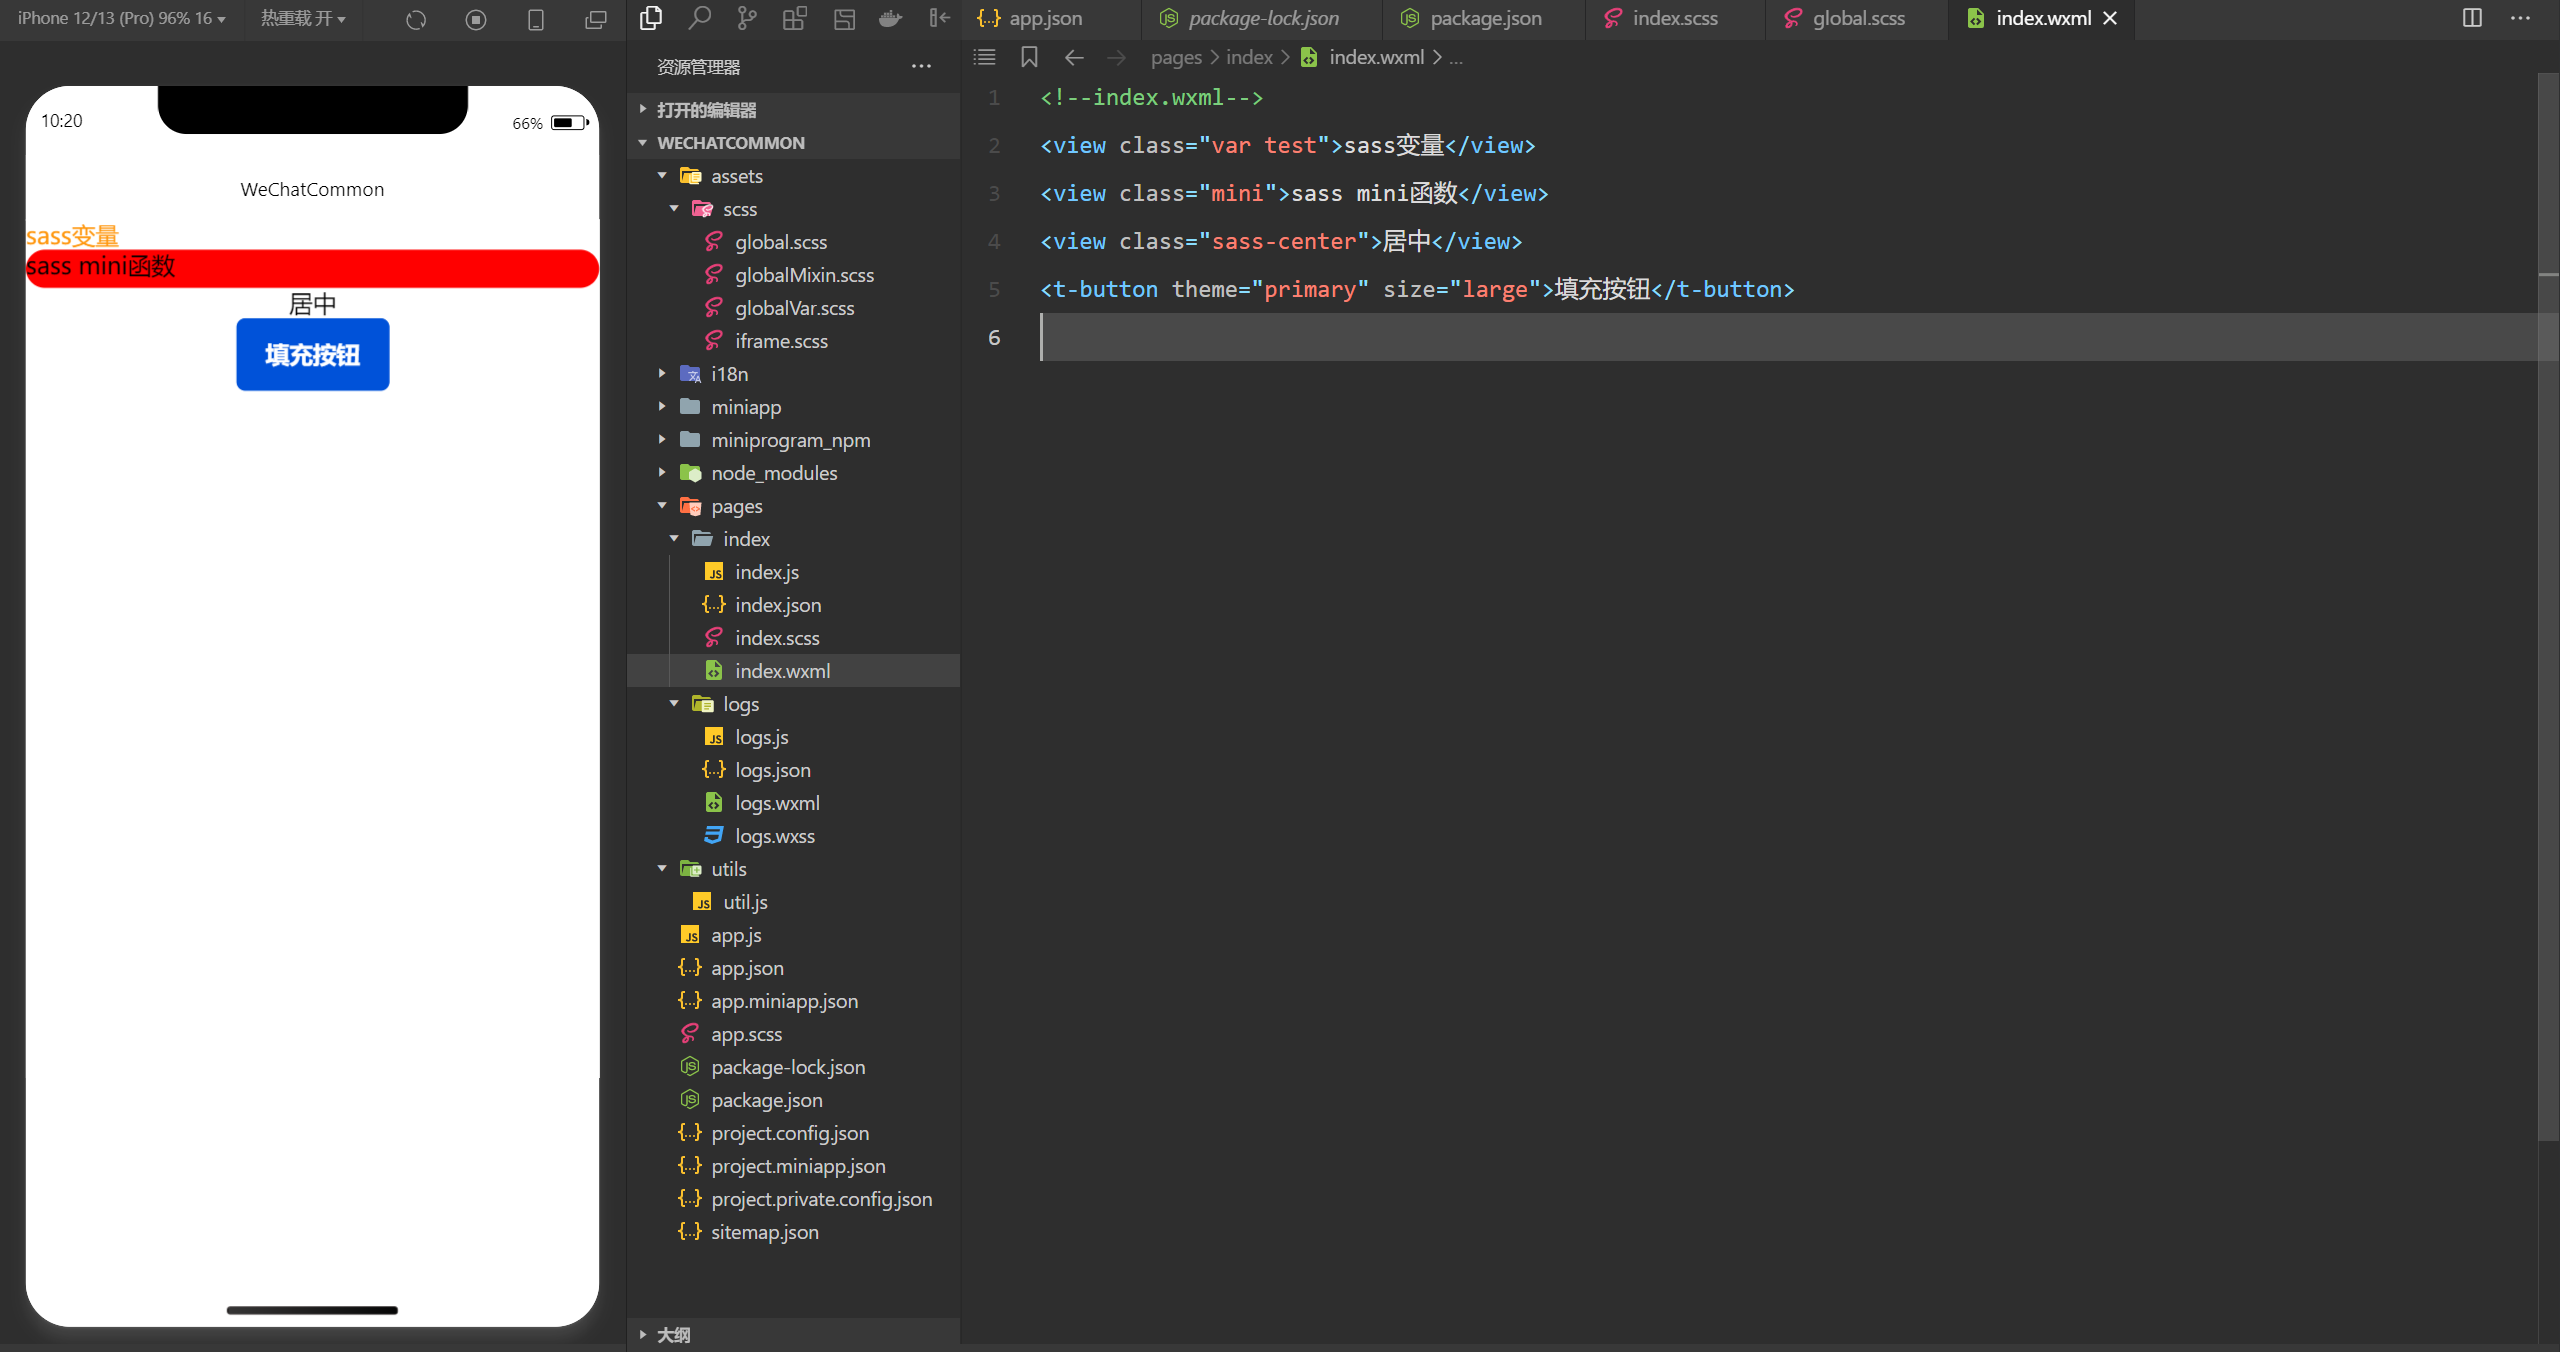
4.全局样式文件管理:修改pages>index>index.scss、pages>index>index.wxml,如果样式生效说明之前创建的全局scss文件成功,不过这里有另一个问题就是“iframe.scss是在当前页面的scss文件中导入的”,这样会导致每次创建页面都要手动导入,但是微信并没有提供类似vite中scss预处理器的配置,不能每个SCSS文件编译时自动注入全局scss文件,就算直接在全局样式文件app.scss中导入,也不能在scss文件中使用,要解决这个问题可以通过gulp写个任务自动注入到每个scss文件
@import "./assets/scss/iframe.scss";
.var{


  color: $primary-color;
}

.mini{


  background: red;
  @include half_radius(50rpx)
}

.sass-center{


  @extend .flex-hor-center;
}
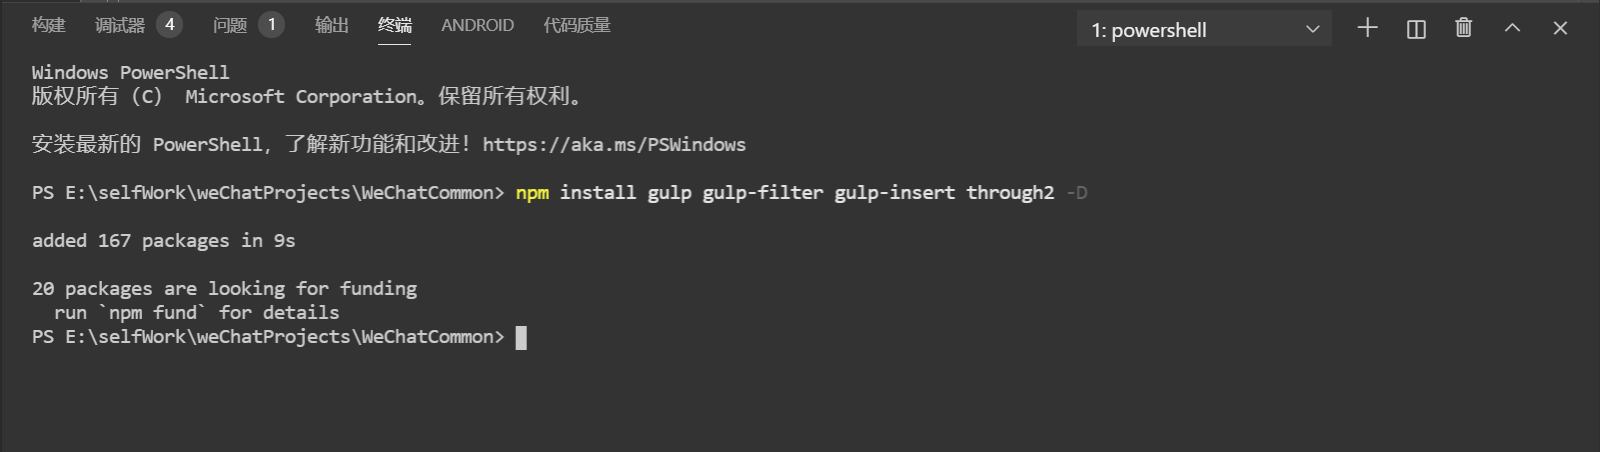
5.自动注入全局scss文件:终端运行npm install gulp gulp-filter gulp-insert through2 -D安装需要用到的包
6.自动注入全局scss文件:在项目根目录新建gulpfile.js,修改package.json中的scripts增加运行脚本命令
import gulp from 'gulp';
import insert from 'gulp-insert';
import filter from 'gulp-filter';
import fs from 'fs';
import path from 'path';
import logger from 'gulplog';
import chalk from 'chalk';
import through2 from 'through2';

const targetDirs = ['pages', 'components'];

//用于过滤不存在的文件夹
const existingDirs = targetDirs.filter(dir => {


  const dirPath = path.resolve(dir);
  if (fs.existsSync(dirPath) && fs.statSync(dirPath).isDirectory()) {


    return true;
  }else{


    logger.info(`文件夹不存在,已忽略:${

     chalk.magenta(dirPath)}`);
    return false;
  }
});

//打印当前处理的文件
const logProcessing = through2.obj((file, _, callback) => {


  const filePath = path.resolve(file.path);
  logger.info(`正在处理:${

     chalk.magenta(filePath)}
最低0.47元/天 解锁文章


 1095
1095

 被折叠的 条评论
为什么被折叠?
被折叠的 条评论
为什么被折叠?
 到【灌水乐园】发言


