


springmvc
Spring MVC属于SpringFrameWork的后续产品,已经融合在Spring Web Flow里面。Spring 框架提供了构建 Web 应用程序的全功能 MVC 模块。使用 Spring 可插入的 MVC 架构,从而在使用Spring进行WEB开发时,可以选择使用Spring的Spring MVC框架或集成其他MVC开发框架,如Struts1(现在一般不用),Struts 2(一般老项目使用)等。
配置
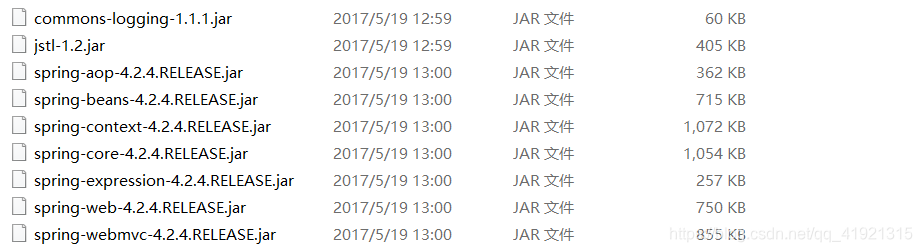
使用的jar包
最后返回json使用的jar包

和Struts2一样,配置前端控制器来拦截请求
web.xml
<?xml version="1.0" encoding="UTF-8"?>
<web-app xmlns:xsi="http://www.w3.org/2001/XMLSchema-instance"
	xmlns="http://xmlns.jcp.org/xml/ns/javaee"
	xsi:schemaLocation="http://xmlns.jcp.org/xml/ns/javaee http://xmlns.jcp.org/xml/ns/javaee/web-app_3_1.xsd"
	id="WebApp_ID" version="3.1">
	<display-name>01_springmvc</display-name>
	<welcome-file-list>
		<welcome-file>index.html</welcome-file>
		<welcome-file>index.htm</welcome-file>
		<welcome-file>index.jsp</welcome-file>
		<welcome-file>default.html</welcome-file>
		<welcome-file>default.htm</welcome-file>
		<welcome-file>default.jsp</welcome-file>
	</welcome-file-list>

	<!-- 配置前端控制器 -->
	<servlet>
		<servlet-name>springmvc</servlet-name>
		<servlet-class>org.springframework.web.servlet.DispatcherServlet</servlet-class>
		<!-- 加载springmvc核心配置文件 -->
		<init-param>
			<param-name>contextConfigLocation</param-name>
			<param-value>classpath:springmvc.xml</param-value>
		</init-param>
	</servlet>
	<!-- 配置拦截路径 -->
	<servlet-mapping>
		<servlet-name>springmvc</servlet-name>
		<!-- 拦截后缀为action的请求 -->
		<url-pattern>*.action</url-pattern>
	</servlet-mapping>
</web-app>
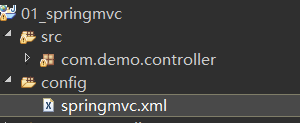
然后再目录下新建一个config,新建springmvc.xml
springmvc.xml
<?xml version="1.0" encoding="UTF-8"?>
<beans xmlns="http://www.springframework.org/schema/beans"
	xmlns:xsi="http://www.w3.org/2001/XMLSchema-instance"
	xmlns:p="http://www.springframework.org/schema/p"
	xmlns:context="http://www.springframework.org/schema/context"
	xmlns:mvc="http://www.springframework.org/schema/mvc"
	xsi:schemaLocation="http://www.springframework.org/schema/beans http://www.springframework.org/schema/beans/spring-beans-4.0.xsd
        http://www.springframework.org/schema/mvc http://www.springframework.org/schema/mvc/spring-mvc-4.0.xsd
        http://www.springframework.org/schema/context http://www.springframework.org/schema/context/spring-context-4.0.xsd">

	<!-- 配置@Controller处理器,包扫描器 -->
	<context:component-scan
		base-package="com.demo.controller" />

	<!-- 注解驱动配置,代替映射器与适配器的单独配置,同时支持json响应(推荐使用) -->
	<mvc:annotation-driven />
</beans>
注解
在配置的包扫描器对应的包下建立一个类,在类上加注解@Controller表明这是一个控制器的类
1.第一个例子
package com.demo.controller;

import javax.servlet.http.HttpServletRequest;

import org.springframework.stereotype.Controller;
import org.springframework.ui.Model;
import org.springframework.web.bind.annotation.RequestMapping;
import org.springframework.web.bind.annotation.RequestMethod;
import org.springframework.web.bind.annotation.RequestParam;
import org.springframework.web.servlet.ModelAndView;
//注解表明这是一个控制类
@Controller
public class hello {
	//这个注解表明拦截请求为hello.action的请求
	@RequestMapping("hello")
	public ModelAndView hello() {
		System.out.println("Springmvc...");
		//ModelAndView的作用是返回数据,设置返回的页面是哪一个jsp
		ModelAndView mav = new ModelAndView();
		// 传递数据
		mav.addObject("msg", "hello world");
		mav.setViewName("index.jsp");
		return mav;
	}
}
- 当然也支持servlet的原生方式
在方法的参数中写对应的参数可以接受到
	// 通过原生HttpServletRequest传递参数
	@RequestMapping("hello2")
	public ModelAndView hello2(HttpServletRequest request) {
		String name = request.getParameter("name");
		ModelAndView mav = new ModelAndView();
		// 传递数据
		mav.addObject("msg", "hello " + name);
		mav.setViewName("index.jsp");
		return mav;
	}
- 用Model来代替ModelAndView
	// 通过原生HttpServletRequest传递参数
	@RequestMapping("hello3")
	public String hello3(Model model, HttpServletRequest request) {
		String name = request.getParameter("name");
		// 传递数据
		model.addAttribute("msg", name);
		return "index.jsp";
	}
- 传递参数,参数要对应jsp页面的名称才能接受到
	@RequestMapping("hello4") // 传递的参数要对应
	public String hello4(Model model, int id) {

		// 传递数据
		model.addAttribute("msg", id);
		return "index.jsp";
	}
4.1 当然参数也可以使用下面的方法不对应名称
	// 实现参数名称可以不对应,id->ids
	// required = true表示id属性不能为空,否则将报错
	@RequestMapping("hello5")
	public String hello5(Model model, @RequestParam(value = "id", required = true) int ids) {
		model.addAttribute("msg", ids);
		return "index.jsp";
	}
4.2 接受pojo类型的参数
//	 接受pojo类型
//	 假设有一个pojo类:User
	@RequestMapping("hello6")
	public String hello6(Model model, User user) {
		// 操作user
		model.addAttribute("msg", "操作完成");
		return "index.jsp";
	}
4.3 接受数组类型的参数,比如checkbox
	@RequestMapping("hello7") // int[] 是checkbox的值类型
	public String hello7(Model model, int[] id) {
		// 数组id可以接受页面中的CheckBox选项
		return "index.jsp";
	}
- 可以通过在类上加注解@RequestMapping来实现分层管理
	// 如果在类上再加一个@RequestMapping("dir")
	// 那么请求目录应该是../dir/hello8
	// ..dir/hello9
	// method:请求方式
	@RequestMapping(value = { "hello8", "hello9" }, method = { RequestMethod.GET, RequestMethod.POST })
	public String hello8(Model model) {
		return "index.jsp";
	}
- 请求与转发
	@RequestMapping("world1")
	public String world1(Model model) {
		// 执行修改操作

		model.addAttribute("msg", "world1");
		// 请求页面
//		return "forward:index.jsp";
		// 转发页面,可以带信息,会放到url中,取值。。。
		return "redirect:index.jsp";
	}
- 通过注解@ResponseBody响应json串回去
	@RequestMapping("json1")
	@ResponseBody
	public String jsonstring(Model model) {
		HashMap<String, String> map = new HashMap<String, String>();
		map.put("name", "lrg");
		map.put("sex", "man");
		map.put("age", "20");
		// JSON.toJSONString(map)这个方法要用到fastjson的jar包
		String json = JSON.toJSONString(map);
		System.out.println(json);
		return json;
	}
- 通过@RequestBody接受一个json串,并执行另一个action
	@RequestMapping("json1")
	// 接受一个json串
	public String json2(Model model, @RequestBody String user) {
		System.out.println(user);
		return "redirect:json1.action";
	}


 382
382

 被折叠的 条评论
为什么被折叠?
被折叠的 条评论
为什么被折叠?
 到【灌水乐园】发言


