


 本文记录了作者在6月20日至25日期间学习微信小程序的过程,设计了功能导航页和成绩预测界面。功能页界面包含图标导航栏和注销登录按钮,成绩预测界面使用cardSwipper组件实现滑动动画,展示算法预测的学生成绩。作者因期末考试暂停开发,计划考试后继续完成剩余前端设计。
6月20日至25日日志
经过一段时间的学习,大致了解了微信小程序的框架,并按照微信小程序的官方教程实现了一些简单的demo,并尝试使用了一些组件。我与任同学进行分工,我主要实现项目需要的主要界面,包括图书馆借阅记录,图书馆打卡记录,消费记录,成绩预测,分析建议报告等界面,任同学负责小程序数据库接口的实现。
在这几天,由于期末考试的缘故,没有进行界面的实现,但大概的任务和界面功能构思在脑海里成形。
等考完试,就将开始项目实现。
1.功能页界面设计
界面功能需求:
实现一个功能导航栏界面,图标来自于阿里巴巴矢量图库。
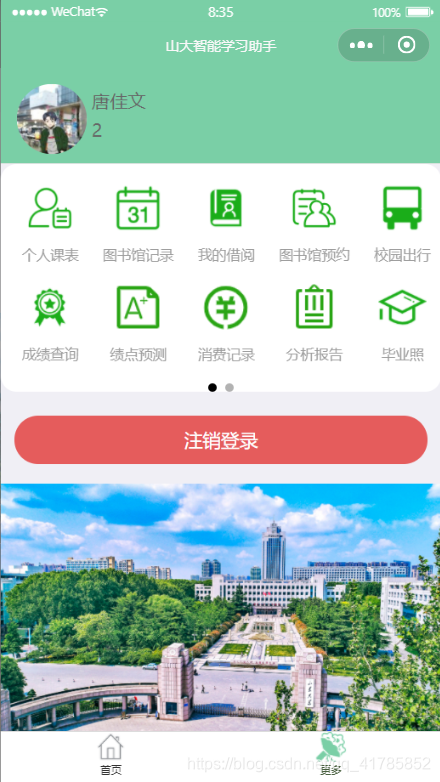
主体思路是一个图标导航栏加上一个注销登录按钮。
2.成绩预测界面设计
需求分析
通过算法组预测出来的学生成绩进行展示,最好要有动画效果。
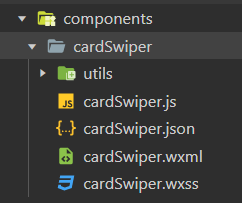
使用cardSwipper组件实现滑动卡片动画效果。
cardSwipper组件放在components文件夹下
js文件
负责动画事件的逻辑实现和事件响应。是卡片动画的核心。
import TouchEvent from "./utils/touchEvent";

Component({
  properties: {
    data: Array
  },

  options: {
    multipleSlots: true
  },

  data: {
    isLoading: false,
    swiperData: [],
    swiperCurIndex: 0,
    slideClass: "",
    lockSwipe: false
  },

  lifetimes: {
    created() {
      this.data.swiperData = this.data.swiperData.concat(this.data.data);
      new TouchEvent(this, "touchCard", {
        swipe: evt => {
          //在touch结束触发,evt.direction代表滑动的方向 ['Up','Right','Down','Left']
          if (evt.direction === "Up") this.next(evt);
          if (evt.direction === "Down") this.prev(evt);
        }
      });
    },
    attached(){
      this.setData({
        swiperData: this.data.data
      })
    }
  },

  methods: {
    next(e) {
      if (this.data.lockSwipe) return;
      this.data.lockSwipe = true;
      if (-this.data.swiperCurIndex >= this.data.swiperData.length - 1)
        return (this.data.lockSwipe = false);

      if (-this.data.swiperCurIndex >= this.data.swiperData.length - 3) {
        this.loadMore();
      }

      const index = e.currentTarget.dataset["index"];
      this.setData({["swiperData[" + index + "].slideClass"]: " ani-slide-up"}, () => {
        this.setData({
          swiperCurIndex: --this.data.swiperCurIndex
        });
      })

      setTimeout(() => {
        this.data.lockSwipe = false;
        this.setData({
          ["swiperData[" + index + "].slideClass"]: ""
        });
      }, 590);
    },

    prev(e) {
      const index = e.currentTarget.dataset["index"] - 1;
      if (this.data.lockSwipe || index < 0) return;
      this.data.lockSwipe = true;
      this.setData({
        ["swiperData[" + index + "].slideClass"]: " ani-slide-down",
        swiperCurIndex: ++this.data.swiperCurIndex
      });

      setTimeout(() => {
        this.data.lockSwipe = false;
        this.setData({
          ["swiperData[" + index + "].slideClass"]: ""
        });
      }, 590);
    },

    loadMore() {
      this.isLoading = true;
      this.triggerEvent("loadmore", {addToList: this.addToList.bind(this)});
    },

    addToList(list) {
      this.isLoading = false;
      this.setData({
        swiperData: this.data.swiperData.concat(list)
      });
    }
  }
});
wxml文件关键代码
<view class="card-swiper">

    <view wx:for="{{swiperData}}" data-index="{{index}}" class="{{'card-swiper-item curdistance' + (swiperCurIndex + index) +  (!!item.slideClass? item.slideClass: '')}}" bindtap="next" catchtouchstart="touchCard.start" catchtouchmove="touchCard.move" catchtouchend="touchCard.end" catchtouchcancel="touchCard.cancel">


    <image class="bgImg" src="/images/bck22.JPG"></image>
     <view class="flex-row" style="display: block;">
        <icon class="iconfont icon-xuekexinxi"></icon>
        <view class="text1" >学科</view>
        <view class="text1" style='font-size:80rpx;color:black'>{{item.name}}</view>
        <view class="text1"style='font-size:40rpx;color:white'>预测成绩</view>
        <view class="text1" style='font-size:120rpx;color:green'>{{item.score}}</view>
    </view>
    </view>

</view>
wxss文件就不显示了,主要是样式设计
在界面的设计上,将引用上述组件并封装进成绩数据。具体实现过程就不展示了。
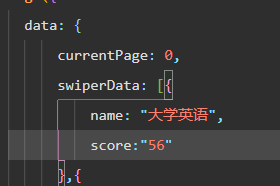
数据格式
包括将要预测的学科成绩,和预测出来的分数。
wxml关键布局代码
<view class="container center">
  <CardSwiper data="{{swiperData}}" bindloadmore="loadMore">

   </CardSwiper>

</view>
效果呈现

小结
这段时间由于期末复习比较紧张,主要利用零碎事件进行小程序的学习和看看github上比较好的界面设计,并实现了两个界面的前端设计和逻辑封装。等考试结束后将完成剩下的前端设计与开发。


 3万+
3万+

 被折叠的 条评论
为什么被折叠?
被折叠的 条评论
为什么被折叠?
 到【灌水乐园】发言


