


种子填色(Seed Filling)算法
- 区域填充即给出一个区域的边界,要求对边界范围内的所有像素单元赋予指定的颜色代码。
- 区域填充中最常用的是多边形填色。
- 多边形填色即给出一个多边形的边界,要求对多边形边界范围内所有像素单元赋予指定的颜色代码。
填色算法分为两大类:
- ⒈ 扫描线填色(Scan-Line Filling)算法。
- ⒉ 种子填色(Seed Filling)算法。
这里主要和大家分享第二种——种子填充算法
种子填充算法。
这类算法通过记录像素点的位置来表示多边形边界,另需提供多边形边界内一点的坐标。一般只能用于人机交互填色。
种子填色又称边界填色(Boundary Filling)。其基本思想是给出多边形光栅化后的边界位置及边界颜色,然后取多边形内一点(x, y),并赋予指定的颜色,再将指定的颜色扩展到整个多边形内部的过程。
种子填色算法要求:区域是连通的。
连通性可分为4连通和8连通
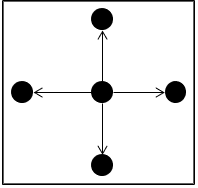
4连通:
从区域内任意一点出发,可通过上、下、
左、右四个方向到达区域内的任意像素;
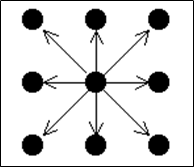
8连通:
从区域内任意一点出发,可通过上、下、左、右、左上、
左下、右上、右下八个方向到达区域内的任意象素;
那么4连通和8连通的区别在哪呢?
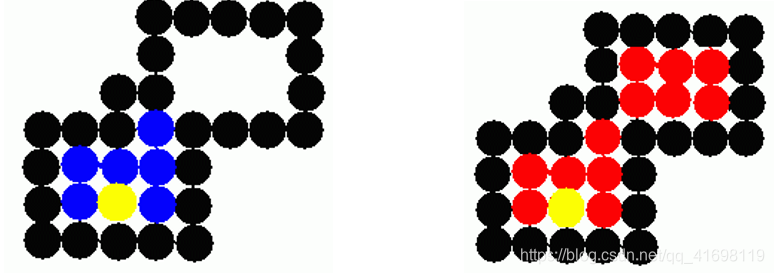
四连通(左边蓝色填充过程)有可能有通不过中间的狭窄区域,导致无法填充。
接着我们以Bresenham算法画的圆为例,来演示怎么填充:
Bresenham圆算法:https://blog.youkuaiyun.com/qq_41698119/article/details/101224454
已知圆的某一点元素(x,y)、填充的颜色fill_color、边界颜色boundary_color:
1、获取圆内一点元素的颜色:c=getpixel(x,y)
2、进入判断,如果该点的颜色和边界颜色、填充颜色不同则继续执行,否则不执行:if((c!=boundary_color)&&(c!=fill_color))
3、进入执行语句后首先设置该点颜色为填充颜色:putpixel(x,y,fill_color)
4、接着以这点为中心,分别执行连通该点上、下、左、右的点元素
5、执行这些语句时,再分别以这些语句中的点为中心,连通执行点上、下、左、右的点元素。进入递归执行。
6、最终直到圆内所有元素的颜色都改变为fill_color之后,绘制结束。
算法核心代码:
void seed_filling(int x,int y,COLORREF fill_color,COLORREF boundary_color)
{
	COLORREF c;
	c=getpixel(x,y);
	if((c!=boundary_color)&&(c!=fill_color))
	{
		putpixel(x,y,fill_color);
		//Sleep(10);用于延迟画
		seed_filling(x+1,y,fill_color,boundary_color);
		seed_filling(x-1,y,fill_color,boundary_color);
		seed_filling(x,y+1,fill_color,boundary_color);
		seed_filling(x,y-1,fill_color,boundary_color);
	}
}
案例:
#include "graphics.h"
#include <conio.h>
#include "windows.h"
#include <math.h>
#include <stdio.h>
void seed_filling(int x,int y,COLORREF fill_color,COLORREF boundary_color)
{
	COLORREF c;
	c=getpixel(x,y);
	if((c!=boundary_color)&&(c!=fill_color))
	{
		putpixel(x,y,fill_color);
		seed_filling(x+1,y,fill_color,boundary_color);
		seed_filling(x-1,y,fill_color,boundary_color);
		seed_filling(x,y+1,fill_color,boundary_color);
		seed_filling(x,y-1,fill_color,boundary_color);
	}
}
void plot_circle_points(int xc,int yc,int x,int y,COLORREF c)
{
	putpixel(xc+x, yc+y, c);
	putpixel(xc-x, yc+y, c);
	putpixel(xc+x, yc-y, c);
	putpixel(xc-x, yc-y, c);
	putpixel(xc+y, yc+x, c);
	putpixel(xc-y, yc+x, c);
	putpixel(xc+y, yc-x, c);
	putpixel(xc-y, yc-x, c);
}
void bresenham(int x1,int y1,int r,COLORREF c)
{
	int x,y,p;
	x=0;
	y=r;
	p=3-2*r;
	while(x<y)
	{
		plot_circle_points(x1,y1,x,y,c);
		if(p<0)
			p=p+4*x+6;
		else
		{
			p=p+4*(x-y)+10;
			y-=1;
		}
		x+=1;
	}
	if(x==y)
	plot_circle_points(x1,y1,x,y,c);
}


void main()
{
	int gd=DETECT,gm; /*图形屏幕初始化*/
	initgraph(&gd,&gm,"");

	bresenham(300,150,70,WHITE);
	seed_filling(300,150,RED,WHITE);

	getch();
	closegraph();
}
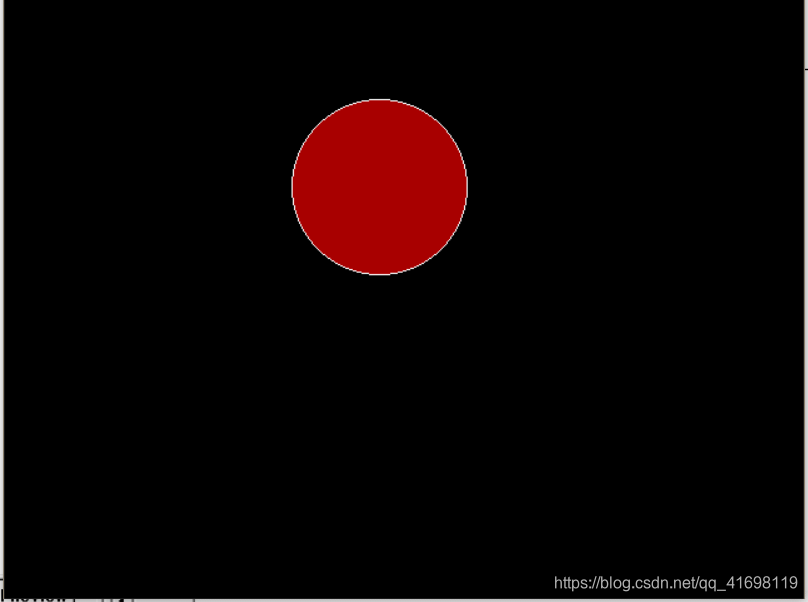
最终效果图:


 2165
2165

 被折叠的 条评论
为什么被折叠?
被折叠的 条评论
为什么被折叠?
 到【灌水乐园】发言


