


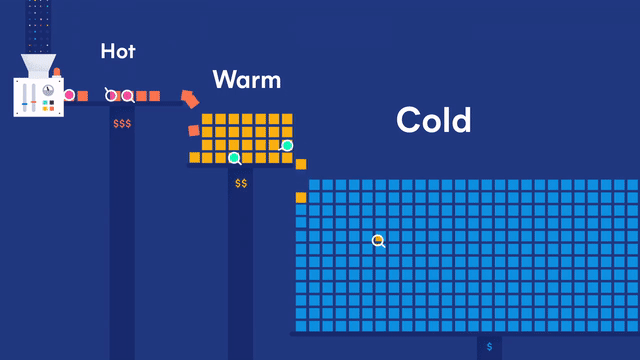
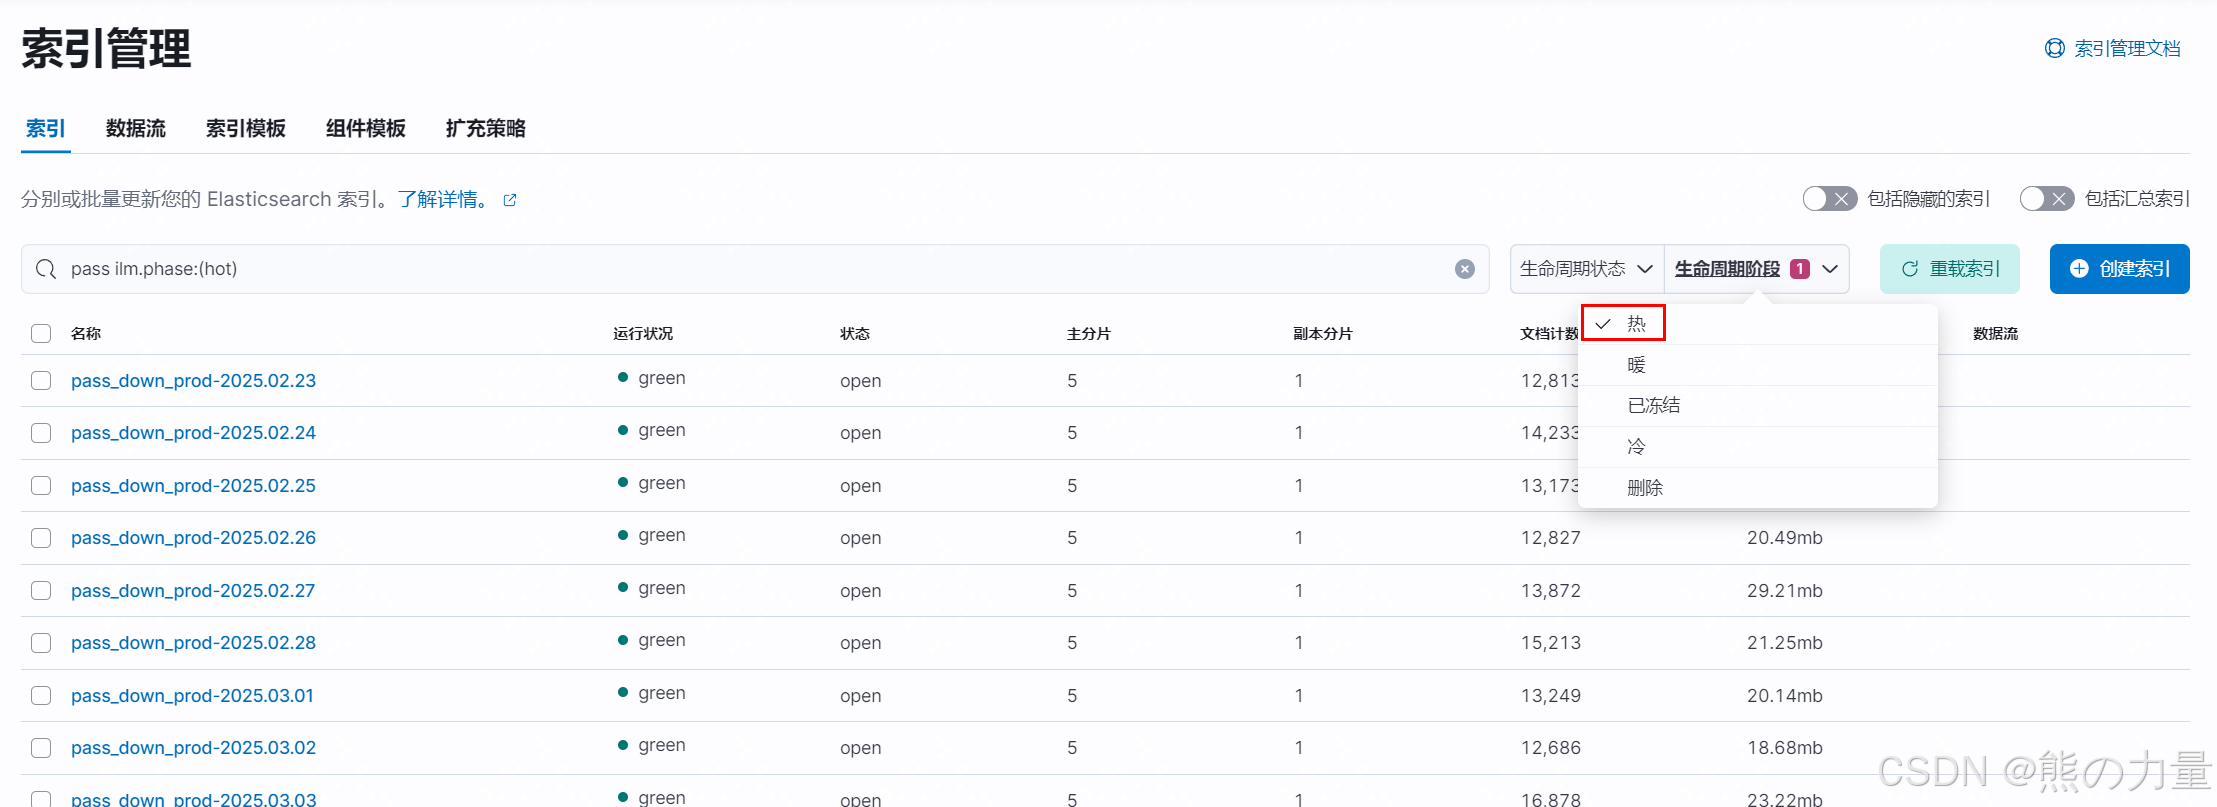
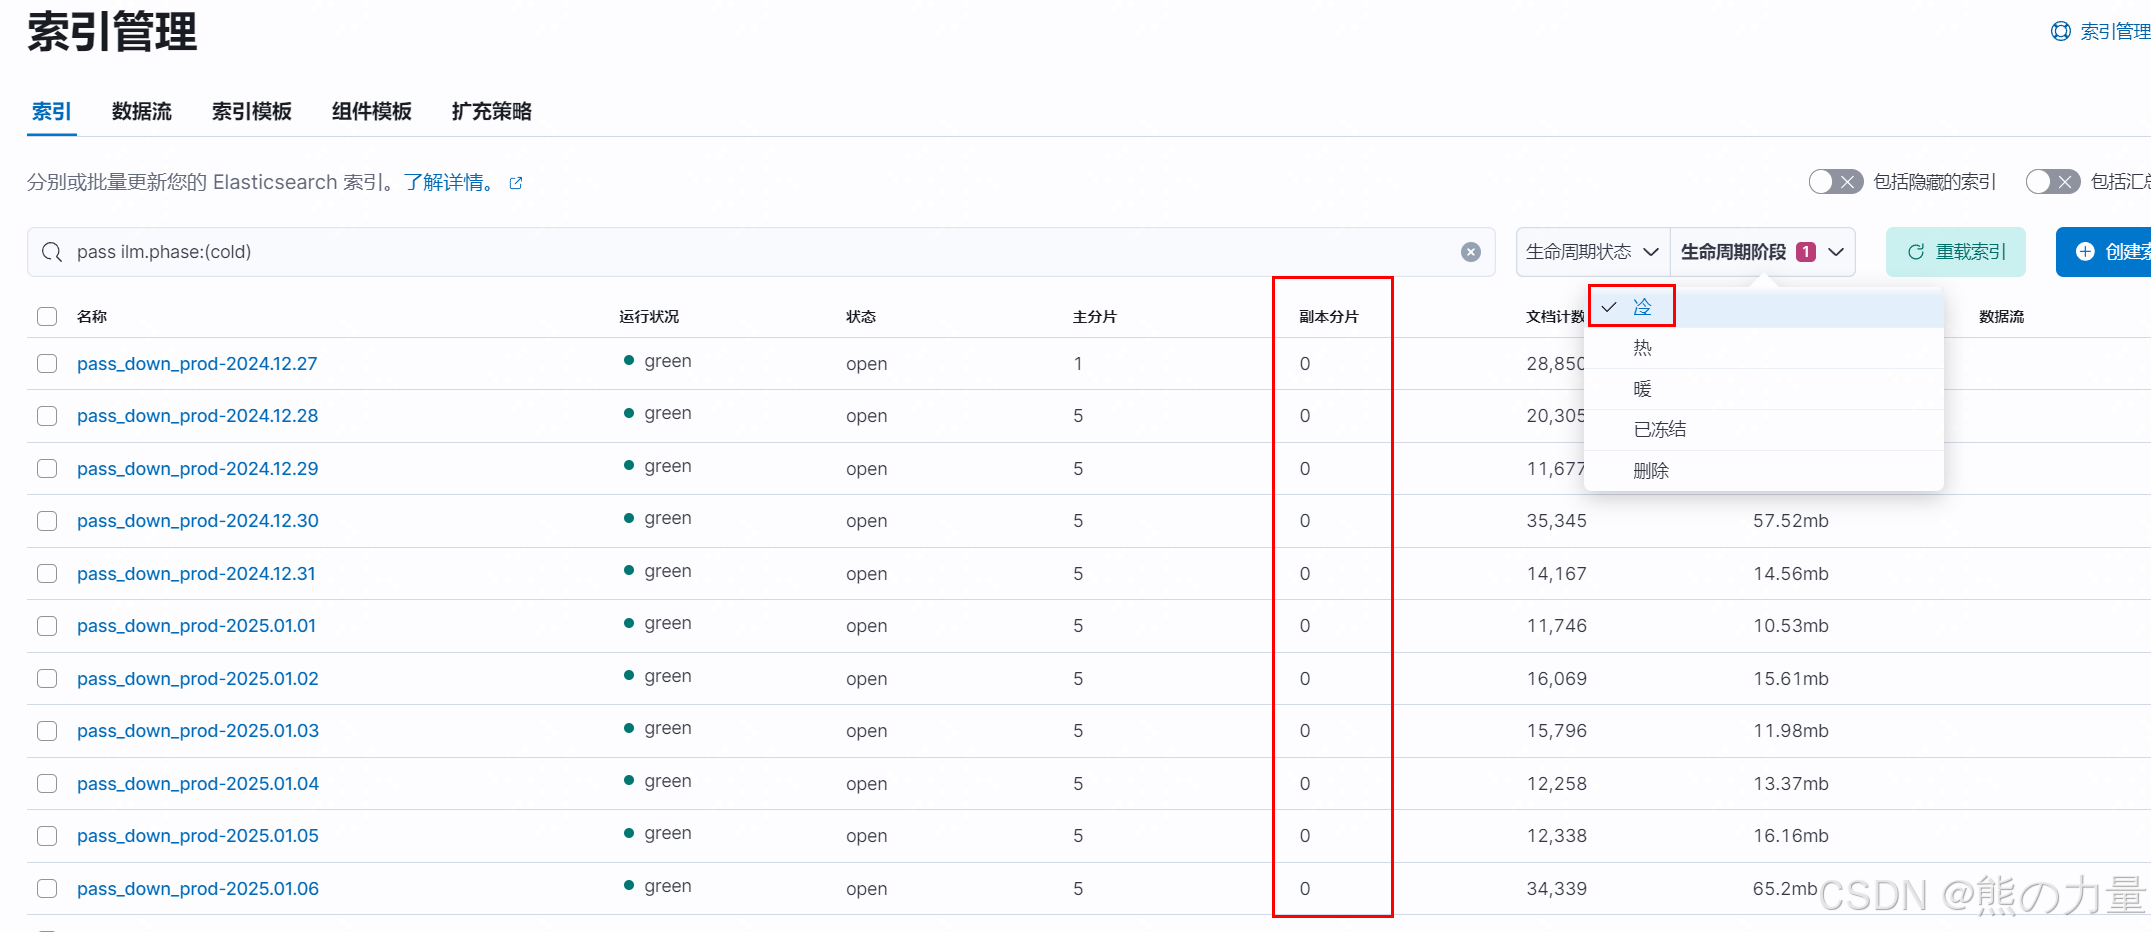
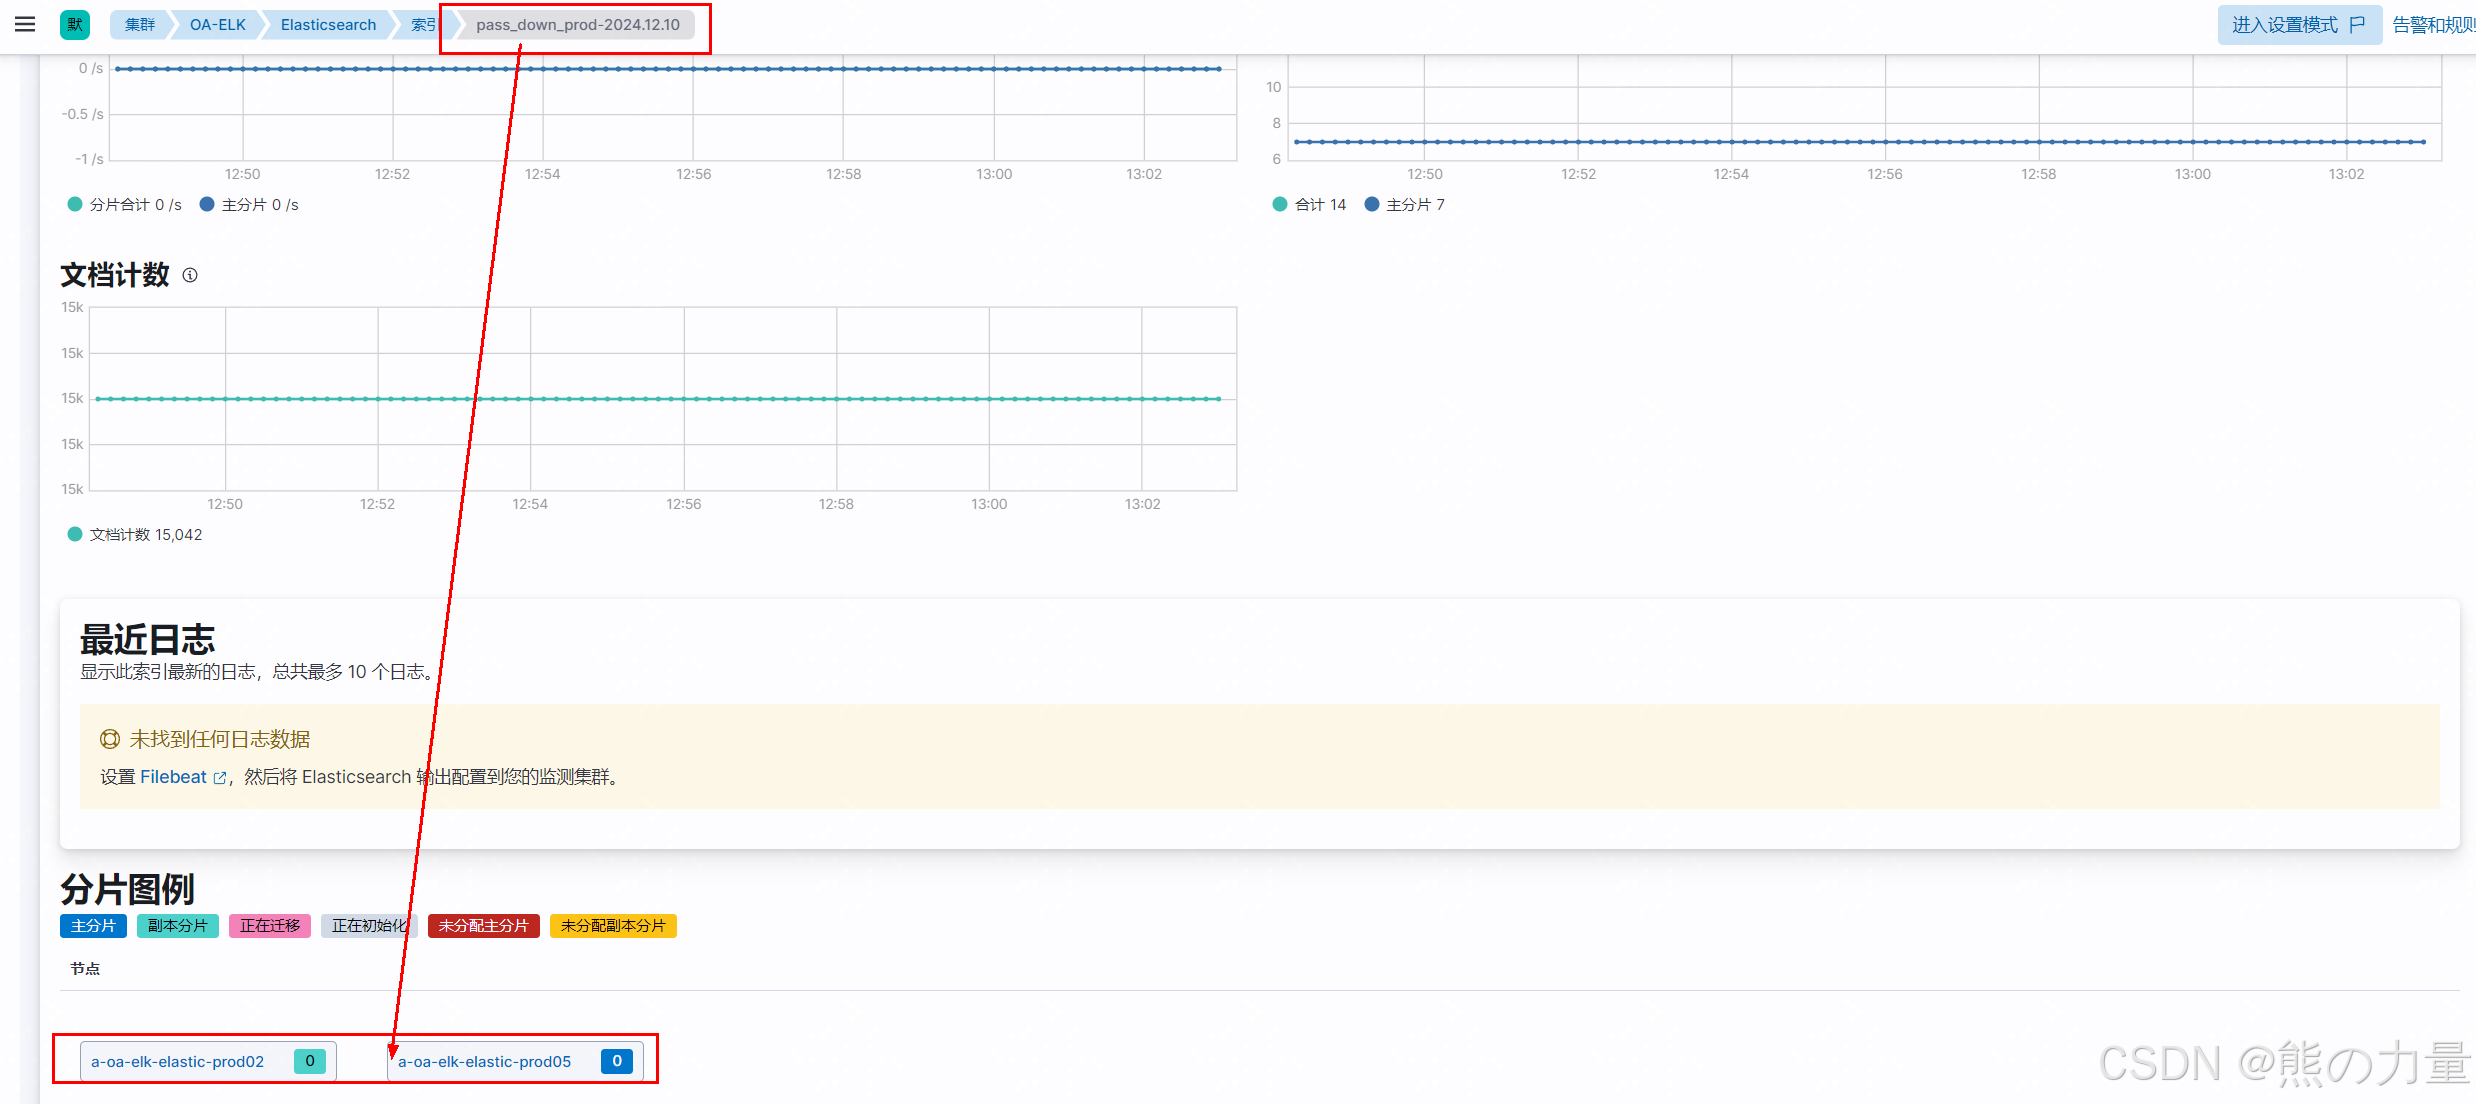
日志就像下图所示,分热、温、冷三种状态,最近的日志为热数据,时间间隔稍微远一点的为温数据,超过一定时限的为冷数据,冷数据再超过一定时限则删除。
0.环境介绍
下面实验如下:
01-05节点为热数据节点
06-07节点为冷数据节点
| 主机名 | IP地址 | 冷热节点类型 |
| a-oa-elk-elastic-prod01 | 10.10.16.146 | 热 |
| a-oa-elk-elastic-prod02 | 10.10.16.147 | 热 |
| a-oa-elk-elastic-prod03 | 10.10.16.148 | 热 |
| a-oa-elk-elastic-prod04 | 10.10.16.149 | 热 |
| a-oa-elk-elastic-prod05 | 10.10.16.150 | 热 |
| a-oa-elk-elastic-prod06 | 10.10.16.152 | 冷 |
| a-oa-elk-elastic-prod07 | 10.10.16.153 | 冷 |
1.首先区分冷热数据节点
在配置文件中添加如下配置,用来区分节点的冷热类型,其实下图中的node.roles:["data_hot"]和node.attr.node_type: hot两种配置,只要选1种写就行。
node.roles: ["master","data","data_hot","data_content","ingest","ml","remote_cluster_client","transform"]
node.attr.node_type: hot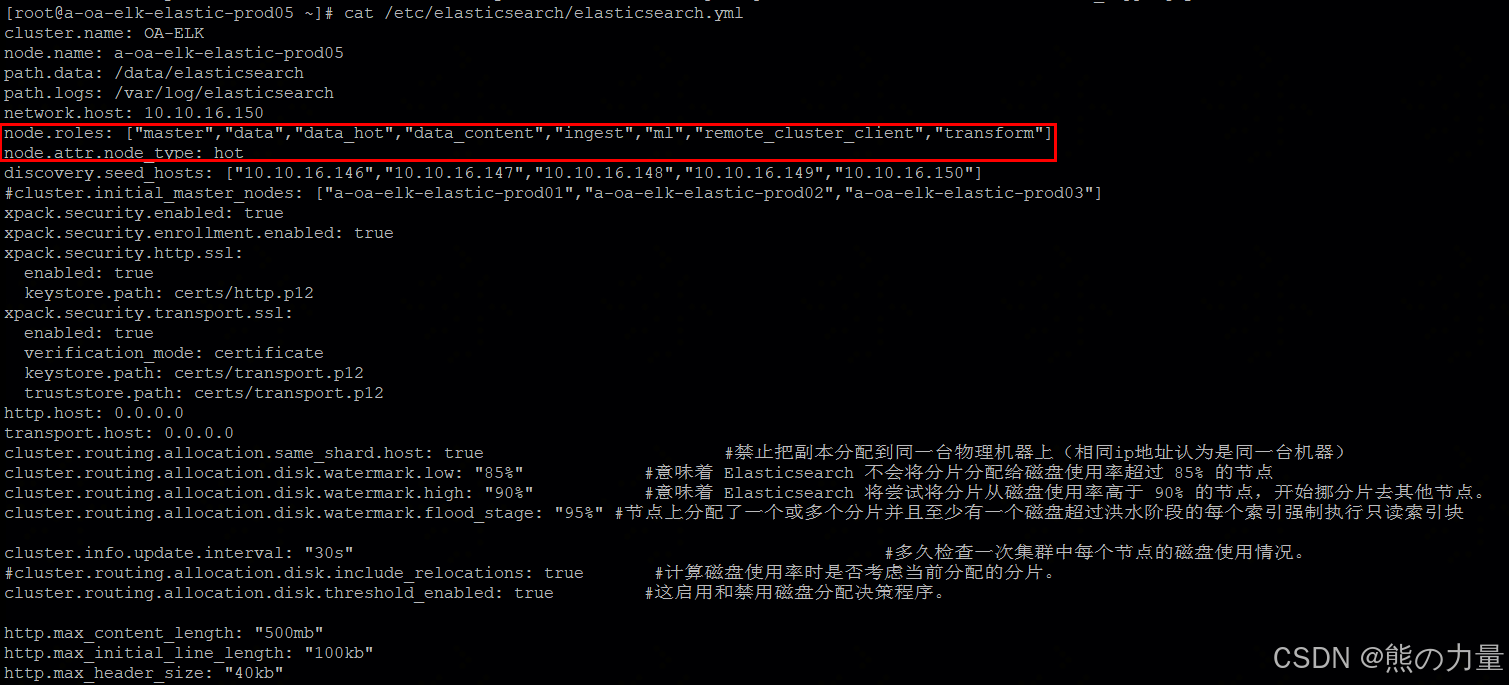
同理,冷数据节点配置如下:
[root@a-oa-elk-elastic-prod06 ~]# cat /etc/elasticsearch/elasticsearch.yml
cluster.name: OA-ELK
node.name: a-oa-elk-elastic-prod06
path.data: /data/elasticsearch
path.logs: /var/log/elasticsearch
network.host: 10.10.16.152
node.roles: ["master","data","data_cold","data_content","ingest","ml","remote_cluster_client","transform"]                    #data_cold
node.attr.node_type: cold        #冷节点
discovery.seed_hosts: ["10.10.16.146","10.10.16.147","10.10.16.148","10.10.16.149","10.10.16.150"]
#cluster.initial_master_nodes: ["a-oa-elk-elastic-prod01","a-oa-elk-elastic-prod02","a-oa-elk-elastic-prod03"]
xpack.security.enabled: true
xpack.security.enrollment.enabled: true
xpack.security.http.ssl:
  enabled: true
  keystore.path: certs/http.p12
xpack.security.transport.ssl:
  enabled: true
  verification_mode: certificate
  keystore.path: certs/transport.p12
  truststore.path: certs/transport.p12
http.host: 0.0.0.0
transport.host: 0.0.0.0
cluster.routing.allocation.same_shard.host: true                        #禁止把副本分配到同一台物理机器上(相同ip地址认为是同一台机器)
cluster.routing.allocation.disk.watermark.low: "85%"            #意味着 Elasticsearch 不会将分片分配给磁盘使用率超过 85% 的节点
cluster.routing.allocation.disk.watermark.high: "90%"           #意味着 Elasticsearch 将尝试将分片从磁盘使用率高于 90% 的节点,开始挪分片去其他节点。
cluster.routing.allocation.disk.watermark.flood_stage: "95%" #节点上分配了一个或多个分片并且至少有一个磁盘超过洪水阶段的每个索引强制执行只读索引块

cluster.info.update.interval: "30s"                                                     #多久检查一次集群中每个节点的磁盘使用情况。
#cluster.routing.allocation.disk.include_relocations: true       #计算磁盘使用率时是否考虑当前分配的分片。
cluster.routing.allocation.disk.threshold_enabled: true         #这启用和禁用磁盘分配决策程序。

http.max_content_length: "500mb"
http.max_initial_line_length: "100kb"
http.max_header_size: "40kb"
配置完成以后,按照常理应该驱逐节点分片,重启服务,确保配置生效,下文第4步。
如果使用的是 node.roles:["data_hot"]方式配置,则生效结果如下:
get _cat/nodes
如果使用的是node.attr.node_type: hot这种,则生效结果如下:
get _cat/nodeattrs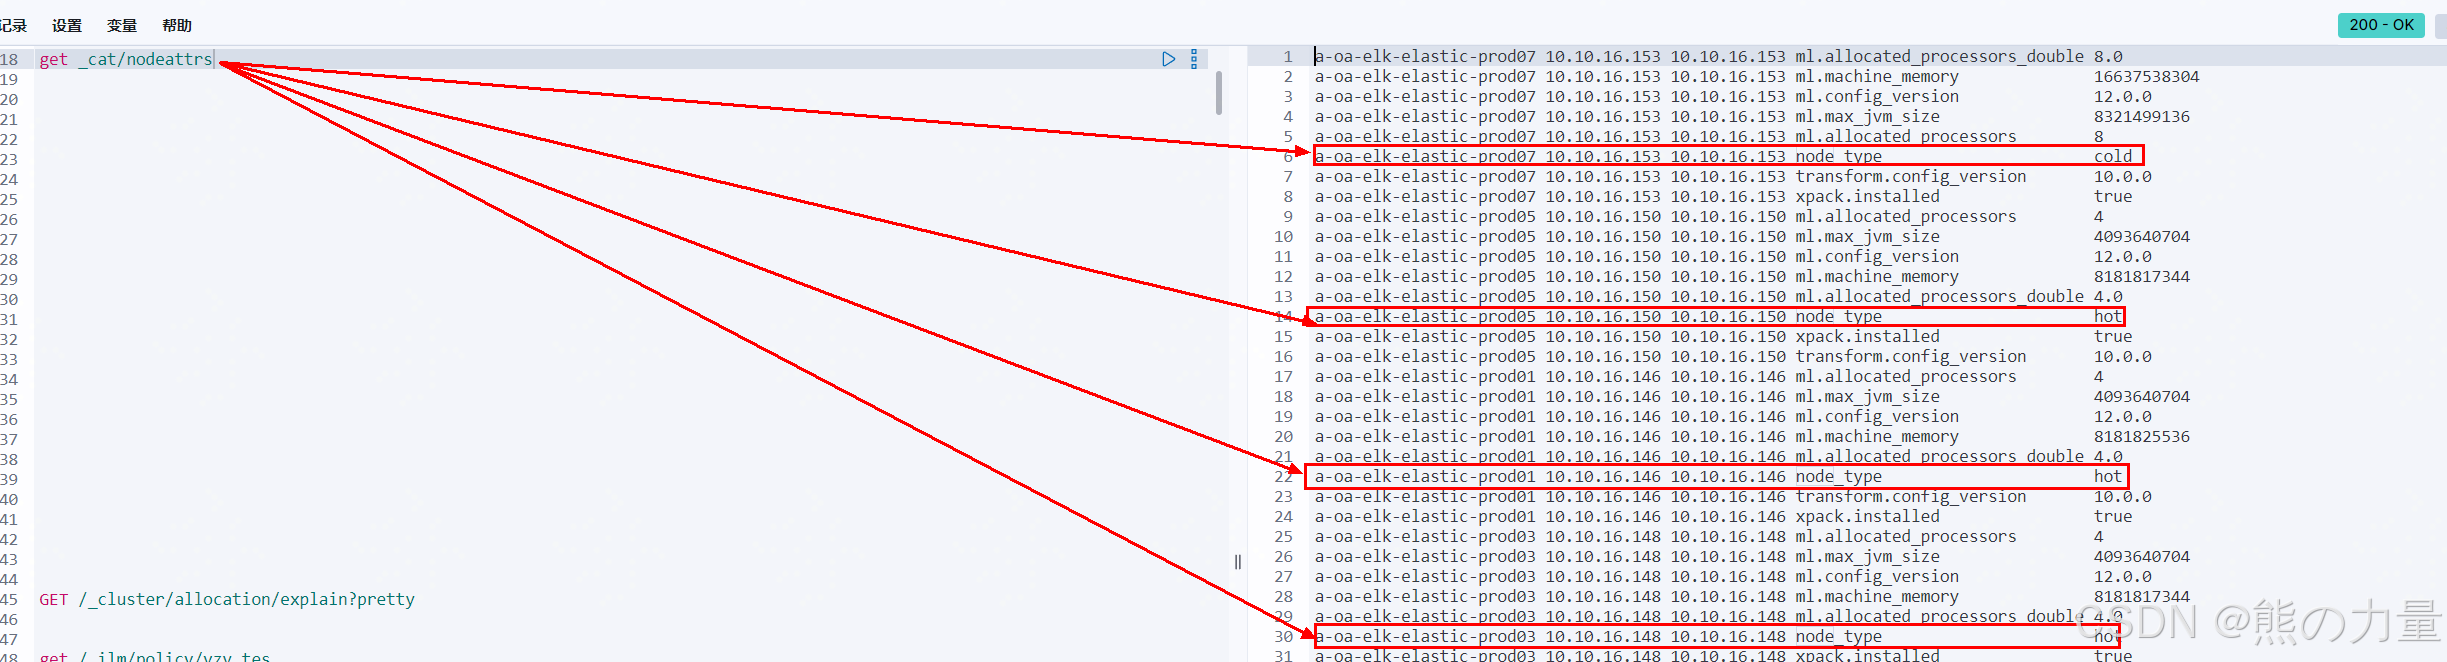
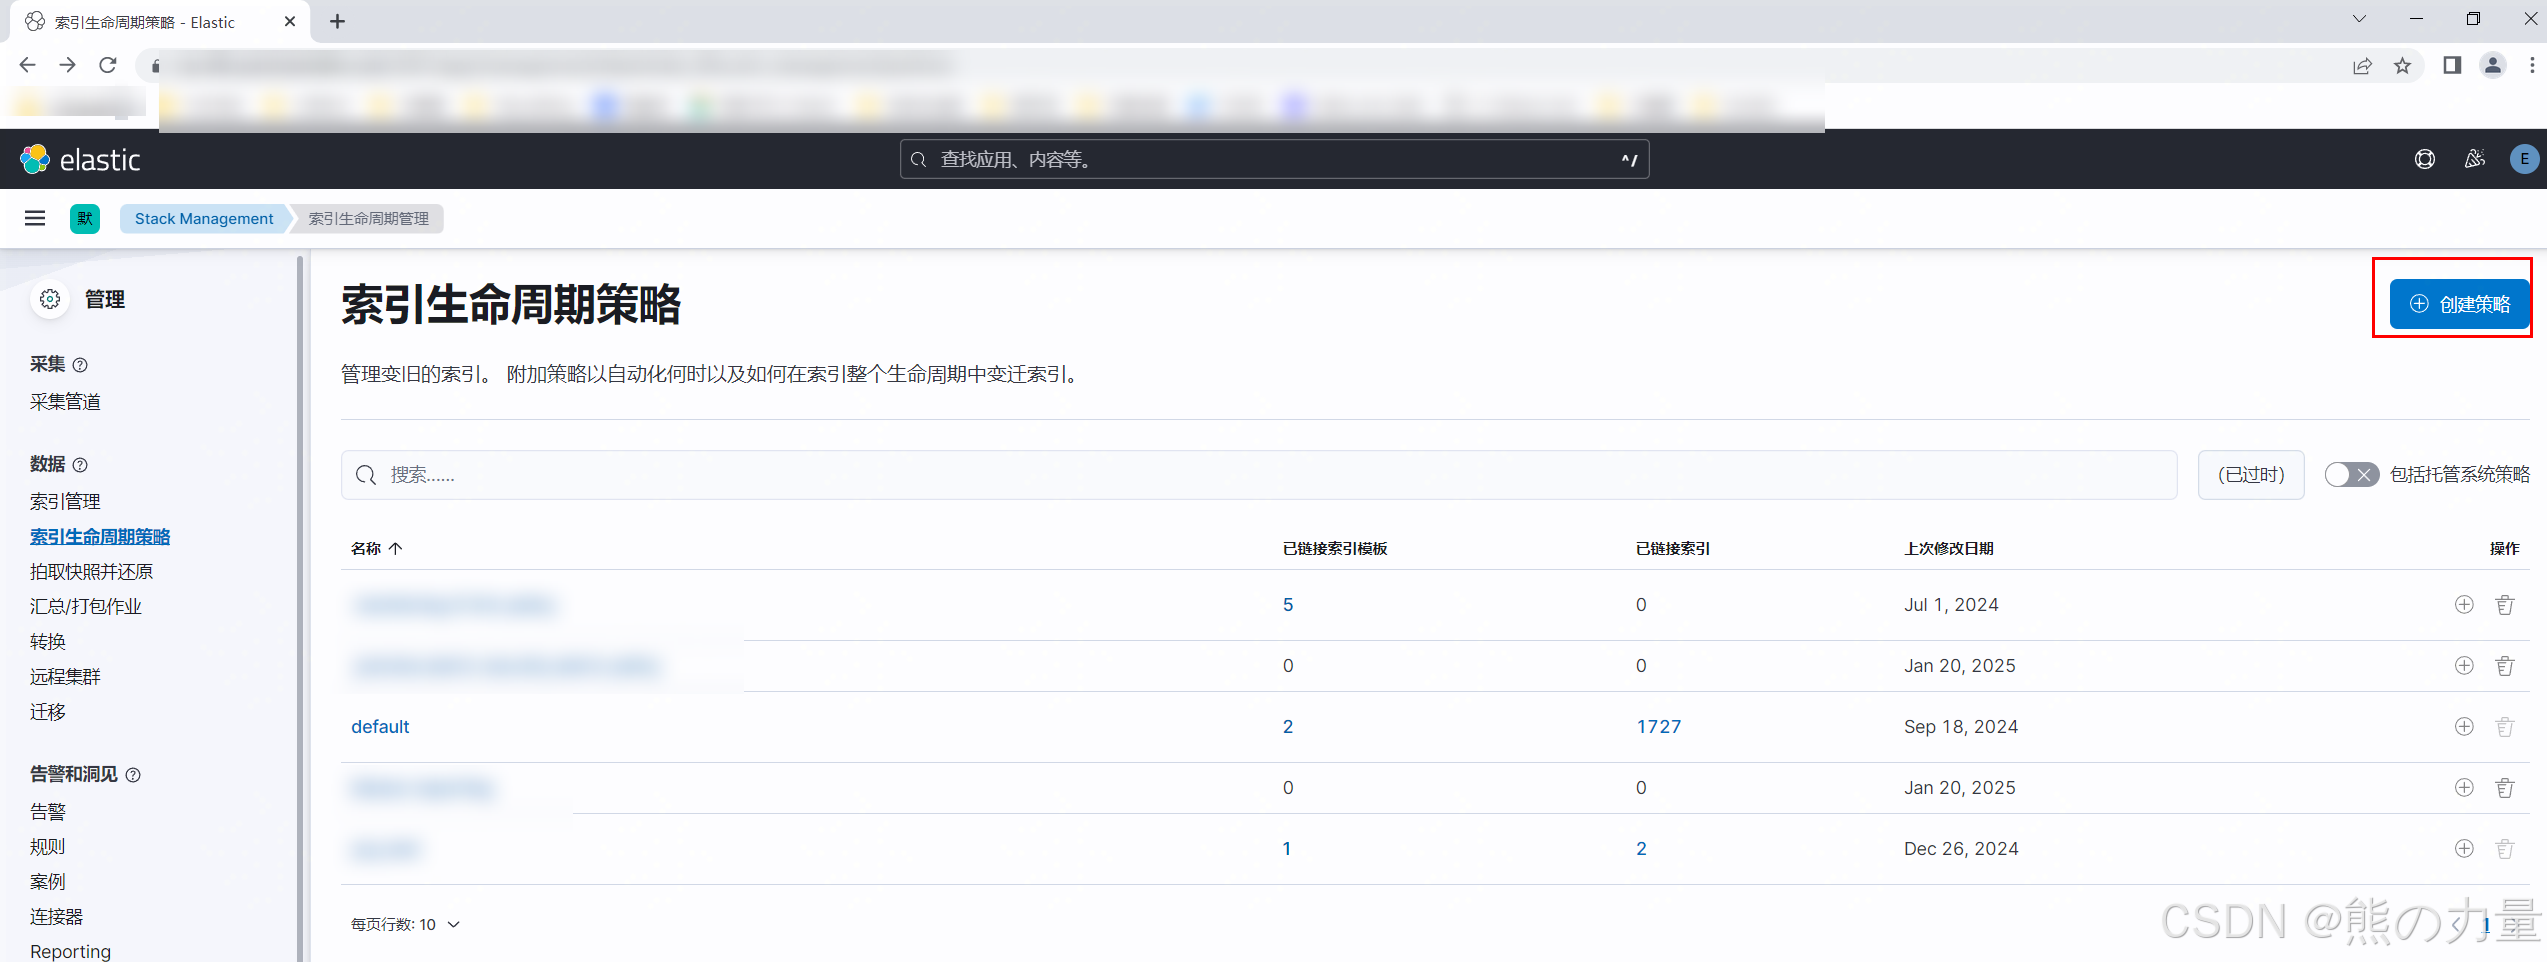
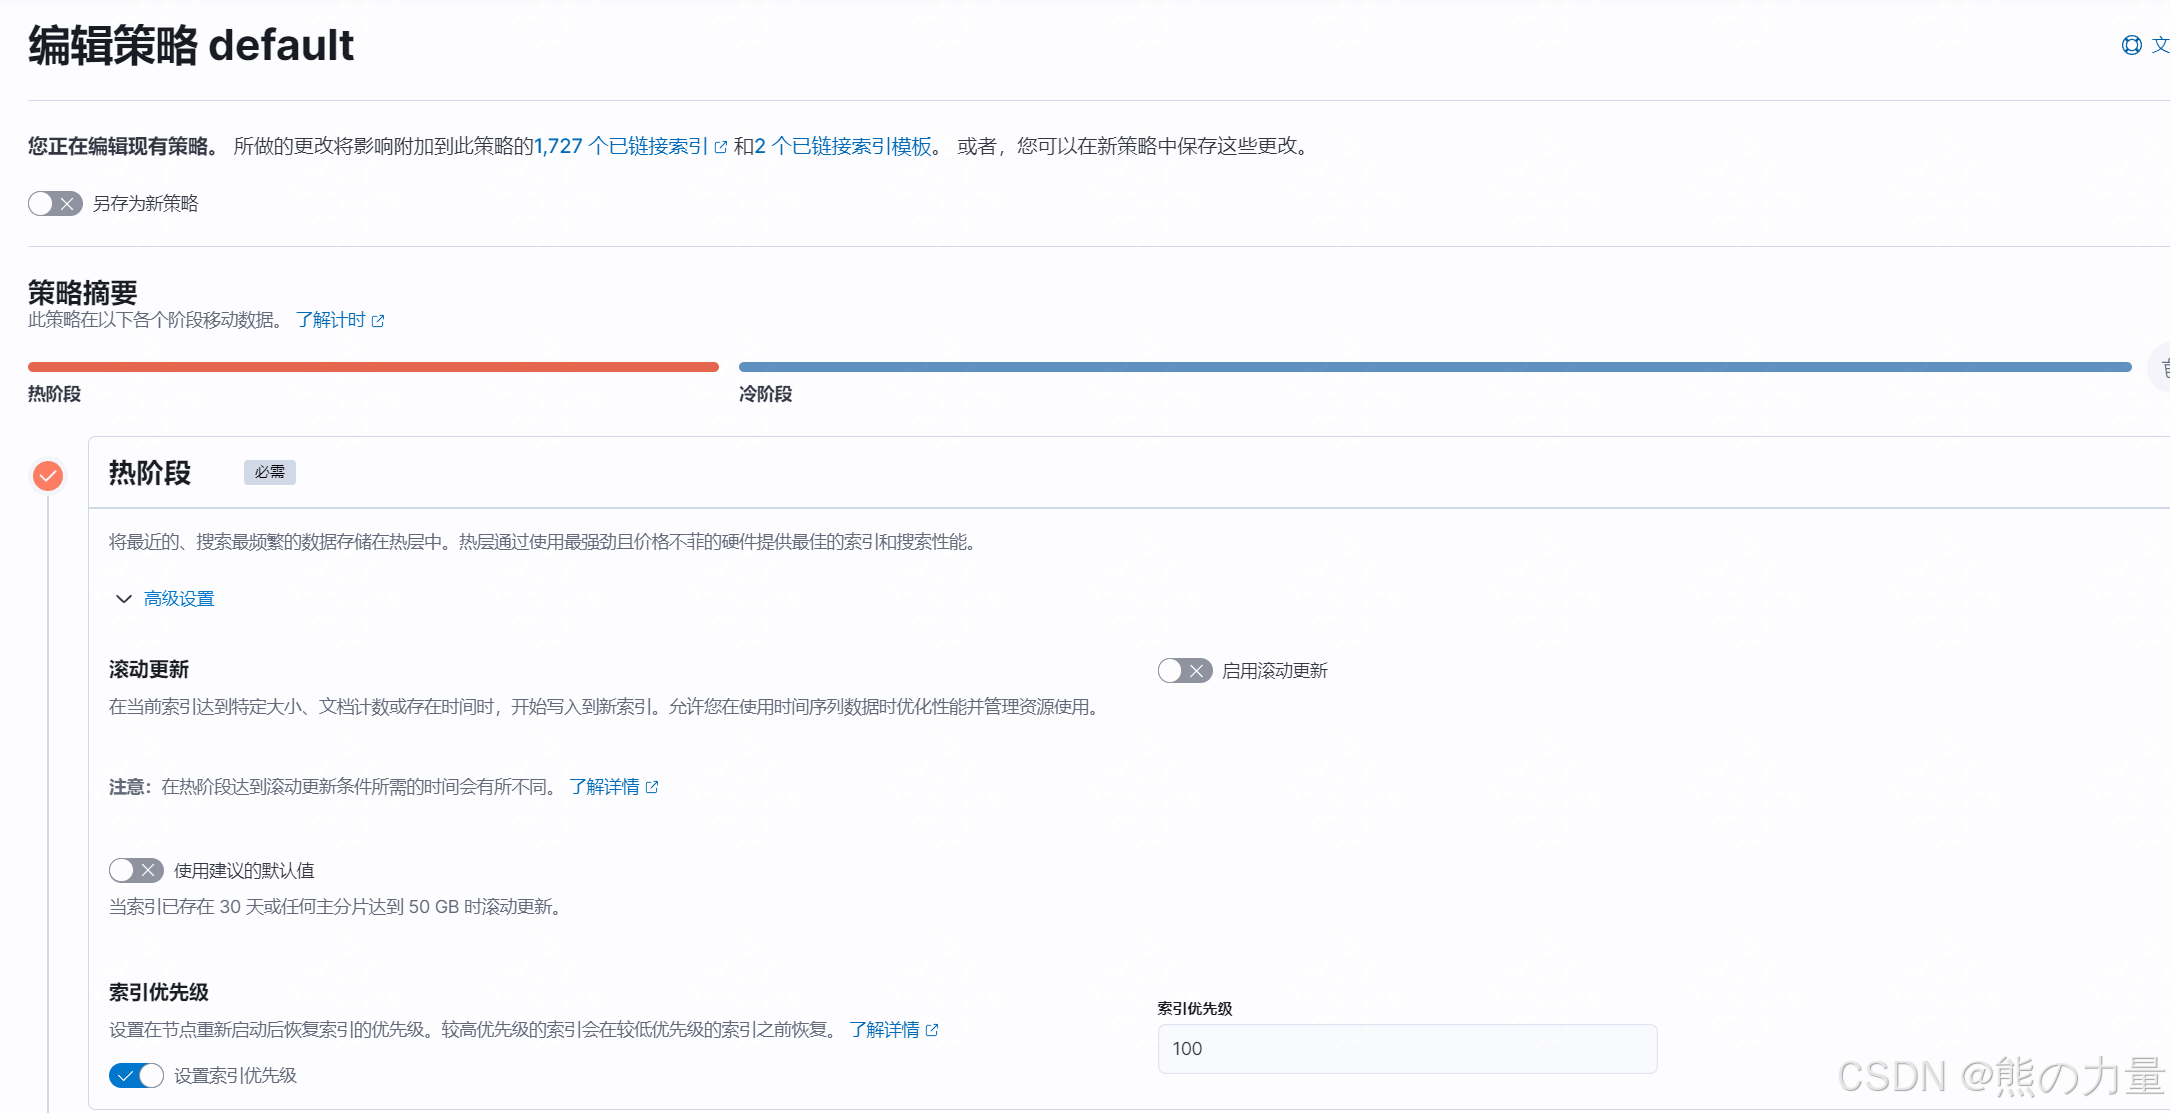
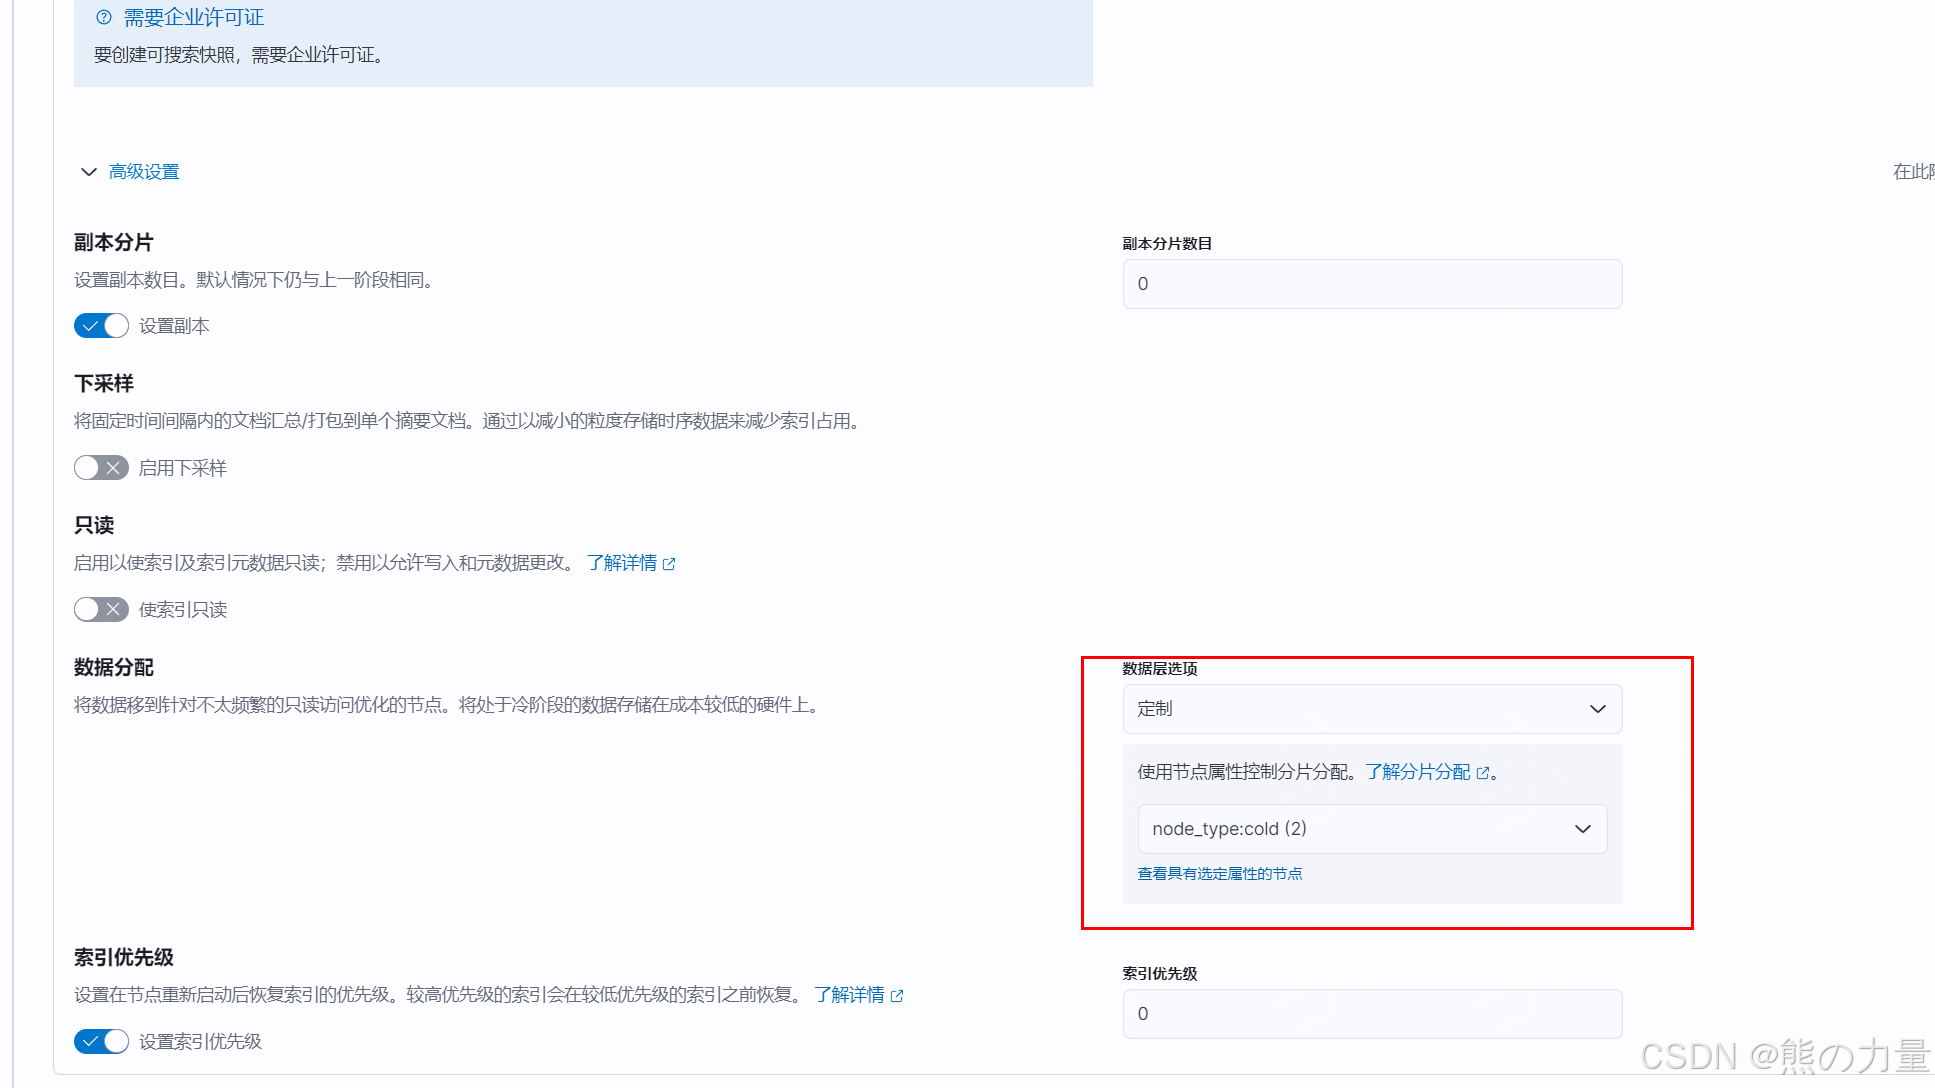
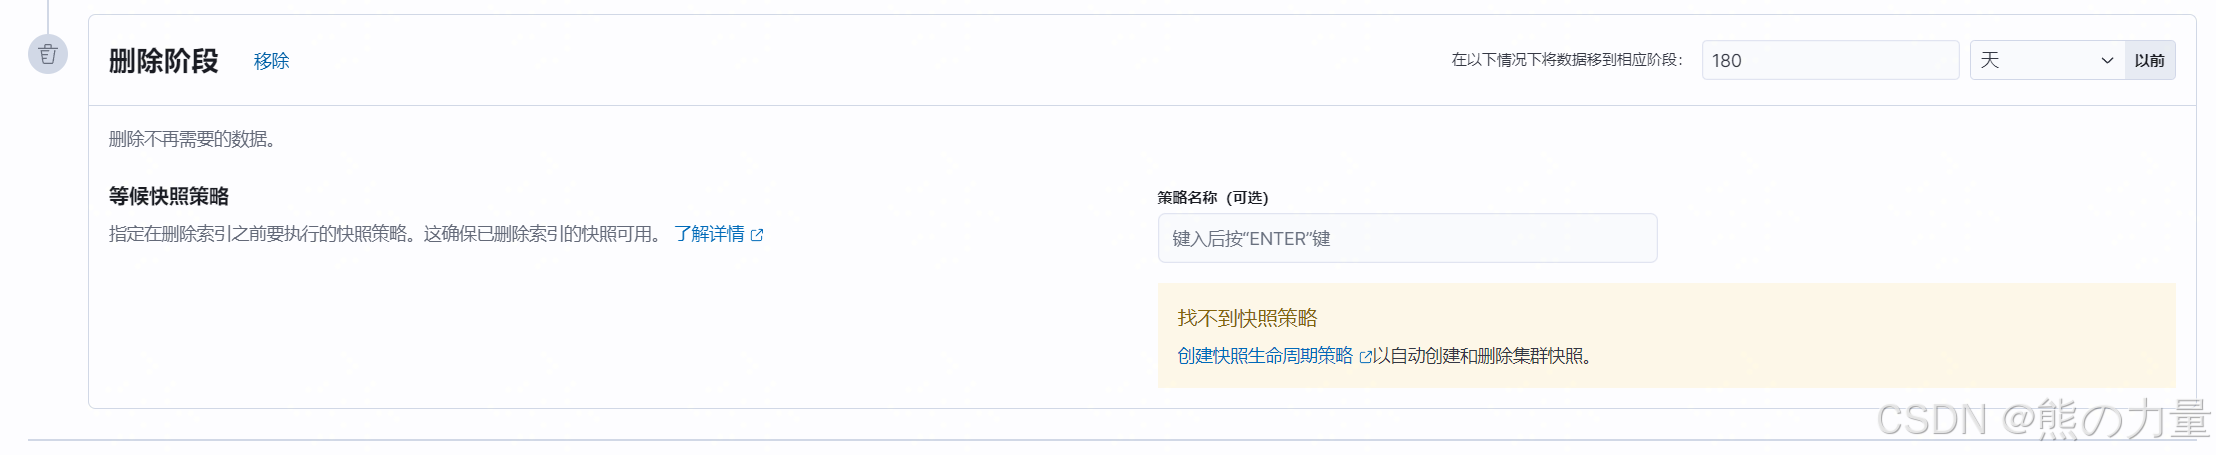
2.设置生命周期策略
我这里使用的是node.attr.node_type的方式,这里设置的默认策略是:
30天以内为热数据:1主分片,1副本。
30-180天为冷数据:1主分片,0副本。
超过180天的数据删除
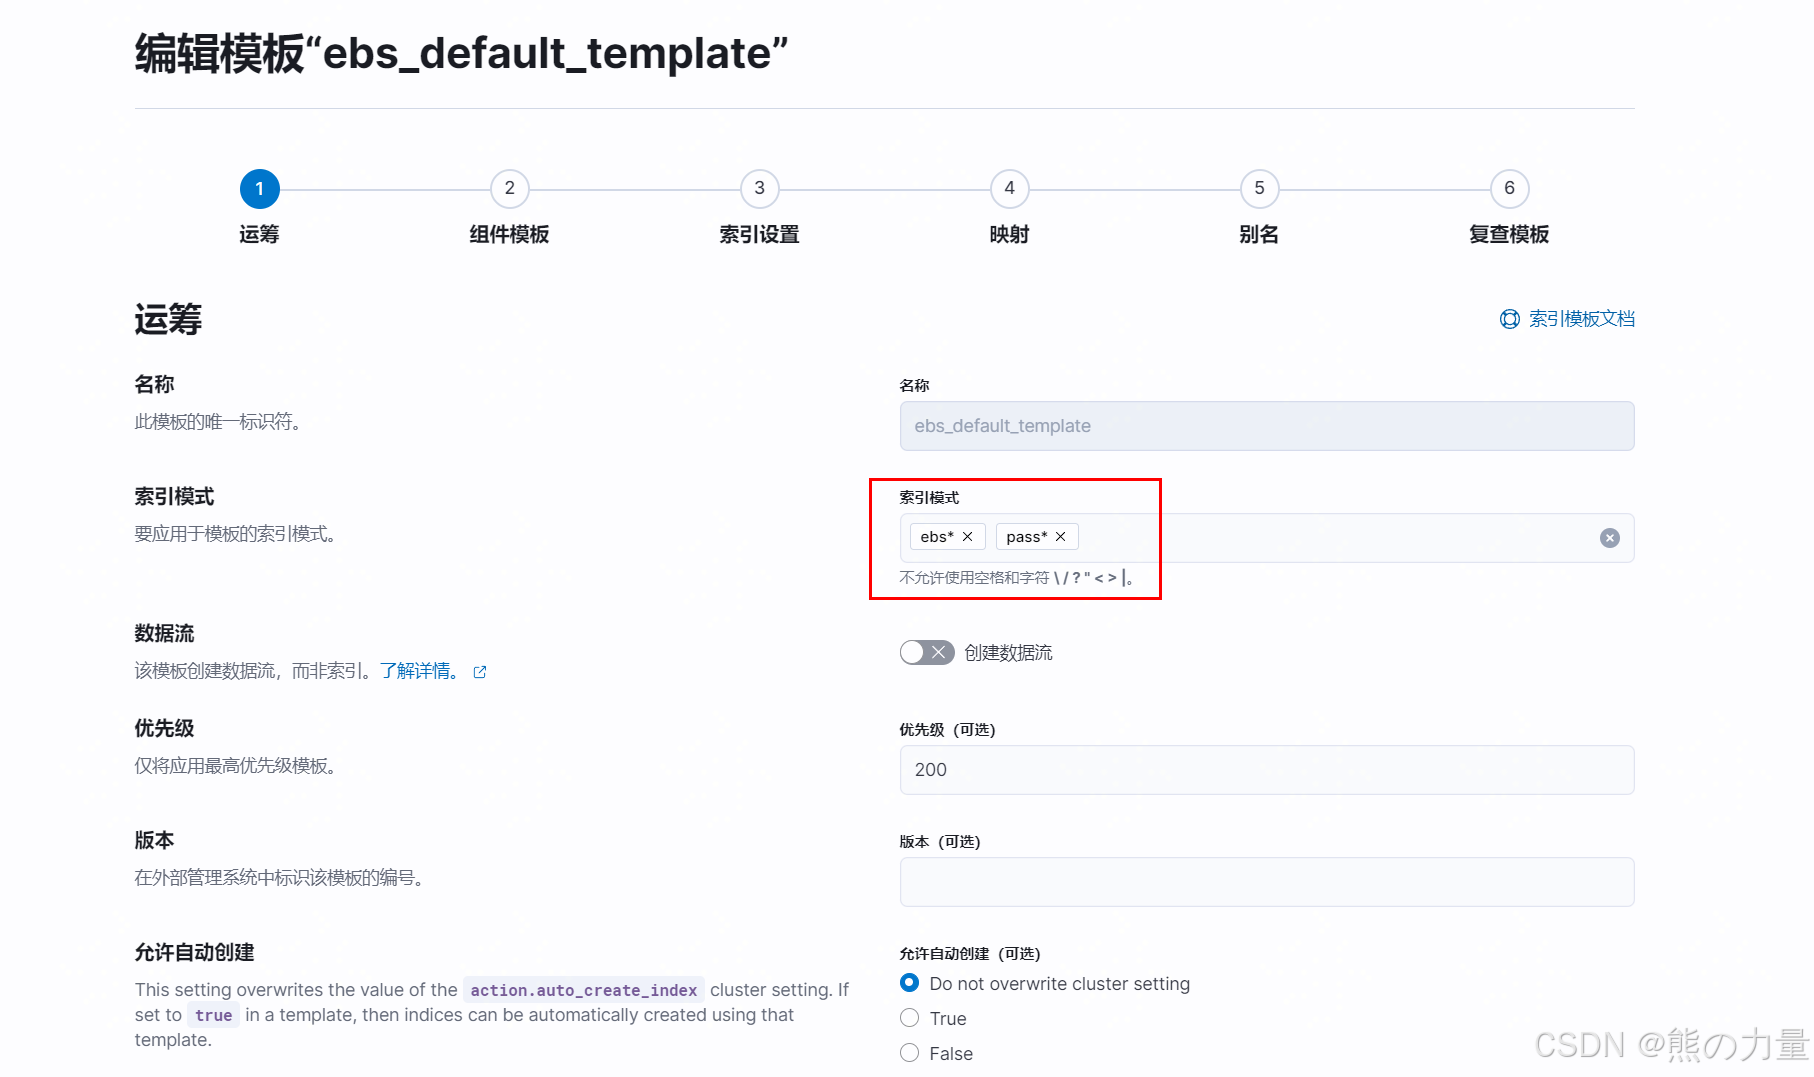
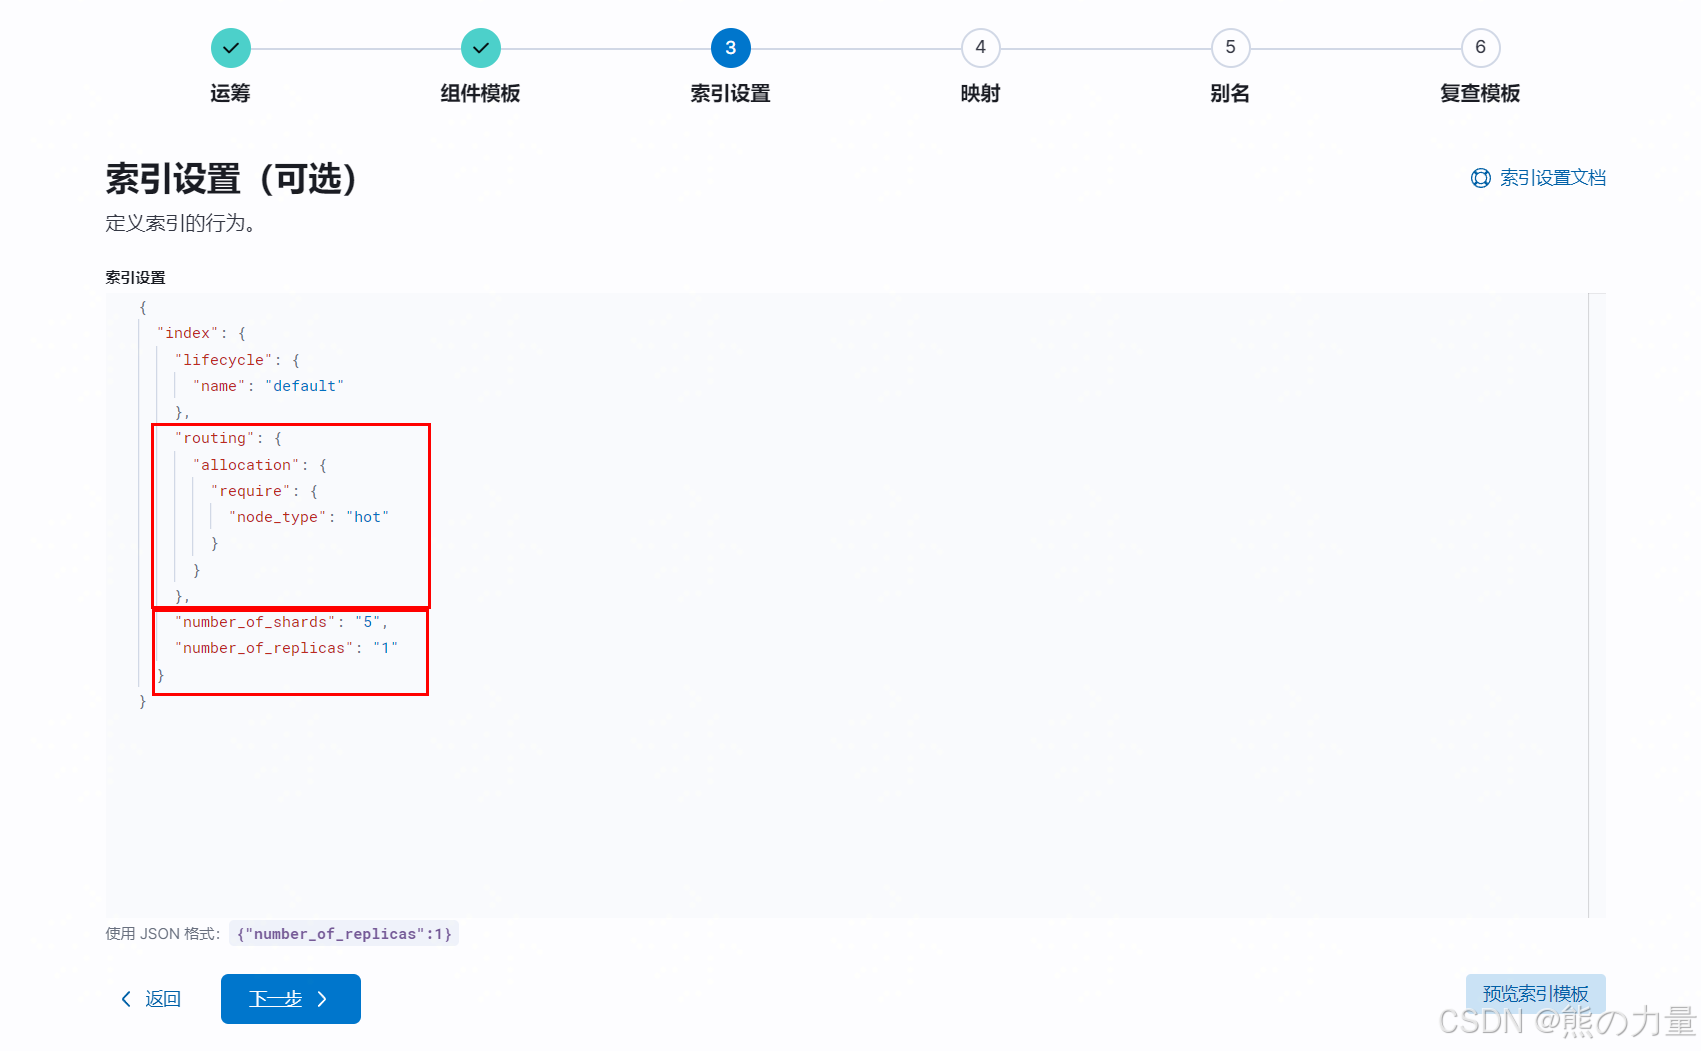
3.设置索引模板
{
  "index": {
    "lifecycle": {
      "name": "default"        #与刚刚创建的生命周期策略一一对应
    },
    "routing": {
      "allocation": {
        "require": {
          "node_type": "hot"    #索引初始创建时,数据存储在那些节点上
        }
      }
    },
    "number_of_shards": "5",    #索引分片数
    "number_of_replicas": "1"    #索引副本数
  }
}
PUT _index_template/ebs_default_template
{
  "priority": 200,
  "template": {
    "settings": {
      "index": {
        "lifecycle": {
          "name": "default"
        },
        "routing": {
          "allocation": {
            "require": {
              "node_type": "hot"
            }
          }
        },
        "number_of_shards": "5",
        "number_of_replicas": "1"
      }
    }
  },
  "index_patterns": [
    "ebs*",
    "pass*"
  ]
}
完成模板创建
logstash中关联模板!!!
logstash中关联模板!!!
logstash中关联模板!!!
output {
  #stdout { codec => rubydebug }
  elasticsearch {
    hosts =>["https://10.10.16.146:9200","https://10.10.16.147:9200","https://10.10.16.148:9200","https://10.10.16.149:9200","https://10.10.16.150:9200"]
    template_name => "ebs_default_template"    #使用的索引模板
    index => "ebs_prod-%{+YYYY.MM.dd}"         #索引格式,我这里用的是每天滚动
    ilm_enabled => true
    user => "elastic"
    password => "aaaaa"
    ssl => "true"
    cacert => "/etc/logstash/certs/http_ca.crt"
  }
}
4.检查索引生命周期策略
至此,配置完成。
###
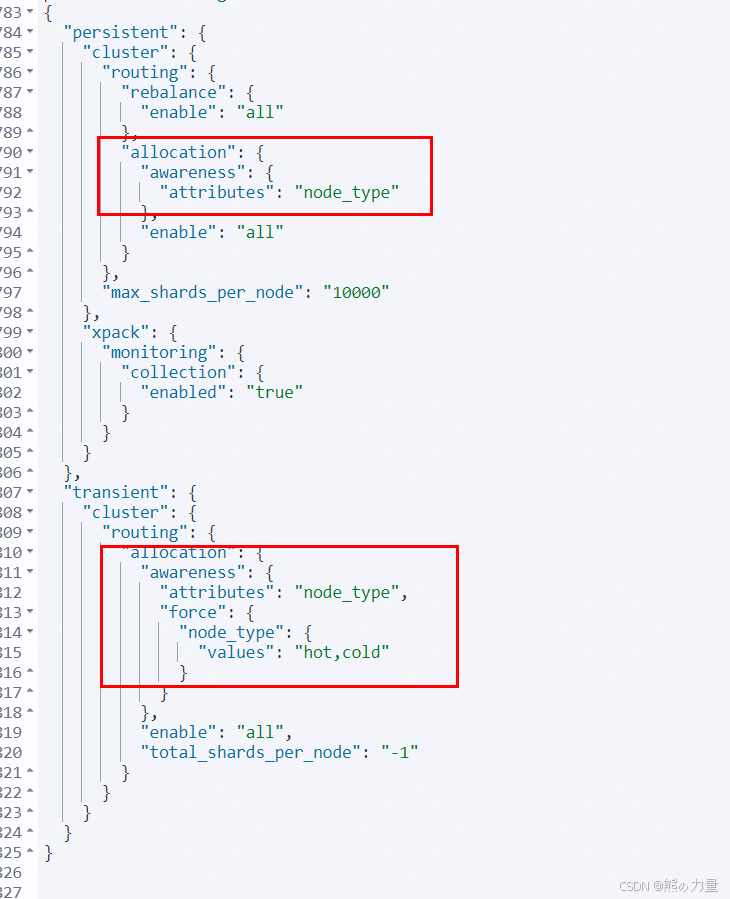
补充cluster.routing.allocation.awareness.attributes导致的报错
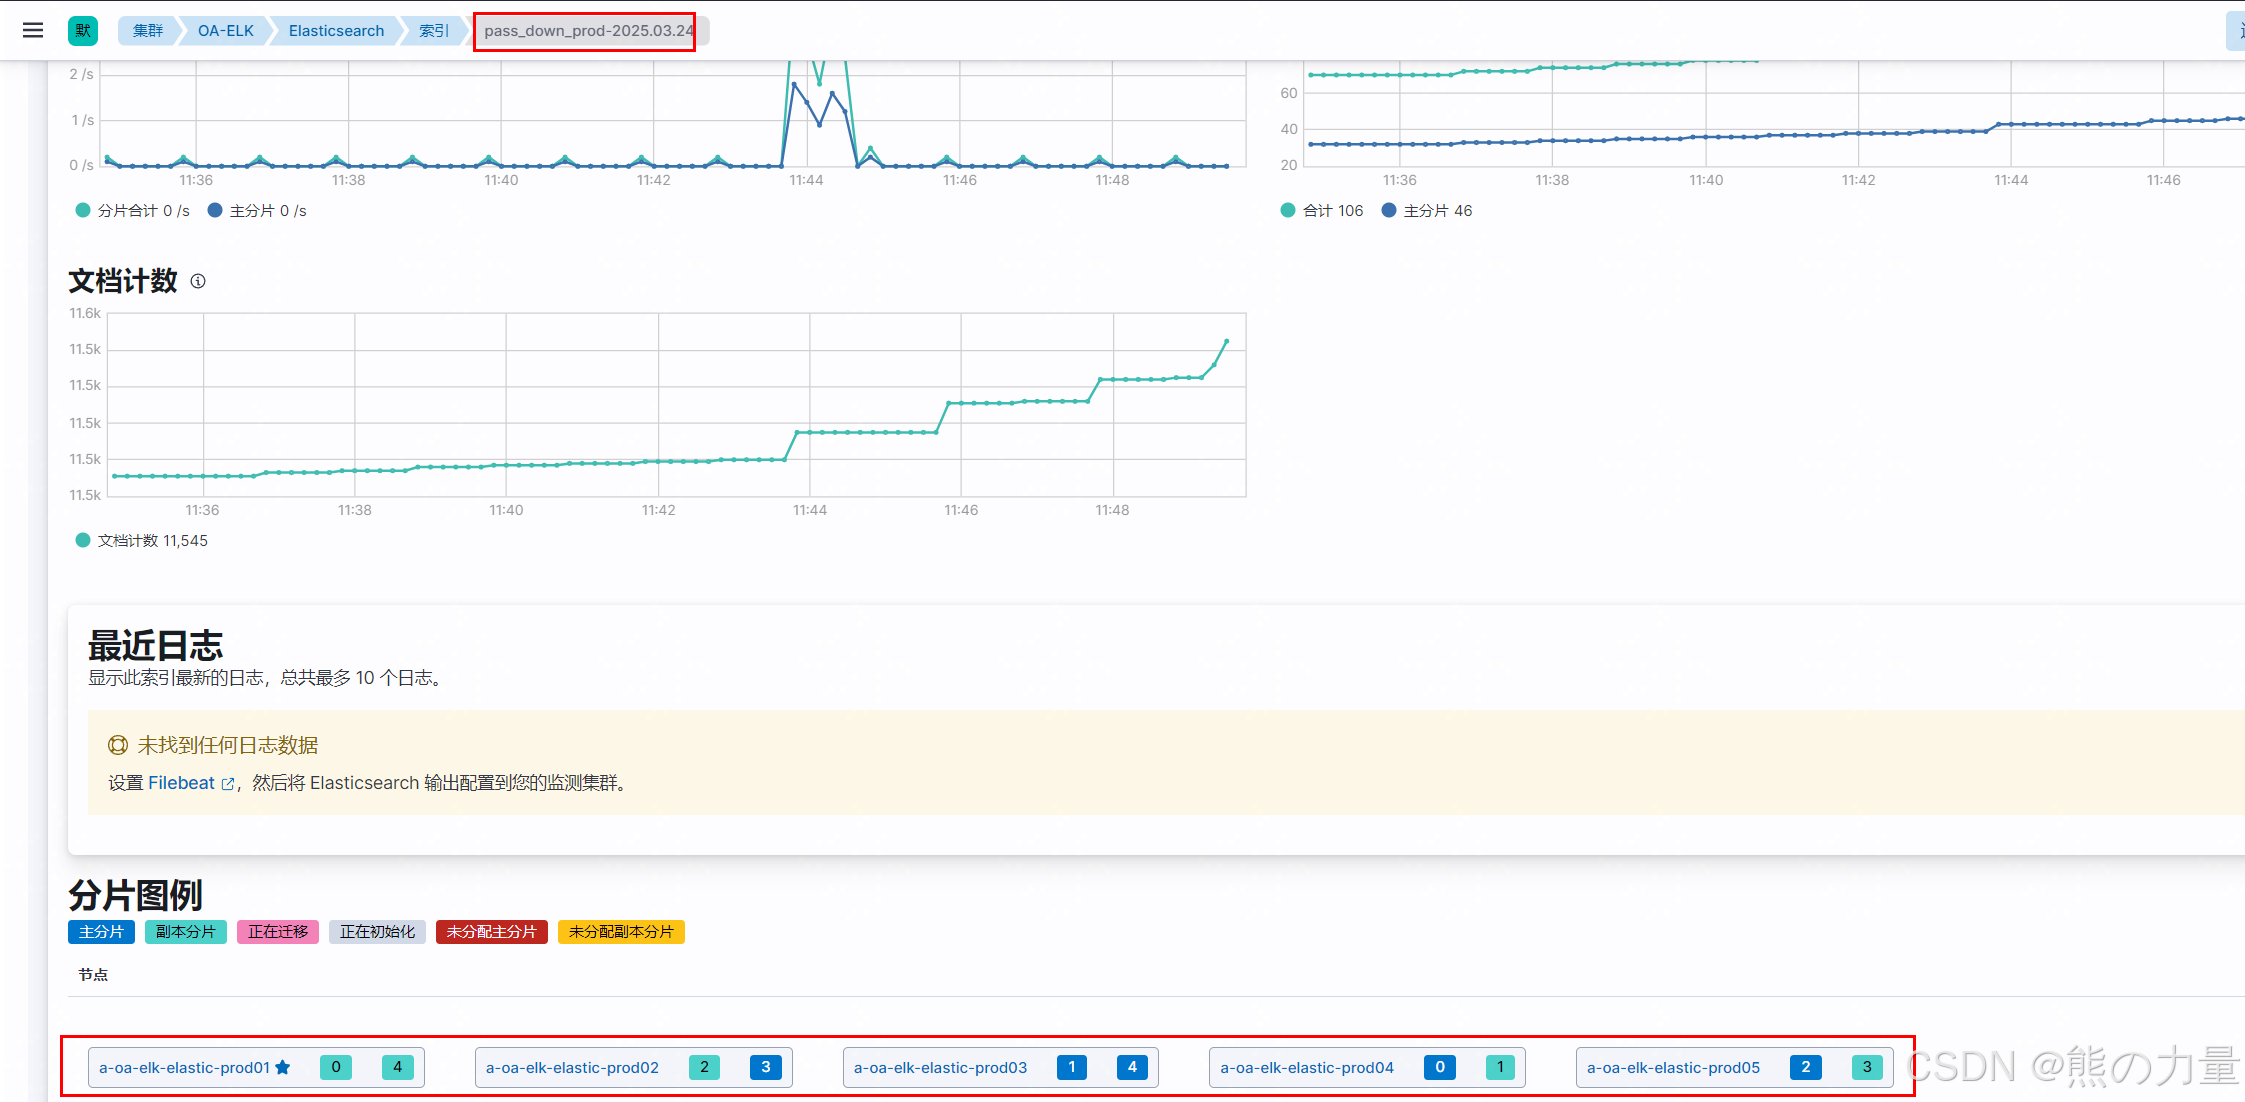
其实我之前刚开始学的时候就这样配置的,但是却一直失败。正常来说,就应该是近30天的索引分片全部存放于节点1-5上面,超过30天的节点分片全部存放于节点6-7上面。
但是我当时的测试结果如下:
比如一个索引存在5个分片,不管怎么调整,就会出现3种情况:
1.5个主分片分配在热节点,5个副本分片分配在冷节点
2.所有索引只有主分片,没有副本分片
3.主分片和副本分片并不区分冷热节点,随机分配。
当时无论怎么调整,始终是上述三种类型。纠结了3个月,还是没研究出来。
最后尝试性取消了如下配置:
put _cluster/settings
{
  "persistent": {
    "cluster": {
      "routing": {
        "allocation": {
          "awareness": {
            "attributes": null    #之前这里写的是node_type
          },
          "enable": "all"
        },
        "rebalance":{
          "enable": "all"
        }
      },
      "max_shards_per_node": "10000"
    },
    "xpack": {
      "monitoring": {
        "collection": {
          "enabled": "true"
        }
      }
    }
  },
  "transient": {
    "cluster": {
      "routing": {
        "allocation": {
          "awareness": {
            "attributes": null    #之前这里写的是node_type
          },
          "enable": "all",
          "total_shards_per_node": "-1"
        }
      }
    }
  }
}
恢复正常,冷热数据分离。
刚开始学的时候不懂,然后网上各种查,看到这个配置,没仔细看,看着说提高高可用,感觉挺好的,有用,就直接配置上了,导致出现了上面的三种异常情况。
其实这个配置的意思是:标记node_type作为区域区分,1副本就只能放在你做标记(冷、热)区域1份,所以就一直导致我两份数据无法同时存放于热节点。
下图为自己挖的小坑,取消掉第1个红框配置就正常了。
分片分配感知:Shard Allocation Awareness
Shard Allocation Awareness的设计初衷是为了提高服务的可用性,通过自定义节点属性作为感知属性,让 Elasticsearch 在分配分片时将物理硬件配置考虑在内。如果 Elasticsearch 知道哪些节点位于同一物理服务器上、同一机架中或同一区域中,则它可以分离主副本分片,以最大程度地降低在发生故障时丢失数据的风险。
启用分片感知策略-配置节点属性
node.attr.rack_id: rack1通过以下设置告诉主节点在分配分片的时候需要考虑哪些属性。这些信息会保存在每个候选节点的集群状态信息中
PUT _cluster/settings
{
  "persistent": {
    "cluster.routing.allocation.awareness.attributes": "rack_id"
  }
}
强制感知策略:Forced awareness
默认情况下,如果一个区域发生故障,Elasticsearch 会将所有故障的副本分片分配给其他区域。但是剩余区域可能没有足够的性能冗余来承载这些分片。
为了防止在发生故障时单个位置过载,您可以设置为cluster.routing.allocation.awareness.force不分配副本,直到另一个位置的节点可用。
部署强制感知策略
设置强制感知策略,告诉主节点当前通过某个属性来划分区域,并且告知区域有哪些值
cluster.routing.allocation.awareness.attributes: zone
cluster.routing.allocation.awareness.force.zone.values: zone1,zone2
补充现有集群get的配置和put的配置
get _cluster/settings/
{
  "persistent": {
    "cluster": {
      "routing": {
        "rebalance": {
          "enable": "all"
        },
        "allocation": {
          "enable": "all"
        }
      },
      "max_shards_per_node": "10000"
    },
    "xpack": {
      "monitoring": {
        "collection": {
          "enabled": "true"
        }
      }
    }
  },
  "transient": {
    "cluster": {
      "routing": {
        "allocation": {
          "awareness": {
            "force": {
              "node_type": {
                "values": "hot,cold"
              }
            }
          },
          "enable": "all",
          "total_shards_per_node": "-1"
        }
      }
    }
  }
}
put _cluster/settings
{
"persistent": {
"cluster": {
"routing": {
"allocation": {
"awareness": {
"attributes": null
},
"enable": "all"
},
"rebalance":{
"enable": "all"
}
},
"max_shards_per_node": "10000"
},
"xpack": {
"monitoring": {
"collection": {
"enabled": "true"
}
}
}
},
"transient": {
"cluster": {
"routing": {
"allocation": {
"awareness": {
"attributes": null
},
"enable": "all",
"total_shards_per_node": "-1"
}
}
}
}
}补充一些小知识:
transient 临时:这些设置在集群重启之前一直会生效。一旦整个集群重启,这些设置就会被清除。
persistent 永久:这些设置永久保存,除非再次被手动修改。是将修改持久化到文件中,重启之后也不影响。

一些查看es集群健康的命令
GET _cluster/health
GET _cluster/settings
GET _cat/nodes
GET _cat/nodeattrs
GET _cat/health?v=true
GET _cat/recovery


 被折叠的 条评论
为什么被折叠?
被折叠的 条评论
为什么被折叠?
 到【灌水乐园】发言


