


文章目录
- 1. HelloWorld
- 2.springboot web 开发
- 3. SpringMVC自动配置原理--用于扩展各种需要的组件
- 4.Spring Boot 员工管理模块--(伪造的数据库--MAP键值对)版本--大多前端的知识(理清逻辑)
- 5. 整合JDBC(jdbctemplate)--不重要
- 6.整合Druid(阿里巴巴的数据库连接池)
- 7.整合mybatis
- 8.Spring Security(都是现成的东西 ,调用API即可---理清功能逻辑)--安全框架
- 9. Shiro(对比Spring Security)简单的安全框架--整合了数据库Mybatis的版本
- 10.Swagger(API在线文档的框架)--随着代码的改变实时更新API文档
- 11.异步、定时、邮件(使用对应的注解)
- 12.分布式:Dubbo和Zookeeper+Springboot集成
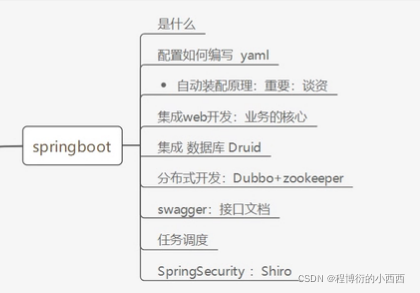
1. HelloWorld
插件爆红给,加入版本号
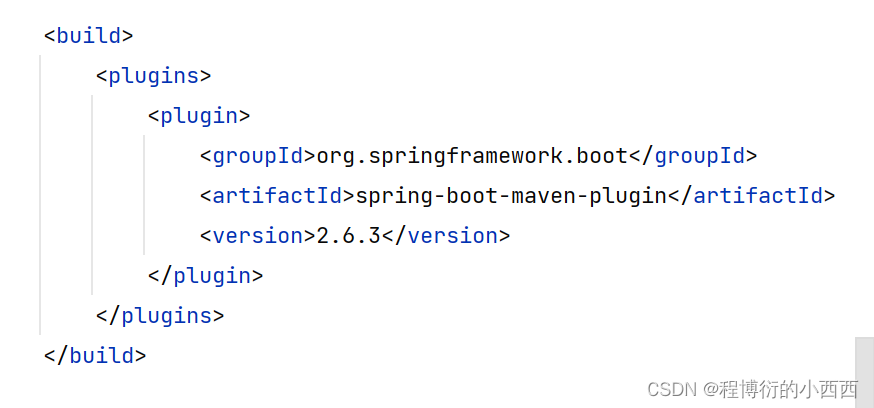
打包为jar包,点击package
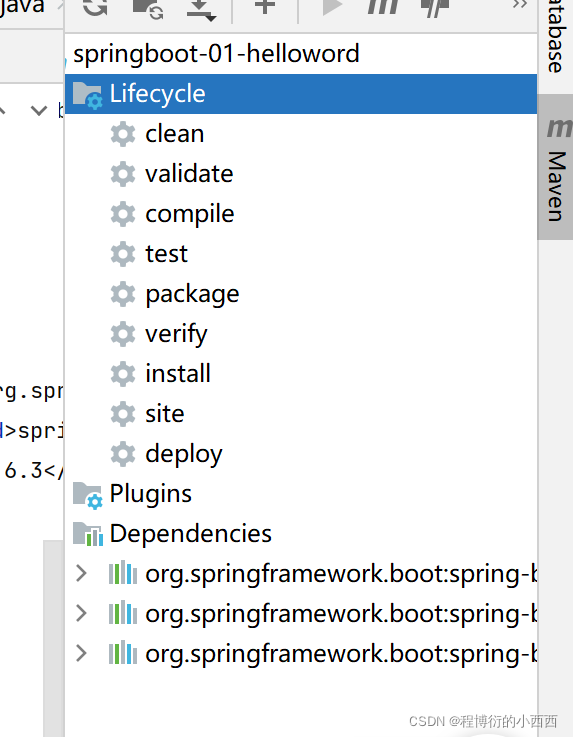
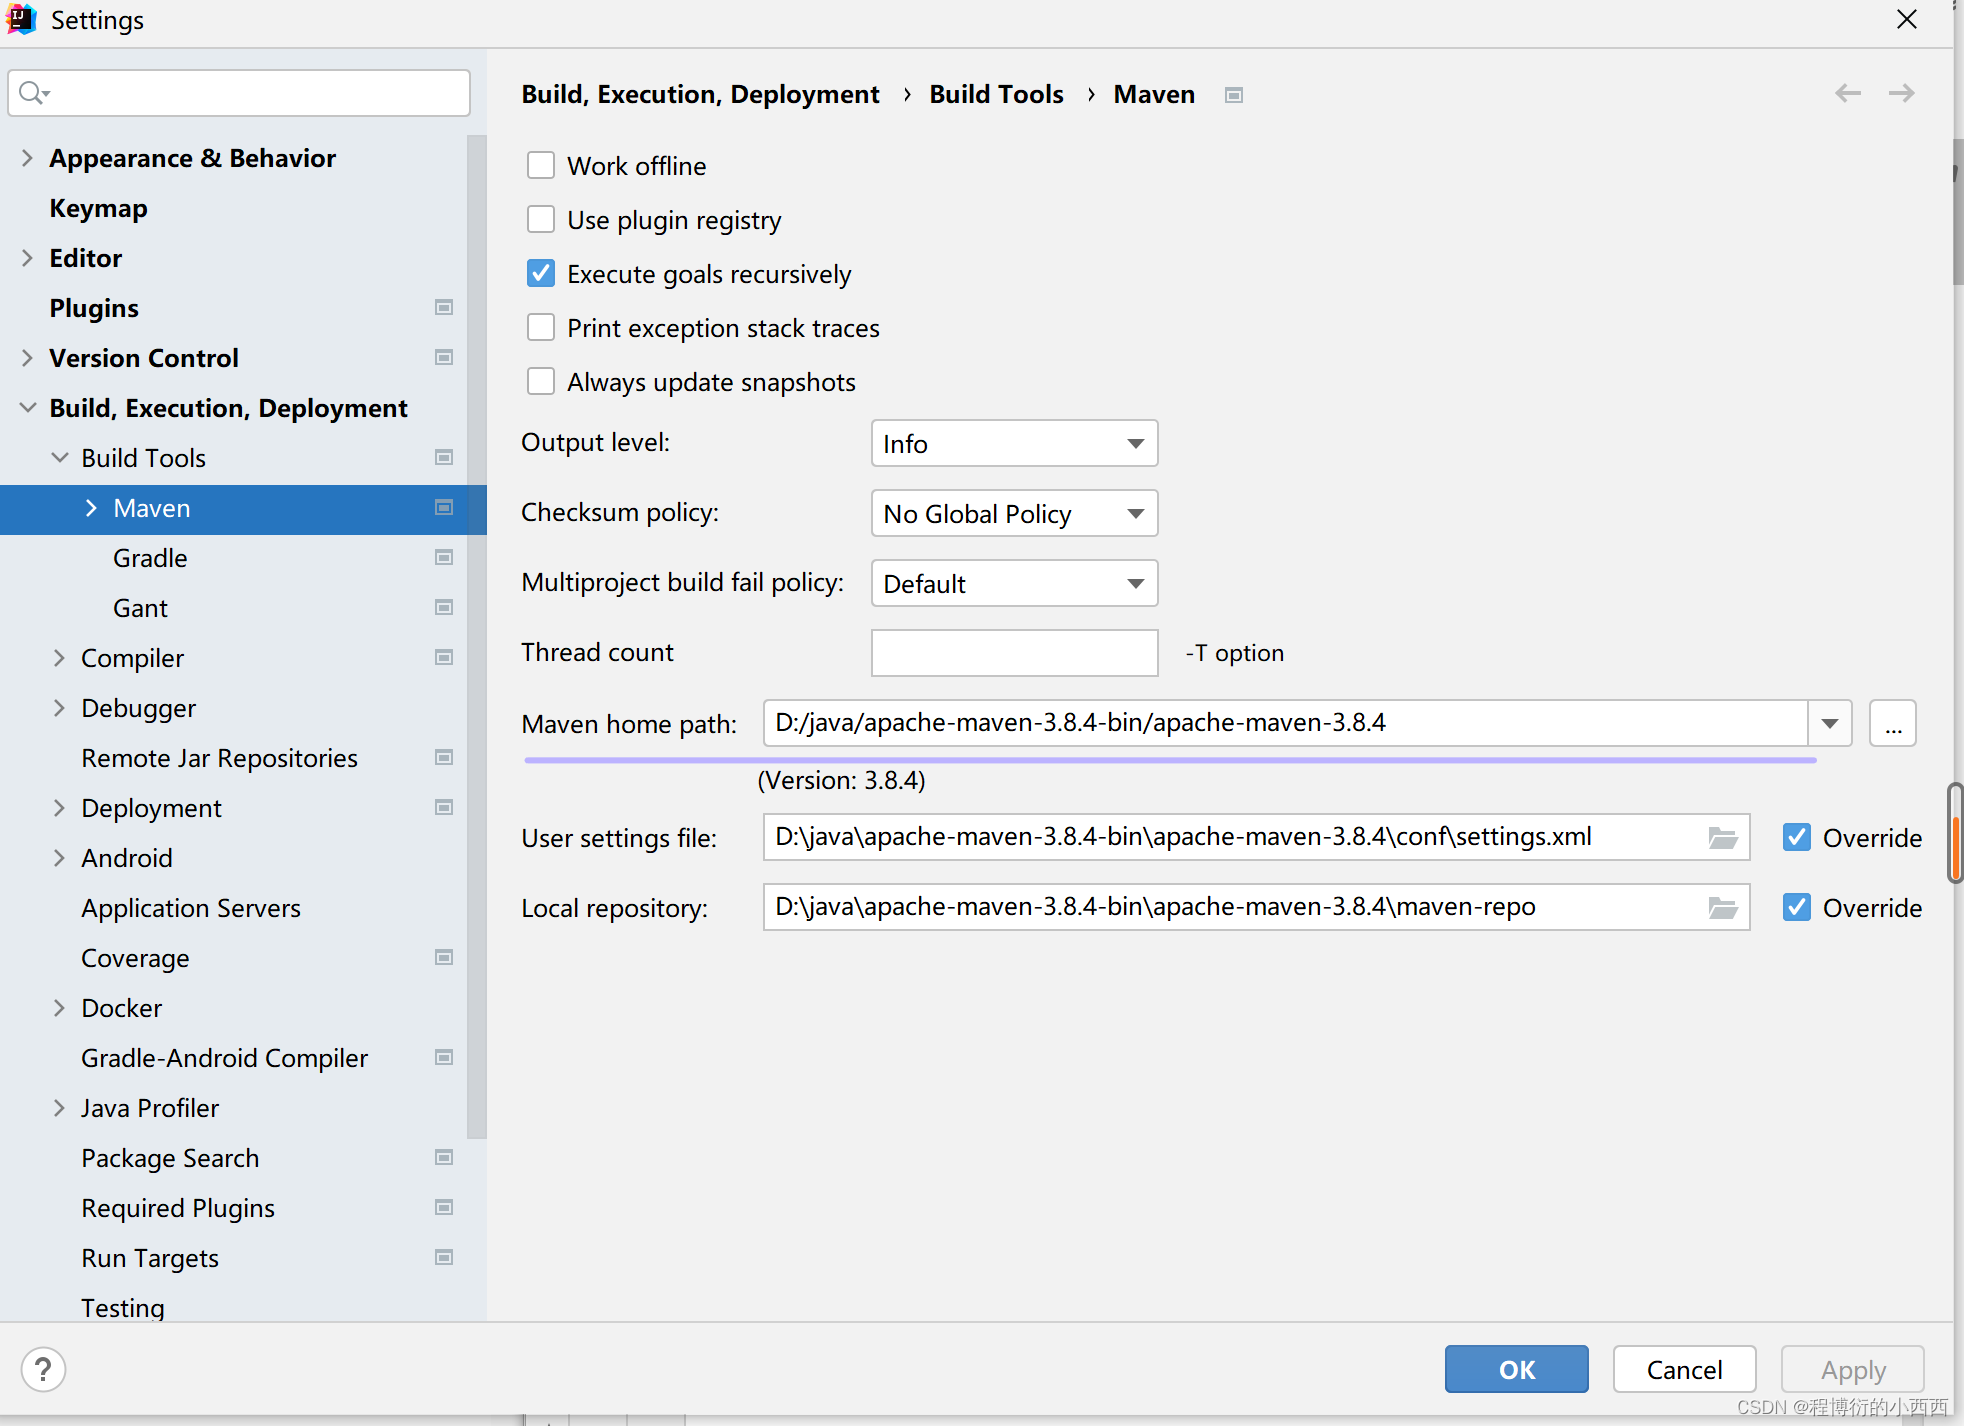
打包不了或者用不了package,检查MavenHomePath是不是自己下载的maven
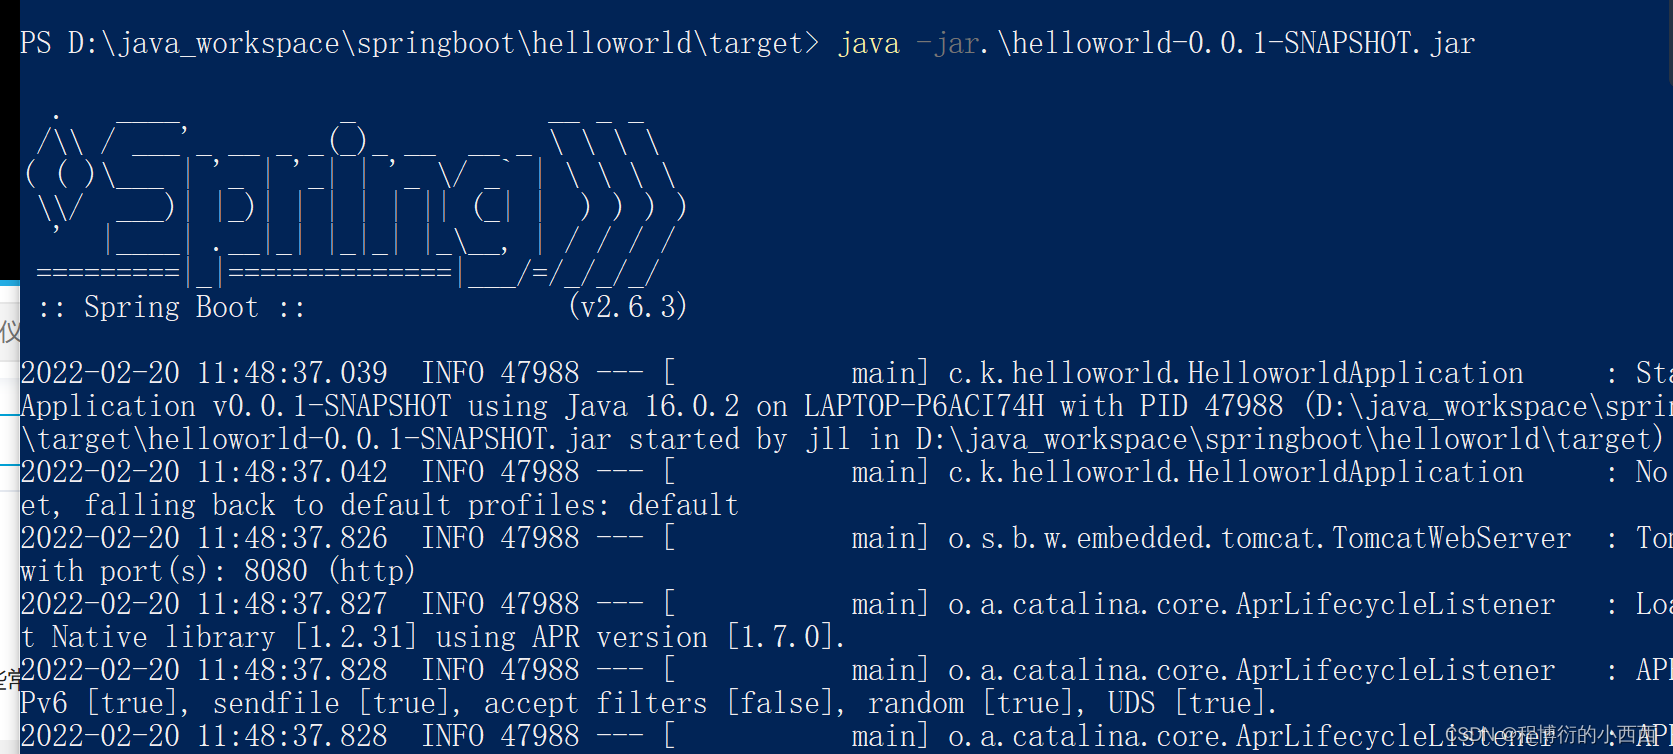
shfit+右键打开相应文件位置下的powershell窗口,测试自己打包的jar包
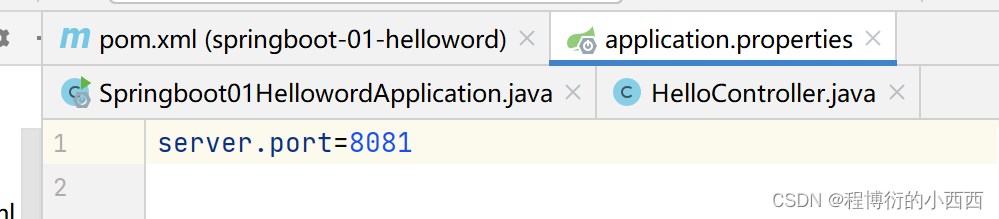
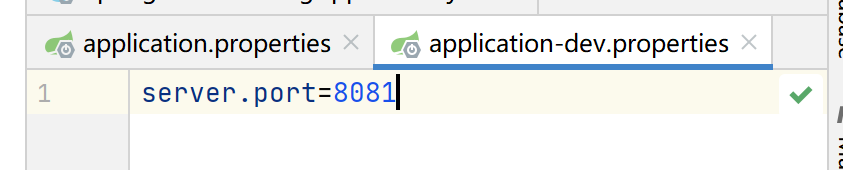
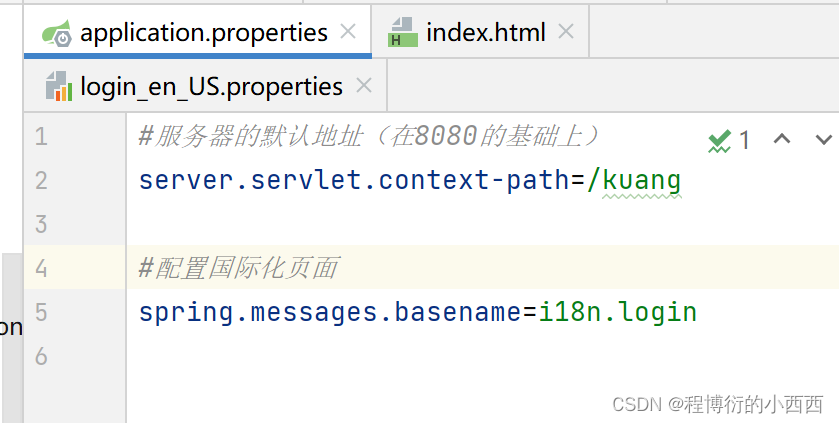
1.1更改服务器的访问端口号
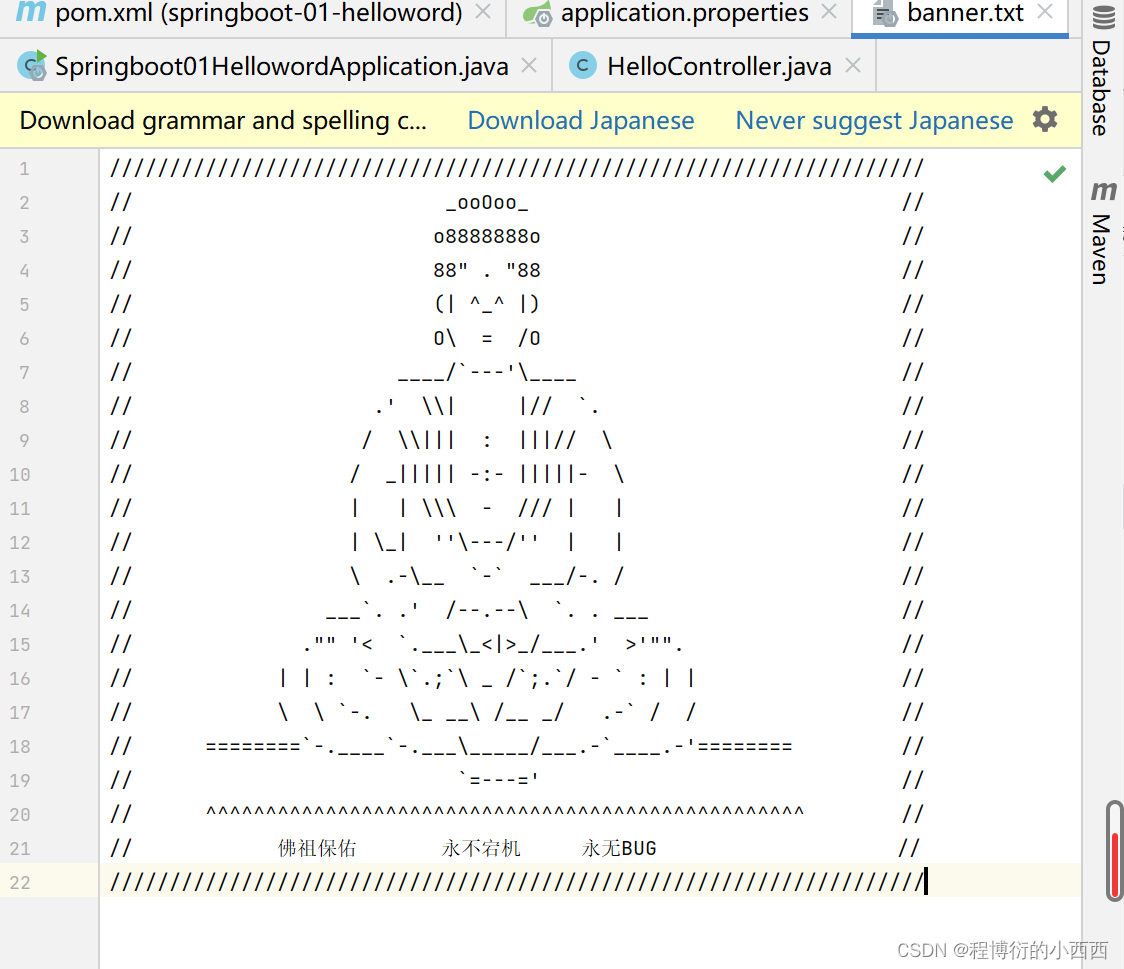
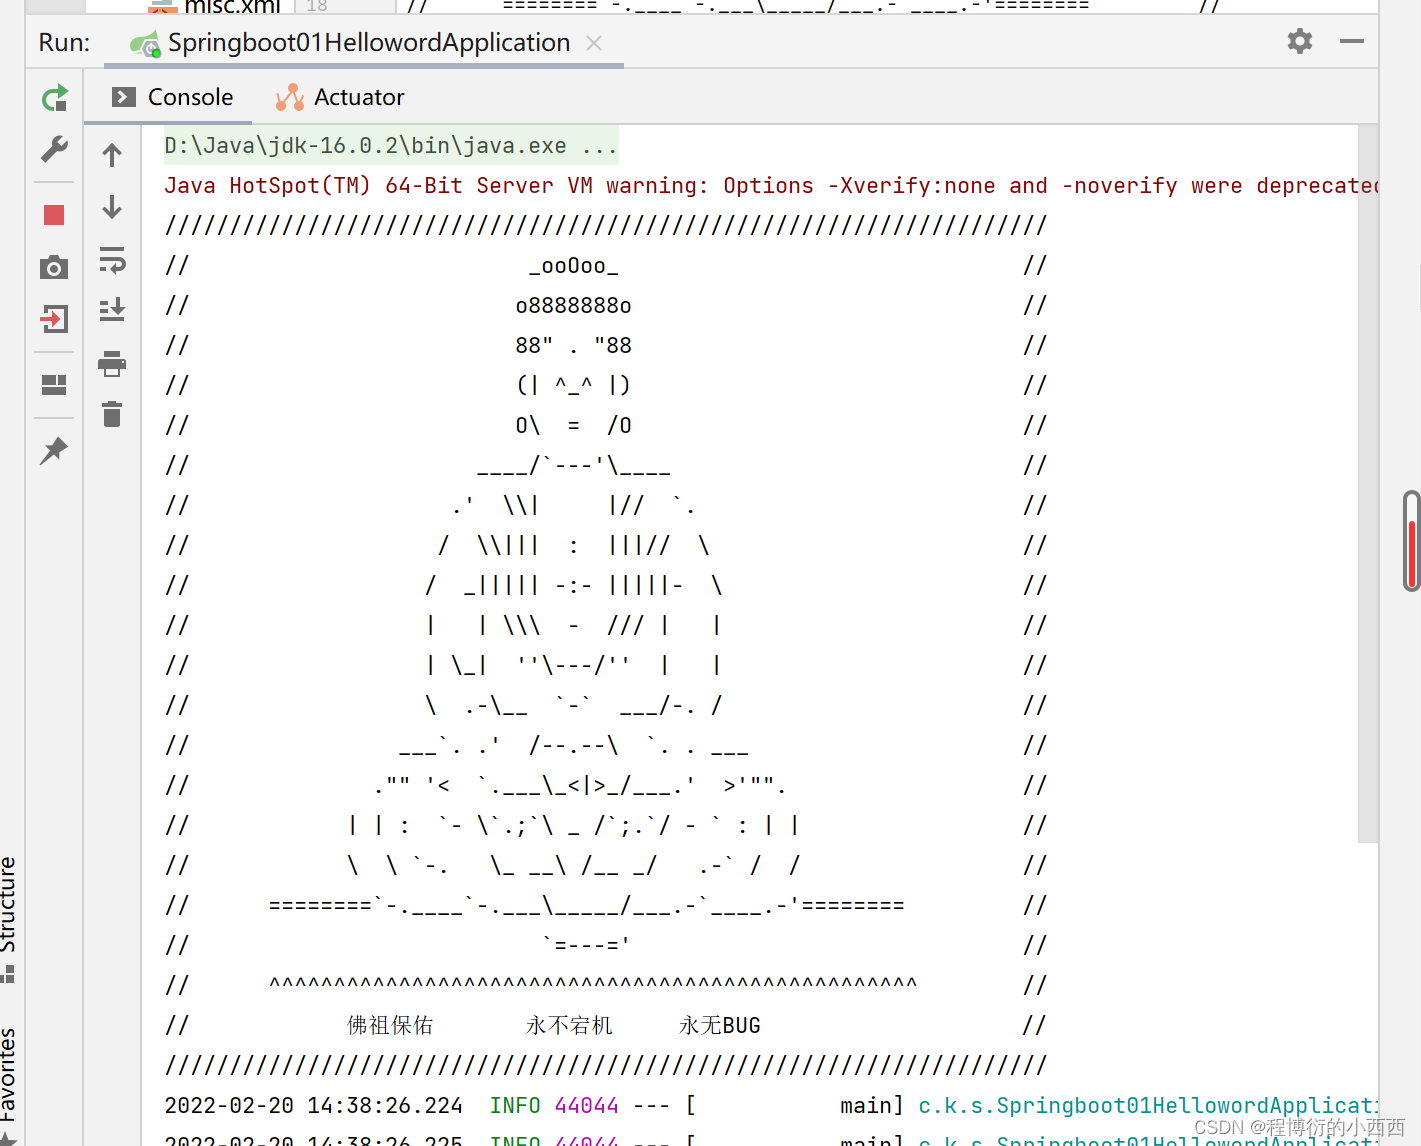
1.2自定义springboot的banner

自定义网站
启动后的效果
1.3环境切换Spring profiles &&JSR303
properties的切换方式

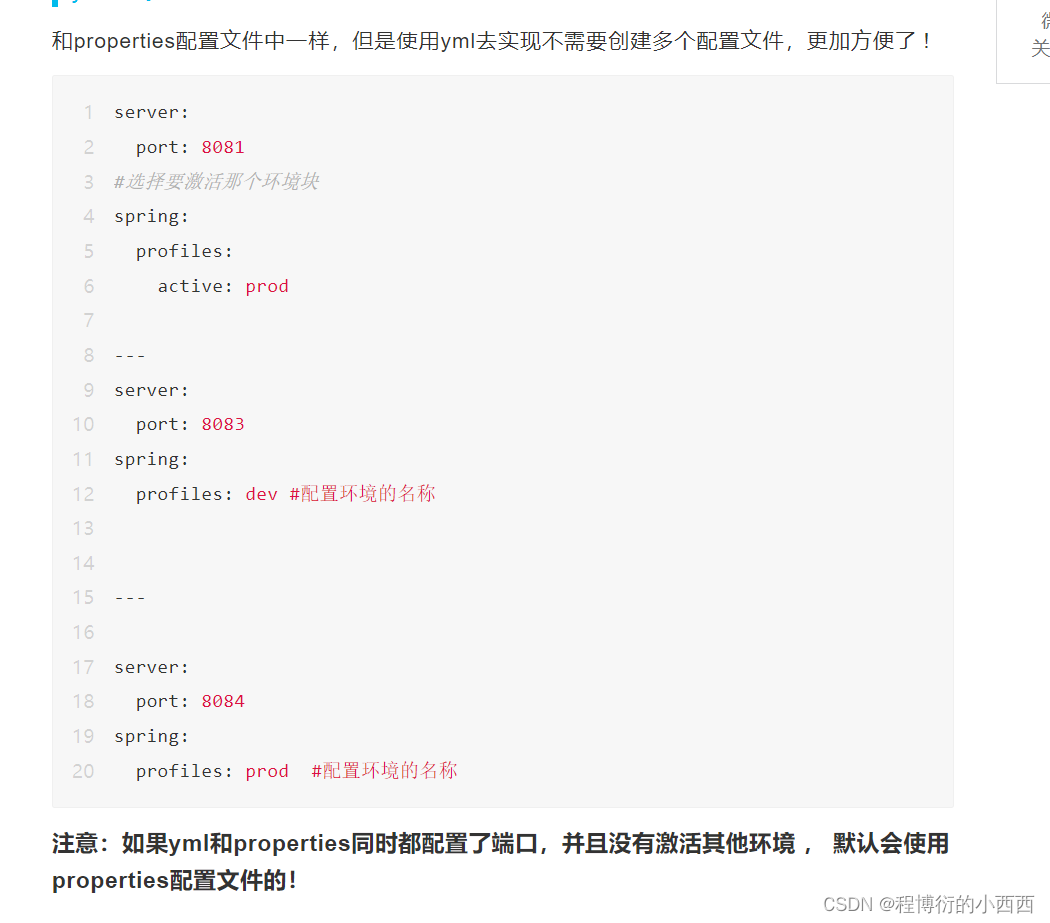
yaml的切换方式
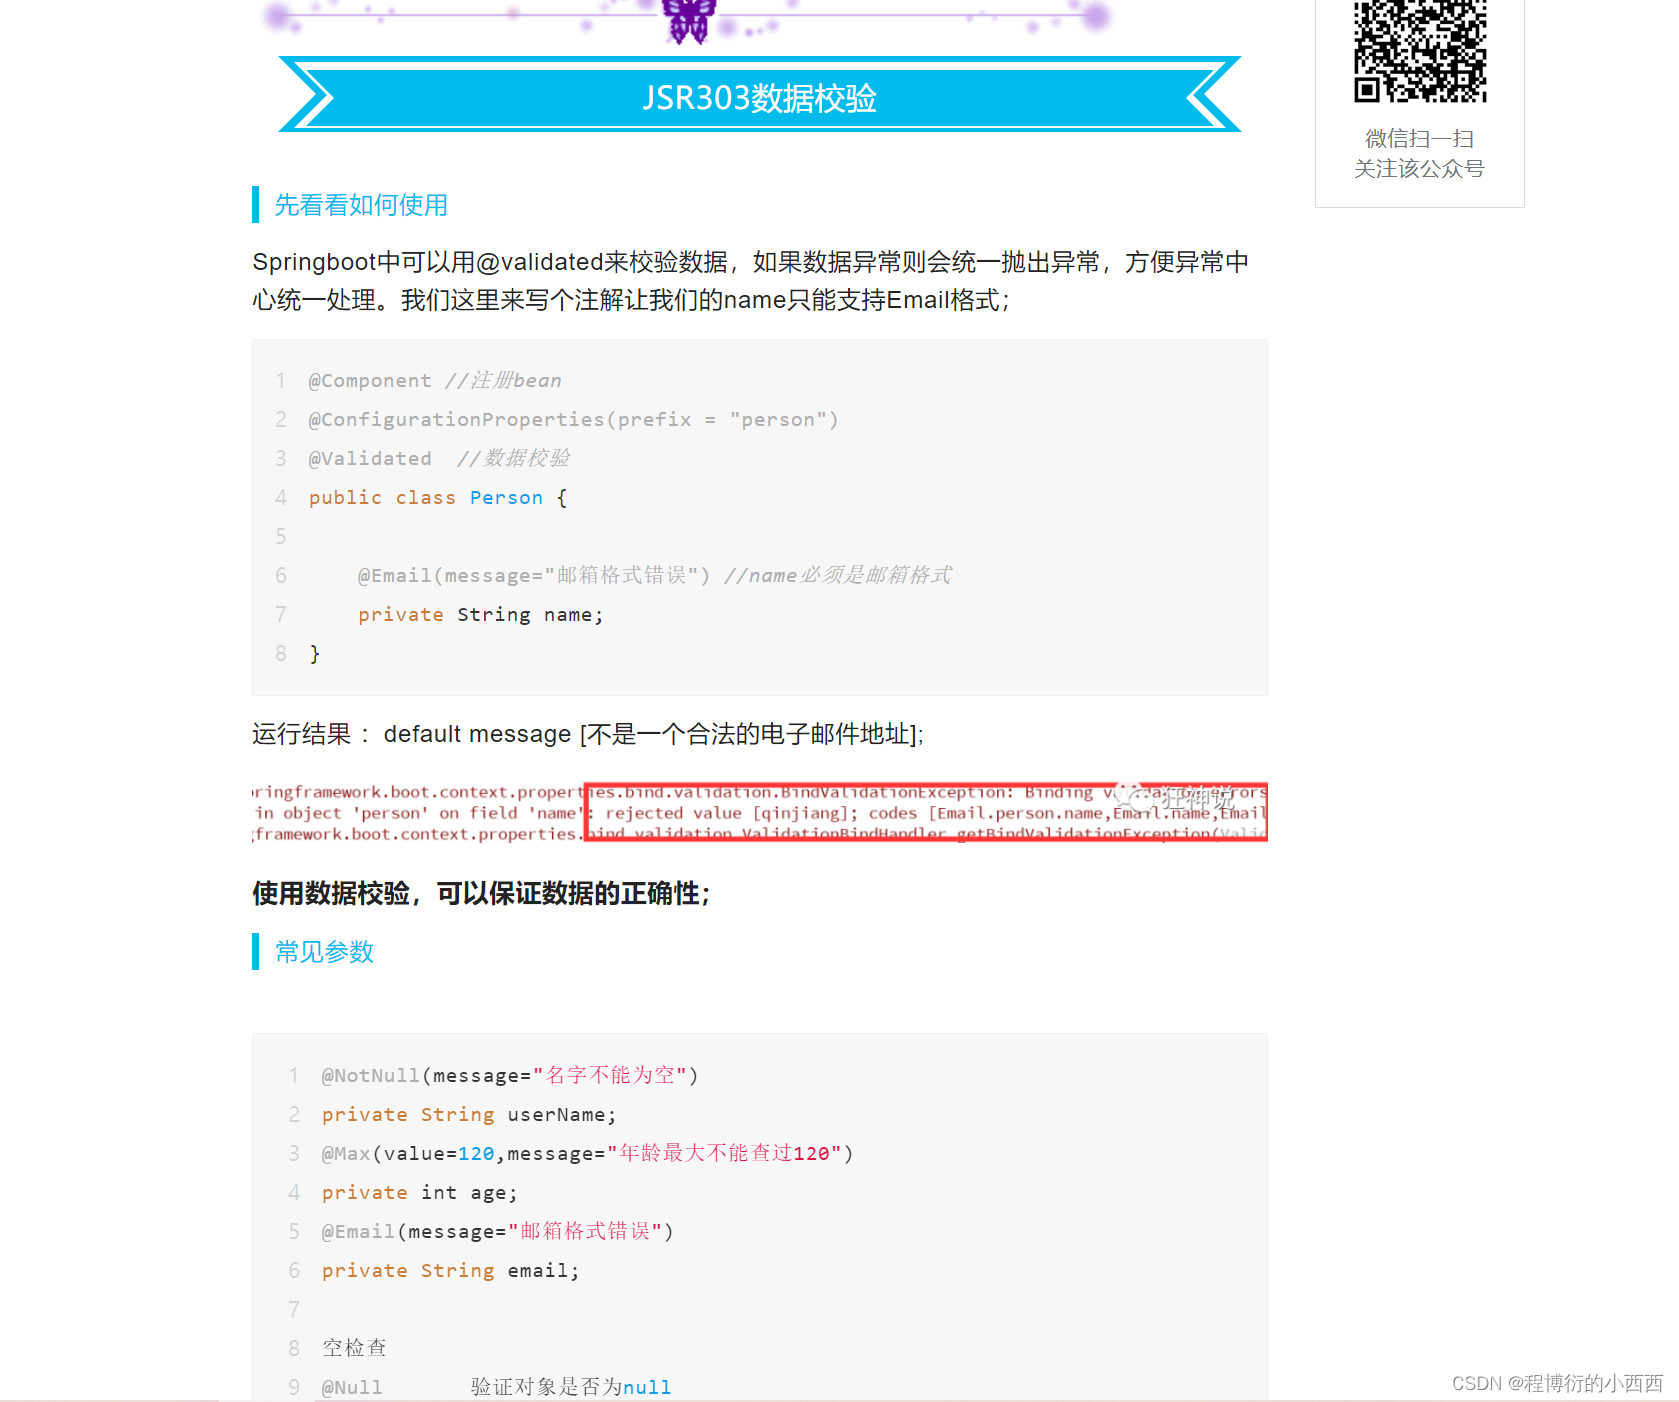
JSR303数据校验
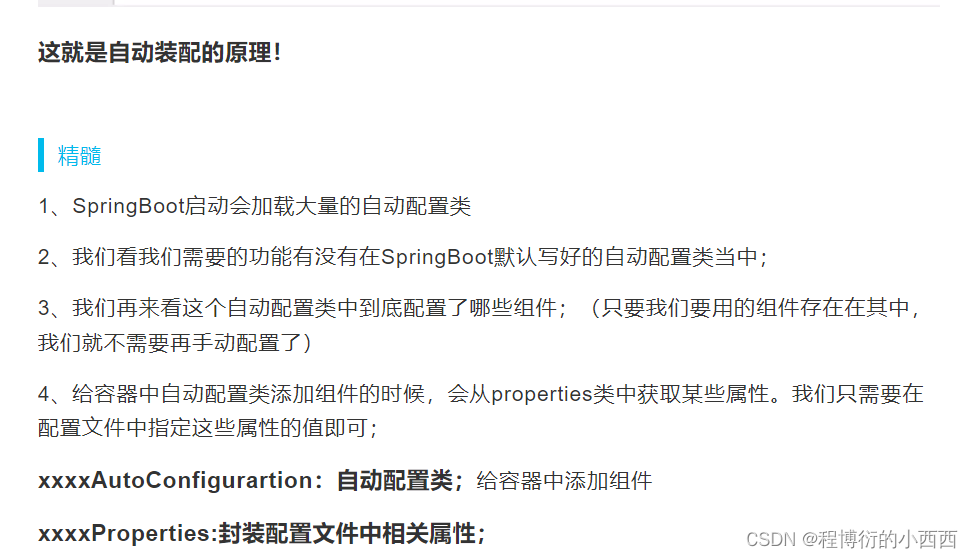
1.4自动配置的原理
2.springboot web 开发
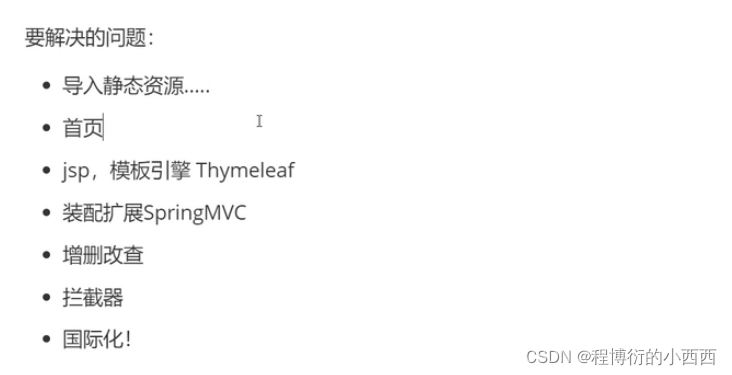
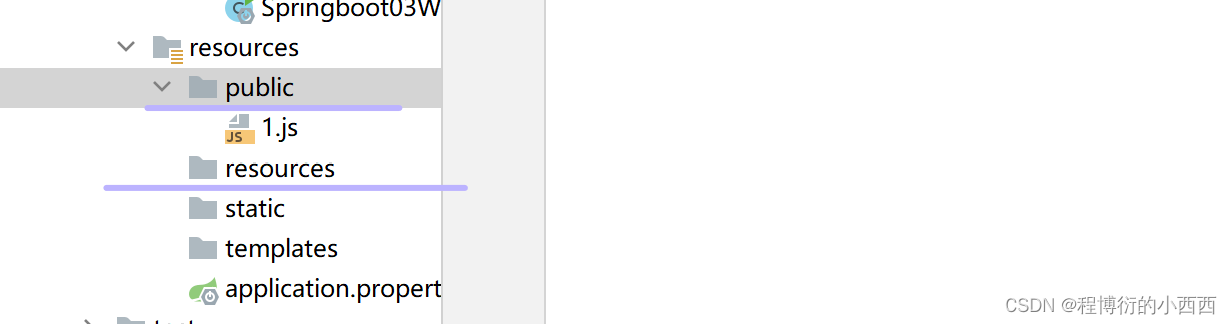
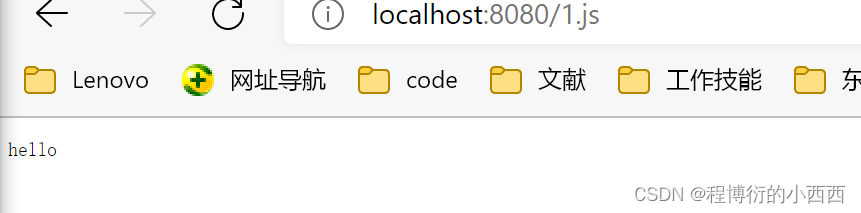
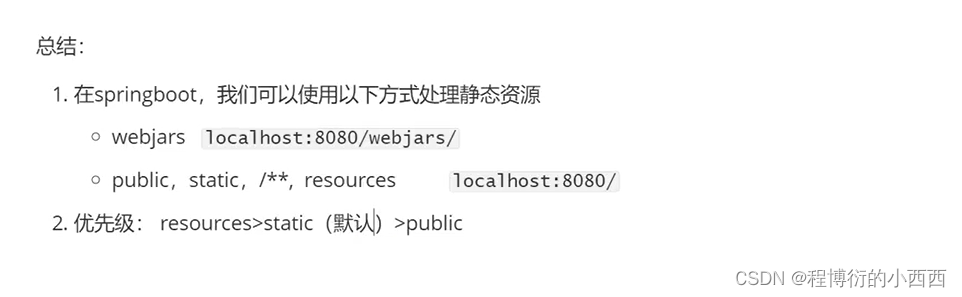
2.1静态资源
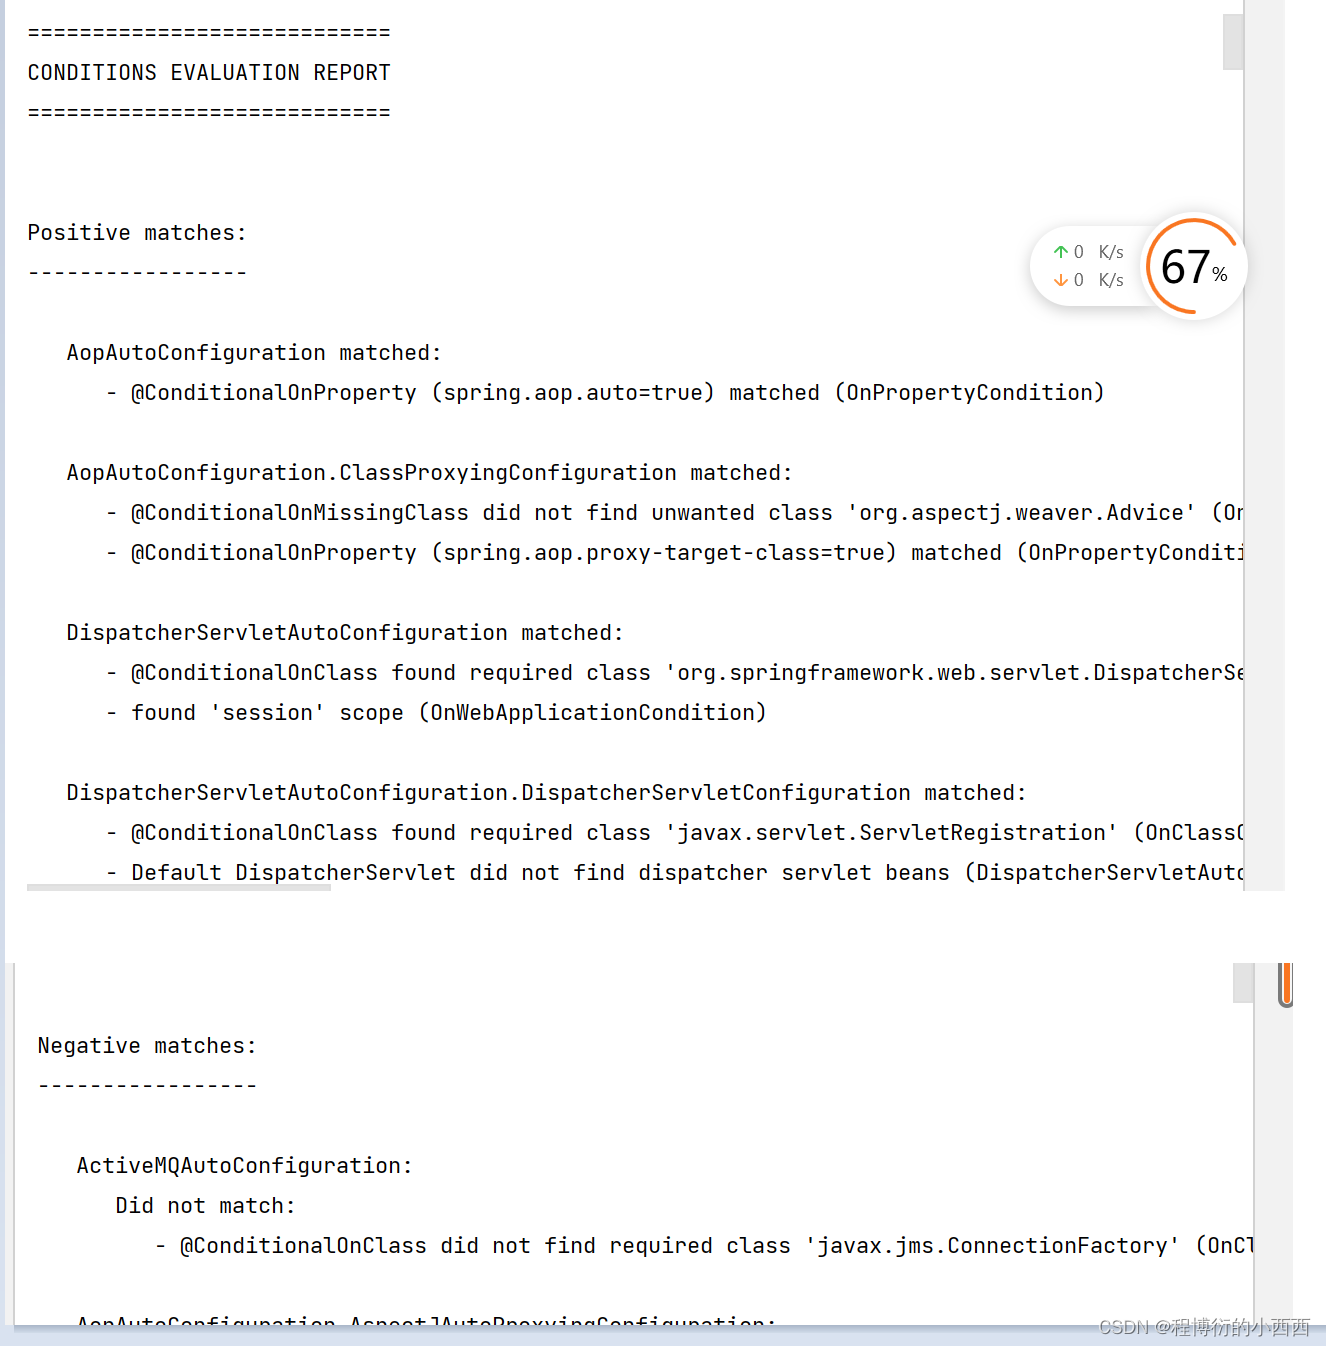
2.1.1 官方默认的路径(看源码–WebMvcAutoConfiguration)
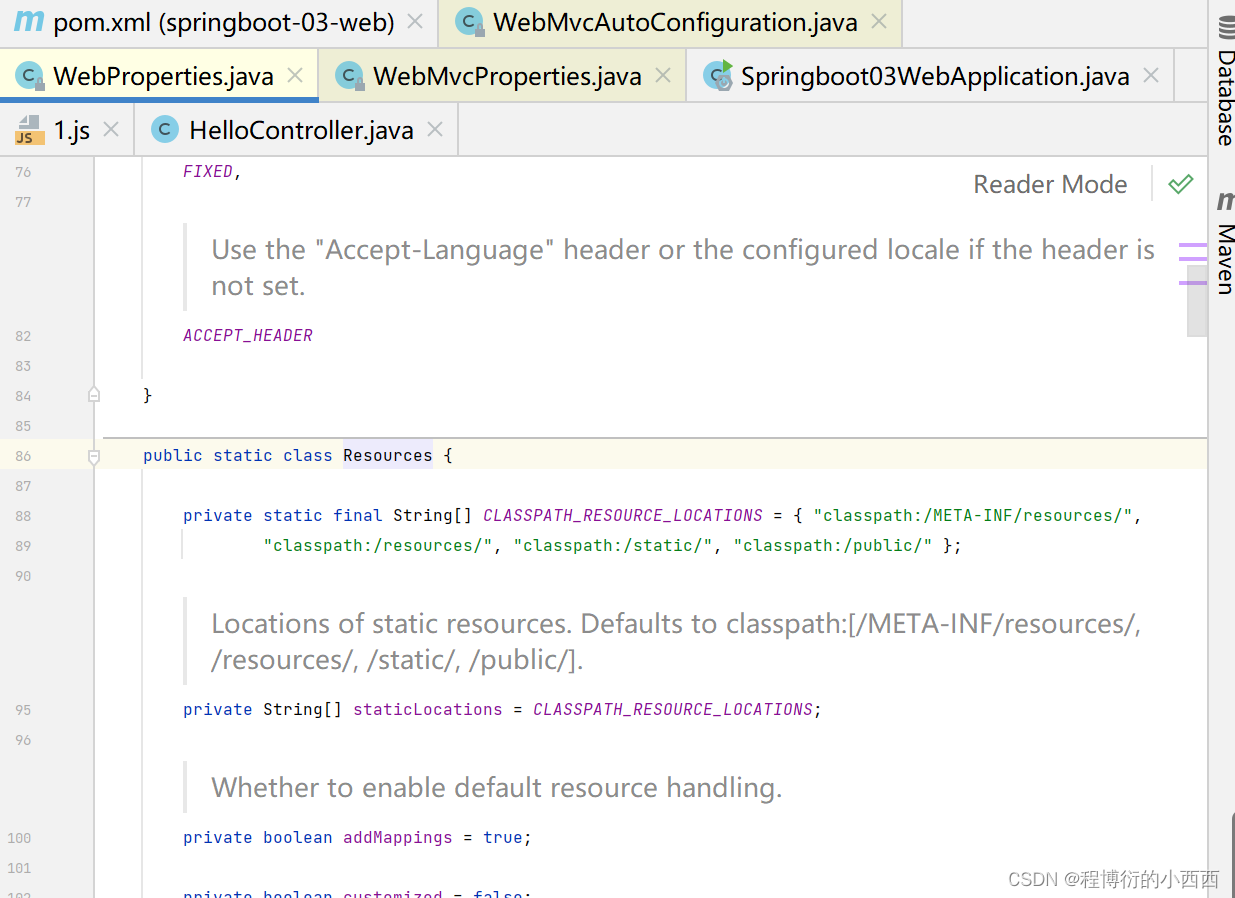
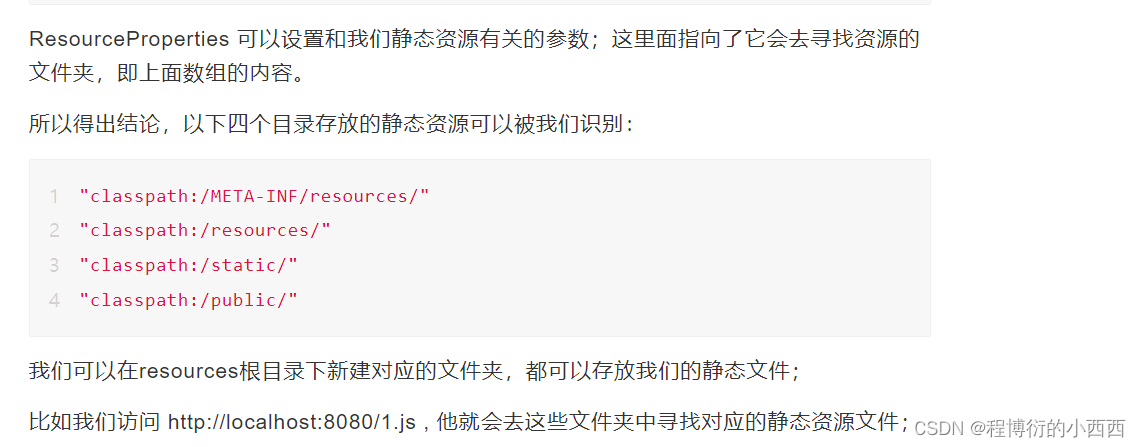
相同的文件名下,优先级依次降低
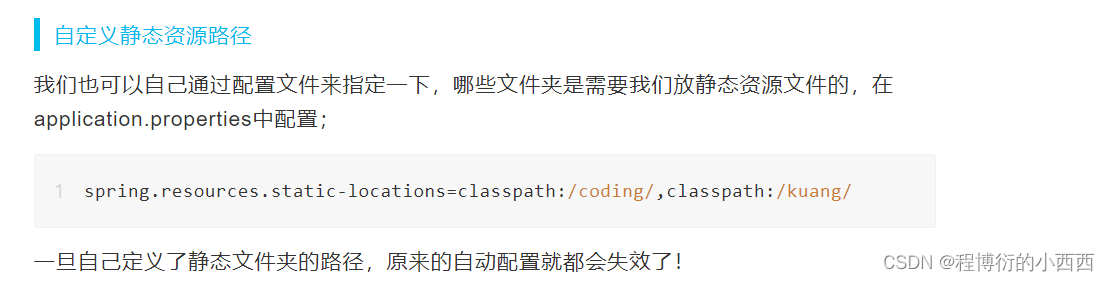
2.1.2 自定义的路径(最好别这样)
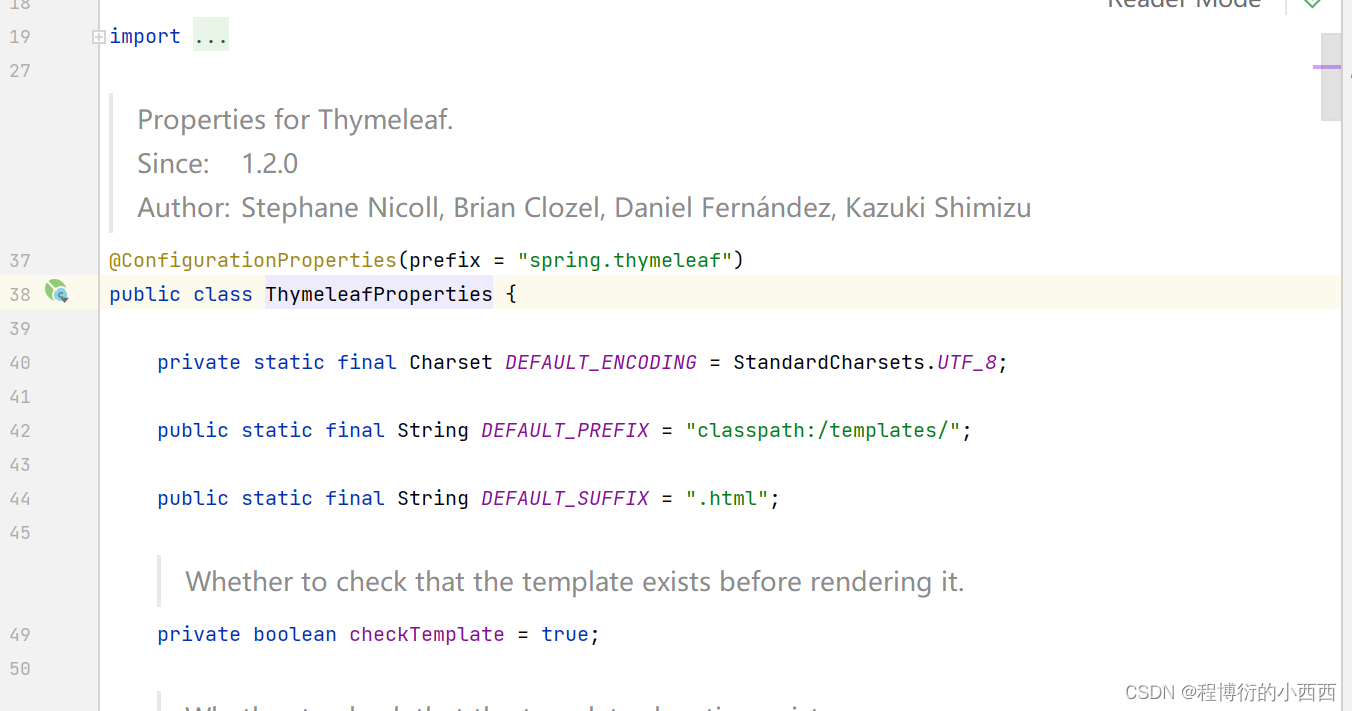
2.2模板引擎–thymeleaf
<!--thymeleaf-->
<dependency>
    <groupId>org.springframework.boot</groupId>
    <artifactId>spring-boot-starter-thymeleaf</artifactId>
</dependency>
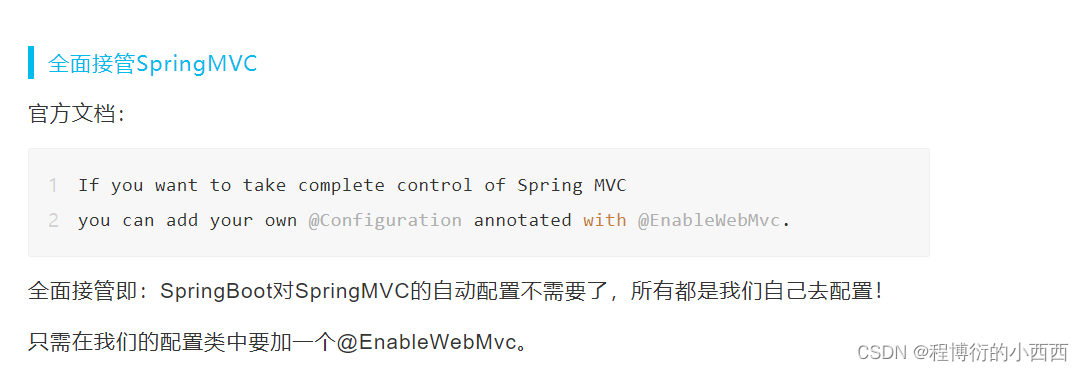
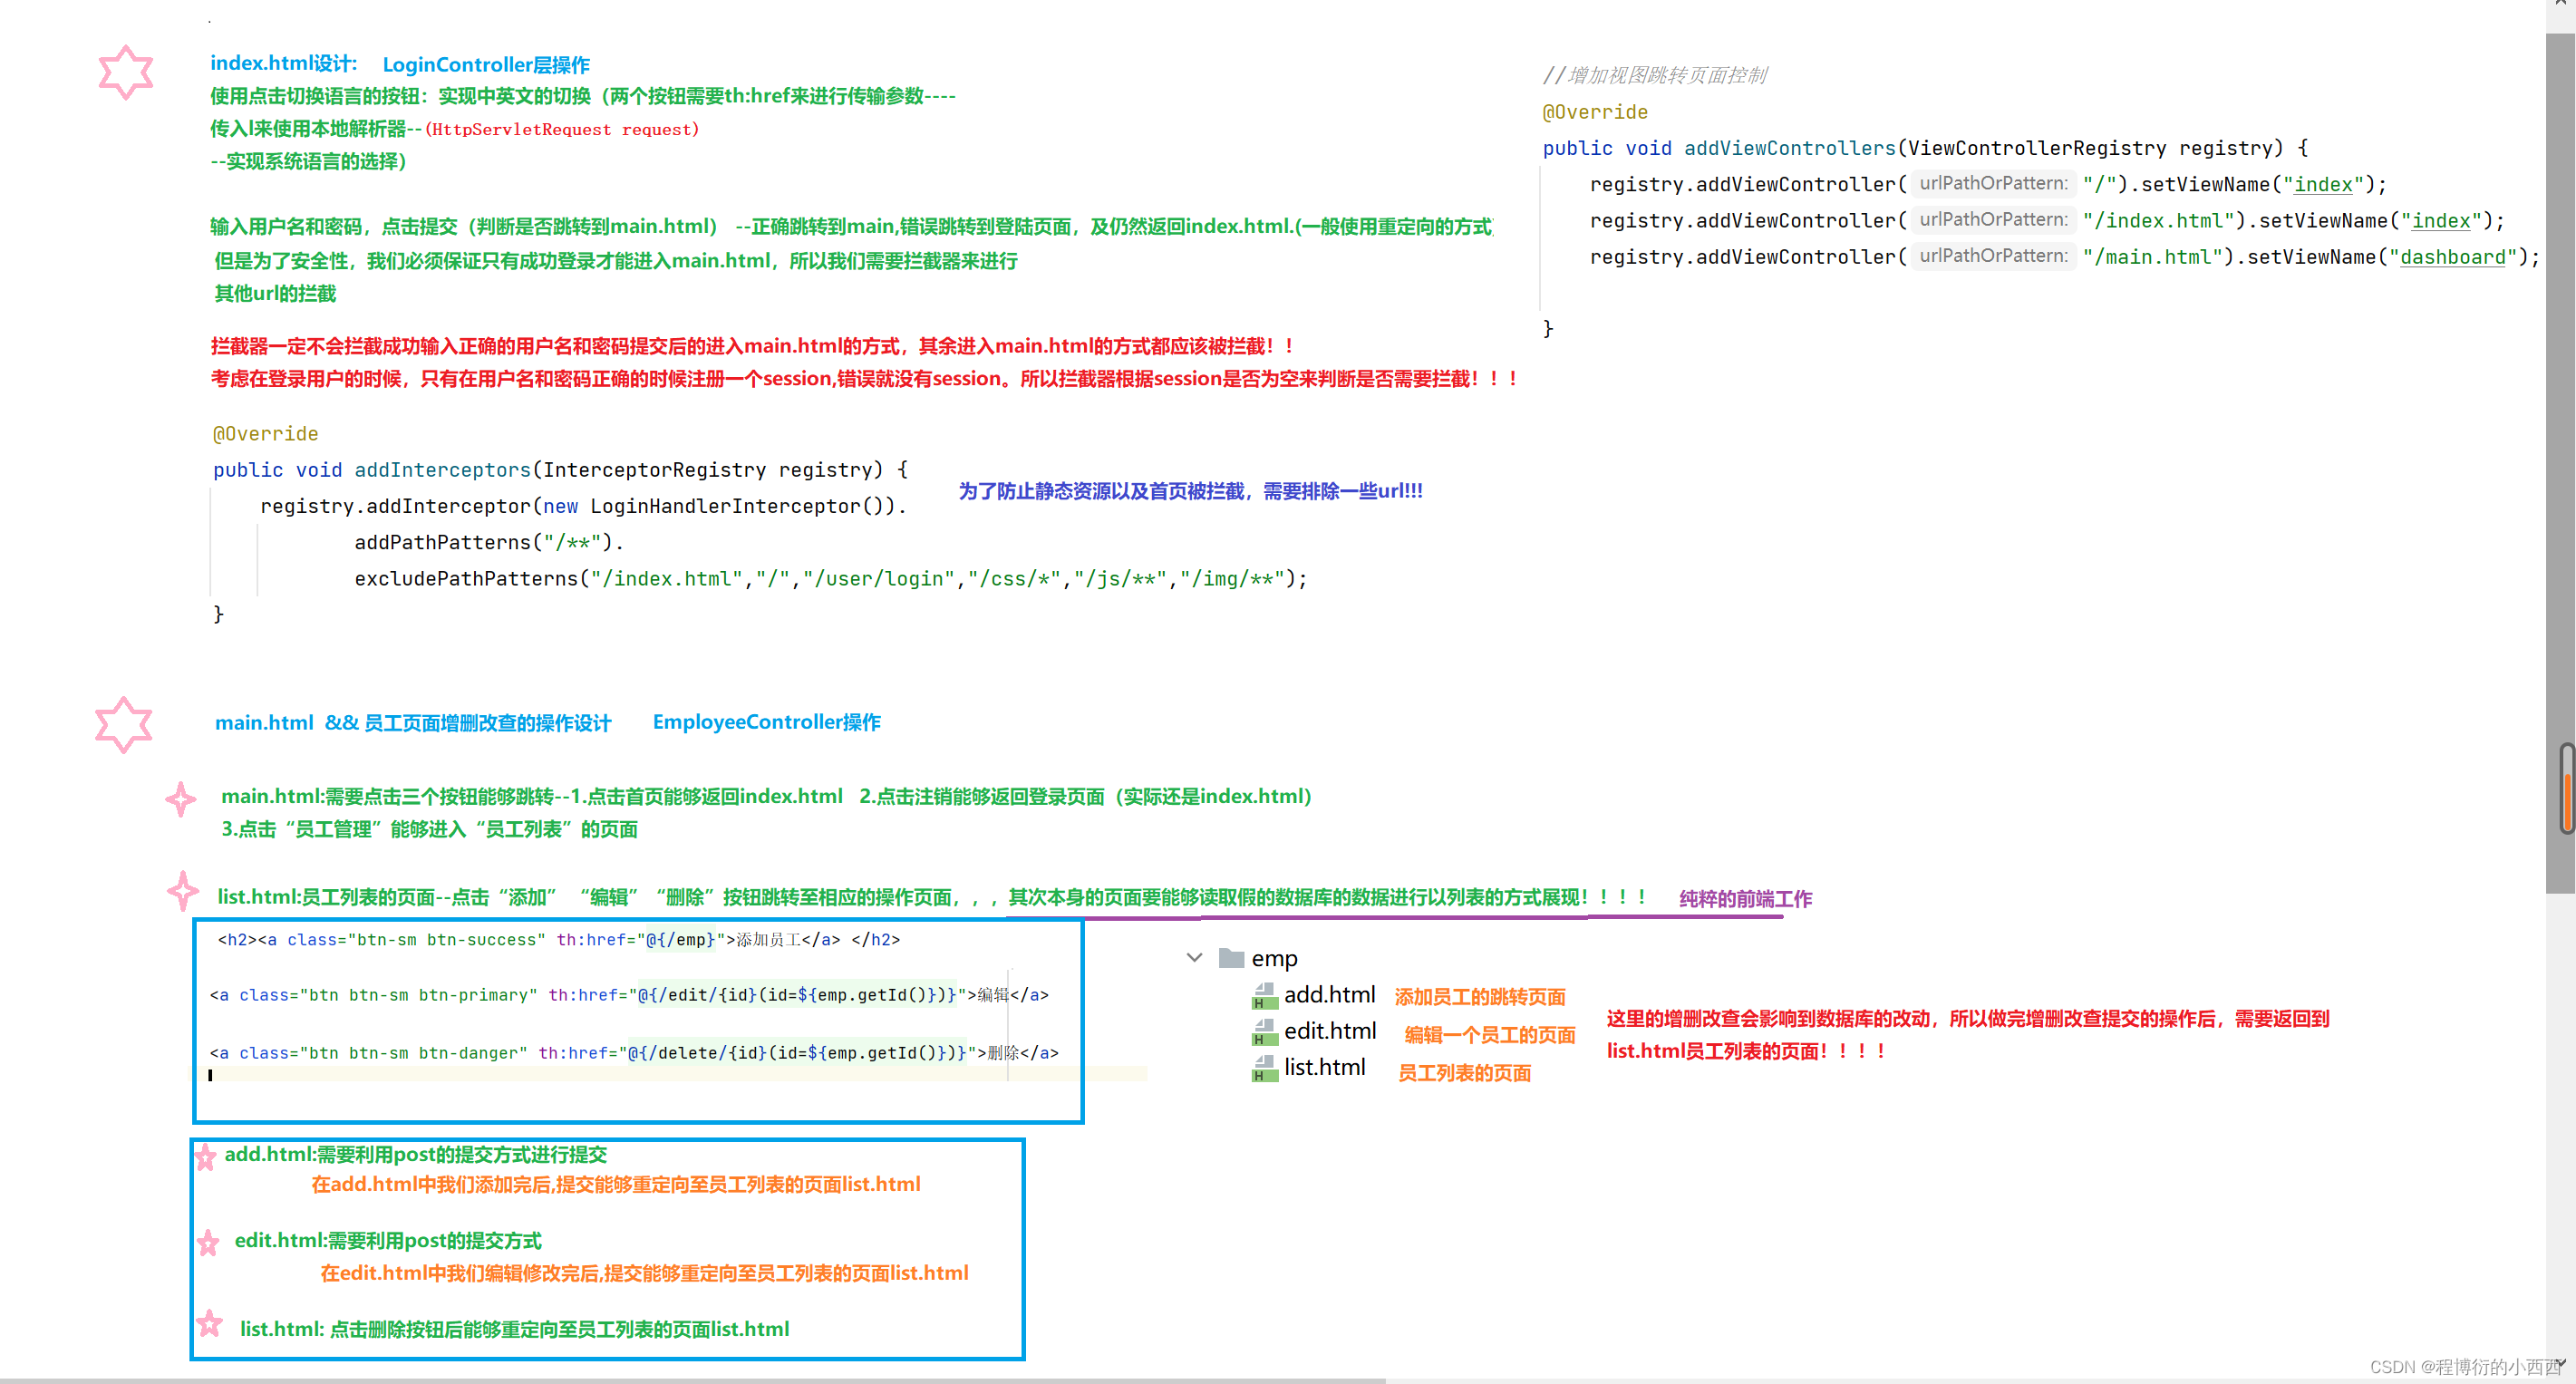
3. SpringMVC自动配置原理–用于扩展各种需要的组件
(@Bean注册一下自己定义的组件类—不在MyMvcConfig文件)
如果想让springboot来自动配置,@Configuration+实现WebMvcConfigurer接口

//同于扩展springmvc
//所以说,我们如果想要使用自己定制化的东西,我们只需要给容器中添加这个组件就好了
@Configuration
public class MyMvcConfig implements WebMvcConfigurer {
    @Override
    public void addViewControllers(ViewControllerRegistry registry) {
        // 浏览器发送/kuang , 就会跳转到test页面;
        registry.addViewController("/kuang").setViewName("test");
    }
}
如果不想让springboot来自动配置,加上@EnableWebMvc的注解
4.Spring Boot 员工管理模块–(伪造的数据库–MAP键值对)版本–大多前端的知识(理清逻辑)
4.1首页配置

thymeleaf的命名空间
xmlns:th="http://www.thymeleaf.org"
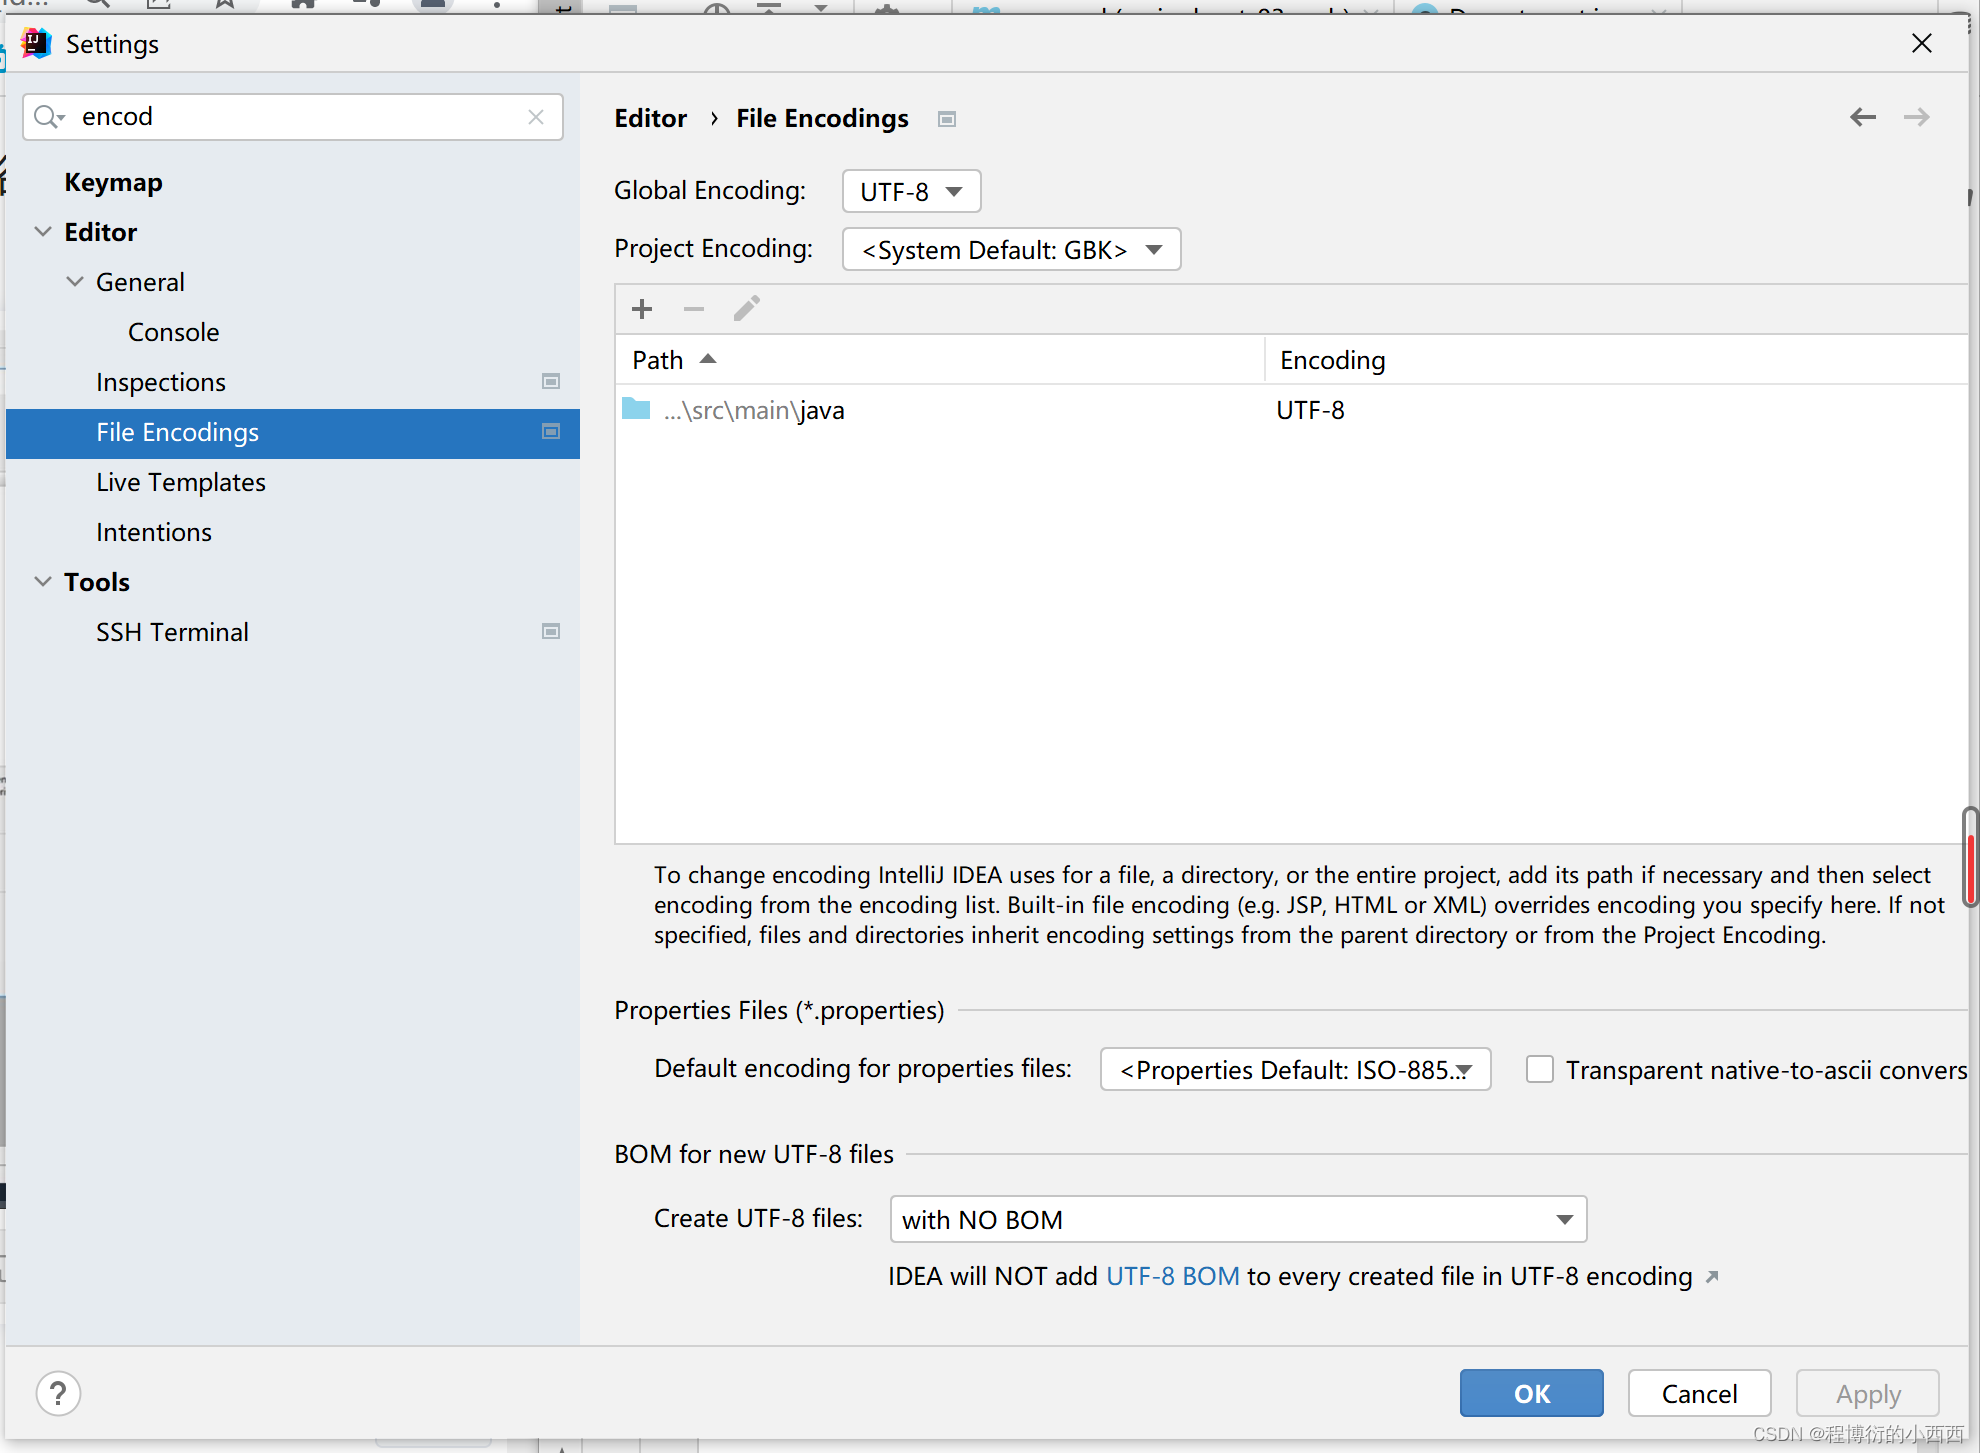
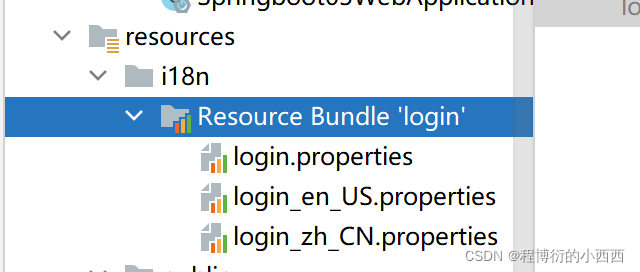
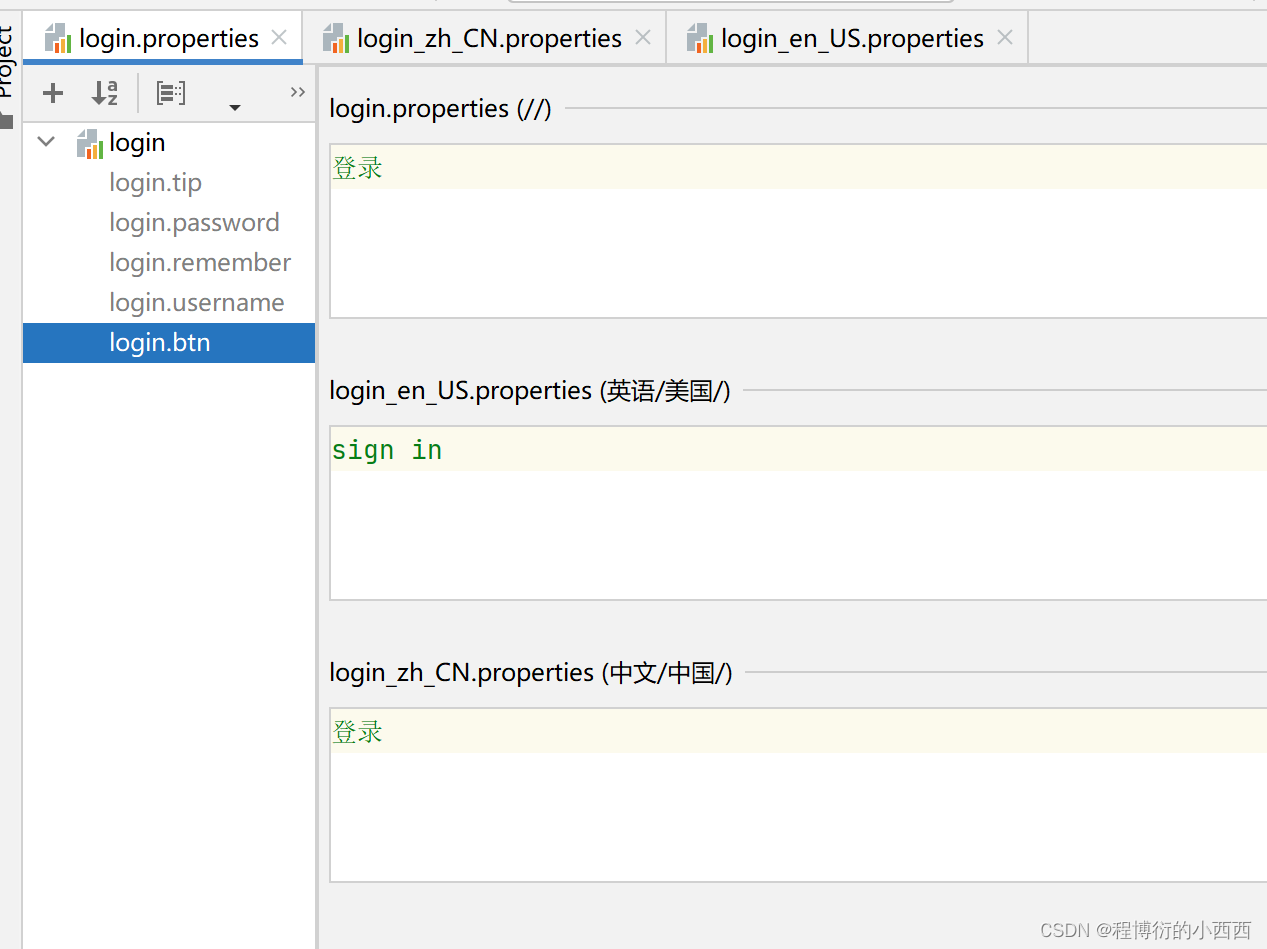
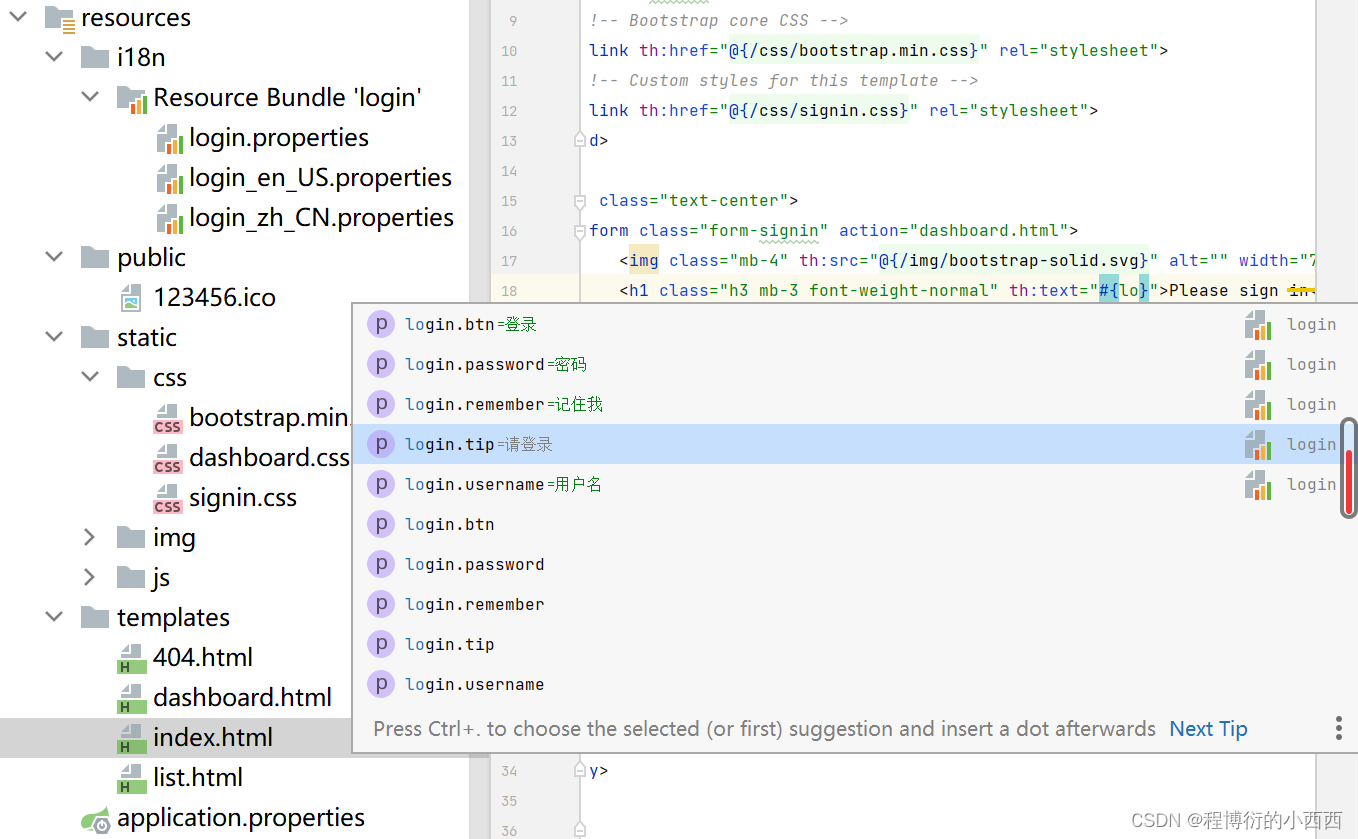
4.2 页面国际化
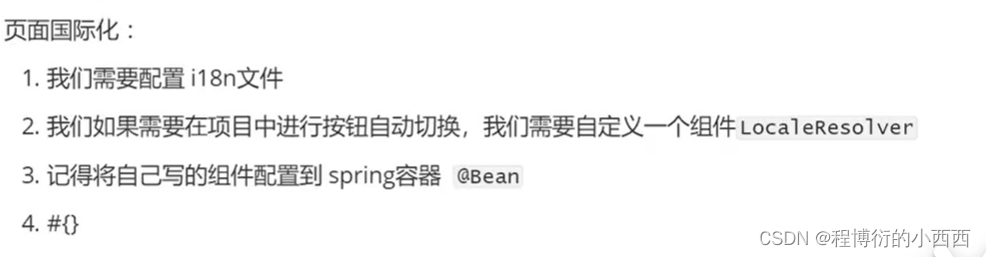
idea的设置里面确保所有的编码都是utf-8
//别忘了将这个本地解析器组件注册到我们的MyMvcConfig
public class MyLocaleResolver implements LocaleResolver {
    //解析请求
    @Override
    public Locale resolveLocale(HttpServletRequest request) {
        //获取请求中的国际化参数
        String language = request.getParameter("l");
        //默认的地区
        Locale locale = Locale.getDefault();
        //如果请求的链接参数不为空,携带了国际化参数
        if (!StringUtils.isEmpty(language)) {
            String[] split = language.split("_");//zh_CN(语言_地区)
            locale = new Locale(split[0], split[1]);//国家地区
        }
        return locale;
    }

    @Override
    public void setLocale(HttpServletRequest request, HttpServletResponse response, Locale locale) {

    }
}
    //本地解析器组件注册到我们的MyMvcConfig
    @Bean
    public LocaleResolver localeResolver(){
        return new MyLocaleResolver();
    }
4.3 登录+拦截器(保证只有用户成功登陆后才能进入main.html)
逻辑1:用户名和密码正确的才会注册seesion&&并重定向访问main.html
逻辑2:为了只有登陆正确(等价于session注册后非空)的才能进入main.html,搞一个拦截器–只有session注册非空的才能进入main.html,其余情况都是被拦截的
@Controller
public class LoginController {
@RequestMapping("/user/login")
public String login(@RequestParam("username") String username,
@RequestParam("password") String password,
Model model,
HttpSession session){
//如果用户名和密码正确(就根据用户名来注册seesion)
if ("admin".equals(username) && "123456".equals(password)){
//只有用户名和密码正确的才会获得session
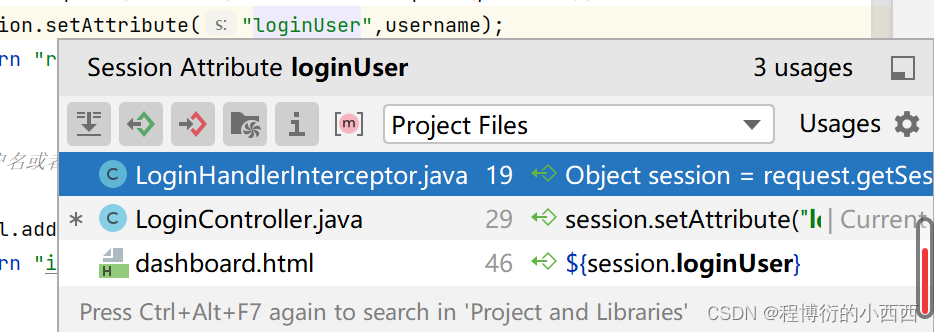
session.setAttribute("loginUser",username);
return "redirect:/main.html";//跳转到dashboard页面(重定向--保证安全型)
}
//如果用户名或者密码不正确
else {
model.addAttribute("msg", "用户名或者密码错误");//显示错误信息
return "index";//跳转到首页
}
}
}
public class LoginHandlerInterceptor implements HandlerInterceptor {
    @Override
    public boolean preHandle(HttpServletRequest request, HttpServletResponse response, Object handler) throws Exception {
        //用户登录成功后,应该有自己的session
        Object session = request.getSession().getAttribute("loginUser");
        if (session == null) {
            request.setAttribute("msg", "权限不够,请先登录");
            request.getRequestDispatcher("/index.html").forward(request, response);
            return false;
        } else {
            return true;
        }
    }
}
注册拦截器组件到mvc自动配置文件
    @Override
    public void addInterceptors(InterceptorRegistry registry) {
        registry.addInterceptor(new LoginHandlerInterceptor()).
                addPathPatterns("/**").
                excludePathPatterns("/index.html","/","/user/login","/css/*","/js/**","/img/**");
    }
用到这个session的位置
4.4展示员工列表
小技巧:如何复用相同的代码–thymeleaf的fragment碎片标签
<nav class="col-md-2 d-none d-md-block bg-light sidebar" th:fragment="sidebar">
<div th:insert="~{dashboard::sidebar}"></div>
小技巧:直接提取公共页面(建一个只存放公共部分代码的html)


前端的东西
						<table class="table table-striped table-sm">
							<thead>
								<tr>
									<th>id</th>
									<th>lastName</th>
									<th>email</th>
									<th>gender</th>
									<th>department</th>
									<th>date</th>
									<th>操作</th>
								</tr>
							</thead>
							<tbody>
								<tr th:each="emp:${emps}">
									<td th:text="${emp.getId()}"></td>
									<td th:text="${emp.getLastName()}"></td>
									<td th:text="${emp.getEmail()}"></td>
									<td th:text="${emp.getGender()==0?'女':'男'}"></td>
									<td th:text="${emp.getDepartment().getDepartmentName()}"></td>
									<td th:text="${#dates.format(emp.getDate(),'yyyy-MM-dd HH:mm:ss')}"></td>
									<td>
										<a class="btn btn-sm btn-primary">编辑</a>
										<a class="btn btn-sm btn-danger">删除</a>
									</td>
								</tr>
							</tbody>
						</table>
4.5 增加员工的实现
					<form  th:action="@{/emp}" method="post">
						<div class="form-group">
							<label>LastName</label>
							<input type="text" name="lastName" class="form-control" placeholder="lastname:zsr">
						</div>
						<div class="form-group">
							<label>Email</label>
							<input type="email" name="email" class="form-control" placeholder="email:xxxxx@qq.com">
						</div>
						<div class="form-group">
							<label>Gender</label><br/>
							<div class="form-check form-check-inline">
								<input class="form-check-input" type="radio" name="gender" value="1">
								<label class="form-check-label">男</label>
							</div>
							<div class="form-check form-check-inline">
								<input class="form-check-input" type="radio" name="gender" value="0">
								<label class="form-check-label">女</label>
							</div>
						</div>
						<div class="form-group">
							<label>department</label>
							<!--注意这里的name是department.id,因为传入的参数为id-->
							<select class="form-control" name="department.id">
								<option th:each="department:${departments}" th:text="${department.getDepartmentName()}" th:value="${department.getId()}"></option>
							</select>
						</div>
						<div class="form-group">
							<label>Birth</label>
							<!--springboot默认的日期格式为yy/MM/dd-->
							<input type="text" name="date" class="form-control" placeholder="birth:yyyy/MM/dd">
						</div>
						<button type="submit" class="btn btn-primary">添加</button>
					</form>
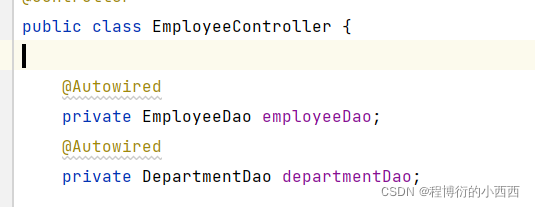
注意待用dao层别忘了自动注入Autowired
    @GetMapping("/emp")
    public String add(Model model) {
        //查出所有的部门信息,添加到departments中,用于前端接收
        Collection<Department> departments = departmentDao.getDepartments();
        model.addAttribute("departments", departments);
        return "emp/add";//返回到添加员工页面
    }


    @PostMapping("/emp")
    public String addEmp(Employee employee) {
        employeeDao.addEmployee(employee);//添加一个员工
        return "redirect:/emps";//重定向到/emps,刷新列表,返回到list页面
    }
4.6修改员工的信息
别忘了在list.html中的编辑按钮加上跳转链接
					<form th:action="@{/add}" method="post">
						<input type="hidden" name="id" th:value="${empByID.getId()}">

						<div class="form-group">
							<label>LastName</label>
							<input th:value="${empByID.getLastName()}" type="text" name="lastName" class="form-control"
								   placeholder="lastname:zsr">
						</div>
						<div class="form-group">
							<label>Email</label>
							<input th:value="${empByID.getEmail()}" type="email" name="email" class="form-control"
								   placeholder="email:xxxxx@qq.com">
						</div>
						<div class="form-group">
							<label>Gender</label><br/>
							<div class="form-check form-check-inline">
								<input th:checked="${empByID.getGender()==1}" class="form-check-input" type="radio"
									   name="gender" value="1">
								<label class="form-check-label">男</label>
							</div>
							<div class="form-check form-check-inline">
								<input th:checked="${empByID.getGender()==0}" class="form-check-input" type="radio"
									   name="gender" value="0">
								<label class="form-check-label">女</label>
							</div>
						</div>
						<div class="form-group">
							<label>department</label>
							<!--注意这里的name是department.id,因为传入的参数为id-->
							<select class="form-control" name="department.id">
								<option th:selected="${department.getId()==empByID.department.getId()}"
										th:each="department:${departments}" th:text="${department.getDepartmentName()}"
										th:value="${department.getId()}">
								</option>
							</select>
						</div>
						<div class="form-group">
							<label>Birth</label>
							<!--springboot默认的日期格式为yy/MM/dd-->
							<input th:value="${#dates.format(empByID.getDate(),'yyyy/MM/dd')}" type="text" name="date" class="form-control"
								   placeholder="birth:yy/MM/dd">
						</div>
						<button type="submit" class="btn btn-primary">修改</button>
					</form>
    //restful风格接收参数
    @RequestMapping("/edit/{id}")
    public String edit(@PathVariable("id") int id, Model model) {
        //查询指定id的员工,添加到empByID中,用于前端接收
        Employee employeeByID = employeeDao.getEmployeeByID(id);
        model.addAttribute("empByID", employeeByID);
        //查出所有的部门信息,添加到departments中,用于前端接收
        Collection<Department> departments = departmentDao.getDepartments();
        model.addAttribute("departments", departments);
        return "/emp/edit";//返回到编辑员工页面
    }


    @PostMapping("/add")
    public String EditEmp(Employee employee) {
        employeeDao.addEmployee(employee);//添加一个员工
        return "redirect:/emps";//添加完成重定向到/emps,刷新列表
    }
4.7删除一个员工信息
别忘了在list.html中的删除按钮加上跳转链接
    @GetMapping("/delete/{id}")
    public String delete(@PathVariable("id") Integer id) {
        employeeDao.deleteEmployeeByID(id);
        return "redirect:/emps";
    }
4.8自定义404页面
只需要在templates目录下新建一个error包,然后将404.html放入其中,报错SpringBoot就会自动找到这个页面
4.9注销
<a class="nav-link" th:href="@{/user/logout}">注销</a>
    @RequestMapping("/user/logout")
    public String logout(HttpSession session) {
        session.invalidate();
        return "redirect:/index.html";
    }
4.10 整个的逻辑梳理
按照controller层调dao层,controller层和前端交互
扩展Springmvc的组件:语言切换的本地解析器 + 拦截器

整个的前端与controller层之间的逻辑关系总结
登录的controller层
@Controller
public class LoginController {

    @RequestMapping("/user/login")
    public String login(@RequestParam("username") String username,
                        @RequestParam("password") String password,
                        Model model,
                        HttpSession session){

        //如果用户名和密码正确(就根据用户名来注册seesion)
        if ("admin".equals(username) && "123456".equals(password)){
            //只有用户名和密码正确的才会获得session
            session.setAttribute("loginUser",username);
            return "redirect:/main.html";//跳转到dashboard页面(重定向--保证安全型)
        }

        //如果用户名或者密码不正确
        else {
            model.addAttribute("msg", "用户名或者密码错误");//显示错误信息
            return "index";//跳转到首页
        }
    }
}
员工增删改查的controller层
@Controller
public class EmployeeController {

    @Autowired
    private EmployeeDao employeeDao;
    @Autowired
    private DepartmentDao departmentDao;


    //来自于主页的侧边栏公共部分点击“员工列表”的跳转到列表list.html的控制
    @RequestMapping("/emps")
    public String list(Model model) {
        Collection<Employee> employees = employeeDao.getAllEmployees();
        model.addAttribute("emps",employees);
        return "emp/list";//返回到list页面
    }

    //在list.html中,我们点击“添加员工列表”希望跳转到add.html的页面
    @GetMapping("/emp")
    public String add(Model model) {
        //查出所有的部门信息,添加到departments中,用于前端接收
        Collection<Department> departments = departmentDao.getDepartments();
        model.addAttribute("departments", departments);
        return "emp/add";//返回到添加员工页面
    }

    //在add.html中我们添加完后,提交能够重定向至员工列表的页面list.html
    @PostMapping("/emp")
    public String addEmp(Employee employee) {
        employeeDao.addEmployee(employee);//添加一个员工
        return "redirect:/emps";//重定向到/emps,刷新列表,返回到list页面
    }


    //在list.html中,我们点击“编辑”希望跳转到edit.html的页面
    //restful风格接收参数
    @RequestMapping("/edit/{id}")
    public String edit(@PathVariable("id") int id, Model model) {
        //查询指定id的员工,添加到empByID中,用于前端接收
        Employee employeeByID = employeeDao.getEmployeeByID(id);
        model.addAttribute("empByID", employeeByID);
        //查出所有的部门信息,添加到departments中,用于前端接收
        Collection<Department> departments = departmentDao.getDepartments();
        model.addAttribute("departments", departments);
        return "/emp/edit";//返回到编辑员工页面
    }

    //在edit.html中我们编辑修改完后,提交能够重定向至员工列表的页面list.html
    @PostMapping("/add")
    public String EditEmp(Employee employee) {
        employeeDao.addEmployee(employee);//添加一个员工
        return "redirect:/emps";//添加完成重定向到/emps,刷新列表
    }


    //在list.html中,我们点击“删除”希望重定向到list.html的页面
    @GetMapping("/delete/{id}")
    public String delete(@PathVariable("id") Integer id) {
        employeeDao.deleteEmployeeByID(id);
        return "redirect:/emps";
    }

    @RequestMapping("/user/logout")
    public String logout(HttpSession session) {
        //搞掉session
        session.invalidate();
        return "redirect:/index.html";
    }


}
5. 整合JDBC(jdbctemplate)–不重要
6.整合Druid(阿里巴巴的数据库连接池)
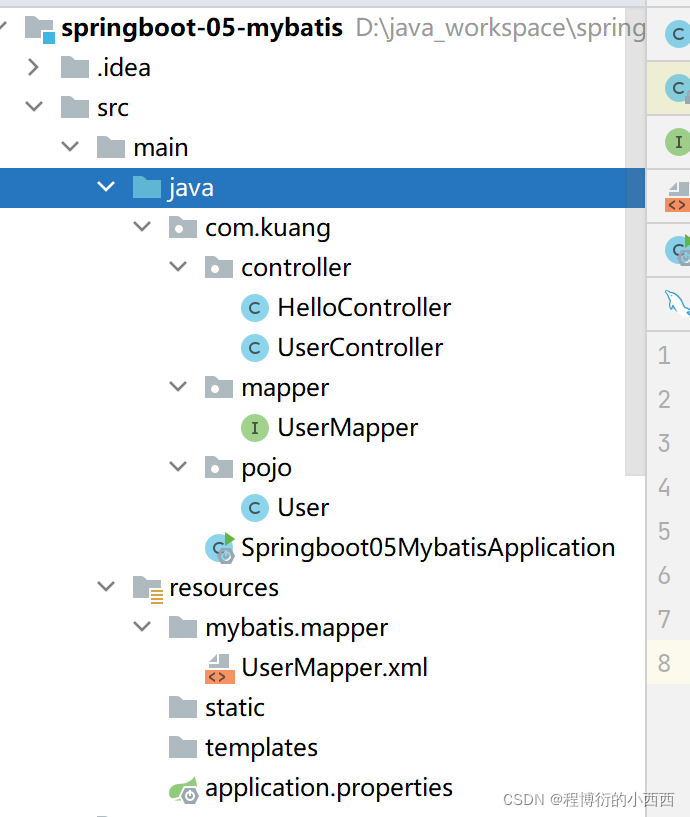
7.整合mybatis
我发现我第一遍做错了(HellloController测试了一遍),后来删了重新来了一遍
UserMapper.xml实现需要别名+注册绑定mapper.xml(文件路径别写错了)
spring.datasource.username=root
spring.datasource.password=111111
spring.datasource.url=jdbc:mysql://localhost:3306/db1?serverTimezone=UTC&useUnicode=true&characterEncoding=utf-8
spring.datasource.driver-class-name=com.mysql.cj.jdbc.Driver

mybatis.type-aliases-package=com.kuang.pojo
mybatis.mapper-locations=classpath:mybatis/mapper/*.xml
dao/mapper层调用pojo层,使用@Repository注解
@Mapper
@Repository
public interface UserMapper {
    List<User> queryUserList();
}
controller层调用dao层
@Controller
public class UserController {
    @Autowired
    UserMapper userMapper;
    @RequestMapping("/u")
    @ResponseBody
    public List<User> queryUserList(){
        List<User> users = userMapper.queryUserList();
        return users;

    }
}

8.Spring Security(都是现成的东西 ,调用API即可—理清功能逻辑)–安全框架
        <!--thymeleaf和spring-security的一些包-->
        <dependency>
            <groupId>org.thymeleaf</groupId>
            <artifactId>thymeleaf-spring5</artifactId>
        </dependency>
        <dependency>
            <groupId>org.thymeleaf.extras</groupId>
            <artifactId>thymeleaf-extras-java8time</artifactId>
        </dependency>

        <dependency>
            <groupId>org.springframework.boot</groupId>
            <artifactId>spring-boot-starter-security</artifactId>
        </dependency>


        <dependency>
            <groupId>org.thymeleaf.extras</groupId>
            <artifactId>thymeleaf-extras-springsecurity5</artifactId>
        </dependency>

8.1注意自定义API与框架现成API的区分
自己的登陆页面和springsecurity的登陆页面不同
springsecurity:url:“8080/login”
http.formLogin();

自己定义的:url:“8080/tologin”
http.formLogin().loginPage("/toLogin");//定制自己的登陆页面
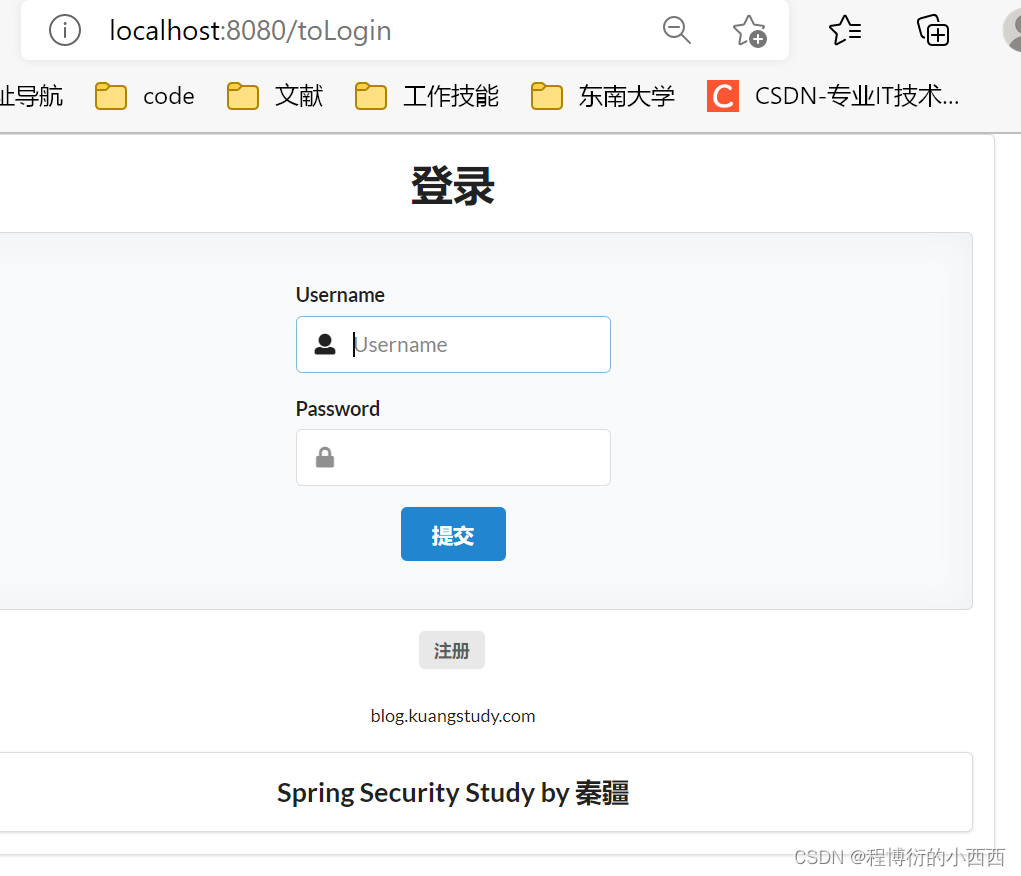
注意使用自己定制的登陆页面还需要注意login.html中表单提交的登陆地址!!!具体注意点看狂神的笔记,显然springsecurity的自带的login更加方便,自定义的需要很多的注意点
8.2 登陆认证与访问权限的配置类
@EnableWebSecurity
public class SecurityConfig extends WebSecurityConfigurerAdapter {


    //用户登录认证的方法
    @Override
    protected void configure(AuthenticationManagerBuilder auth) throws Exception {
        //在内存中定义,也可以在jdbc中去拿....
        auth.inMemoryAuthentication().passwordEncoder(new BCryptPasswordEncoder())
                .withUser("kuangshen").password(new BCryptPasswordEncoder().encode("123456")).roles("vip2","vip3")
                .and()
                .withUser("root").password(new BCryptPasswordEncoder().encode("123456")).roles("vip1","vip2","vip3")
                .and()
                .withUser("guest").password(new BCryptPasswordEncoder().encode("123456")).roles("vip1");
    }


    //链式编程,用户登录后相关页面的授权的方法
    @Override
    protected void configure(HttpSecurity http) throws Exception {
        // 定制请求的授权规则
        // 首页所有人可以访问
        http.authorizeRequests().antMatchers("/").permitAll()
                .antMatchers("/level1/**").hasRole("vip1")
                .antMatchers("/level2/**").hasRole("vip2")
                .antMatchers("/level3/**").hasRole("vip3");

        // 开启自动配置的登录功能
        // 没有权限进入登录页
        // /login?error 重定向到这里表示登录失败
        http.formLogin()
                .usernameParameter("username")
                .passwordParameter("password")
                .loginPage("/toLogin").loginProcessingUrl("/lg");//定制自己的登陆页面

        http.csrf().disable();//关闭csrf功能:跨站请求伪造,默认只能通过post方式提交logout请求

        //开启自动注销功能,并跳转到首页
        http.logout().logoutSuccessUrl("/");

//        记住我:cookie的实现(默认保存两周),自定义接收前端的参数
        http.rememberMe().rememberMeParameter("remember");
    }


}
@Controller
public class RouterController {
    @RequestMapping({"/","/index"})
    public String index(){
        return "index";
    }

    @RequestMapping("/toLogin")
    public String toLogin(){
        return "views/login";
    }

    @RequestMapping("/level1/{id}")
    public String level1(@PathVariable("id") int id){
        return "views/level1/"+id;
    }

    @RequestMapping("/level2/{id}")
    public String level2(@PathVariable("id") int id){
        return "views/level2/"+id;
    }

    @RequestMapping("/level3/{id}")
    public String level3(@PathVariable("id") int id){
        return "views/level3/"+id;
    }
}
9. Shiro(对比Spring Security)简单的安全框架–整合了数据库Mybatis的版本
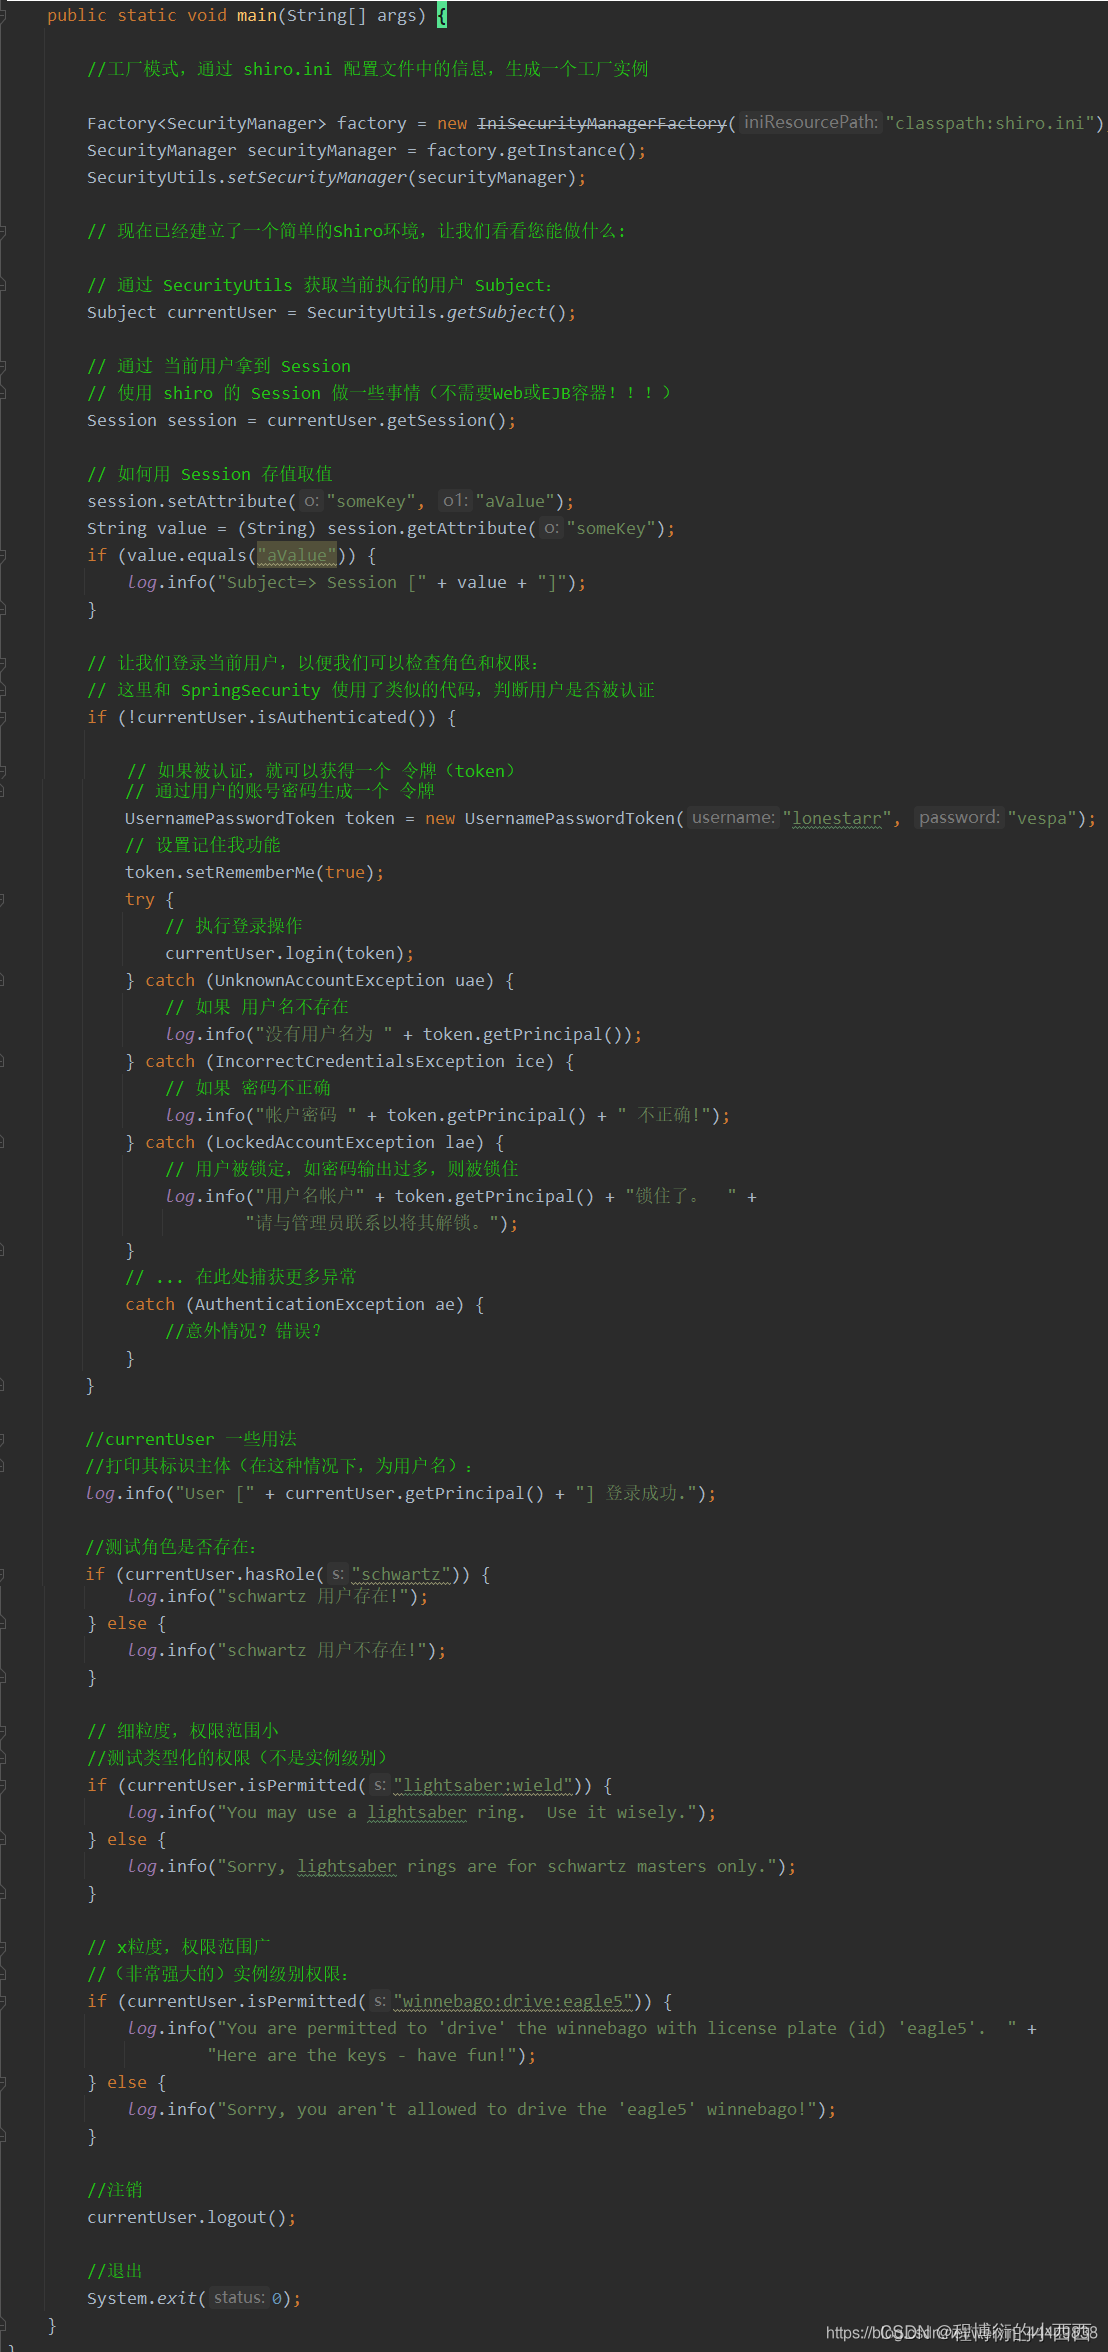
9.1 具体的shiro的原理
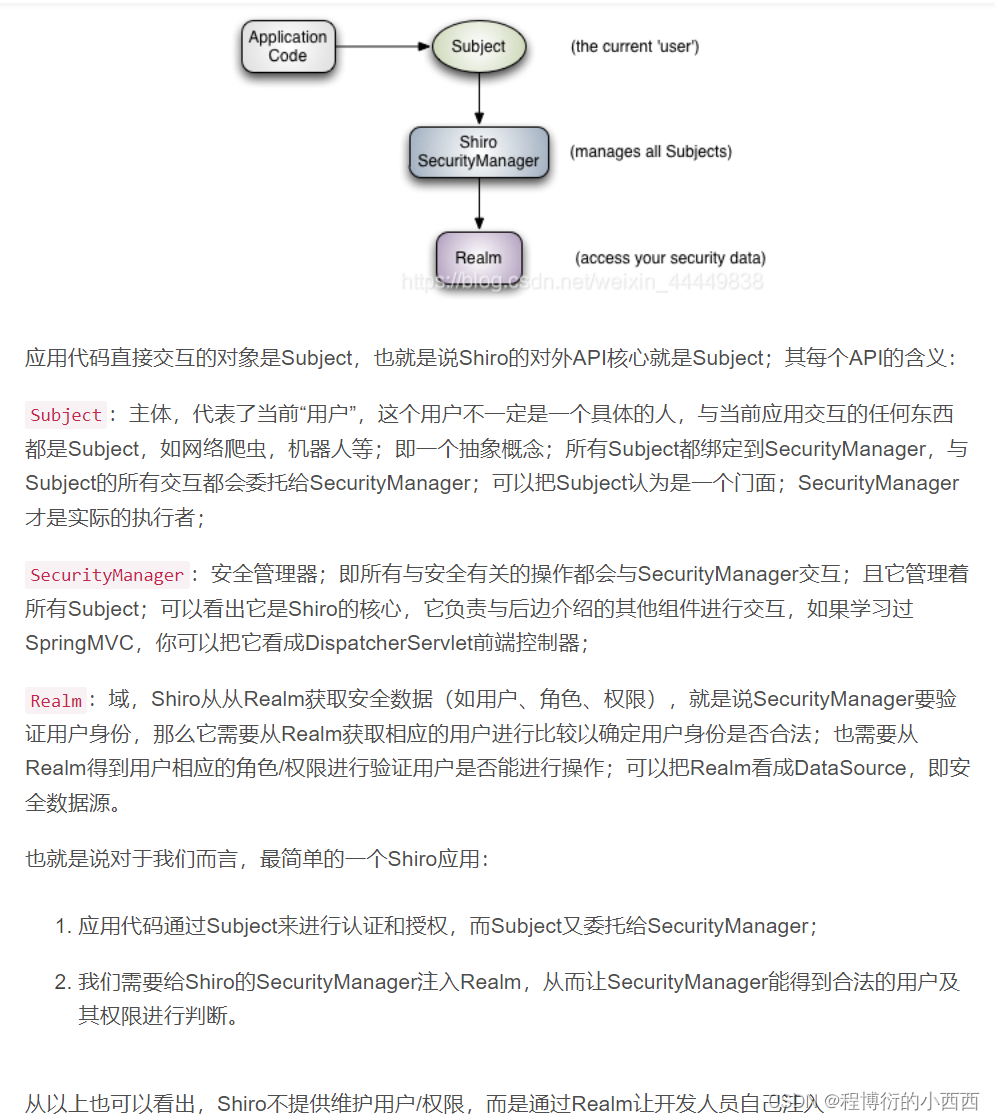
总体了解
9.2 具体的实现逻辑代码(注意和前端以及数据库的交互—所以这个是个mybatis的框架)
自定义Realm,来自定义用户的登录认证 和 用户访问的授权
//自定义一个realm
public class UserRealm extends AuthorizingRealm {

    @Autowired
    UserService userService;

    //用户登录的认证
    @Override
    protected AuthenticationInfo doGetAuthenticationInfo(AuthenticationToken authenticationToken) throws AuthenticationException {
        //打印一个提示
        System.out.println("执行了认证方法");

        //通过参数获取登录的控制器中生成的 令牌
        UsernamePasswordToken token = (UsernamePasswordToken) authenticationToken;


        // 用户名密码--连接真实的数据库(数据库中的用户都是合法的用户--秒a)
        User user = userService.queryUserByName(token.getUsername());

        //用户名认证
        if (user==null){
            // return null 就表示控制器中抛出的相关异常
            return null;
        }


        Subject  currentSubject= SecurityUtils.getSubject();
        Session session = currentSubject.getSession();
        session.setAttribute("loginUser",user);


        //密码认证, Shiro 自己做,为了避免和密码的接触
        //最后返回一个 AuthenticationInfo 接口的实现类,这里选择 SimpleAuthenticationInfo
        // 三个参数:获取当前用户的认证 ; 密码 ; 认证名
        return new SimpleAuthenticationInfo(user, user.getPwd(), "");
    }


    //用户登录后相关操作的授权
    @Override
    protected AuthorizationInfo doGetAuthorizationInfo(PrincipalCollection principalCollection) {
        //打印一个提示
        System.out.println("执行了授权方法");
        SimpleAuthorizationInfo info = new SimpleAuthorizationInfo();


        //拿到登陆的用户对象
        Subject subject = SecurityUtils.getSubject();
        //来自于下面的认证里的user(shiro自己设计的两个方法的联动)
        User curUser = (User) subject.getPrincipal();
        info.addStringPermission(curUser.getPerms());

        return info;
    }


}
shiro的三要素:注意三者之间的对接—使用bean-name+Qualifier注解来联动
@Configuration
public class ShiroConfig {

//   subject -> ShiroFilterFactoryBean
    @Bean(name="shiroFilterFactoryBean")
    public ShiroFilterFactoryBean getShiroFilterFactoryBean(@Qualifier("DefaultWebSecurityManager") DefaultWebSecurityManager defaultWebSecurityManager){
        ShiroFilterFactoryBean bean = new ShiroFilterFactoryBean();
    //关联securityManager,设置安全管理器
        bean.setSecurityManager(defaultWebSecurityManager);


        //添加 Shiro 的内置过滤器拦截=======================
        /*
            anon : 无需认证,就可以访问
            authc : 必须认证,才能访问
            user : 必须拥有 “记住我”功能才能用
            perms : 拥有对某个资源的权限才能访问
            role : 拥有某个角色权限才能访问
         */
        Map<String, String> filterMap = new LinkedHashMap<>();


        // 设置 /user/ 下面的所有请求,只有认证过才能访问(没有认证就去登陆页面)
        filterMap.put("/user/*","authc");

        //授权的操作
        filterMap.put("/user/add","perms[user:add]");
        filterMap.put("/user/update","perms[user:update]");


        bean.setFilterChainDefinitionMap(filterMap);

        bean.setLoginUrl("/toLogin");//认证通过的用户可以进入登陆页面

        bean.setUnauthorizedUrl("/unauth");//设置没有授权的跳转页面


        return bean;

    }


//    securityManager -> DefaultWebSecurityManager
    @Bean(name="DefaultWebSecurityManager")
    public DefaultWebSecurityManager getDefaultWebSecurityManager(@Qualifier("userRealm1") UserRealm userRealm){
        DefaultWebSecurityManager securityManager = new DefaultWebSecurityManager();
        //关联realm
        securityManager.setRealm(userRealm);
        return securityManager;

    }


//    创建realm对象,需要自定义类(被spring托管)---用于实现用户的认证
    @Bean
   public UserRealm userRealm1(){
       return new UserRealm();
   }

//   整合shiroDialect:用来整合shiro-thymeleaf
    @Bean
    public ShiroDialect getShiroDialect(){
        return new ShiroDialect();

    }

}
controller层的设置(用于前端与数据库以及shiro的安全框架之间的交互)
@Controller
public class Mycontroller {
    @RequestMapping({"/","/index"})
    public String toIndex(Model model){
        model.addAttribute("msg","hello");
        return "index";
    }

    @RequestMapping("/user/add")
    public String add(){
        return "user/add";
    }


    @RequestMapping("/user/update")
    public String update(){
        return "user/update";
    }

    @RequestMapping("/toLogin")
    public String toLogin(){
        return "login";
    }


    //登录的方法(这个实际上是post请求)
    @RequestMapping("/login")
    public String login(String username, String password, Model model) {
        //获取当前用户
        Subject subject = SecurityUtils.getSubject();

        //封装用户的登录数据,获得(制作成)令牌
        UsernamePasswordToken token = new UsernamePasswordToken(username, password);

        //登录 及 异常处理
        try {
            //用户登录
            subject.login(token);

            return "index";
        } catch (UnknownAccountException uae) {
            //如果用户名不存在
            System.out.println("用户名不存在");
            model.addAttribute("exception", "用户名不存在");
            return "login";
        } catch (IncorrectCredentialsException ice) {
            //如果密码错误
            System.out.println("密码错误");
            model.addAttribute("exception", "密码错误");
            return "login";
        }

    }


    //未授权的页面
    @RequestMapping("/unauth")
    @ResponseBody
    public String unauthorized(){
        return "未经授权无法访问该页面";

    }

}
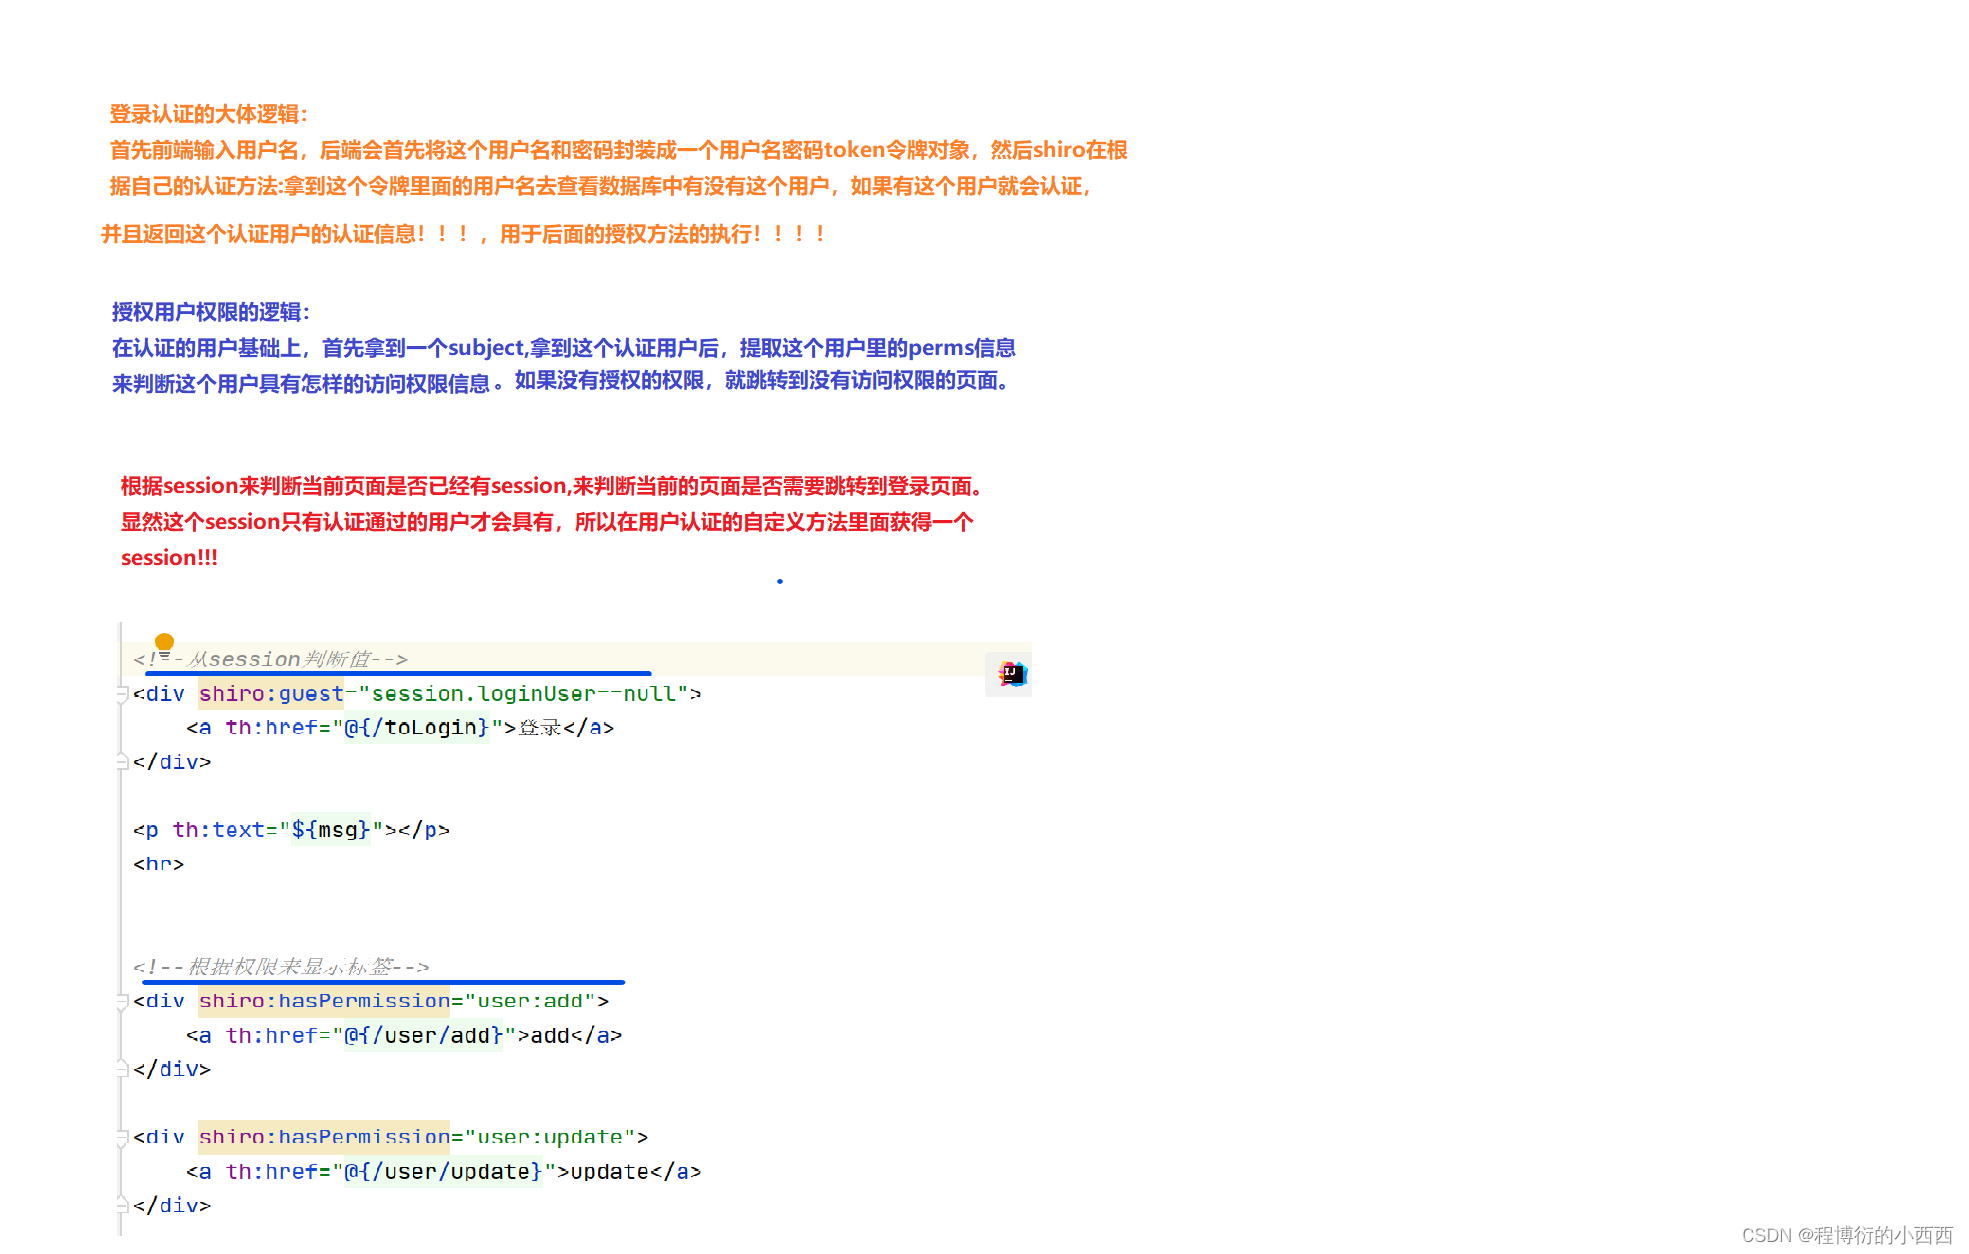
9.3 大体的认证与权限的安全设置的逻辑
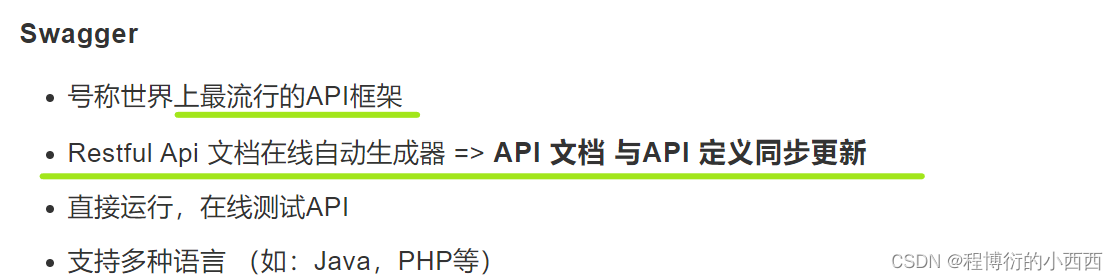
10.Swagger(API在线文档的框架)–随着代码的改变实时更新API文档
解决版本之间不兼容问题
spring.mvc.pathmatch.matching-strategy=ant_path_matcher
不容易a
        <dependency>
            <groupId>io.springfox</groupId>
            <artifactId>springfox-swagger2</artifactId>
            <version>2.9.2</version>
        </dependency>
        <dependency>
            <groupId>io.springfox</groupId>
            <artifactId>springfox-swagger-ui</artifactId>
            <version>2.9.2</version>
        </dependency>
10.1设置要显示的配置环境的swagger–swagger开关的应用
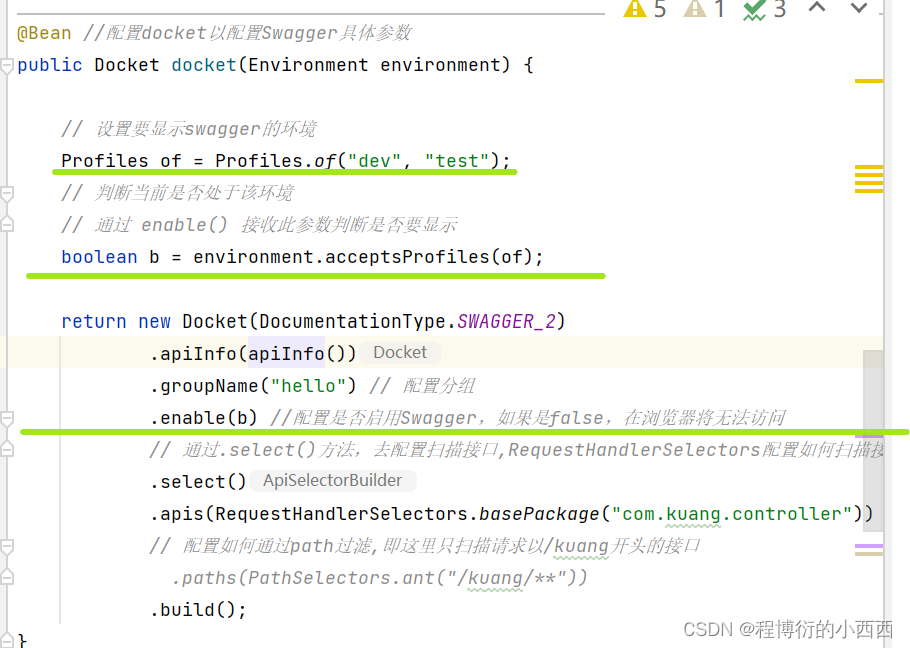
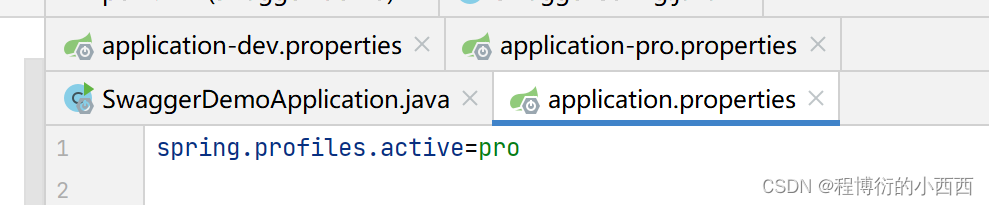
显然在ipro的配置环境下,不会显示swagger
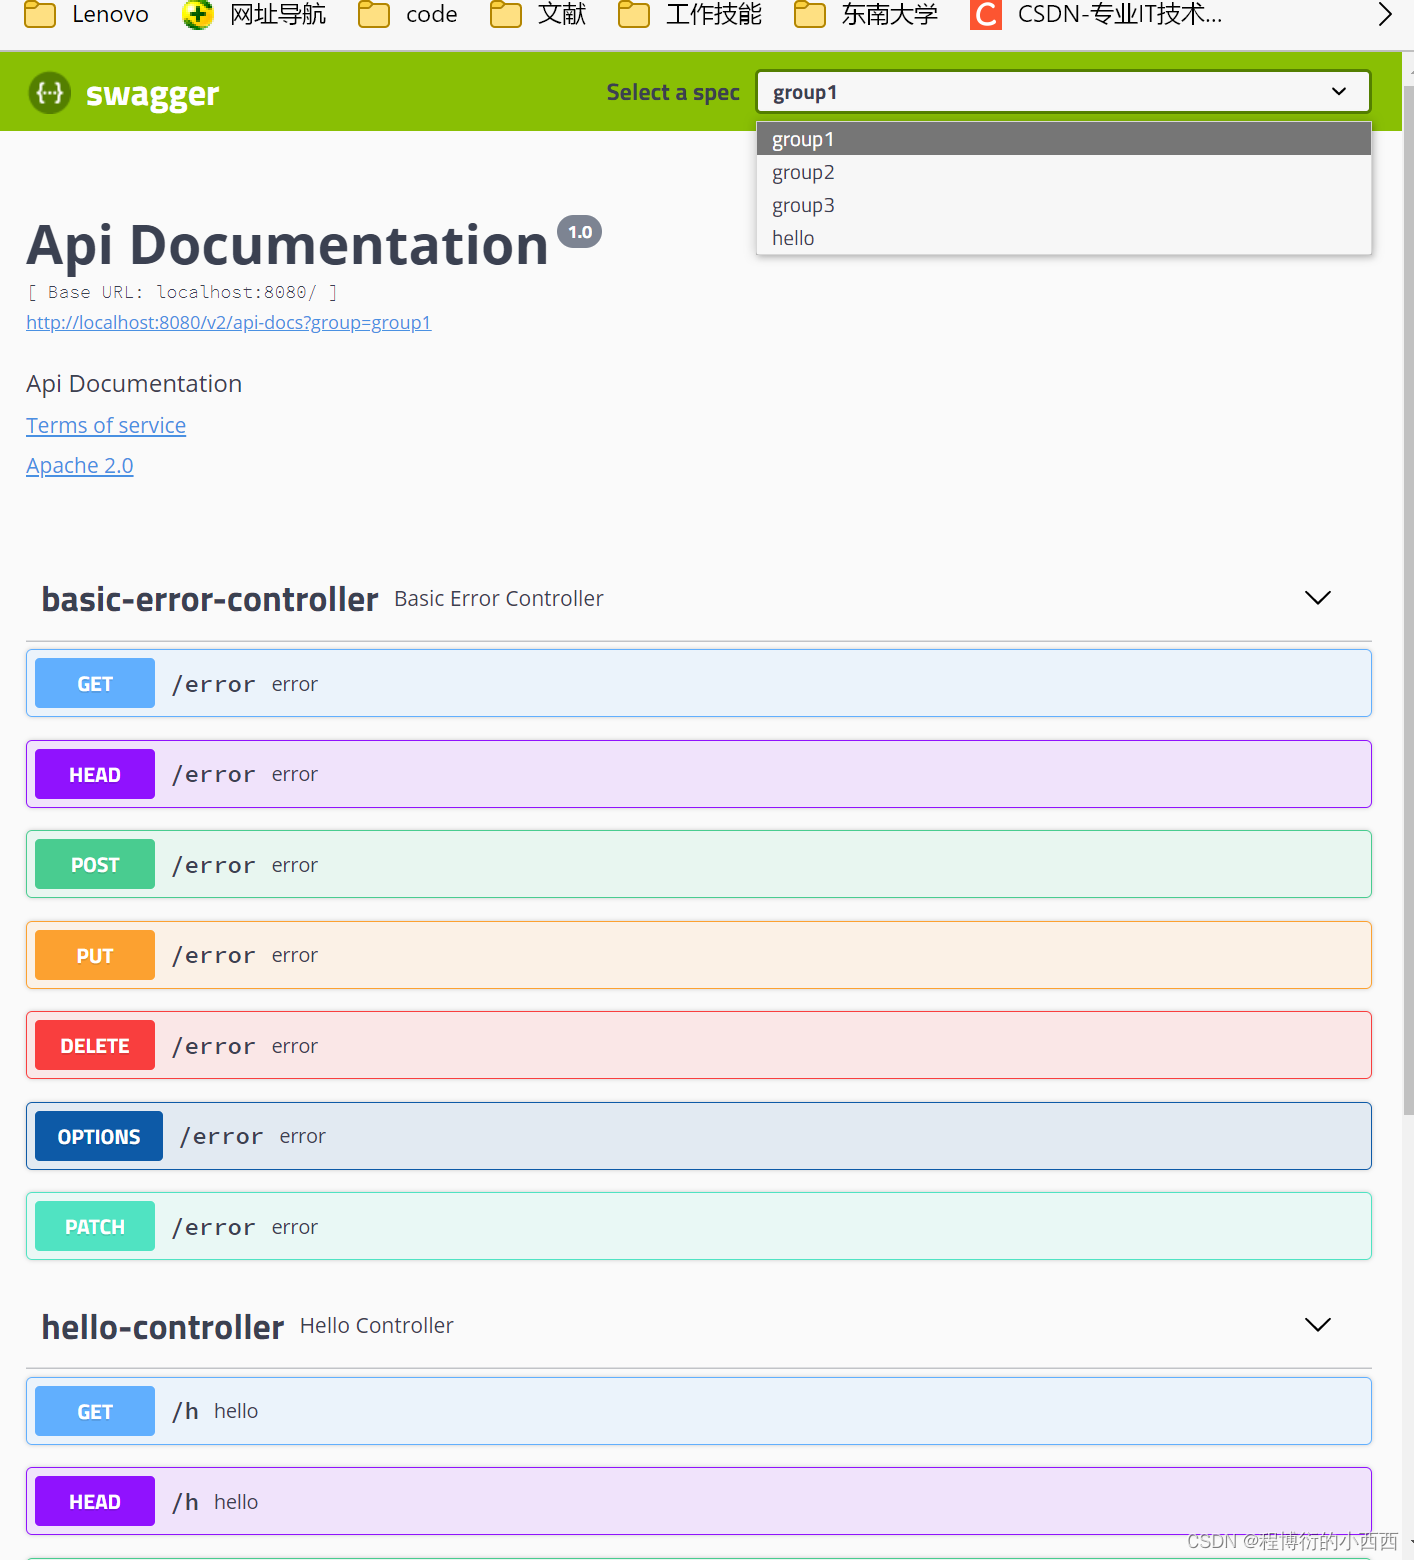
10.2 设置API文档的分组
配置多个分组只需要配置多个docket(不要重名)即可:
@Bean
public Docket docket1(){
   return new Docket(DocumentationType.SWAGGER_2).groupName("group1");
}
@Bean
public Docket docket2(){
   return new Docket(DocumentationType.SWAGGER_2).groupName("group2");
}
@Bean
public Docket docket3(){
   return new Docket(DocumentationType.SWAGGER_2).groupName("group3");
}
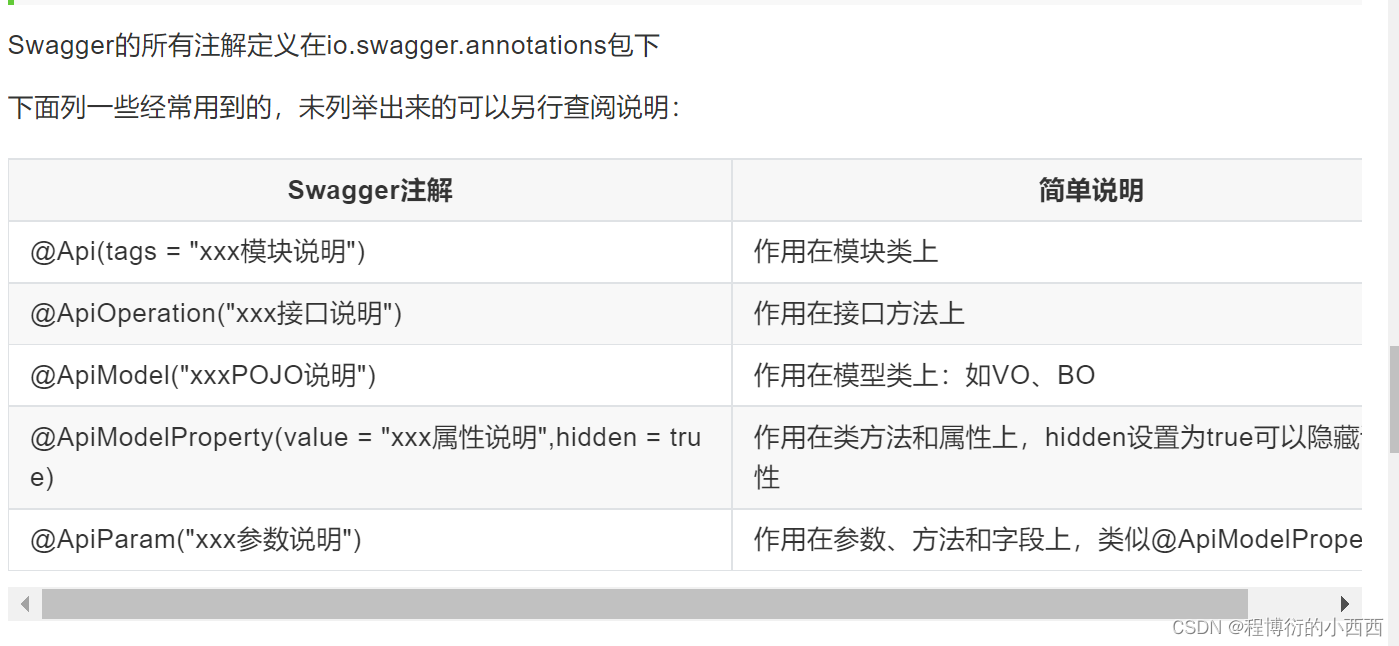
10.3swagger给API注释的注解
11.异步、定时、邮件(使用对应的注解)
12.分布式:Dubbo和Zookeeper+Springboot集成
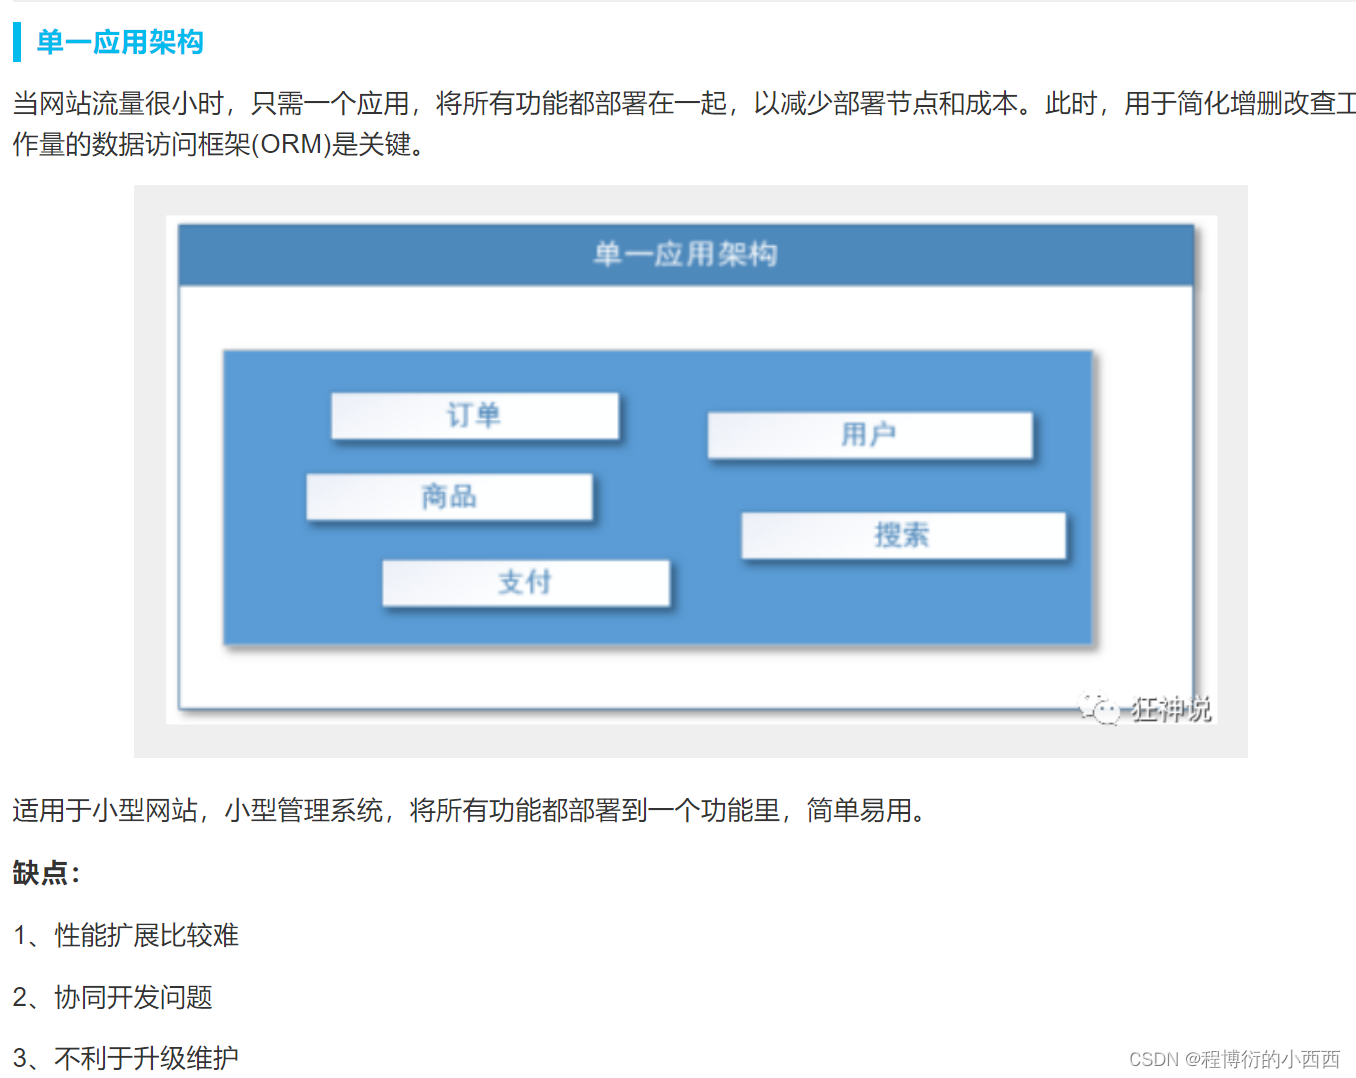
12.1分布式架构
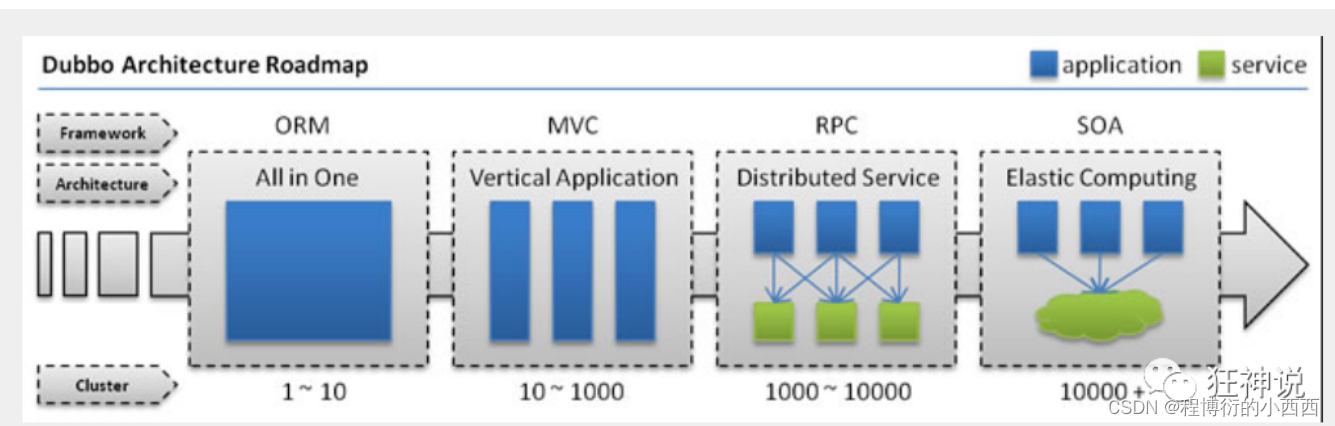
mvc三层架构:
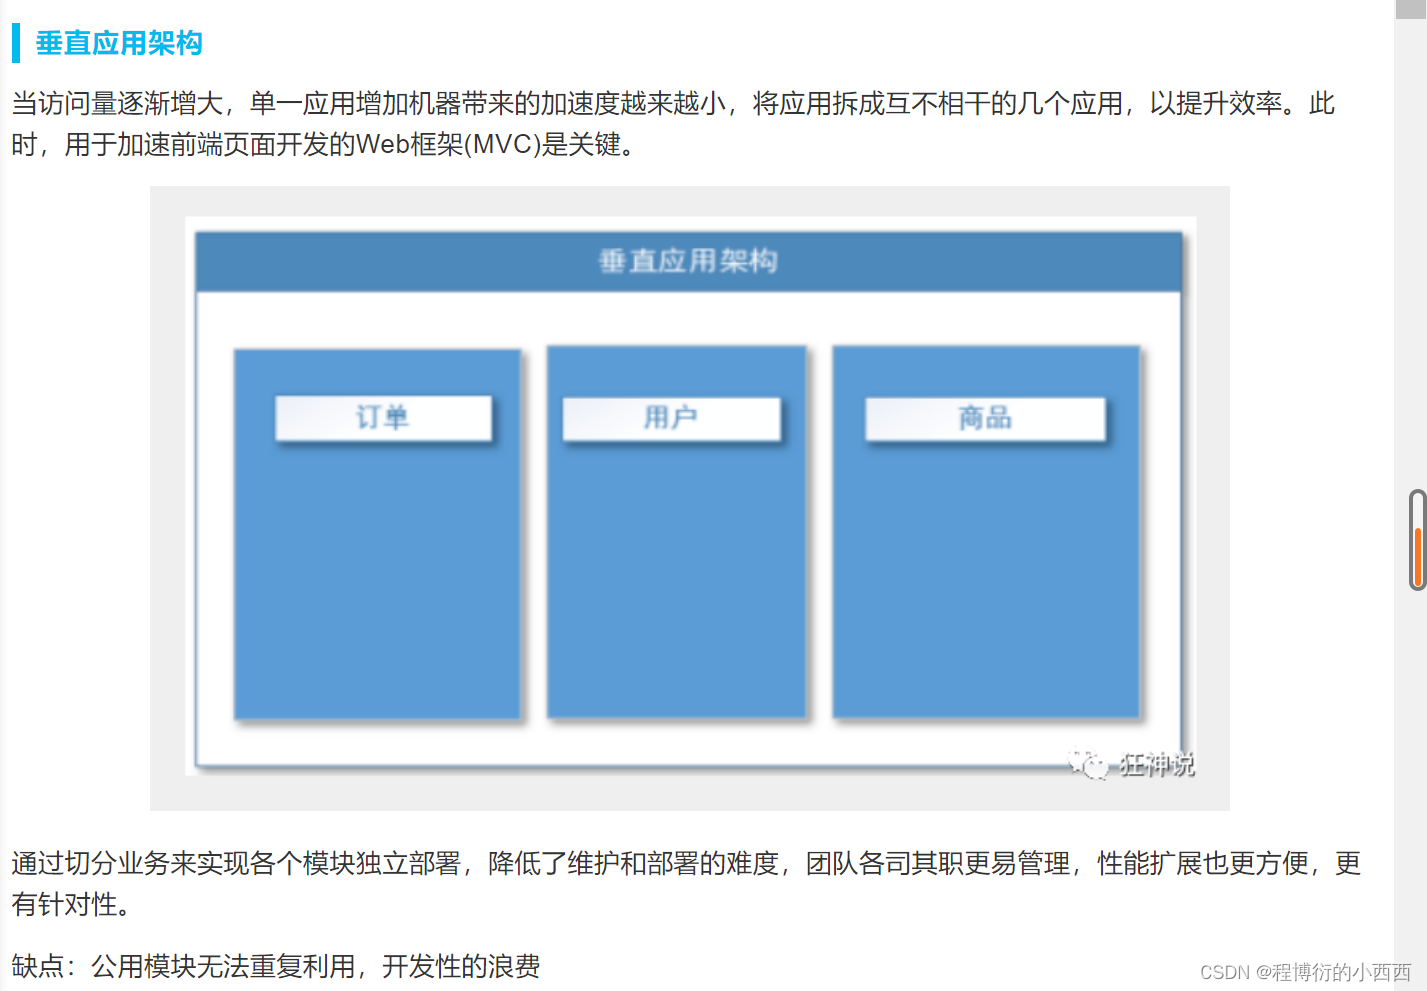
RPC:分布式服务架构
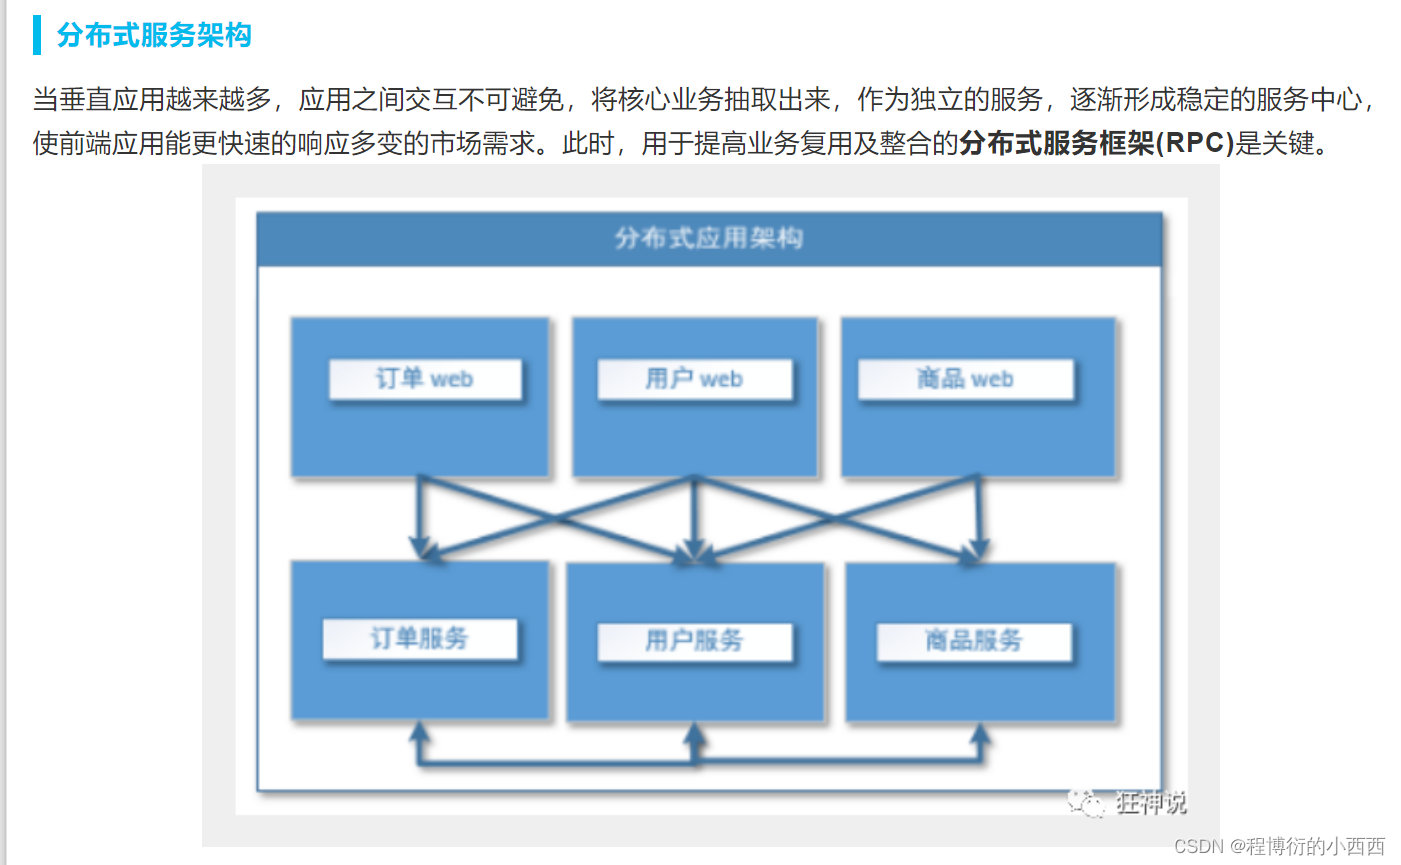
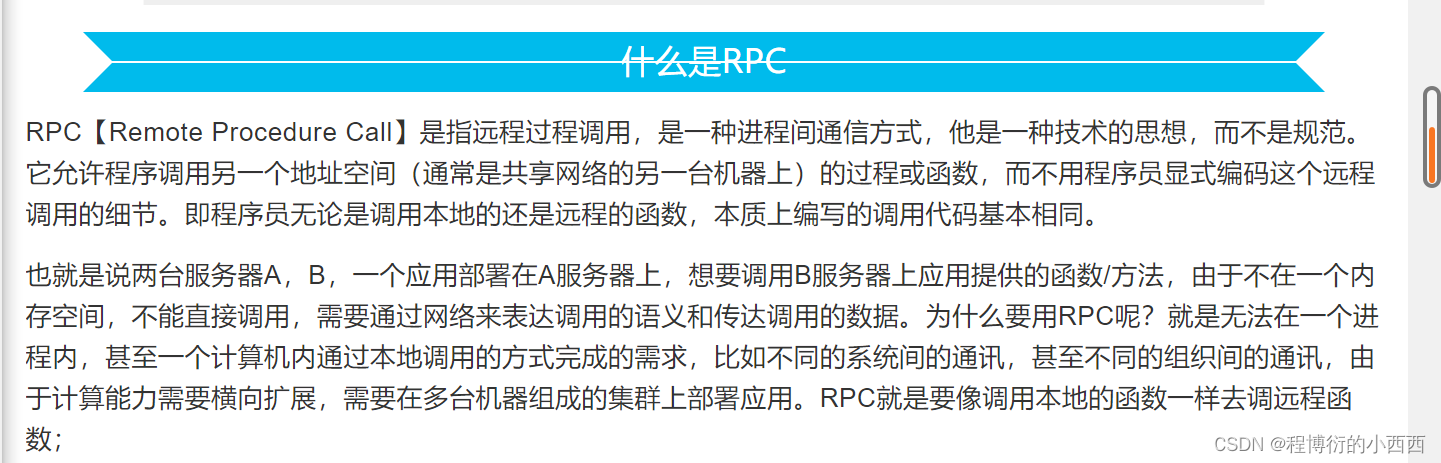
12.2 RPC 远程过程调用
12.3 Dubbo(Java RPC框架)

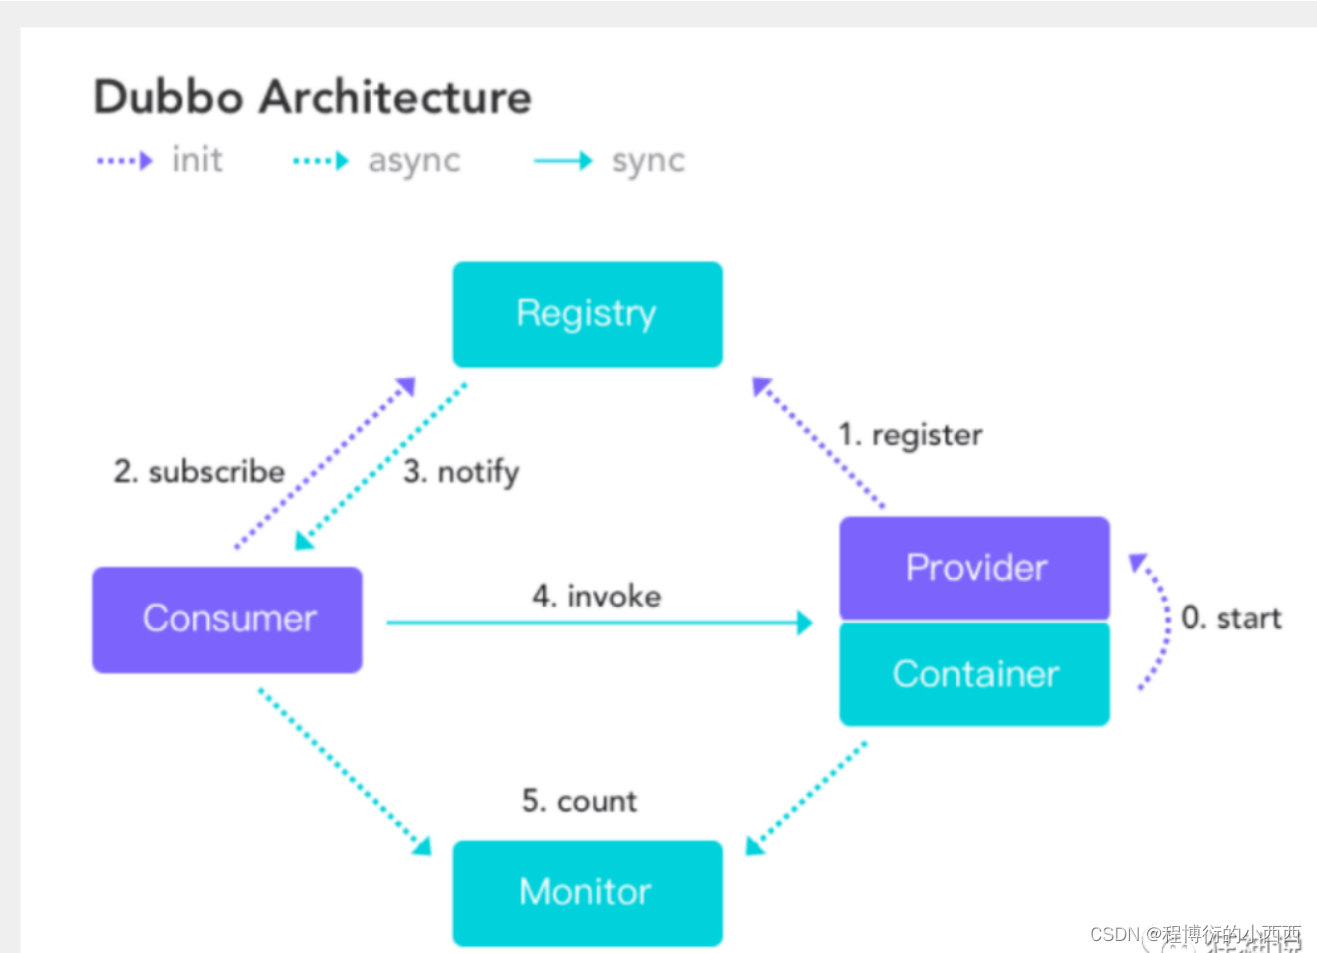

我zookeeper安装3.4失败了,3.7貌似成功了
主要是两个独立项目之间的联动,利用zookeeprer作为中间人存储一定的信息


 654
654

 被折叠的 条评论
为什么被折叠?
被折叠的 条评论
为什么被折叠?
 到【灌水乐园】发言


