


 本文深入探讨了Python中进程和线程的实现方式,包括多进程的创建与管理,线程的启动与同步,以及进程间通信的方法。通过具体代码示例,详细讲解了multiprocessing模块的使用,如Pool的批量任务处理,子进程的调用,以及Queue的进程间数据传递。同时,介绍了多线程环境下Lock的使用和ThreadLocal的作用。
文章目录
11 进程和线程
11.1 多进程
linux创建子进程:
import os

print('Process (%s) start...' % os.getpid())
# Only works on Unix/Linux/Mac:
pid = os.fork()
if pid == 0:
    print('I am child process (%s) and my parent is %s.' % (os.getpid(), os.getppid()))
else:
    print('I (%s) just created a child process (%s).' % (os.getpid(), pid))
运行:
Process (876) start...
I (876) just created a child process (877).
I am child process (877) and my parent is 876.
11.1.1 multiprocessing
启动一个子进程并等待其结束:
from multiprocessing import Process
import os

# 子进程要执行的代码
def run_proc(name):
    print('Run child process %s (%s)...' % (name, os.getpid()))

if __name__=='__main__':
    print('Parent process %s.' % os.getpid())
    p = Process(target=run_proc, args=('test',))
    print('Child process will start.')
    p.start()
    p.join()
    print('Child process end.')
结果:
Parent process 928.
Process will start.
Run child process test (929)…
Process end.
11.1.2 Pool
进程池的方式批量创建子进程:
from multiprocessing import Pool
import os, time, random

def long_time_task(name):
    print('Run task %s (%s)...' % (name, os.getpid()))
    start = time.time()
    time.sleep(random.random() * 3)
    end = time.time()
    print('Task %s runs %0.2f seconds.' % (name, (end - start)))

if __name__=='__main__':
    print('Parent process %s.' % os.getpid())
    p = Pool(4)
    for i in range(5):
        p.apply_async(long_time_task, args=(i,))
    print('Waiting for all subprocesses done...')
    p.close()
    p.join()
    print('All subprocesses done.')
Parent process 669.
Waiting for all subprocesses done…
Run task 0 (671)…
Run task 1 (672)…
Run task 2 (673)…
Run task 3 (674)…
Task 2 runs 0.14 seconds.
Run task 4 (673)…
Task 1 runs 0.27 seconds.
Task 3 runs 0.86 seconds.
Task 0 runs 1.41 seconds.
Task 4 runs 1.91 seconds.
All subprocesses done.
11.1.3 子进程
nslookup www.python.org:
import subprocess

print('$ nslookup www.python.org')
r = subprocess.call(['nslookup', 'www.python.org'])
print('Exit code:', r)
$ nslookup www.python.org Server: 192.168.19.4
Address: 192.168.19.4#53Non-authoritative answer: www.python.org canonical name =
python.map.fastly.net. Name: python.map.fastly.net Address:
199.27.79.223Exit code: 0
子进程还需要输入:
import subprocess

print('$ nslookup')
p = subprocess.Popen(['nslookup'], stdin=subprocess.PIPE, stdout=subprocess.PIPE, stderr=subprocess.PIPE)
output, err = p.communicate(b'set q=mx\npython.org\nexit\n')
print(output.decode('utf-8'))
print('Exit code:', p.returncode)
上面的代码相当于在命令行执行命令nslookup,然后手动输入:
set q=mx
python.org
exit
11.1.4 进程间通信
在父进程中创建两个子进程,一个往Queue里写数据,一个从Queue里读数据:
from multiprocessing import Process, Queue
import os, time, random

# 写数据进程执行的代码:
def write(q):
    print('Process to write: %s' % os.getpid())
    for value in ['A', 'B', 'C']:
        print('Put %s to queue...' % value)
        q.put(value)
        time.sleep(random.random())

# 读数据进程执行的代码:
def read(q):
    print('Process to read: %s' % os.getpid())
    while True:
        value = q.get(True)
        print('Get %s from queue.' % value)

if __name__=='__main__':
    # 父进程创建Queue,并传给各个子进程:
    q = Queue()
    pw = Process(target=write, args=(q,))
    pr = Process(target=read, args=(q,))
    # 启动子进程pw,写入:
    pw.start()
    # 启动子进程pr,读取:
    pr.start()
    # 等待pw结束:
    pw.join()
    # pr进程里是死循环,无法等待其结束,只能强行终止:
    pr.terminate()
运行结果:
Process to write: 50563
Put A to queue...
Process to read: 50564
Get A from queue.
Put B to queue...
Get B from queue.
Put C to queue...
Get C from queue.
11.2 多线程
启动一个线程:
import time, threading

# 新线程执行的代码:
def loop():
    print('thread %s is running...' % threading.current_thread().name)
    n = 0
    while n < 5:
        n = n + 1
        print('thread %s >>> %s' % (threading.current_thread().name, n))
        time.sleep(1)
    print('thread %s ended.' % threading.current_thread().name)

print('thread %s is running...' % threading.current_thread().name)
t = threading.Thread(target=loop, name='LoopThread')
t.start()
t.join()
print('thread %s ended.' % threading.current_thread().name)
11.2.1 Lock
创建一个锁:
balance = 0
lock = threading.Lock()

def run_thread(n):
    for i in range(100000):
        # 先要获取锁:
        lock.acquire()
        try:
            # 放心地改吧:
            change_it(n)
        finally:
            # 改完了一定要释放锁:
            lock.release()
11.2.2 多核CPU
11.3 ThreadLocal
import threading

# 创建全局ThreadLocal对象:
local_school = threading.local()

def process_student():
    # 获取当前线程关联的student:
    std = local_school.student
    print('Hello, %s (in %s)' % (std, threading.current_thread().name))

def process_thread(name):
    # 绑定ThreadLocal的student:
    local_school.student = name
    process_student()

t1 = threading.Thread(target= process_thread, args=('Alice',), name='Thread-A')
t2 = threading.Thread(target= process_thread, args=('Bob',), name='Thread-B')
t1.start()
t2.start()
t1.join()
t2.join()
Hello, Alice (in Thread-A)
Hello, Bob (in Thread-B)
11.4 进程 vs. 线程
11.4.1 线程切换
11.4.2 计算密集型 vs. IO密集型
11.4.3 异步IO
11.5 分布式进程
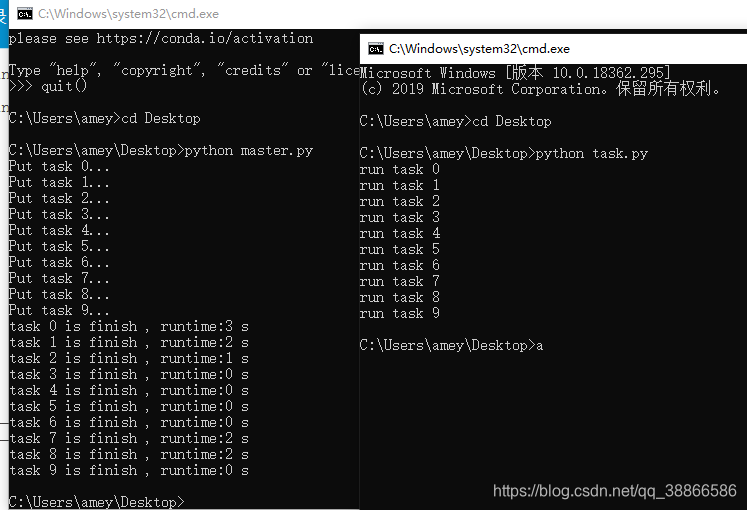
服务进程,服务进程负责启动Queue,把Queue注册到网络上,然后往Queue里面写入任务:
#!/usr/bin/env python3
# -*- coding : utf-8 -*-
# master.py for windows

import time, queue
from multiprocessing.managers import BaseManager
from multiprocessing import freeze_support

# 任务个数
task_number = 10;

# 定义收发队列
task_queue = queue.Queue(task_number);
result_queue = queue.Queue(task_number);


def gettask():
    return task_queue;


def getresult():
    return result_queue;


def test():
    # windows下绑定调用接口不能使用lambda,所以只能先定义函数再绑定
    BaseManager.register('get_task', callable=gettask);
    BaseManager.register('get_result', callable=getresult);
    # 绑定端口并设置验证码,windows下需要填写ip地址,linux下不填默认为本地
    manager = BaseManager(address=('192.168.3.163', 5002), authkey=b'123');
    # 启动
    manager.start();
    try:
        # 通过网络获取任务队列和结果队列
        task = manager.get_task();
        result = manager.get_result();

        # 添加任务
        for i in range(task_number):
            print('Put task %d...' % i)
            task.put(i);

        # 每秒检测一次是否所有任务都被执行完
        while not result.full():
            time.sleep(1);

        for i in range(result.qsize()):
            ans = result.get();
            print('task %d is finish , runtime:%d s' % ans);

    except:
        print('Manager error');
    finally:
        # 一定要关闭,否则会爆管道未关闭的错误
        manager.shutdown();


if __name__ == '__main__':
    # windows下多进程可能会炸,添加这句可以缓解
    freeze_support()
    test();
#!/usr/bin/env python3
# -*- coding : utf-8 -*-
# task.py for windows

import time, sys, queue, random
from multiprocessing.managers import BaseManager

BaseManager.register('get_task')
BaseManager.register('get_result')

conn = BaseManager(address=('192.168.3.163', 5002), authkey=b'123');

try:
    conn.connect();
except:
    print('连接失败');
    sys.exit();

task = conn.get_task();
result = conn.get_result();

while not task.empty():
    n = task.get(timeout=1);
    print('run task %d' % n);
    sleeptime = random.randint(0, 3);
    time.sleep(sleeptime);
    rt = (n, sleeptime);
    result.put(rt);

if __name__ == '__main__':
    pass;


 2056
2056

 被折叠的 条评论
为什么被折叠?
被折叠的 条评论
为什么被折叠?
 到【灌水乐园】发言


