


新建裸机项目
-
目录结构
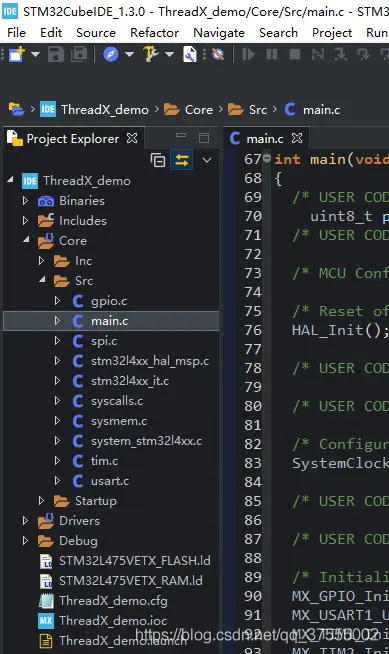 image
image - 主函数
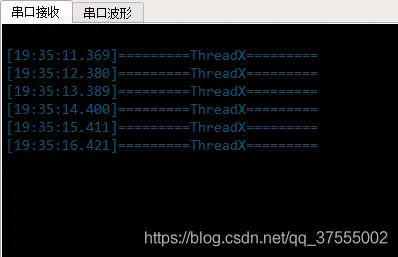
int main(void)
{
  /* USER CODE BEGIN 1 */
    uint8_t pData[]="=========ThreadX========= ";
  /* USER CODE END 1 */
  .......
  .......
  .......
  /* Infinite loop */
  /* USER CODE BEGIN WHILE */
  while (1)
  {
      HAL_UART_Transmit(&huart1, pData, sizeof(pData), HAL_MAX_DELAY);
      HAL_Delay(1000);
    /* USER CODE END WHILE */

    /* USER CODE BEGIN 3 */
  }
  /* USER CODE END 3 */
}
image
ThreadX 源码
git clone https://github.com/azure-rtos/threadx.git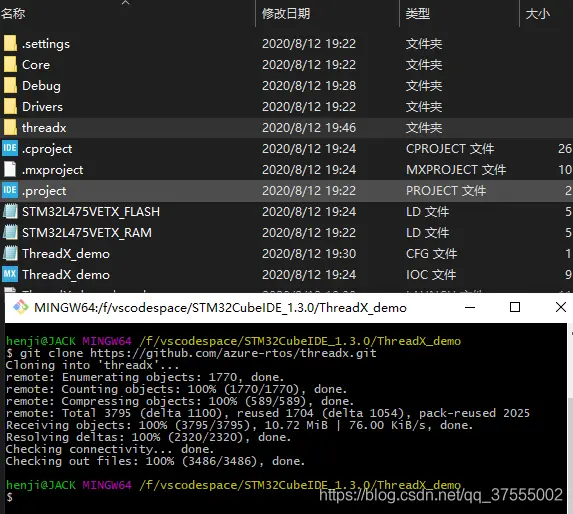
image
- 主要的两个文件
| 文件夹 | 内容 |
|---|---|
| common | 源码 |
| ports | 移植文件 |
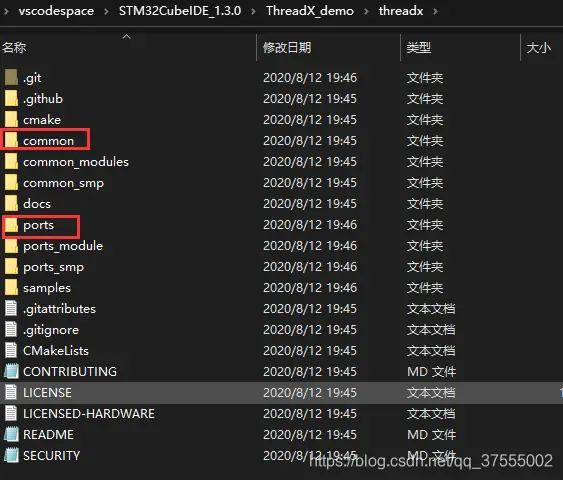
image
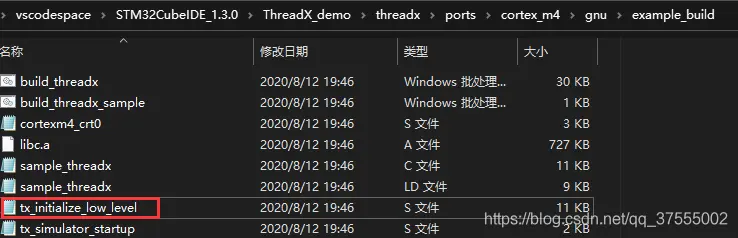
找到
threadx\ports\cortex_m4\gnu\example_build
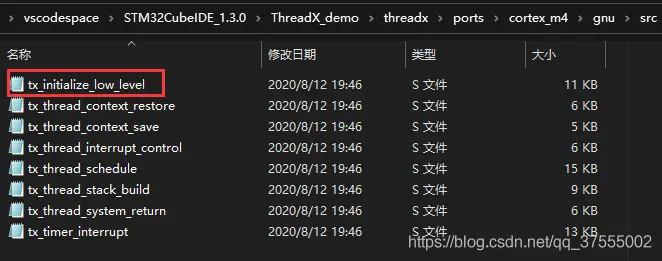
把tx_initialize_low_level.S文件复制到
\threadx\ports\cortex_m4\gnu\src
image
image
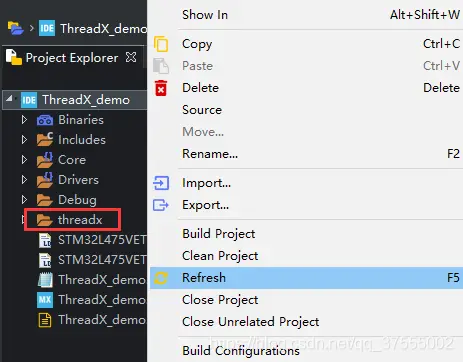
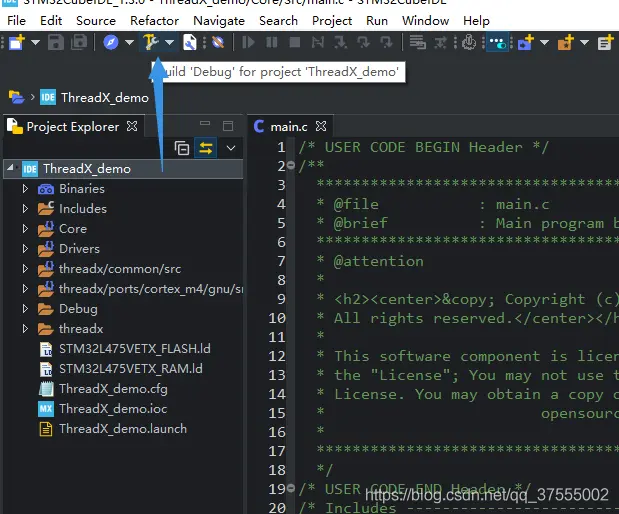
- 回到STM32CubeIDE reflesh 工程
image
- 开始添加编译
image
image
image
image
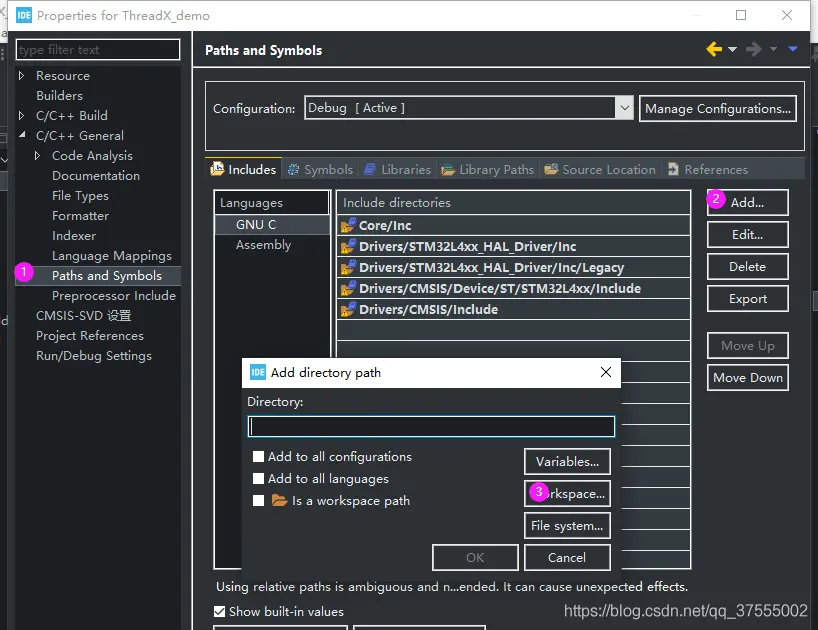
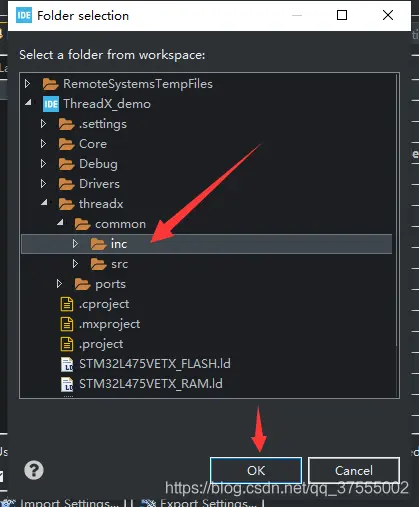
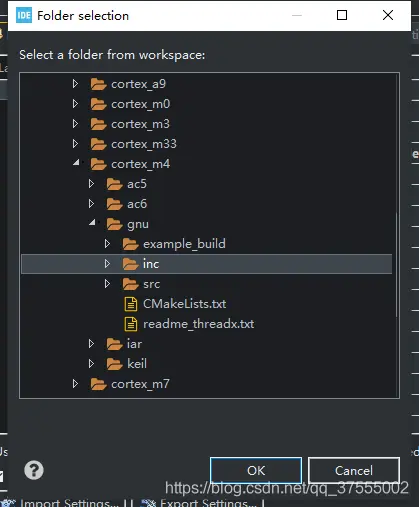
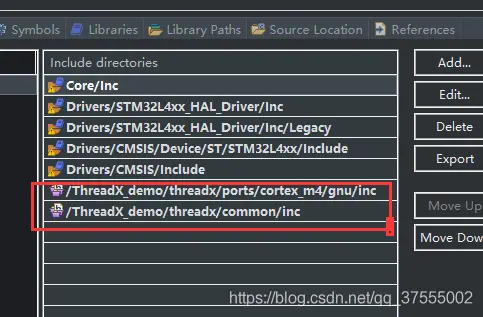
-
添加的两个头文件路径
 image
image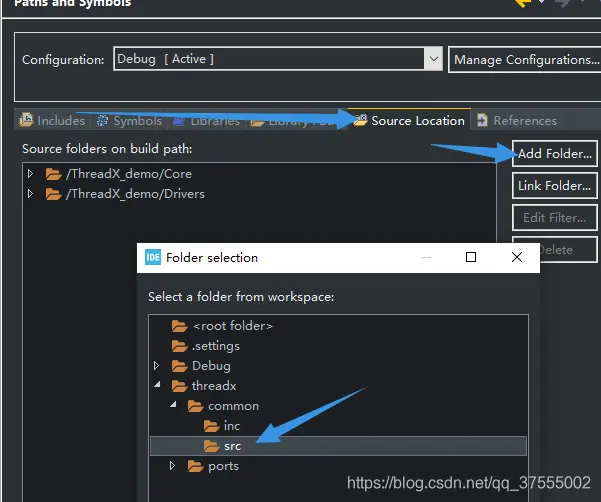 image
image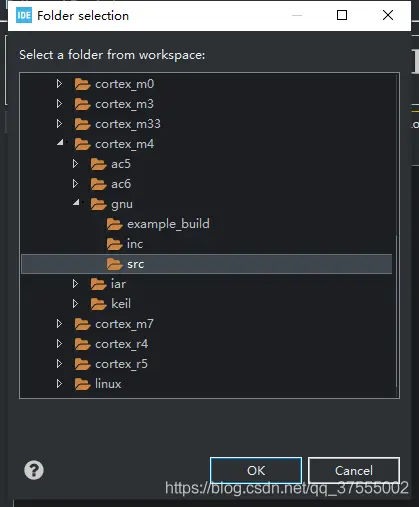 image
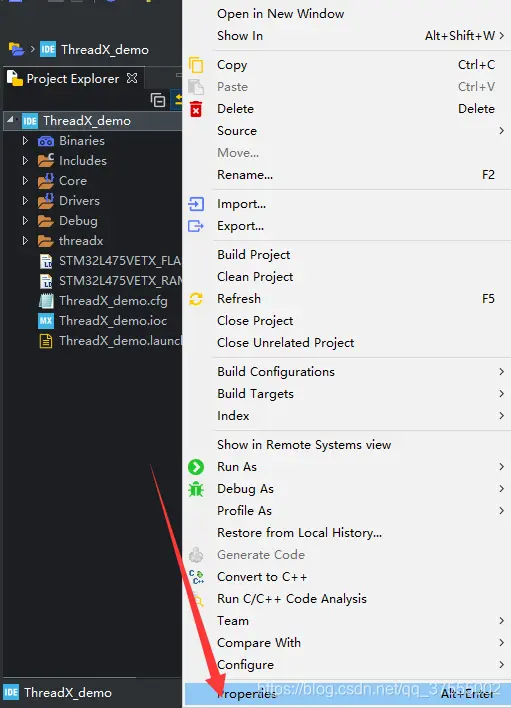
image -
添加上的源码路径
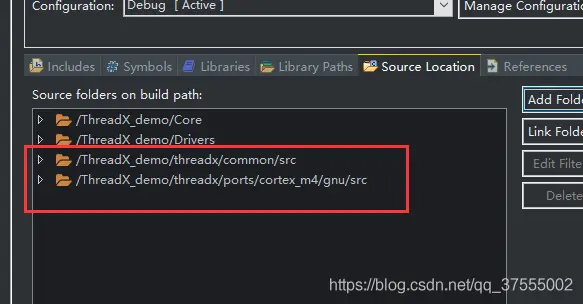 image
image
修改文件
image
不出意外肯定是会报错的(移植怎么可能什么都不改是吧)
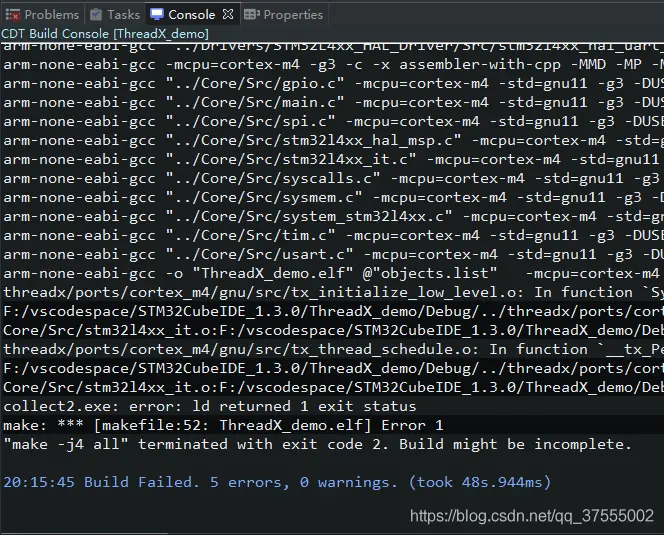
image
看下具体的错误,啊,原来是重复定义了,被threadx接管了,那么只要把它注释掉在编译。
[图片上传失败...(image-e9873b-1598410223670)]

image
果不其然 error 又出现了(哪有注释几行就完事了)
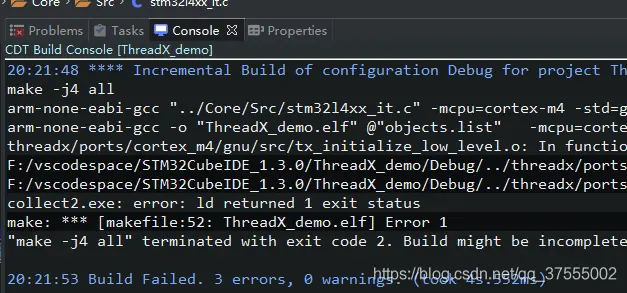
image
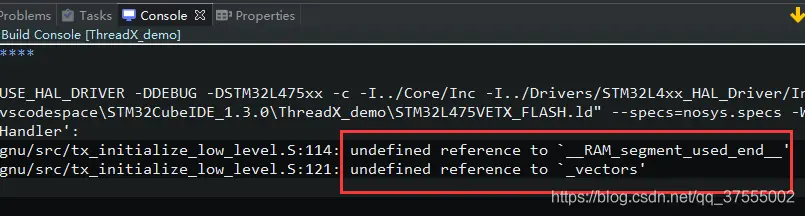
那看一下具体的错误, RAM_segment_used_end
_vectors
-------------没有定义
那就去tx_initialize_low_level.S 里面看一下,解释下很清楚了。(为什么全英文的东西愿意看,就是threadx里面文件注释太全了,虽然是英文但是至少比没有注释强太多了)
image
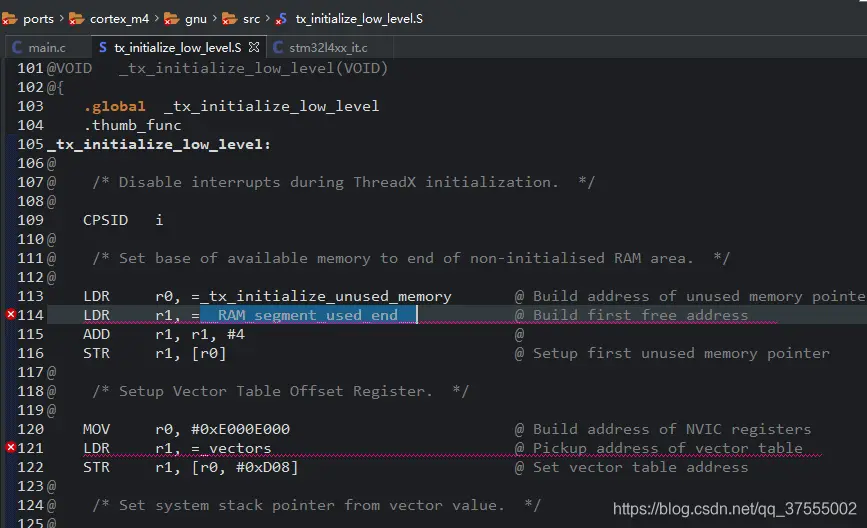
image
- 找到STM32某某_FLASH.ld,给他设置地址RAM_segment_used_end
__RAM_segment_used_end__ = .;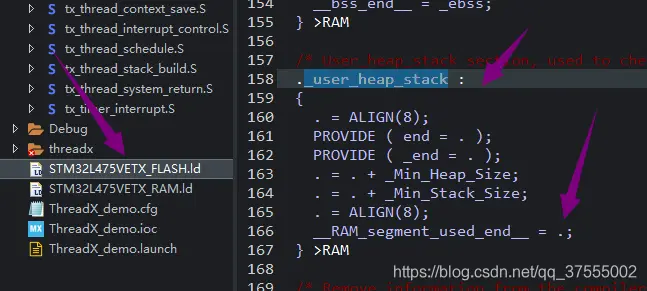
image
- 找到 startup_stm32某某.s 里面 g_pfnVectors 中断向量 应该由 threadx 指向
替换_vector = g_pfnVectors ,再次编译 imagenice ! no error !!! 接下来就是跑threadx的了
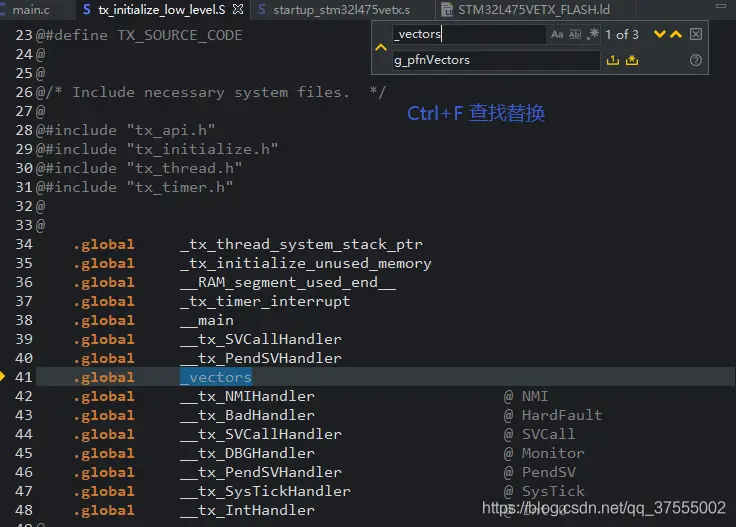 image
image image
image
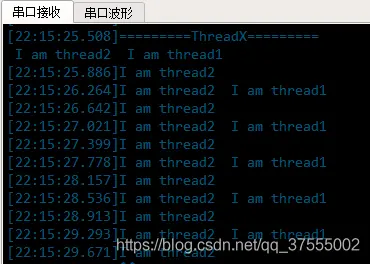
验证
-
首先加入头文件 "tx_api.h"
 image
image -
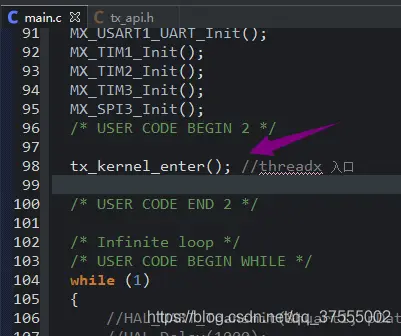
调用 tx_kernel_enter()
 image
image - 编写 void tx_application_define(void *first_unused_memory)就可以运行了
/* USER CODE BEGIN Header */
/**
******************************************************************************
* @file : main.c
* @brief : Main program body
******************************************************************************
* @attention
*
* <h2><center>© Copyright (c) 2020 STMicroelectronics.
* All rights reserved.</center></h2>
*
* This software component is licensed by ST under BSD 3-Clause license,
* the "License"; You may not use this file except in compliance with the
* License. You may obtain a copy of the License at:
* opensource.org/licenses/BSD-3-Clause
*
******************************************************************************
*/
/* USER CODE END Header */
/* Includes ------------------------------------------------------------------*/
#include "main.h"
#include "spi.h"
#include "tim.h"
#include "usart.h"
#include "gpio.h"
#include "tx_api.h"
........
........
........
/* Private variables ---------------------------------------------------------*/
/* USER CODE BEGIN PV */
TX_THREAD my_thread_1;
TX_THREAD my_thread_2;
uint8_t pData1[]="I am thread1 ";
uint8_t pData2[]="I am thread2 ";
/* USER CODE END PV */
........
........
........
int main(void)
{
/* USER CODE BEGIN 1 */
uint8_t pData[]="=========ThreadX========= \n";
/* USER CODE END 1 */
........
........
........
/* Initialize all configured peripherals */
MX_GPIO_Init();
MX_USART1_UART_Init();
MX_TIM1_Init();
MX_TIM2_Init();
MX_TIM3_Init();
MX_SPI3_Init();
/* USER CODE BEGIN 2 */
HAL_UART_Transmit(&huart1, pData, sizeof(pData), HAL_MAX_DELAY);
tx_kernel_enter(); //threadx 入口
/* USER CODE END 2 */
/* Infinite loop */
/* USER CODE BEGIN WHILE */
while (1)
{
/* USER CODE END WHILE */
/* USER CODE BEGIN 3 */
}
/* USER CODE END 3 */
}
/* USER CODE BEGIN 4 */
void thread1_entry(ULONG entry_input)
{
while(1)
{
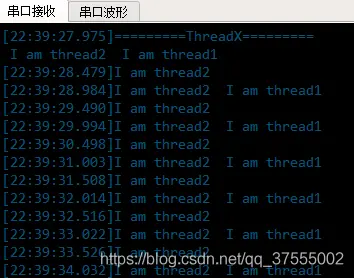
HAL_UART_Transmit(&huart1, pData1, sizeof(pData1), HAL_MAX_DELAY);
tx_thread_sleep(1000);// 线程睡眠1000 timer_ticks
}
}
void thread2_entry(ULONG entry_input)
{
while(1)
{
HAL_UART_Transmit(&huart1, pData2, sizeof(pData2), HAL_MAX_DELAY);
tx_thread_sleep(500);// 线程睡眠500 timer_ticks
}
}
void tx_application_define(void *first_unused_memory)
{
/*线程1*/
tx_thread_create(
&my_thread_1, //线程控制块指针
"my_thread1", //线程名字
thread1_entry, //线程入口函数
0, //线程入口参数
first_unused_memory, //线程的起始地址(这里偷懒,没有进行分配,直接使用未用的起始地址)
1024, //内存区域大小K
3, //优先级3 (0~TX_MAX_PRIORITES-1)0 表示最高优先级
3, //禁用抢占的最高优先级
TX_NO_TIME_SLICE,//时间切片值范围为 1 ~ 0xFFFF(TX_NO_TIME_SLICE = 0)
TX_AUTO_START //线程自动启动
);
/*线程2*/
tx_thread_create(
&my_thread_2, //线程控制块指针
"my_thread2", //线程名字
thread2_entry, //线程入口函数
0, //线程入口参数
first_unused_memory+1024, //线程的起始地址+1024 (-被前面线程用掉了)
1024, //内存区域大小K
1, //优先级3 (0~TX_MAX_PRIORITES-1)0 表示最高优先级
1, //禁用抢占的最高优先级
TX_NO_TIME_SLICE,//时间切片值范围为 1 ~ 0xFFFF(TX_NO_TIME_SLICE = 0)
TX_AUTO_START //线程自动启动
);
}
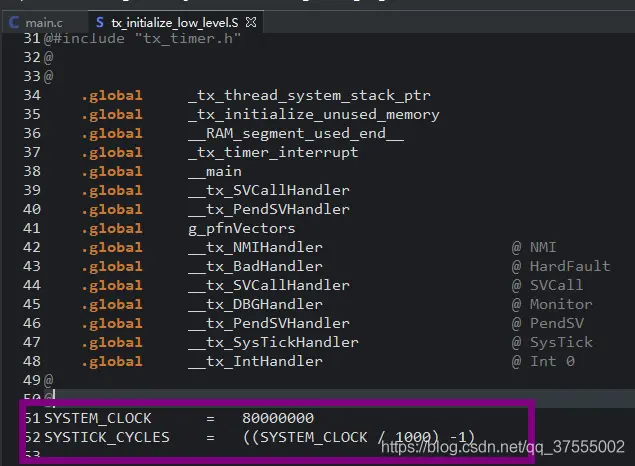
/* USER CODE END 4 */乍看以为ok了,但实际上还是有些小毛病的,时间好像对不上号啊,
我的时钟频率是80Mhz,延时的时间跟想法有出入。
这里还有个地方需要修改就是系统的OS tick,根据设置按需修改
image
image
这样算出来应该差不了
image
完


 1589
1589

 被折叠的 条评论
为什么被折叠?
被折叠的 条评论
为什么被折叠?
 到【灌水乐园】发言


