


 本文详细介绍Docker环境搭建步骤,包括Docker版本选择、在CentOS上安装配置及验证,通过实例演示如何运行hello-world与Ubuntu容器。深入探讨MySQL容器的使用,包括服务器与客户端的启动、基本操作及数据持久化策略,展示如何利用数据卷实现数据库文件的保存。
容器化技术与容器服务(2)
准备docker环境
• Docker 版本
– 社区版
– 企业版
• 与 Kubernetes 集成
– 社区版 17.03.2 ce
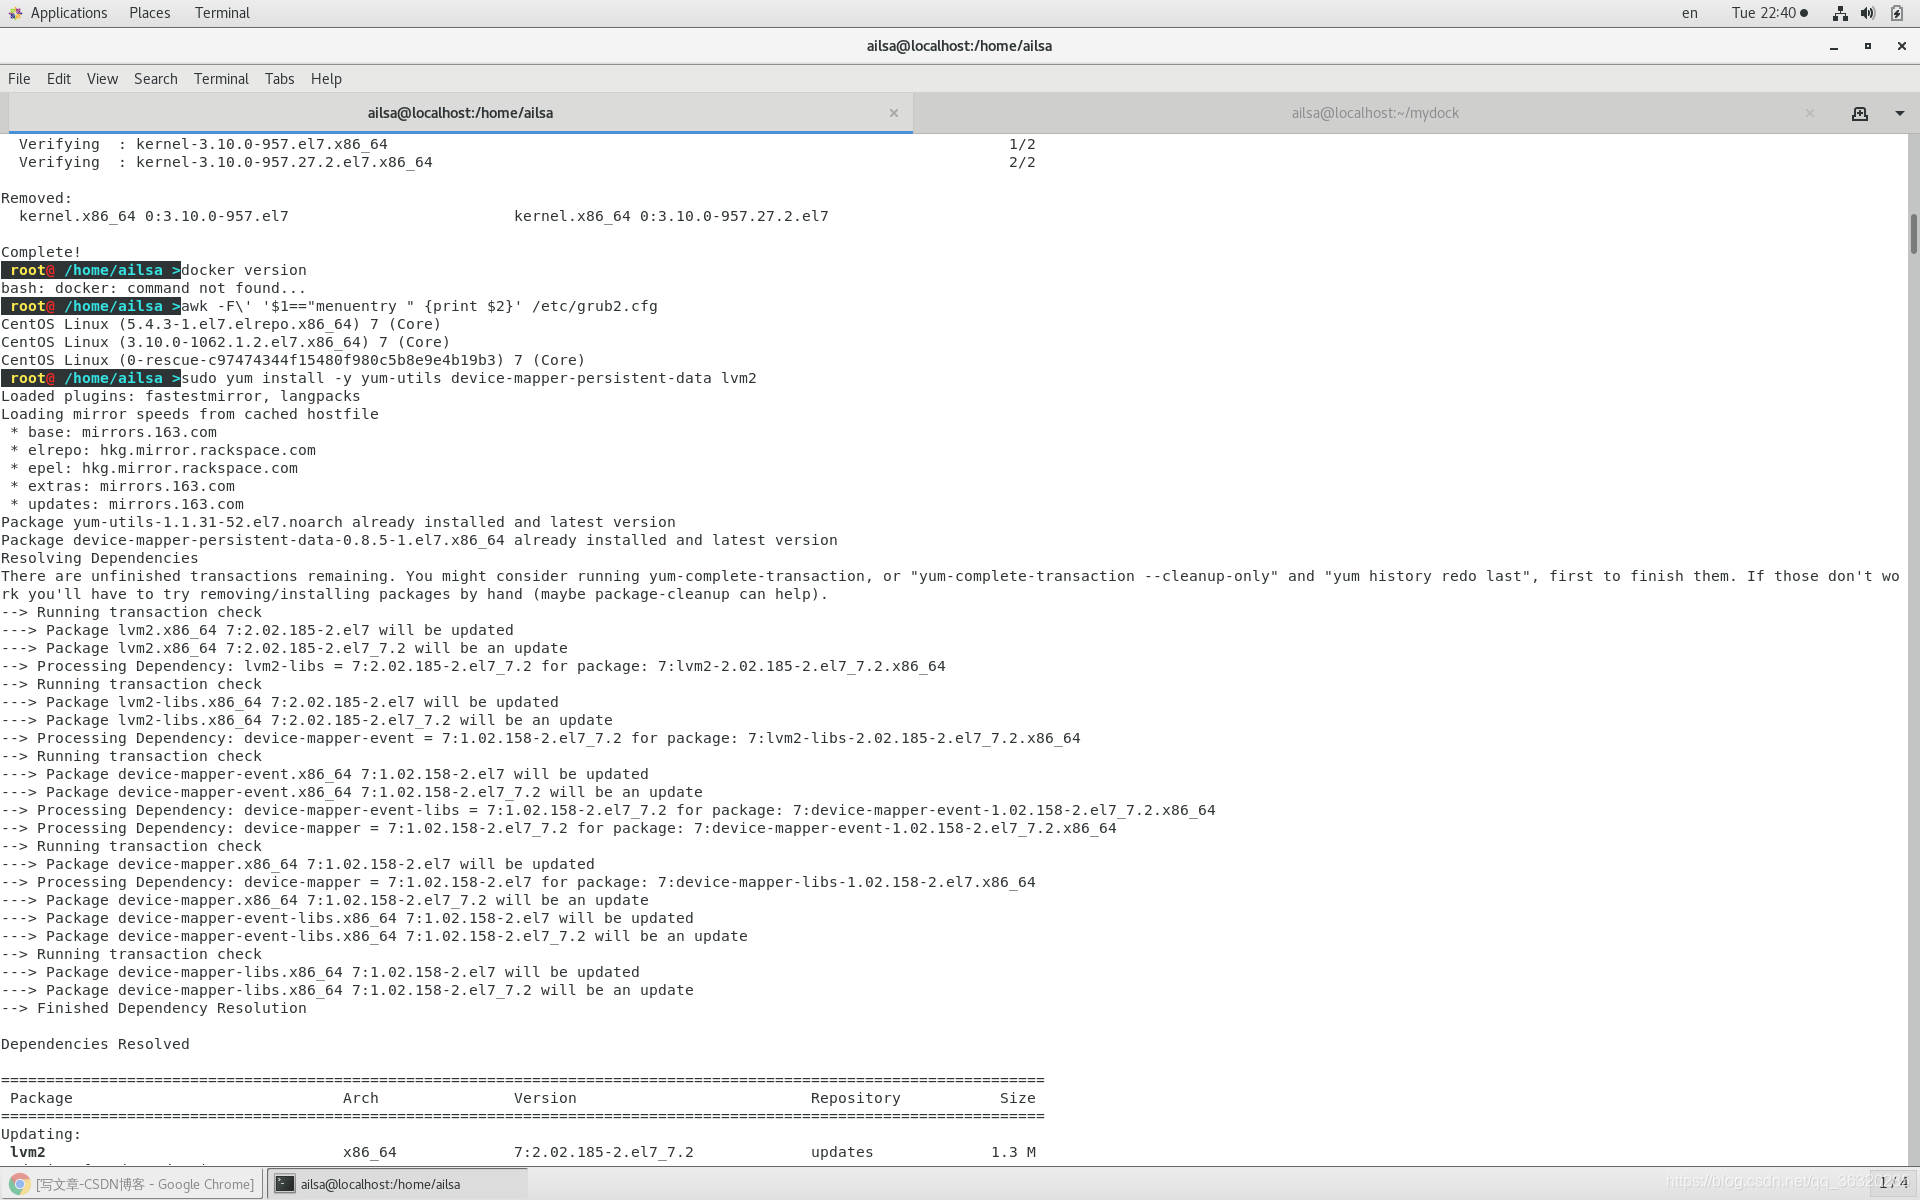
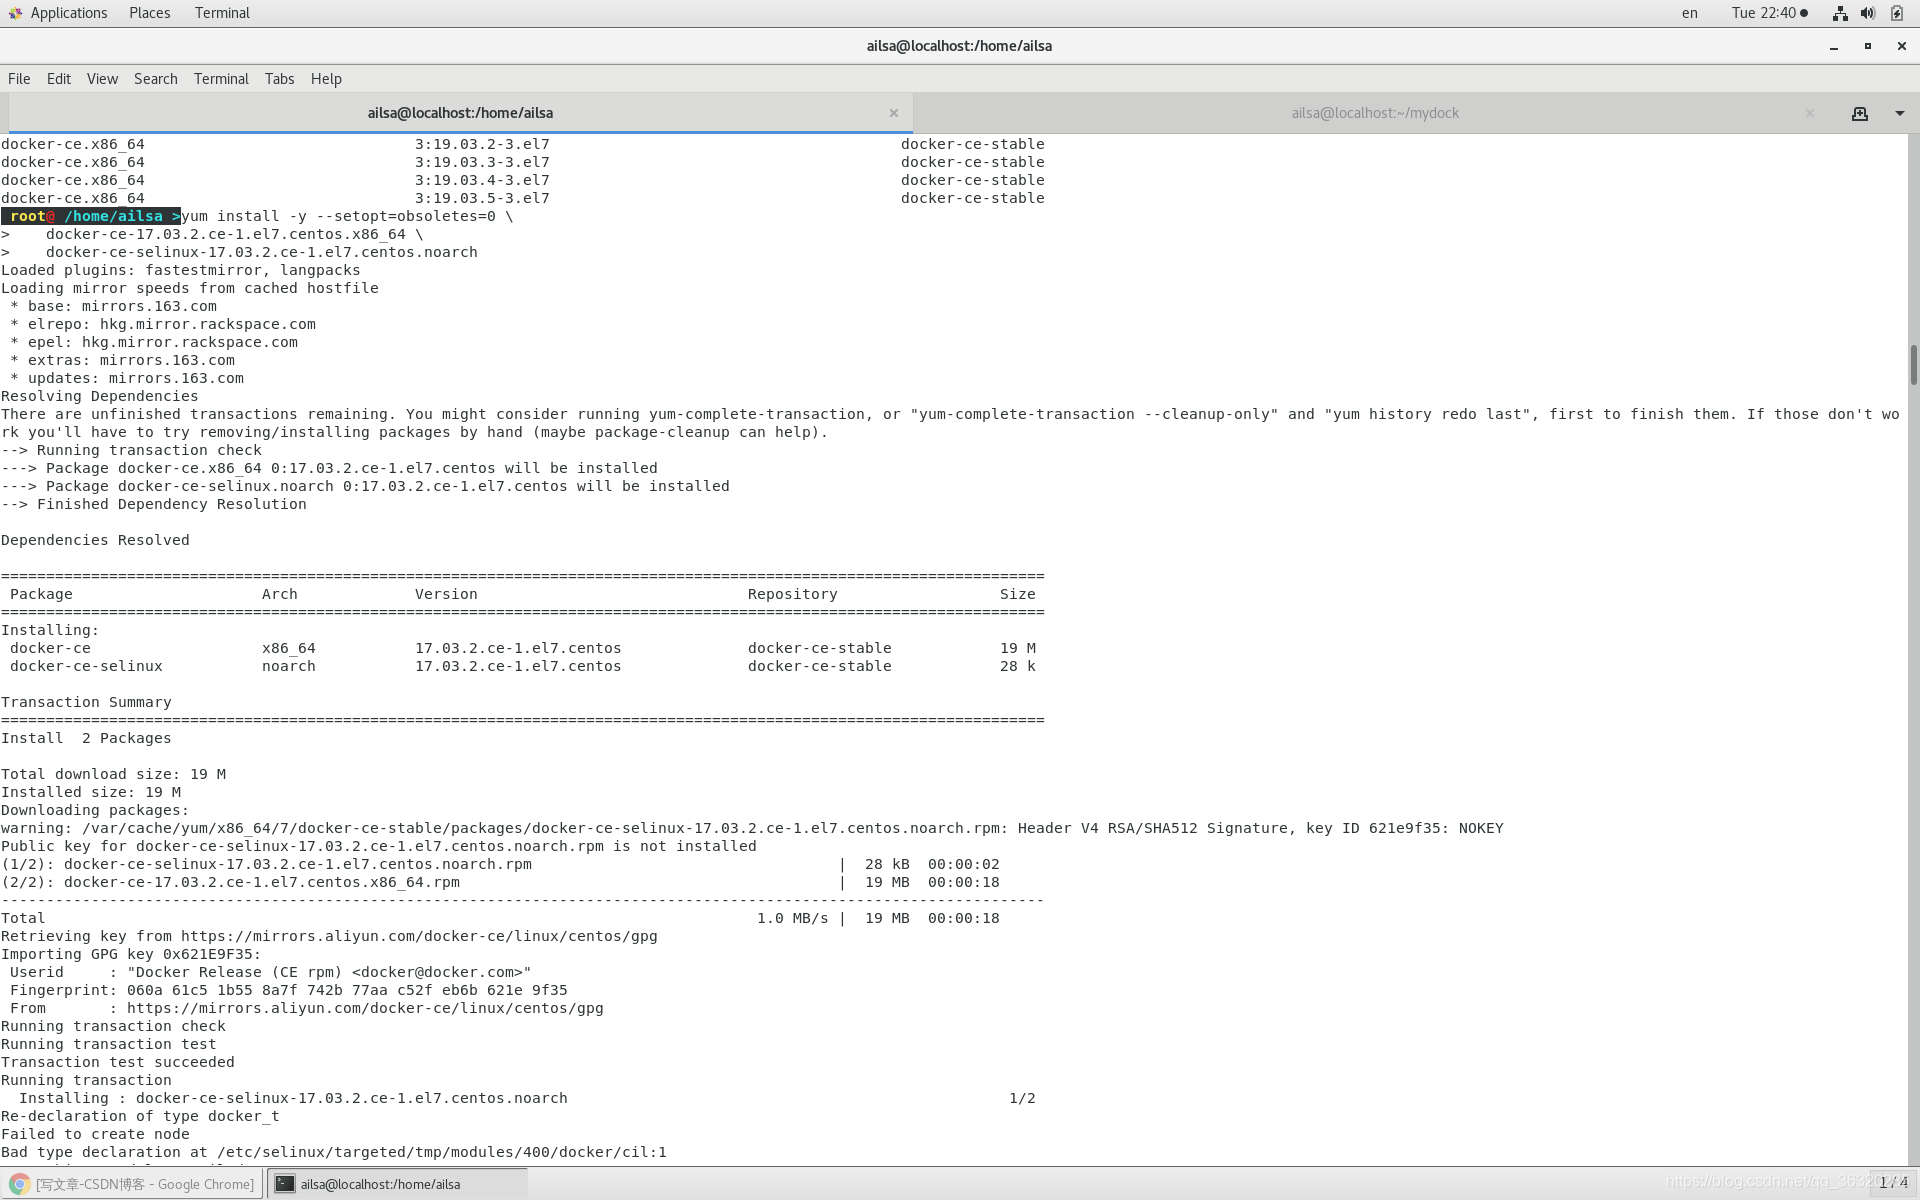
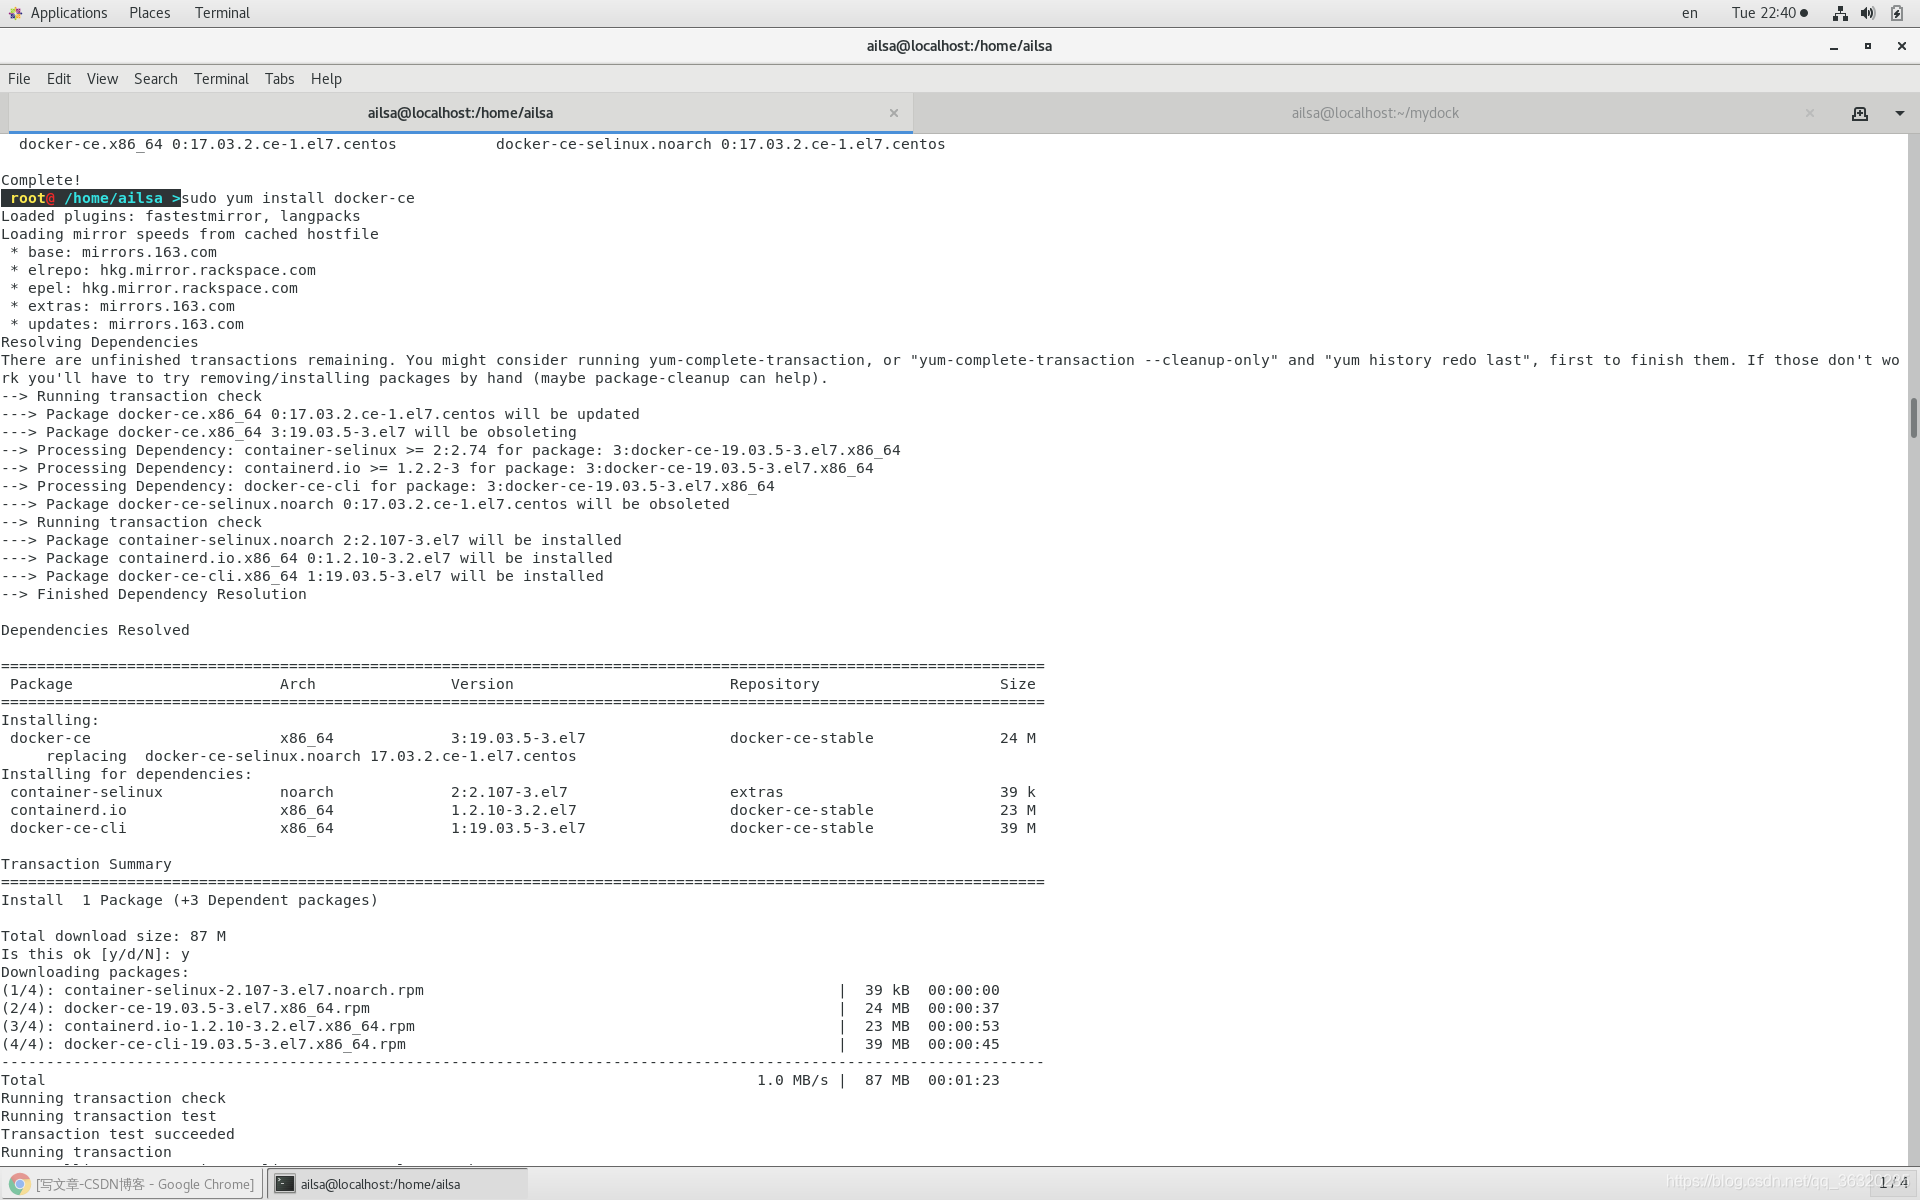
• CentOS(虚拟机)安装 docker
– 官方指南
• https://docs.docker.com/install/linux/docker-ce/centos/#installdocker-ce
– 中文指南
• http://www.cnblogs.com/freefei/p/9263998.html
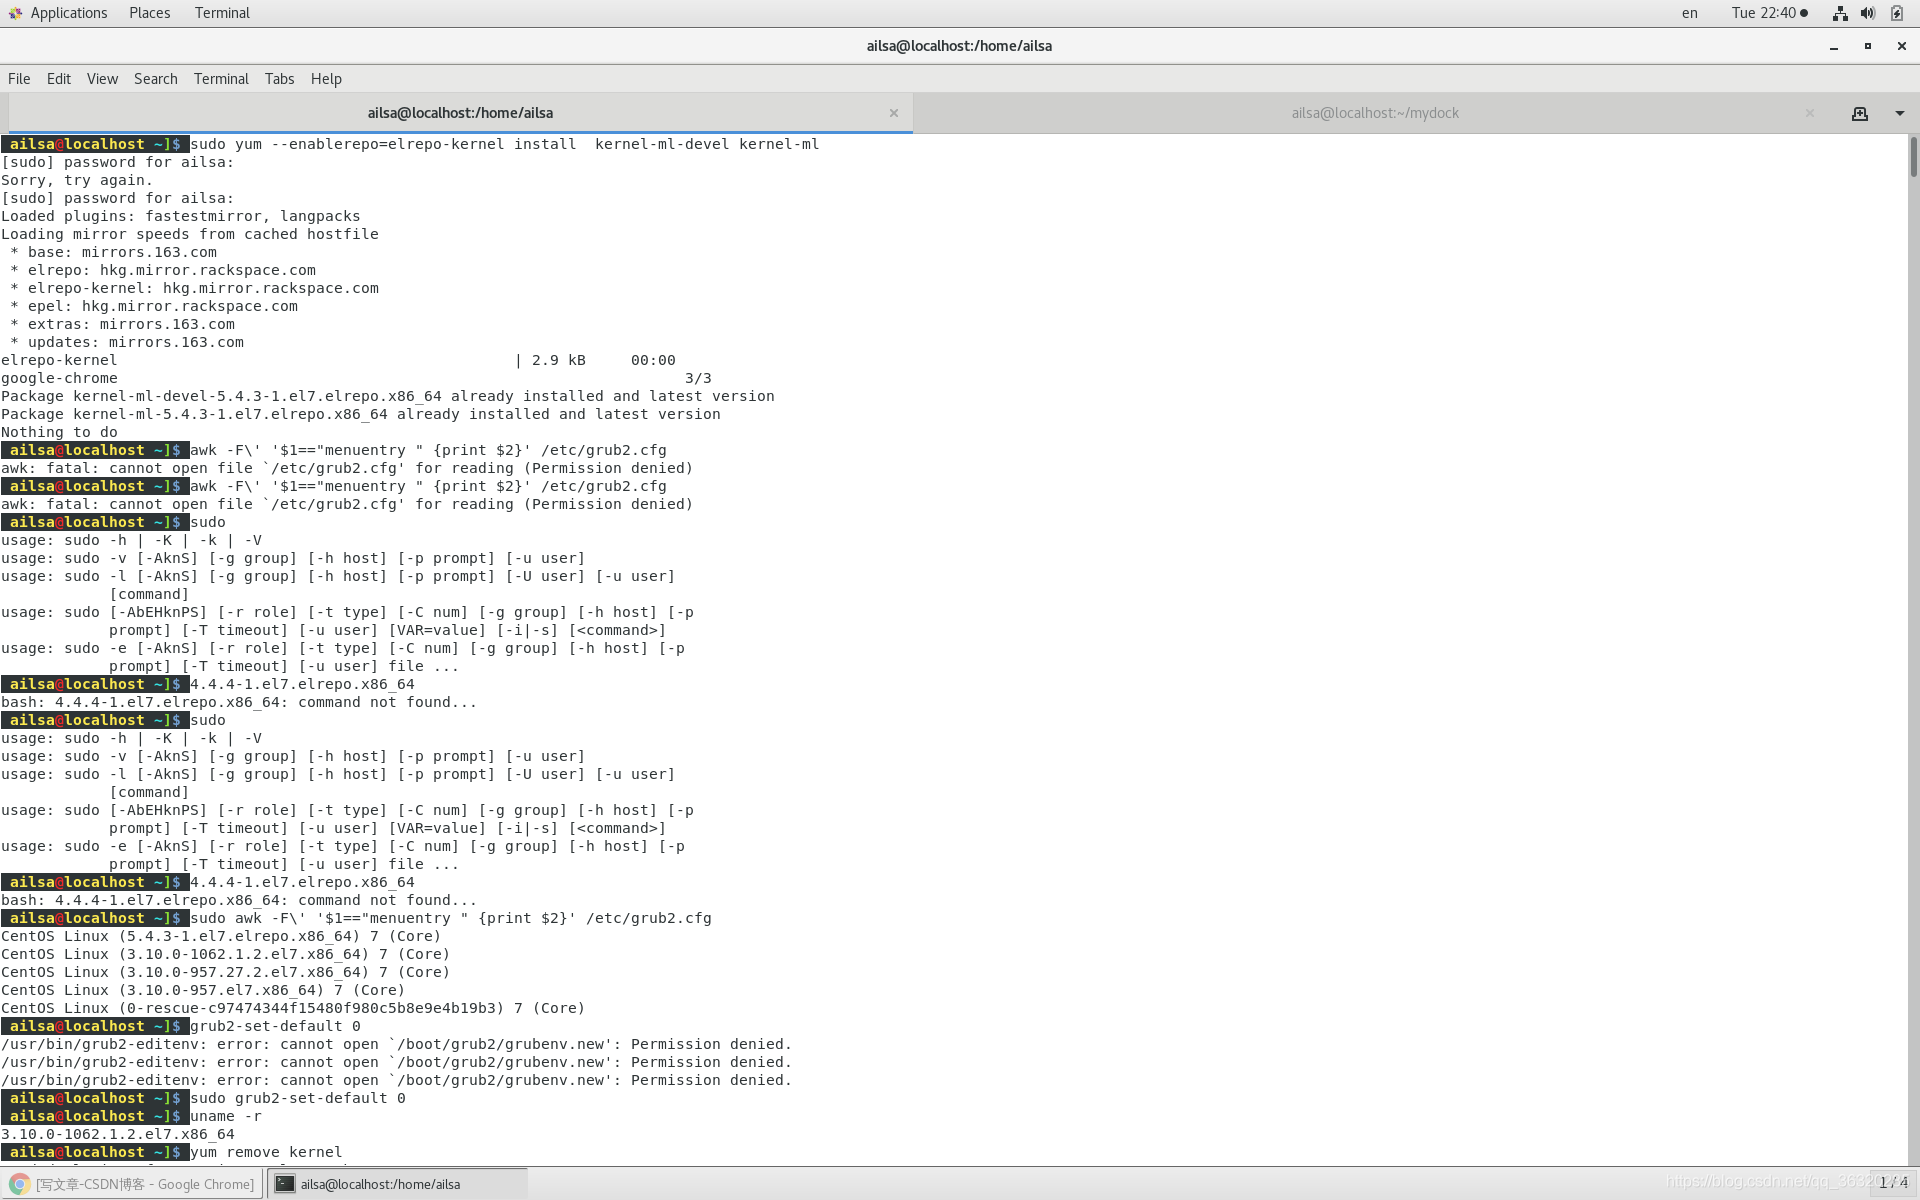

检查 docker 安装
~]# docker version
Client:
Version: 17.03.2-ce
API version: 1.27
Go version: go1.7.5
Git commit: f5ec1e2
Built: Tue Jun 27 02:21:36 2017
OS/Arch: linux/amd64
Server:
Version: 17.03.2-ce
API version: 1.27 (minimum version 1.12)
Go version: go1.7.5
Git commit: f5ec1e2
Built: Tue Jun 27 02:21:36 2017
OS/Arch: linux/amd64
Experimental: false

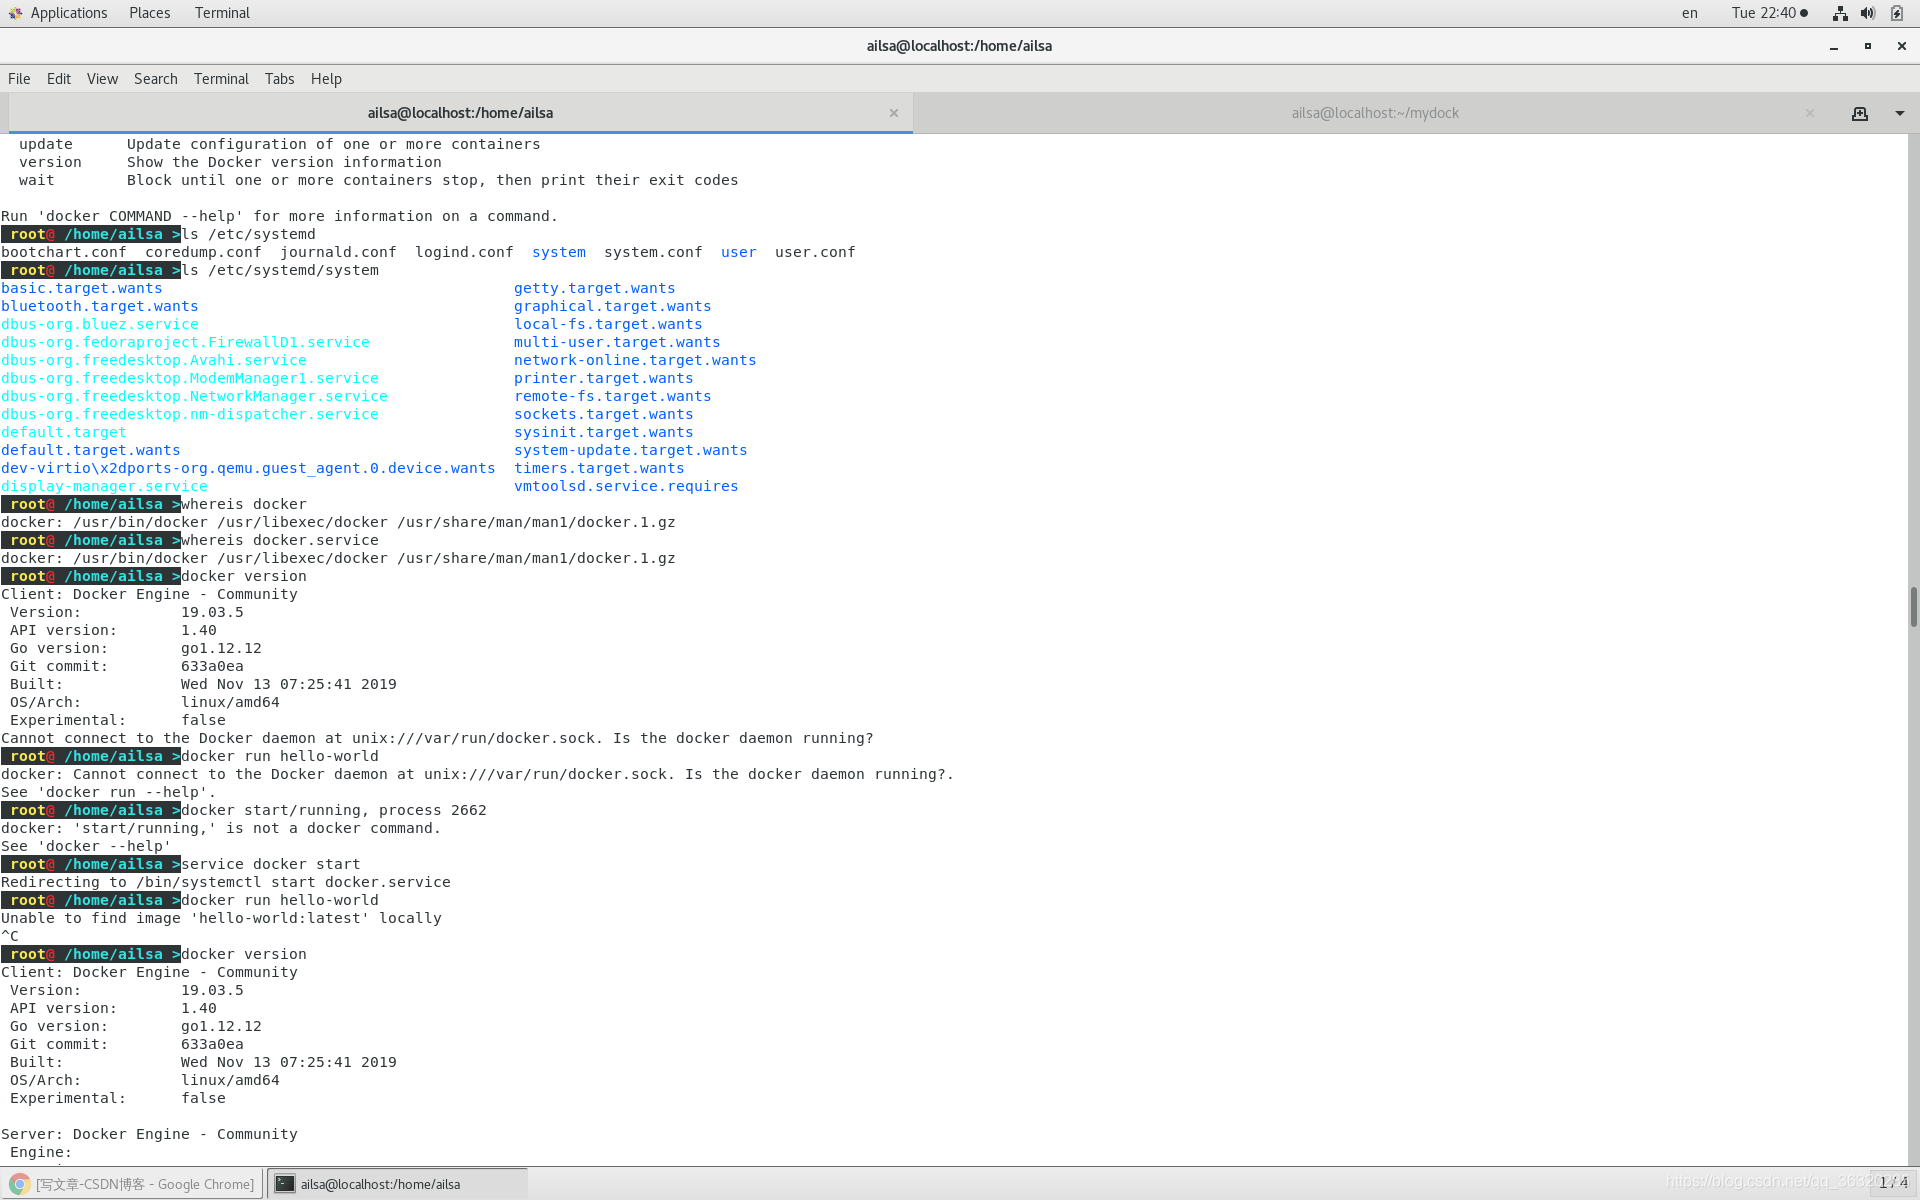
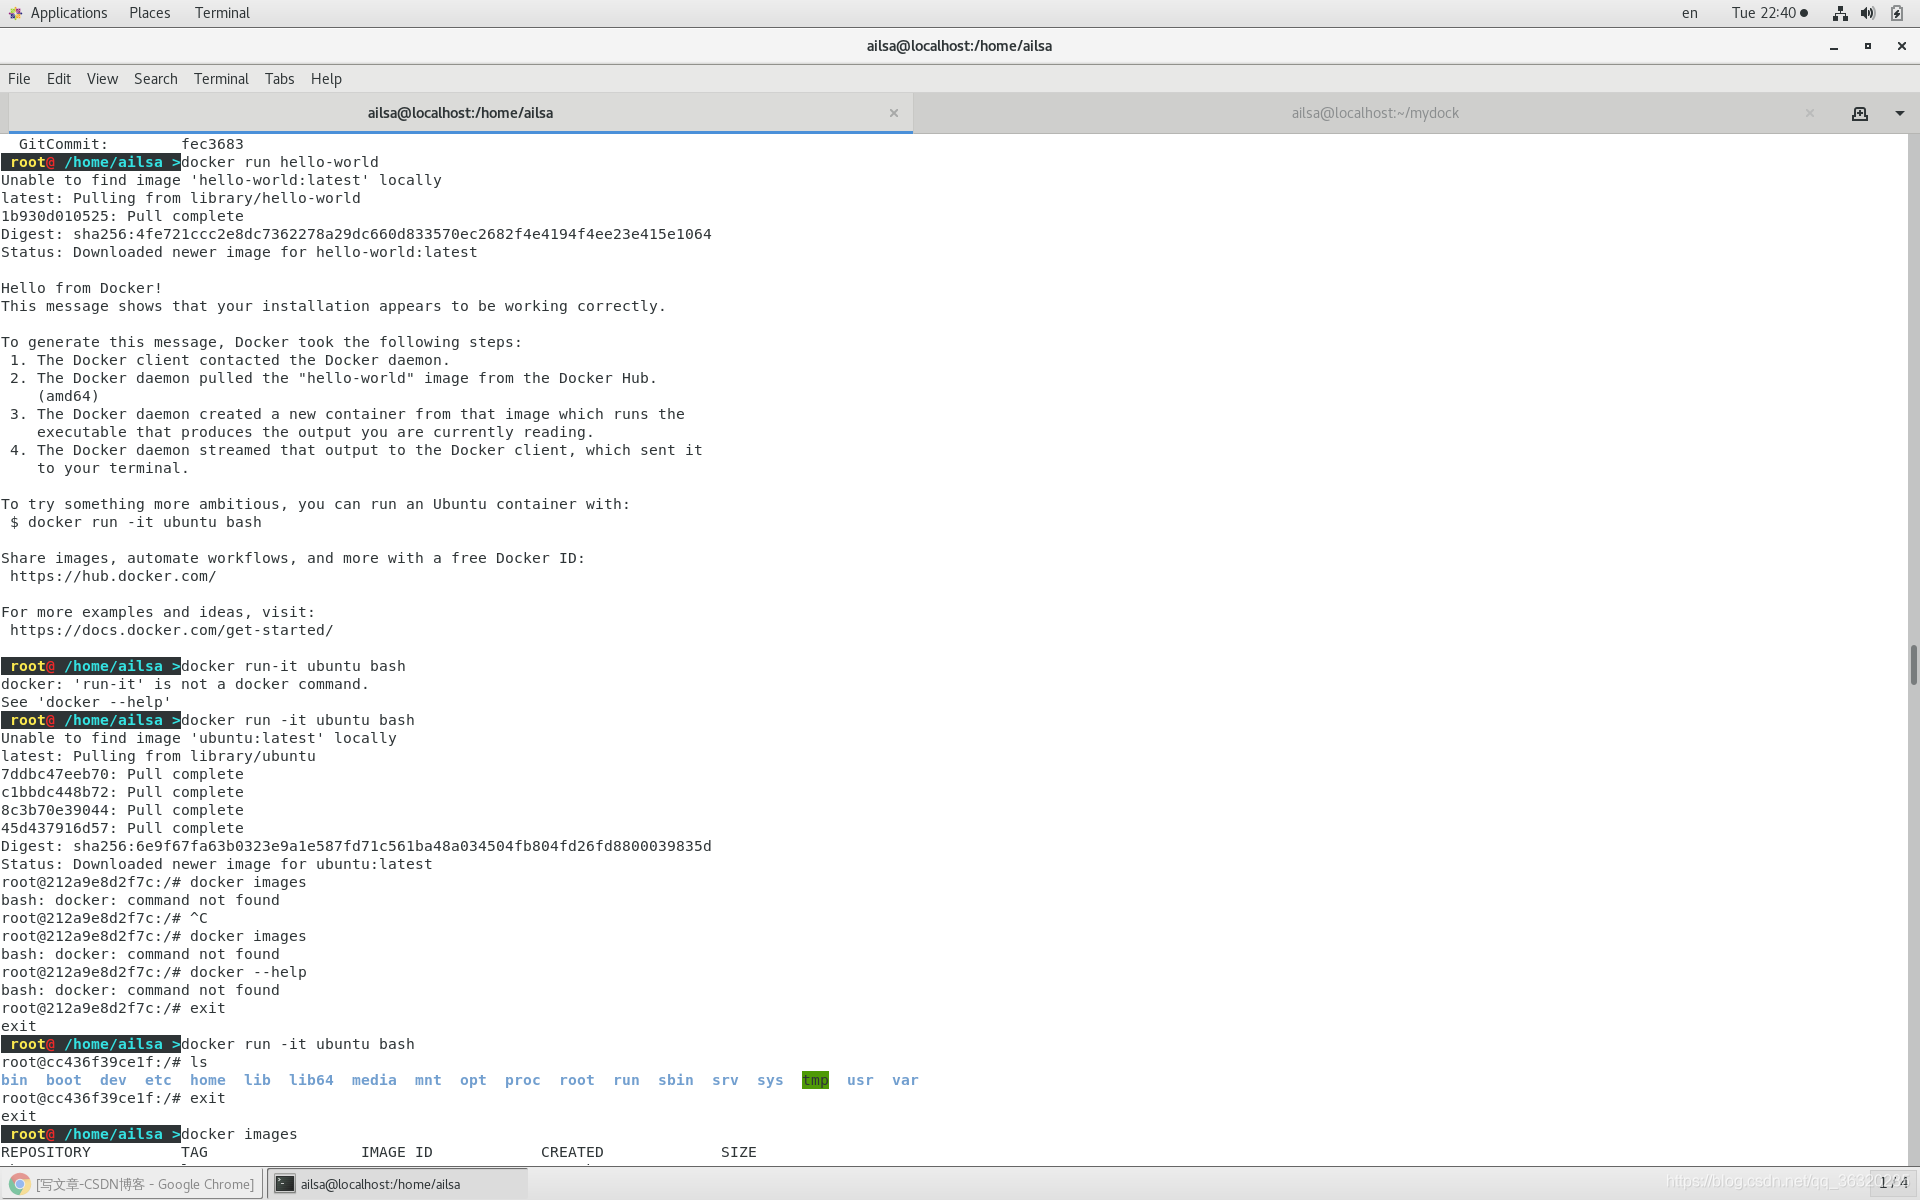
~]# docker run hello-world
Unable to find image ‘hello-world:latest’ locally
latest: Pulling from library/hello-world
d1725b59e92d: Pull complete
Digest: sha256:0add3ace90ecb4adbf7777e9aacf18357296e799f81cabc9fde470971e499788
Status: Downloaded newer image for hello-world:latest
Hello from Docker!
This message shows that your installation appears to be working correctly.
To generate this message, Docker took the following steps:
- The Docker client contacted the Docker daemon.
- The Docker daemon pulled the “hello-world” image from the Docker Hub.
(amd64) - The Docker daemon created a new container from that image which runs the
executable that produces the output you are currently reading. - The Docker daemon streamed that output to the Docker client, which sent it
to your terminal.
To try something more ambitious, you can run an Ubuntu container with:
$ docker run -it ubuntu bash
~]# docker run -it ubuntu bash
Unable to find image ‘ubuntu:latest’ locally
latest: Pulling from library/ubuntu
32802c0cfa4d: Pull complete
da1315cffa03: Pull complete
fa83472a3562: Pull complete
f85999a86bef: Pull complete
Digest: sha256:6d0e0c26489e33f5a6f0020edface2727db9489744ecc9b4f50c7fa671f23c49
Status: Downloaded newer image for ubuntu:latest
root@e2442527555f:/# ls
bin dev home lib64 mnt proc run srv tmp var
boot etc lib media opt root sbin sys usr
root@e2442527555f:/# exit
exit
[root@centos-docker-ex ~]#
显示本地镜像库内容
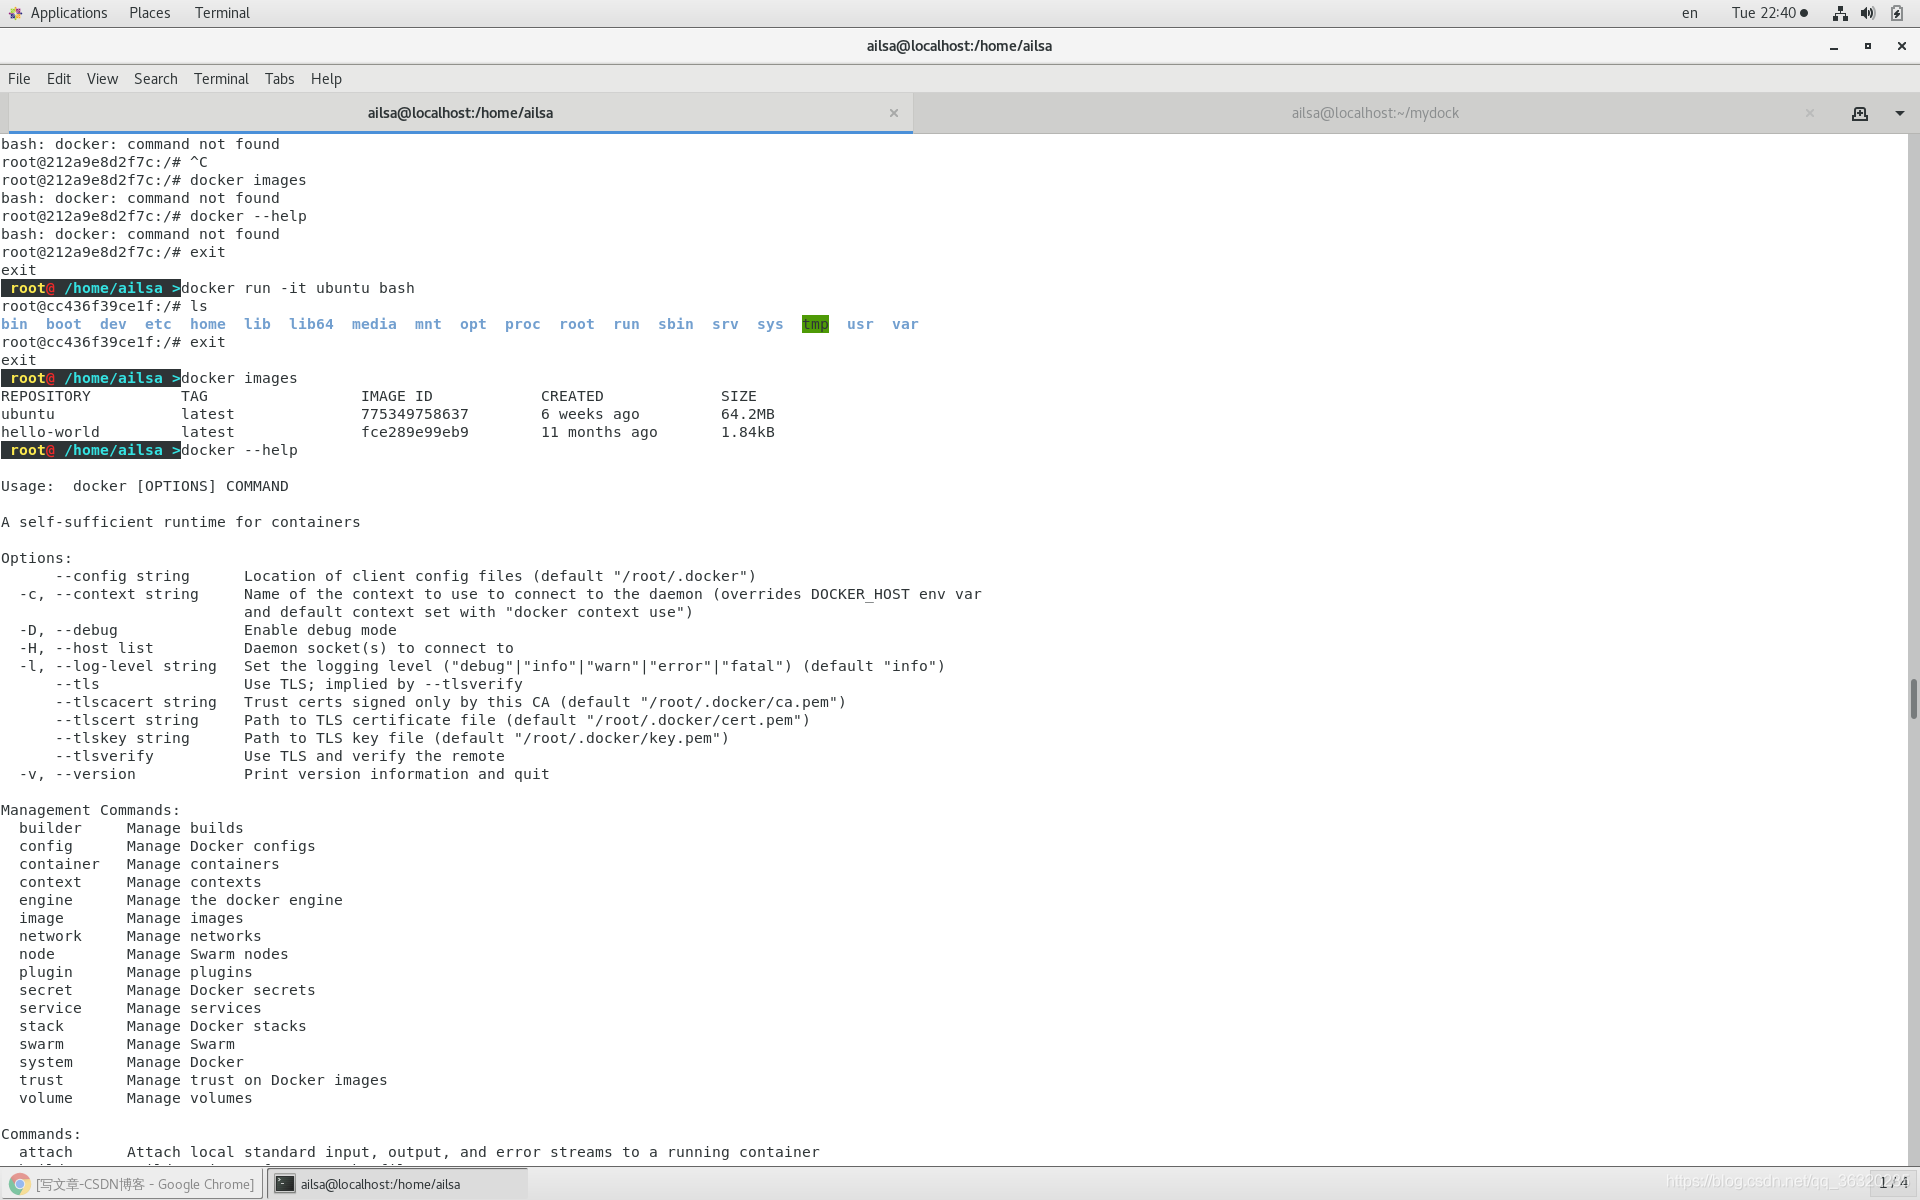
显示运行中容器
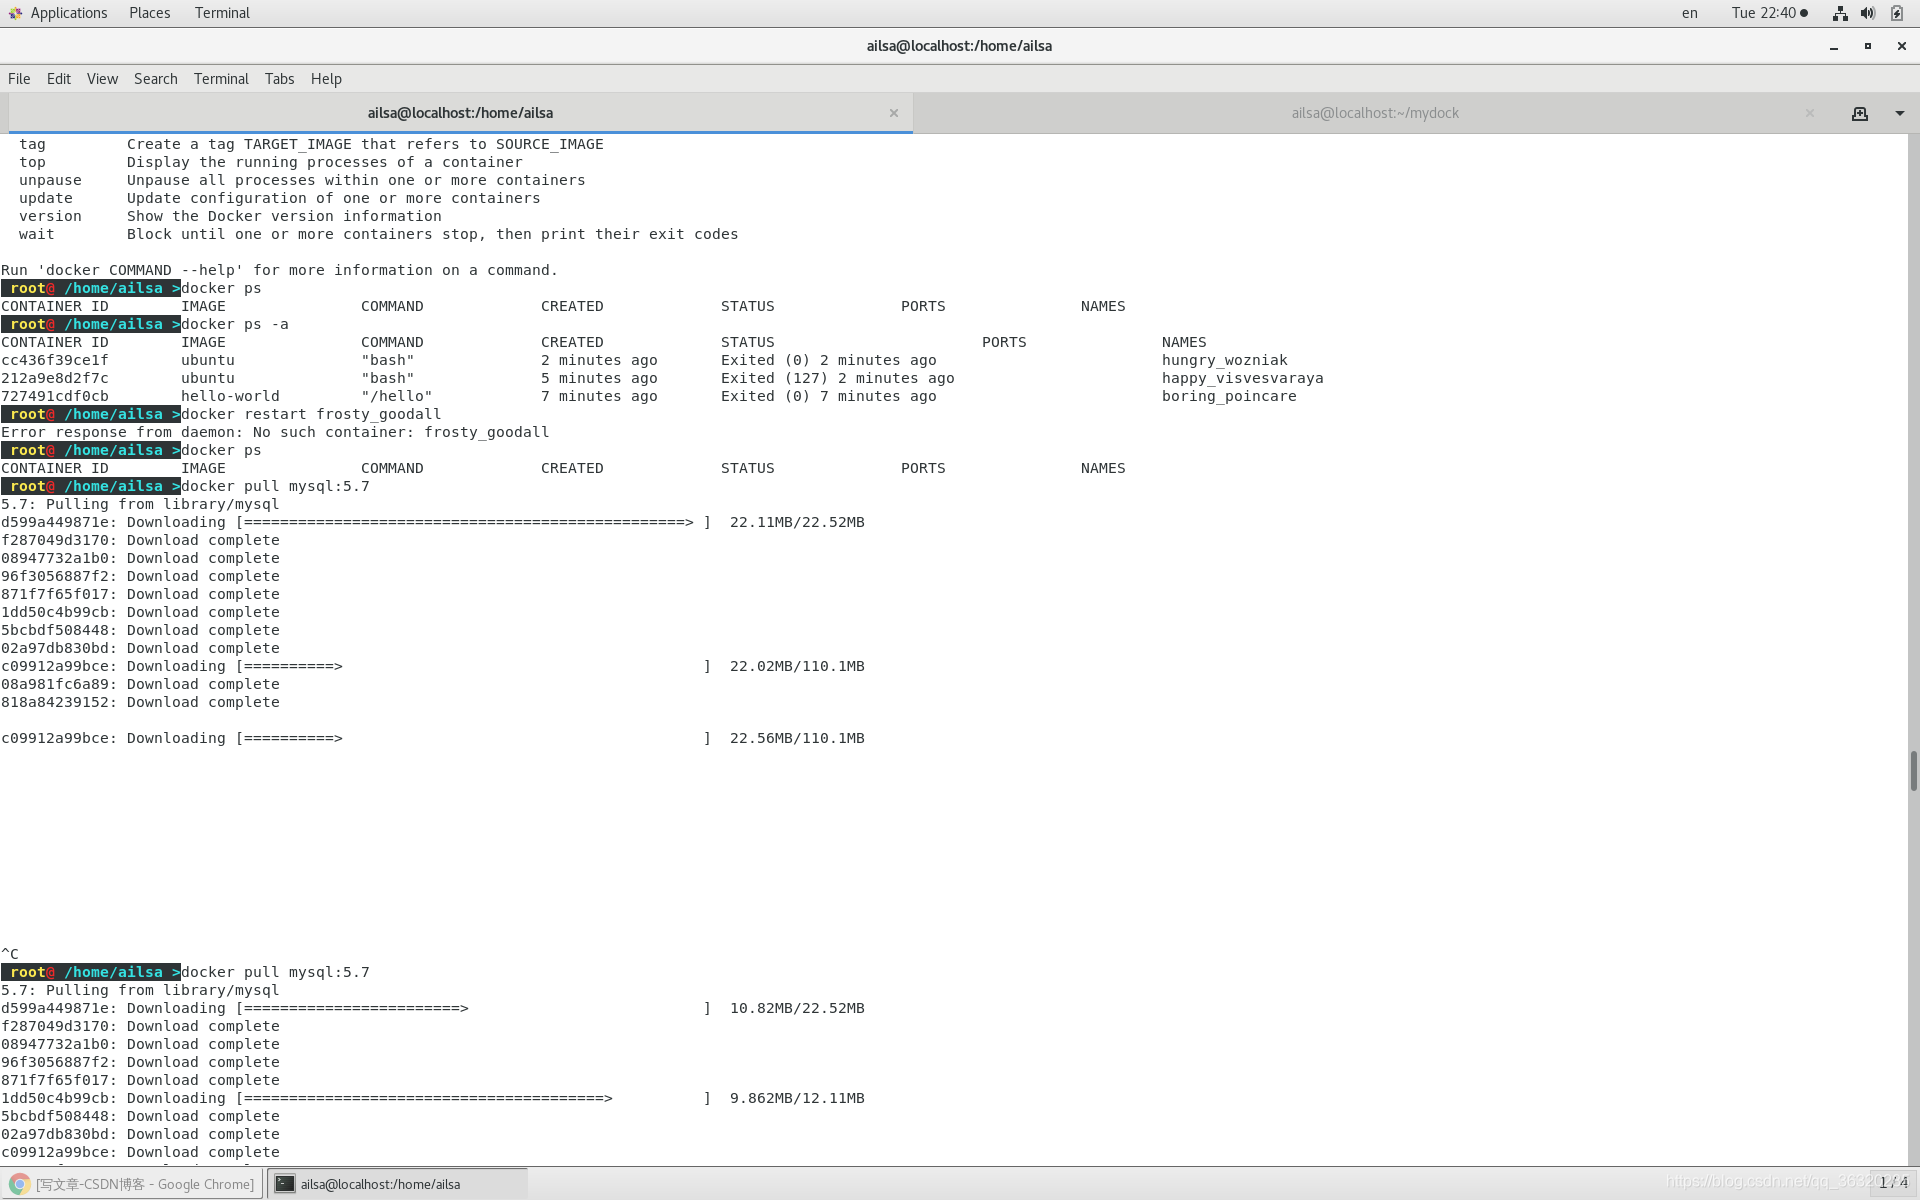
拉取 MySQL 镜像
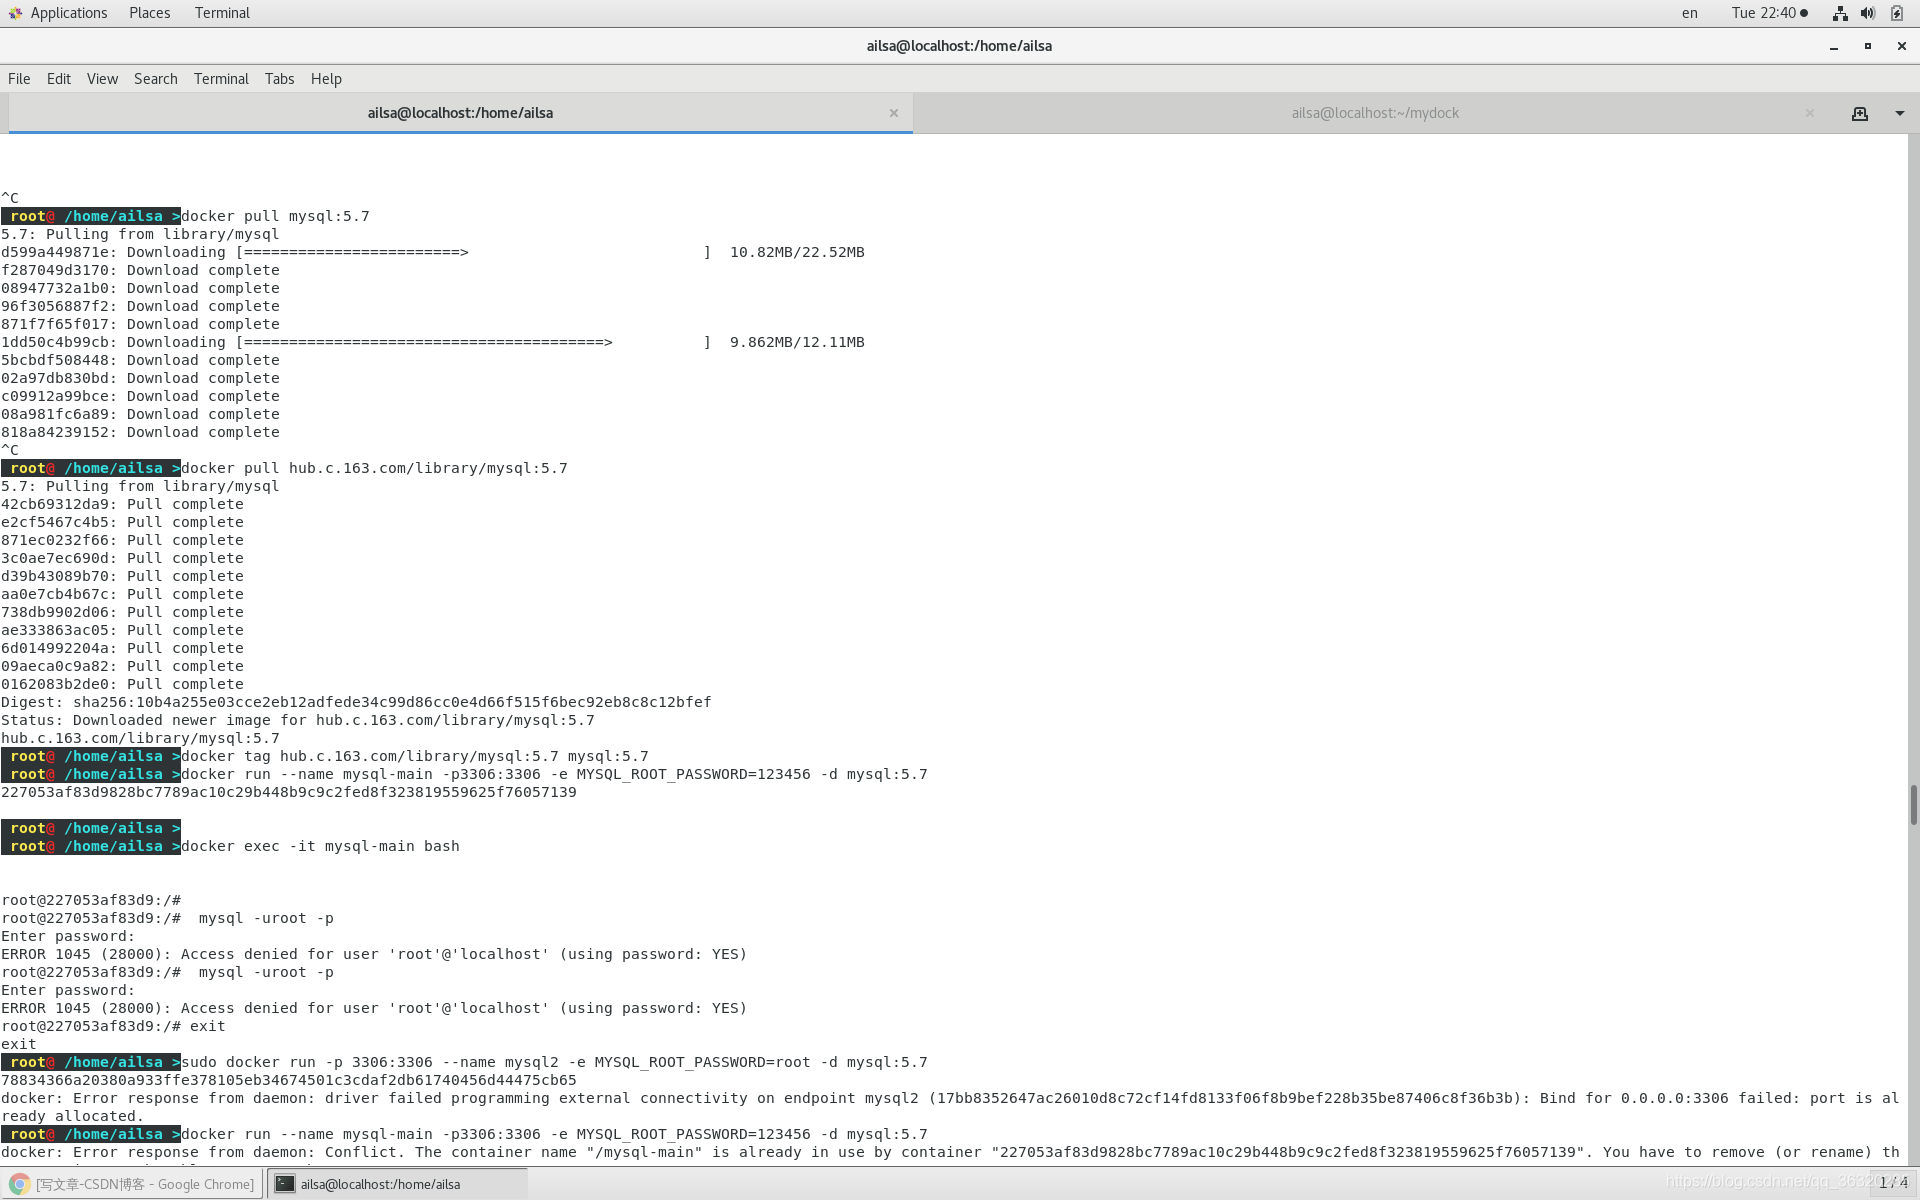
上面拉取太慢了,所以更改成了网易的源头,pull之后改名
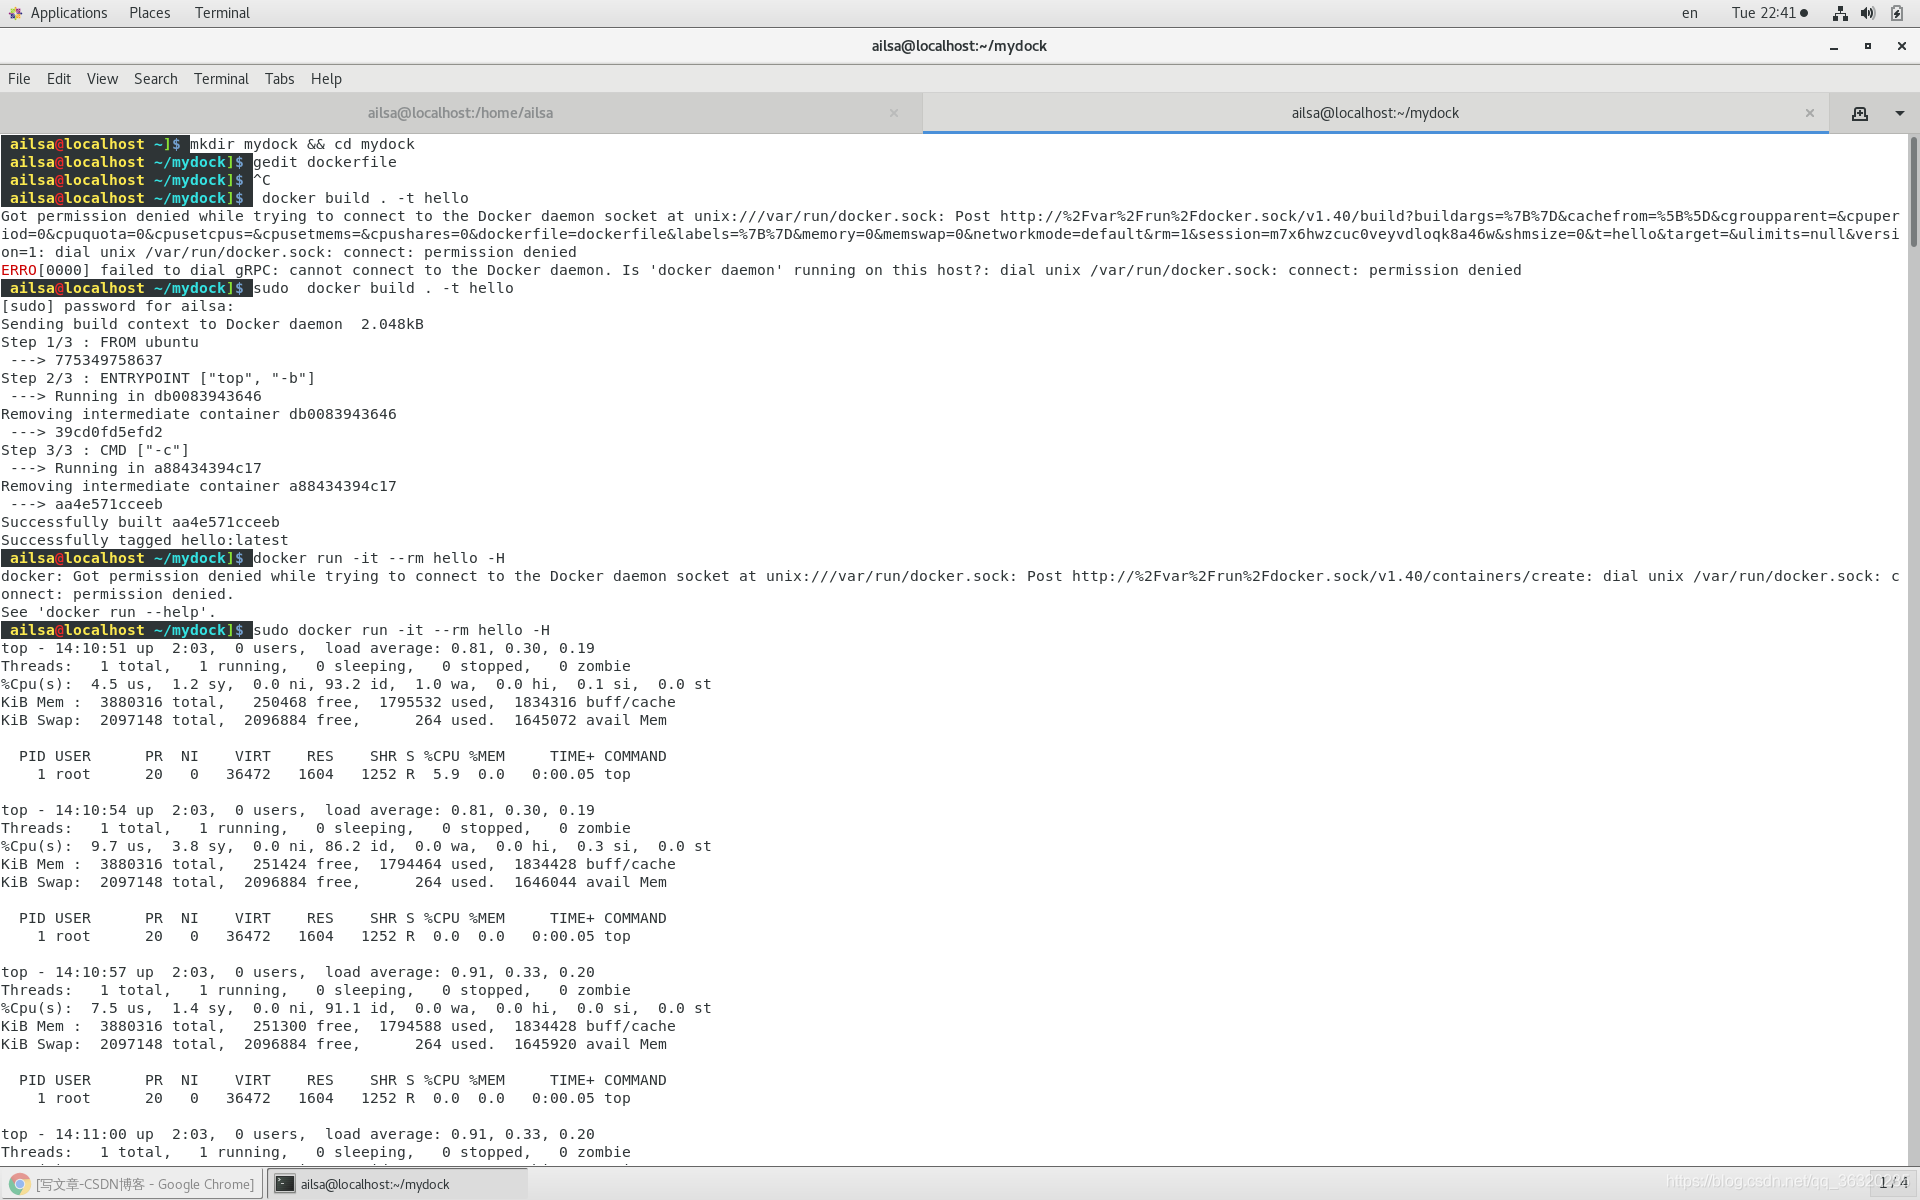
构建docker镜像练习
– 录入以下内容
– 构建镜像
– 运行镜像
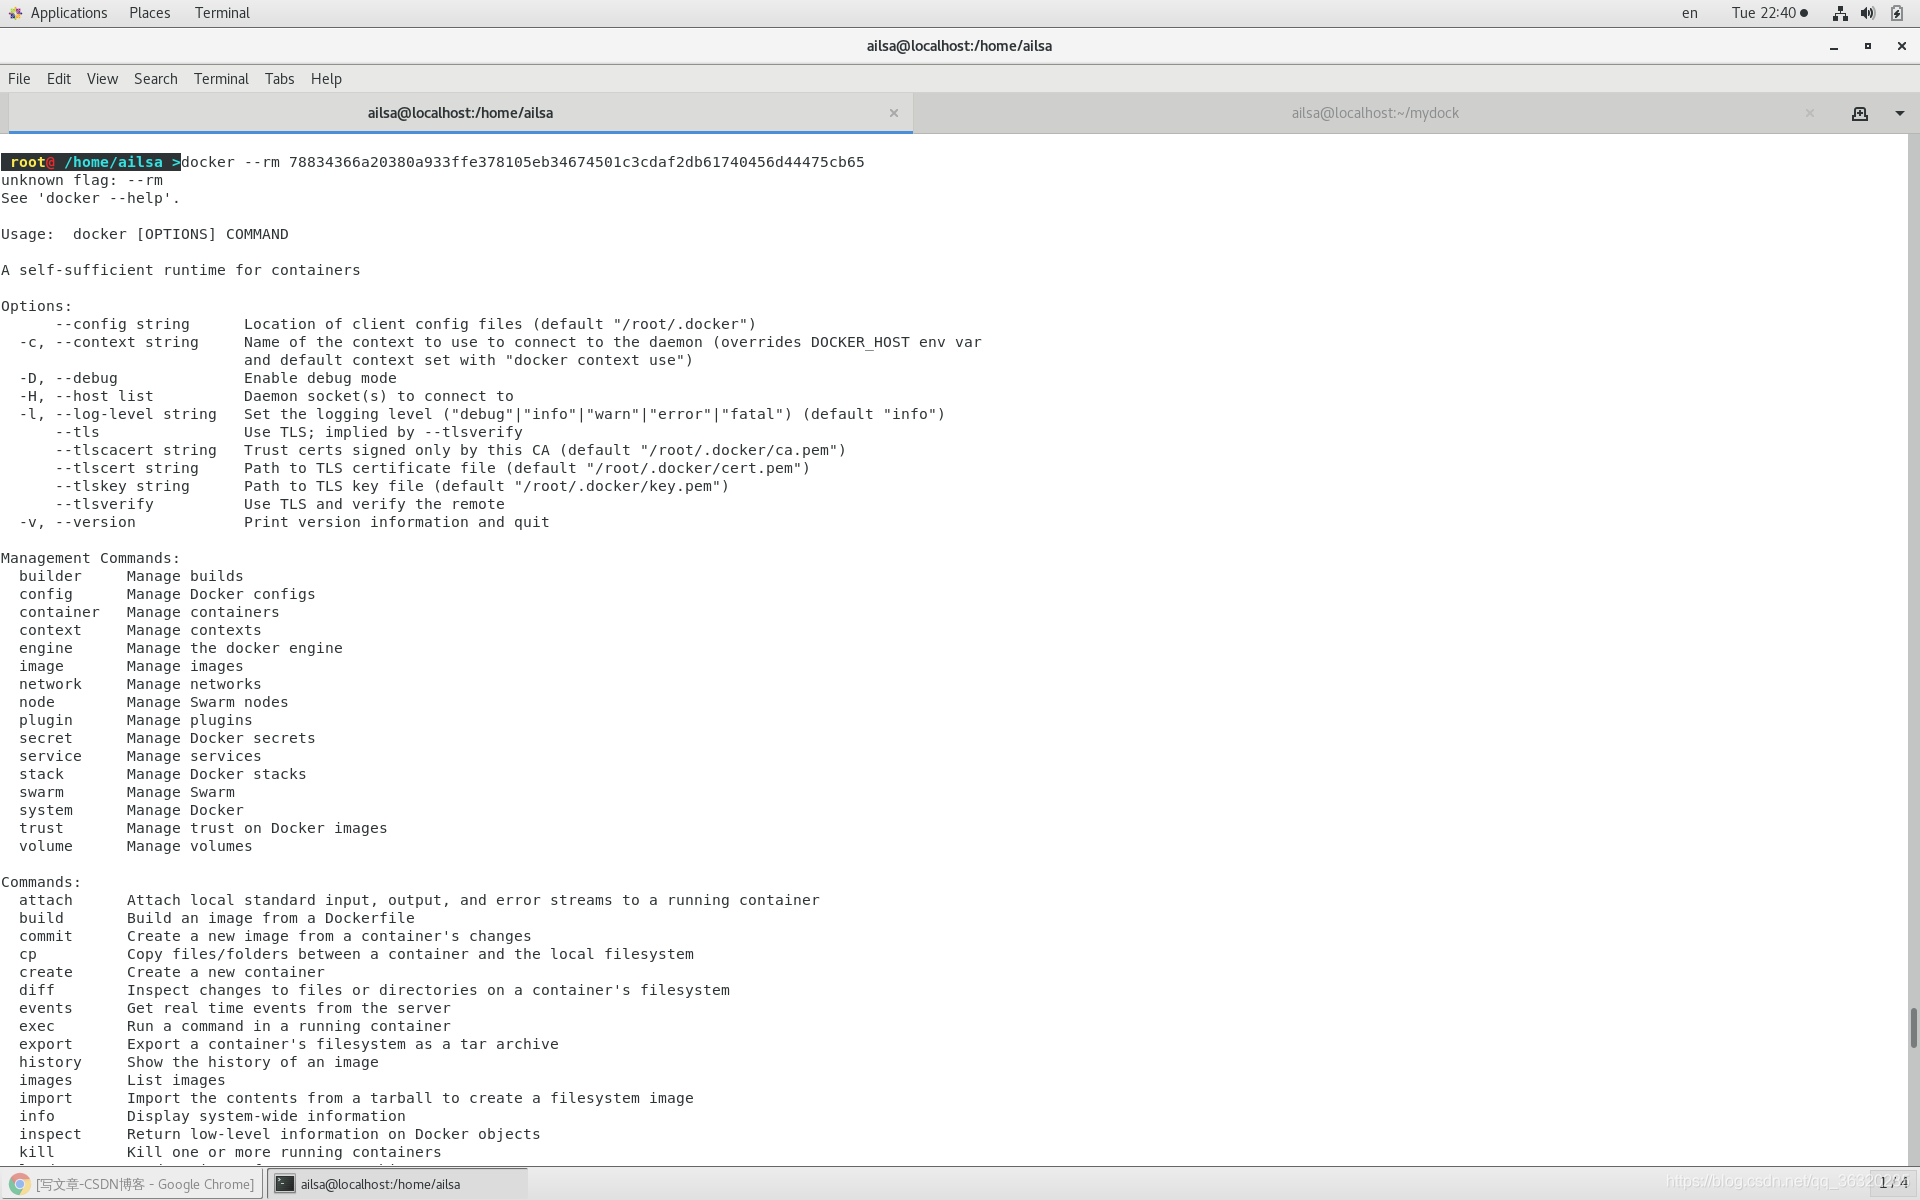
• docker run -it --rm hello -H
~] mkdir mydock && cd mydock
mydock]# vi dockerfile
FROM ubuntu
ENTRYPOINT [“top”, “-b”]
CMD ["-c"]
mydock]# docker build . -t hello
Sending build context to Docker daemon
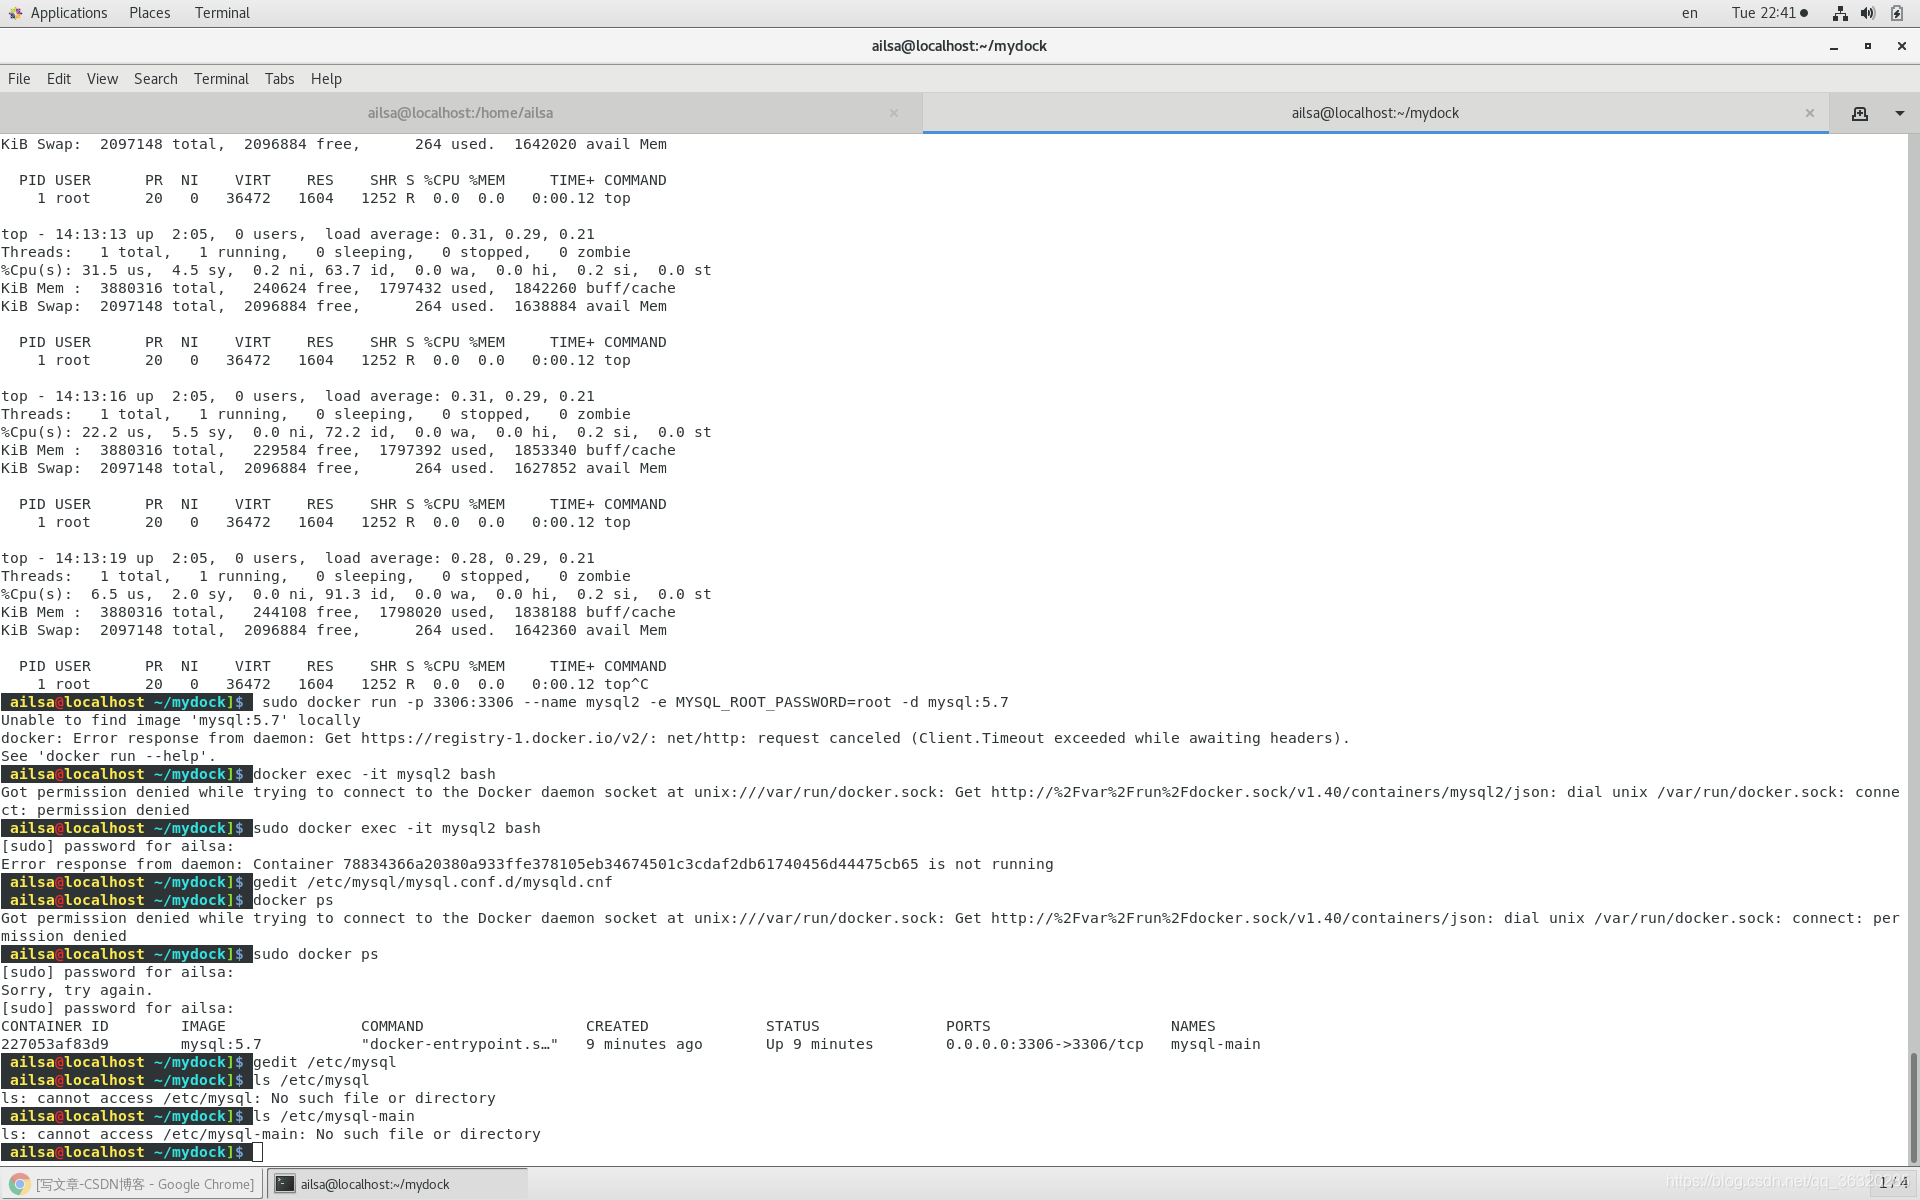
使用MySQL容器
– 启动服务器
– 启动 MySQL 客户端
– mysql 客户端基本操作
• https://blog.youkuaiyun.com/pmlpml/article/details/78602290
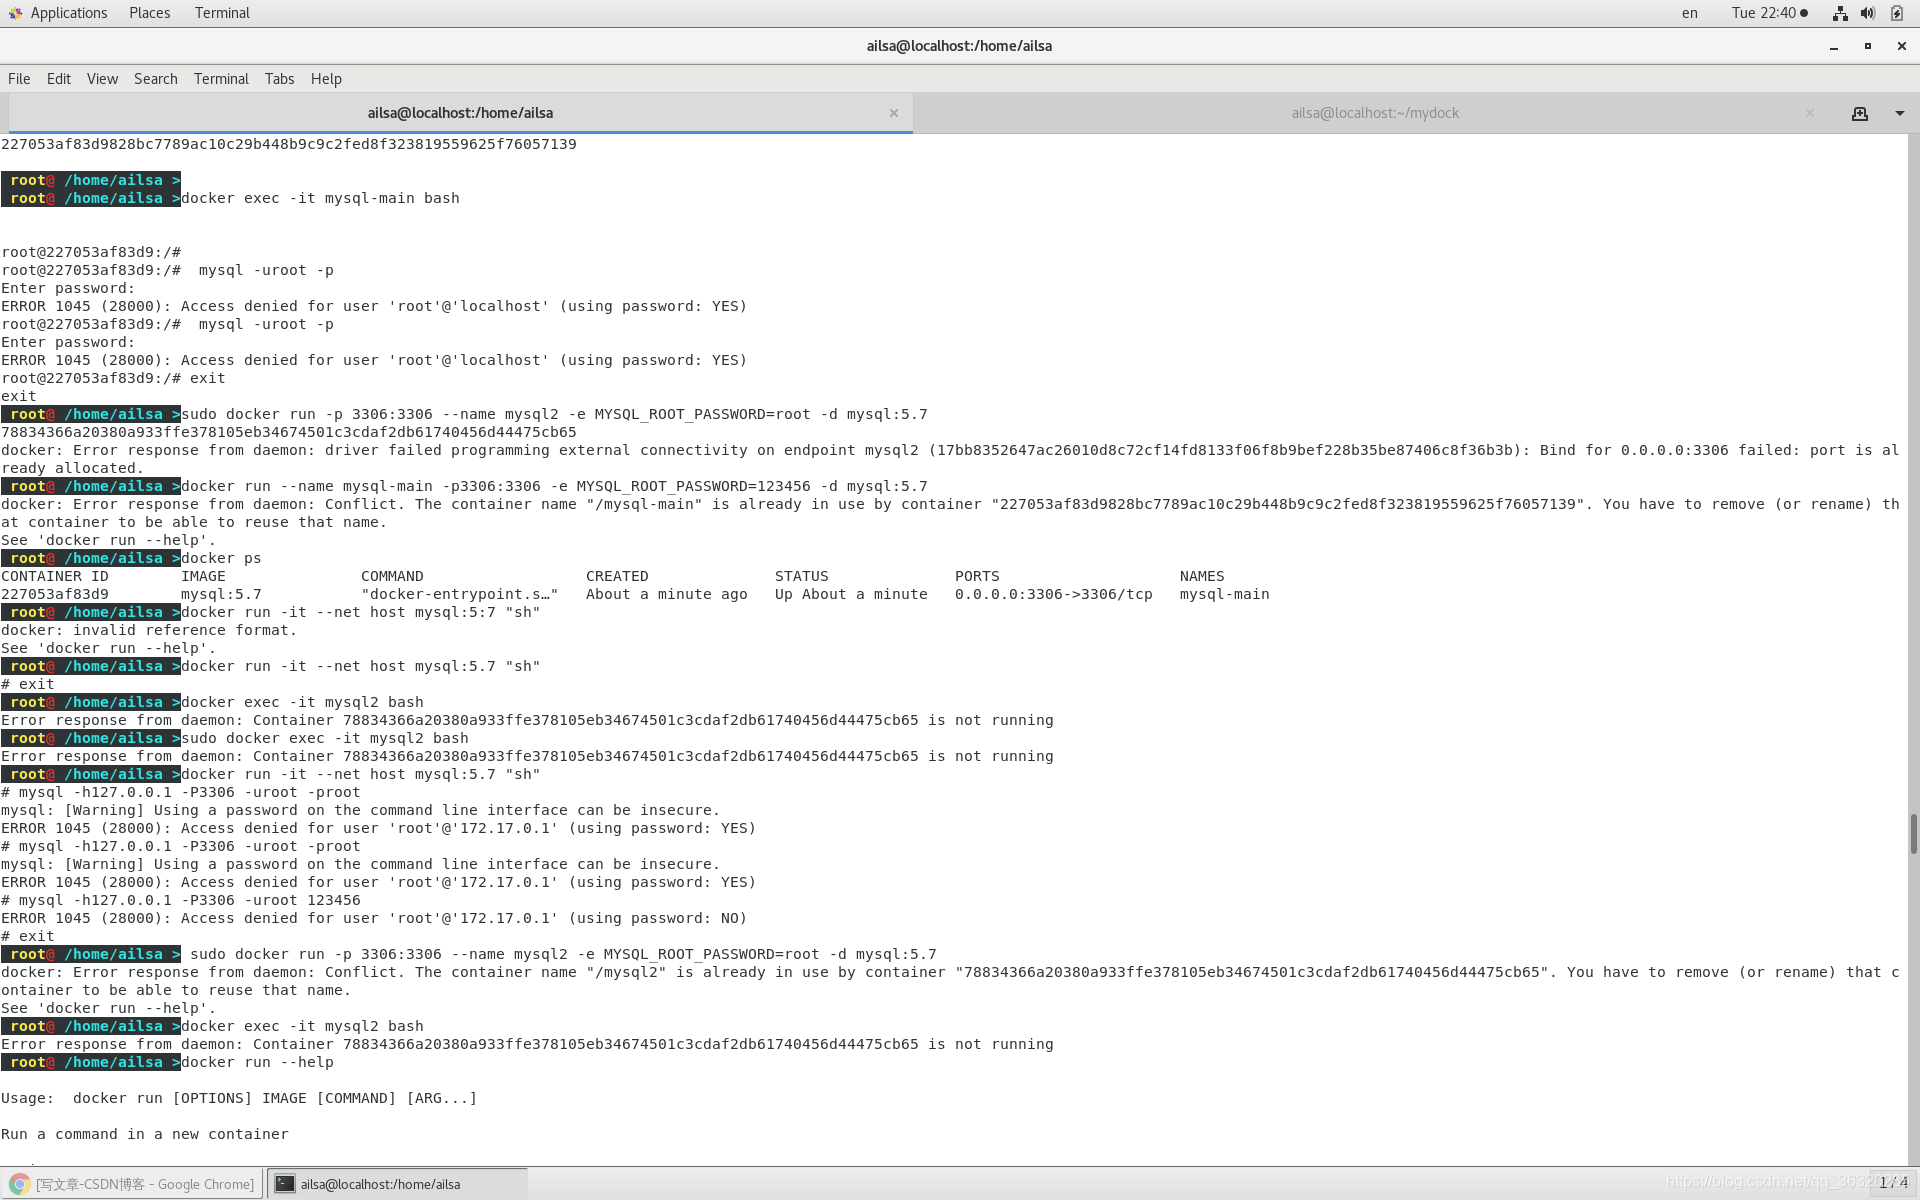
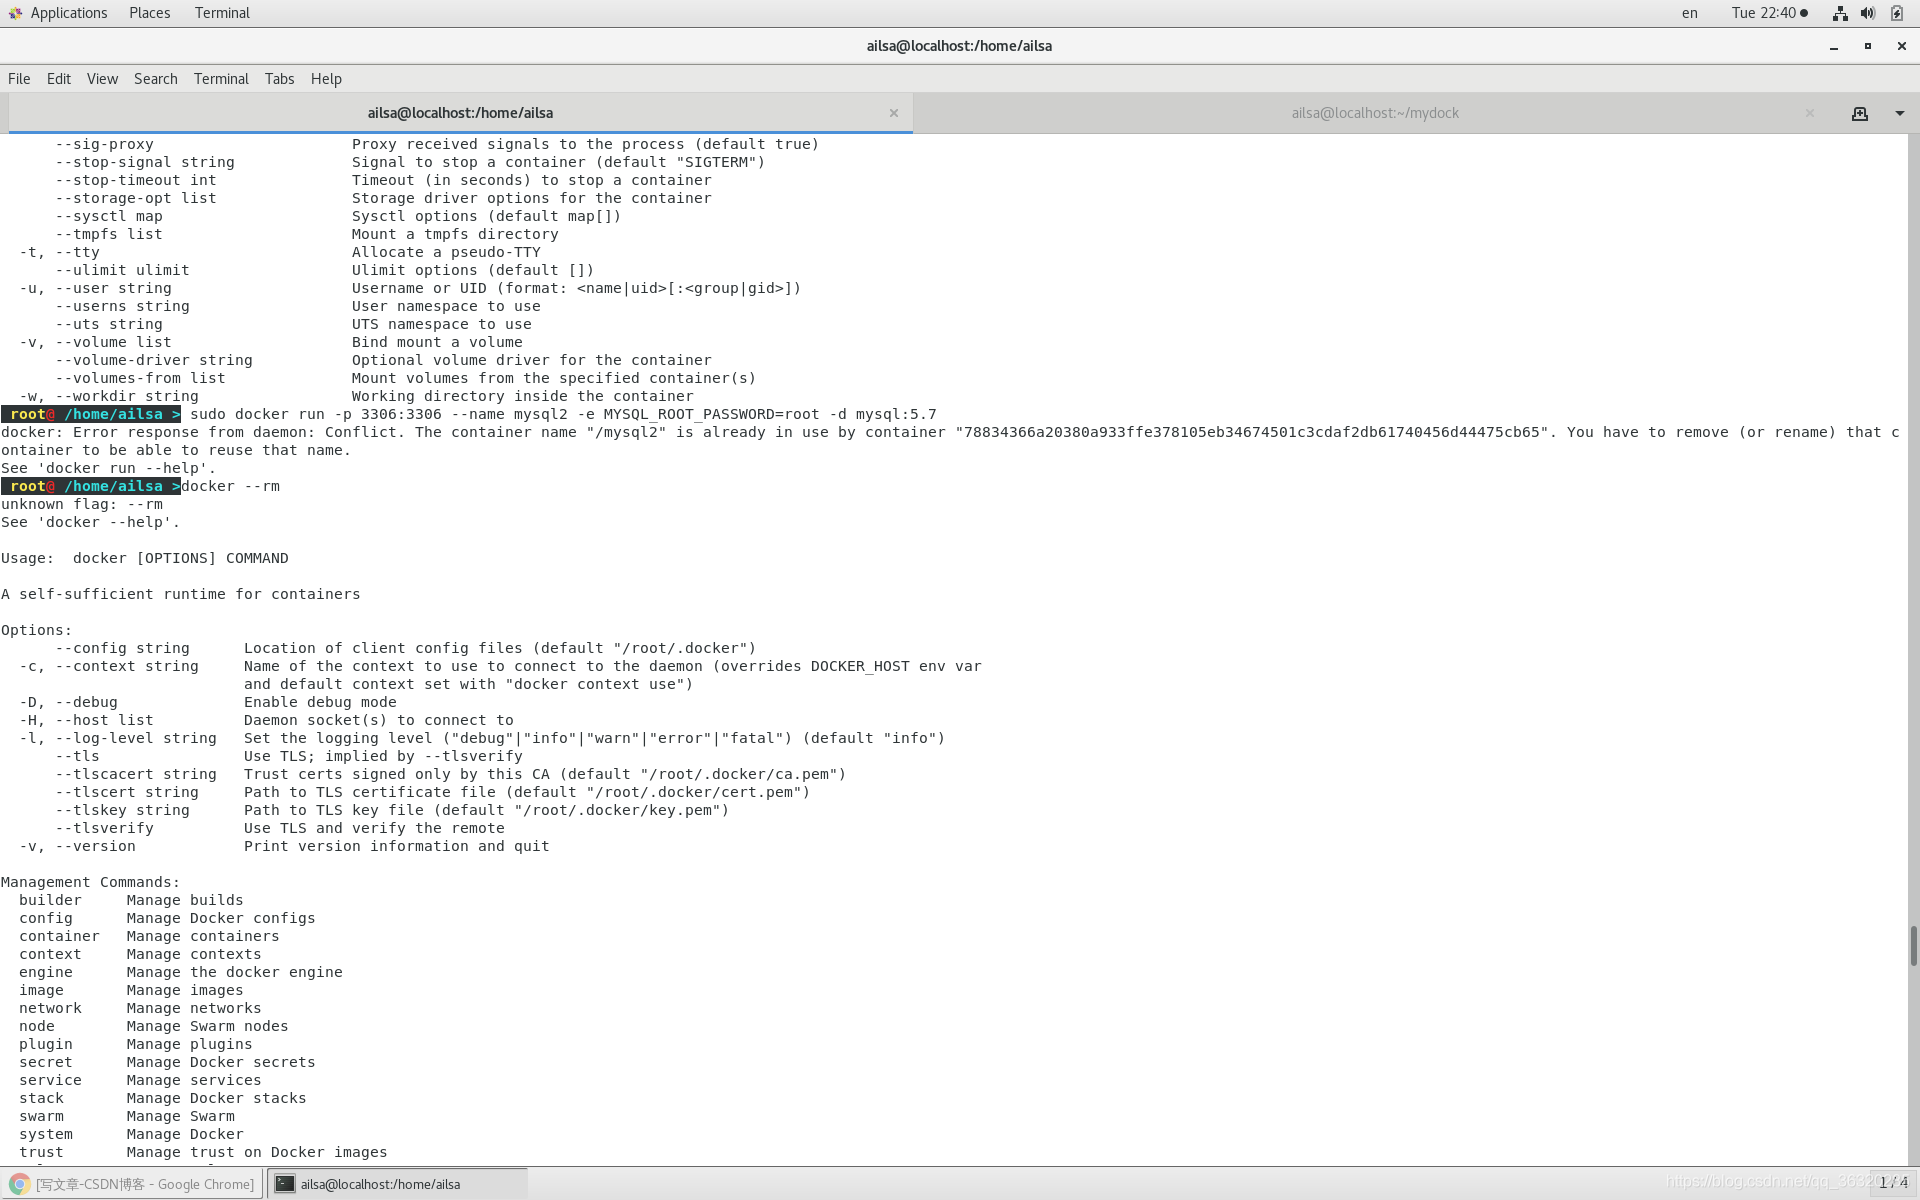
~]# sudo docker run -p 3306:3306 --name mysql2 -e MYSQL_ROOT_PASSWORD=root -d mysql:5.7
00cbdb363500c562e7ee552250b6434a33a37301cc24986645d216d6bbcd2f36
[root@centos-docker-ex ~]# docker ps
CONTAINER ID IMAGE COMMAND PORTS NAMES
00cbdb363500 mysql:5.7 “docker-entrypoint…” 0.0.0.0:3306->3306/tcp, 33060/tcp mysql2
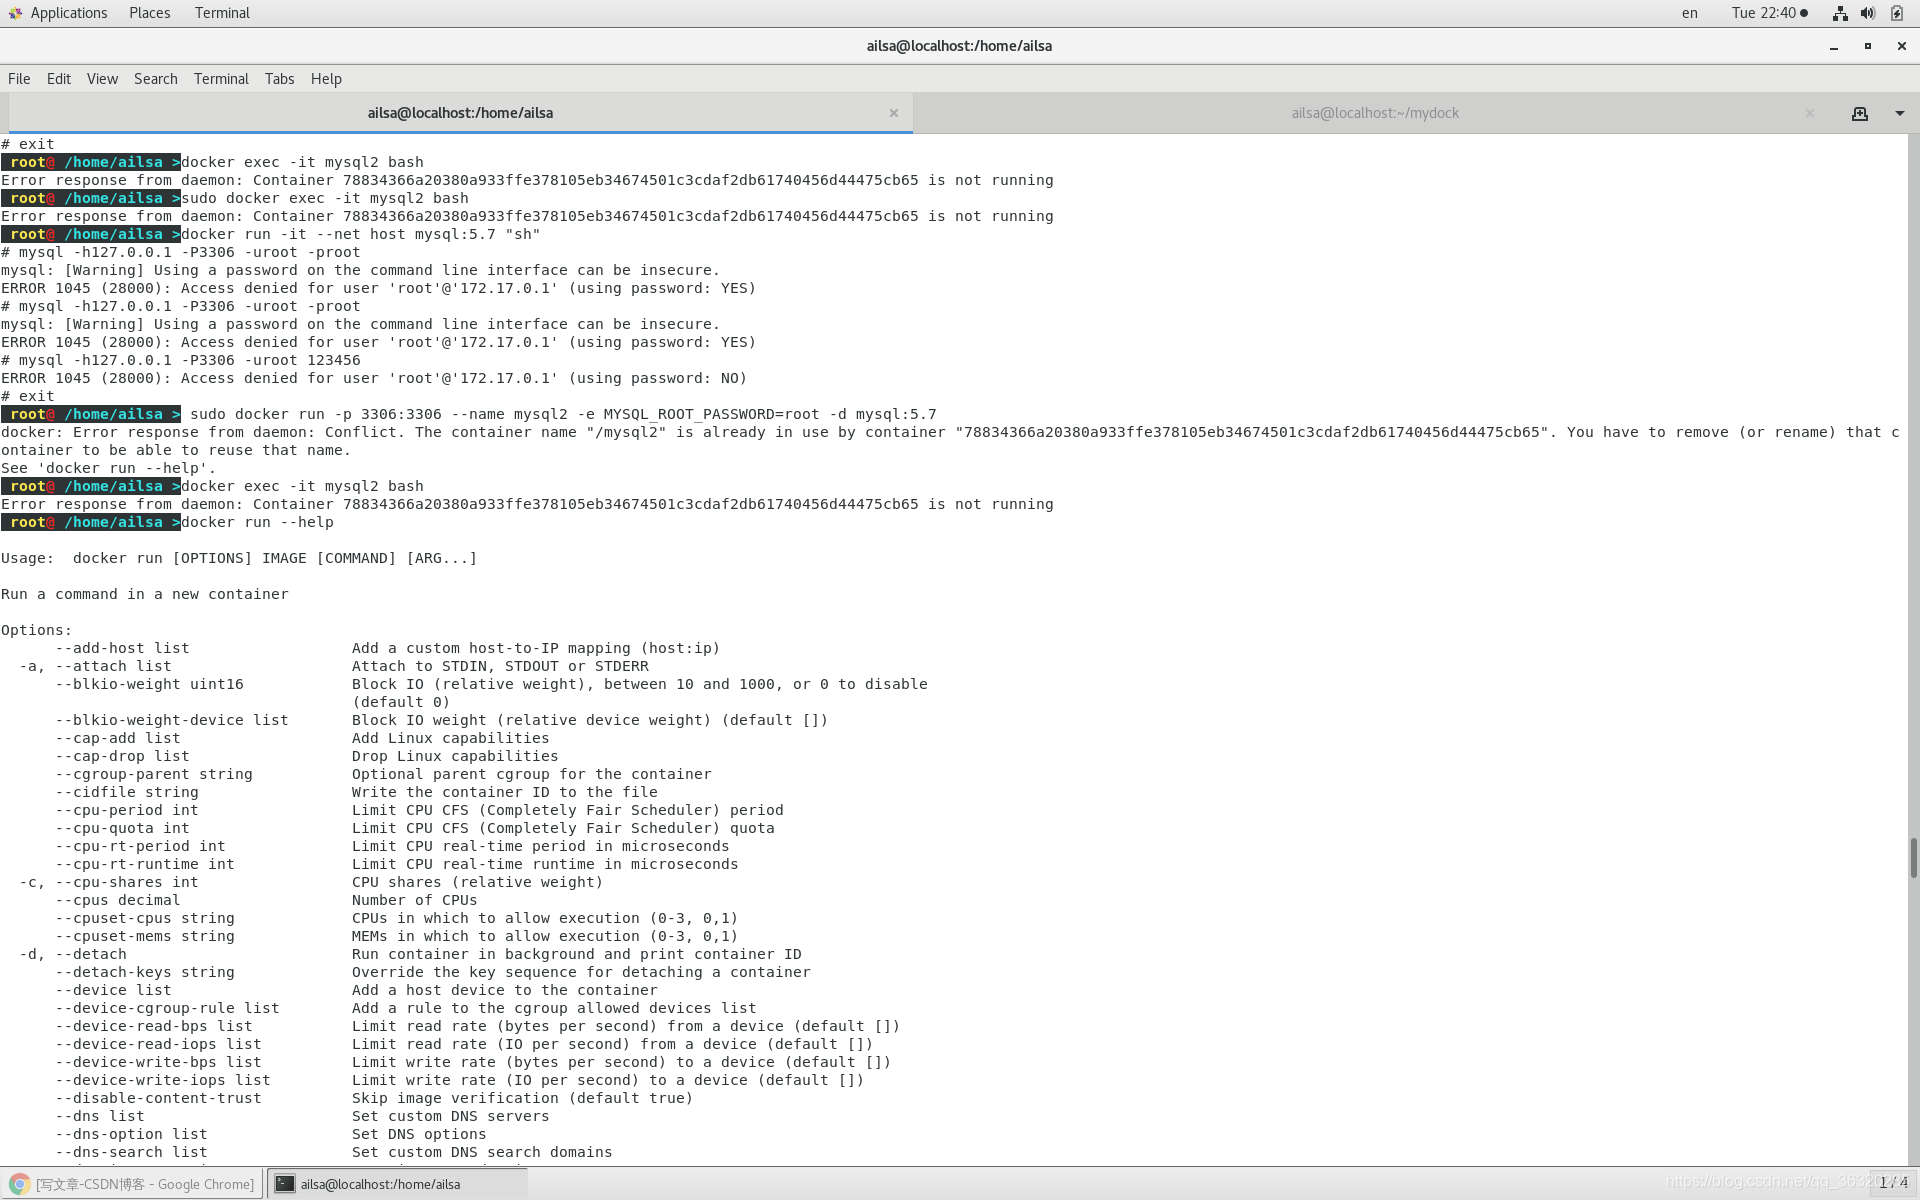
~]# docker run -it --net host mysql:5.7 “sh”
mysql -h127.0.0.1 -P3306 -uroot -proot
…
Server version: 5.7.24 MySQL Community Server (GPL)
…
mysql>
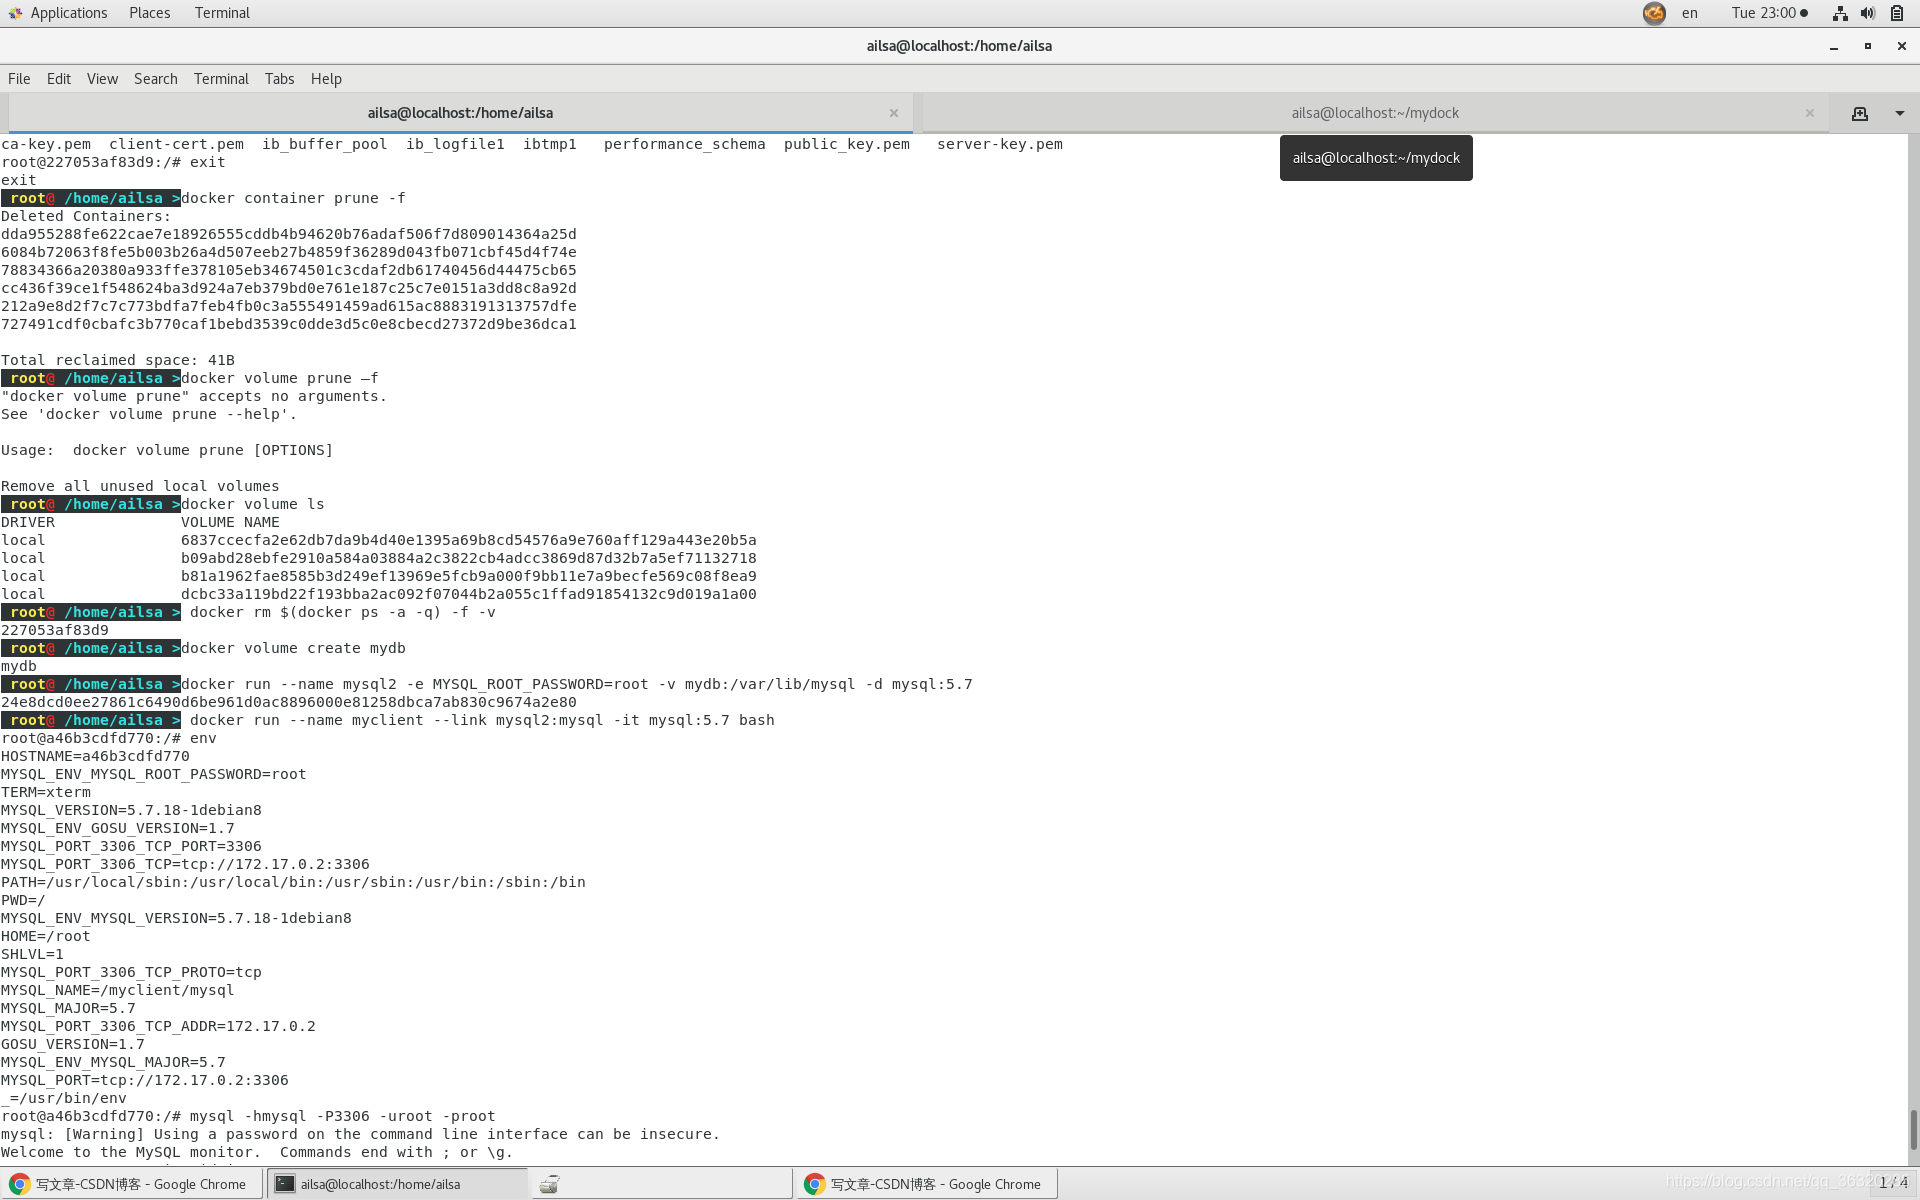
使用MySQL容器(挂载卷保存db)
– 数据库文件在哪里?
– Dockerfile 的 VOLUME /var/lib/mysql 的含义
• 每次启动 mysql 容器,docker 创建一个文件卷挂载在容器内/var/lib/mysql位置
• 这个卷在主机(host)的 /var/lib/docker/volumes/ 目录下
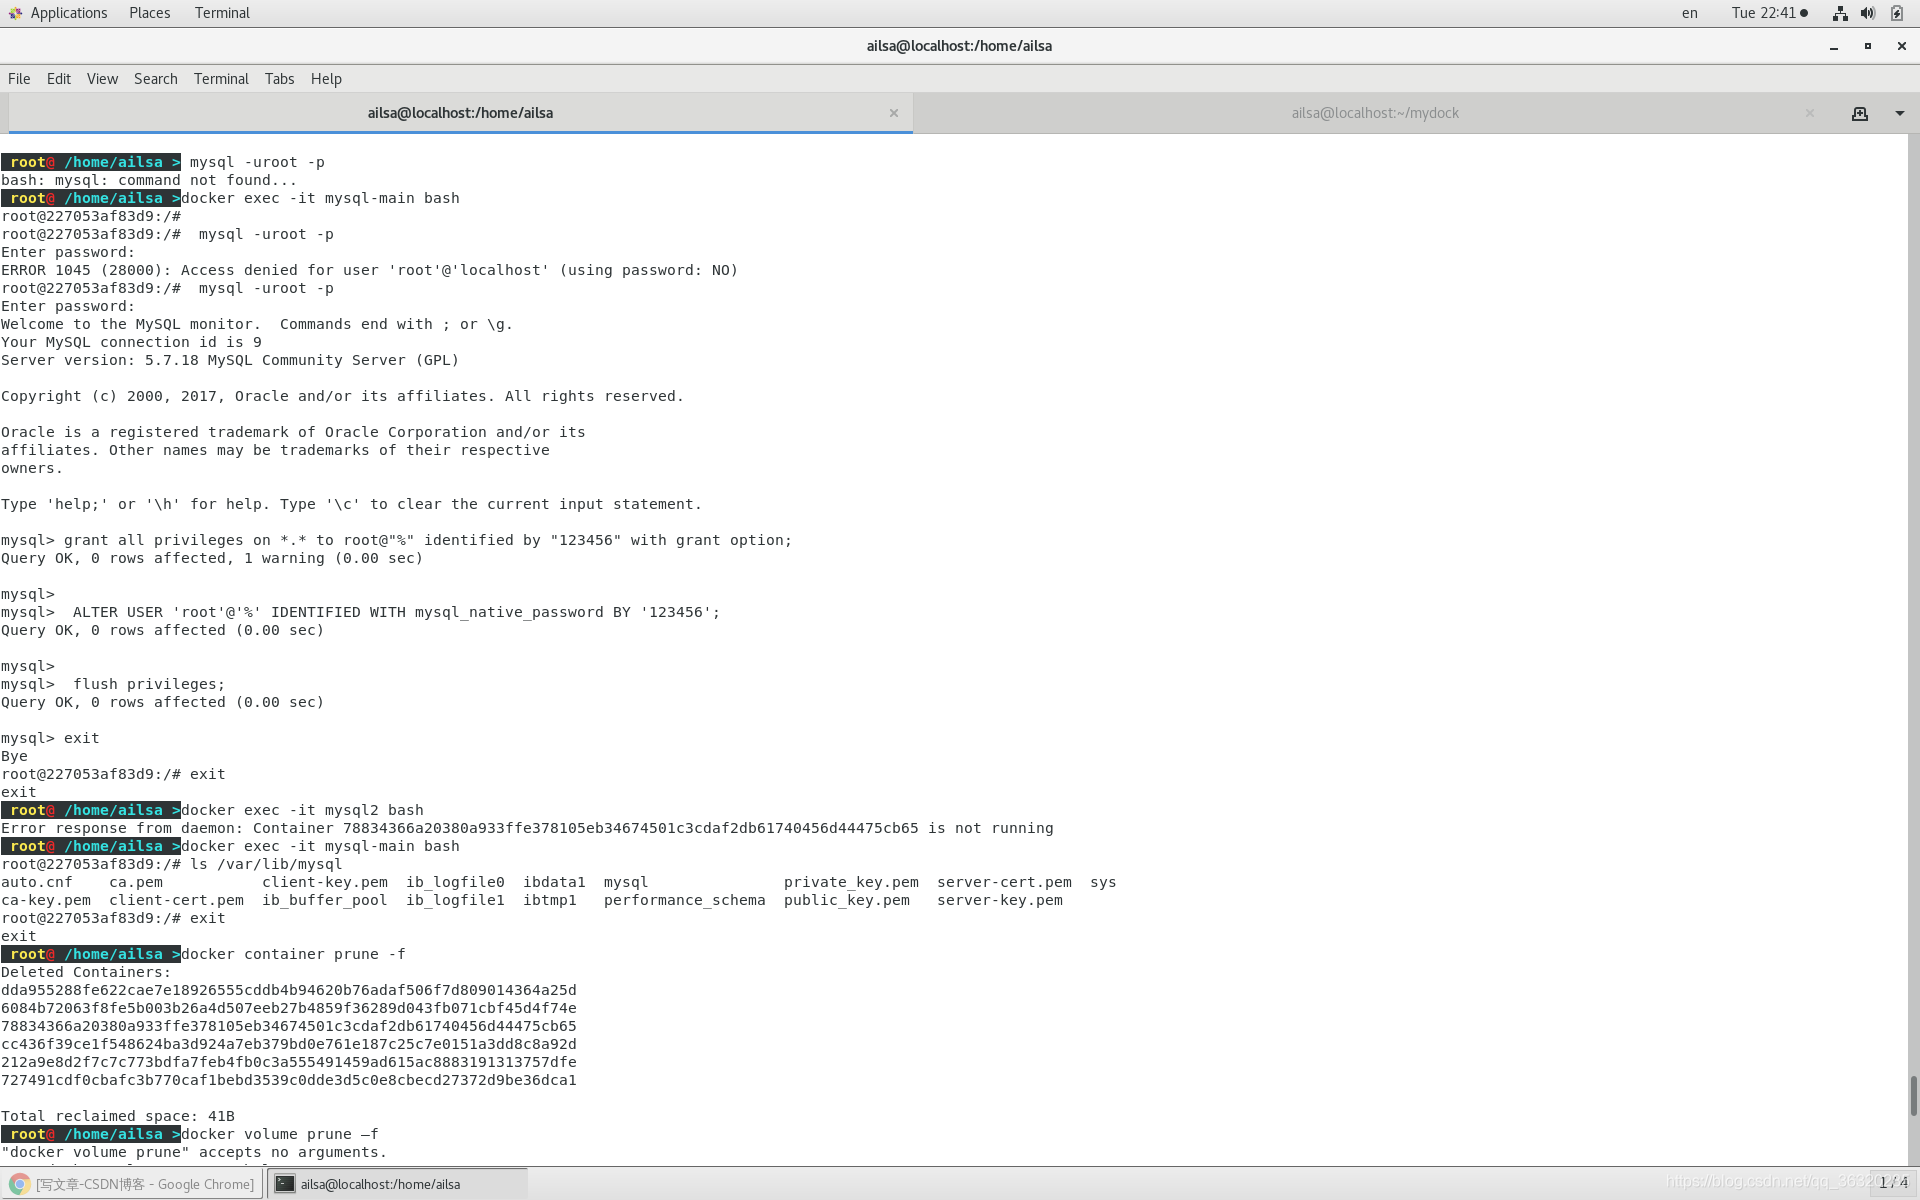
~]# docker exec -it mysql2 bash
root@00cbdb363500:/# ls /var/lib/mysql
auto.cnf client-key.pem ibdata1 private_key.pem sys
ca-key.pem ib_buffer_pool ibtmp1 public_key.pem test
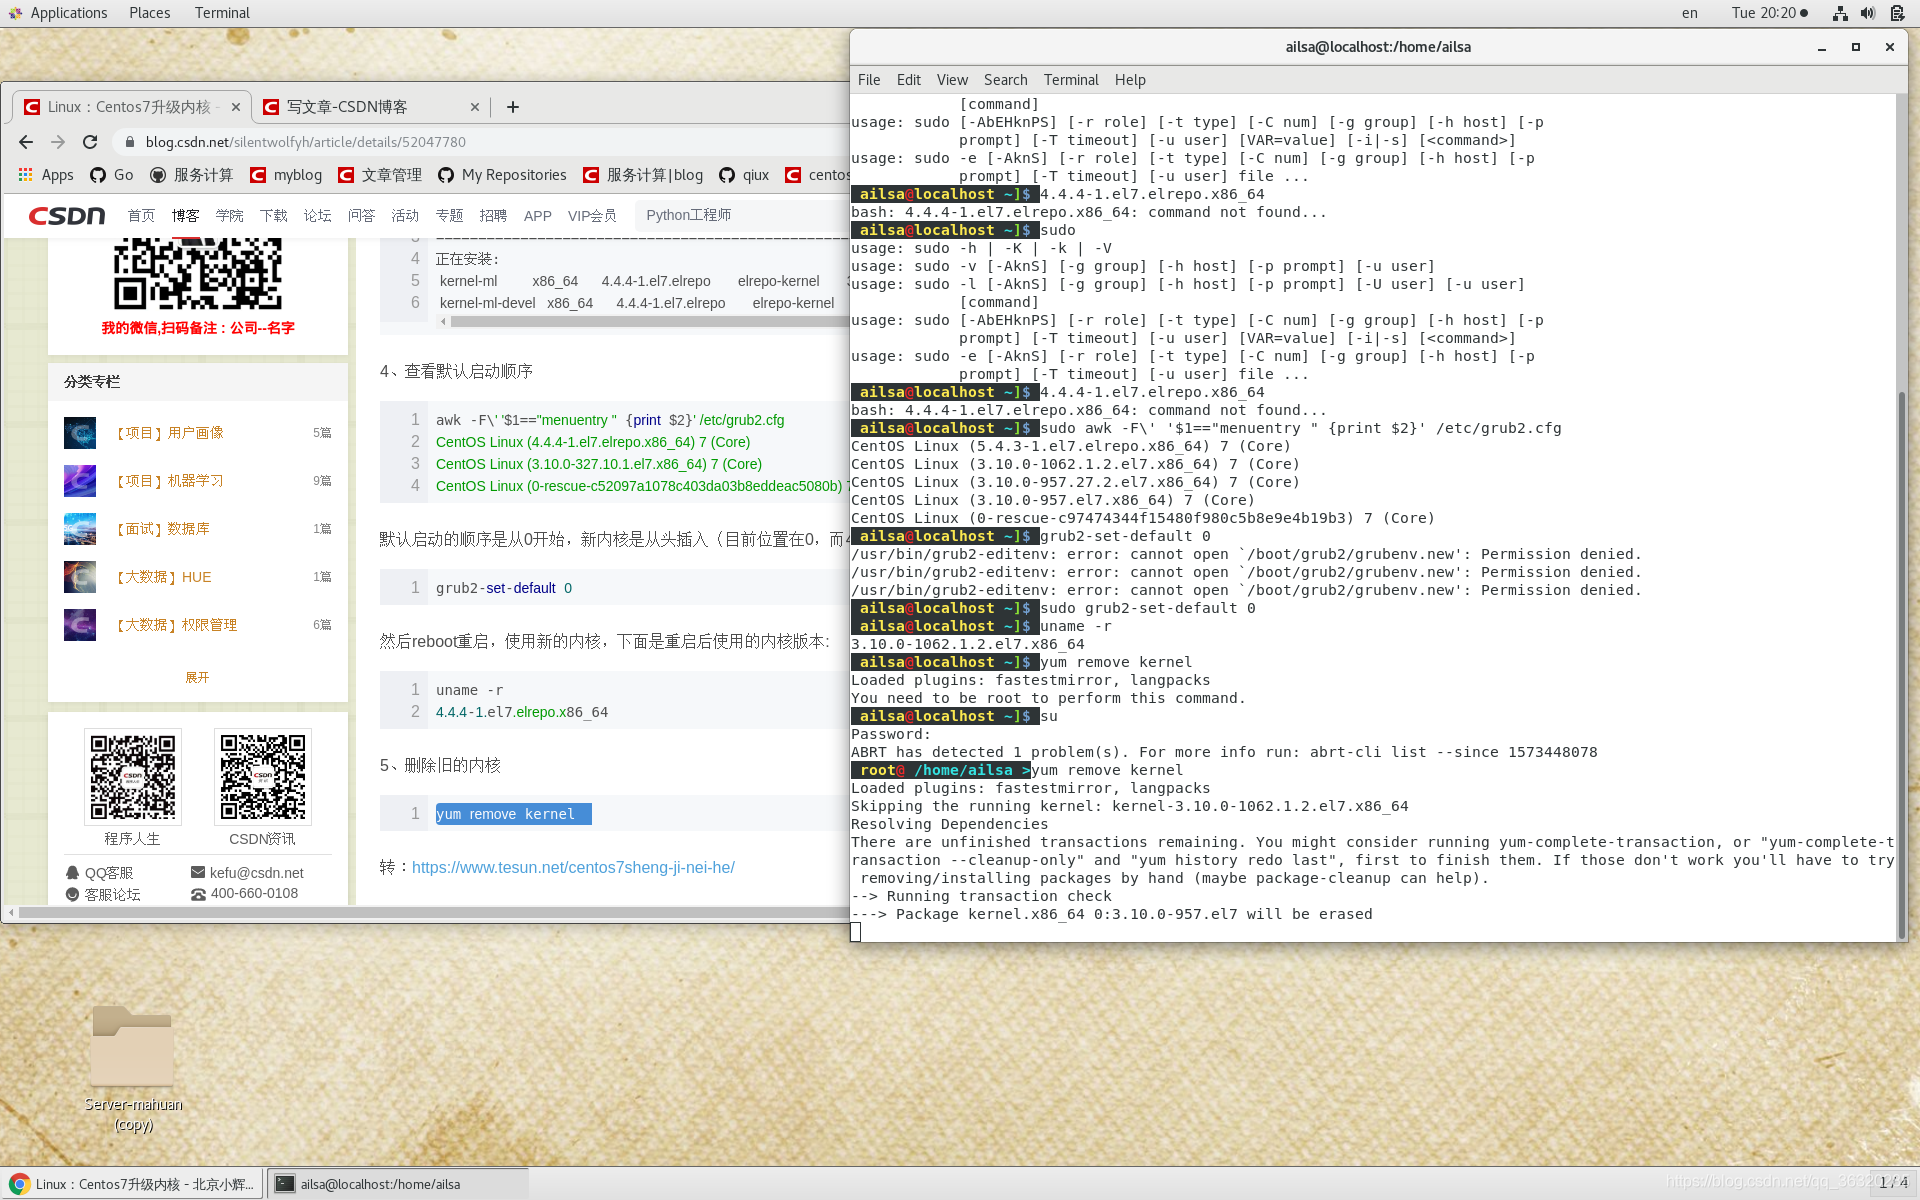
~]# docker container prune -f
~]# docker volume prune –f
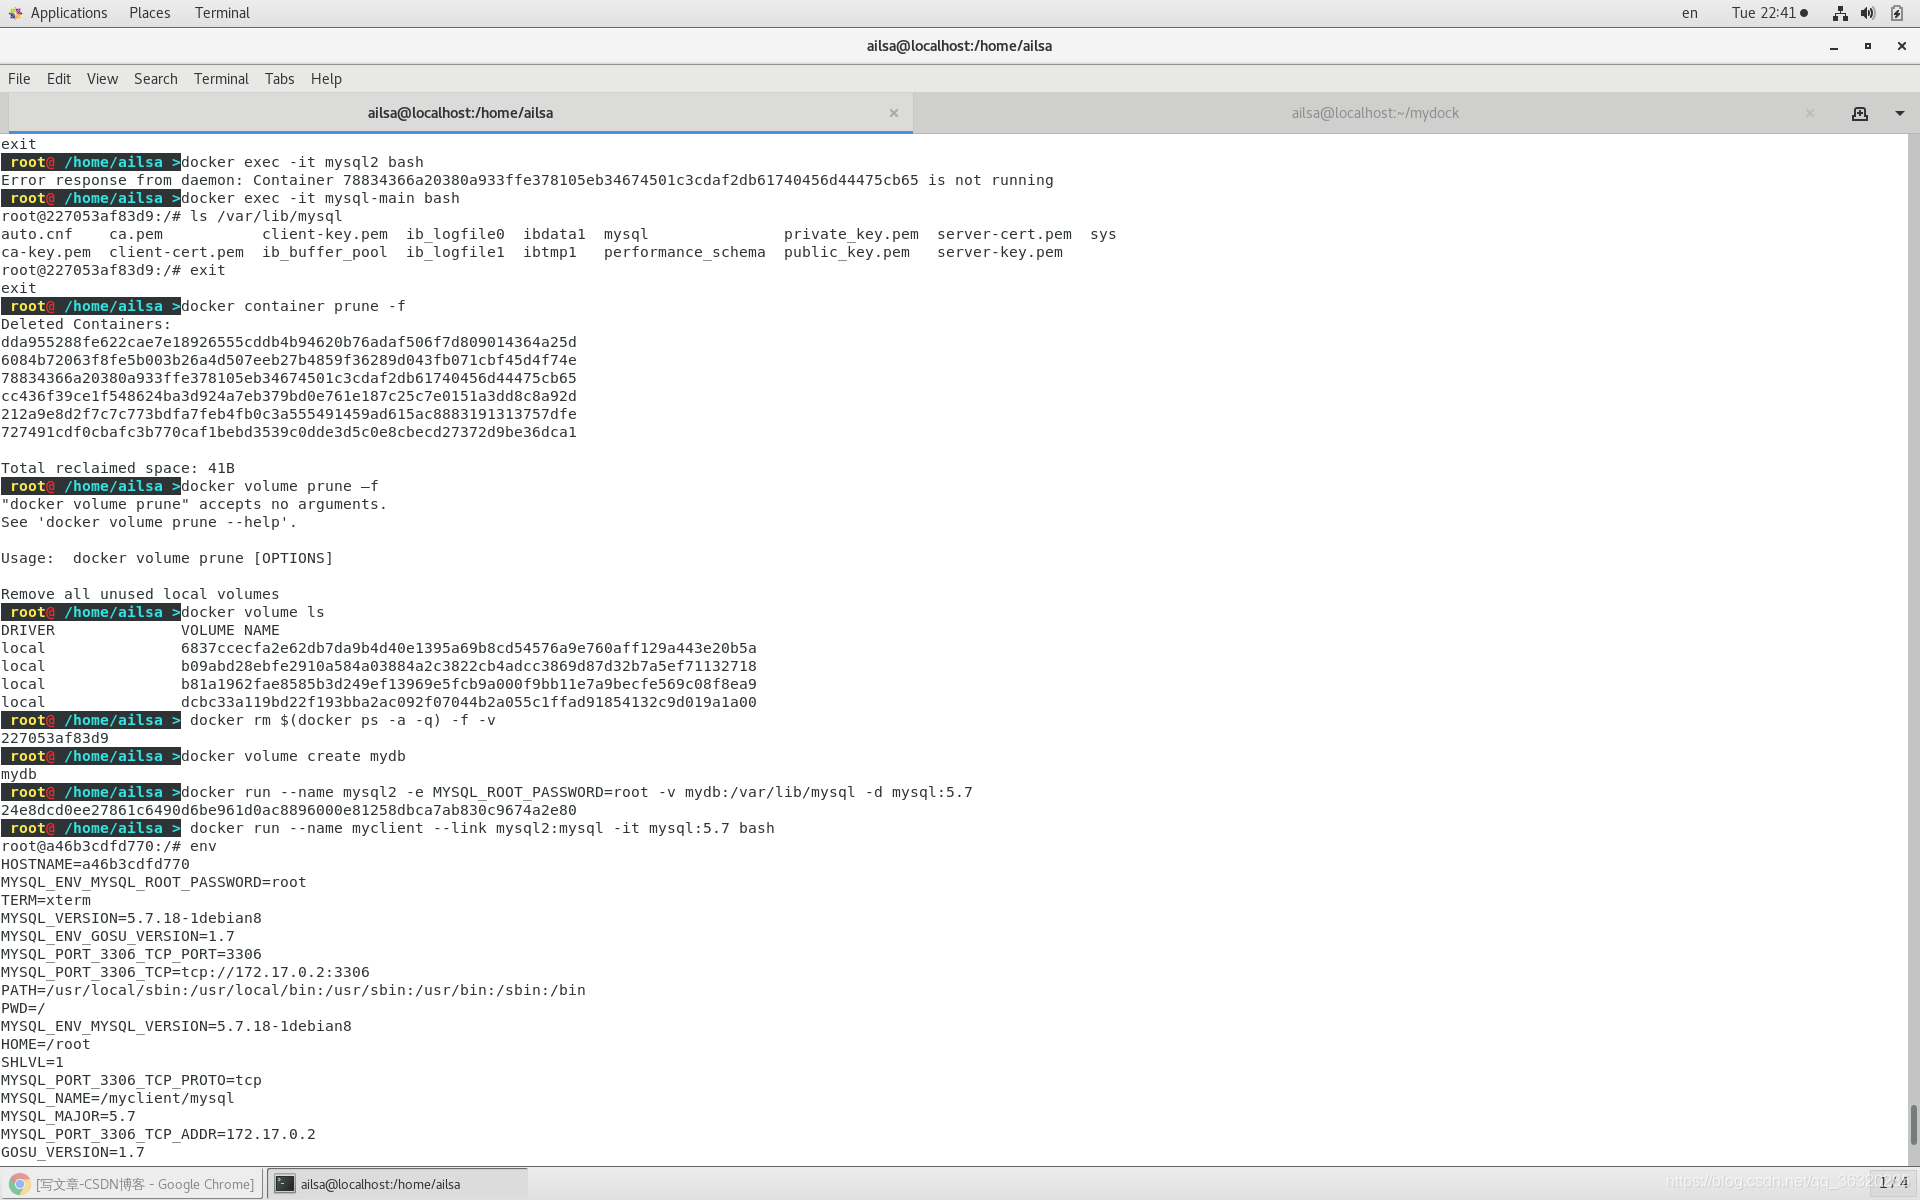
~]# docker volume ls
DRIVER VOLUME NAME
local dffe3dbb73fd6948fc557380b61ca2459b9d410707287a37d1742bf6564a3669
创建卷并挂载
– 注意:这里没有暴露端口到主机!
– 将自己定义的数据卷挂载在 /var/lib/mysql
• 启动客户端容器链接服务器
– 注意:这里使用了 --link 连接两个容器
– 客户端容器内可以使用 mysql 这个别名访问服务器
~]# docker rm $(docker ps -a -q) -f -v
~]# docker volume create mydb
~]# docker run --name mysql2 -e MYSQL_ROOT_PASSWORD=root -v mydb:/var/lib/mysql -d mysql:5.7
~]# docker run --name myclient --link mysql2:mysql -it mysql:5.7 bash
root@768d01904d4e:/# env
…
root@768d01904d4e:/# mysql -hmysql -P3306 -uroot -proot


 被折叠的 条评论
为什么被折叠?
被折叠的 条评论
为什么被折叠?
 到【灌水乐园】发言


