


版权声明:本文为博主原创文章,未经允许,不得转载。https://mp.youkuaiyun.com/mdeditor/91447781
一、前期环境
1.Ubuntu 16.04
2.cuda 9.0
3.cudnn 7.6.0
4.python 2.7
5. tensorflow 1.8.0
环境搭建见博客 https://blog.youkuaiyun.com/qq_29370449/article/details/91491428
二、代码运行
1 代码下载
本人本次使用的为https://github.com/smallcorgi/Faster-RCNN_TF,可通过以下代码直接下载:
git clone --recursive https://github.com/smallcorgi/Faster-RCNN_TF.git
2 更新GPU的架构配置
cd Faster-RCNN_TF/lib
vim setup.py
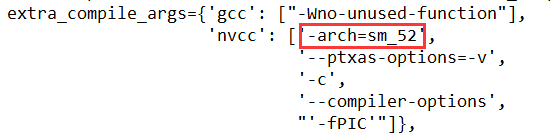
如上,进入lib目录下,在setup.py文件中找到 -arch 这个参数,改成自己的GPU架构。
对应的配置如下图:
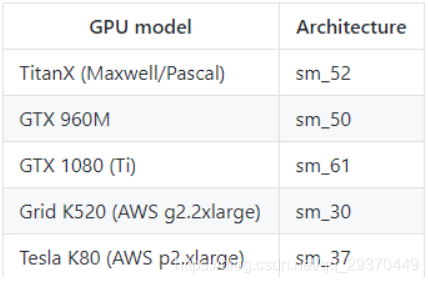
本人使用的服务器为TITAN Xp,因此将 -arch改为sm_52。
大家可以通过nvidia-smi查看自己电脑的GPU配置。
3 链接cython 模块
cd Faster-RCNN_TF/lib
make
4 下载测试模型
下载在PASCAL VOC 2007上训练的模型进行demo测试
下载地址:https://drive.google.com/file/d/0ByuDEGFYmWsbZ0EzeUlHcGFIVWM/view
或 https://www.dropbox.com/s/cfz3blmtmwj6bdh/VGGnet_fast_rcnn_iter_70000.ckpt?dl=0
模型下载好后,将其(VGGnet_fast_rcnn_iter_70000.ckpt)放在Faster-RCNN_TF/demo_model/目录下。
5 运行demo
运行demo.py文件
cd Faster-RCNN_TF
export CUDA_VISIBLE_DEVICES=n(n为可用的gpu编号)
python ./tools/demo.py --model demo_model/VGGnet_fast_rcnn_iter_70000.ckpt
5.1 运行demo过程中遇到的错误一
错误:ensorflow.python.framework.errors.NotFoundError: /home/Projects/Faster-RCNN_TF/tools/…/lib/roi_pooling_layer/roi_pooling.so: undefined symbol: _ZTIN10tensorflow8OpKernelE
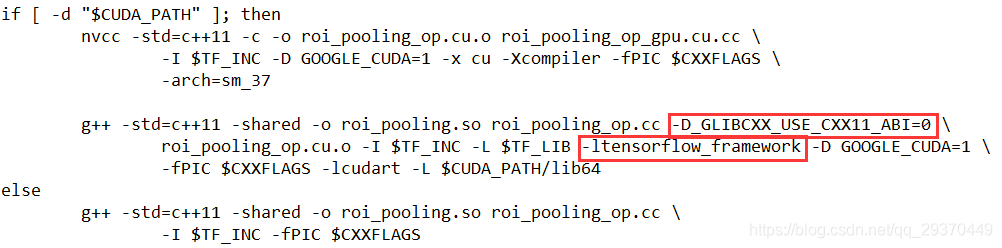
分析:因为make.sh文件中缺少了TF_LIB 编译参数,还需要添加 -D_GLIBCXX_USE_CXX11_ABI=0
解决:
vim cd Faster-RCNN_TF/lib/make.sh
(1) 修改 make.sh文件添加TF_LIB,并修改相应的编译参数
TF_LIB=$(python -c 'import tensorflow as tf; print(tf.sysconfig.get_lib())')

if [ -d "$CUDA_PATH" ]; then
	nvcc -std=c++11 -c -o roi_pooling_op.cu.o roi_pooling_op_gpu.cu.cc \
		-I $TF_INC -D GOOGLE_CUDA=1 -x cu -Xcompiler -fPIC $CXXFLAGS \
		-arch=sm_37

        g++ -std=c++11 -shared -o roi_pooling.so roi_pooling_op.cc -D_GLIBCXX_USE_CXX11_ABI=0 \
                roi_pooling_op.cu.o -I $TF_INC -L $TF_LIB -ltensorflow_framework -D GOOGLE_CUDA=1 \
                -fPIC $CXXFLAGS -lcudart -L $CUDA_PATH/lib64
else
	g++ -std=c++11 -shared -o roi_pooling.so roi_pooling_op.cc \
		-I $TF_INC -fPIC $CXXFLAGS
(2)重新make,然后运行
5.2 运行demo过程中遇到的错误二
错误:InternalError: Dst tensor is not initialized.
分析:出现这个错误一般是GPU内存耗尽,挂在后台进程中的IPython内核会这样做,tensorflow 算是一个比较贪心的工具了就算用device_id指定gpu 也会占用别的GPU的显存资源。
解决办法:运行程序之前,先运行export CUDA_VISIBLE_DEVICES=n(n为可用的gpu编号),仅显卡设备 n 这一台GPU可见,然后再去执行Python代码 .py 才不会占用别的GPU资源。
5.3 运行demo过程中遇到的错误三
错误:_tkinter.TclError: no display name and no $DISPLAY environment variable
分析:Linux终端没有GUI,matplotlib 绘制的图像没有输出出来
解决办法:需要对demo.py做如下两处修改:
- 将matplotlib的后端模式为”Agg”
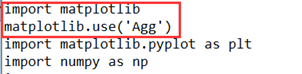
如果在demo.py中修改matplotlib的后端模式为”Agg”没有用,可以更改其配置文件matplotlibrc。
- 通过命令whereis matlotlibrc可以找到该配置文件的位置,编辑一下,找到backend,将其改成Agg就可以了。
- 如果找不到该配置文件,可以进入~/.config/matplotlib,创建文件matplotlibrc,添加如下一行:
backend : Agg
2.修改代码,不要让图像show,而是把图像保存起来。
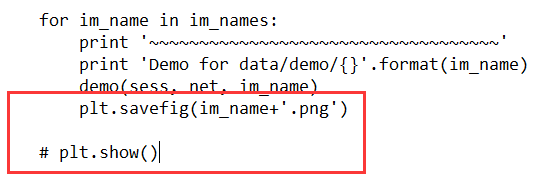
解决完以上问题,再运行demo.py文件就成功了。
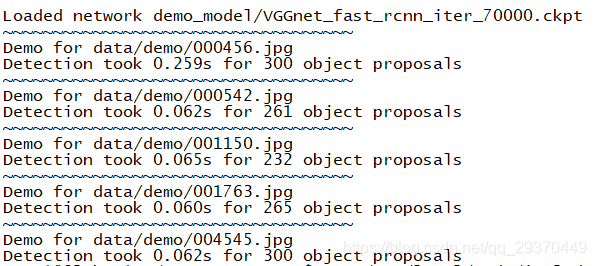
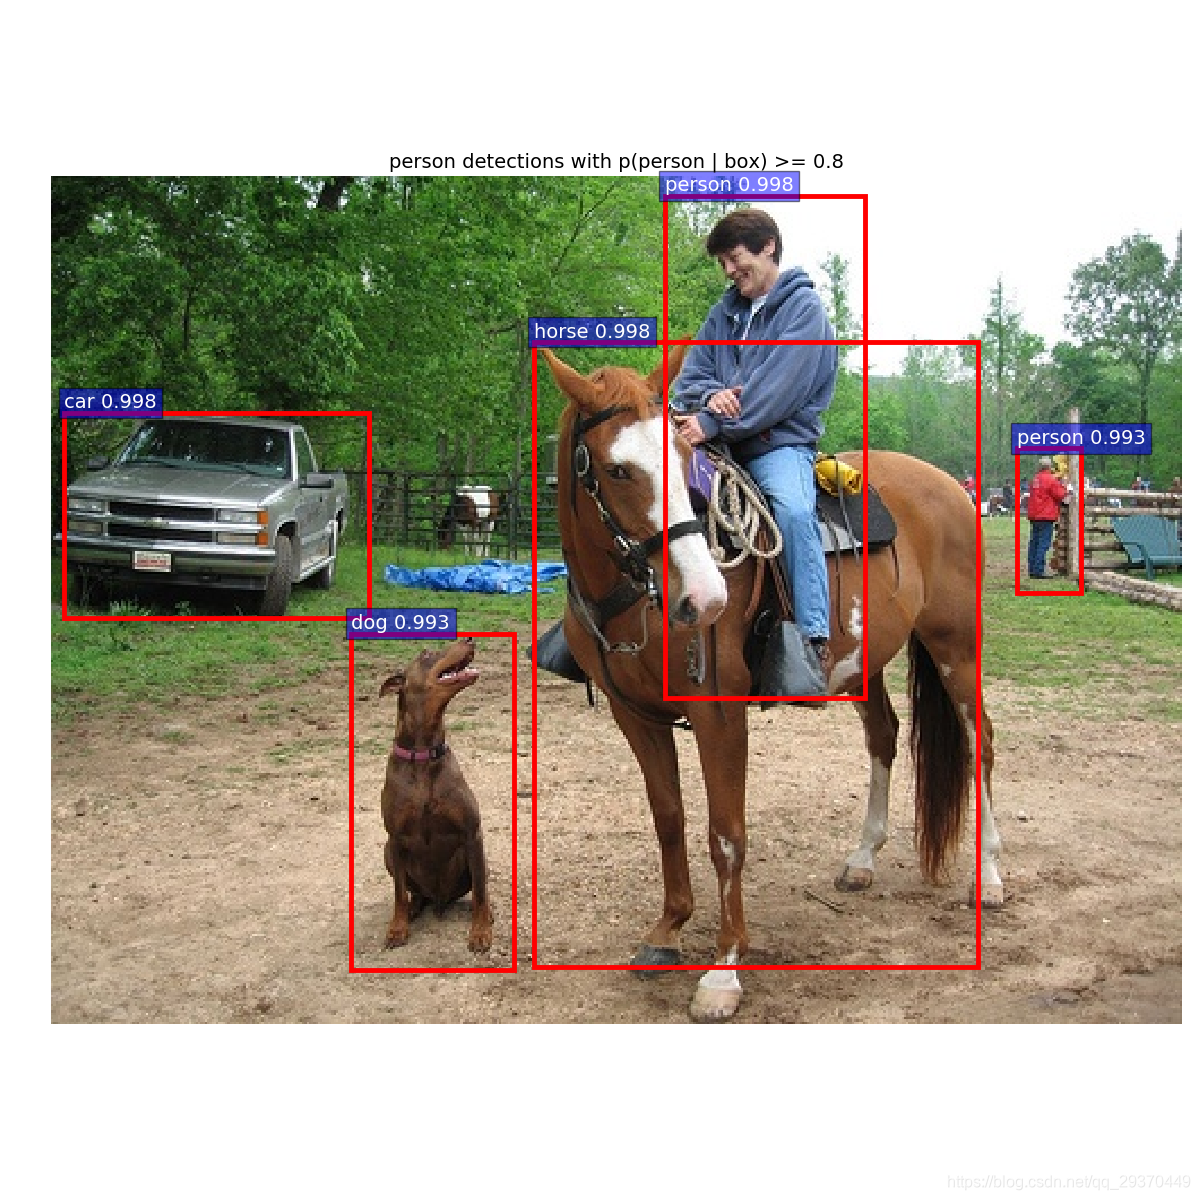
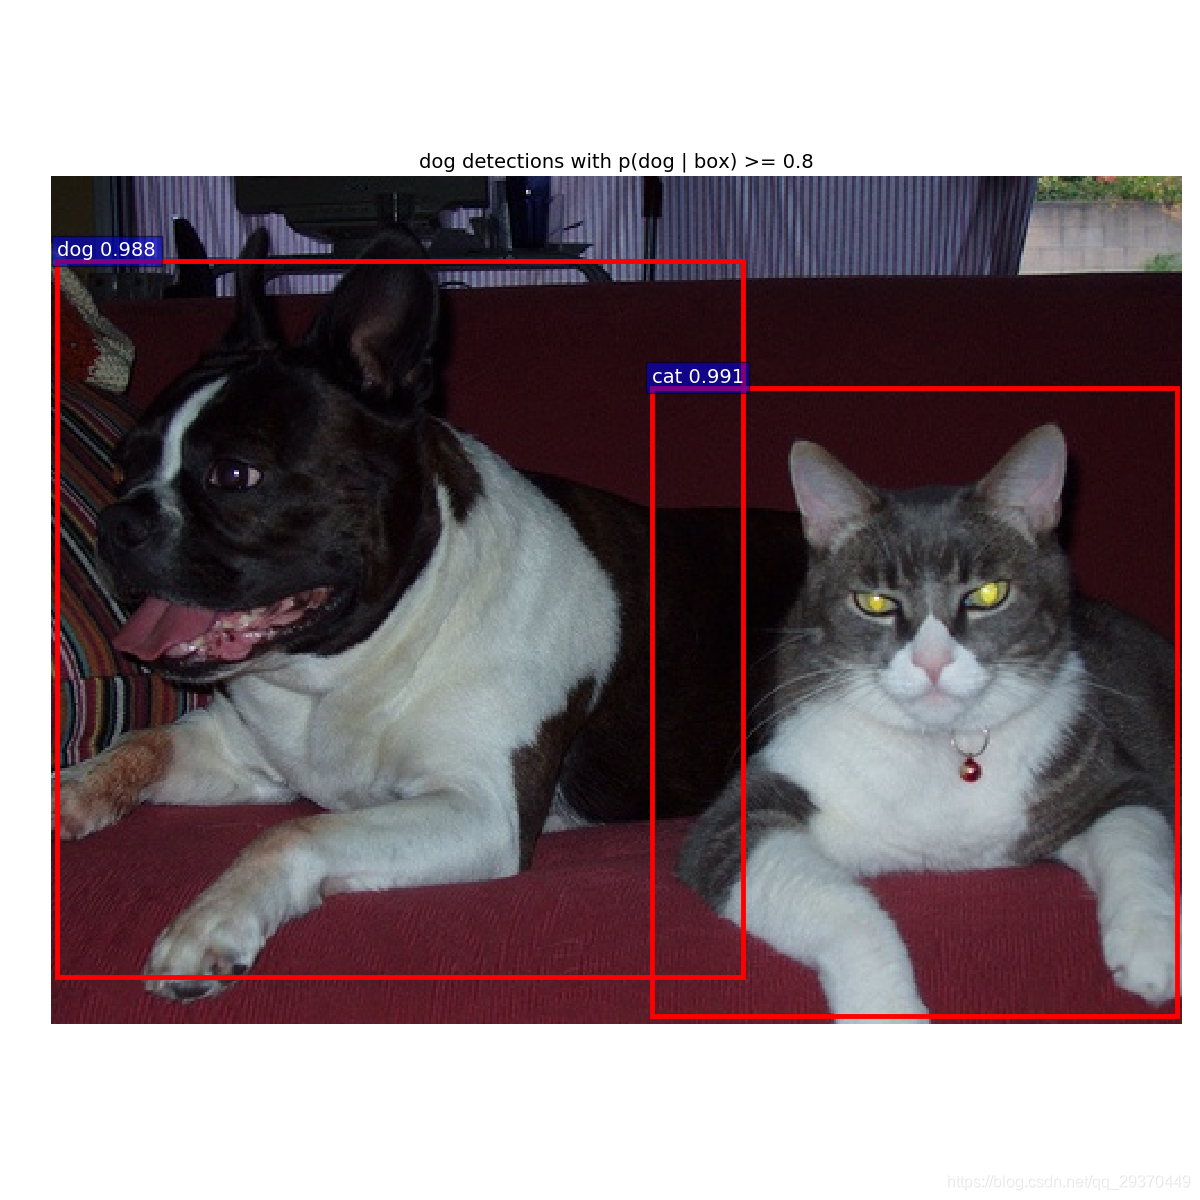
domo执行完,图片会保存在Faster-RCNN_TF/下,下载下来如下图:

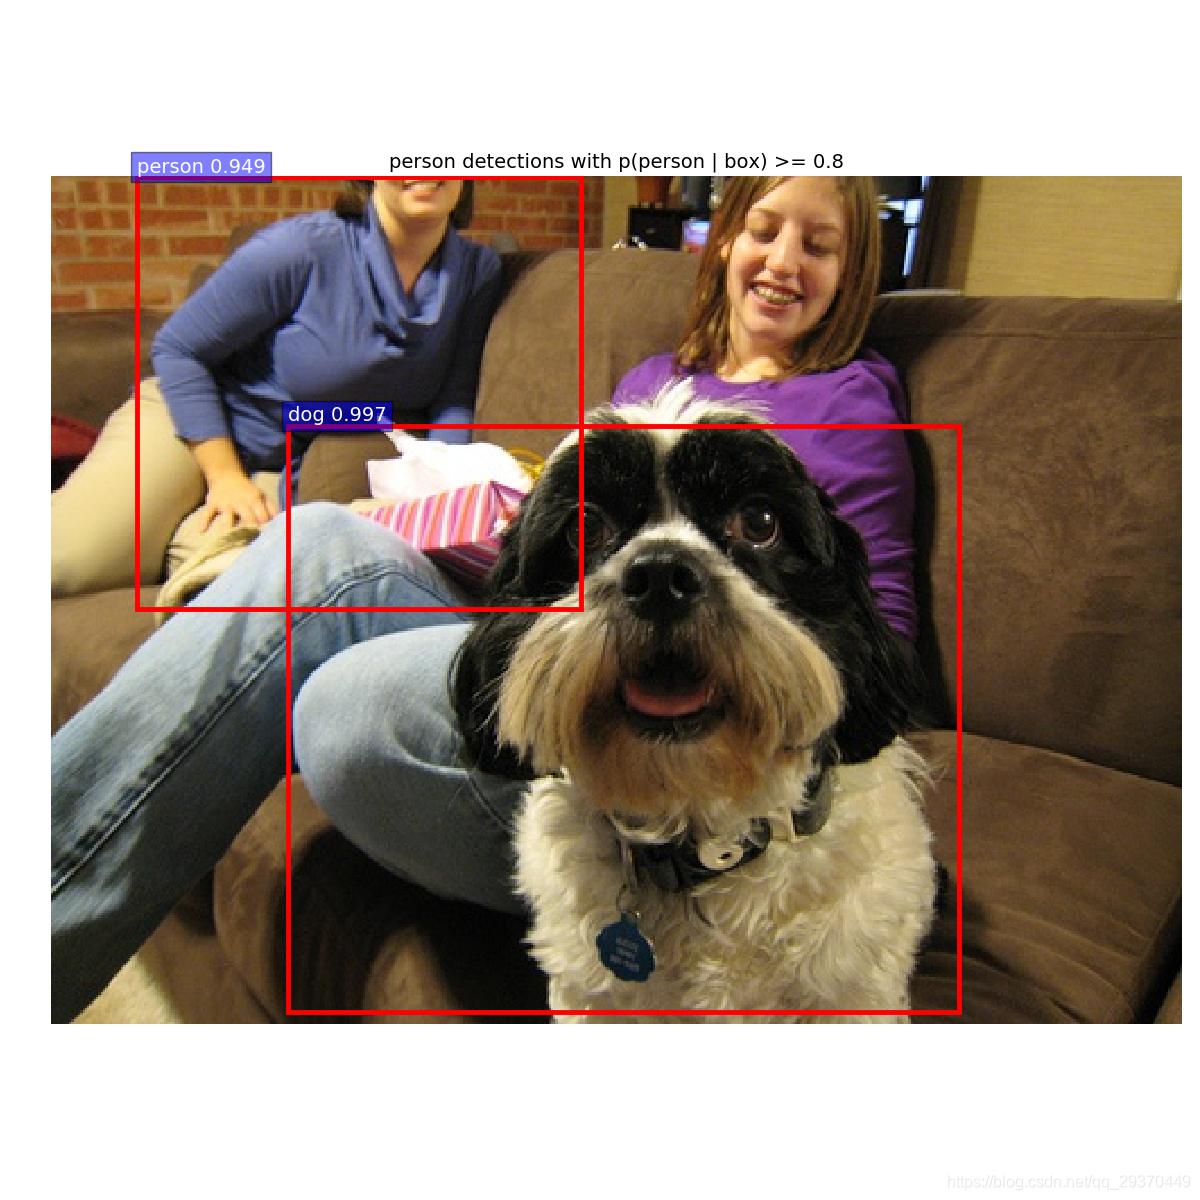
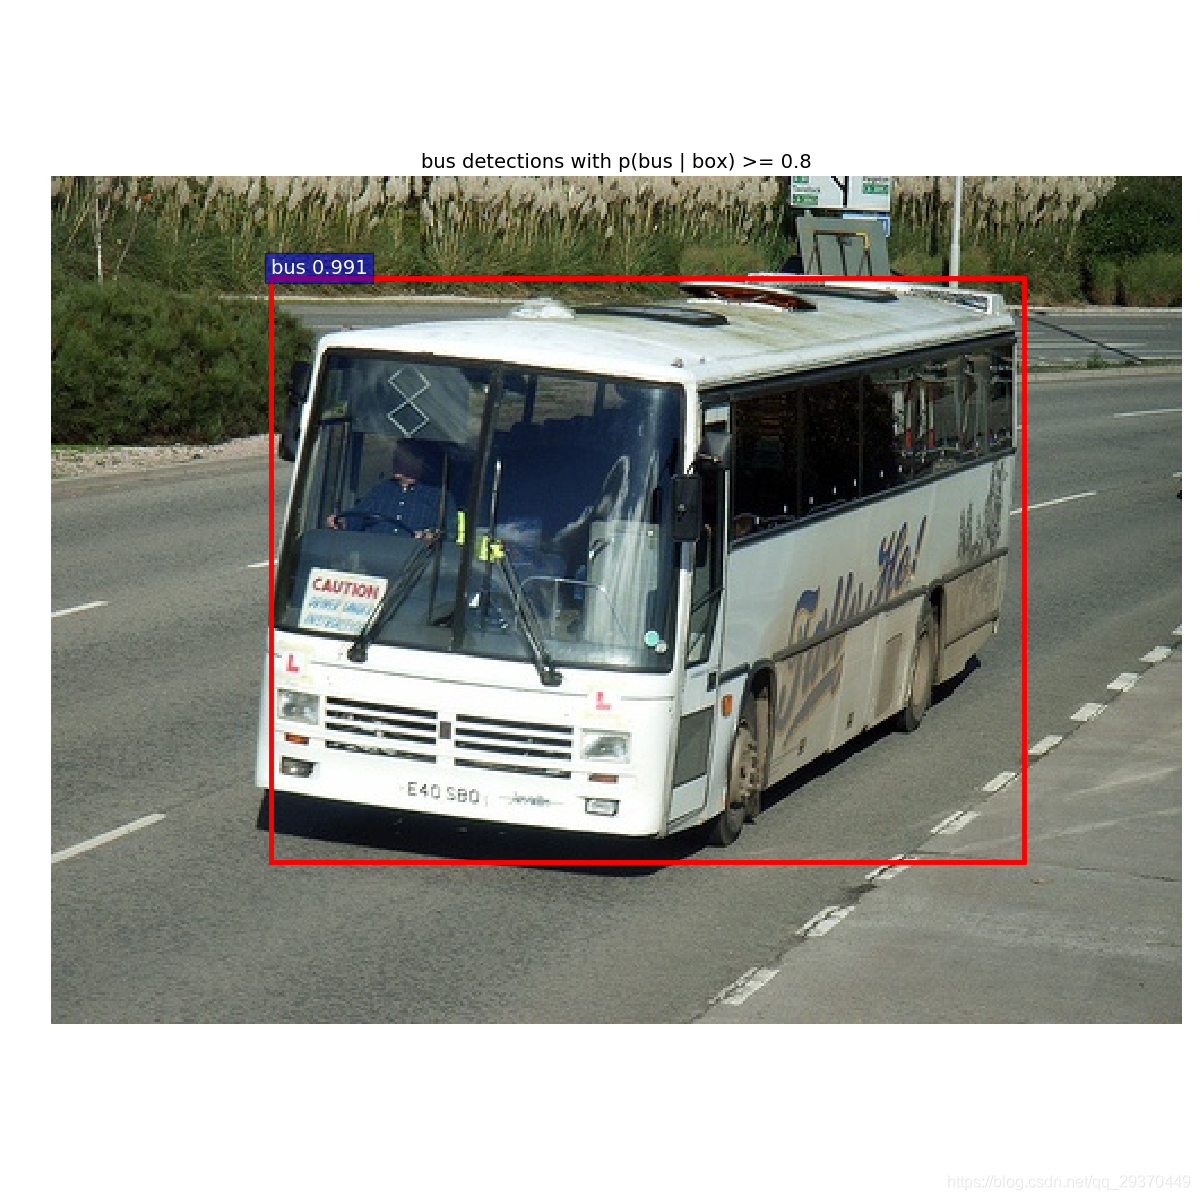
执行完demo,接下来就可以进行模型训练了。
模型训练请见博客 https://blog.youkuaiyun.com/qq_29370449/article/details/91615684


 3050
3050

 被折叠的 条评论
为什么被折叠?
被折叠的 条评论
为什么被折叠?
 到【灌水乐园】发言


