


本文系统介绍了智能体(AI Agent)的功能架构、核心能力和工程技术,涵盖感知、规划、行动与反思的闭环交互。通过脑-感知-行动三模块架构、规划-记忆-工具三位一体模型以及MRKL架构,阐述了Agent应具备的能力体系和解决方案。文章还深入探讨了任务拆解技术(CoT、ToT、Self-Consistency)、自我反思机制(ReAct、Reflexion)以及工具使用范式(Function Call、MCP),并详细介绍了分层记忆系统设计和向量检索技术。最后,文章提出了Agent系统集成、性能优化策略和未来发展方向,为读者构建完整的Agent知识框架提供了全面指导。
一、智能体架构的三大维度
1.1 功能维度:脑-感知-行动三位一体
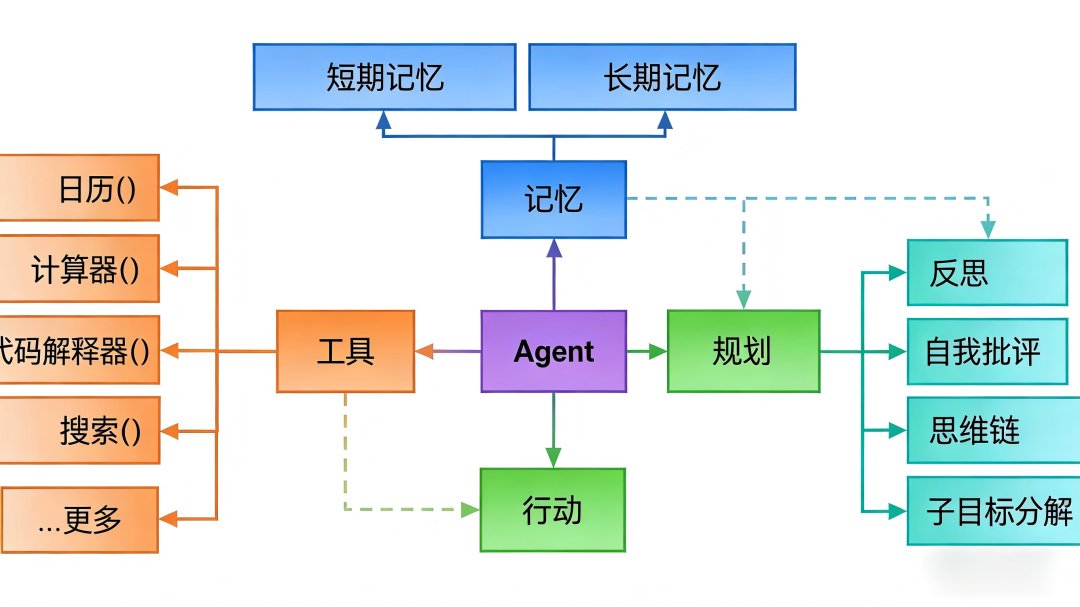
复旦大学张奇团队提出的脑-感知-行动三模块架构,为理解智能体提供了清晰的功能视角:
大脑模块作为控制中枢,承担记忆管理、推理决策、目标规划等高级认知功能。其核心价值在于将原始信息转化为可执行策略,例如在气象查询场景中,大脑模块需整合当前环境信息、历史气象数据、用户偏好等多源信息,生成“建议携带雨具”的决策。
感知模块负责多模态信息处理与转化,将环境输入转化为大脑可理解的表示形式。这包括自然语言理解、视觉识别、听觉处理等,关键技术涉及多模态融合、特征提取与上下文理解。
行动模块作为执行单元,通过工具调用与环境产生实际交互。其设计需考虑动作的可行性、安全性、效率性,并建立完善的反饋机制以确保行动效果。
class TripartiteAgentArchitecture:
"""三模块智能体架构实现"""
def __init__(self, config: AgentConfig):
# 大脑模块 - 控制中枢
self.brain = BrainModule(
memory_system=HierarchicalMemory(),
reasoning_engine=NeuralSymbolicReasoner(),
planner=HierarchicalTaskPlanner()
)
# 感知模块 - 信息处理
self.perception = PerceptionModule(
text_processor=MultilingualProcessor(),
vision_processor=VisionTransformer(),
audio_processor=AudioUnderstandingModel(),
sensor_fusion=SensorFusionEngine()
)
# 行动模块 - 环境交互
self.action = ActionModule(
tool_orchestrator=ToolOrchestrator(),
skill_library=SkillRepository(),
safety_checker=SafetyValidator()
)
# 协调控制器
self.coordinator = ModuleCoordinator(
communication_bus=MessageBus(),
state_manager=StateManager(),
error_handler=FaultToleranceHandler()
)
async def execute_task(self, task: TaskSpecification) -> ExecutionResult:
"""执行任务的主循环"""
# 初始化执行上下文
context = ExecutionContext(
task_id=task.task_id,
initial_state=task.initial_state,
constraints=task.constraints
)
execution_history = []
while not self._is_task_complete(context):
# 1. 感知阶段
perceptual_input = await self.perception.perceive_environment(
context.current_state
)
# 2. 认知处理
cognitive_state = await self.brain.process_perception(
perceptual_input,
context
)
# 3. 决策生成
action_plan = await self.brain.generate_plan(
cognitive_state,
context
)
# 4. 行动执行
action_result = await self.action.execute_plan(
action_plan,
context
)
# 5. 状态更新与学习
await self._update_and_learn(
perceptual_input,
cognitive_state,
action_plan,
action_result,
context
)
execution_history.append({
"perception": perceptual_input,
"cognition": cognitive_state,
"action_plan": action_plan,
"result": action_result
})
return ExecutionResult(
task_id=task.task_id,
success=self._evaluate_success(context),
execution_history=execution_history,
final_state=context.current_state,
metrics=self._collect_metrics(execution_history)
)
1.2 核心能力维度:规划-记忆-工具三位一体
前OpenAI研究员Weng Lilian提出的规划-记忆-工具三位一体模型,从认知科学角度揭示了Agent的核心能力构成:
规划能力涉及任务分解、策略制定、路径优化,需要将宏观目标转化为可执行的微观动作序列。关键在于平衡探索与利用、处理不确定性、应对环境动态变化。
记忆系统分为短期工作记忆与长期知识记忆。短期记忆通过注意力机制实现上下文保持,长期记忆则依赖高效的检索增强机制,如最大内积搜索(MIPS)。
工具使用扩展了Agent的能力边界,使其能够调用外部系统、专业工具、计算资源,实现“非原生”能力的快速集成。
class CoreCapabilityFramework:
"""核心能力框架实现"""
def __init__(self, capability_config: CapabilityConfig):
# 规划系统
self.planning_system = PlanningSystem(
decomposer=HierarchicalTaskDecomposer(),
scheduler=TemporalScheduler(),
optimizer=PlanOptimizer()
)
# 记忆系统
self.memory_system = MemorySystem(
working_memory=WorkingMemory(buffer_size=4096),
long_term_memory=LongTermMemory(
vector_store=VectorDatabase(
index_type="HNSW",
distance_metric="cosine"
),
retriever=HybridRetriever()
),
episodic_memory=EpisodicMemory()
)
# 工具系统
self.tool_system = ToolSystem(
toolkit=ToolRegistry(),
orchestrator=ToolOrchestrator(),
safety_layer=ToolSafetyLayer()
)
# 能力协调器
self.capability_orchestrator = CapabilityOrchestrator(
conflict_resolver=CapabilityConflictResolver(),
priority_manager=CapabilityPriorityManager()
)
async def plan_with_memory_and_tools(
self,
goal: str,
context: Dict[str, Any]
) -> ExecutionPlan:
"""基于记忆和工具的规划"""
# 1. 从记忆检索相关信息
relevant_memories = await self.memory_system.retrieve(
query=goal,
context=context,
top_k=10
)
# 2. 整合记忆进行规划
initial_plan = await self.planning_system.generate_plan(
goal=goal,
context=context,
memories=relevant_memories
)
# 3. 识别所需工具
required_tools = await self.tool_system.identify_required_tools(
plan=initial_plan,
context=context
)
# 4. 优化规划(集成工具调用)
optimized_plan = await self.planning_system.optimize_with_tools(
plan=initial_plan,
tools=required_tools,
context=context
)
# 5. 验证计划
validation_result = await self._validate_plan(
optimized_plan,
context
)
if not validation_result.is_valid:
# 重新规划
return await self.replan_with_feedback(
goal, context, validation_result.feedback
)
return optimized_plan
1.3 工程技术维度:MRKL架构
模块化推理、知识与语言(MRKL)系统代表了Agent工程化的高级形态:
核心架构:大语言模型作为“路由器”,将任务动态分配给专家模块
专家系统:针对特定领域优化的专用工具,如计算器、数据库接口、API调用器等
路由机制:基于任务类型、复杂度、资源需求的智能分配策略
class MRKLSystem:
"""MRKL系统实现"""
def __init__(self, system_config: MRKLConfig):
# 路由模型(大脑)
self.router_model = RouterLLM(
model_name=system_config.router_model,
routing_strategy=system_config.routing_strategy
)
# 专家模块注册表
self.expert_registry = ExpertRegistry()
# 注册各类专家
self._register_experts(system_config.experts)
# 执行协调器
self.orchestrator = ExpertOrchestrator(
parallelism_strategy=system_config.parallelism,
error_handling=system_config.error_handling
)
def _register_experts(self, expert_configs: List[ExpertConfig]):
"""注册专家模块"""
experts = {
"calculator": CalculatorExpert(),
"database": DatabaseExpert(
connection_pool=expert_configs.database.connection_pool
),
"api_client": APIExpert(
api_configs=expert_configs.apis
),
"code_executor": CodeExecutionExpert(
sandbox_config=expert_configs.sandbox
),
"reasoning_engine": LogicalReasoningExpert(),
"knowledge_retriever": KnowledgeRetrievalExpert(
vector_store=expert_configs.vector_store
)
}
for name, expert in experts.items():
self.expert_registry.register(name, expert)
async def process_query(self, query: str) -> MRKLResponse:
"""处理查询的完整流程"""
# 1. 路由决策
routing_decision = await self.router_model.analyze_and_route(query)
# 2. 专家选择
selected_experts = await self._select_experts(
routing_decision, query
)
# 3. 并行/串行执行
expert_results = await self.orchestrator.execute_experts(
experts=selected_experts,
query=query,
routing_decision=routing_decision
)
# 4. 结果整合
integrated_result = await self._integrate_results(
expert_results, query
)
# 5. 响应生成
final_response = await self._generate_response(
integrated_result, query
)
return MRKLResponse(
query=query,
routing_decision=routing_decision,
expert_results=expert_results,
final_response=final_response
)
二、规划系统:从任务拆解到自我反思
2.1 任务拆解技术
任务拆解将复杂问题转化为可管理的子任务序列,是规划系统的核心。
思维链(Chain of Thought, CoT) 通过显式的中间推理步骤提升模型推理能力:
class ChainOfThoughtReasoner:
"""思维链推理器"""
def __init__(self, llm_client: LLMClient):
self.llm = llm_client
self.parser = ReasoningStepParser()
async def reason_step_by_step(
self,
problem: str,
context: Optional[Dict] = None
) -> CoTResult:
"""分步推理"""
# 构建CoT提示
cot_prompt = self._build_cot_prompt(problem, context)
# 生成推理链
reasoning_chain = []
current_step = 1
while not self._is_problem_solved(reasoning_chain):
# 生成下一步推理
step_prompt = self._build_step_prompt(
problem, reasoning_chain, current_step
)
step_response = await self.llm.generate(step_prompt)
# 解析推理步骤
reasoning_step = self.parser.parse_step(
step_response, current_step
)
reasoning_chain.append(reasoning_step)
# 验证步骤正确性
if not await self._validate_step(
reasoning_step, problem, reasoning_chain
):
# 修正错误推理
corrected_step = await self._correct_reasoning_step(
reasoning_step, problem, reasoning_chain
)
reasoning_chain[-1] = corrected_step
current_step += 1
# 提取最终答案
final_answer = self._extract_final_answer(reasoning_chain)
return CoTResult(
problem=problem,
reasoning_chain=reasoning_chain,
final_answer=final_answer,
confidence=self._calculate_confidence(reasoning_chain)
)
思维树(Tree of Thought, ToT) 扩展CoT为树状结构,支持多路径探索与回溯:
class TreeOfThoughtReasoner:
"""思维树推理器"""
def __init__(self, config: ToTConfig):
self.config = config
self.llm = config.llm
self.evaluator = ThoughtEvaluator()
self.search_strategy = config.search_strategy
async def explore_thought_tree(
self,
problem: str
) -> ToTResult:
"""探索思维树"""
# 初始化根节点
root = ThoughtNode(
state=problem,
parent=None,
depth=0,
value=0.0
)
# 搜索最佳路径
best_path = await self._search_tree(root, problem)
# 回溯最佳路径
reasoning_path = self._backtrack_path(best_path)
return ToTResult(
problem=problem,
best_path=reasoning_path,
explored_nodes=self._get_explored_nodes(),
search_metrics=self._collect_search_metrics()
)
async def _search_tree(
self,
node: ThoughtNode,
problem: str
) -> ThoughtNode:
"""搜索思维树"""
if self._is_terminal(node) or node.depth >= self.config.max_depth:
return node
# 生成候选思考
candidate_thoughts = await self._generate_candidate_thoughts(
node, problem
)
# 评估候选思考
evaluated_candidates = []
for thought in candidate_thoughts:
evaluation = await self.evaluator.evaluate_thought(
thought, problem, node
)
evaluated_candidates.append((evaluation.score, thought))
# 选择最优候选(根据搜索策略)
if self.search_strategy == "breadth_first":
selected = await self._breadth_first_selection(evaluated_candidates)
elif self.search_strategy == "depth_first":
selected = await self._depth_first_selection(evaluated_candidates)
elif self.search_strategy == "best_first":
selected = await self._best_first_selection(evaluated_candidates)
else:
selected = await self._beam_search_selection(evaluated_candidates)
# 递归搜索
return await self._search_tree(selected, problem)
自一致性(Self-Consistency) 通过多路径采样提升推理鲁棒性:
class SelfConsistencyReasoner:
"""自一致性推理器"""
def __init__(self, base_reasoner: BaseReasoner, config: SCConfig):
self.reasoner = base_reasoner
self.config = config
self.voting_strategy = config.voting_strategy
async def reason_with_consistency(
self,
problem: str
) -> SCResult:
"""自一致性推理"""
# 生成多条推理链
reasoning_chains = []
for i in range(self.config.num_samples):
chain = await self.reasoner.reason(problem)
reasoning_chains.append(chain)
# 提取答案
answers = [self._extract_answer(chain) for chain in reasoning_chains]
# 一致性投票
if self.voting_strategy == "majority":
final_answer = self._majority_vote(answers)
elif self.voting_strategy == "weighted":
final_answer = self._weighted_vote(answers, reasoning_chains)
elif self.voting_strategy == "confidence_based":
final_answer = self._confidence_based_vote(answers, reasoning_chains)
else:
final_answer = self._consensus_vote(answers)
# 计算一致性指标
consistency_metrics = self._calculate_consistency_metrics(
answers, reasoning_chains
)
return SCResult(
problem=problem,
final_answer=final_answer,
reasoning_chains=reasoning_chains,
candidate_answers=answers,
consistency_score=consistency_metrics.consistency_score,
confidence_score=consistency_metrics.confidence_score
)
2.2 自我反思机制
自我反思使Agent能够从经验中学习,持续改进性能。
ReAct(推理-行动)框架 实现思考与行动的交替循环:
class ReActAgent:
"""ReAct智能体实现"""
def __init__(self, config: ReActConfig):
self.llm = config.llm
self.tools = config.tools
self.max_steps = config.max_steps
async def react_loop(
self,
initial_goal: str
) -> ReActTrajectory:
"""ReAct循环"""
trajectory = ReActTrajectory(goal=initial_goal)
current_state = initial_goal
for step in range(self.max_steps):
# 思考阶段
thought = await self._think(current_state, trajectory)
trajectory.add_thought(thought)
# 行动阶段
action = await self._decide_action(thought, current_state)
if action.action_type == "FINISH":
# 任务完成
trajectory.add_action(action)
trajectory.complete_successfully()
break
# 执行行动
observation = await self._act(action)
trajectory.add_observation(observation)
# 更新状态
current_state = await self._update_state(
current_state, thought, action, observation
)
if self._is_goal_achieved(current_state, initial_goal):
trajectory.complete_successfully()
break
return trajectory
async def _think(
self,
state: str,
trajectory: ReActTrajectory
) -> Thought:
"""生成思考"""
prompt = self._build_thought_prompt(state, trajectory)
response = await self.llm.generate(prompt)
return Thought(
content=response,
timestamp=datetime.now(),
context=state
)
async def _decide_action(
self,
thought: Thought,
state: str
) -> Action:
"""决定行动"""
# 分析思考内容,决定下一步行动
action_plan = await self._analyze_thought_for_action(thought)
# 选择工具
if action_plan.requires_tool:
tool = await self._select_tool(action_plan)
return ToolAction(
tool=tool,
parameters=action_plan.parameters
)
else:
return FinishAction(
result=action_plan.result
)
Reflexion框架 通过语言反馈实现强化学习:
class ReflexionAgent:
"""Reflexion智能体实现"""
def __init__(self, base_agent: BaseAgent, config: ReflexionConfig):
self.agent = base_agent
self.config = config
self.reflection_memory = ReflectionMemory()
async def solve_with_reflection(
self,
problem: str,
max_attempts: int = 3
) -> ReflexionResult:
"""带反思的求解"""
attempts = []
for attempt in range(max_attempts):
# 执行尝试
execution_result = await self.agent.solve(problem)
attempts.append(execution_result)
if execution_result.success:
# 成功,返回结果
return ReflexionResult(
problem=problem,
success=True,
final_result=execution_result,
attempts=attempts,
reflections=self.reflection_memory.get_reflections(problem)
)
# 生成反思
reflection = await self._generate_reflection(
problem, execution_result, attempts
)
# 存储反思
self.reflection_memory.add_reflection(problem, reflection)
# 将反思集成到下一次尝试
await self._integrate_reflection(reflection)
# 所有尝试都失败
return ReflexionResult(
problem=problem,
success=False,
final_result=attempts[-1],
attempts=attempts,
reflections=self.reflection_memory.get_reflections(problem)
)
async def _generate_reflection(
self,
problem: str,
failed_attempt: ExecutionResult,
previous_attempts: List[ExecutionResult]
) -> Reflection:
"""生成反思"""
reflection_prompt = self._build_reflection_prompt(
problem, failed_attempt, previous_attempts
)
reflection_text = await self.llm.generate(reflection_prompt)
return Reflection(
text=reflection_text,
problem=problem,
based_on_attempt=failed_attempt.attempt_id,
generated_at=datetime.now()
)
三、工具使用:从Function Call到MCP
3.1 Function Call:工具调用的基础范式
Function Call是工具调用的基础实现,通过预定义函数格式实现模型与工具交互:
class FunctionCallSystem:
"""Function Call系统实现"""
def __init__(self, tool_registry: ToolRegistry):
self.tools = tool_registry
self.llm = LLMClient()
self.parser = FunctionCallParser()
async def process_with_tools(
self,
query: str,
context: Optional[Dict] = None
) -> ToolAugmentedResponse:
"""使用工具处理查询"""
# 1. 工具描述生成
tool_descriptions = self._generate_tool_descriptions()
# 2. 模型决定是否调用工具
llm_response = await self.llm.generate_with_tools(
query=query,
tools=tool_descriptions,
context=context
)
# 3. 解析函数调用
if self._requires_tool_call(llm_response):
function_calls = self.parser.parse_function_calls(llm_response)
# 4. 执行函数调用
tool_results = []
for call in function_calls:
result = await self._execute_function_call(call)
tool_results.append(result)
# 5. 整合结果生成最终响应
final_response = await self._integrate_results(
llm_response, tool_results, query
)
else:
# 直接使用模型响应
final_response = llm_response
return ToolAugmentedResponse(
original_query=query,
requires_tools=self._requires_tool_call(llm_response),
tool_calls=function_calls if 'function_calls' in locals() else [],
tool_results=tool_results if 'tool_results' in locals() else [],
final_response=final_response
)
async def _execute_function_call(
self,
function_call: FunctionCall
) -> ToolResult:
"""执行函数调用"""
try:
# 获取工具
tool = self.tools.get_tool(function_call.name)
if not tool:
raise ToolNotFoundError(f"Tool {function_call.name} not found")
# 验证参数
validated_args = tool.validate_arguments(function_call.arguments)
# 执行工具
result = await tool.execute(validated_args)
return ToolResult(
tool_name=function_call.name,
arguments=validated_args,
result=result,
success=True
)
except Exception as e:
return ToolResult(
tool_name=function_call.name,
arguments=function_call.arguments,
error=str(e),
success=False
)
3.2 MCP:标准化的工具调用协议
模型上下文协议(Model Context Protocol, MCP)解决了Function Call的碎片化问题:
class MCPSystem:
"""MCP系统实现"""
def __init__(self, mcp_config: MCPConfig):
self.config = mcp_config
self.server = MCPServer(mcp_config.server_config)
self.client = MCPClient(mcp_config.client_config)
self.tool_manager = MCPToolManager()
async def initialize(self):
"""初始化MCP系统"""
# 1. 启动MCP服务器
await self.server.start()
# 2. 注册工具
await self._register_tools()
# 3. 建立客户端连接
await self.client.connect()
async def _register_tools(self):
"""注册MCP工具"""
# 标准工具注册
standard_tools = [
MCPTool(
name="calculator",
description="Perform mathematical calculations",
input_schema={
"type": "object",
"properties": {
"expression": {"type": "string", "description": "Mathematical expression"}
},
"required": ["expression"]
},
handler=self._handle_calculation
),
MCPTool(
name="web_search",
description="Search the web for information",
input_schema={
"type": "object",
"properties": {
"query": {"type": "string", "description": "Search query"},
"limit": {"type": "integer", "description": "Number of results"}
},
"required": ["query"]
},
handler=self._handle_web_search
)
]
for tool in standard_tools:
await self.tool_manager.register(tool)
# 加载自定义工具
await self._load_custom_tools()
async def process_mcp_request(
self,
request: MCPRequest
) -> MCPResponse:
"""处理MCP请求"""
# 1. 请求验证
validation_result = await self._validate_request(request)
if not validation_result.valid:
return MCPResponse.error(
error_code="INVALID_REQUEST",
message=validation_result.message
)
# 2. 工具查找
tool = await self.tool_manager.find_tool(request.tool_name)
if not tool:
return MCPResponse.error(
error_code="TOOL_NOT_FOUND",
message=f"Tool {request.tool_name} not found"
)
# 3. 参数验证
try:
validated_args = tool.validate_arguments(request.arguments)
except ValidationError as e:
return MCPResponse.error(
error_code="INVALID_ARGUMENTS",
message=str(e)
)
# 4. 执行工具
try:
result = await tool.execute(validated_args)
return MCPResponse.success(
tool_name=request.tool_name,
result=result,
metadata={
"execution_time": result.execution_time,
"tool_version": tool.version
}
)
except Exception as e:
return MCPResponse.error(
error_code="EXECUTION_ERROR",
message=f"Tool execution failed: {str(e)}"
)
def _build_mcp_tool_schema(self) -> Dict[str, Any]:
"""构建MCP工具模式"""
return {
"mcp_protocol_version": "1.0",
"tools": [
{
"name": tool.name,
"description": tool.description,
"inputSchema": tool.input_schema,
"outputSchema": tool.output_schema,
"authentication": tool.authentication_schema
}
for tool in self.tool_manager.get_all_tools()
],
"capabilities": {
"parallel_execution": True,
"streaming_responses": True,
"authentication": True
}
}
四、记忆系统:从短期记忆到长期检索
4.1 记忆架构设计
完善的记忆系统需要分层存储与高效检索:
class HierarchicalMemorySystem:
"""分层记忆系统"""
def __init__(self, config: MemoryConfig):
# 短期记忆(工作记忆)
self.working_memory = WorkingMemory(
capacity=config.working_memory_capacity,
decay_rate=config.memory_decay_rate
)
# 情节记忆(对话历史)
self.episodic_memory = EpisodicMemory(
storage=VectorStore(config.vector_store_config),
retention_policy=config.retention_policy
)
# 语义记忆(知识库)
self.semantic_memory = SemanticMemory(
knowledge_base=KnowledgeBase(config.kb_config),
retrieval_strategy=config.retrieval_strategy
)
# 程序记忆(技能与过程)
self.procedural_memory = ProceduralMemory(
skill_library=SkillLibrary(config.skill_config)
)
# 记忆协调器
self.coordinator = MemoryCoordinator(
fusion_strategy=config.memory_fusion_strategy
)
async def store_memory(
self,
memory: MemoryChunk,
memory_type: MemoryType
) -> MemoryReference:
"""存储记忆"""
# 编码记忆
encoded_memory = await self._encode_memory(memory)
# 存储到相应记忆系统
if memory_type == MemoryType.WORKING:
reference = await self.working_memory.store(encoded_memory)
elif memory_type == MemoryType.EPISODIC:
reference = await self.episodic_memory.store(encoded_memory)
elif memory_type == MemoryType.SEMANTIC:
reference = await self.semantic_memory.store(encoded_memory)
elif memory_type == MemoryType.PROCEDURAL:
reference = await self.procedural_memory.store(encoded_memory)
else:
raise ValueError(f"Unknown memory type: {memory_type}")
# 创建索引
await self._index_memory(reference, encoded_memory)
return reference
async def retrieve_memories(
self,
query: str,
context: Optional[Dict] = None,
memory_types: Optional[List[MemoryType]] = None
) -> MemoryRetrievalResult:
"""检索记忆"""
if memory_types is None:
memory_types = list(MemoryType)
retrieved_memories = []
for memory_type in memory_types:
if memory_type == MemoryType.WORKING:
memories = await self.working_memory.retrieve(query, context)
elif memory_type == MemoryType.EPISODIC:
memories = await self.episodic_memory.retrieve(query, context)
elif memory_type == MemoryType.SEMANTIC:
memories = await self.semantic_memory.retrieve(query, context)
elif memory_type == MemoryType.PROCEDURAL:
memories = await self.procedural_memory.retrieve(query, context)
else:
continue
retrieved_memories.extend(memories)
# 记忆融合与排序
fused_memories = await self.coordinator.fuse_and_rank(
retrieved_memories, query, context
)
return MemoryRetrievalResult(
query=query,
memories=fused_memories,
retrieval_metrics=self._collect_retrieval_metrics(
retrieved_memories, fused_memories
)
)
4.2 向量检索与MIPS
最大内积搜索(MIPS)是长期记忆检索的核心技术:
class MIPSRetrievalEngine:
"""MIPS检索引擎"""
def __init__(self, config: MIPSConfig):
self.config = config
self.index = self._initialize_index(config)
self.encoder = VectorEncoder(config.encoder_config)
def _initialize_index(self, config: MIPSConfig) -> BaseIndex:
"""初始化索引"""
if config.index_type == "HNSW":
return HNSWIndex(
dimension=config.vector_dimension,
M=config.hnsw_M,
ef_construction=config.hnsw_ef_construction,
ef_search=config.hnsw_ef_search
)
elif config.index_type == "IVF":
return IVFIndex(
dimension=config.vector_dimension,
nlist=config.ivf_nlist,
nprobe=config.ivf_nprobe
)
elif config.index_type == "Flat":
return FlatIndex(
dimension=config.vector_dimension
)
elif config.index_type == "ANNOY":
return AnnoyIndex(
dimension=config.vector_dimension,
n_trees=config.annoy_n_trees
)
else:
raise ValueError(f"Unsupported index type: {config.index_type}")
async def build_index(
self,
vectors: np.ndarray,
metadata: List[Dict]
) -> IndexStatistics:
"""构建索引"""
# 数据预处理
processed_vectors = self._preprocess_vectors(vectors)
# 构建索引
start_time = time.time()
self.index.build(processed_vectors)
build_time = time.time() - start_time
# 存储元数据
self.metadata = metadata
# 收集统计信息
stats = IndexStatistics(
num_vectors=len(vectors),
dimension=vectors.shape[1],
index_type=self.config.index_type,
build_time=build_time,
memory_usage=self.index.get_memory_usage()
)
return stats
async def search(
self,
query_vector: np.ndarray,
k: int = 10,
filters: Optional[Dict] = None
) -> SearchResult:
"""搜索相似向量"""
# 预处理查询向量
processed_query = self._preprocess_query(query_vector)
# 执行搜索
start_time = time.time()
if self.config.search_algorithm == "exact":
indices, distances = self.index.search_exact(processed_query, k)
elif self.config.search_algorithm == "approximate":
indices, distances = self.index.search_approximate(processed_query, k)
else:
raise ValueError(f"Unknown search algorithm: {self.config.search_algorithm}")
search_time = time.time() - start_time
# 应用过滤器
if filters:
indices, distances = self._apply_filters(indices, distances, filters)
# 获取结果
results = []
for idx, distance in zip(indices, distances):
if idx < len(self.metadata):
result = SearchResultItem(
index=idx,
distance=float(distance),
metadata=self.metadata[idx],
score=self._calculate_score(distance)
)
results.append(result)
return SearchResult(
query_vector=query_vector,
results=results[:k],
search_time=search_time,
search_params={
"k": k,
"algorithm": self.config.search_algorithm
}
)
def _calculate_score(self, distance: float) -> float:
"""计算相似度分数"""
# 将距离转换为相似度分数
if self.config.distance_metric == "cosine":
# 余弦距离转换为相似度
similarity = 1 - distance
return max(0.0, min(1.0, similarity))
elif self.config.distance_metric == "euclidean":
# 欧氏距离转换为相似度
similarity = 1 / (1 + distance)
return similarity
elif self.config.distance_metric == "inner_product":
# 内积直接作为分数
return distance
else:
return distance
(表1:近似最近邻算法对比)
| 算法 | 核心优势 | 局限性 | 适用场景 | 向量规模 | 索引构建时间 | 查询延迟 | 内存使用 |
|---|---|---|---|---|---|---|---|
| HNSW | 高维高效,精度优秀 | 内存占用较高 | 大规模高维向量 | 百万-十亿级 | 中等 | 低 | 中等 |
| IVF | 查询速度快,可调参数多 | 精度依赖聚类质量 | 大规模中等维度 | 千万-十亿级 | 高 | 极低 | 低 |
| ANNOY | 内存友好,构建快 | 高维性能下降 | 中小规模应用 | 十万-百万级 | 低 | 低 | 低 |
| Flat | 100%准确度 | 无法扩展 | 小规模验证 | <1万 | 无 | 高 | 高 |
| ScaNN | 超大规模优化 | 参数调优复杂 | 十亿级向量 | 十亿级+ | 高 | 极低 | 中等 |
五、系统集成与工程实践
5.1 完整Agent系统架构
class CompleteAgentSystem:
"""完整Agent系统实现"""
def __init__(self, system_config: AgentSystemConfig):
# 核心组件
self.brain = BrainModule(
planning_system=PlanningSystem(config=system_config.planning),
reasoning_engine=ReasoningEngine(config=system_config.reasoning),
decision_maker=DecisionMaker(config=system_config.decision)
)
# 记忆系统
self.memory = HierarchicalMemorySystem(
config=system_config.memory
)
# 工具系统
self.tools = ToolSystem(
tool_registry=ToolRegistry(config=system_config.tools),
mcp_server=MCPManager(config=system_config.mcp)
)
# 感知系统
self.perception = PerceptionSystem(
config=system_config.perception
)
# 行动系统
self.action = ActionSystem(
config=system_config.action
)
# 协调与监控
self.coordinator = SystemCoordinator()
self.monitor = SystemMonitor()
self.learner = ContinuousLearner()
# 初始化系统
self._initialize_system()
async def _initialize_system(self):
"""初始化系统"""
# 1. 加载工具
await self.tools.initialize()
# 2. 加载记忆
await self.memory.initialize()
# 3. 启动监控
await self.monitor.start()
# 4. 系统健康检查
health = await self._health_check()
if not health.healthy:
raise SystemInitializationError(
f"System initialization failed: {health.issues}"
)
async def execute_task(
self,
task_request: TaskRequest
) -> TaskExecutionResult:
"""执行任务"""
execution_id = str(uuid.uuid4())
execution_start = datetime.now()
with self.monitor.track_execution(execution_id):
# 1. 任务解析
parsed_task = await self._parse_task(task_request)
# 2. 上下文构建
context = await self._build_execution_context(
parsed_task, task_request
)
# 3. 记忆检索
relevant_memories = await self.memory.retrieve_memories(
query=parsed_task.description,
context=context
)
# 4. 规划生成
plan = await self.brain.generate_plan(
task=parsed_task,
context=context,
memories=relevant_memories
)
# 5. 计划执行
execution_results = []
for step in plan.steps:
step_result = await self._execute_step(
step, context, execution_id
)
execution_results.append(step_result)
# 更新上下文
context = await self._update_context(
context, step, step_result
)
# 检查是否需要重新规划
if self._requires_replanning(step_result, plan):
new_plan = await self.brain.replan(
original_plan=plan,
execution_results=execution_results,
context=context
)
plan = new_plan
# 6. 结果整合
final_result = await self._integrate_results(
execution_results, parsed_task, context
)
# 7. 学习与改进
await self.learner.learn_from_execution(
task_request=task_request,
execution_results=execution_results,
final_result=final_result
)
execution_time = (datetime.now() - execution_start).total_seconds()
return TaskExecutionResult(
execution_id=execution_id,
task=parsed_task,
plan=plan,
execution_results=execution_results,
final_result=final_result,
execution_time=execution_time,
metrics=self.monitor.get_execution_metrics(execution_id)
)
5.2 性能优化策略
class AgentOptimizationFramework:
"""Agent性能优化框架"""
def __init__(self, optimization_config: OptimizationConfig):
self.config = optimization_config
# 优化组件
self.cache_manager = CacheManager(config.cache_config)
self.prefetcher = PrefetchEngine(config.prefetch_config)
self.batch_processor = BatchProcessor(config.batch_config)
self.parallel_executor = ParallelExecutor(config.parallel_config)
async def optimize_agent_performance(
self,
agent: CompleteAgentSystem
) -> OptimizationResult:
"""优化Agent性能"""
optimization_results = []
# 1. 缓存优化
cache_optimization = await self.optimize_caching(agent)
optimization_results.append(cache_optimization)
# 2. 预取优化
prefetch_optimization = await self.optimize_prefetching(agent)
optimization_results.append(prefetch_optimization)
# 3. 批处理优化
batch_optimization = await self.optimize_batching(agent)
optimization_results.append(batch_optimization)
# 4. 并行优化
parallel_optimization = await self.optimize_parallelism(agent)
optimization_results.append(parallel_optimization)
# 5. 模型优化
model_optimization = await self.optimize_models(agent)
optimization_results.append(model_optimization)
# 计算总体优化效果
overall_improvement = self._calculate_overall_improvement(
optimization_results
)
return OptimizationResult(
optimizations=optimization_results,
overall_improvement=overall_improvement,
recommendations=self._generate_recommendations(
optimization_results
)
)
async def optimize_caching(
self,
agent: CompleteAgentSystem
) -> CacheOptimization:
"""缓存优化"""
# 分析缓存模式
cache_patterns = await self._analyze_cache_patterns(agent)
# 优化缓存策略
optimized_policies = []
for pattern in cache_patterns:
policy = self._optimize_cache_policy(pattern)
optimized_policies.append(policy)
# 应用优化
await self._apply_cache_policy(agent, policy)
# 评估优化效果
improvement = await self._evaluate_cache_improvement(agent)
return CacheOptimization(
patterns_analyzed=len(cache_patterns),
policies_applied=optimized_policies,
performance_improvement=improvement
)
六、未来发展方向
6.1 技术趋势
神经符号融合:结合神经网络与符号推理的优势
多Agent协同:分布式Agent系统的协同与协作
具身智能:物理世界交互能力的增强
持续学习:在线学习与自适应能力提升
6.2 挑战与对策
可解释性挑战:开发可解释的决策过程
安全与对齐:确保Agent行为符合人类价值观
计算效率:优化资源使用与响应时间
知识边界:明确能力范围与局限性认知
七、总结
AI Agent的发展正从单一功能模块向复杂系统集成演进。成功的Agent系统需要在规划、记忆、工具使用三个核心能力上取得平衡,并通过合理的架构设计实现高效协同。
规划是方向:决定Agent如何思考与决策
记忆是基础:提供经验积累与知识复用
工具是延伸:扩展能力边界与解决复杂问题
在实际工程实践中,需根据具体场景选择合适的技术组合,在性能、准确性、可维护性之间找到最佳平衡点。随着MCP等标准化协议的普及和向量检索技术的成熟,Agent系统的构建将变得更加模块化和高效。
未来,Agent将不仅是一个技术产品,更是人机协作的新范式。通过深入理解Agent的架构原理与实现技术,我们可以更好地设计和构建下一代智能系统,真正实现人工智能的实用化与普及化。
如何学习大模型 AI ?
由于新岗位的生产效率,要优于被取代岗位的生产效率,所以实际上整个社会的生产效率是提升的。
但是具体到个人,只能说是:
“最先掌握AI的人,将会比较晚掌握AI的人有竞争优势”。
这句话,放在计算机、互联网、移动互联网的开局时期,都是一样的道理。
我在一线互联网企业工作十余年里,指导过不少同行后辈。帮助很多人得到了学习和成长。
我意识到有很多经验和知识值得分享给大家,也可以通过我们的能力和经验解答大家在人工智能学习中的很多困惑,所以在工作繁忙的情况下还是坚持各种整理和分享。但苦于知识传播途径有限,很多互联网行业朋友无法获得正确的资料得到学习提升,故此将并将重要的AI大模型资料包括AI大模型入门学习思维导图、精品AI大模型学习书籍手册、视频教程、实战学习等录播视频免费分享出来。
这份完整版的大模型 AI 学习资料已经上传优快云,朋友们如果需要可以微信扫描下方优快云官方认证二维码免费领取【保证100%免费】

为什么要学习大模型?
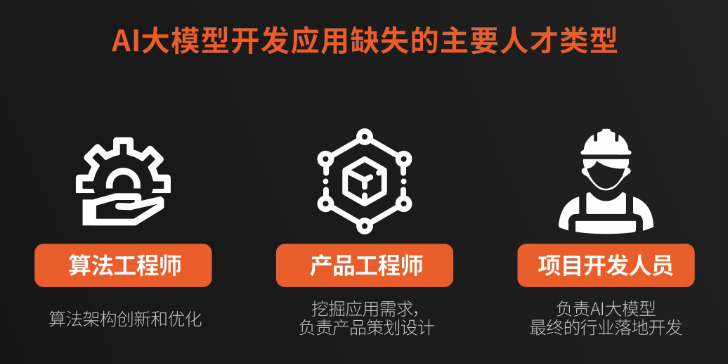
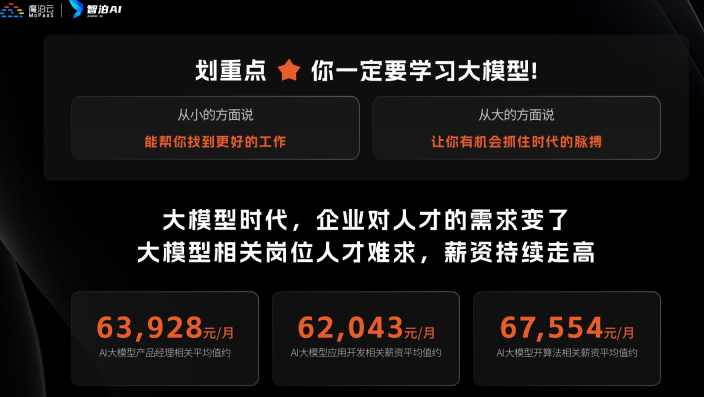
我国在A大模型领域面临人才短缺,数量与质量均落后于发达国家。2023年,人才缺口已超百万,凸显培养不足。随着AI技术飞速发展,预计到2025年,这一缺口将急剧扩大至400万,严重制约我国AI产业的创新步伐。加强人才培养,优化教育体系,国际合作并进是破解困局、推动AI发展的关键。
大模型入门到实战全套学习大礼包
1、大模型系统化学习路线
作为学习AI大模型技术的新手,方向至关重要。 正确的学习路线可以为你节省时间,少走弯路;方向不对,努力白费。这里我给大家准备了一份最科学最系统的学习成长路线图和学习规划,带你从零基础入门到精通!
2、大模型学习书籍&文档
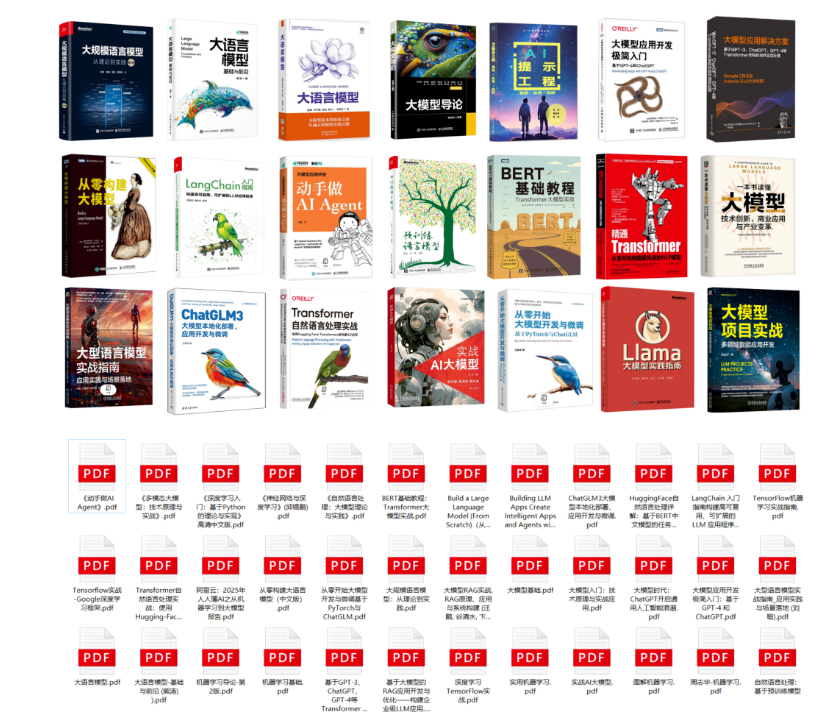
学习AI大模型离不开书籍文档,我精选了一系列大模型技术的书籍和学习文档(电子版),它们由领域内的顶尖专家撰写,内容全面、深入、详尽,为你学习大模型提供坚实的理论基础。
3、AI大模型最新行业报告
2025最新行业报告,针对不同行业的现状、趋势、问题、机会等进行系统地调研和评估,以了解哪些行业更适合引入大模型的技术和应用,以及在哪些方面可以发挥大模型的优势。

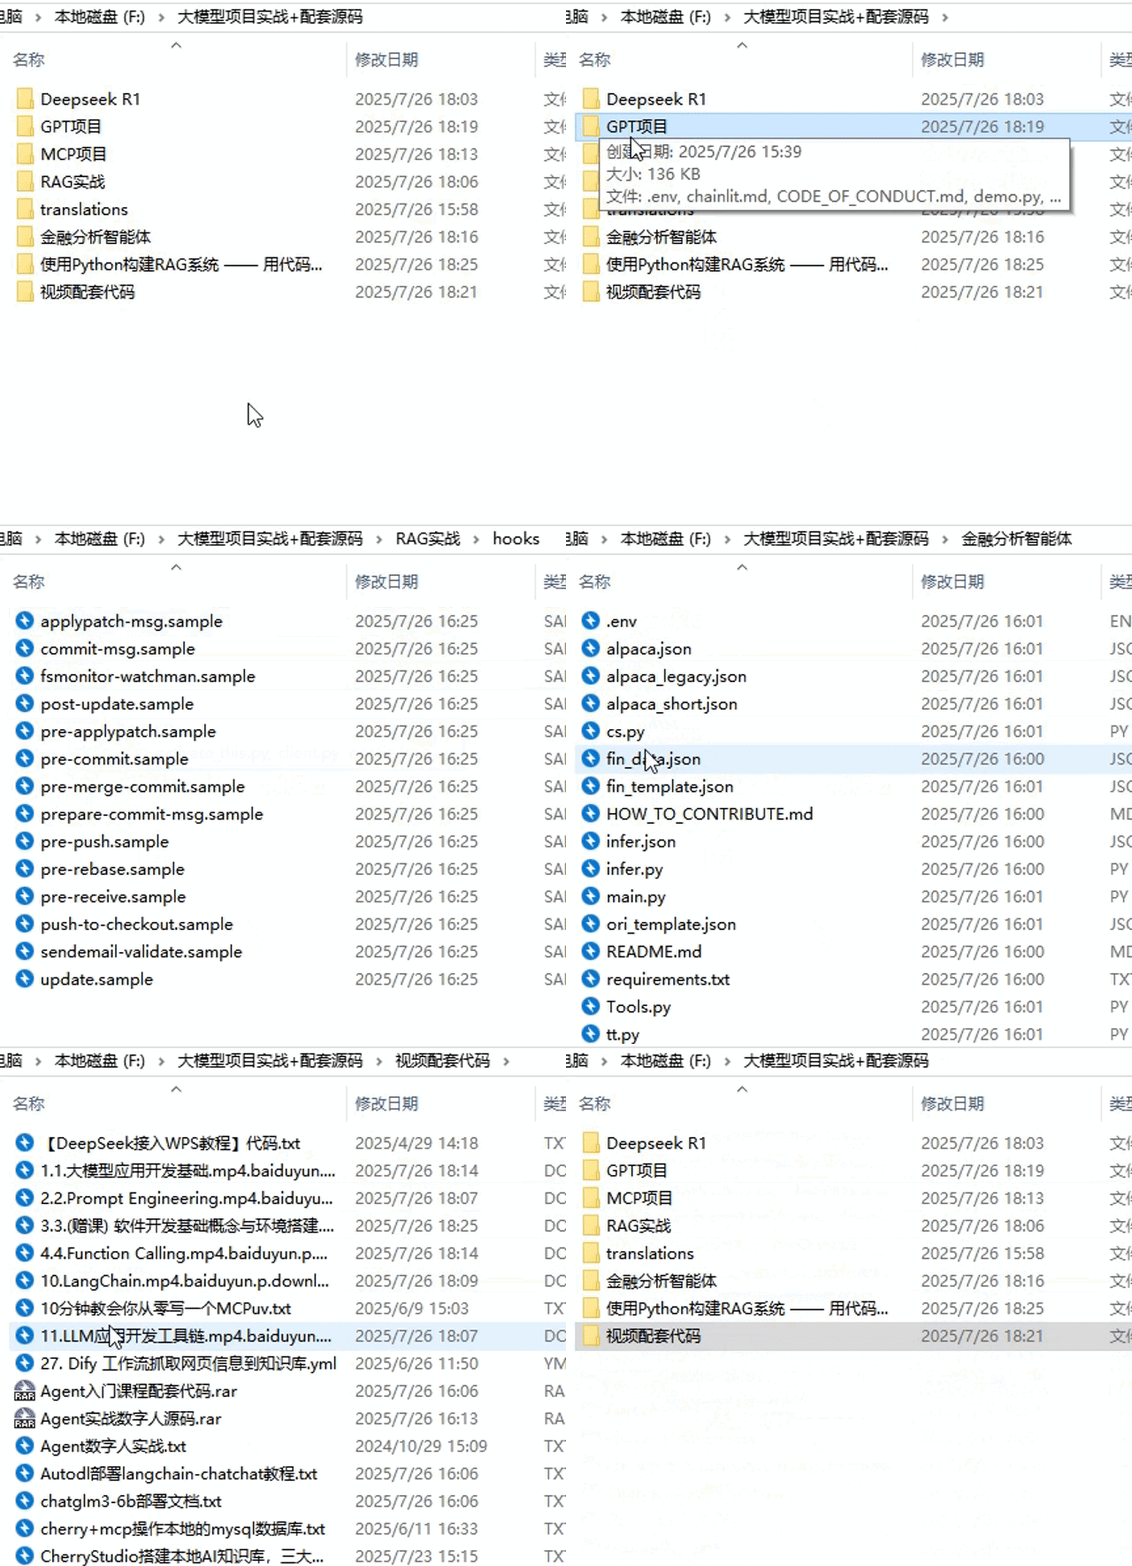
4、大模型项目实战&配套源码
学以致用,在项目实战中检验和巩固你所学到的知识,同时为你找工作就业和职业发展打下坚实的基础。
5、大模型大厂面试真题
面试不仅是技术的较量,更需要充分的准备。在你已经掌握了大模型技术之后,就需要开始准备面试,我精心整理了一份大模型面试题库,涵盖当前面试中可能遇到的各种技术问题,让你在面试中游刃有余。

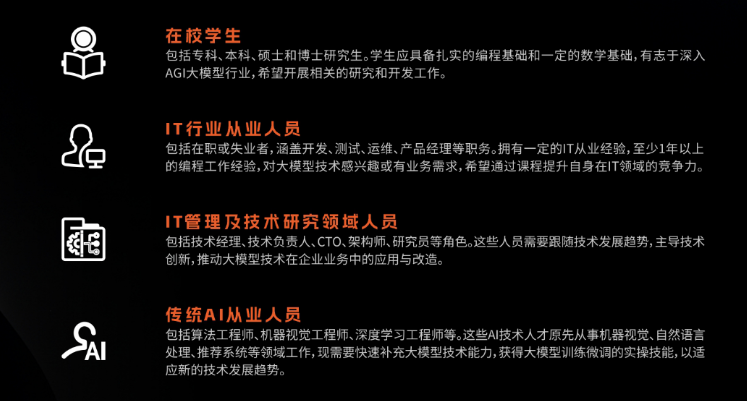
适用人群
第一阶段(10天):初阶应用
该阶段让大家对大模型 AI有一个最前沿的认识,对大模型 AI 的理解超过 95% 的人,可以在相关讨论时发表高级、不跟风、又接地气的见解,别人只会和 AI 聊天,而你能调教 AI,并能用代码将大模型和业务衔接。
- 大模型 AI 能干什么?
- 大模型是怎样获得「智能」的?
- 用好 AI 的核心心法
- 大模型应用业务架构
- 大模型应用技术架构
- 代码示例:向 GPT-3.5 灌入新知识
- 提示工程的意义和核心思想
- Prompt 典型构成
- 指令调优方法论
- 思维链和思维树
- Prompt 攻击和防范
- …
第二阶段(30天):高阶应用
该阶段我们正式进入大模型 AI 进阶实战学习,学会构造私有知识库,扩展 AI 的能力。快速开发一个完整的基于 agent 对话机器人。掌握功能最强的大模型开发框架,抓住最新的技术进展,适合 Python 和 JavaScript 程序员。
- 为什么要做 RAG
- 搭建一个简单的 ChatPDF
- 检索的基础概念
- 什么是向量表示(Embeddings)
- 向量数据库与向量检索
- 基于向量检索的 RAG
- 搭建 RAG 系统的扩展知识
- 混合检索与 RAG-Fusion 简介
- 向量模型本地部署
- …
第三阶段(30天):模型训练
恭喜你,如果学到这里,你基本可以找到一份大模型 AI相关的工作,自己也能训练 GPT 了!通过微调,训练自己的垂直大模型,能独立训练开源多模态大模型,掌握更多技术方案。
到此为止,大概2个月的时间。你已经成为了一名“AI小子”。那么你还想往下探索吗?
- 为什么要做 RAG
- 什么是模型
- 什么是模型训练
- 求解器 & 损失函数简介
- 小实验2:手写一个简单的神经网络并训练它
- 什么是训练/预训练/微调/轻量化微调
- Transformer结构简介
- 轻量化微调
- 实验数据集的构建
- …
第四阶段(20天):商业闭环
对全球大模型从性能、吞吐量、成本等方面有一定的认知,可以在云端和本地等多种环境下部署大模型,找到适合自己的项目/创业方向,做一名被 AI 武装的产品经理。
- 硬件选型
- 带你了解全球大模型
- 使用国产大模型服务
- 搭建 OpenAI 代理
- 热身:基于阿里云 PAI 部署 Stable Diffusion
- 在本地计算机运行大模型
- 大模型的私有化部署
- 基于 vLLM 部署大模型
- 案例:如何优雅地在阿里云私有部署开源大模型
- 部署一套开源 LLM 项目
- 内容安全
- 互联网信息服务算法备案
- …
学习是一个过程,只要学习就会有挑战。天道酬勤,你越努力,就会成为越优秀的自己。
如果你能在15天内完成所有的任务,那你堪称天才。然而,如果你能完成 60-70% 的内容,你就已经开始具备成为一名大模型 AI 的正确特征了。
这份完整版的大模型 AI 学习资料已经上传优快云,朋友们如果需要可以微信扫描下方优快云官方认证二维码免费领取【保证100%免费】
 1万+


 扫一扫


 被折叠的 条评论
为什么被折叠?
 到【灌水乐园】发言


