在RHEL 9.4上安装和配置 Postfix 邮件服务器

很多软件都需要配置smtp服务器。

在LINUX上构建一个免费的smtp服务器还是很有必要的。

前面是指南,后面是实际操作日志。

继续之前,还请确保不存在其他 MTA(如 Sendmail),因为这将导致与 Postfix 配置冲突。例如,要删除 Sendmail,请运行以下命令:

  1. # dnf remove sendmail

步骤 2)设置主机名并更新 /etc/hosts

使用下面的 hostnamectl 命令在系统上设置主机名:

  1. # hostnamectl set-hostname server1.crazytechgeek.info
  2. # exec bash

此外,你需要在 /etc/hosts 中添加系统的主机名和 IP:

  1. # vim /etc/hosts
  2. 192.168.1.13   server1.crazytechgeek.info

保存并退出文件。

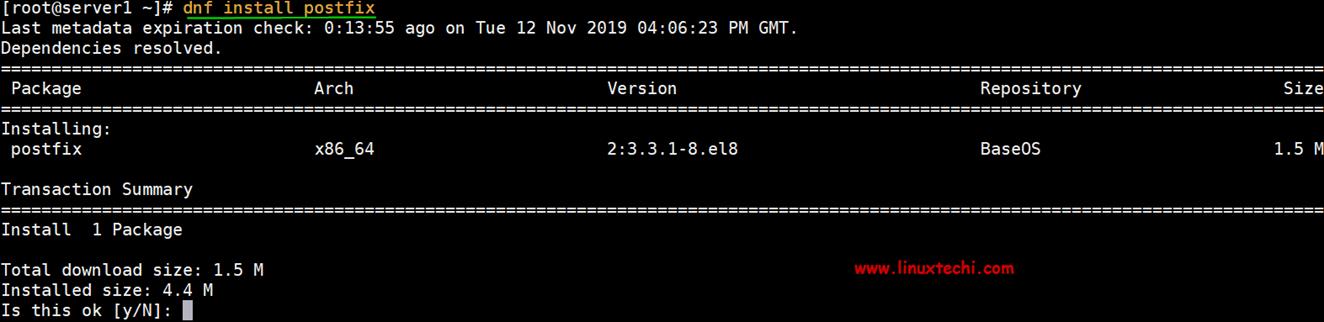
步骤 3)安装 Postfix 邮件服务器

验证系统上没有其他 MTA 在运行后,运行以下命令安装 Postfix:

  1. # dnf install postfix

Install-Postfix-Centos8

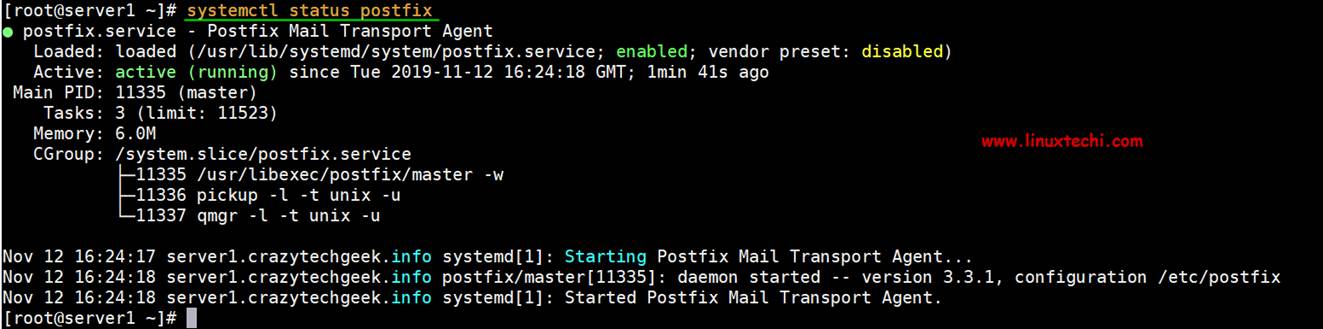
步骤 4)启动并启用 Postfix 服务

成功安装 Postfix 后,运行以下命令启动并启用 Postfix 服务:

  1. # systemctl start postfix
  2. # systemctl enable postfix

要检查 Postfix 状态,请运行以下 systemctl 命令:

  1. # systemctl status postfix

Start-Postfix-check-status-centos8

太好了,我们已经验证了 Postfix 已启动并正在运行。接下来,我们将配置 Postfix 从本地发送邮件到我们的服务器。
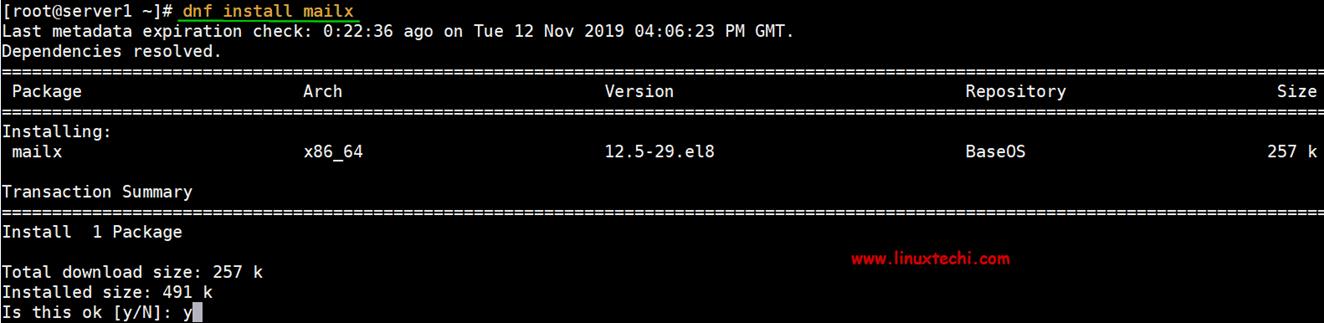
步骤 5)安装 mailx 邮件客户端

在配置 Postfix 服务器之前,我们需要安装 mailx,要安装它,请运行以下命令:

  1. # dnf install mailx

Install-Mailx-CentOS8

步骤 6)配置 Postfix 邮件服务器

Postfix 的配置文件位于 /etc/postfix/main.cf 中。我们需要对配置文件进行一些修改,因此请使用你喜欢的文本编辑器将其打开:

  1. # vi /etc/postfix/main.cf

更改以下几行:

  1. myhostname = server1.crazytechgeek.info
  2. mydomain = crazytechgeek.info
  3. myorigin = $mydomain
  4. ## 取消注释并将 inet_interfaces 设置为 all##
  5. inet_interfaces = all
  6. ## 更改为 all ##
  7. inet_protocols = all
  8. ## 注释 ##
  9. #mydestination = $myhostname, localhost.$mydomain, localhost
  10. ## 取消注释 ##
  11. mydestination = $myhostname, localhost.$mydomain, localhost, $mydomain
  12. ## 取消注释并添加 IP 范围 ##
  13. mynetworks = 192.168.1.0/24, 127.0.0.0/8
  14. ## 取消注释 ##
  15. home_mailbox = Maildir/

完成后,保存并退出配置文件。重新启动 postfix 服务以使更改生效:

  1. # systemctl restart postfix

备注:

在RHEL 9.X环境中,inet_protocols = all 已经是期望的值

步骤 7)测试 Postfix 邮件服务器

测试我们的配置是否有效,首先,创建一个测试用户。

  1. # useradd postfixuser
  2. # passwd postfixuser

接下来,运行以下命令,从本地用户 pkumar 发送邮件到另一个用户 postfixuser。

  1. # telnet localhost smtp
  2. 或者
  3. # telnet localhost 25

如果未安装 telnet 服务,那么可以使用以下命令进行安装:

  1. # dnf install telnet -y

如前所述运行命令时,应获得如下输出:

  1. [root@linuxtechi ~]# telnet localhost 25
  2. Trying 127.0.0.1...
  3. Connected to localhost.
  4. Escape character is '^]'.
  5. 220 server1.crazytechgeek.info ESMTP Postfix

上面的结果确认与 postfix 邮件服务器的连接正常。接下来,输入命令:

  1. # ehlo localhost

输出看上去像这样:

  1. 250-server1.crazytechgeek.info
  2. 250-PIPELINING
  3. 250-SIZE 10240000
  4. 250-VRFY
  5. 250-ETRN
  6. 250-STARTTLS
  7. 250-ENHANCEDSTATUSCODES
  8. 250-8BITMIME
  9. 250-DSN
  10. 250 SMTPUTF8

接下来,运行橙色高亮的命令,例如 mail from、rcpt to、data,最后输入 quit:

  1. mail from:<pkumar>
  2. 250 2.1.0 Ok
  3. rcpt to:<postfixuser>
  4. 250 2.1.5 Ok
  5. data
  6. 354 End data with <CR><LF>.<CR><LF>
  7. Hello, Welcome to my mailserver (Postfix)
  8. .
  9. 250 2.0.0 Ok: queued as B56BF1189BEC
  10. quit
  11. 221 2.0.0 Bye
  12. Connection closed by foreign host

完成 telnet 命令可从本地用户 pkumar 发送邮件到另一个本地用户 postfixuser,如下所示:

Send-email-with-telnet-centos8

如果一切都按计划进行,那么你应该可以在新用户的家目录中查看发送的邮件:

  1. # ls /home/postfixuser/Maildir/new
  2. 1573580091.Vfd02I20050b8M635437.server1.crazytechgeek.info
  3. #

要阅读邮件,只需使用 cat 命令,如下所示:

  1. # cat /home/postfixuser/Maildir/new/1573580091.Vfd02I20050b8M635437.server1.crazytechgeek.info

Read-postfix-email-linux

Postfix 邮件服务器日志

Postfix 邮件服务器邮件日志保存在文件 /var/log/maillog 中,使用以下命令查看实时日志,

  1. # tail -f /var/log/maillog

postfix-maillogs-centos8

保护 Postfix 邮件服务器

建议始终确保客户端和 Postfix 服务器之间的通信安全,这可以使用 SSL 证书来实现,它们可以来自受信任的权威机构或自签名证书。在本教程中,我们将使用 openssl 命令生成用于 Postfix 的自签名证书,

我假设 openssl 已经安装在你的系统上,如果未安装,请使用以下 dnf 命令:

  1. # dnf install openssl -y

使用下面的 openssl 命令生成私钥和 CSR(证书签名请求):

  1. # openssl req -nodes -newkey rsa:2048 -keyout mail.key -out mail.csr

Postfix-Key-CSR-CentOS8

现在,使用以下 openssl 命令生成自签名证书:

  1. # openssl x509 -req -days 365 -in mail.csr -signkey mail.key -out mail.crt
  2. Signature ok
  3. subject=C = IN, ST = New Delhi, L = New Delhi, O = IT, OU = IT, CN = server1.crazytechgeek.info, emailAddress = root@linuxtechi
  4. Getting Private key
  5. #

现在将私钥和证书文件复制到 /etc/postfix 目录下:

  1. # cp mail.key mail.crt /etc/postfix

在 Postfix 配置文件中更新私钥和证书文件的路径:

  1. # vi /etc/postfix/main.cf
  2. ………
  3. smtpd_use_tls = yes
  4. smtpd_tls_cert_file = /etc/postfix/mail.crt
  5. smtpd_tls_key_file = /etc/postfix/mail.key
  6. smtpd_tls_security_level = may
  7. ………

重启 Postfix 服务以使上述更改生效:

  1. # systemctl restart postfix

让我们尝试使用 mailx 客户端将邮件发送到内部本地域和外部域。

从 pkumar 发送内部本地邮件到 postfixuser 中:

  1. # echo "test email" | mailx -s "Test email from Postfix MailServer" -r root@linuxtechi root@linuxtechi

使用以下命令检查并阅读邮件:

  1. # cd /home/postfixuser/Maildir/new/
  2. # ll
  3. total 8
  4. -rw-------. 1 postfixuser postfixuser 476 Nov 12 17:34 1573580091.Vfd02I20050b8M635437.server1.crazytechgeek.info
  5. -rw-------. 1 postfixuser postfixuser 612 Nov 13 02:40 1573612845.Vfd02I20050bbM466643.server1.crazytechgeek.info
  6. # cat 1573612845.Vfd02I20050bbM466643.server1.crazytechgeek.info

Read-Postfixuser-Email-CentOS8

从 postfixuser 发送邮件到外部域(root@linuxtechi.com):

  1. # echo "External Test email" | mailx -s "Postfix MailServer" -r root@linuxtechi root@linuxtechi

注意:如果你的 IP 没有被任何地方列入黑名单,那么你发送到外部域的邮件将被发送,否则它将被退回,并提示你的 IP 被 spamhaus 之类的数据库列入黑名单。

检查 Postfix 邮件队列

使用 mailq 命令列出队列中的邮件:

  1. # mailq
  2. Mail queue is empty
  3. #

完成!我们的 Postfix 配置正常工作了!目前就这样了。我们希望你觉得本教程有见地,并且你可以轻松地设置本地 Postfix 服务器

------------------------日志-----------------------

[root@db2p work]# dnf install postfix -y

Updating Subscription Management repositories.

Unable to read consumer identity

This system is not registered with an entitlement server. You can use "rhc" or "subscription-manager" to register.

Last metadata expiration check: 0:00:27 ago on Wed 25 Jun 2025 09:04:08 PM EDT.

Dependencies resolved.

=========================================================================================================================================================================

Package Architecture Version Repository Size

=========================================================================================================================================================================

Installing:

postfix x86_64 2:3.5.9-24.el9 APP 1.5 M

Transaction Summary

=========================================================================================================================================================================

Install 1 Package

Total size: 1.5 M

Installed size: 4.4 M

Downloading Packages:

Running transaction check

Transaction check succeeded.

Running transaction test

Transaction test succeeded.

Running transaction

Preparing : 1/1

Running scriptlet: postfix-2:3.5.9-24.el9.x86_64 1/1

Installing : postfix-2:3.5.9-24.el9.x86_64 1/1

Running scriptlet: postfix-2:3.5.9-24.el9.x86_64 1/1

Verifying : postfix-2:3.5.9-24.el9.x86_64 1/1

Installed products updated.

Installed:

postfix-2:3.5.9-24.el9.x86_64

Complete!

[root@db2p work]# systemctl start postfix

[root@db2p work]# systemctl enable postfix

Created symlink /etc/systemd/system/multi-user.target.wants/postfix.service → /usr/lib/systemd/system/postfix.service.

[root@db2p work]# systemctl status postfix

● postfix.service - Postfix Mail Transport Agent

Loaded: loaded (/usr/lib/systemd/system/postfix.service; enabled; preset: disabled)

Active: active (running) since Wed 2025-06-25 21:04:55 EDT; 15s ago

Main PID: 14586 (master)

Tasks: 3 (limit: 100311)

Memory: 5.0M

CPU: 615ms

CGroup: /system.slice/postfix.service

├─14586 /usr/libexec/postfix/master -w

├─14607 pickup -l -t unix -u

└─14608 qmgr -l -t unix -u

Jun 25 21:04:55 db2p.cpd.com systemd[1]: Starting Postfix Mail Transport Agent...

Jun 25 21:04:55 db2p.cpd.com postfix/master[14586]: daemon started -- version 3.5.9, configuration /etc/postfix

Jun 25 21:04:55 db2p.cpd.com systemd[1]: Started Postfix Mail Transport Agent.

[root@db2p work]# dnf install mailx -y

Updating Subscription Management repositories.

Unable to read consumer identity

This system is not registered with an entitlement server. You can use "rhc" or "subscription-manager" to register.

Last metadata expiration check: 0:00:42 ago on Wed 25 Jun 2025 09:04:55 PM EDT.

No match for argument: mailx

Error: Unable to find a match: mailx

[root@db2p work]# vi /etc/postfix/main.cf

[root@db2p work]# vi /etc/postfix/main.cf

[root@db2p work]# systemctl restart postfix

[root@db2p work]# useradd postfixuser

[root@db2p work]# passwd postfixuser

Changing password for user postfixuser.

New password:

Retype new password:

passwd: all authentication tokens updated successfully.

[root@db2p work]# telnet localhost smtp

bash: telnet: command not found...

Install package 'telnet' to provide command 'telnet'? [N/y] y

* Waiting in queue...

* Loading list of packages....

The following packages have to be installed:

telnet-1:0.17-85.el9.x86_64 The client program for the Telnet remote login protocol

Proceed with changes? [N/y] y

* Waiting in queue...

* Waiting for authentication...

* Waiting in queue...

* Loading list of packages....

* Requesting data...

* Testing changes...

* Installing packages... Failed to install packages: PackageKit daemon disappeared

[root@db2p work]# telnet localhost smtp

Trying ::1...

Connected to localhost.

Escape character is '^]'.

220 db2p.cpd.com ESMTP Postfix

ehlo localhost

250-db2p.cpd.com

250-PIPELINING

250-SIZE 10240000

250-VRFY

250-ETRN

250-STARTTLS

250-ENHANCEDSTATUSCODES

250-8BITMIME

250-DSN

250-SMTPUTF8

250 CHUNKING

1. mail from:

502 5.5.2 Error: command not recognized

mail from:

250 2.1.0 Ok

rcpt to:

250 2.1.5 Ok

data

354 End data with .

Hello, Welcome to my mailserver (Postfix)

250 2.0.0 Ok: queued as B56BF1189BEC

quit

221 2.0.0 Bye

^C^C^C^C

quit

Hello, Welcome to my mailserver (Postfix)

.

250 2.0.0 Ok: queued as B56BF1189BEC

quit

Connection closed by foreign host.

[root@db2p work]# cat /etc/redhat-release

Red Hat Enterprise Linux release 9.4 (Plow)

[root@db2p work]# ls /home/postfixuser/Maildir/new

1750901389.Vfd00I80631a1M409804.db2p.cpd.com

[root@db2p work]# cat 1750901389.Vfd00I80631a1M409804.db2p.cpd.com

cat: 1750901389.Vfd00I80631a1M409804.db2p.cpd.com: No such file or directory

[root@db2p work]# ls

config-limits.shell db2server.rsp one-elm.shell prepre-im-for-rhel-9.shell start-websphere-liberty.shell

config-yum.shell install-db2-11.5.9-on-rhel-9.4.shell prepare-elm-media.shell set-up-db2.shell

[root@db2p work]# cd /home/postfixuser/Maildir/new

[root@db2p new]# ls

1750901389.Vfd00I80631a1M409804.db2p.cpd.com

[root@db2p new]# cat 1750901389.Vfd00I80631a1M409804.db2p.cpd.com

Return-Path:

X-Original-To: postfixuser

Delivered-To: postfixuser@cpd.com

Received: from localhost (localhost [IPv6:::1])

by db2p.cpd.com (Postfix) with ESMTP id 946095CCF7

for ; Wed, 25 Jun 2025 21:25:41 -0400 (EDT)

Message-Id:

Date: Wed, 25 Jun 2025 21:25:41 -0400 (EDT)

From: pkumar@cpd.com

Hello, Welcome to my mailserver (Postfix)

250 2.0.0 Ok: queued as B56BF1189BEC

quit

221 2.0.0 Bye

����������������

quit

Hello, Welcome to my mailserver (Postfix)

[root@db2p new]#

### 如何在 Rocky Linux 9配置发送电子邮件 #### 安装必要的软件包 为了能够在 Rocky Linux 9 上发送邮件,通常需要安装 `mailx` 或者其他类似的 MUA (邮件用户代理)[^1]。 ```bash sudo yum install mailx ``` #### 配置 SMTP 发送设置 对于基于 QQ 邮箱的 SMTP 设置,在 `/etc/mail.rc` 文件中加入如下内容[^3]: ```plaintext set from=your_email@qq.com set smtp=smtp.qq.com set smtp-auth-user=your_email@qq.com set smtp-auth-password=your_auth_code set smtp-auth=login ``` 这里的 `your_email@qq.com` 是指用于发送邮件的具体邮箱地址,而 `your_auth_code` 则是指该邮箱对应的授权码而非登录密码。需要注意的是,QQ 邮箱的安全策略可能要求开启特定的服务权限来允许第三方客户端连接SMTP服务。 #### 使用 MailX 命令发送测试邮件 完成上述配置之后,可以通过下面的方式尝试发送一封简单的测试邮件: ```bash echo "This is a test message body." | mailx -s "Test Subject" recipient@example.com ``` 这条命令会把字符串 `"This is a test message body."` 作为正文内容,并带有主题 `"Test Subject"` 发送给指定的目标邮箱 `recipient@example.com`。 #### 查看已接收的邮件 如果想要查看本机接收到的任何反馈或其他形式的通知邮件,则可以在终端输入 `mail` 来启动交互式的阅读界面[^2]。 ```bash mail ``` 在此模式下可以根据提示浏览现有的消息列表以及读取具体内容。
评论
添加红包

请填写红包祝福语或标题

红包个数最小为10个

红包金额最低5元

当前余额3.43前往充值 >
需支付:10.00
成就一亿技术人!
领取后你会自动成为博主和红包主的粉丝 规则
hope_wisdom
发出的红包
实付
使用余额支付
点击重新获取
扫码支付
钱包余额 0

抵扣说明:

1.余额是钱包充值的虚拟货币,按照1:1的比例进行支付金额的抵扣。
2.余额无法直接购买下载,可以购买VIP、付费专栏及课程。

余额充值