


VUE hello world 程序
<!DOCTYPE html>
<head>
    <meta charset="UTF-8">
    <meta name="viewport" content="width=device-width, initial-scale=1.0">
    <title>hello world</title>
    <script src="https://unpkg.com/vue@next"></script>
</head>

<body>
    <div id="root"></div>
</body>
<script>
    const app = Vue.createApp({ <!-- vue实例 -->
        template:`<div>hello world</div>`
    })
    app.mount("#root") <!-- 注册到 div root -->
</script>
</html>
1 插值表达式
在 “{{}}”中可以写入一行表达式,可以直接获取data的数据。
<!DOCTYPE html>
<head>
    <meta charset="UTF-8">
    <meta name="viewport" content="width=device-width, initial-scale=1.0">
    <title>hello world</title>
    <script src="https://unpkg.com/vue@next"></script>
</head>

<body>
    <div id="root"></div>
</body>
<script>
    const app = Vue.createApp({
        data(){
            return{
                message:'hello world'
            }
        },
        template:`<div>{{message}}</div>`
    })
    app.mount("#root")
</script>
</html>
1.2 使用 v-html 进行html元素插值
<script>
const app = Vue.createApp({
data(){
return{
message:'<strong>hello world</strong>'
}
},
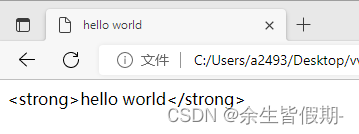
template:`<div>{{message}}</div>`
})
app.mount("#root")
</script>如果单纯插值表达式,会将 html 标签原样输出
此刻使用 v-html 可以解决这个问题,v-html 指令是设置 innerHTML
<script>
    const app = Vue.createApp({
        data(){
            return{
                message:'<strong>hello world</strong>'
            }
        },
        template:`<div v-html="message"></div>`
    })
    app.mount("#root")
</script>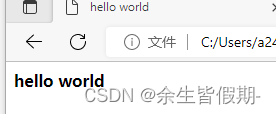
1.3 对 html 元素名字进行插值
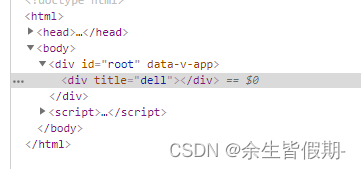
使用 [attributeName] 即可插值属性名
<!DOCTYPE html>
<head>
    <meta charset="UTF-8">
    <meta name="viewport" content="width=device-width, initial-scale=1.0">
    <title>hello world</title>
    <script src="https://unpkg.com/vue@next"></script>
</head>

<body>
    <div id="root"></div>
</body>
<script>
    const app = Vue.createApp({

        data(){
            return{
                name:'title',
                message:'dell'
            }
        },
        template:`
        <div v-bind:[name]="message"></div> <!-- 属性名插值语法 -->
        `
    })
    app.mount("#root")
</script>
</html>
2 数据绑定
Vue中有2种数据绑定的方式:
单向绑定(v-bind):数据只能从data流向页面
双向绑定(v-model):数据不仅能从data流向页面,还可以从页面流向data
备注:
双向绑定一般都应用在表单类元素上(如:<input>、<select>、<textarea>等)
v-model:value 可以简写为 v-model,因为 v-model 默认收集的就是 value 值
<!DOCTYPE html>
<head>
    <meta charset="UTF-8">
    <meta name="viewport" content="width=device-width, initial-scale=1.0">
    <title>hello world</title>
    <script src="https://unpkg.com/vue@next"></script>
</head>

<body>
    <div id="root"></div>
</body>
<script>
    const app = Vue.createApp({

        data(){
            return{
                mes11:"uuu"
            }
        },
        template:`
        <input type="text" v-bind:value="mes11"/> <!-- 单项绑定 -->
        <input type="text" v-model="mes11"/> <!-- 双向绑定 -->
        `
    })
    app.mount("#root")
</script>
</html>
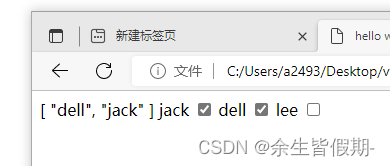
2.1 checkbox表单的双向绑定
<!DOCTYPE html>
<head>
    <meta charset="UTF-8">
    <meta name="viewport" content="width=device-width, initial-scale=1.0">
    <title>hello world</title>
    <script src="https://unpkg.com/vue@next"></script>
</head>

<body>
    <div id="root"></div>
</body>
<script>
    const app = Vue.createApp({
        data:function(){
            return({
                msg:[]
            })
        },
        template: `
        {{msg}}
        jack <input type="checkbox" v-model="msg" value="jack" />
        dell <input type="checkbox" v-model="msg" value="dell" />
        lee <input type="checkbox" v-model="msg" value="lee" />
        `
    })
    app.mount("#root")
</script>

</html>
使用数组类型可以获得 checkbox的合集
2.2 option表单的双向绑定
<!DOCTYPE html>
<head>
    <meta charset="UTF-8">
    <meta name="viewport" content="width=device-width, initial-scale=1.0">
    <title>hello world</title>
    <script src="https://unpkg.com/vue@next"></script>
</head>

<body>
    <div id="root"></div>
</body>
<script>
    const app = Vue.createApp({
        data:function(){
            return({
                msg:'A'
            })
        },
        template: `
        {{msg}}
        <select v-model="msg">
            <option>A</option>
            <option>B</option>
            <option>C</option>
        </select>
        `
    })
    app.mount("#root")
</script>

</html>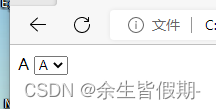
3 计算属性 computed
computed是vue的计算属性,是根据依赖关系进行缓存的计算,只有在它的相关依赖发生改变时才会进行更新。
<!DOCTYPE html>
<head>
    <meta charset="UTF-8">
    <meta name="viewport" content="width=device-width, initial-scale=1.0">
    <title>hello world</title>
    <script src="https://unpkg.com/vue@next"></script>
</head>

<body>
    <div id="root"></div>
</body>
<script>
    const app = Vue.createApp({

        data(){
            return{
                message:"hello world",
                count:2,
                price:5
            }
        },
        computed:{
            total(){
                return this.count * this.price
            }
        },
        template:`
        <div>{{total}}</div>
        `
    })
    app.mount("#root")
</script>
</html>
结果输出 10
4 侦听器 watch
watch对象中,属性名为侦听的数据名,当数据被修改即可调用这个函数。
computed 和 watch 都能实现的功能建议使用conputed实现,更加简洁而且有缓存。
<!DOCTYPE html>
<head>
    <meta charset="UTF-8">
    <meta name="viewport" content="width=device-width, initial-scale=1.0">
    <title>hello world</title>
    <script src="https://unpkg.com/vue@next"></script>
</head>

<body>
    <div id="root"></div>
</body>
<script>
    const app = Vue.createApp({

        data(){
            return{
                msga:"hello"
            }
        },
        watch:{
            msga(){
                setTimeout(()=>{
                    console.log(111)
                },1000)
            }
        },
        template:`
        <input v-model="msga"/>
        `
    })
    app.mount("#root")
</script>
</html>
5 事件绑定
v-on:click 等价于 @click 点击后触发事件
<!DOCTYPE html>
<head>
    <meta charset="UTF-8">
    <meta name="viewport" content="width=device-width, initial-scale=1.0">
    <title>hello world</title>
    <script src="https://unpkg.com/vue@next"></script>
</head>

<body>
    <div id="root"></div>
</body>
<script>
    const app = Vue.createApp({
        data() {
            return {
                counter: "1"
            }
        },
        methods:{
            handleBtnClick:function(event){
                console.log(event.target) <!-- target可以获得原生事件 -->
            }
        },
        template: `
        <div @click="handleBtnClick">{{counter}}</div>
        `
    })
    app.mount("#root")
</script>

</html>
5.1 事件绑定参数
事件绑定可以传递参数,$event 可以传递真实的dom
<!DOCTYPE html>
<head>
    <meta charset="UTF-8">
    <meta name="viewport" content="width=device-width, initial-scale=1.0">
    <title>hello world</title>
    <script src="https://unpkg.com/vue@next"></script>
</head>

<body>
    <div id="root"></div>
</body>
<script>
    const app = Vue.createApp({
        data() {
            return {
                counter: "1"
            }
        },
        methods:{
            handleBtnClick:function(num,event){
                console.log(event)
            }
        },
        template: `
        <div @click="handleBtnClick(2,$event)">{{counter}}</div>
        `
    })
    app.mount("#root")
</script>

</html>
5.2 事件绑定修饰符 阻止冒泡
<!DOCTYPE html>
<head>
    <meta charset="UTF-8">
    <meta name="viewport" content="width=device-width, initial-scale=1.0">
    <title>hello world</title>
    <script src="https://unpkg.com/vue@next"></script>
</head>

<body>
    <div id="root"></div>
</body>
<script>
    const app = Vue.createApp({
        data() {
            return {
                counter: "1"
            }
        },
        methods:{
            handleDivClick:function(){
                console.log('dev')
            },
            handleBtnClick:function(){
                console.log('button')
            }
        },
        template: `
        <div @click="handleDivClick">
            <button @click="handleBtnClick">button</button>
        </div>
        `
    })
    app.mount("#root")
</script>

</html>
如果事件嵌套事件,会冒泡触发,内部的实现会触发外部事件。
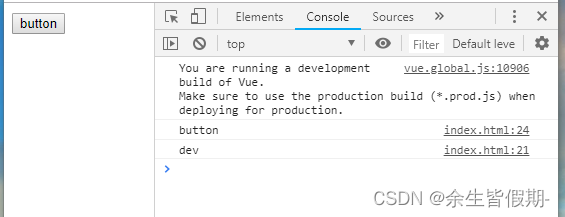
对外层元素使用 .self 即可阻止冒泡
<div @click.self="handleDivClick">
    <button @click="handleBtnClick">button</button>
</div>
事件修饰符还有 .prevent 阻止默认行为,.capture 捕获模式,.once 只执行一次等...
6 按键修饰符
<!DOCTYPE html>
<head>
    <meta charset="UTF-8">
    <meta name="viewport" content="width=device-width, initial-scale=1.0">
    <title>hello world</title>
    <script src="https://unpkg.com/vue@next"></script>
</head>

<body>
    <div id="root"></div>
</body>
<script>
    const app = Vue.createApp({
        methods:{
            handleKeyDown:function(){
                console.log(1)
            }
        },
        template: `
        <input @keydown.delete="handleKeyDown" />
        `
    })
    app.mount("#root")
</script>

</html>
当进行指定的按键操作即可触发函数
常用有按键修饰符 enter tab delete esc up down left right
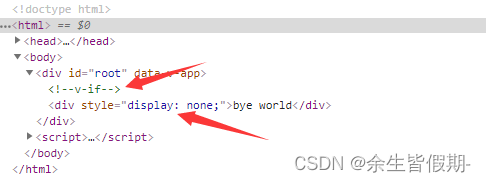
7 条件渲染 v-if v-show区别
<!DOCTYPE html>
<head>
    <meta charset="UTF-8">
    <meta name="viewport" content="width=device-width, initial-scale=1.0">
    <title>hello world</title>
    <script src="https://unpkg.com/vue@next"></script>
</head>

<body>
    <div id="root"></div>
</body>
<script>
    const app = Vue.createApp({
        data:function(){
            return({
                show:false
            })
        },
        template: `
        <div v-if="show">hello world</div>
        <div v-show="show">bye world</div>
        `
    })
    app.mount("#root")
</script>

</html>
v-if 直接不渲染这个dom元素,v-show采用display:none的方式
8.0 列表循环
8.1 数组列表循环
<!DOCTYPE html>
<head>
    <meta charset="UTF-8">
    <meta name="viewport" content="width=device-width, initial-scale=1.0">
    <title>hello world</title>
    <script src="https://unpkg.com/vue@next"></script>
</head>

<body>
    <div id="root"></div>
</body>
<script>
    const app = Vue.createApp({
        data:function(){
            return({
                list:['dell','les','teacher']
            })
        },
        template: `
        <ul>
            <li v-for="value in list">{{value}}</li>
        </ul>
        `
    })
    app.mount("#root")
</script>

</html>
效果如下:

还可以使用 value key 的形式输出
<li v-for="(value,key) in list">{{value}}--{{key}}</li>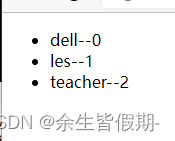
8.2 对象列表循环
<!DOCTYPE html>
<head>
<meta charset="UTF-8">
<meta name="viewport" content="width=device-width, initial-scale=1.0">
<title>hello world</title>
<script src="https://unpkg.com/vue@next"></script>
</head>
<body>
<div id="root"></div>
</body>
<script>
const app = Vue.createApp({
data:function(){
return({
listObject:{
firstName:'dell',
lastName:'lee',
job:'teacher'
}
})
},
template: `
<ul>
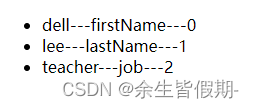
<li v-for="(value,key,index) in listObject">{{value}}---{{key}}---{{index}}</li>
</ul>
`
})
app.mount("#root")
</script>
</html>如果 v-for 一个对象 可以获得 value,key,index 三个值


 6162
6162

 被折叠的 条评论
为什么被折叠?
被折叠的 条评论
为什么被折叠?
 到【灌水乐园】发言


