


本文将从源码深度分析Ragflow,理解原理,未来对复杂场景可以多一些思考。
RAGflow框架热门,主要是因为:
- 文档解析
- 解析后可追溯
但他的工作流做得不够出色,现在一般的方案是用RagFlow 只构建知识库。用dify或手搓代码做更智能体搭建。因此本文将侧重于RagFlow的ocr文档处理部分,其他架构是类似的。
文章目录
核心技术:Deep Doc引擎
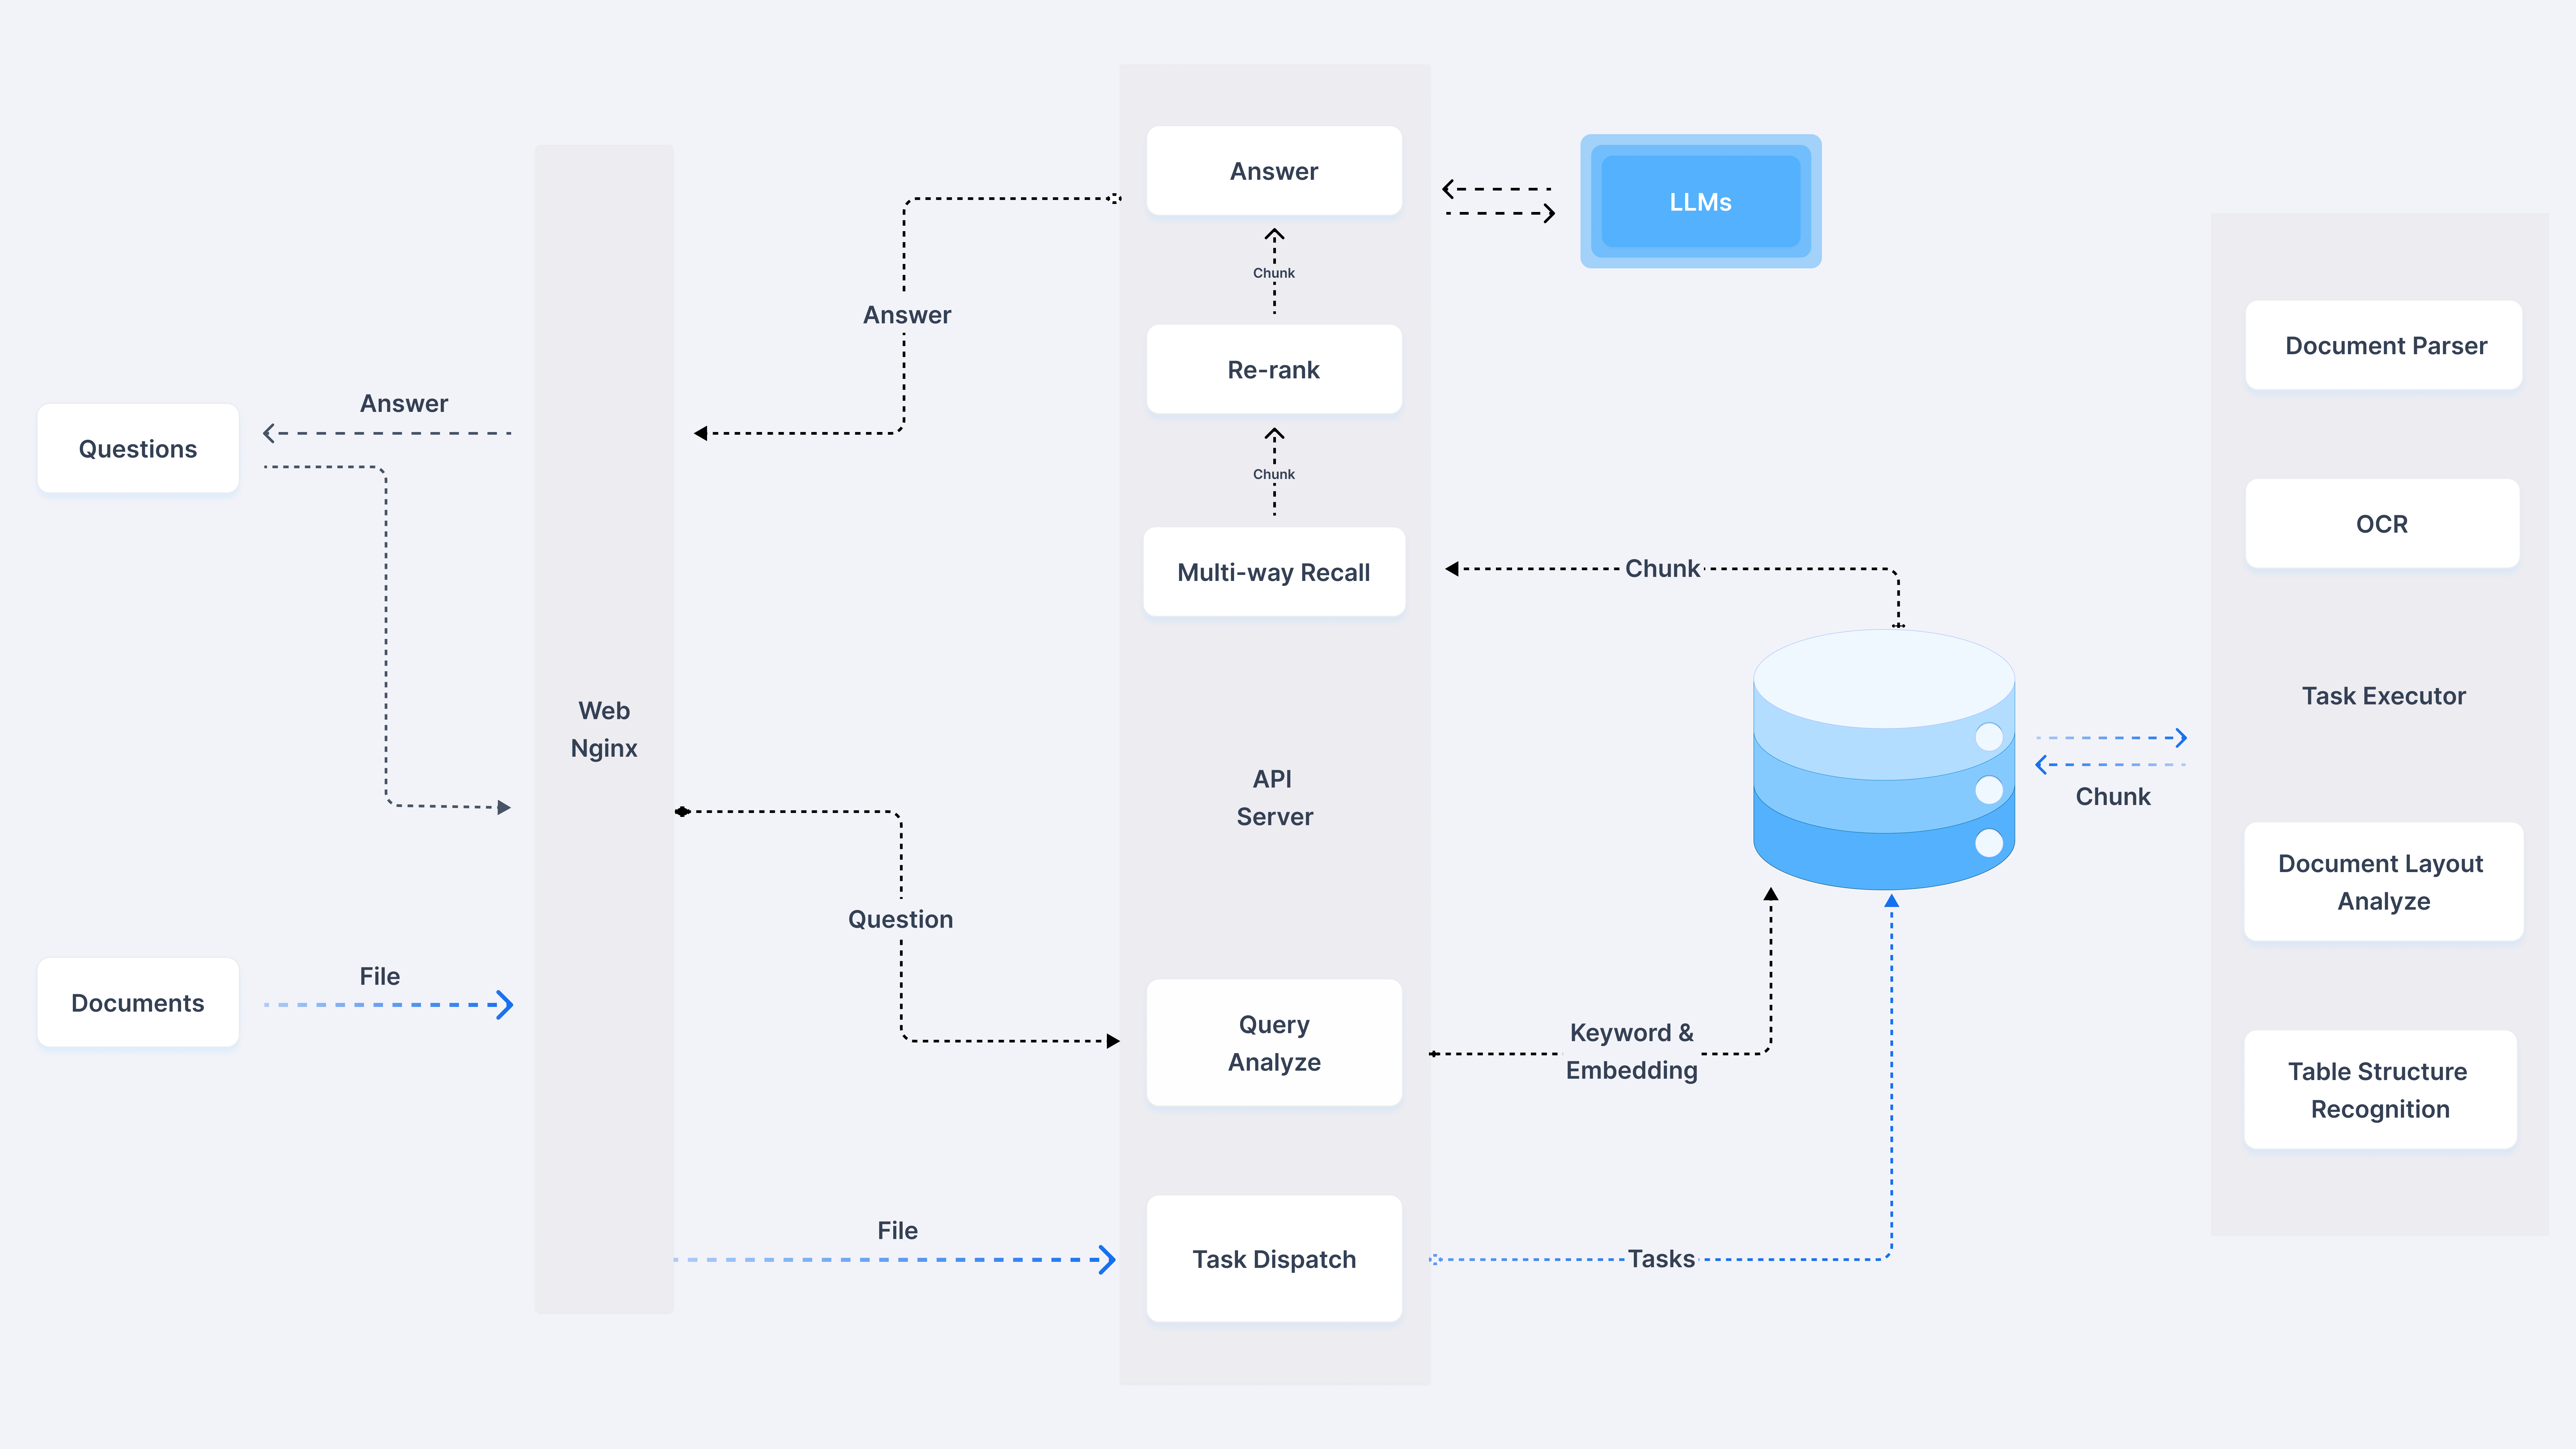
下图为RagFlow的架构图,最右侧是deepdoc部分。
我们单独抽取文档部分分析:
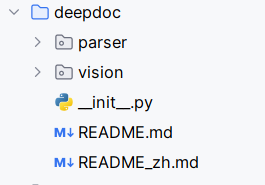
DeepDoc 由两个组成部分:视觉处理和解析器
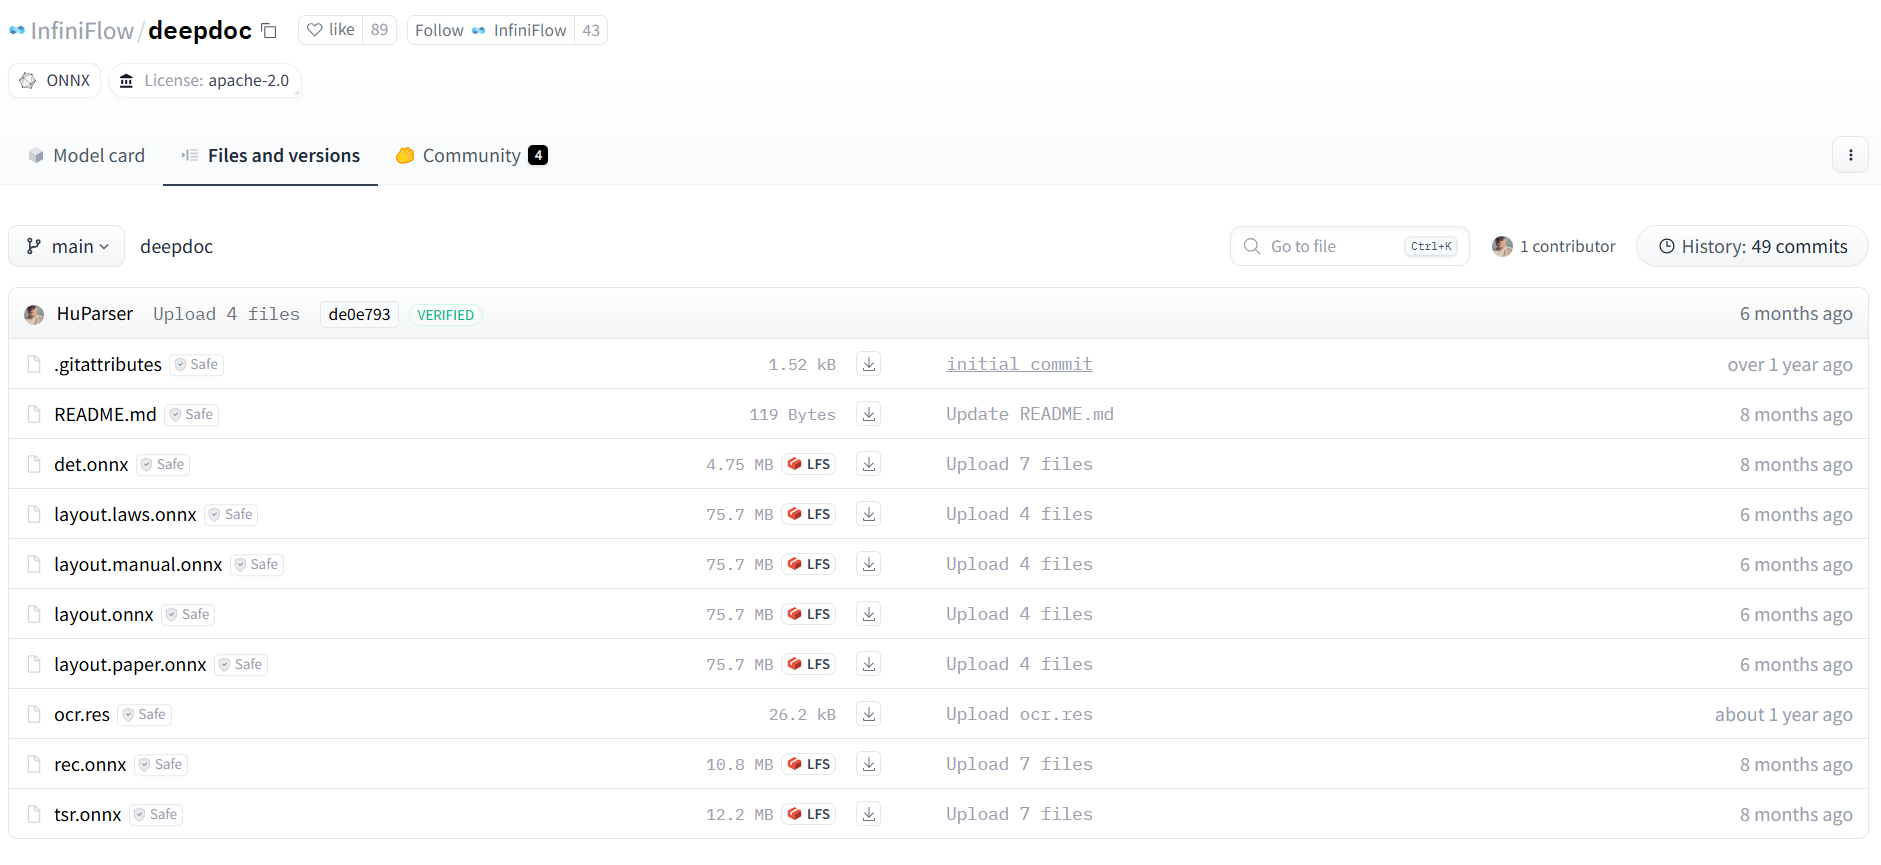
拉下来了官方的代码,他们设计模式分离做得很好。Deep Doc每个组件都是独立的,可以单独使用,也可以组合使用。比如你只需要OCR功能,就只用OCR模块;如果要分析文档布局,再加上LayoutRecognizer。但是该源码不涉及到核心算法实现,主要是调用他们团队开发的HuggingFace 上的模型文件:
- det.onnx - 文本检测模型
- rec.onnx - 文本识别模型
- layout.onnx - 布局识别模型
- tsr.onnx- 表格结构识别模型
- ocr.res - OCR字符字典文件
一、视觉处理
OCR
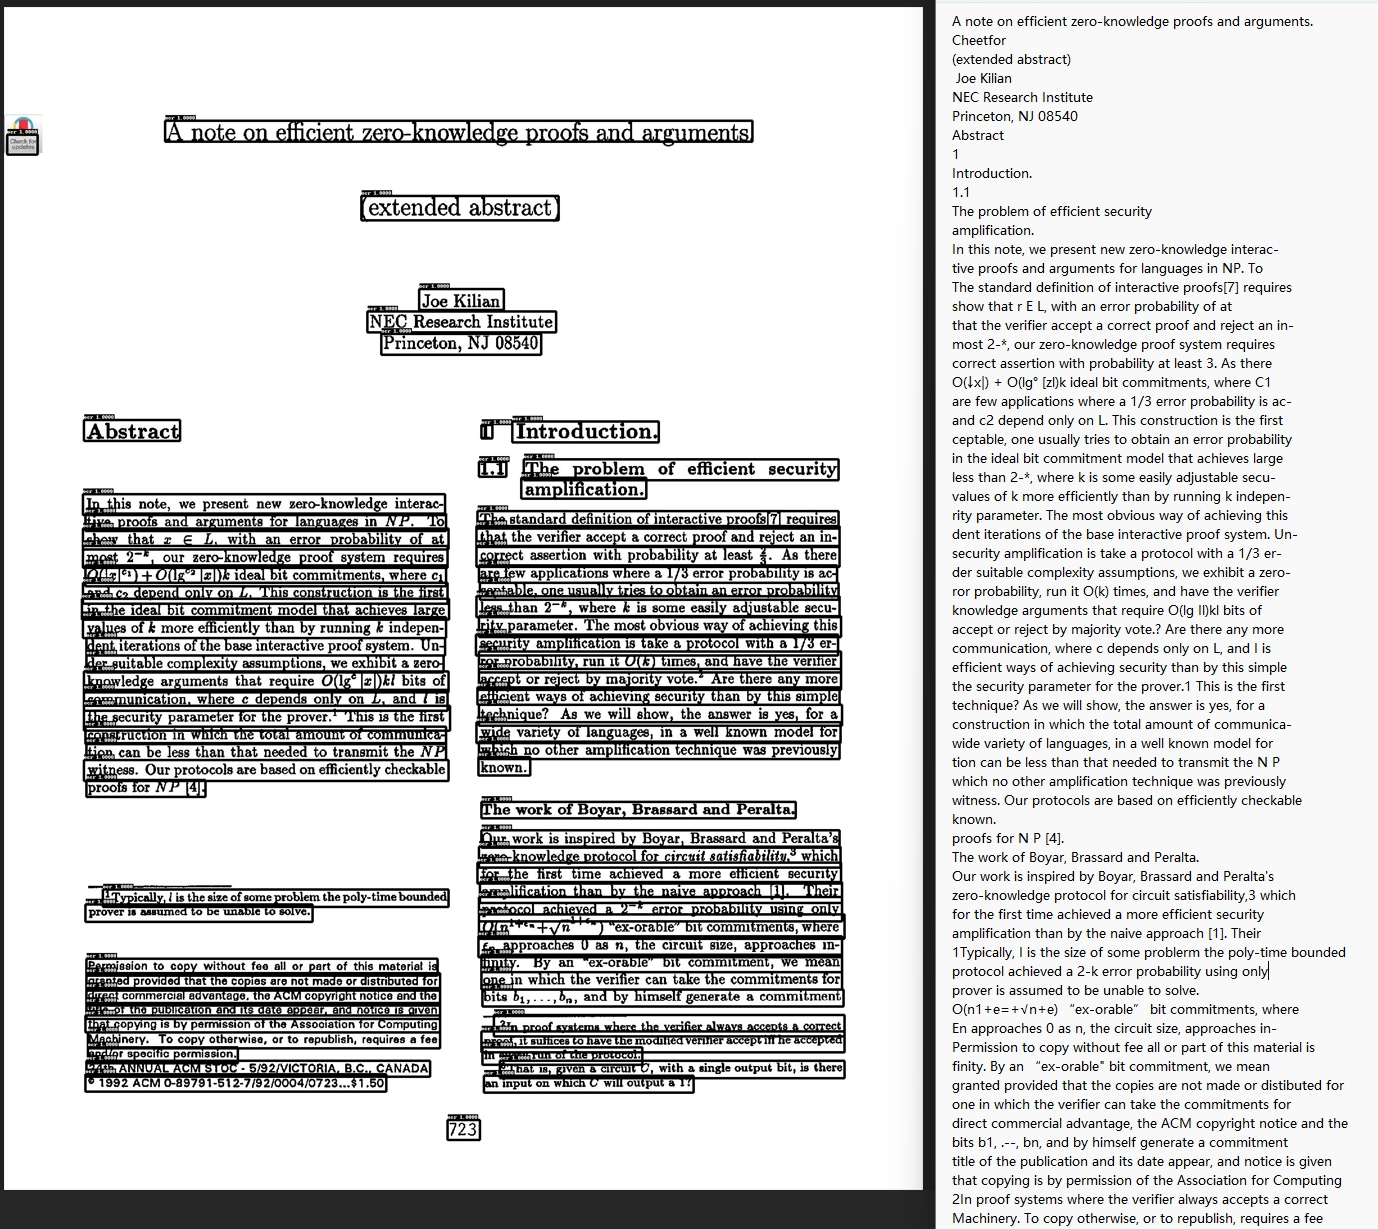
使用OCR。引入该技术目的是为了应对扫描pdf,同时该算法也为后续TSR识别奠定基础。整个效果如下图:
其实我们自己如果去处理pdf扫描文档,最可能的就是粗暴做法,套用个OCR API做解析。
对吗?🤭
但作者为了突出它的产品第二个大优势:解析后可追溯。将pdf先检测出文本框,再对这些文本框进行OCR。这样当用户点击某段文本就可以关联到它具体的pdf部分了。OCR这部分流程如下:
PDF (3页) → [page0, page1, page2]
    ↓ [并行OCR处理]
Page 0:
    image0 → OCR处理 → results0 → "document_0.jpg" + "document_0.jpg.txt"
Page 1:
    image1 → OCR处理 → results1 → "document_1.jpg" + "document_1.jpg.txt"
Page 2:
    image2 → OCR处理 → results2 → "document_2.jpg" + "document_2.jpg.txt"
    ↓ [最终输出]
输出目录结构:
    ./ocr_outputs/
    ├── document_0.jpg     # 第0页标注图像
    ├── document_0.jpg.txt # 第0页文本内容
    ├── document_1.jpg     # 第1页标注图像
    ├── document_1.jpg.txt # 第1页文本内容
    ├── document_2.jpg     # 第2页标注图像
    └── document_2.jpg.txt # 第2页文本内容
第一阶段:PDF预处理
输入pdf →处理对象转换成每一页pdf转换为图像
输入PDF文件 (document.pdf)
    ↓ [PDF解析 - pdfplumber]
PDF页面对象列表:
    page0, page1, page2, ..., pageN
    ↓ [页面渲染 - 3倍缩放]
图像转换 (zoomin=3, resolution=216 DPI):
    page0 → image0 (2592x3456像素)  # A4页面典型尺寸
    page1 → image1 (2592x3456像素)
    page2 → image2 (2592x3456像素)
    ↓ [格式标准化]
RGB图像列表:
    images = [image0.convert('RGB'), image1.convert('RGB'), ...]
    outputs = ["document_0.jpg", "document_1.jpg", ...]
核心代码是,代码太长了,看下面我的解释即可:
def init_in_out(args):
    from PIL import Image
    import os
    import traceback
    from api.utils.file_utils import traversal_files
    images = []
    outputs = []

    if not os.path.exists(args.output_dir):
        os.mkdir(args.output_dir)

    def pdf_pages(fnm, zoomin=3):
        nonlocal outputs, images
        with sys.modules[LOCK_KEY_pdfplumber]:
            pdf = pdfplumber.open(fnm)
            images = [p.to_image(resolution=72 * zoomin).annotated for i, p in
                                enumerate(pdf.pages)]

        for i, page in enumerate(images):
            outputs.append(os.path.split(fnm)[-1] + f"_{i}.jpg")
        pdf.close()
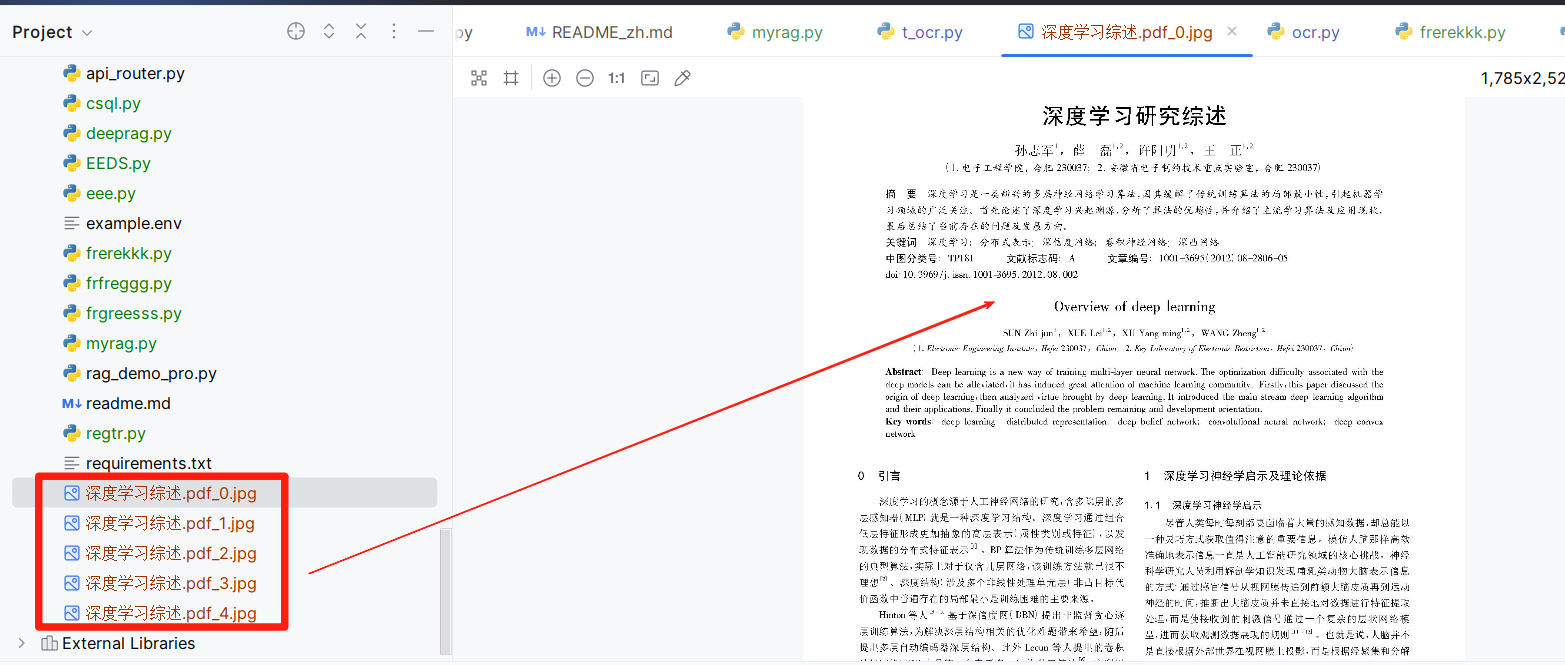
这部分没有保存图片,生成的图片是在内存中。
我单独测试了这段代码,将图片显示的保存下来:
第二阶段:文本框识别
针对每个单页图像做文本检测 → 文本区域裁剪
单页图像处理 (以page0为例)
原始图像 image0 (2592x3456)
    ↓ [文本检测预处理]
检测预处理:
    1. DetResizeForTest: 2592x3456 → 960x1280 (保持比例,限制最大边960)
    2. NormalizeImage: RGB归一化 mean=[0.485,0.456,0.406], std=[0.229,0.224,0.225]
    3. ToCHWImage: HWC→CHW格式转换 (1280,960,3) → (3,1280,960)
    4. KeepKeys: 保留image和shape信息
    ↓ [DB文本检测模型推理]
检测模型输出:
    feature_map (1, 1, 1280, 960) # 概率图
    ↓ [DB后处理]
检测框提取:
    thresh=0.3, box_thresh=0.5, unclip_ratio=1.5
    max_candidates=1000
    ↓ [几何校正与过滤]
检测到5个文本框,四个点,每个点有一个X,Y值:
    box1: [(150,300), (450,300), (450,360), (150,360)]     # "Company Report 2024"
    box2: [(150,400), (350,395), (355,445), (155,450)]     # "第一季度总结" (轻微倾斜)
    box3: [(500,420), (520,650), (580,645), (560,415)]     # "Sales: $1.2M" (较大倾斜)
    box4: [(150,500), (550,500), (550,530), (150,530)]     # "Net Profit: 15.8%"
    box5: [(200,600), (400,605), (395,635), (195,630)]     # "Growth Rate: +8.5%"
    ↓ [智能排序 - 阅读顺序]
排序后的检测框:
    [box1, box2, box4, box5, box3]  # 从上到下,从左到右
代码是,其实作者就是在做了基本图像处理后调用了它们实现的huggingface上文本检测模型:
class TextRecognizer:
    def __init__(self, model_dir, device_id: int | None = None):
        self.rec_image_shape = [int(v) for v in "3, 48, 320".split(",")]
        self.rec_batch_num = 16
        postprocess_params = {


            'name': 'CTCLabelDecode',
            "character_dict_path": os.path.join(model_dir, "ocr.res"),
            "use_space_char": True
        }
        self.postprocess_op = build_post_process(postprocess_params)
        self.predictor, self.run_options = load_model(model_dir, 'rec', device_id)
        self.input_tensor = self.predictor.get_inputs()[0]

    def resize_norm_img(self, img, max_wh_ratio):
        imgC, imgH, imgW = self.rec_image_shape

        assert imgC == img.shape[2]
        imgW = int((imgH * max_wh_ratio))
        w = self.input_tensor.shape[3:][0]
        if isinstance(w, str):
            pass
        elif w is not None and w > 0:
            imgW = w
        h, w = img.shape[:2]
        ratio = w / float(h)
        if math.ceil(imgH * ratio) > imgW:
            resized_w = imgW
        else:
            resized_w = int(math.ceil(imgH * ratio))

        resized_image = cv2.resize(img, (resized_w, imgH))
        resized_image = resized_image.astype('float32')
        resized_image = resized_image.transpose((2, 0, 1)) / 255
        resized_image -= 0.5
        resized_image /= 0.5
        padding_im = np.zeros((imgC, imgH, imgW), dtype=np.float32)
        padding_im[:, :, 0:resized_w] = resized_image
        return padding_im

    def resize_norm_img_vl(self, img, image_shape):

        imgC, imgH, imgW = image_shape
        img = img[:, :, ::-1]  # bgr2rgb
        resized_image = cv2.resize(
            img, (imgW, imgH), interpolation=cv2.INTER_LINEAR)
        resized_image = resized_image.astype('float32')
        resized_image = resized_image.transpose((2, 0, 1)) / 255
        return resized_image

    def resize_norm_img_srn(self, img, image_shape):
        imgC, imgH, imgW = image_shape

        img_black = np.zeros((imgH, imgW))
        im_hei = img.shape[0]
        im_wid = img.shape[1]

        if im_wid <= im_hei * 1:
            img_new = cv2.resize(img, (imgH * 1, imgH))
        elif im_wid <= im_hei * 2:
            img_new = cv2.resize(img,
最低0.47元/天 解锁文章


 1823
1823

 被折叠的 条评论
为什么被折叠?
被折叠的 条评论
为什么被折叠?
 到【灌水乐园】发言


