


 本文详细介绍pyecharts 1.9.0版本中render包的结构和核心函数make_snapshot,教你如何利用snapshot模块渲染图片,并配置第三方库如selenium、phantomjs和pypeteer。学习如何通过make_snapshot生成SVG、PDF、PNG等多种格式图表。
当前pyecharts版本为1.9.0
概述
render包结构
render包位于pyecharts包顶级目录中,用于渲染图表。render包结构如下:
├─render # 渲染设置包
│  │  display.py # 定义HTML、JavaScript显示类,用于支持在notebook中嵌入输出结果
│  │  engine.py # 定义渲染相关类、函数
│  │  snapshot.py # 定义渲染图片函数
│  │  __init__.py # 暴露渲染图片函数
│  │
│  ├─templates # 定义渲染模板
│  │      components.html
│  │      macro
│  │      nb_components.html
│  │      nb_jupyter_globe.html
│  │      nb_jupyter_lab.html
│  │      nb_jupyter_lab_tab.html
│  │      nb_jupyter_notebook.html
│  │      nb_jupyter_notebook_tab.html
│  │      nb_nteract.html
│  │      simple_chart.html
│  │      simple_globe.html
│  │      simple_page.html
│  │      simple_tab.html
snapshot模块
snapshot模块,路径为pyecharts/render/snapshot.py,作用为提供渲染图片的接口。原理就是将HTML渲染为图片。
注意!单纯依靠该模块还不能直接渲染图片,还需要安装snapshot-selenium、snapshot-phantomjs、snapshot-pyppeteer等包,利用selenium、phantomjs、pypeteer等第三方库生成图片。具体方法参见pyecharts文档https://pyecharts.org/#/zh-cn/render_images。
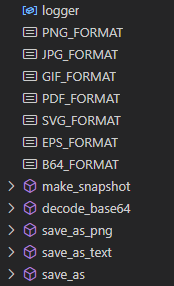
snapshot模块的结构如下图所示。
make_snapshot函数,模块最重要的函数,集成模块其他函数对外提供接口。decode_base64(data: str) -> bytes函数:解码base64字符串为字节数据。save_as_png(image_data: bytes, output_name: str)函数:根据字节数据生成图片。save_as(image_data: bytes, output_name: str, file_type: str)函数:依靠PIL库根据字节数据生成图片。save_as_text(image_data: str, output_name: str)函数:根据字符串生成文本文件。
make_snapshot函数
render包通过from .snapshot import make_snapshot向外暴露make_snapshot函数。
make_snapshot函数的签名为:
def make_snapshot( engine: Any, file_name: str, output_name: str, delay: float = 2, pixel_ratio: int = 2, is_remove_html: bool = False, **kwargs, )
make_snapshot函数的参数如下:
engine:渲染引擎,第三方库接口。file_name:传入的HTML文件名称。字符串。output_name:输出图片路径。字符串。delay:延迟时间,避免图还没渲染完成就生成了图片,造成图片不完整。浮点数,默认值为2,单位秒。pixel_ratio:像素比例,用于调节图片质量。整数,默认值为2。is_remove_html:渲染完图片是否删除原 HTML 文件。布尔值,默认值为False。browser:浏览器类型,目前仅支持 Chrome, Safari,使用snapshot-selenium时有效。字符串,默认值为"Chrome"。
make_snapshot函数的处理要点大致如下:
如果生成图片路径中文件的扩展名为SVG或base64,调用save_as_text(image_data: str, output_name: str)函数生成文件。
如果生成图片路径中文件的扩展名为pdf, gif, png, jpeg,eps,则利用decode_base64(data: st
 最低0.47元/天 解锁文章


 1258
1258

 被折叠的 条评论
为什么被折叠?
被折叠的 条评论
为什么被折叠?
 到【灌水乐园】发言


