


本系列仍然为DateWhale系列课程,你可以在下面的链接找到
10分钟快速手搓一个小应用-AI编程学习
前言
说实话,AI浪潮从2023年末的OPENAI3.5突然开始爆火已来,我还没怎么用过这方面。正好乘着这门课程学习一下。
前置条件
本次学习用到的有
VSCODE
通义灵码插件(下面用AI代指)
第一次课程不涉及任何代码。目前是简单的体验一下如何让AI工作。
如果需要让他创建文件需要在通义灵码插件的左下角选择文件编辑,这就是教程里面的AI程序员功能
计时器
简单的让他写一个前端计时器试试,他创建了一个indel.html文件以及如下内容
<!DOCTYPE html>
<html lang="zh-CN">
<head>
    <meta charset="UTF-8">
    <meta name="viewport" content="width=device-width, initial-scale=1.0">
    <title>计时器</title>
    <style>
        body {
            font-family: Arial, sans-serif;
            display: flex;
            justify-content: center;
            align-items: center;
            height: 100vh;
            margin: 0;
            background-color: #f4f4f9;
        }
        .timer-container {
            text-align: center;
            background-color: #fff;
            padding: 20px;
            border-radius: 8px;
            box-shadow: 0 4px 6px rgba(0, 0, 0, 0.1);
        }
        #timer {
            font-size: 3rem;
            margin-bottom: 20px;
            color: #333;
        }
        button {
            padding: 10px 20px;
            font-size: 1rem;
            margin: 5px;
            cursor: pointer;
            border: none;
            border-radius: 4px;
            background-color: #007bff;
            color: white;
        }
        button:hover {
            background-color: #0056b3;
        }
    </style>
</head>
<body>
    <div class="timer-container">
        <div id="timer">00:00:00</div>
        <button id="start">开始</button>
        <button id="pause">暂停</button>
        <button id="reset">重置</button>
    </div>

    <script>
        let timerInterval;
        let startTime;
        let elapsedTime = 0;
        let isRunning = false;

        const timerDisplay = document.getElementById('timer');
        const startButton = document.getElementById('start');
        const pauseButton = document.getElementById('pause');
        const resetButton = document.getElementById('reset');

        // 更新计时器显示
        function updateTimer() {
            const totalSeconds = Math.floor(elapsedTime / 1000);
            const hours = String(Math.floor(totalSeconds / 3600)).padStart(2, '0');
            const minutes = String(Math.floor((totalSeconds % 3600) / 60)).padStart(2, '0');
            const seconds = String(totalSeconds % 60).padStart(2, '0');
            timerDisplay.textContent = `${hours}:${minutes}:${seconds}`;
        }

        // 开始计时器
        function startTimer() {
            if (!isRunning) {
                startTime = Date.now() - elapsedTime;
                timerInterval = setInterval(() => {
                    elapsedTime = Date.now() - startTime;
                    updateTimer();
                }, 100);
                isRunning = true;
            }
        }

        // 暂停计时器
        function pauseTimer() {
            if (isRunning) {
                clearInterval(timerInterval);
                isRunning = false;
            }
        }

        // 重置计时器
        function resetTimer() {
            clearInterval(timerInterval);
            elapsedTime = 0;
            isRunning = false;
            updateTimer();
        }

        // 绑定按钮事件
        startButton.addEventListener('click', startTimer);
        pauseButton.addEventListener('click', pauseTimer);
        resetButton.addEventListener('click', resetTimer);

        // 初始化计时器显示
        updateTimer();
    </script>
</body>
</html>
效果是这样的,没想到能做出很不错的计时器,对我而言已经大大超出预期了。毕竟我没学过JS

番茄闹钟
接下来试试番茄闹钟
<!DOCTYPE html>
<html lang="zh-CN">
<head>
    <meta charset="UTF-8">
    <meta name="viewport" content="width=device-width, initial-scale=1.0">
    <title>番茄钟计时器</title>
    <style>
        body {
            display: flex;
            justify-content: center;
            align-items: center;
            height: 100vh;
            margin: 0;
            background-color: #f0f0f0;
            font-family: Arial, sans-serif;
        }

        .timer-container {
            text-align: center;
            padding: 2rem;
            background-color: white;
            border-radius: 10px;
            box-shadow: 0 4px 6px rgba(0, 0, 0, 0.1);
        }

        #timer-display {
            font-size: 3rem;
            font-weight: bold;
            margin-bottom: 1rem;
            animation: breathe 2s infinite ease-in-out;
        }

        @keyframes breathe {
            0%, 100% { opacity: 1; transform: scale(1); }
            50% { opacity: 0.7; transform: scale(1.05); }
        }

        .button-container {
            display: flex;
            justify-content: space-around;
            margin-top: 1rem;
        }

        .control-button {
            padding: 0.8rem 1.5rem;
            font-size: 1rem;
            border: none;
            border-radius: 5px;
            cursor: pointer;
            transition: all 0.3s ease;
        }

        .start-btn {
            background-color: #4CAF50;
            color: white;
        }

        .pause-btn {
            background-color: #FF9800;
            color: white;
        }

        .reset-btn {
            background-color: #F44336;
            color: white;
        }

        .control-button:hover {
            opacity: 0.9;
            transform: translateY(-2px);
        }

        .control-button:active {
            transform: translateY(1px);
        }
    </style>
</head>
<body>
    <div class="timer-container">
        <div id="timer-display">25:00</div>
        <div class="button-container">
            <button class="control-button start-btn" onclick="startTimer()">开始</button>
            <button class="control-button pause-btn" onclick="pauseTimer()" disabled>暂停</button>
            <button class="control-button reset-btn" onclick="resetTimer()">重置</button>
        </div>
    </div>

    <script>
        let timer;
        let seconds = 1500; // 25 minutes in seconds
        let isRunning = false;

        function updateDisplay() {
            const minutes = Math.floor(seconds / 60);
            const remainingSeconds = seconds % 60;
            document.getElementById('timer-display').textContent =
                `${minutes.toString().padStart(2, '0')}:${remainingSeconds.toString().padStart(2, '0')}`;
        }

        function startTimer() {
            if (!isRunning) {
                isRunning = true;
                document.querySelector('.start-btn').disabled = true;
                document.querySelector('.pause-btn').disabled = false;
                timer = setInterval(() => {
                    if (seconds > 0) {
                        seconds--;
                        updateDisplay();
                    } else {
                        clearInterval(timer);
                        alert('时间到!');
                        resetTimer();
                    }
                }, 1000);
            }
        }

        function pauseTimer() {
            if (isRunning) {
                isRunning = false;
                document.querySelector('.start-btn').disabled = false;
                document.querySelector('.pause-btn').disabled = true;
                clearInterval(timer);
            }
        }

        function resetTimer() {
            clearInterval(timer);
            seconds = 1500;
            isRunning = false;
            updateDisplay();
            document.querySelector('.start-btn').disabled = false;
            document.querySelector('.pause-btn').disabled = true;
        }

        // Initialize the display
        updateDisplay();
    </script>
</body>
</html>
效果如下,就是这个呼吸感略显抽象

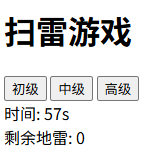
扫雷
接下来上一点点强度,弄个扫雷,代码如下
<!DOCTYPE html>
<html lang="zh-CN">
<head>
    <meta charset="UTF-8">
    <meta name="viewport" content="width=device-width, initial-scale=1.0">
    <title>扫雷游戏</title>
    <style>
        /* ... existing code ... */
        .grid {
            display: grid;
            gap: 2px;
            justify-content: center;
        }
        .cell {
            width: 30px;
            height: 30px;
            background-color: #ddd;
            border: 1px solid #999;
            display: flex;
            align-items: center;
            justify-content: center;
            cursor: pointer;
        }
        .revealed {
            background-color: #fff;
        }
        .mine {
            background-color: red;
        }
        .flagged {
            background-color: yellow;
        }
        /* ... existing code ... */
    </style>
</head>
<body>
    <h1>扫雷游戏</h1>
    <div>
        <button onclick="startGame('easy')">初级</button>
        <button onclick="startGame('medium')">中级</button>
        <button onclick="startGame('hard')">高级</button>
    </div>
    <div id="timer">时间: 0s</div>
    <div id="score">剩余地雷: 10</div>
    <div id="grid" class="grid"></div>

    <script>
        let gridSize = { easy: [9, 9], medium: [16, 16], hard: [16, 30] };
        let mineCount = { easy: 10, medium: 40, hard: 99 };
        let currentDifficulty = 'easy';
        let grid, revealed, flagged, mines, timer, startTime;

        function startGame(difficulty) {
            currentDifficulty = difficulty;
            const size = gridSize[difficulty];
            const count = mineCount[difficulty];

            // 初始化雷区
            grid = Array.from({ length: size[0] }, () => Array(size[1]).fill(0));
            revealed = Array.from({ length: size[0] }, () => Array(size[1]).fill(false));
            flagged = Array.from({ length: size[0] }, () => Array(size[1]).fill(false));
            mines = [];

            // 随机放置地雷
            while (mines.length < count) {
                const x = Math.floor(Math.random() * size[0]);
                const y = Math.floor(Math.random() * size[1]);
                if (!mines.includes(`${x},${y}`)) {
                    mines.push(`${x},${y}`);
                    grid[x][y] = -1;
                }
            }

            // 计算每个格子周围的地雷数
            for (let i = 0; i < size[0]; i++) {
                for (let j = 0; j < size[1]; j++) {
                    if (grid[i][j] === -1) continue;
                    let mineNum = 0;
                    for (let dx = -1; dx <= 1; dx++) {
                        for (let dy = -1; dy <= 1; dy++) {
                            const nx = i + dx, ny = j + dy;
                            if (nx >= 0 && nx < size[0] && ny >= 0 && ny < size[1] && grid[nx][ny] === -1) {
                                mineNum++;
                            }
                        }
                    }
                    grid[i][j] = mineNum;
                }
            }

            // 渲染网格
            const gridElement = document.getElementById('grid');
            gridElement.innerHTML = '';
            gridElement.style.gridTemplateColumns = `repeat(${size[1]}, 30px)`;
            for (let i = 0; i < size[0]; i++) {
                for (let j = 0; j < size[1]; j++) {
                    const cell = document.createElement('div');
                    cell.classList.add('cell');
                    cell.dataset.x = i;
                    cell.dataset.y = j;
                    cell.addEventListener('click', handleClick);
                    cell.addEventListener('contextmenu', handleRightClick);
                    gridElement.appendChild(cell);
                }
            }

            // 重置计时器和分数
            clearInterval(timer);
            startTime = Date.now();
            timer = setInterval(updateTimer, 1000);
            document.getElementById('score').innerText = `剩余地雷: ${count}`;
        }

        function updateTimer() {
            const elapsed = Math.floor((Date.now() - startTime) / 1000);
            document.getElementById('timer').innerText = `时间: ${elapsed}s`;
        }

        function handleClick(event) {
            const cell = event.target;
            const x = parseInt(cell.dataset.x);
            const y = parseInt(cell.dataset.y);

            if (flagged[x][y]) return;

            if (grid[x][y] === -1) {
                revealAllMines();
                alert('游戏结束!你踩到地雷了!');
                clearInterval(timer);
                return;
            }

            revealCell(x, y);

            // 检查是否胜利
            if (checkWin()) {
                alert('恭喜你赢了!');
                clearInterval(timer);
            }
        }

        function handleRightClick(event) {
            event.preventDefault();
            const cell = event.target;
            const x = parseInt(cell.dataset.x);
            const y = parseInt(cell.dataset.y);

            if (revealed[x][y]) return;

            flagged[x][y] = !flagged[x][y];
            cell.classList.toggle('flagged');
            document.getElementById('score').innerText = `剩余地雷: ${mineCount[currentDifficulty] - flagged.flat().filter(Boolean).length}`;
        }

        function revealCell(x, y) {
            if (revealed[x][y]) return;
            revealed[x][y] = true;
            const cell = document.querySelector(`.cell[data-x="${x}"][data-y="${y}"]`);
            cell.classList.add('revealed');

            if (grid[x][y] === 0) {
                for (let dx = -1; dx <= 1; dx++) {
                    for (let dy = -1; dy <= 1; dy++) {
                        const nx = x + dx, ny = y + dy;
                        if (nx >= 0 && nx < gridSize[currentDifficulty][0] && ny >= 0 && ny < gridSize[currentDifficulty][1]) {
                            revealCell(nx, ny);
                        }
                    }
                }
            } else {
                cell.innerText = grid[x][y];
            }
        }

        function revealAllMines() {
            mines.forEach(mine => {
                const [x, y] = mine.split(',').map(Number);
                const cell = document.querySelector(`.cell[data-x="${x}"][data-y="${y}"]`);
                cell.classList.add('mine');
            });
        }

        function checkWin() {
            for (let i = 0; i < gridSize[currentDifficulty][0]; i++) {
                for (let j = 0; j < gridSize[currentDifficulty][1]; j++) {
                    if (!revealed[i][j] && grid[i][j] !== -1) return false;
                }
            }
            return true;
        }

        // 启动默认难度为初级
        startGame('easy');
    </script>
</body>
</html>
效果如下,这已经够一学期的前端学习量了哈哈
总的看来目前做一些简单的前端完全没问题,期待后面更多的用途
三子棋
接下来让AI来帮忙完成部分缺失代码,看看理解代码的能力,当然都是比较简单的代码。需要用到pygame库,可以用pip install pygame进行安装
点击下载对应源代码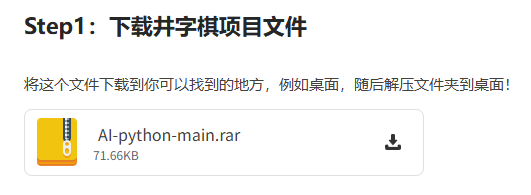
然后让AI帮忙完成player函数
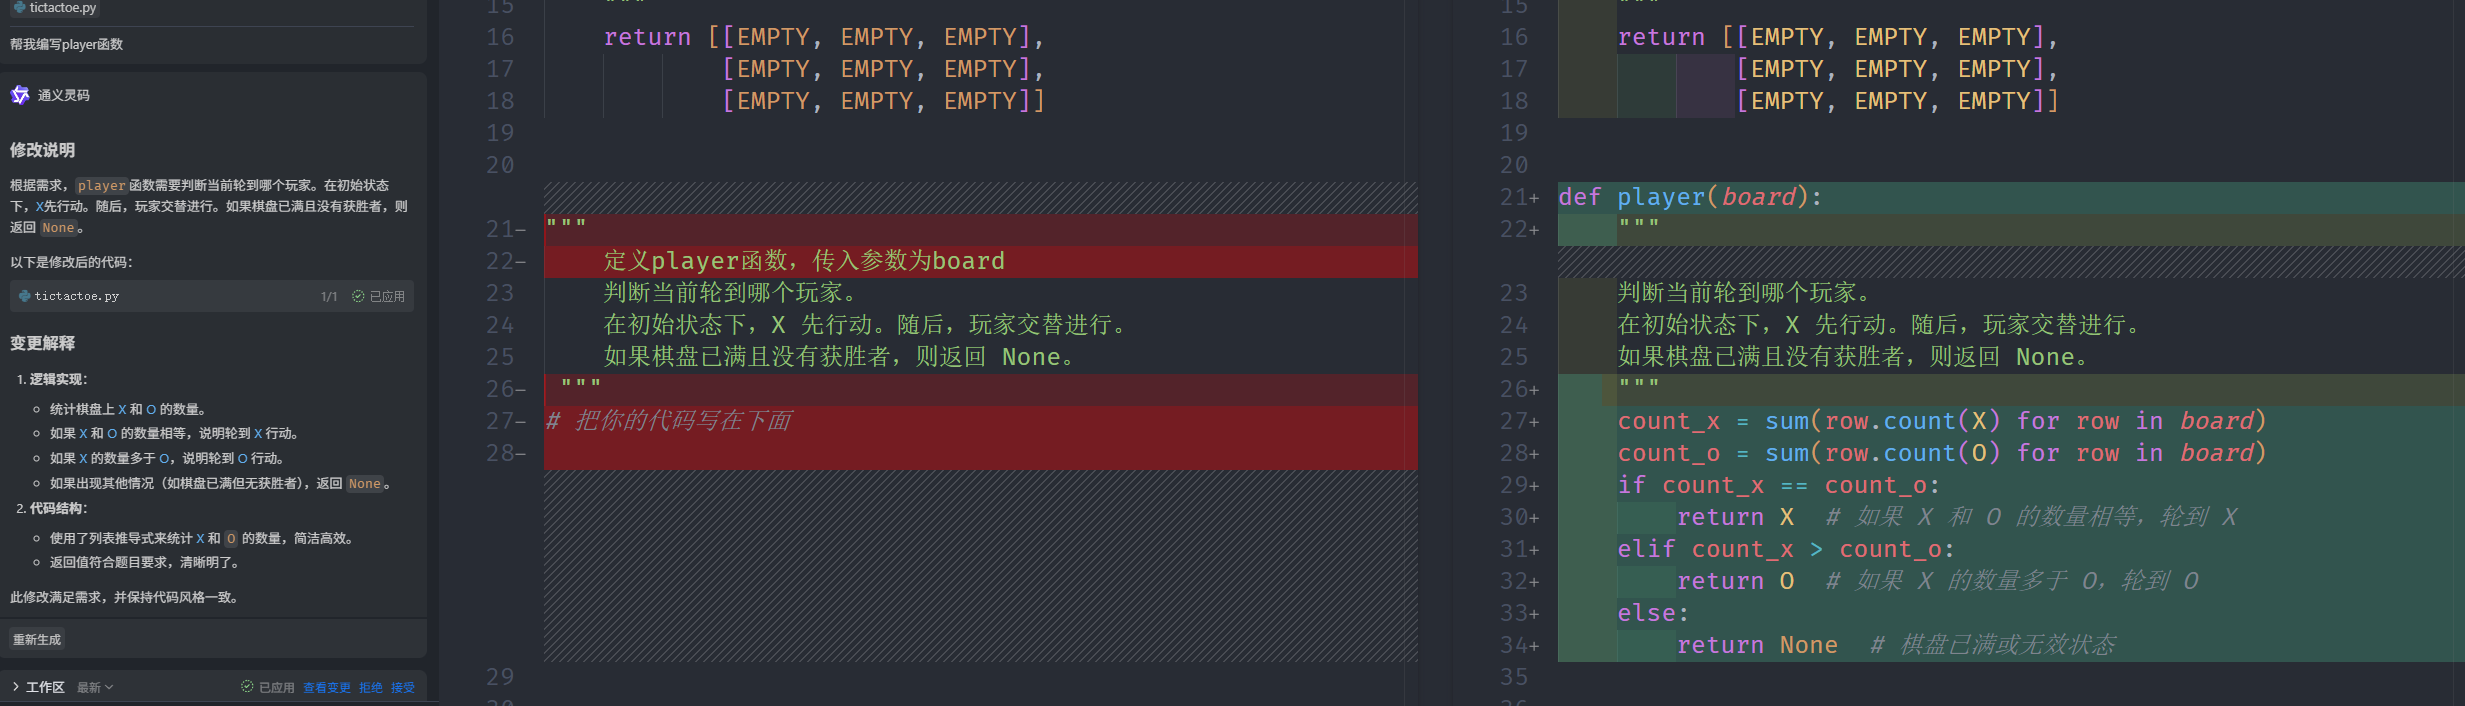
接下来运行runner.py试试看效果,非常不错,整体游戏的雏形已经有了。不过要说明一点,这其实并不是AI在和我们下棋,而是简单的算法。比如这个井字棋用到了极小化极大算法,鉴于不是本次的重点就不再赘述,感兴趣的可以自行百度。

三体问题
最后让AI来生成一个三体问题试试看
第一版提示词
三体里面有个很有趣的设定那就是三体行人有三个太阳并且毫无规律的运行,你能生成一个前端界面模拟三体的三星系统吗
添加两个按钮 开始和重置 让三星系统默认居中 三星系统分别用三个颜色和不同的大小(引力正比于大小) 三星系统分别用三个颜色绘制出轨迹线
界面如下
结果点击开始就黑屏了什么都没有,于是继续询问

然接下来看看第二版的效果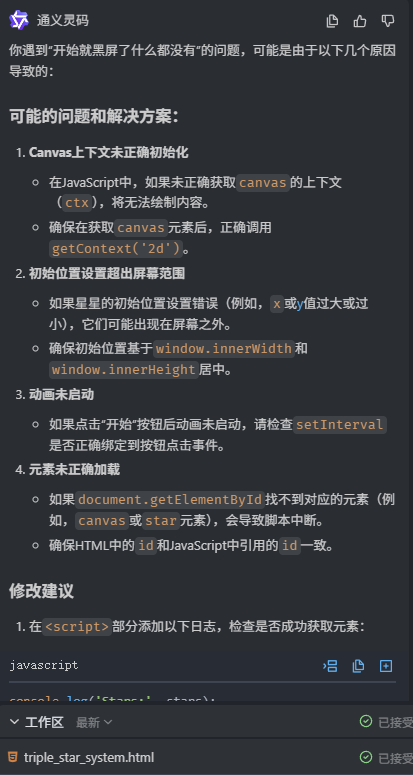
虽然能动了,但是太小了,并且运行很慢

接下来进行第三版
再次提示
添加一个时间倍率滑动块,放大界面和星球大小,添加轨迹线
可以看到已经很不错了。就是后面好像有点鬼畜了。

至此这次比较短的教程算是完结了。主要重在体验一下AI辅助编程的用法。


 1116
1116

 被折叠的 条评论
为什么被折叠?
被折叠的 条评论
为什么被折叠?
 到【灌水乐园】发言


