


 本文提供了一份详细的Win10系统下CUDA10与TensorFlow-GPU的最新安装教程,覆盖从安装包准备到环境配置的全过程,帮助初学者快速搭建深度学习环境。
背景简介
作为刚入门深度学习的小白,新购置了一台机子,准备兴高采烈的开始用GPU跑深度学习算法,百度了一通win10下安装cuda和tensorflow-gpu的教程,十分繁琐且不说,很多都是老版本的cuda,性能自然没有新的cuda10强,十分不悦,准备死磕cuda10到底,最后查阅各种资料加亲身实践,终于在两台机子上(台式+笔记本)都成功运行了tensorflow-gpu,现将经验总结如下,希望可以帮助到大家
安装包准备
假设你是一台全新的机子,甚至连python环境都没有,你需要的安装包如下
- Anaconda3-5.2.0-Windows-x86_64.exe(python3.6版本),下载地址https://repo.anaconda.com/archive/
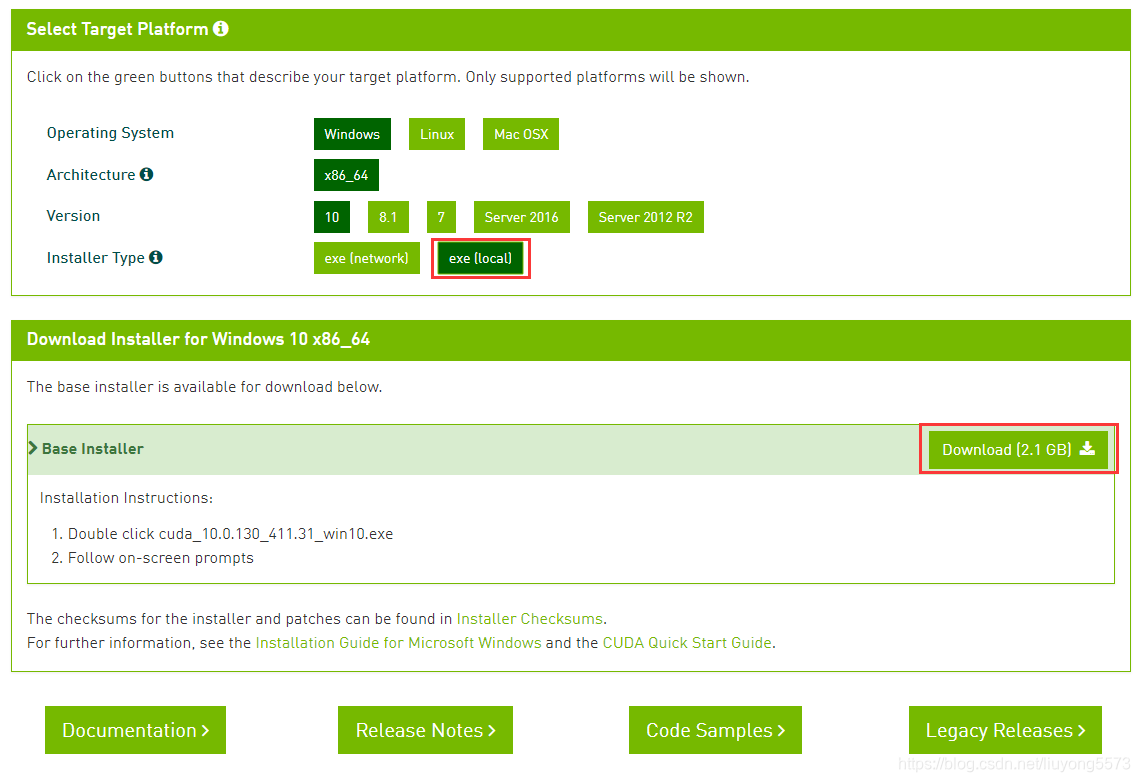
说明:用anaconda就是方便,内置了各种包,5.2.0版本带的是python3.6环境,就下这个版本,省心,最新版本带的是3.7环境,虽然可以切换环境,但是麻烦,下这个版本省事;目前就用python3.6环境,支持好;有python3.6环境了可以不用下载 - cuda10.0,下载地址https://developer.nvidia.com/cuda-downloads
说明:如果你要问我这是干嘛的,这就是用来调用gpu的工具,进行高效并行计算;图中的local就是整个安装包下完整了,不用在安装的过程中再下载了,network则相反,只用下载一个精简的安装包,安装过程中就要先慢慢等待下载
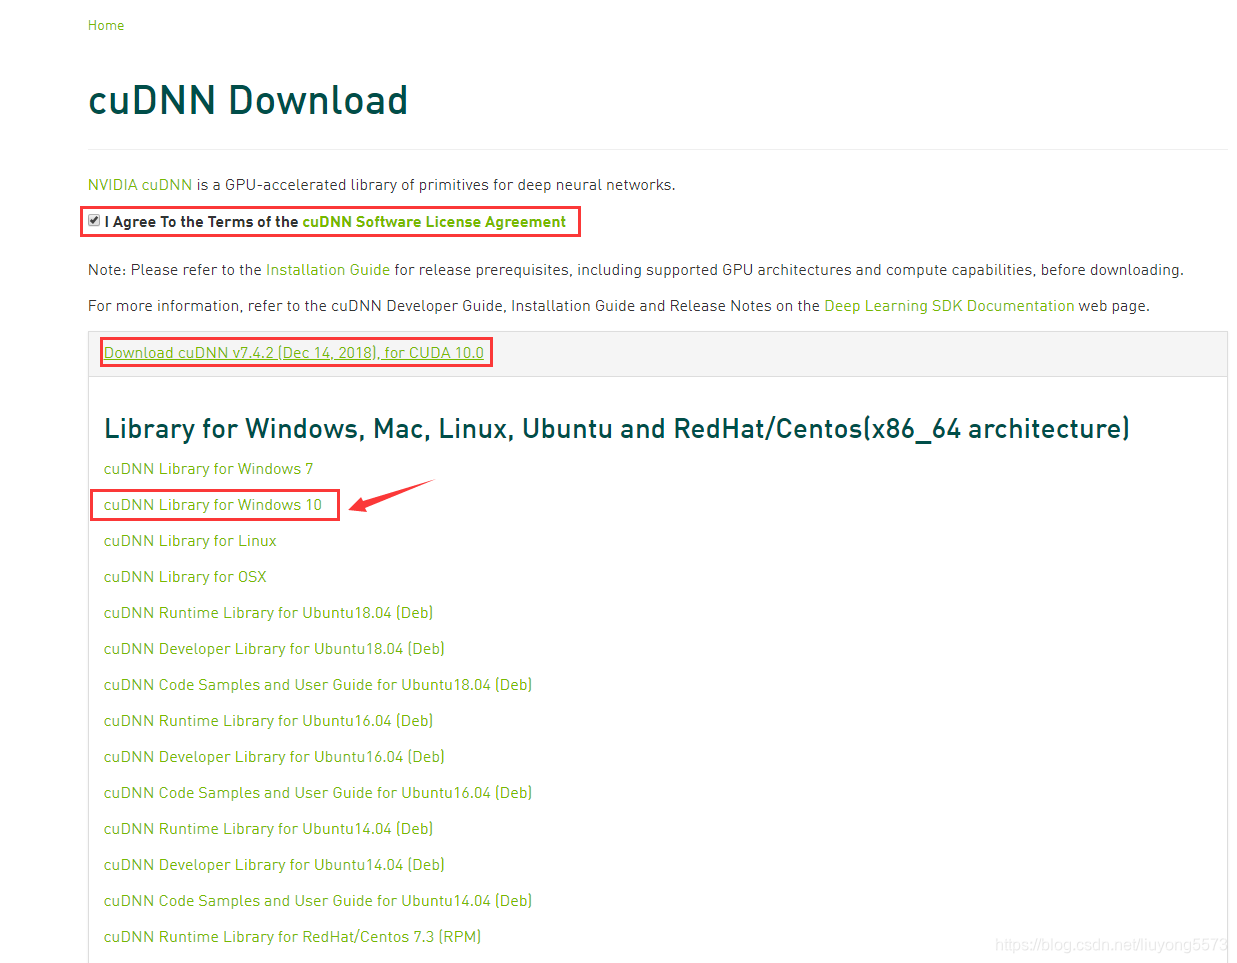
- cudnn ,下载地址https://developer.nvidia.com/rdp/cudnn-download
说明:这是干嘛的?可以理解为cuda的一个补丁,用来加速深度学习的一些运算的,特地针对深度学习进行优化了
- tensorflow-gpu-1.12.0,下载地址,https://github.com/fo40225/tensorflow-windows-wheel/blob/master/1.12.0/py36/GPU/cuda100cudnn73sse2/tensorflow_gpu-1.12.0-cp36-cp36m-win_amd64.whl
说明:一个大神编译的tensorflow-gpu-1.12.0的轮子,用来支持cuda10的,用pip直接安装的不能用,反正我试过不行
安装过程
安装包下完之后,马上开干,过程简单无痛苦
- 显卡支持:明确的一点是,我已经假定大家的显卡都能支持cuda了,基本现在的显卡都支持cuda了,除非你的机子非常老了,如果你仍然不放心,就去这个网址去查吧https://developer.nvidia.com/cuda-gpus;如果没找到自己的显卡型号,那就可以点右上角了
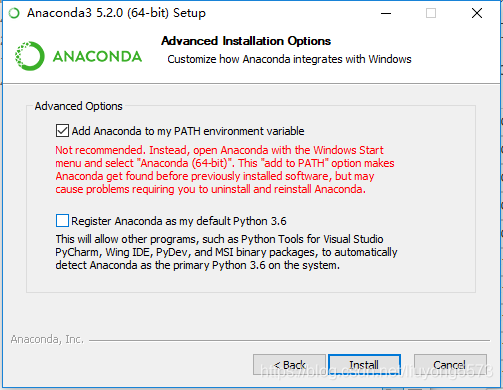
- anaconda:安装若没有python环境,点击anaconda安装包进行安装,傻瓜式操作即可;下图中这一步把第一个勾起来,方便,第二个勾起来也可以,无所谓,按图上操作不会坑,也不是本文关键,不放心可以百度anaconda安装教程
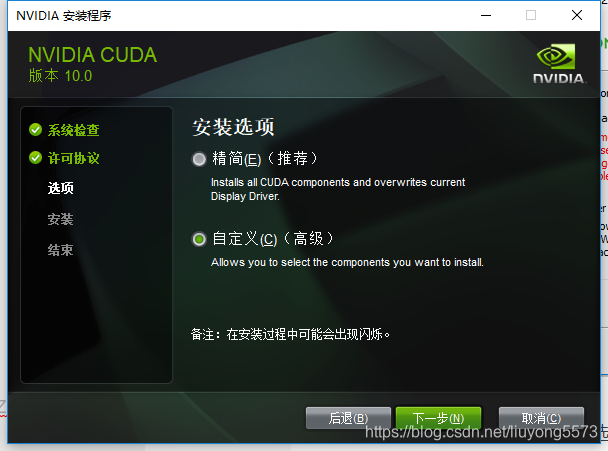
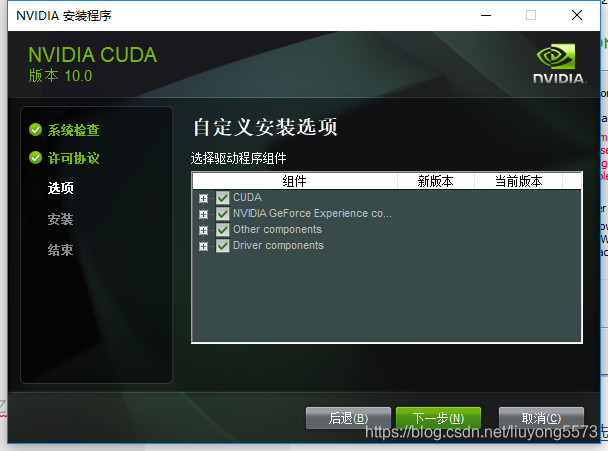
- cuda安装:(安装过程最好关闭杀软)选择精简安装还是自定义安装,本人之前试过精简安装失败了,选择了自定义安装可以成功,自定义安装默认所有组件全部勾选,其实等同于精简,之后的安装路径默认即可。咱不管这么多,虽然里面有些组件用不上,但为了方便,都装上,没毛病;最后会提示由于没有vs studio,有个组件无法安装,不重要,略过,直接完成就ok;主要注意的一点是,确保电脑上已经安装了vc++2015或者vc++2017,一般都有的,没有的朋友可以自行搜索安装;
最后安装完毕后,会自动添加环境变量的,不用管
- cudnn安装:其实下载过来的不是一个exe文件,而是一个压缩包,解压后,有三个文件夹,把三个文件夹拷贝到cuda的安装目录下,如果cuda安装的时候用的是默认路径,则为C:\Program Files\NVIDIA GPU Computing Toolkit\CUDA\v10.0,现在大家应该可以理解,cudnn其实就是cuda的一个补丁而已,专为深度学习运算进行优化的

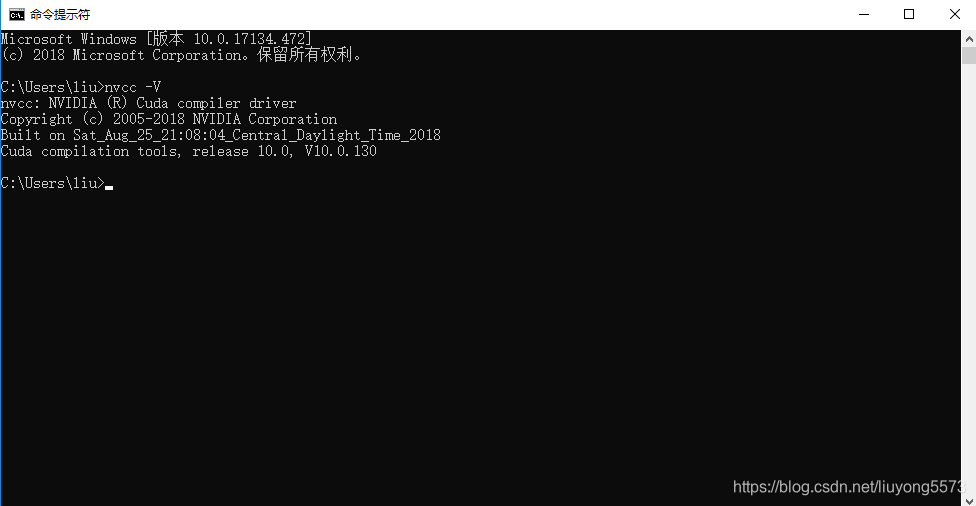
- 测试cuda: 十分简单,打开cmd命令行,输入nvcc -V,看到下图内容就为成功;网上说的编译cuda自带的例子,确保安装成功,别整这些没用的,麻烦,如果不行还是凉凉,显示这个基本上是ok的
- 安装tensorflow:打开命令行,输入pip install tensorflow,自动下载tensorflow(cpu版)及其依赖,然后再安装之前下载的tensorflow-gpu-1.12.0的轮子,命令:pip install 路径\tensorflow_gpu-1.12.0-cp36-cp36m-win_amd64.whl,即可安装完成
- 测试tensorflow:重新打开一个命令行,输入python,进入python环境,输入
出现如下图所示结果,说明安装成功,会显示可以使用的gpu,若显示找不到dll文件,将命令行关闭后重新再试一遍import tensorflow as tf tf.Session()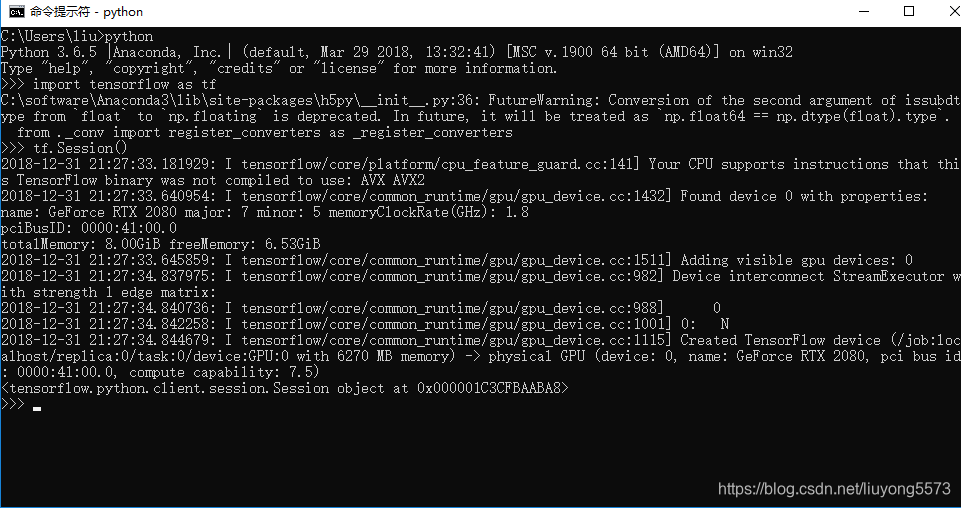
总结
在18年的最后一天写下了人生的第一篇博客,希望可以帮助到大家。也希望在来年能学到更多的东西和大家分享,一起进步!


 1万+
1万+

 被折叠的 条评论
为什么被折叠?
被折叠的 条评论
为什么被折叠?
 到【灌水乐园】发言


