


vite移动端和PC端构建的顺序
我们此次项目包括了移动端和PC端,这样让我们在开发的时候就要分别去处理这两部分的内容,我们应该要按照什么顺序构建呢?
因为我们这次项目采用的是tailwindcss,所以要支持他的构建顺序。也就是移动优先原则。tailwind在构建响应式系统时,需要先构建移动端,再构建PC端。
构建移动处理工具isMobile
我们应该任何去判断这个是移动端设备还是PC设备呢?
为了达到这个目的我们需要创建我们的第一个工具方法:isMobile。
src\constants\index.js
//PC 设备指定宽度
export const PC_WIDTH = 1280
src\utils\flexible.js
import { computed } from "vue";
import { PC_WIDTH } from "../constants";

/**
 * 判断是否为移动设备,判断依据是否为1280
 */
export const isMobile =computed(() =>{
    return document.documentElement.clientWidth < PC_WIDTH
})
src\App.vue
<template>
  <div>
    {{ isMobile }}
  </div>
</template>

<script>
import { isMobile } from './utils/flexible'
export default {
  setup() {
    console.log('isMobile value:', isMobile.value)
    return {
      isMobile
    }
  }
}
</script>

<style scoped lang='scss'>

</style>
注意:因为我们使用的是响应式布局所以依旧宽带改变进行判断设备,但是实际开发中还是建议使用正则表达式来判断
/**
 * 判断当前是否为移动设备
 */
export const isMobileTerminal = computed(() => {
  return /Android|webOS|iPhone|iPod|BlackBerry|IEMobile|Opera Mini/i.test(navigator.userAgent)
})
vueuse优化方案
我们使用isMobile方法时,当我们切换浏览器设备,发现其结构并不是相应式的,这样我们的计算属性就毫无意义。
我们知道对于计算属性来说,它会在依赖的响应式数据中发送变化,重新计算,但是我们编写的document.documentElement.clientWidth并不是响应式数据,所以计算属性不能重计算。
这时我们就引入了vue的工具类库vueuse。
- 安装vueuse
npm i @vueuse/core@8.1.2- 在src\utils\flexible.js,使用useWindowSize方法
import { computed } from "vue";
import { PC_WIDTH } from "../constants";
import { useWindowSize } from "@vueuse/core";

const {width} = useWindowSize()
/**
 * 判断是否为移动设备,判断依据是否为1280
 */
export const isMobile =computed(() =>{
    return width.value < PC_WIDTH
})
定义@软连接
在我们将'../constants'改为'@/constants '时候会发现以下错误
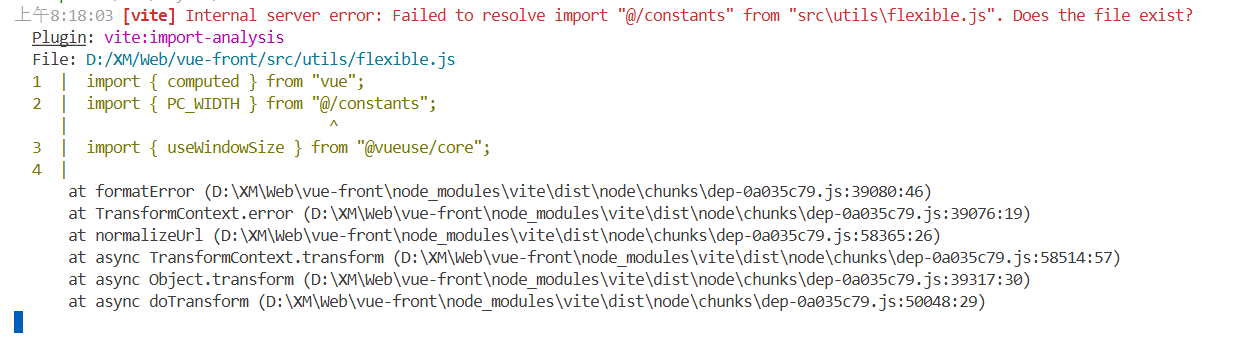
那我们可以定义什么方法才可以让vite支持呢?
我们可以使用vite提供的resolve.alias功能,表示:通过别名指向一个具体的路径
在vite.config.js编写以下代码:
import { defineConfig } from 'vite'
import vue from '@vitejs/plugin-vue'
import {join} from 'path'

// https://vitejs.dev/config/
export default defineConfig({
  plugins: [vue()],
  //软链接
  resolve: {
    alias: {
      '@': join(__dirname,'/src')
    }
  }
})
构建VueRouter移动端路由表
我们已经有了isMobile方法,接下来就是构建移动端路由表,首先我们需要初始化我们的'vue-router'
- 在src\router\index.js中初始化VueRouter
import { createRouter, createWebHistory } from 'vue-router'
import { isMobile } from '@/utils/flexible'
import moblieRoutes from './modules/moblie-routes'
import pcRoutes from './modules/pc-routes'

//创建vueRouter实例
const router = createRouter({
  history: createWebHistory(),
  routes: isMobile.value?moblieRoutes:pcRoutes
})

export default router- 在src\router\modules\moblie-routes.js构建移动端路由表
export default [
    {
        path: '/',
        name: 'home',
        component:()=>import('@/views/main/index.vue')
    }
]- 并在main.js里面修改
import { createApp } from 'vue'
import App from './App.vue'
import './styles/index.scss'
import router from './router'

createApp(App).use(router).mount('#app')
划分路由首页
src\views\main\index.vue
<template>
  <div>
    <navigation-vue />
  </div>
</template>

<script setup>
import navigationVue from './components/navigation/index.vue'
</script>

<style scoped lang="scss"></style>
src\views\main\components\navigation\index.vue
<template>
  <mobile-navigation-vue v-if="isMobile" />
</template>

<script setup>
import { isMobile } from '@/utils/flexible'
import mobileNavigationVue from './mobile/index.vue'
</script>

<style scoped lang="scss"></style>
src\views\main\components\navigation\mobile\index.vue
<template>
  <div>
    这是移动端的navigation
  </div>
</template>

<script setup>

</script>

<style scoped lang=''>

</style>
导入配置axios
有了基础的导航栏之后,我们接下来就是开始获取数据、渲染数据,这就用到了axios
- 首选要安装axios依赖
npm i --save axios@0.26.1- 创建src\utils\request.js
import axios from 'axios'

const service = axios.create({
  baseURL: 'https://api.imooc-front.lgdsunday.club/api',
  timeout: 5000
})

export default service- 创建请求接口
import request from '@/utils/request'

/** 获取分页列表 */
export const getCategory = () =>{
    return request({
        url: '/category'
    })
}- 在调用接口并尝试获取数据
<template>
<div>
这是移动端的navigation
</div>
</template>
<script setup>
import {getCategory} from '@/api/category'
const getCategoryData = async() =>{
const res =await getCategory()
console.log(res)
}
getCategoryData()
</script>
<style scoped lang=''>
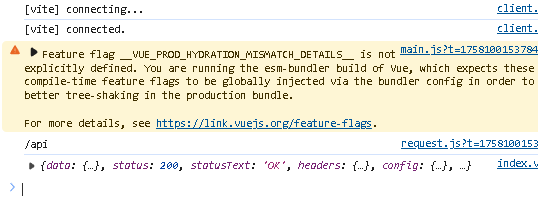
</style>发现出现跨域问题

vite处理跨域问题
刚刚我们发现了跨域问题,这个在前后端分离项目跨域是十分常见的,接下来我们开始处理跨域问题。
- 首先我们要修改一下request.js文件
const service = axios.create({
  baseURL: '/api',
  timeout: 5000
})- 然后在vite.config.js文件中添加server选型,配置代理
import { defineConfig } from 'vite'
import vue from '@vitejs/plugin-vue'
import {join} from 'path'

// https://vitejs.dev/config/
export default defineConfig({

 ......

  // 代理配置
  server:{
    proxy:{
      //代理所有 /api的请求
      '/api':{
        target:'https://api.imooc-front.lgdsunday.club',
        //跨域配置
        changeOrigin: true
      }
    }
  }
})
vite处理环境变量
dev:https://api.imooc-front.lgdsunday.club/api
prod:https://api.imooc-front.lgdsunday.club/prod-api
我们在企业开发的时候经常会碰到开发环境和生产环节,这是我们就要将dev里面的数据打包项目时切换为prod模式
在vite里面提供了.env文件,该文件为环境变量文件、默认提供了四中文件格式:
.env  									所有情况下都会加载
.env.local 							所有情况下都会加载,但会被git忽略
.env.[mode] 						只在指定模式下加载
.env.[mode].local 			只在指定模式下加载,但会被git忽略
开发生产环境和发布环境
# 开发时进行加载

# base api ,默认只有VITE_ 前缀的变量才会暴露出去,给vite进行处理
VITE_BASE_API = '/api'
# 发布时进行加载
# base api ,默认只有VITE_ 前缀的变量才会暴露出去,给vite进行处理
VITE_BASE_API = '/prod-api'生产环境
发布环境:
- 首先要
npm run build然后进入dist文件夹中 - 使用npm安装anywhere :
npm install -g anywhere - 使用简单的静态服务器
anywhere
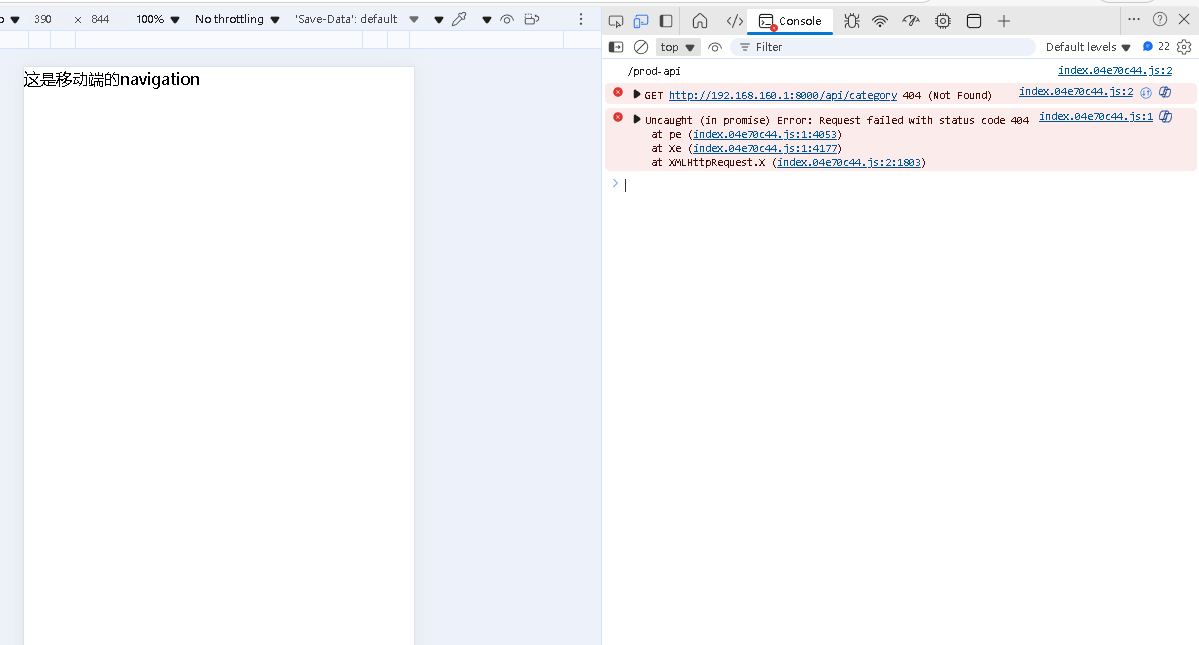
根据状态切换不一样的请求地址:
import axios from 'axios'


const service = axios.create({
  baseURL: import.meta.env.VITE_BASE_API,
  timeout: 5000
})

export default service
import.meta.env.VITE_BASE_API 查看当前的环境


 411
411

 被折叠的 条评论
为什么被折叠?
被折叠的 条评论
为什么被折叠?
 到【灌水乐园】发言


