


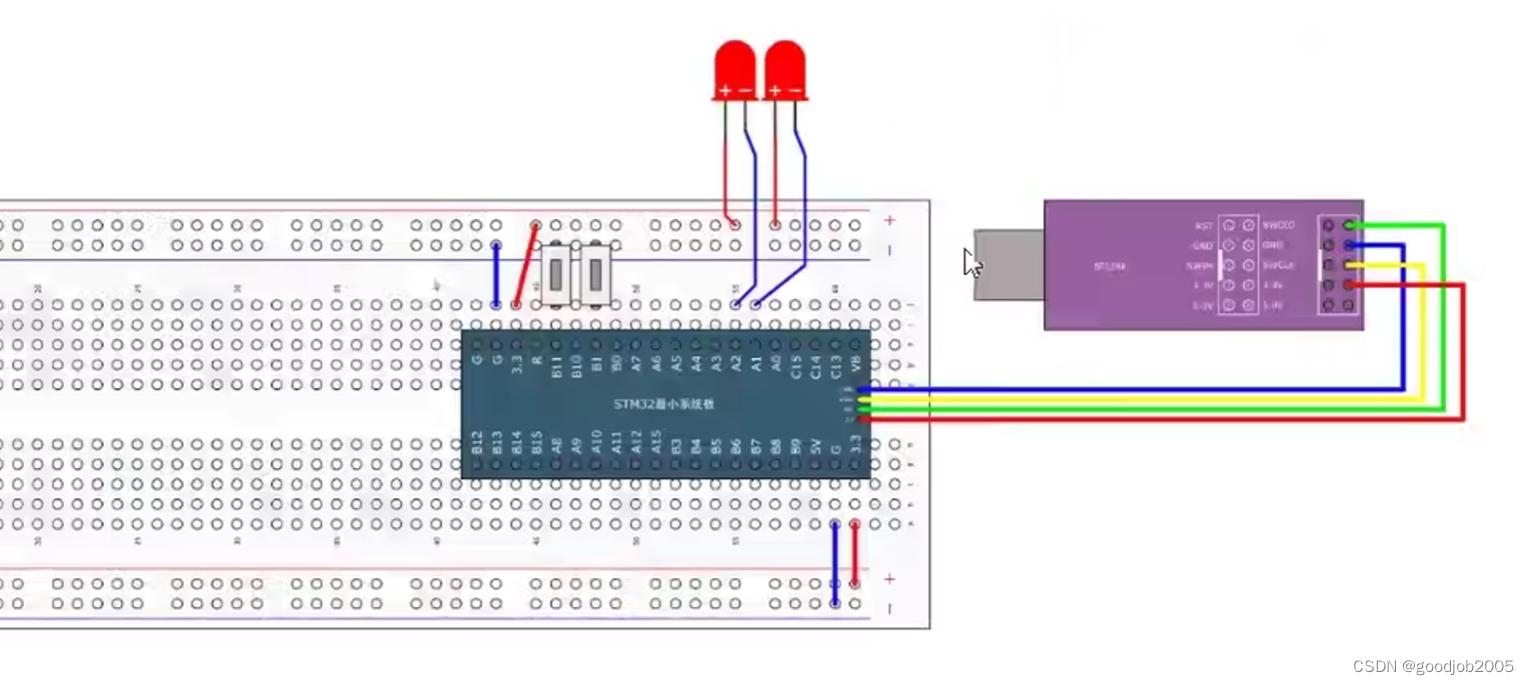
教程接线图
我的接线图
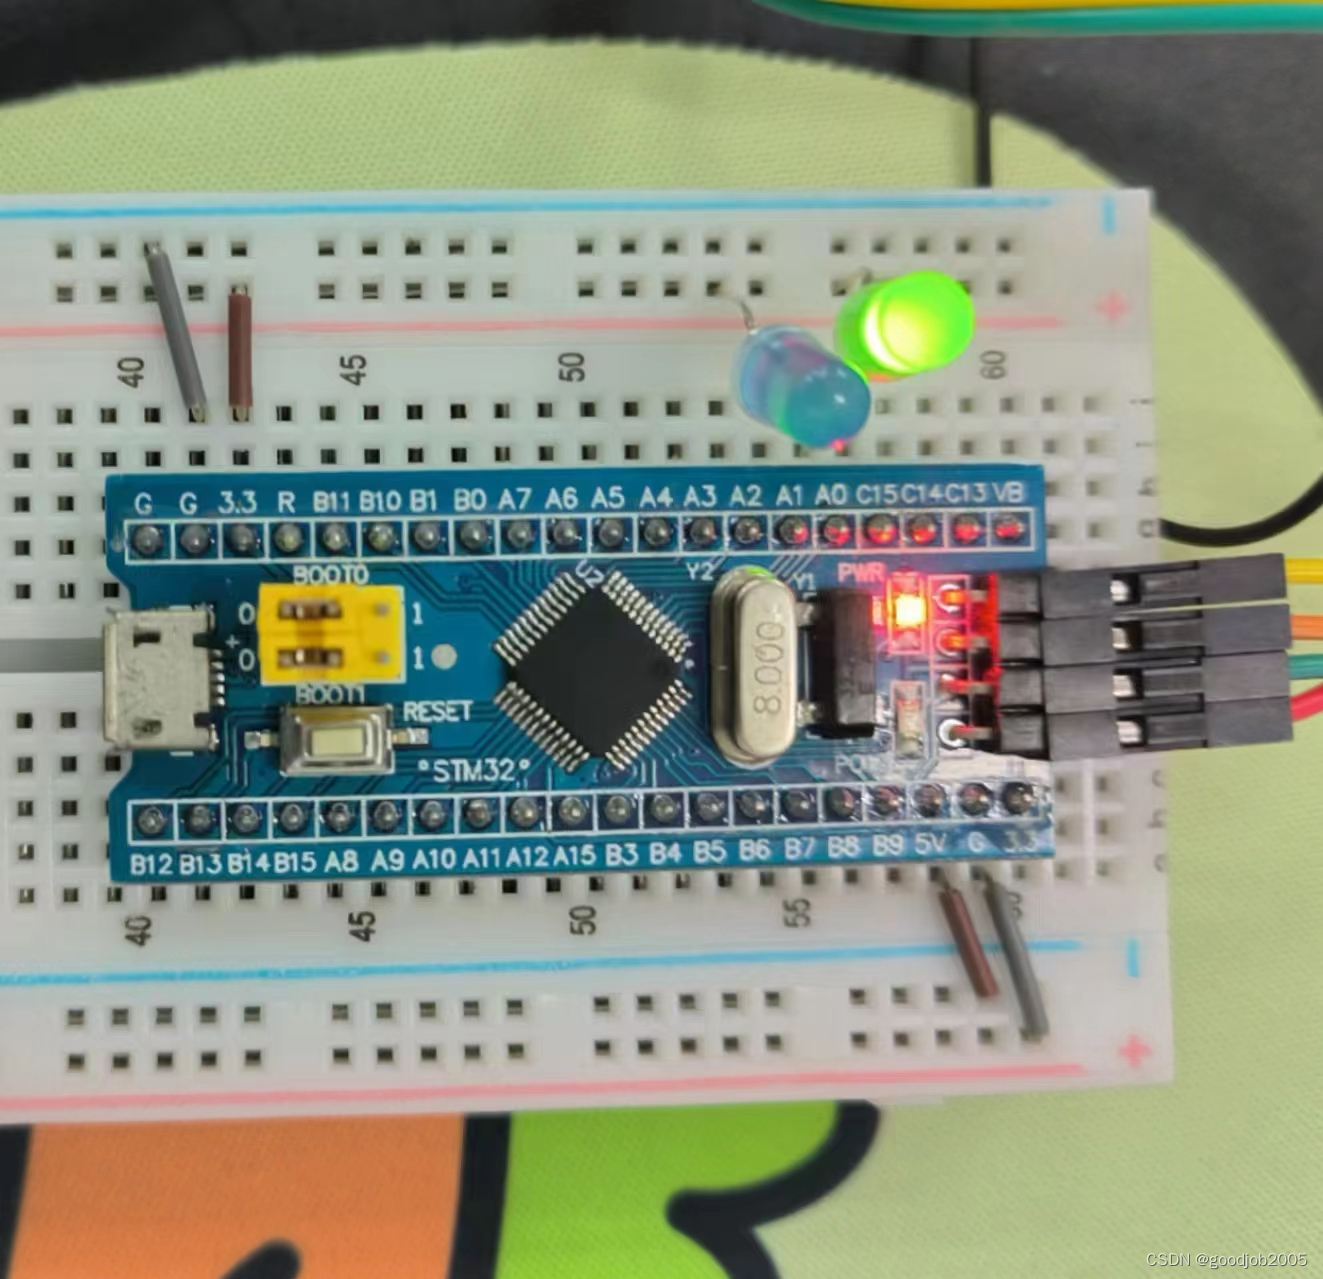
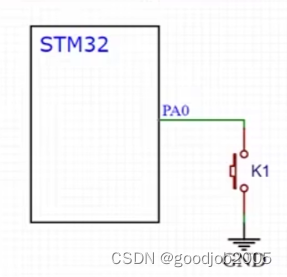
就是PA0,PA1端口控制led,低电平点亮
PB6端口控制按键
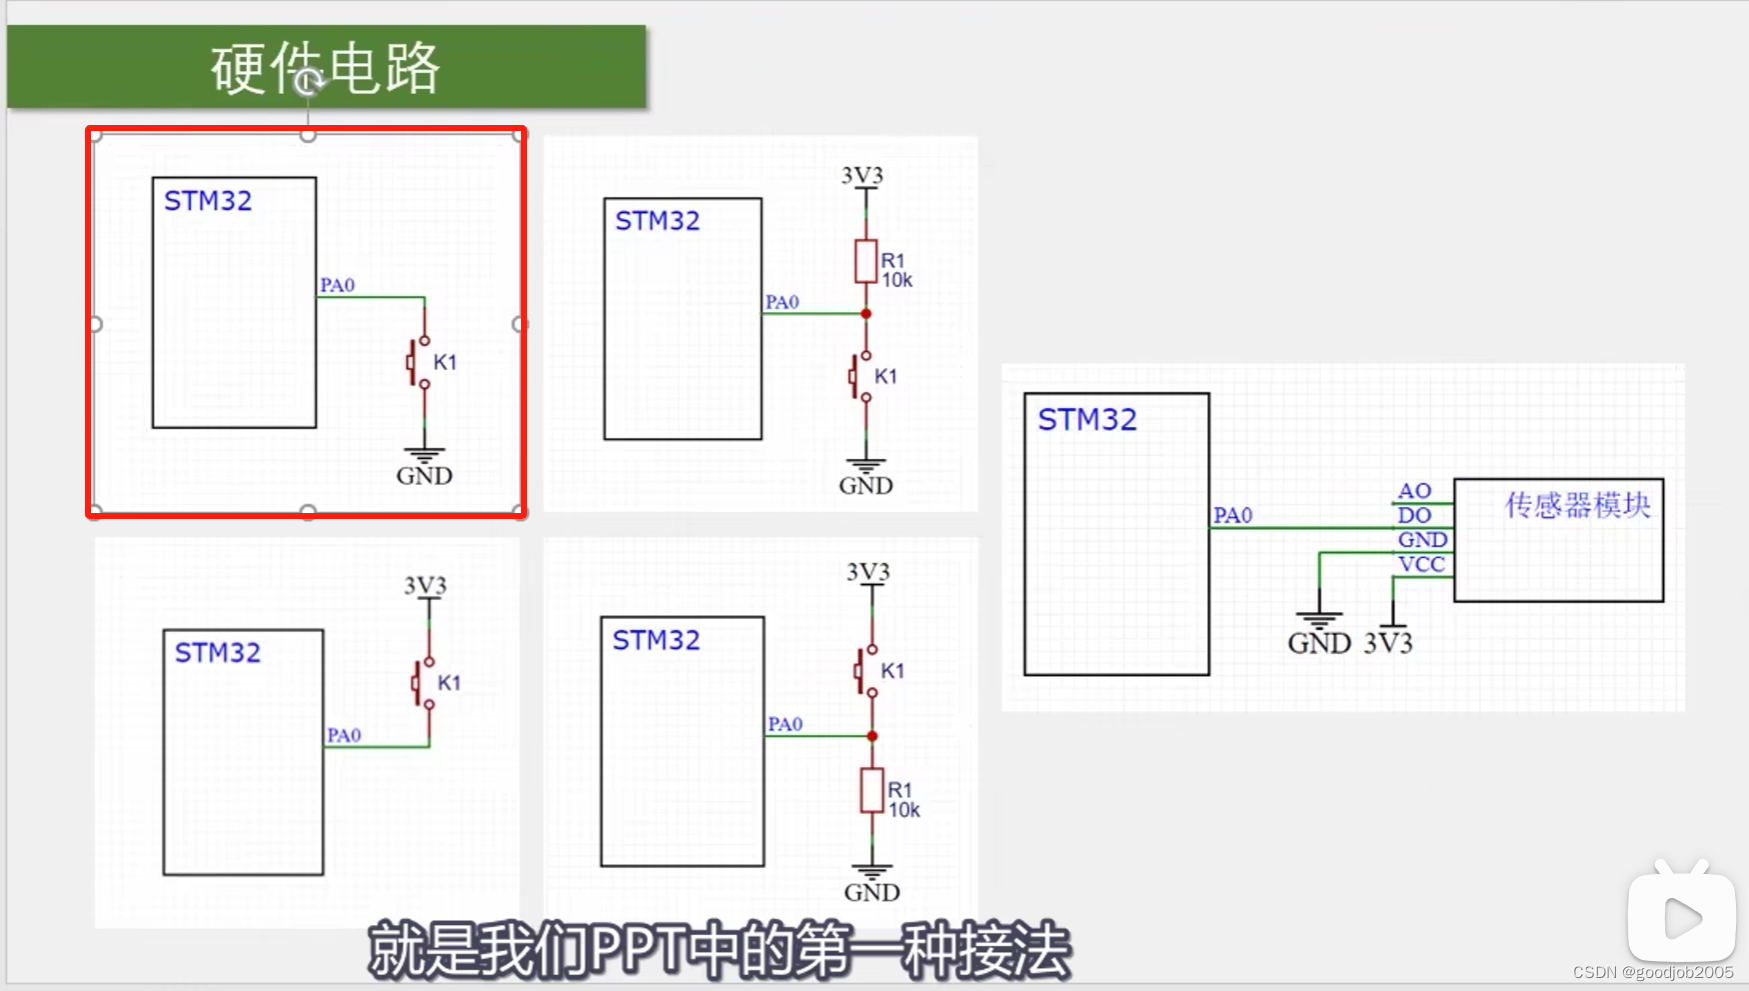
按键接法用的是第一种:
下面开始写代码:
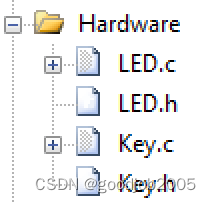
新建一个文件Hardware用来存放各种函数
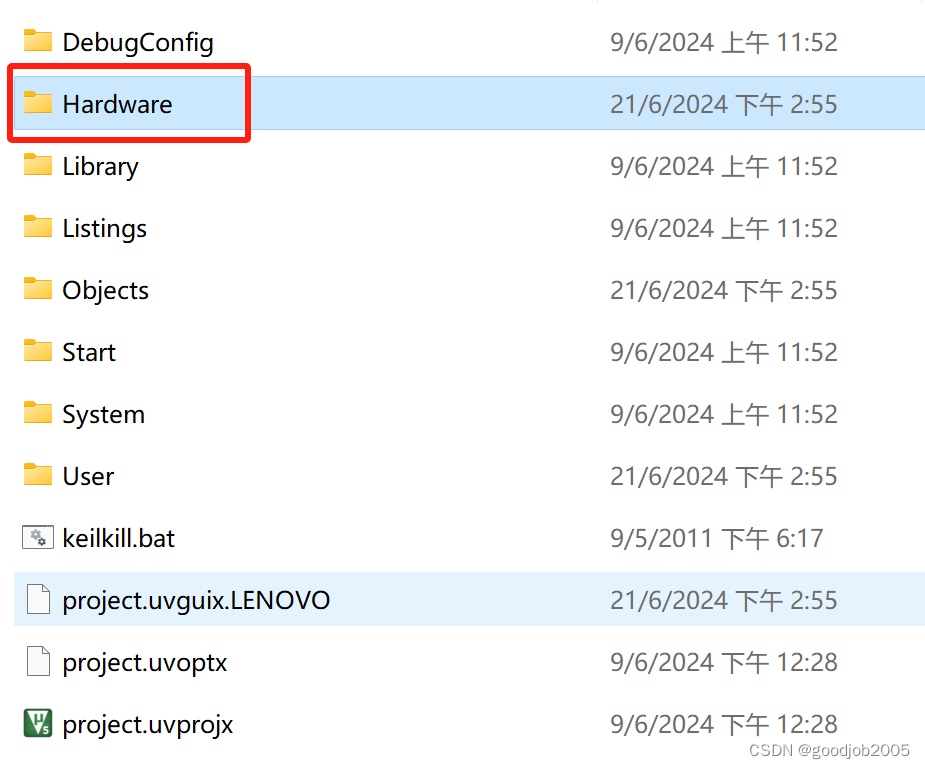
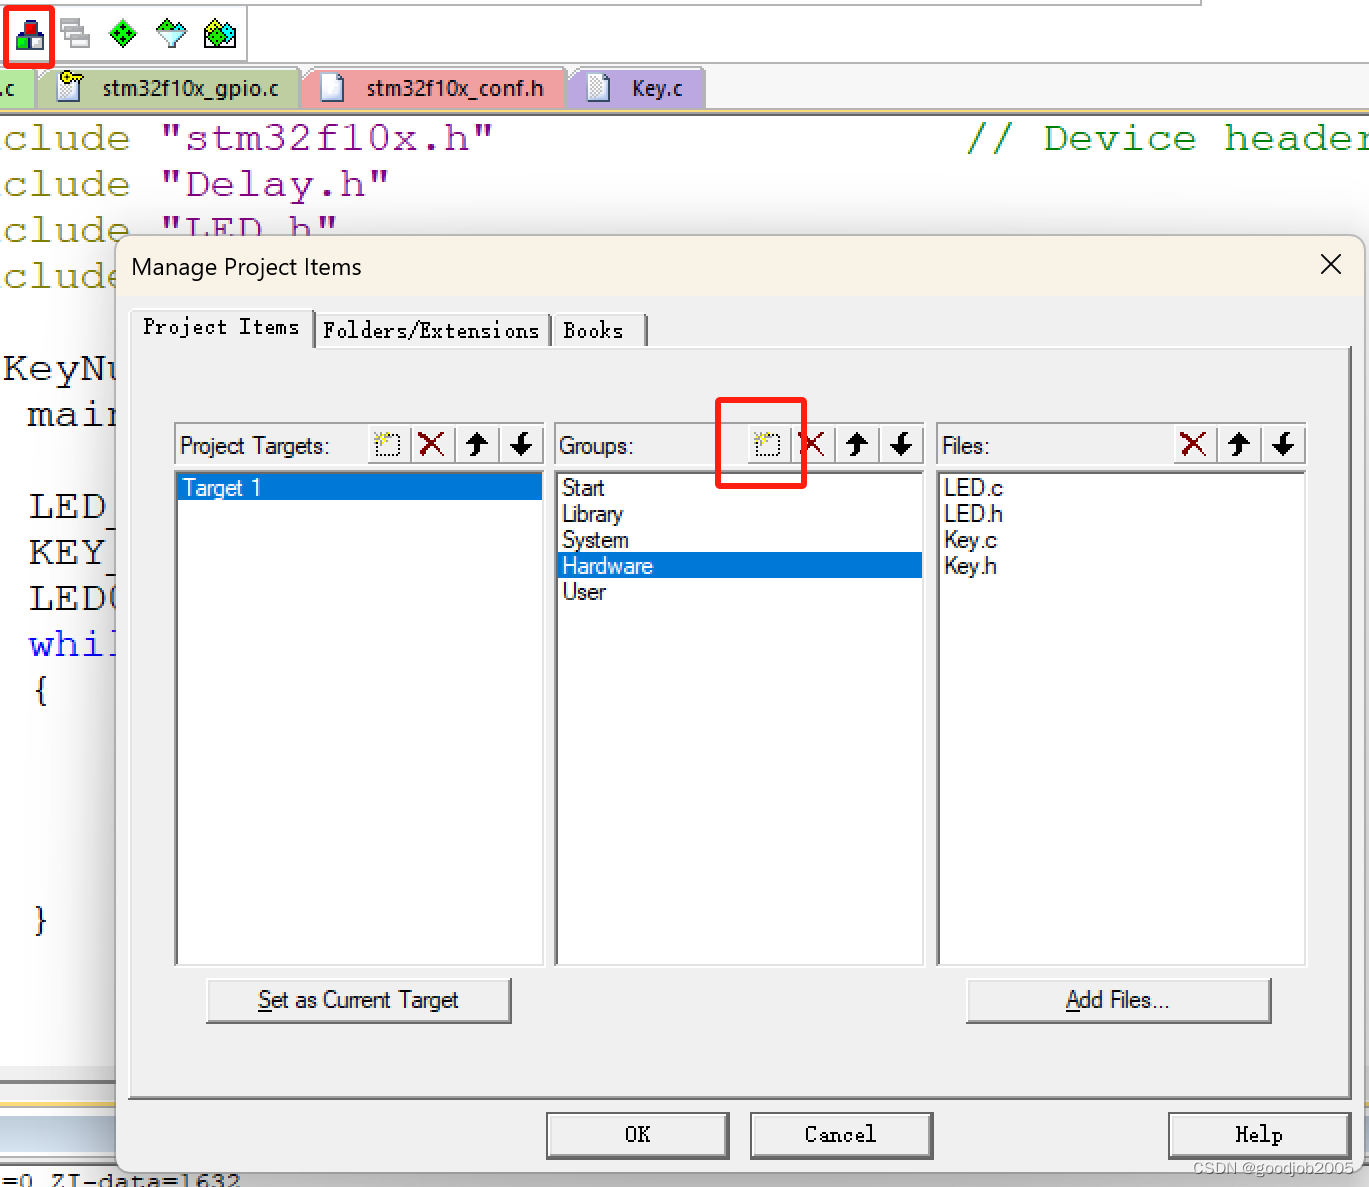
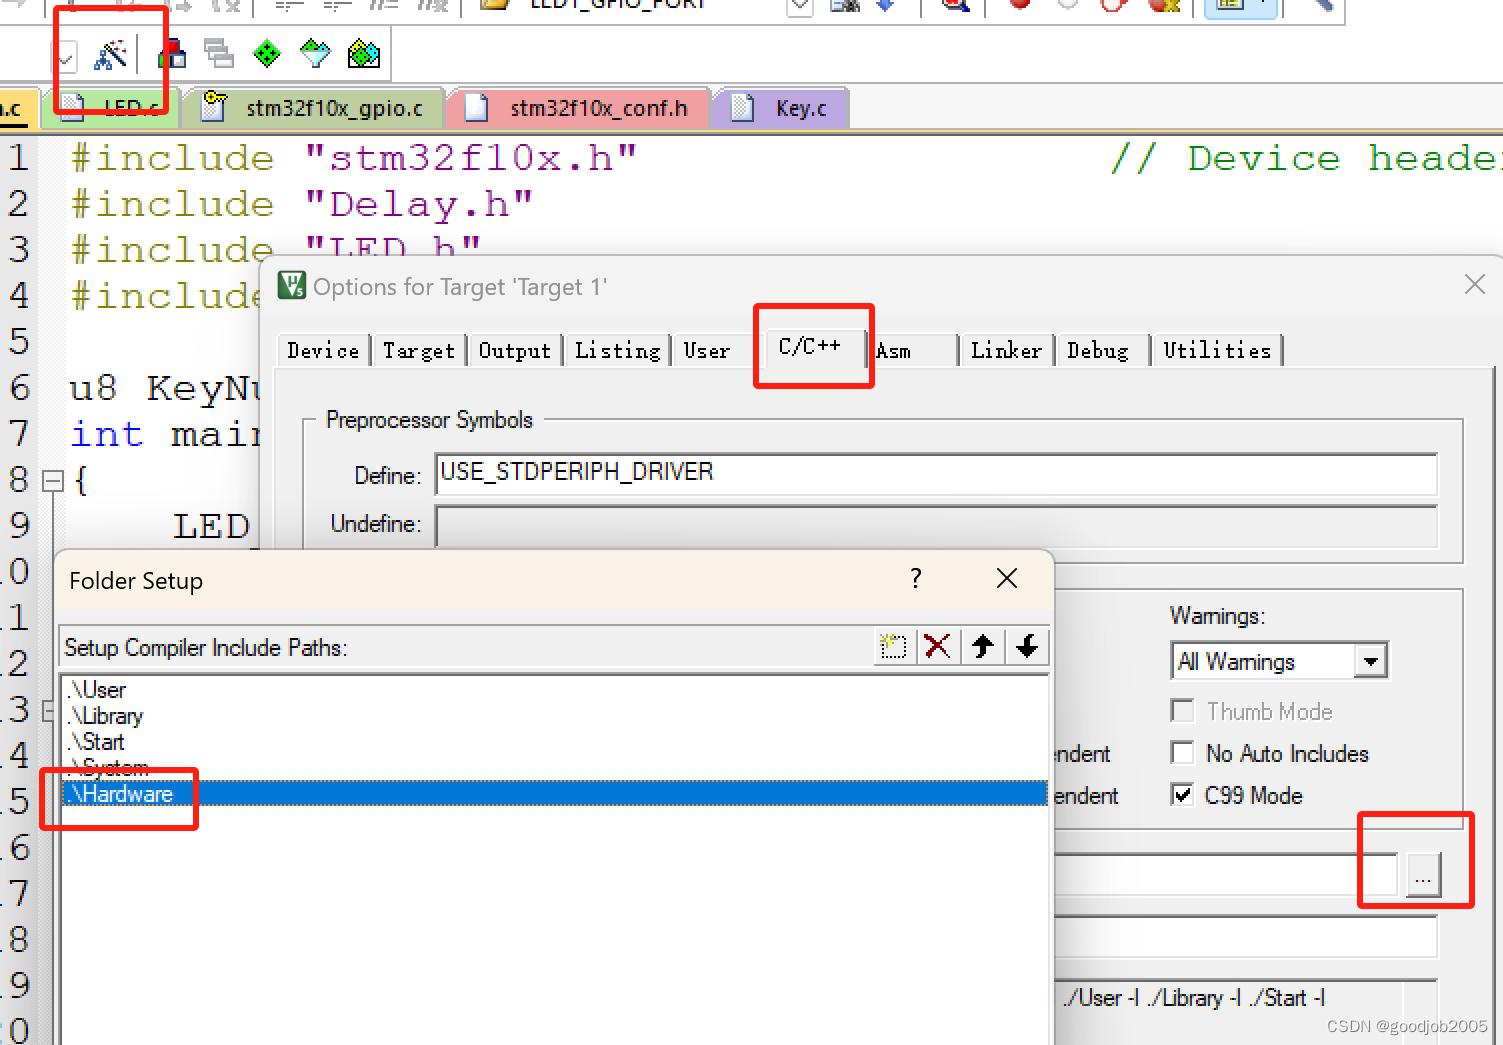
导入这个文件的路径
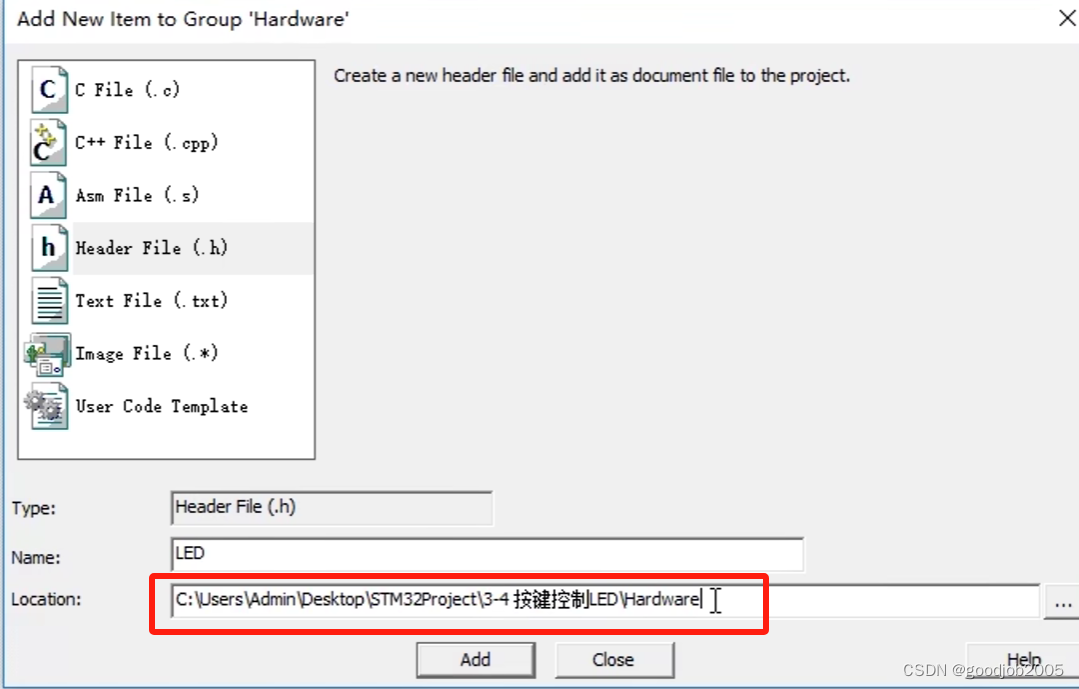
添加函数(记得路径不要选错)
首先写代码配置寄存器
#include "stm32f10x.h"                  // Device header
#include "Delay.h"
void KEY_Init(void)
{
	RCC_APB1PeriphClockCmd(RCC_APB2Periph_GPIOB,ENABLE);

	GPIO_InitTypeDef GPIO_InitStructure;
	GPIO_InitStructure.GPIO_Mode=GPIO_Mode_IPU;//上拉输入
	GPIO_InitStructure.GPIO_Pin=GPIO_Pin_1;
	GPIO_InitStructure.GPIO_Speed=GPIO_Speed_50MHz;
    //这是输出速度,在输入模式下其实是没用的,但是也填一下

	GPIO_Init(GPIOB,&GPIO_InitStructure);
}
至于为什么设置成上拉电阻
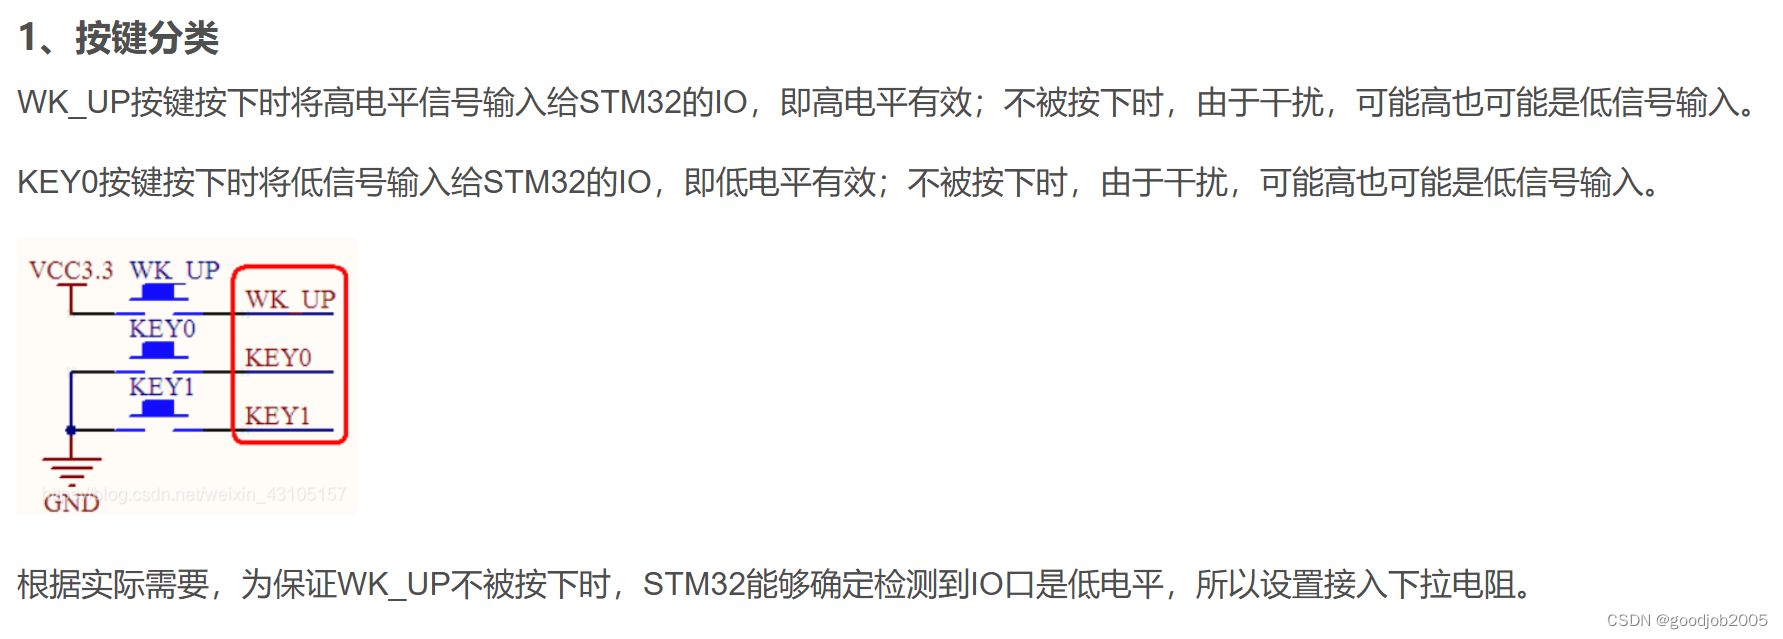
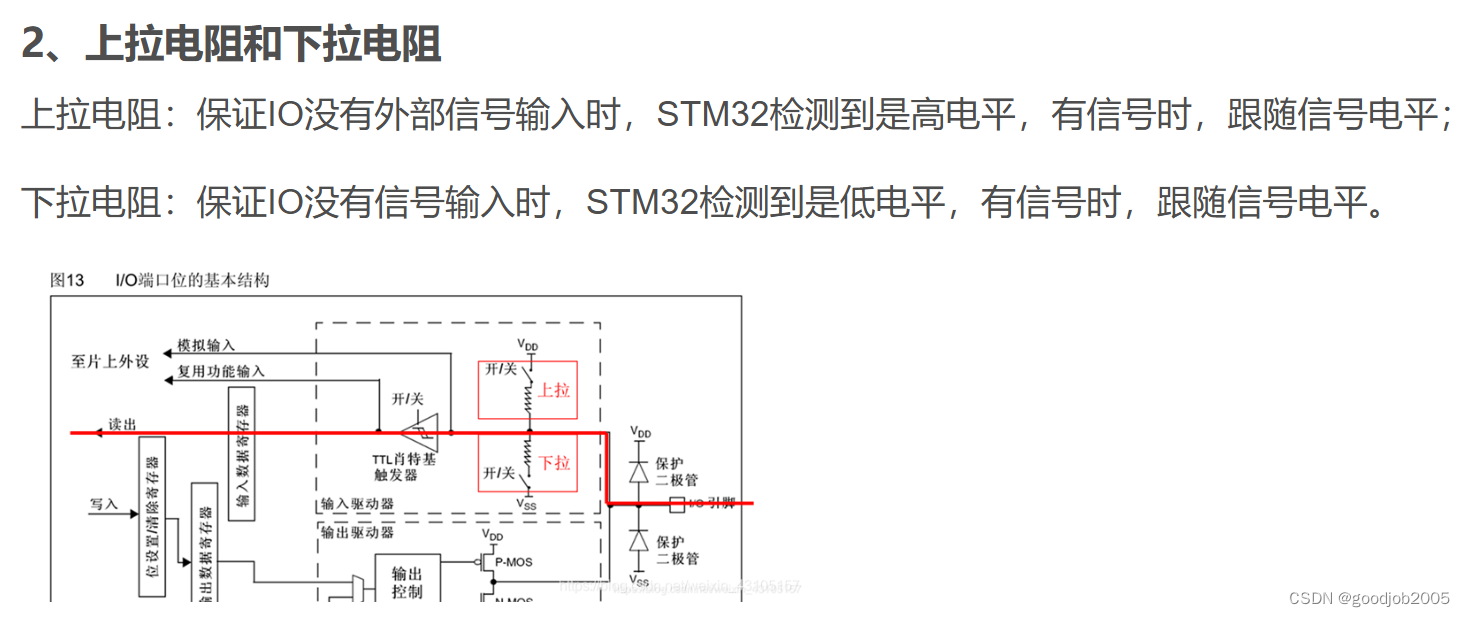
图1,2源自STM32设置IO口输入上拉下拉_stm32io口读电压可以配置下拉电阻吗-优快云博客
我们是这样接的,按下的时候传到单片机的是低电平信号,我们希望低电平信号被检测到,所以应该保证没有信号输入的时候,stm32检测到的是高电平,所以选择上拉输入
接下来要写读取键码的函数:
读取键码要从端口进行读取,所以回到GPIO的函数里寻找 ,如下四个是GPIO口的读取函数
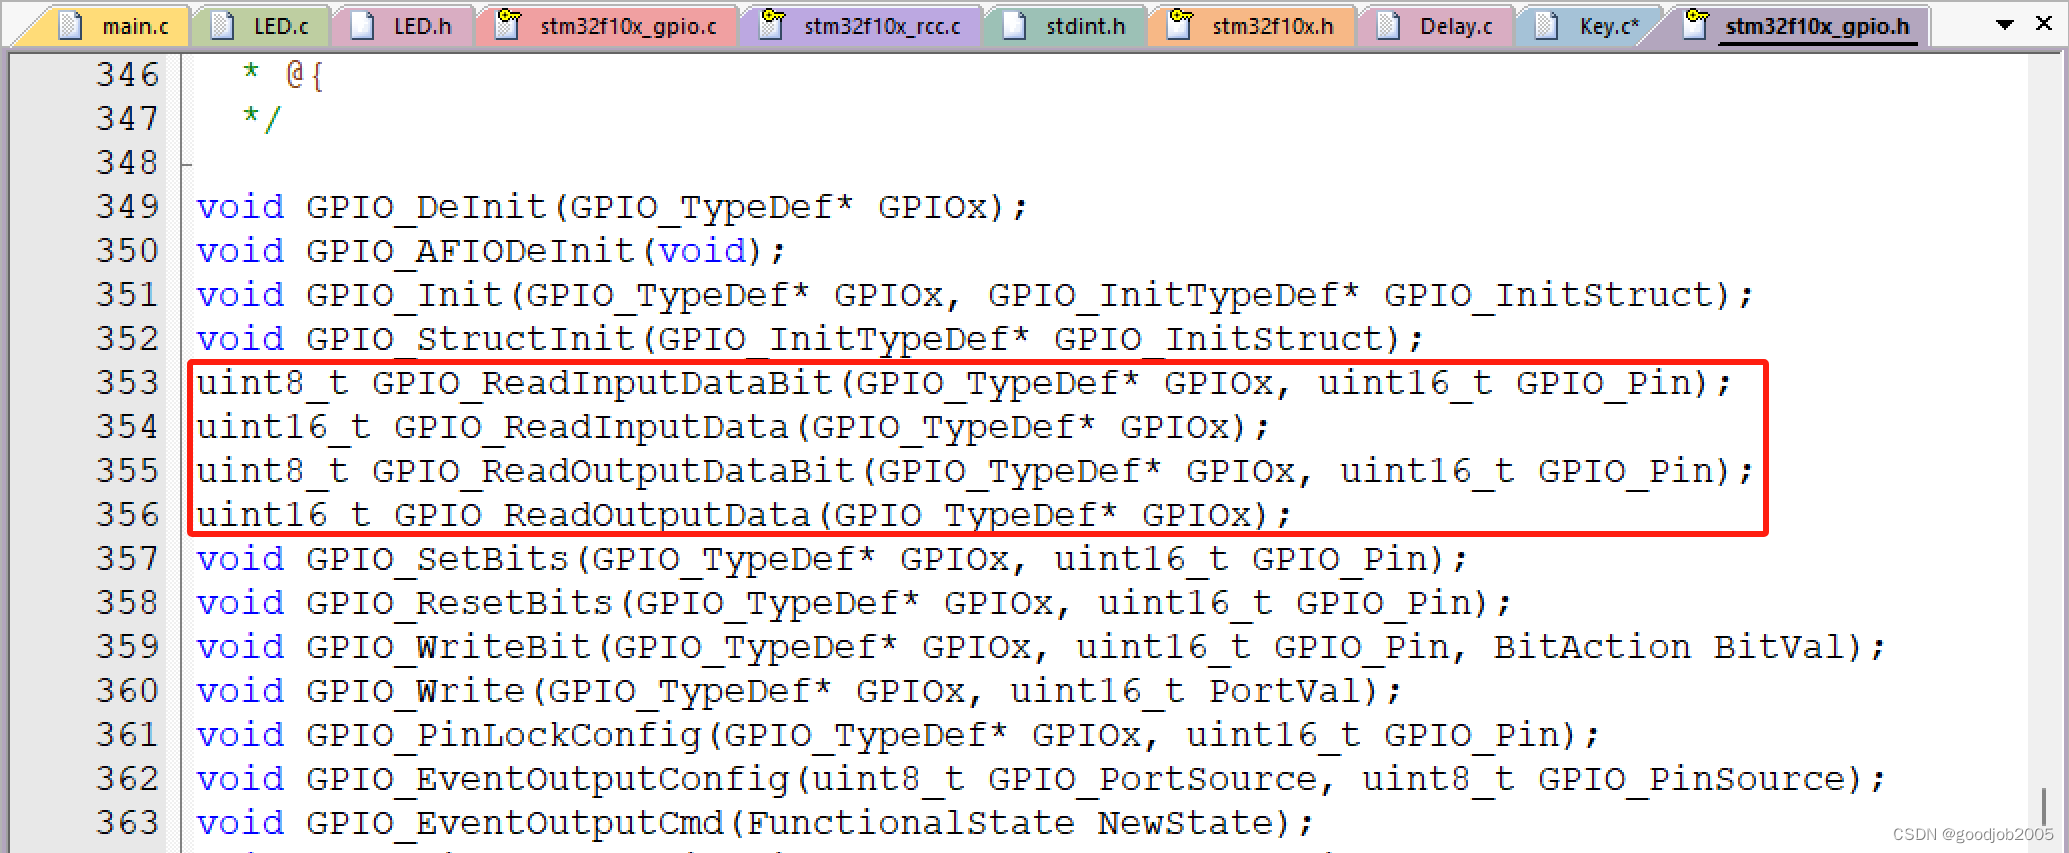
首先看第一个函数
/**
  * @brief  Reads the specified input port pin.
  * @param  GPIOx: where x can be (A..G) to select the GPIO peripheral.
  * @param  GPIO_Pin:  specifies the port bit to read.
  *   This parameter can be GPIO_Pin_x where x can be (0..15).
  * @retval The input port pin value.
  */
uint8_t GPIO_ReadInputDataBit(GPIO_TypeDef* GPIOx, uint16_t GPIO_Pin)
{
  uint8_t bitstatus = 0x00;

  /* Check the parameters */
  // 检测传递给函数的参数是否是有效的参数
  assert_param(IS_GPIO_ALL_PERIPH(GPIOx));
  assert_param(IS_GET_GPIO_PIN(GPIO_Pin));

  //判断是否有读取到的端口值
  if ((GPIOx->IDR & GPIO_Pin) != (uint32_t)Bit_RESET)
  {
    bitstatus = (uint8_t)Bit_SET;
    //返回值为1
  }
  else
  {
    bitstatus = (uint8_t)Bit_RESET;
    //返回值为0
  }
  return bitstatus;
}那个检查参数是否有效的函数详见assert_param函数的用法 - 白衣尽湿 - 博客园 (cnblogs.com)
第二个函数:读取整个输入寄存器
uint16_t GPIO_ReadInputData(GPIO_TypeDef* GPIOx);第三个函数:读取输出寄存器的某一个位,输出模式下,看一下自己输出的是什么
uint8_t GPIO_ReadOutputDataBit(GPIO_TypeDef* GPIOx, uint16_t GPIO_Pin);
第四个函数:读取整个输出寄存器
uint16_t GPIO_ReadOutputData(GPIO_TypeDef* GPIOx);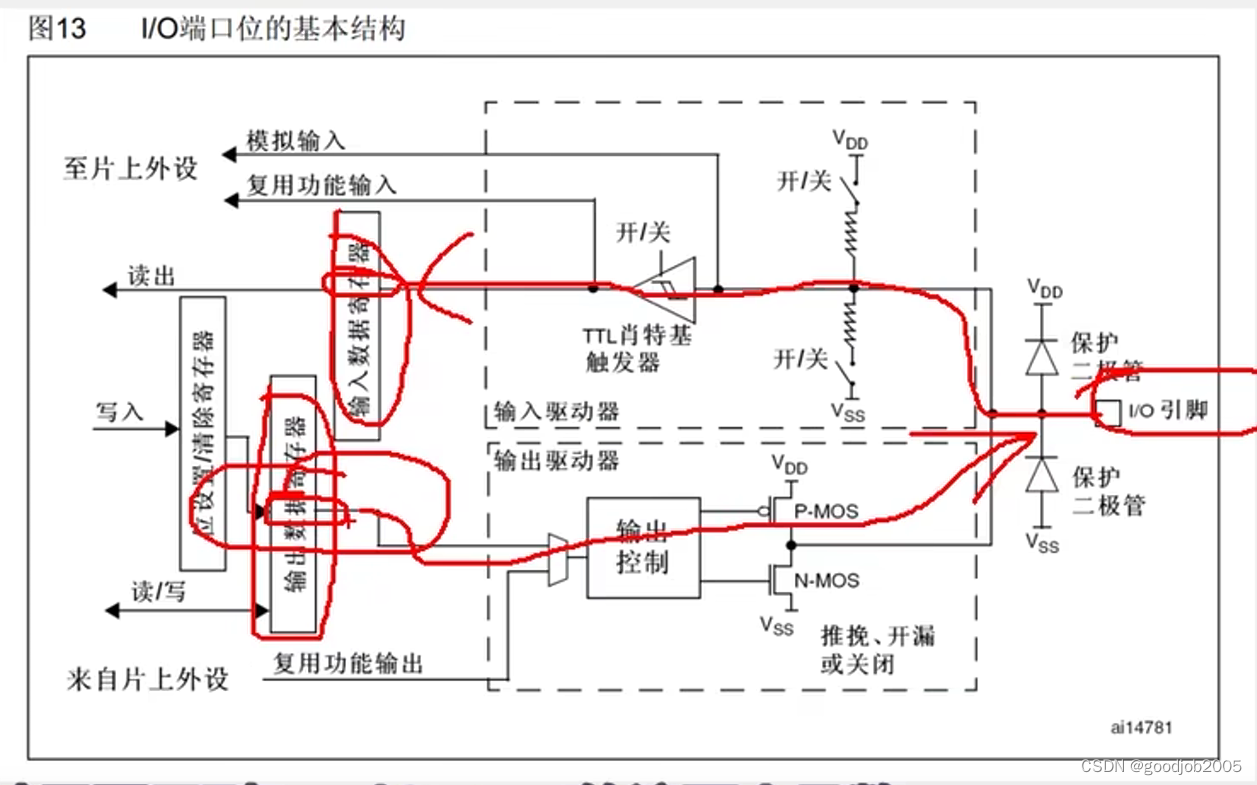
//key.c
#include "stm32f10x.h" // Device header
#include "Delay.h"
void Key_Init(void)
{
RCC_APB1PeriphClockCmd(RCC_APB2Periph_GPIOB,ENABLE);
GPIO_InitTypeDef GPIO_InitStructure;
GPIO_InitStructure.GPIO_Mode=GPIO_Mode_IPU;//ÏÂÀÊäÈë
GPIO_InitStructure.GPIO_Pin=GPIO_Pin_6;
GPIO_InitStructure.GPIO_Speed=GPIO_Speed_50MHz;
GPIO_Init(GPIOB,&GPIO_InitStructure);
}
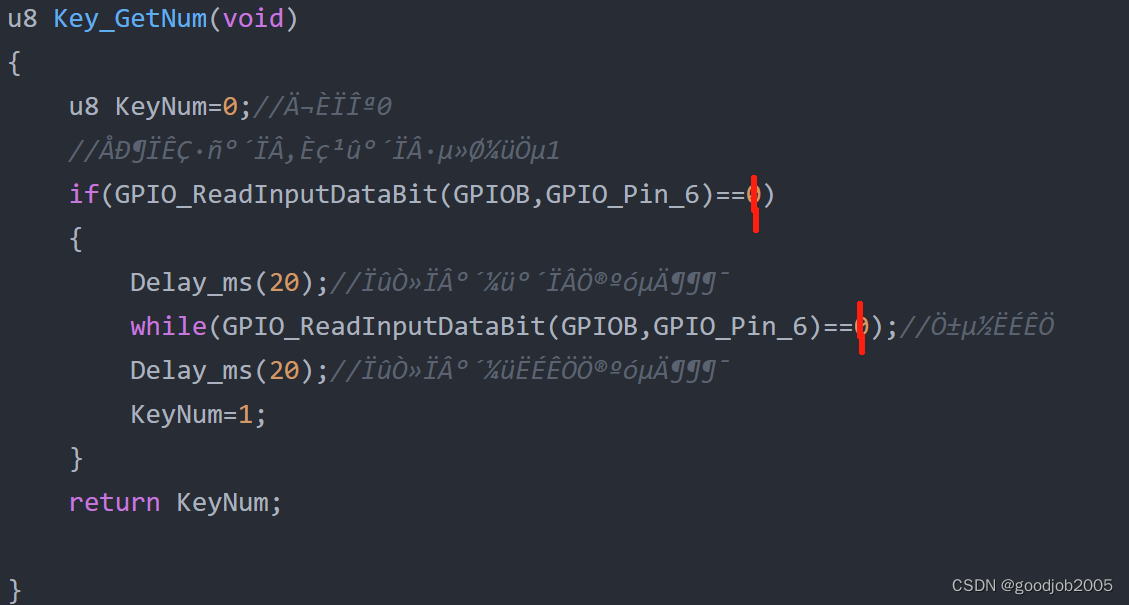
//¶ÁÈ¡¼üÂë
u8 Key_GetNum(void)
{
u8 KeyNum=0;//ĬÈÏΪ0
//ÅжÏÊÇ·ñ°´ÏÂ,Èç¹û°´Ï·µ»Ø¼üÖµ1
if(GPIO_ReadInputDataBit(GPIOB,GPIO_Pin_6)==0)
{
Delay_ms(20);//Ïûһϰ´¼ü°´ÏÂÖ®ºóµÄ¶¶¶¯
while(GPIO_ReadInputDataBit(GPIOB,GPIO_Pin_6)==0);//Ö±µ½ËÉÊÖ
Delay_ms(20);//Ïûһϰ´¼üËÉÊÖÖ®ºóµÄ¶¶¶¯
KeyNum=1;
}
return KeyNum;
}
//main.c
#include "stm32f10x.h"                  // Device header
#include "Delay.h"
#include "LED.h"
#include "Key.h"

u8 KeyNum=0;
int main(void)
{
	LED_Init();
	Key_Init();
	//LED(GPIOA ,GPIO_Pin_0,1);
	while(1)
	{


		KeyNum=Key_GetNum();
		LED(GPIOA ,GPIO_Pin_0,1);
		if(KeyNum==0)
			LED(GPIOA ,GPIO_Pin_1,0);//À¶µÆÃð
		else
			LED(GPIOA ,GPIO_Pin_1,1);//À¶µÆÁÁ
//

	}
}
有个问题,我的灯没有点亮,我一步步排查,应该是按键的问题,还有key.c里面要把这个设置为1 才可以,唉,我恨,调了半天也没找到到底是因为按键的什么原因,按键和接线都换了,还是不行,太累了明天再试吧


 被折叠的 条评论
为什么被折叠?
被折叠的 条评论
为什么被折叠?
 到【灌水乐园】发言


