


LIGHTNING IN 15 MINUTES
Lightning in 15 minutes — PyTorch Lightning 2.2.5 documentation
背景知识:不需要
目标:了解lightning工作流的7个关键步骤
将pytorch转lightning主要了的部分
-
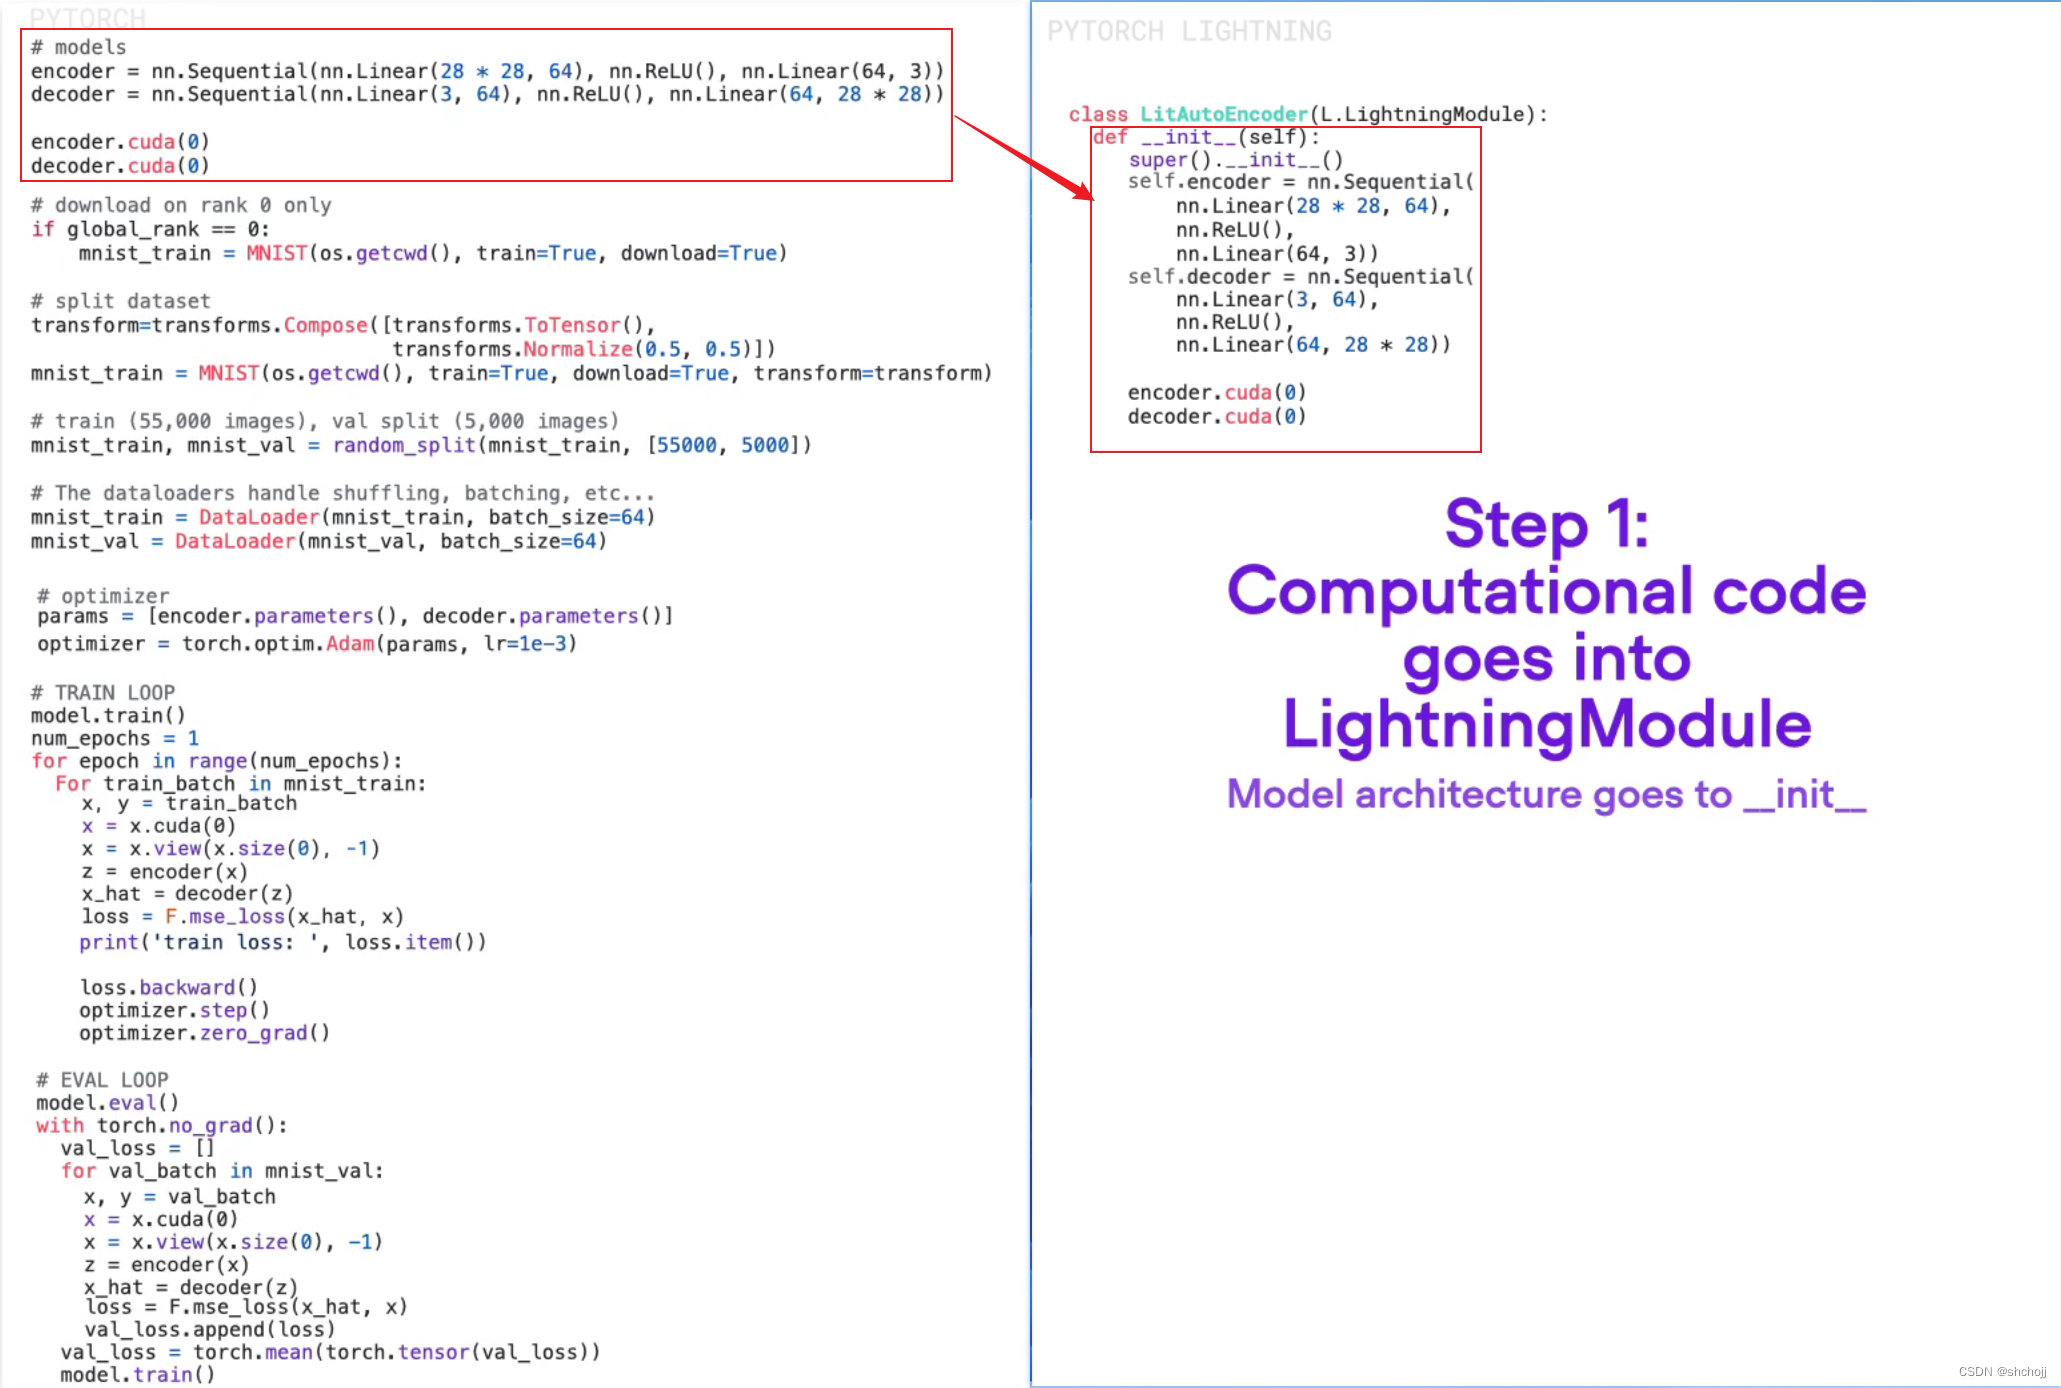
模型结构放入__init__
-
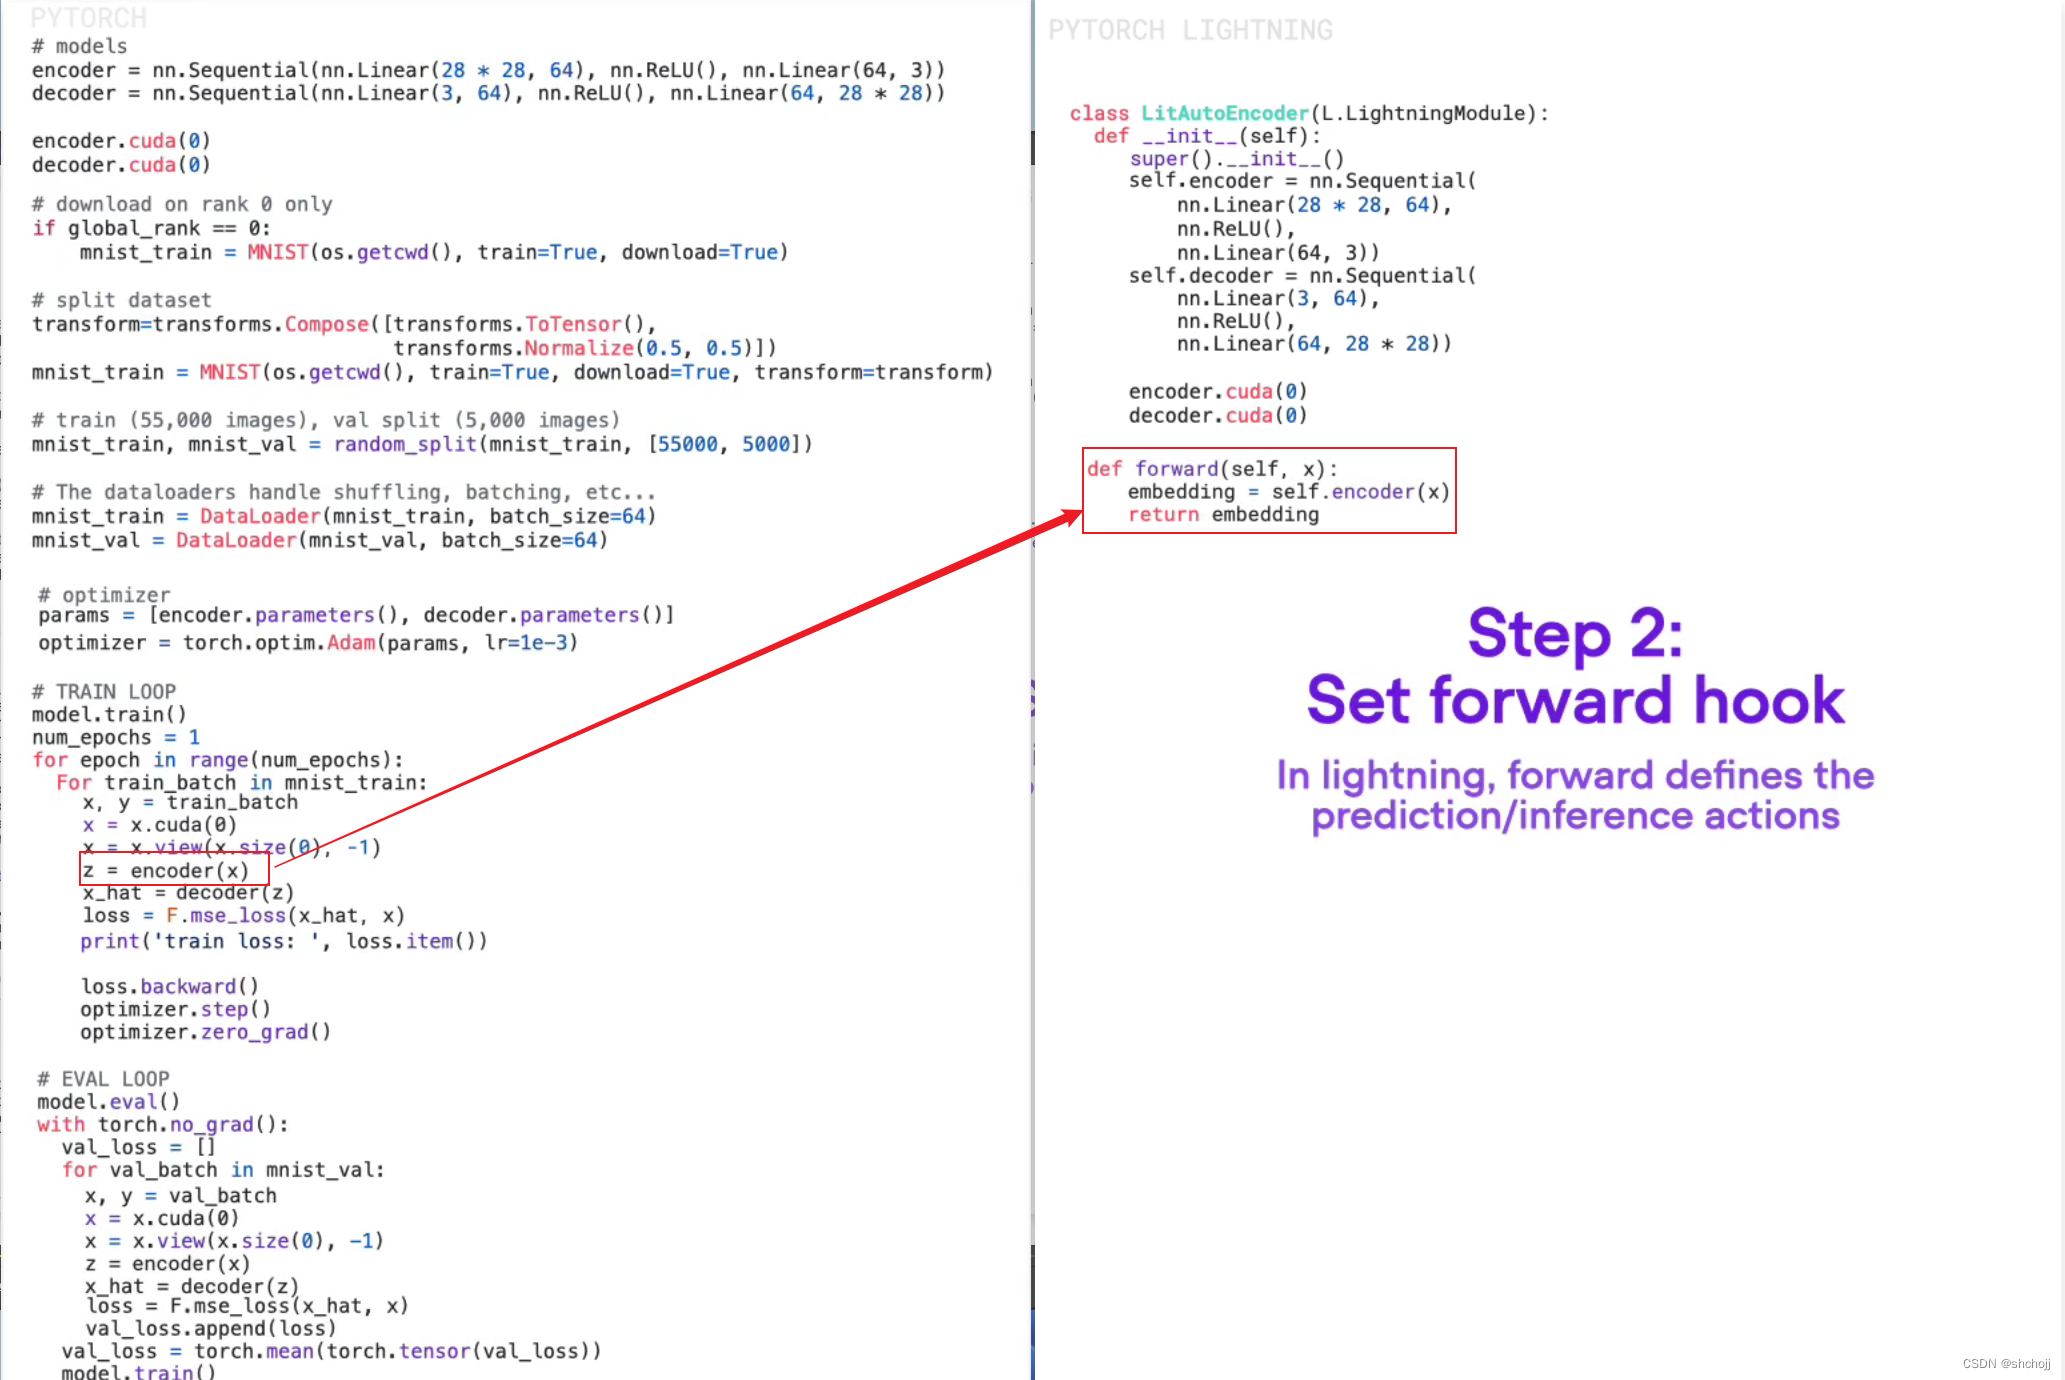
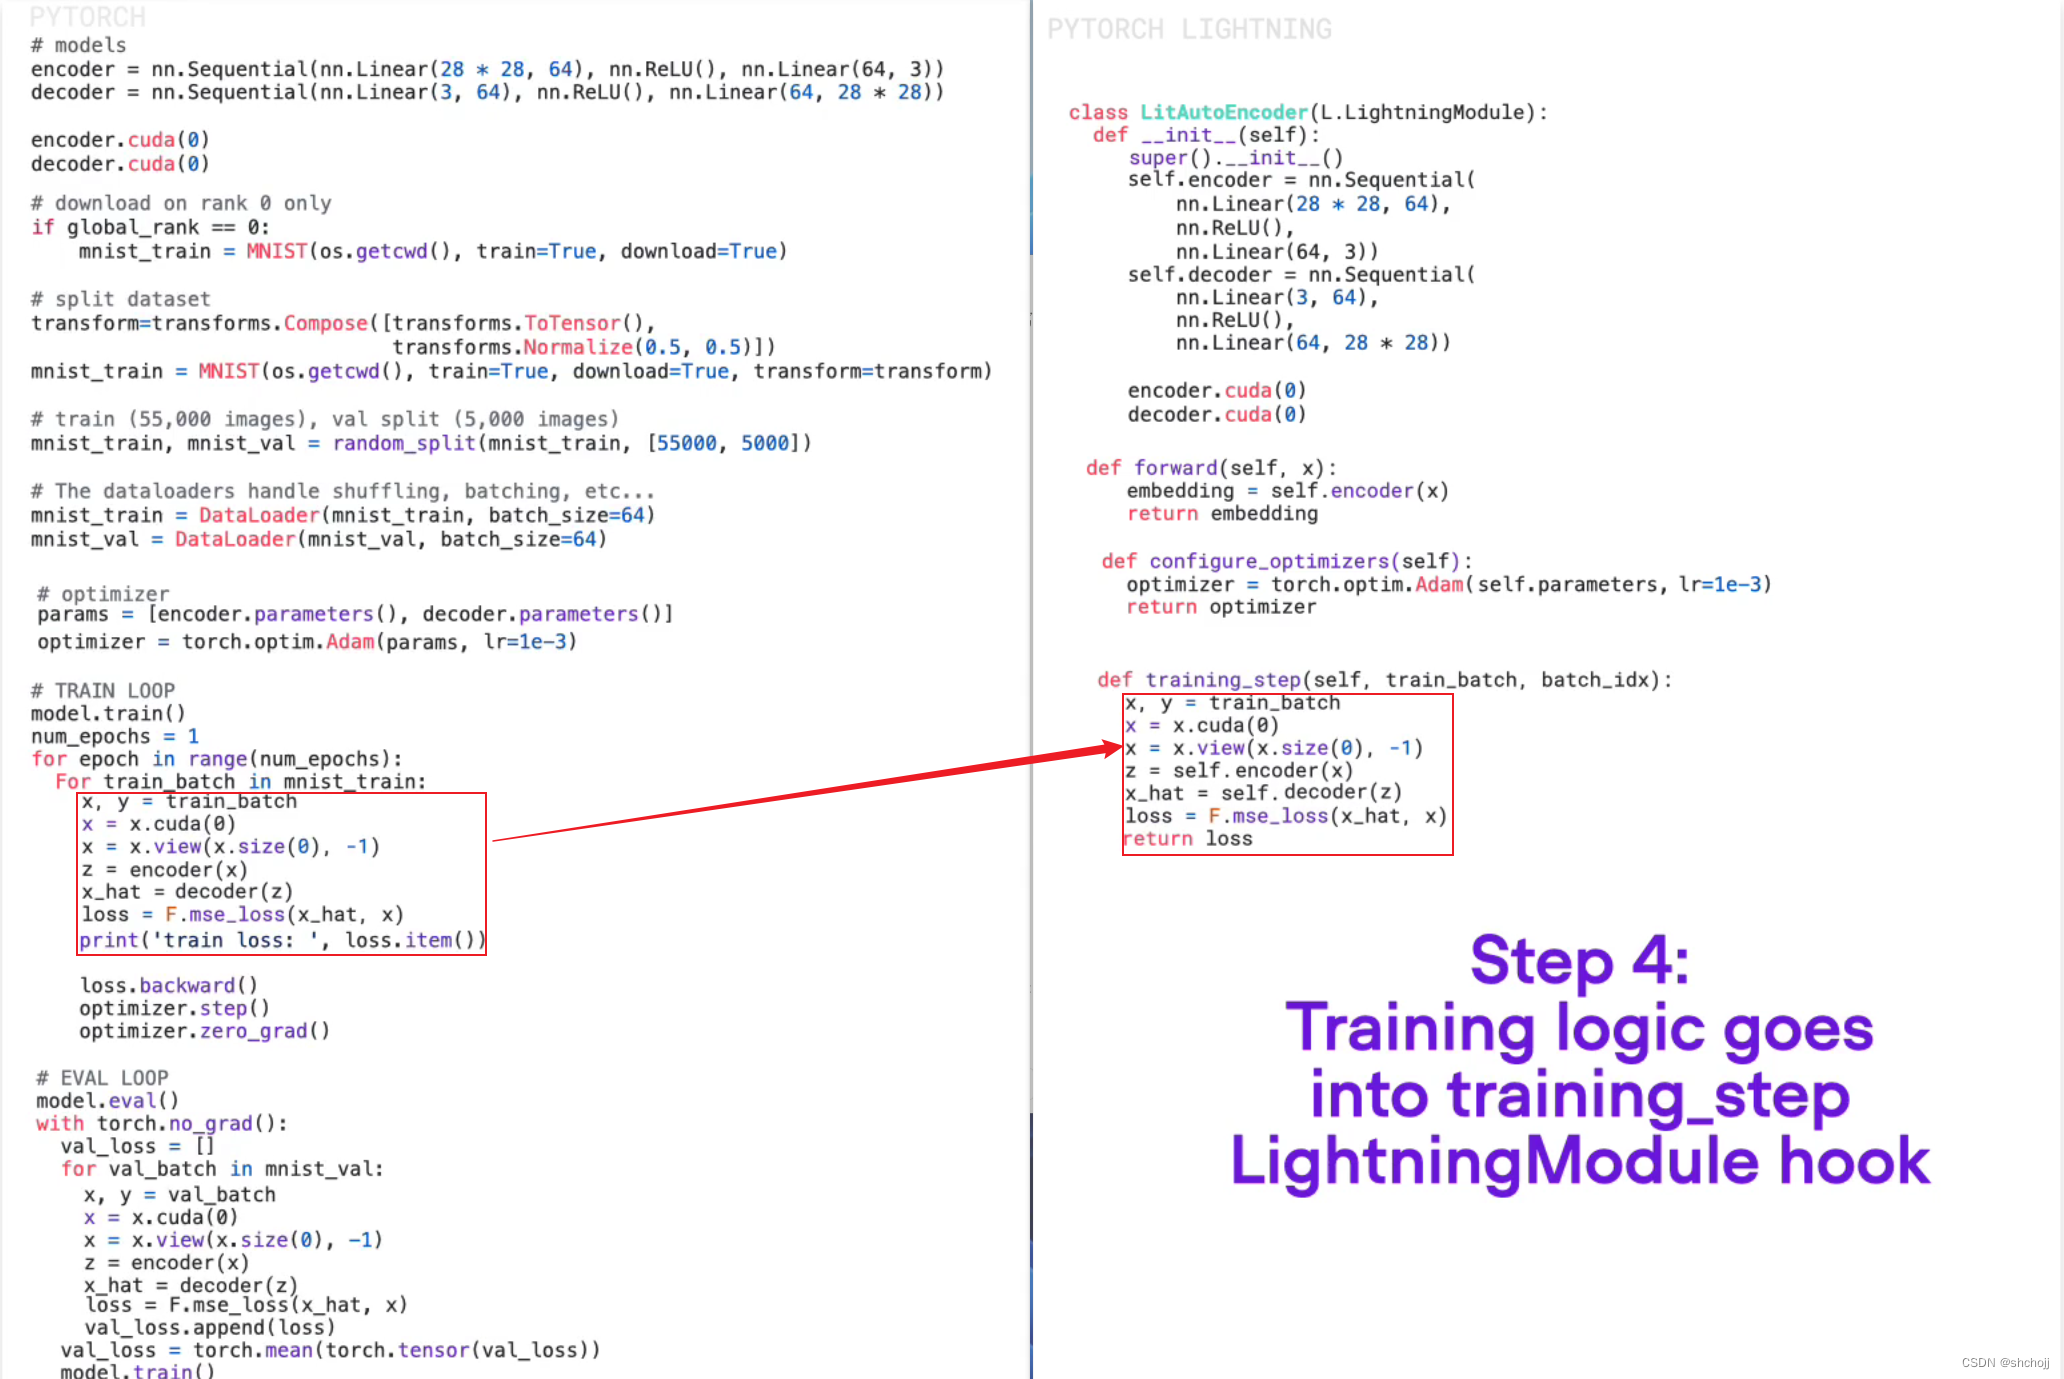
将编码器放入forward hook
-
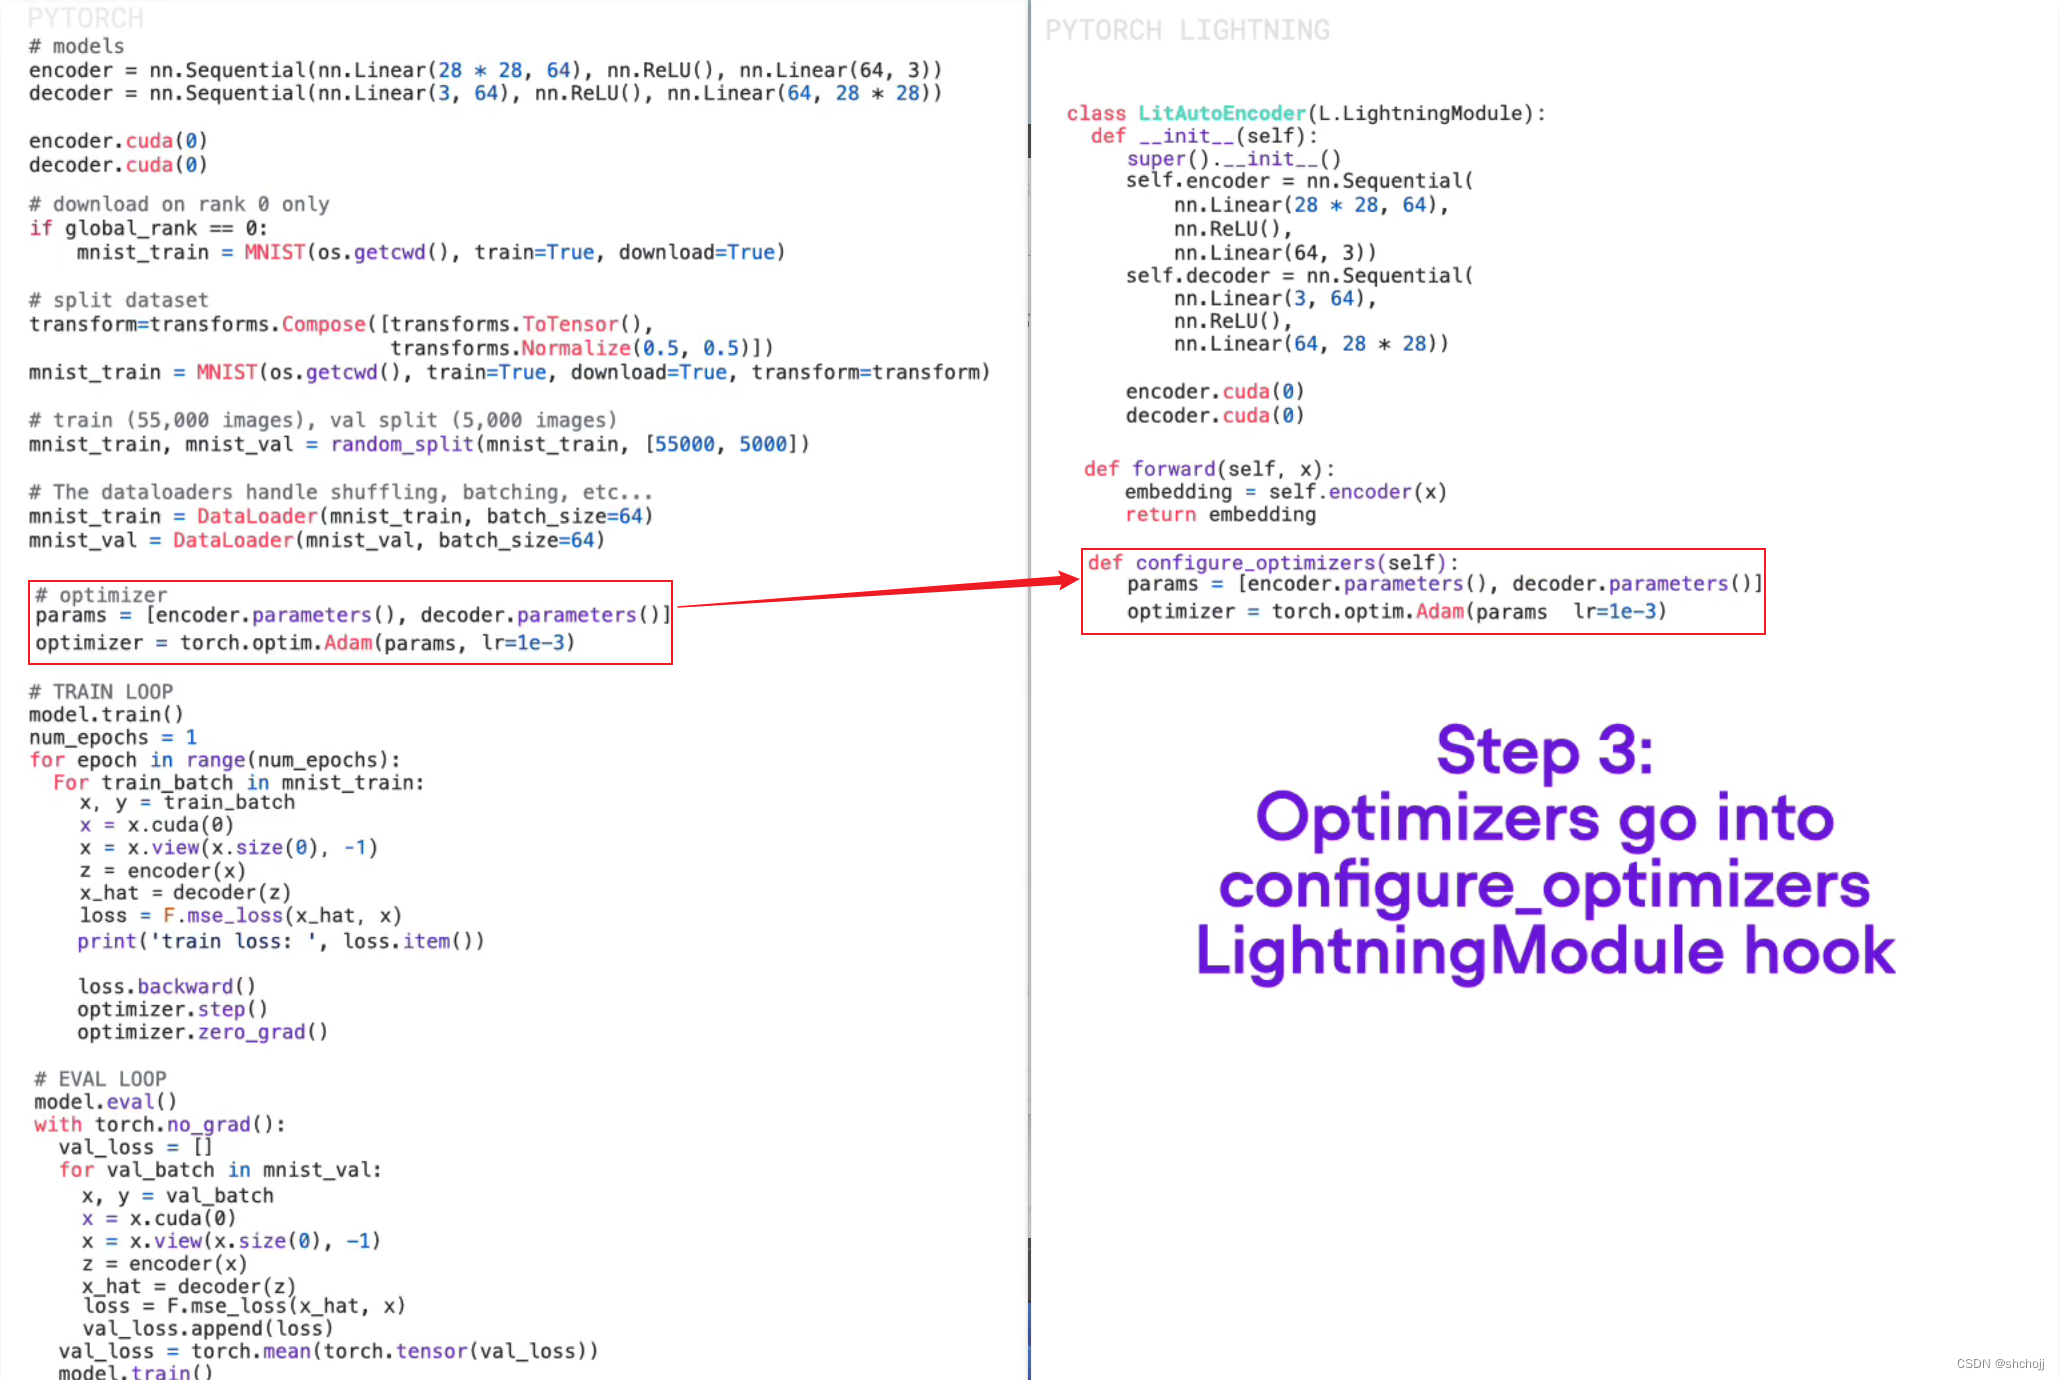
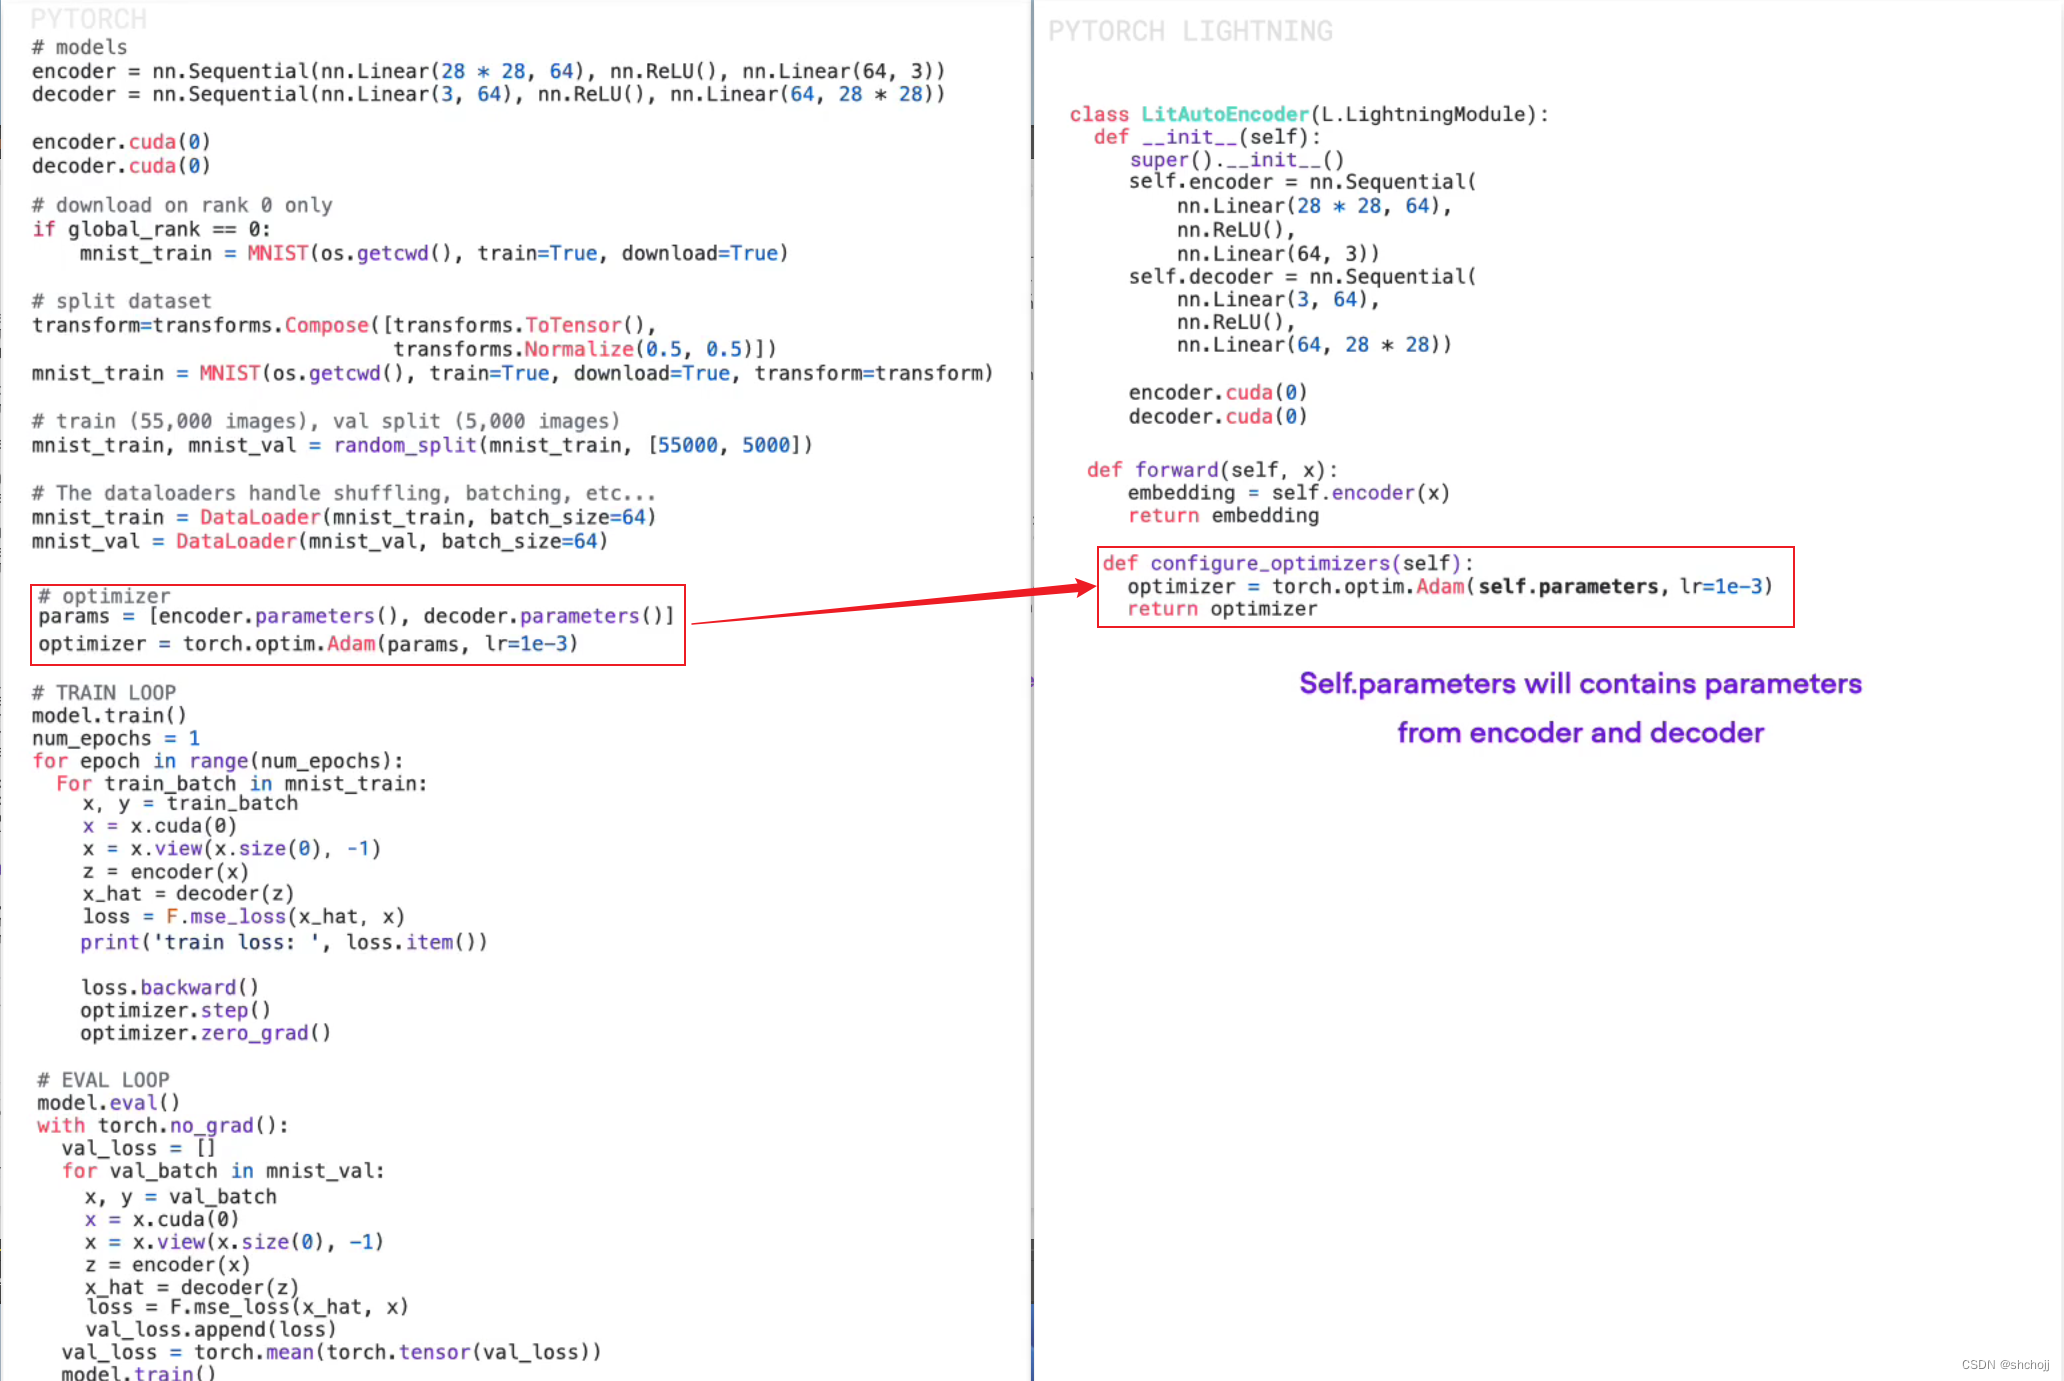
配置优化器,参数本省就包含来自编码器和解码器。
-
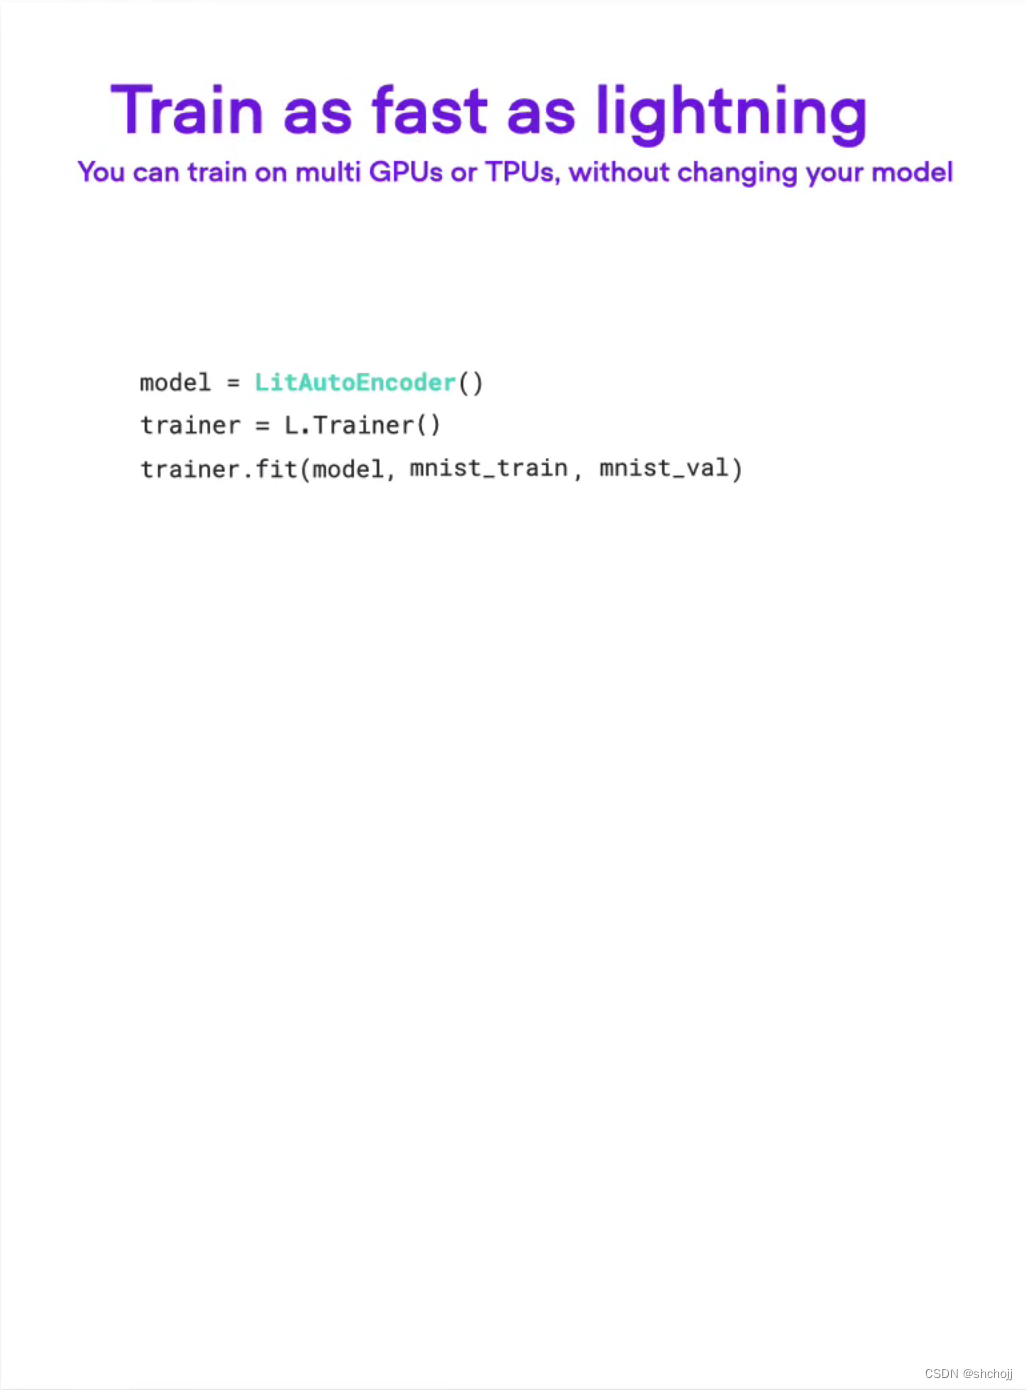
创建训练
-
设置验证环节
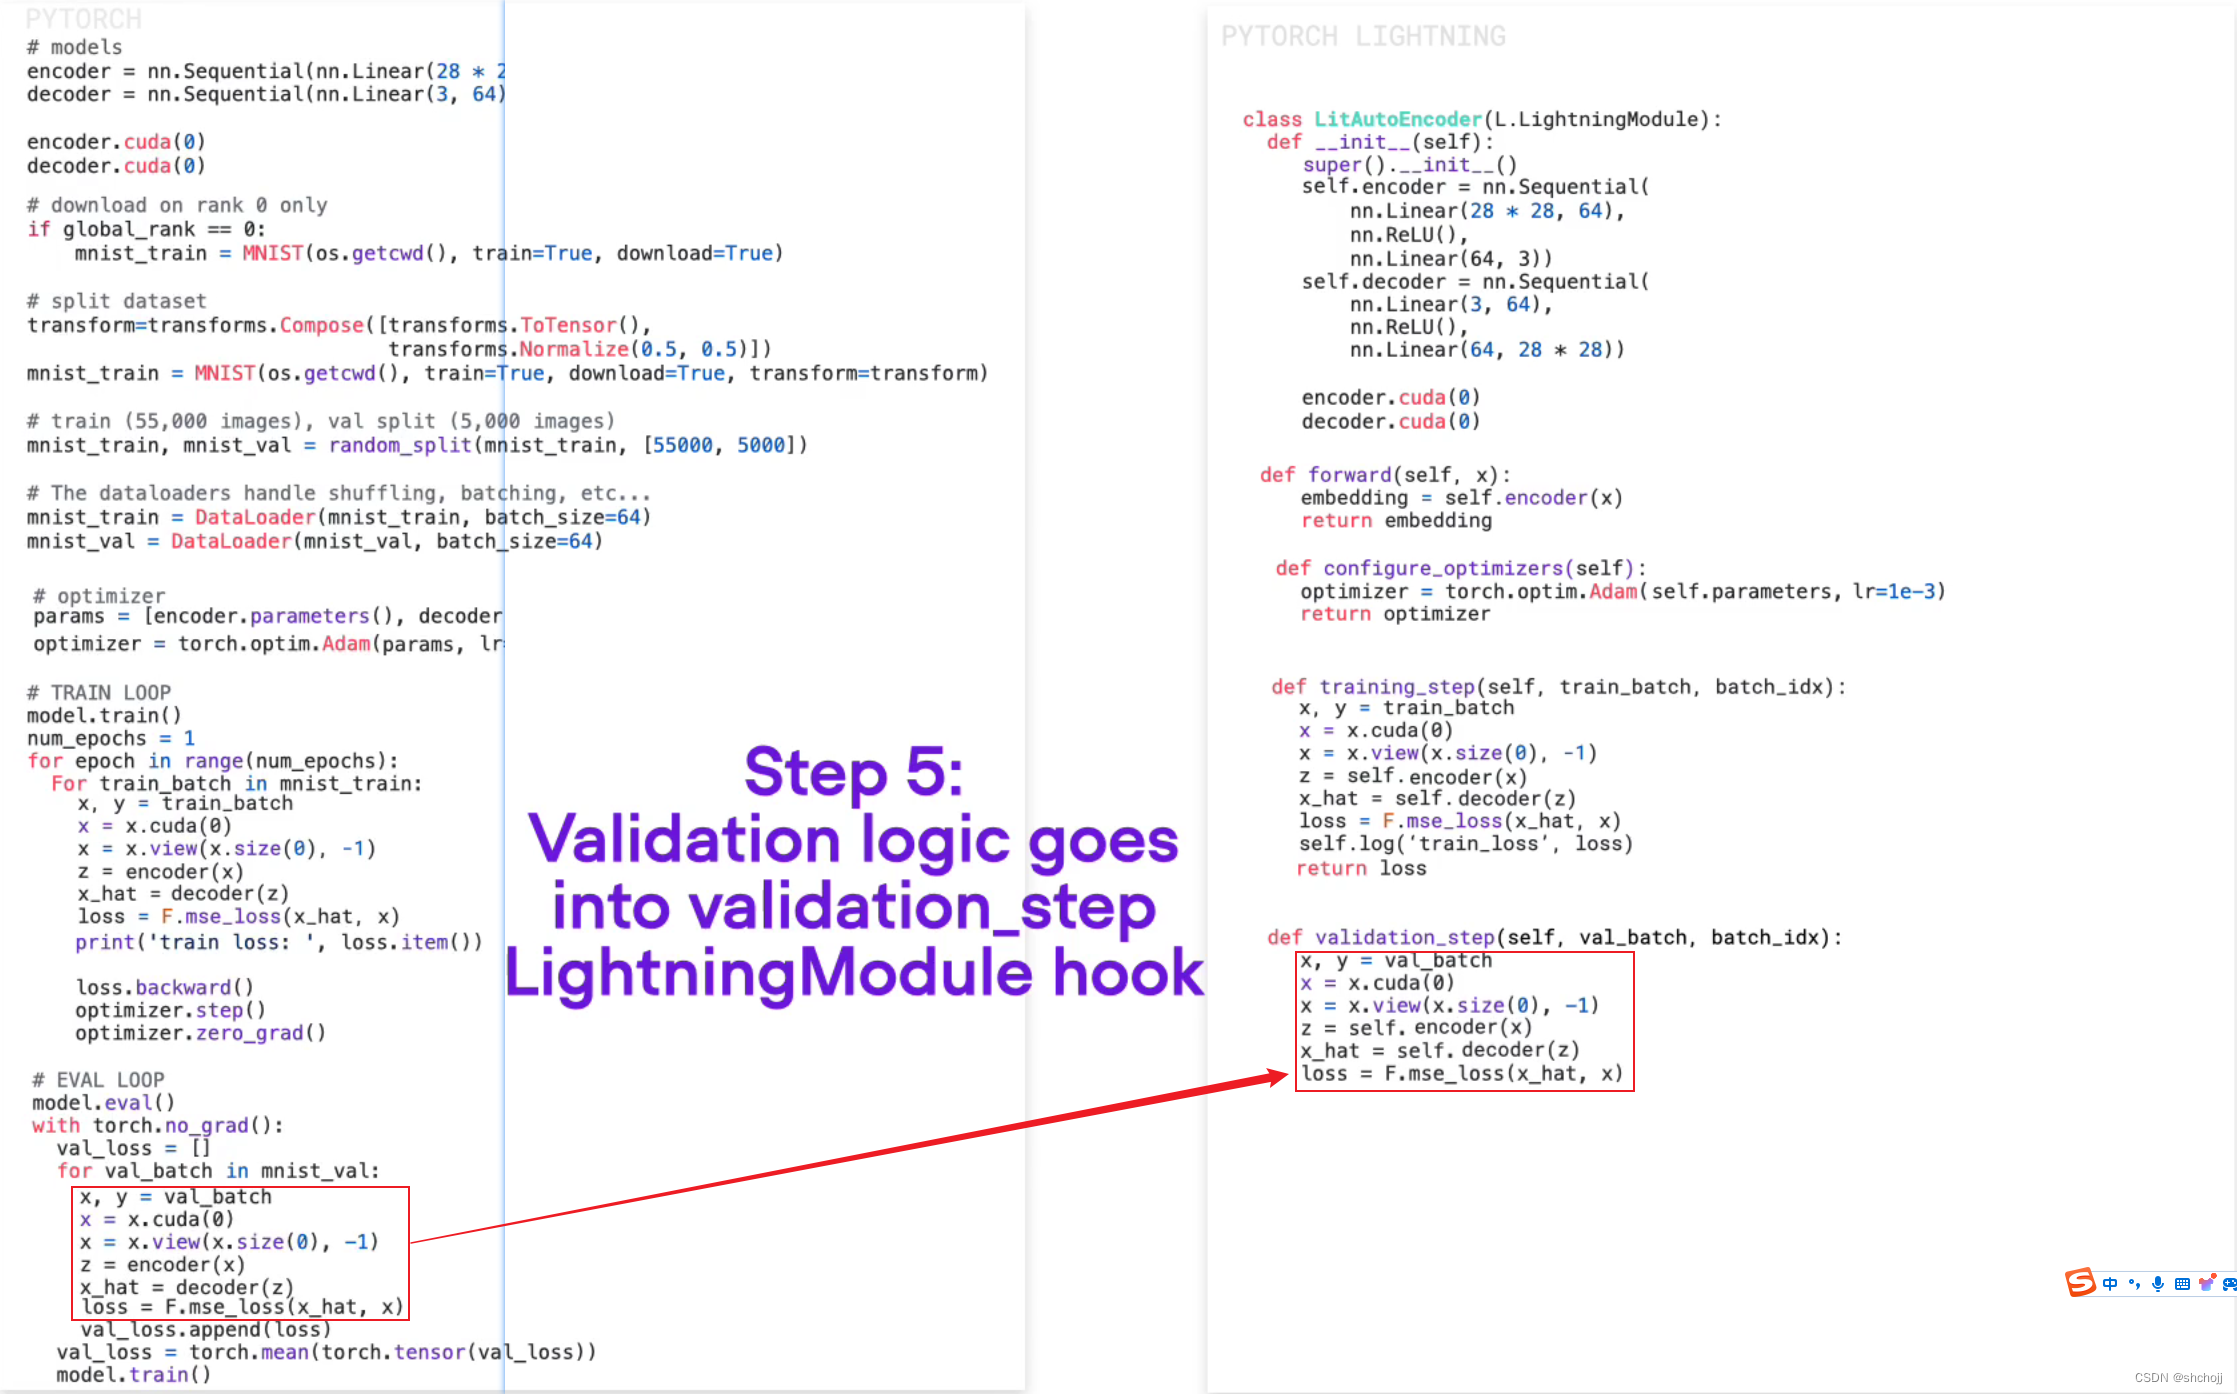
-
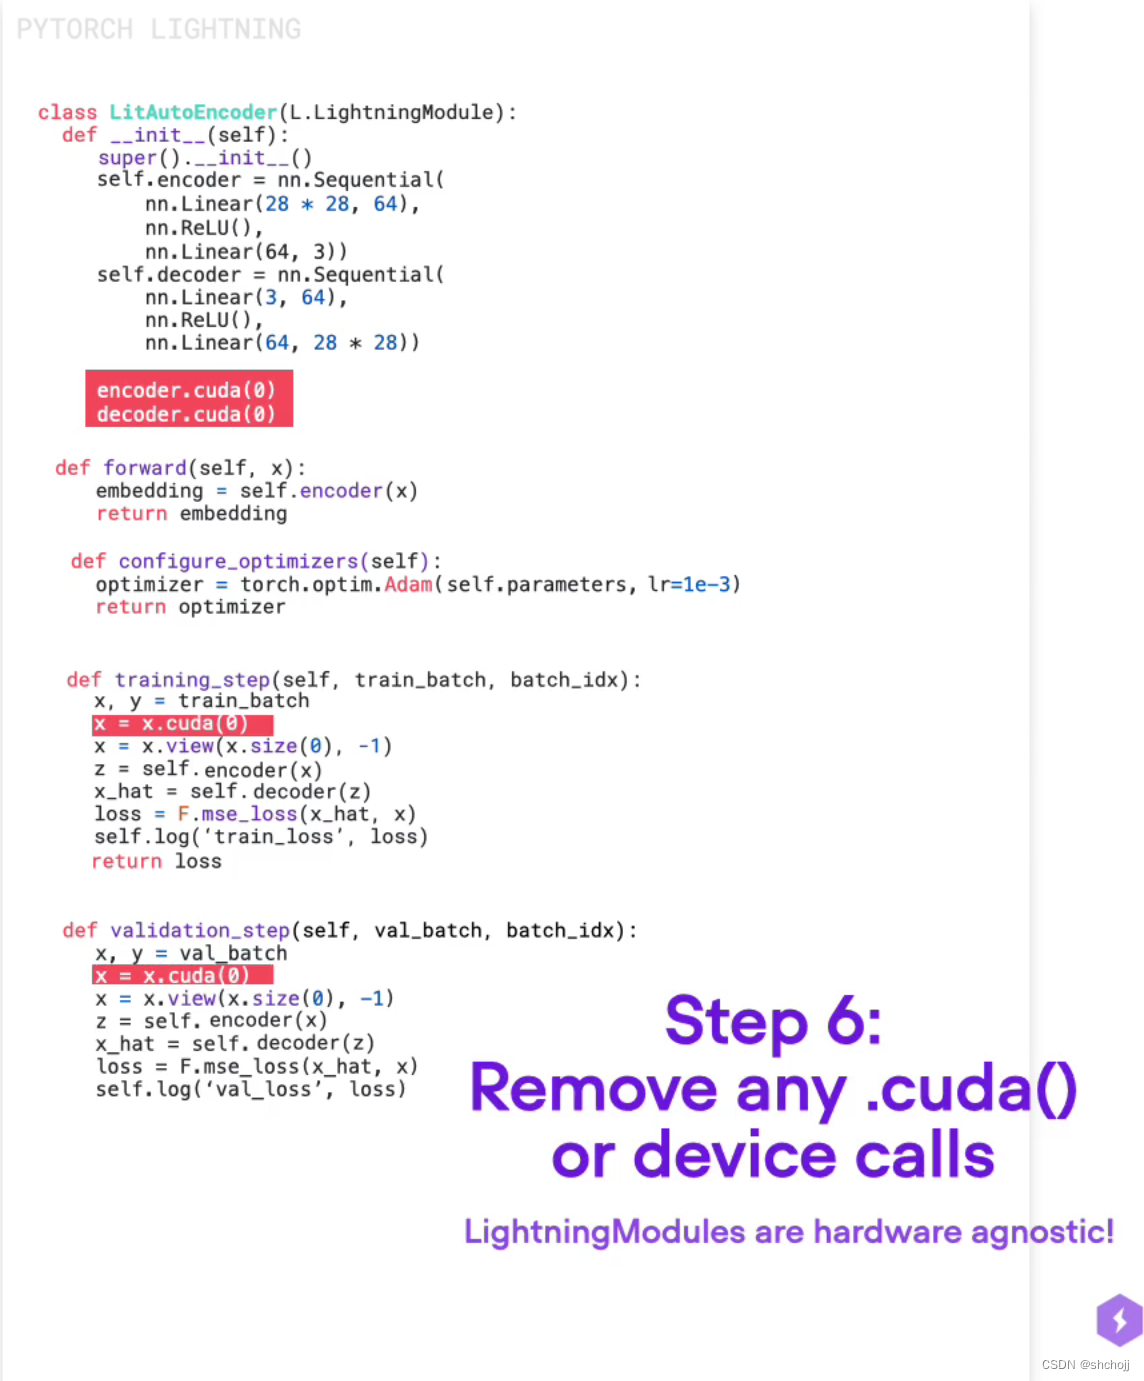
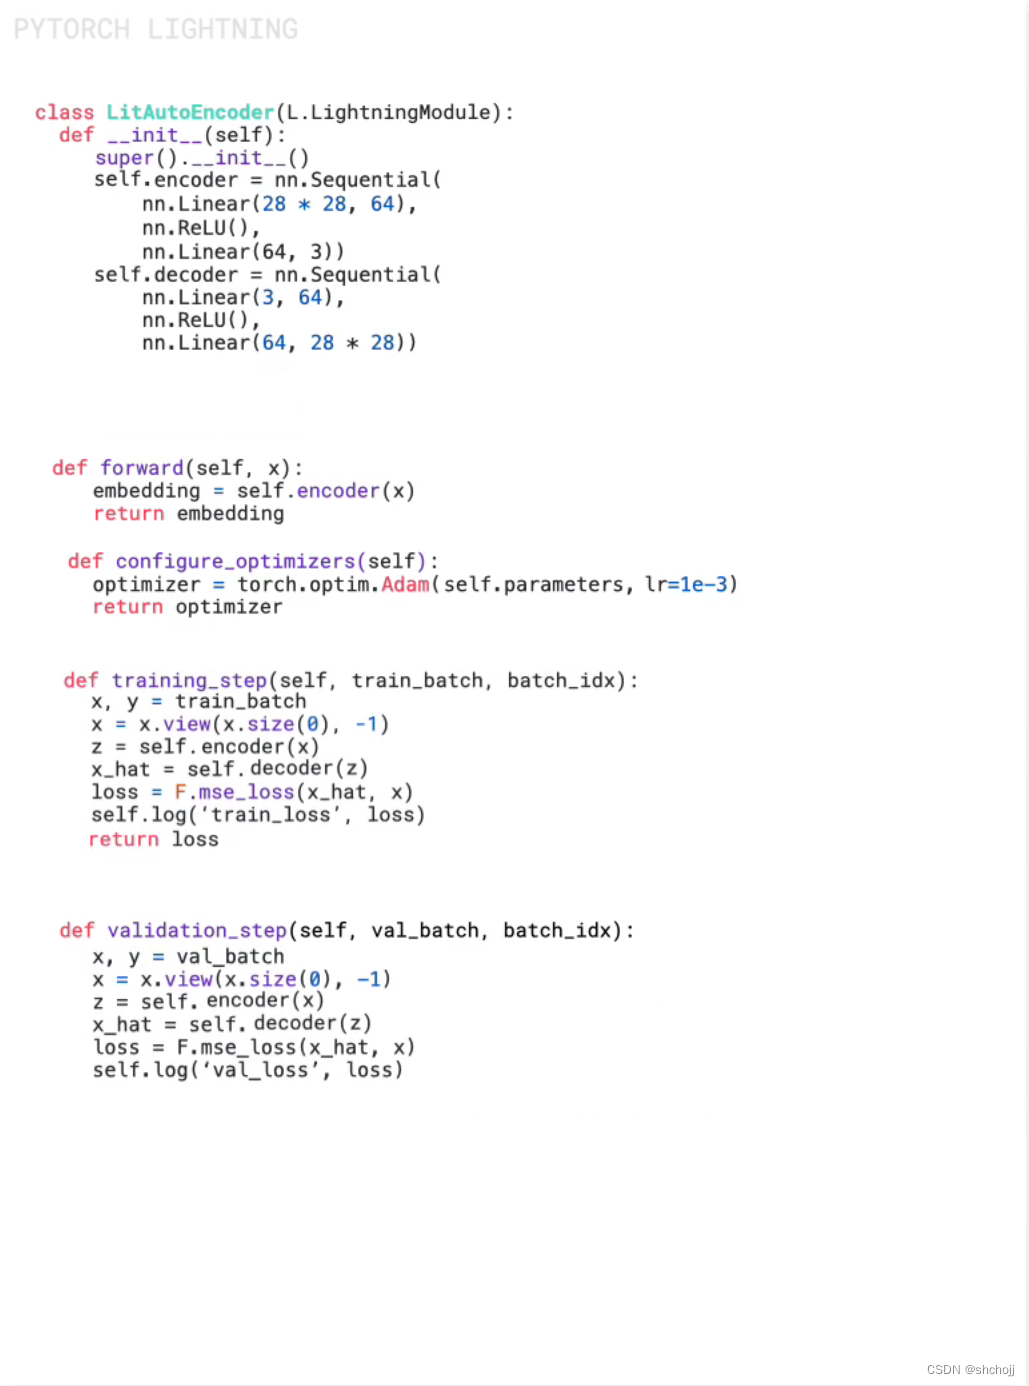
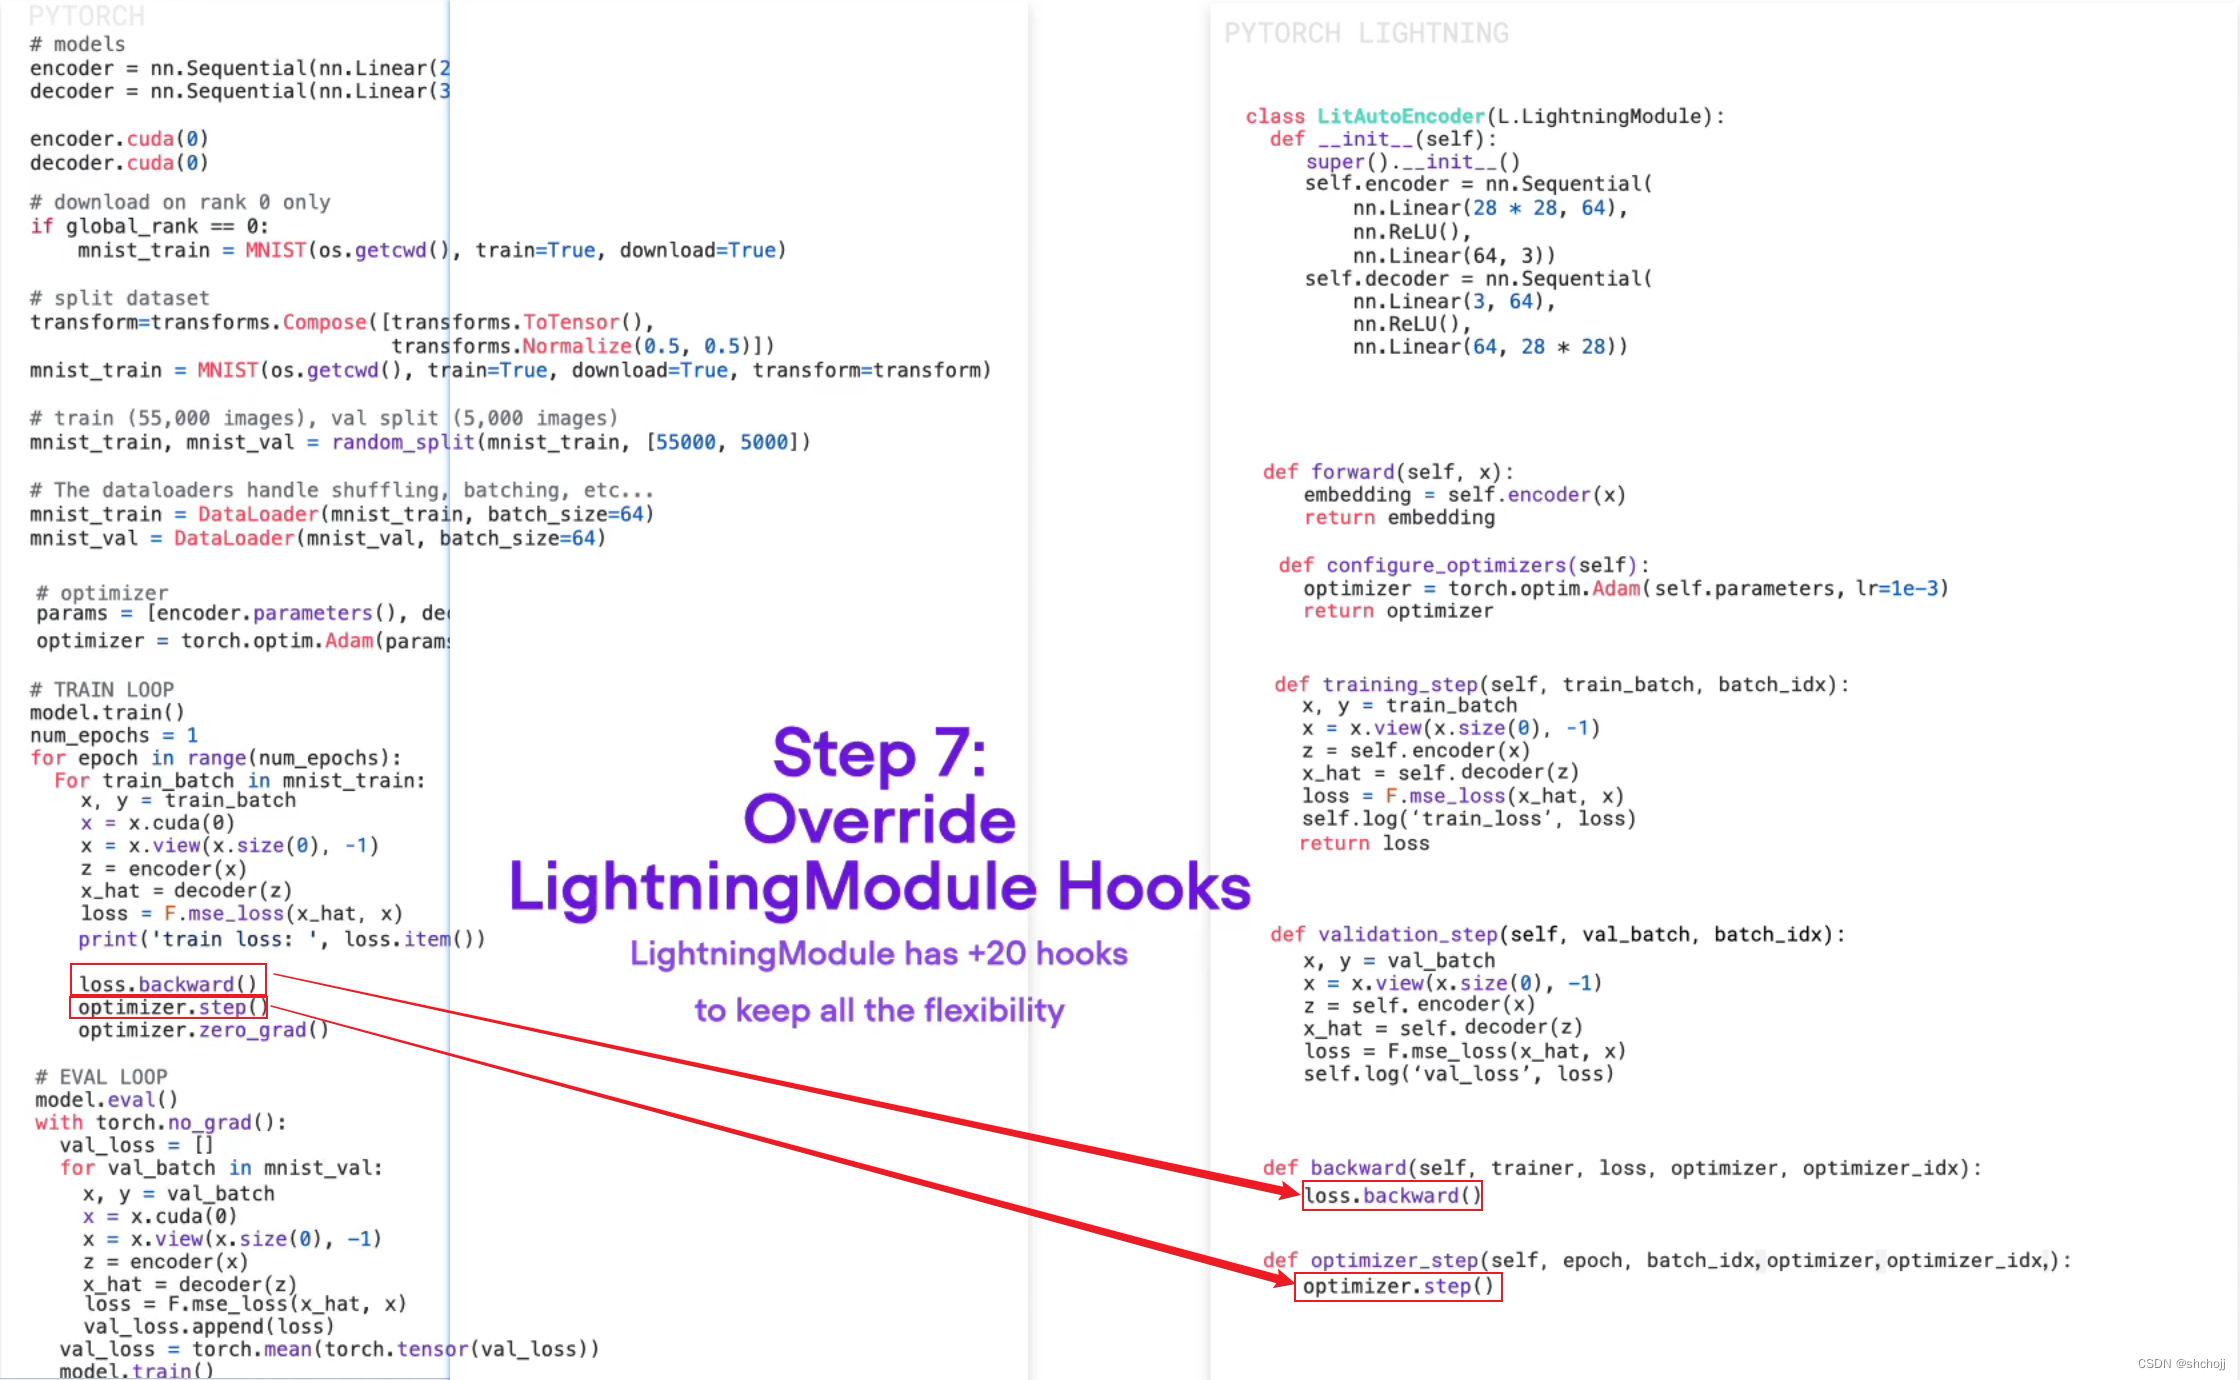
把有关于cuda的部分移除掉,后面会统一追加
-
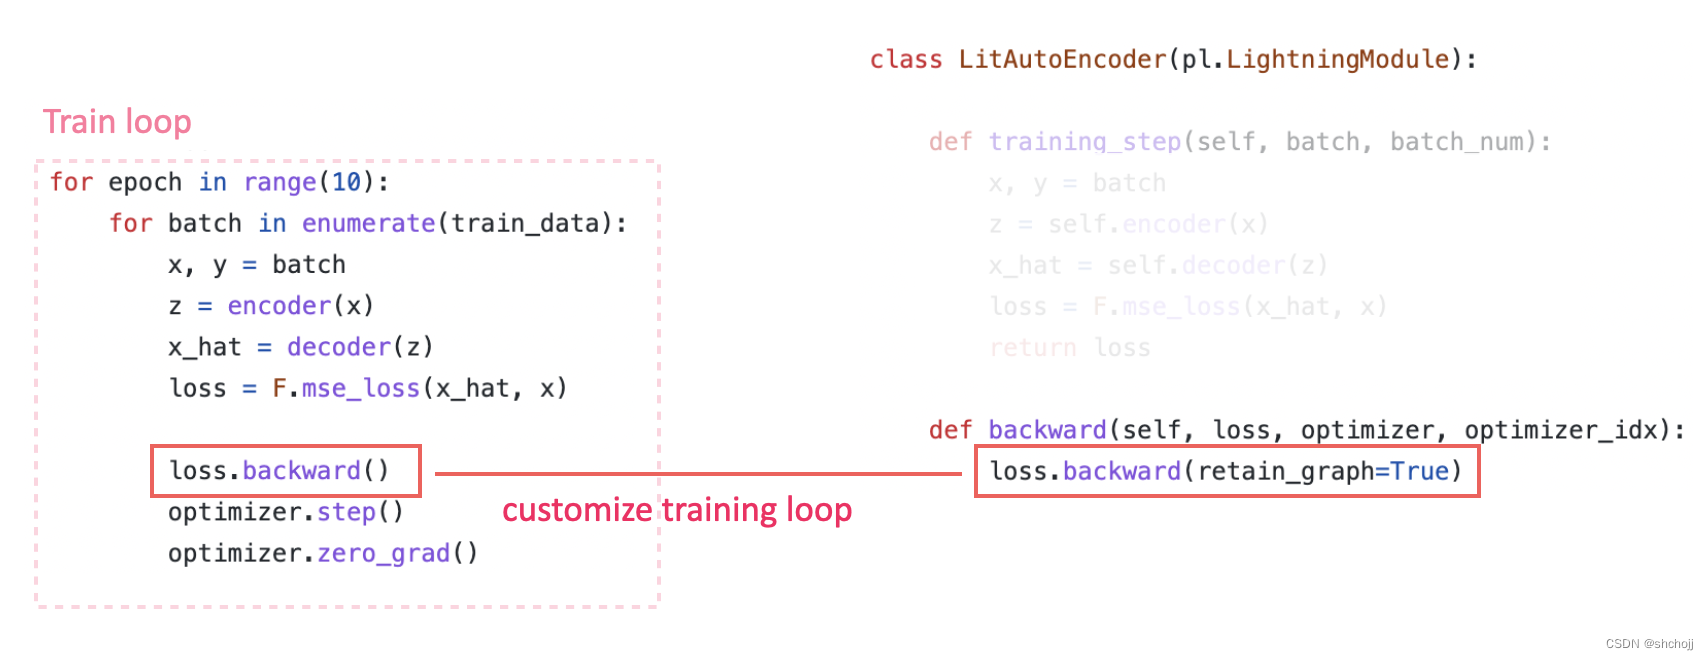
设置反向传播和优化器部分,也可以不显式的写明
-
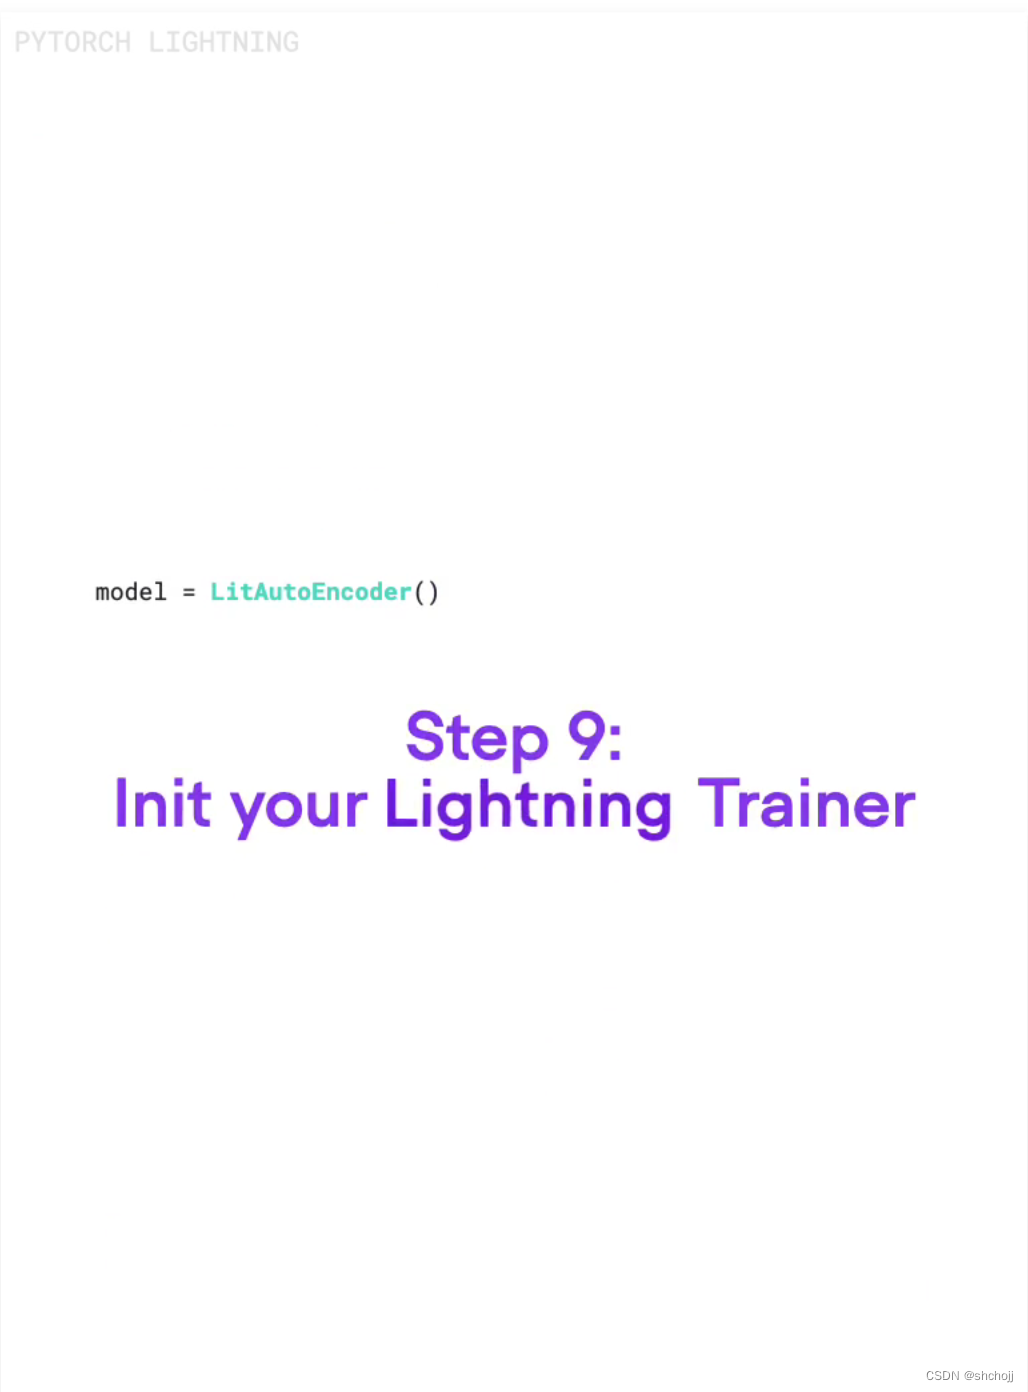
模型初始化

-
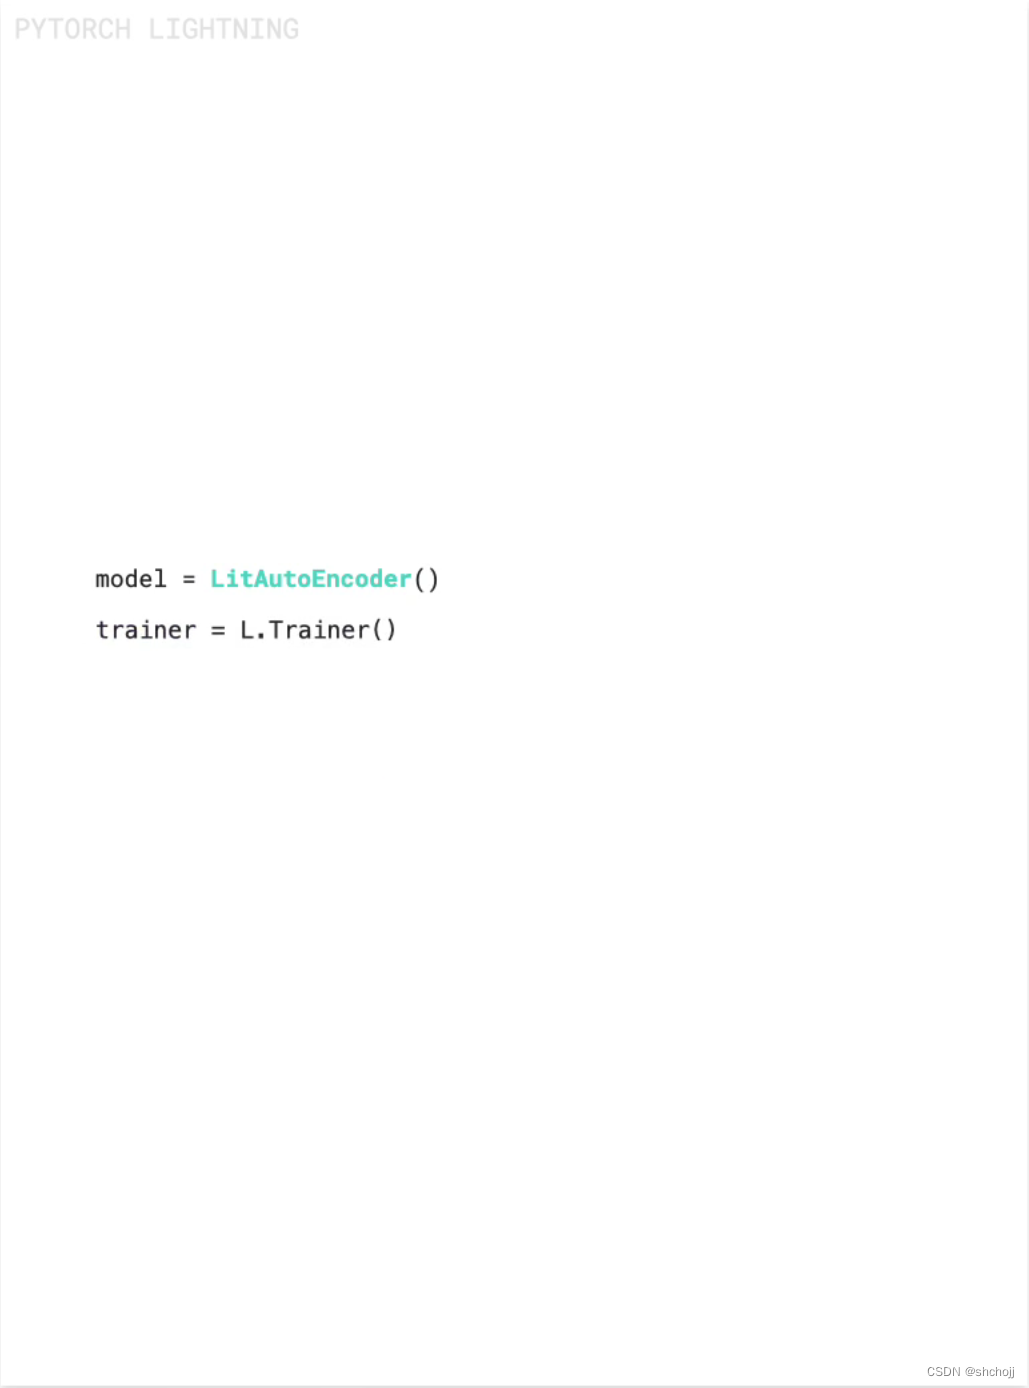
初始化训练器
优化器会自动的组合这些步骤

-
设置数据载入

-
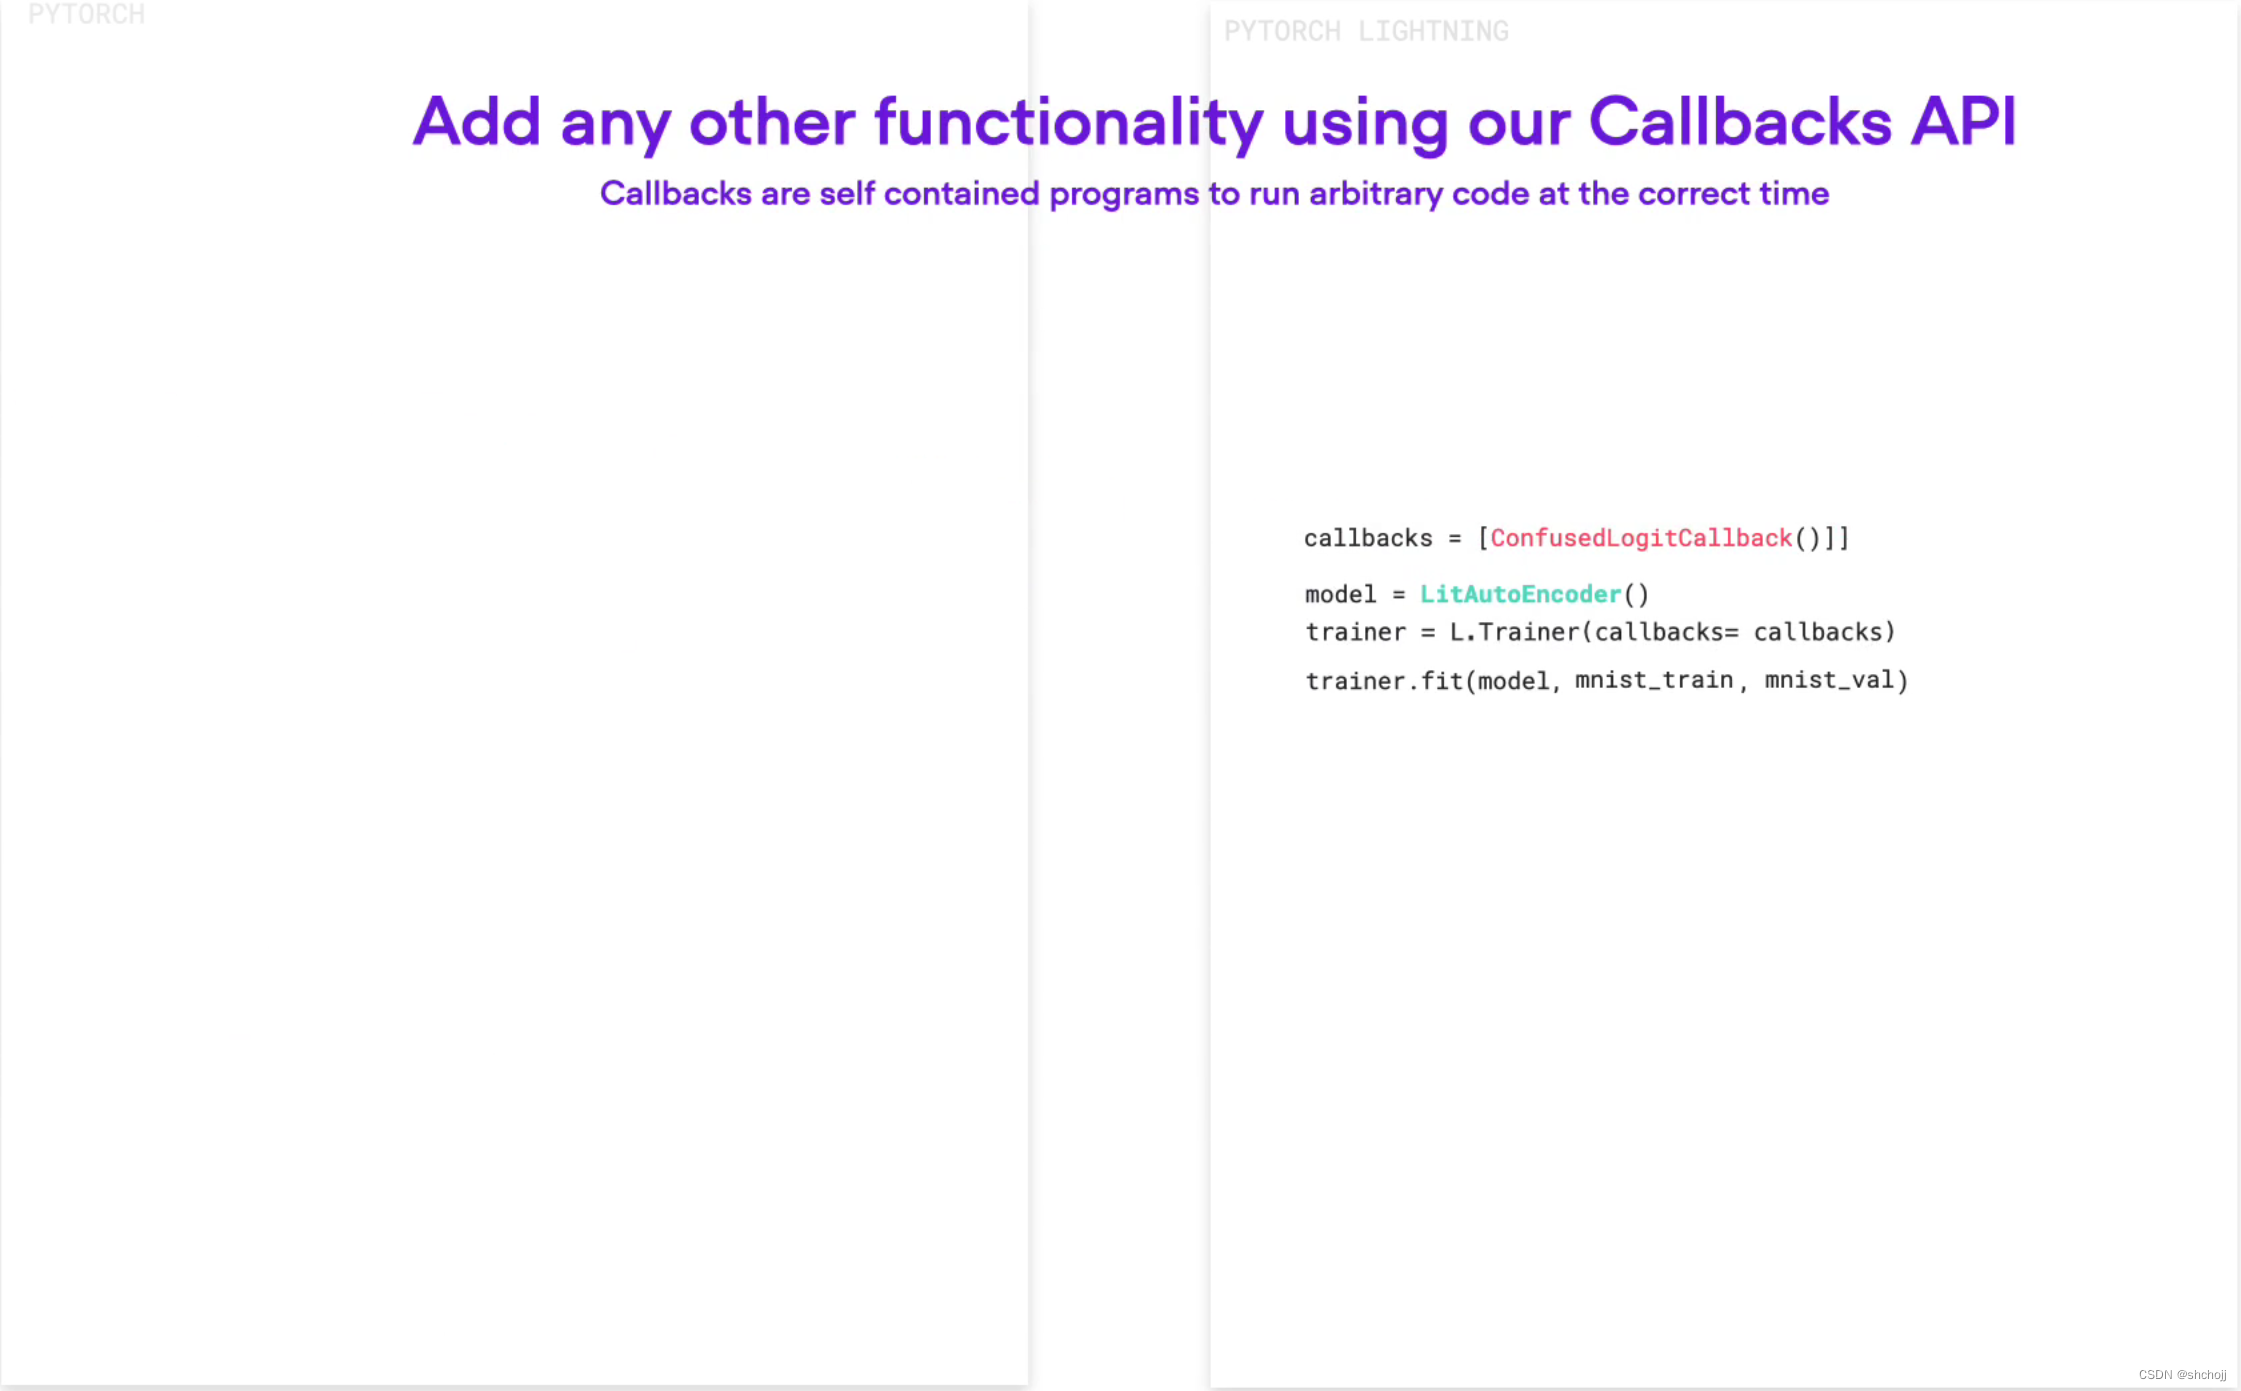
设置回调函数

-
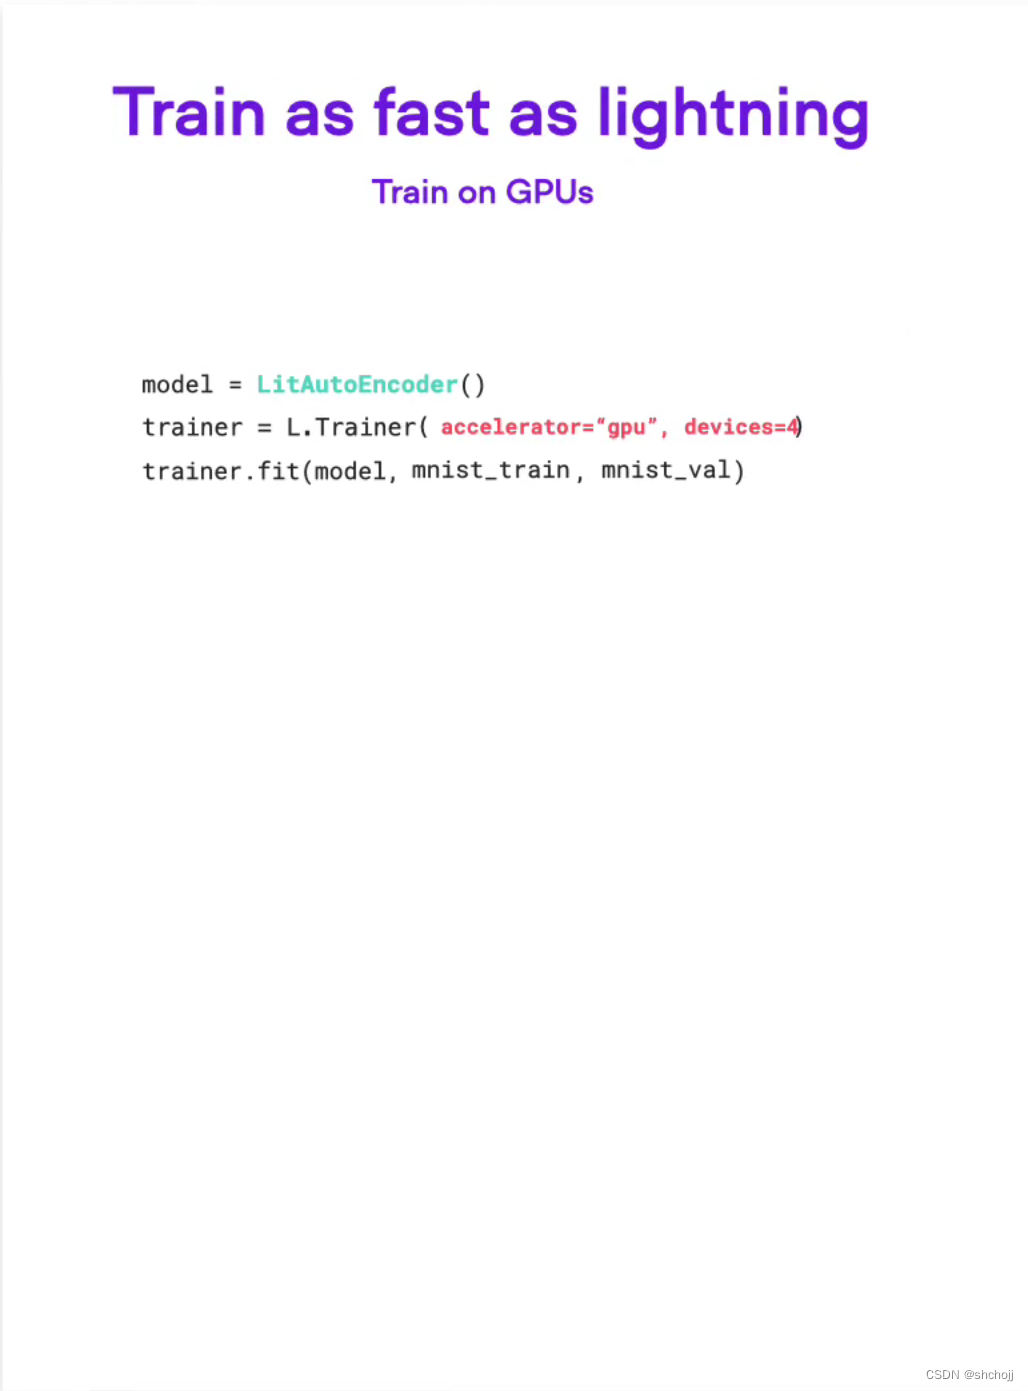
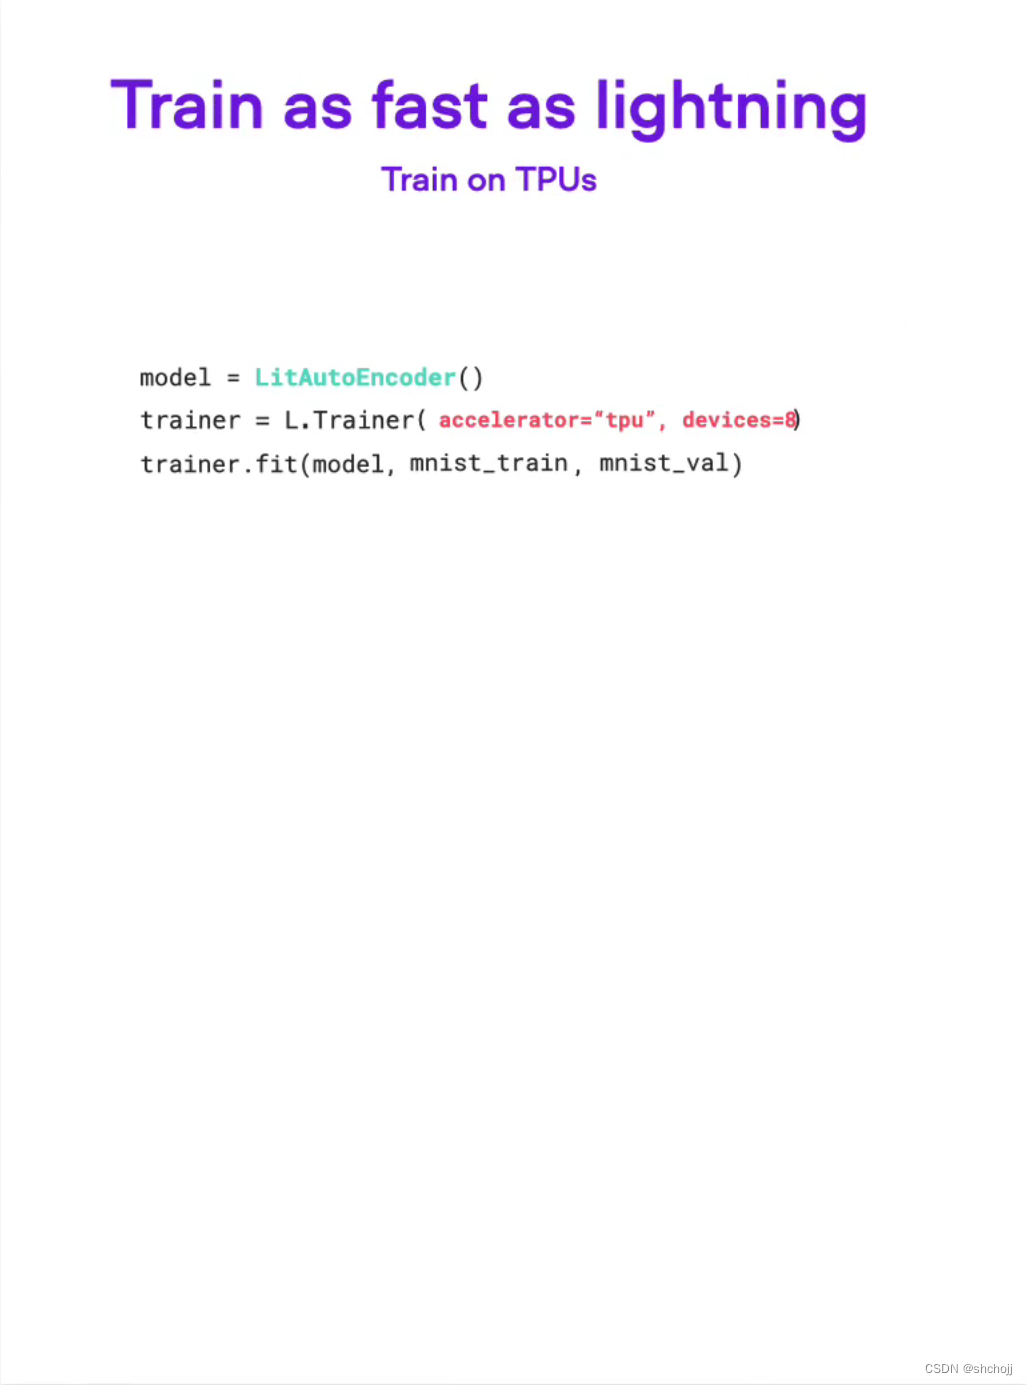
快速的设置GPU或者CPU
创建lightning的7个主要步骤
-
安装
pip install lightning -
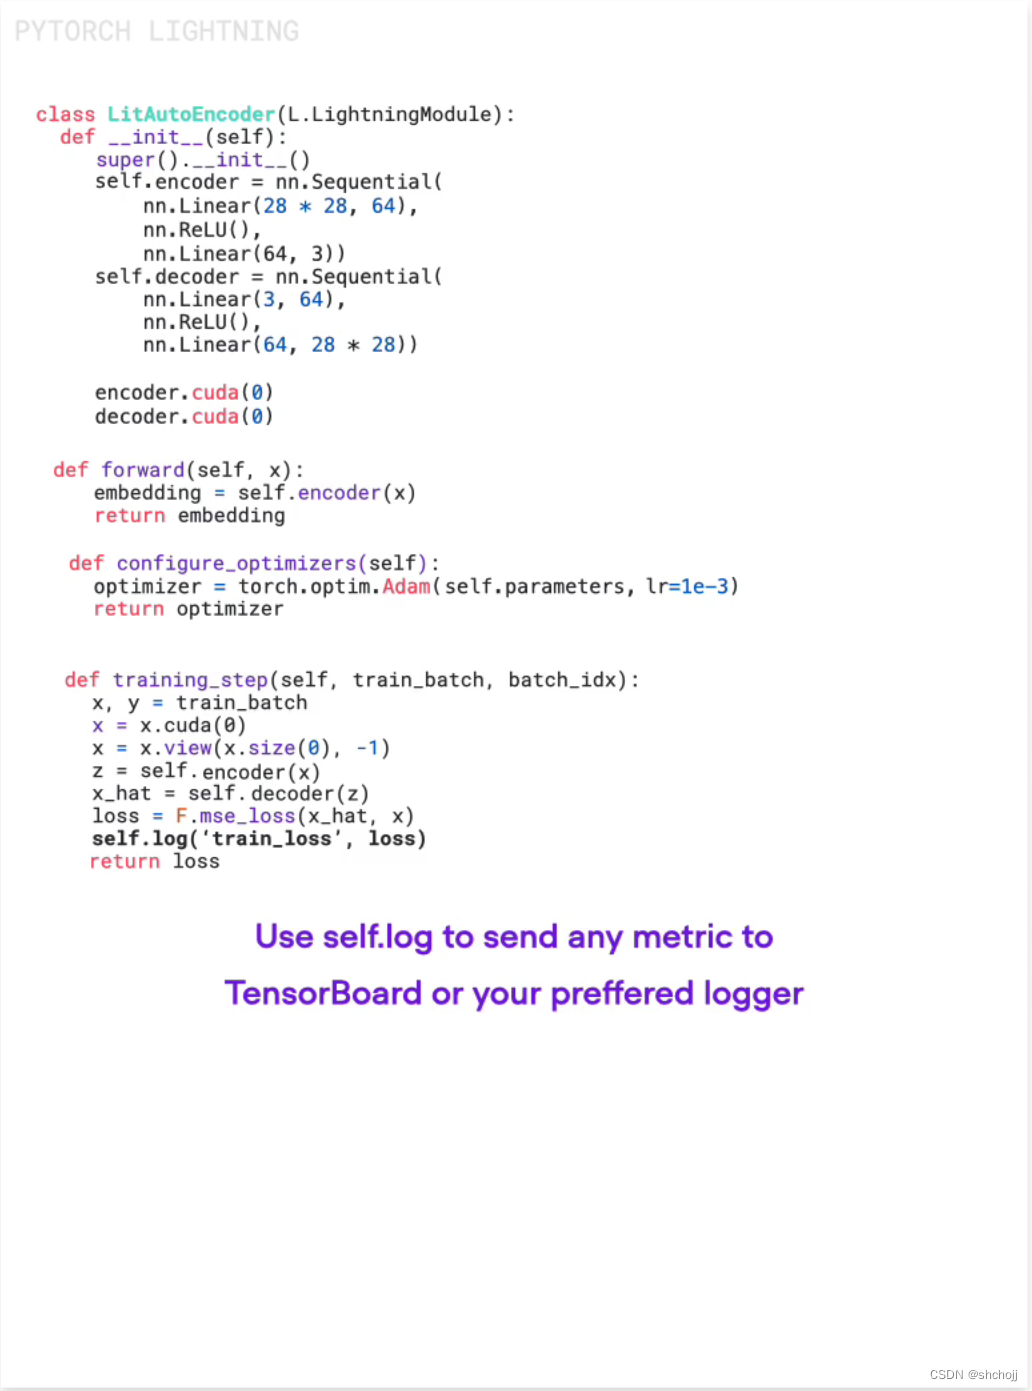
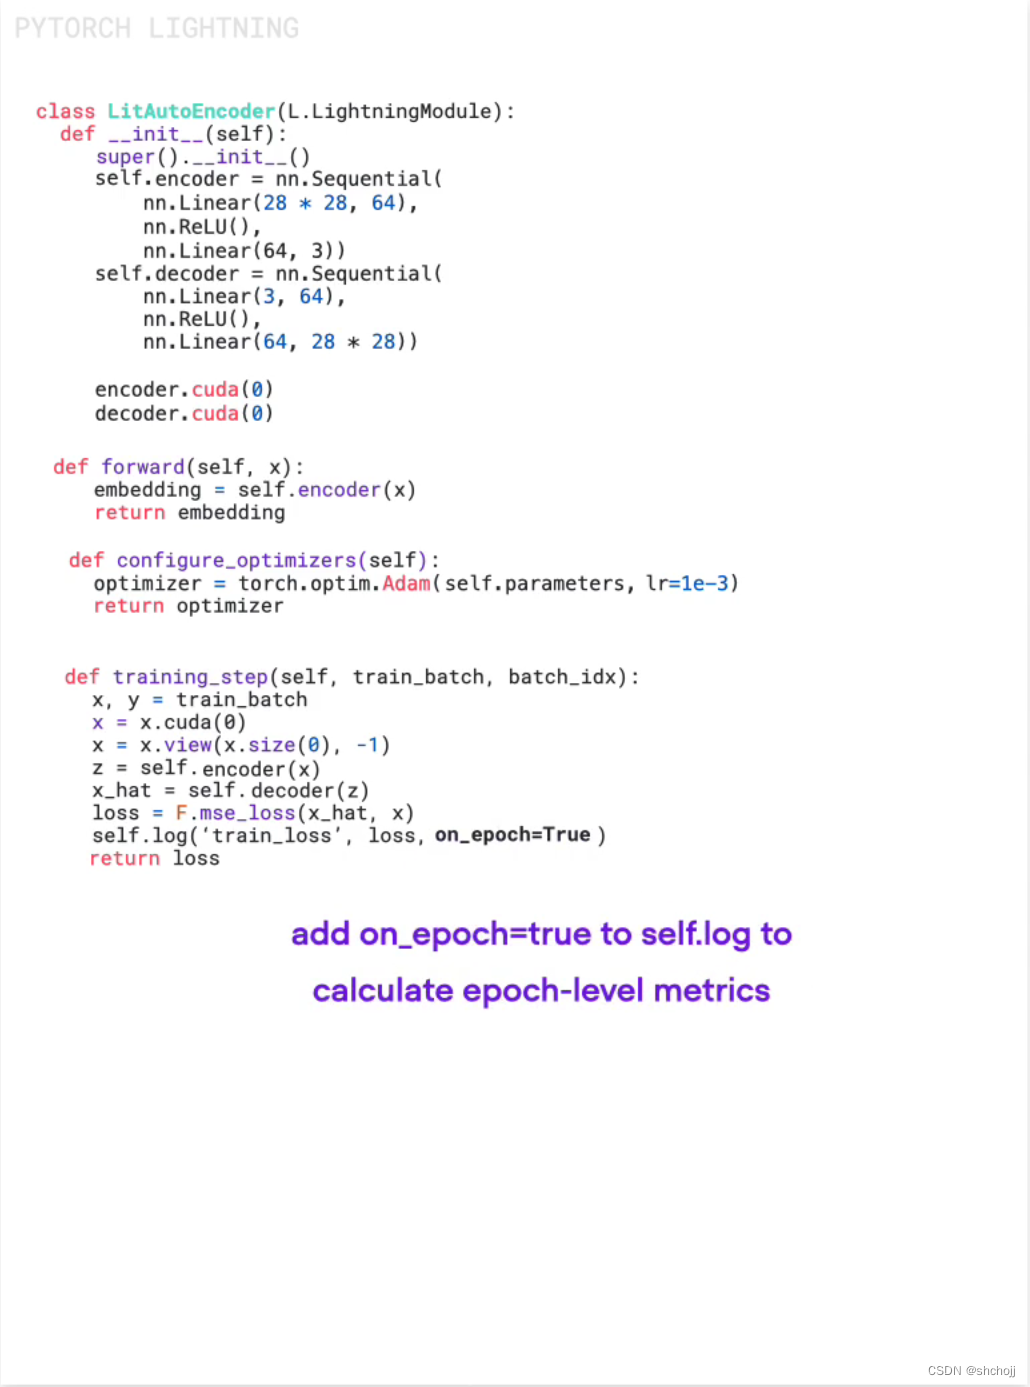
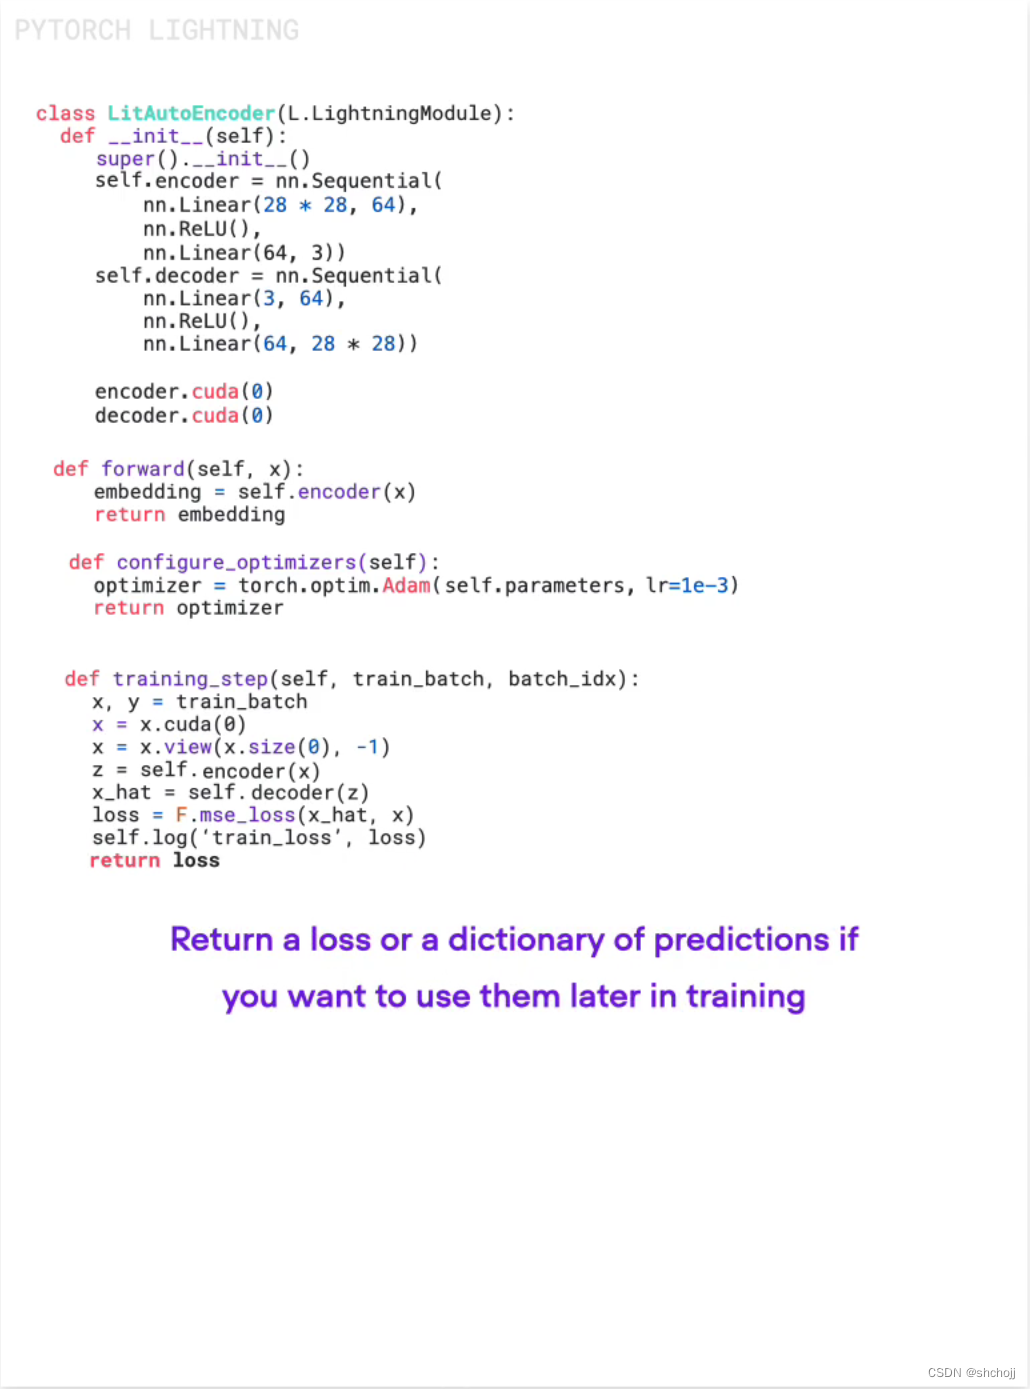
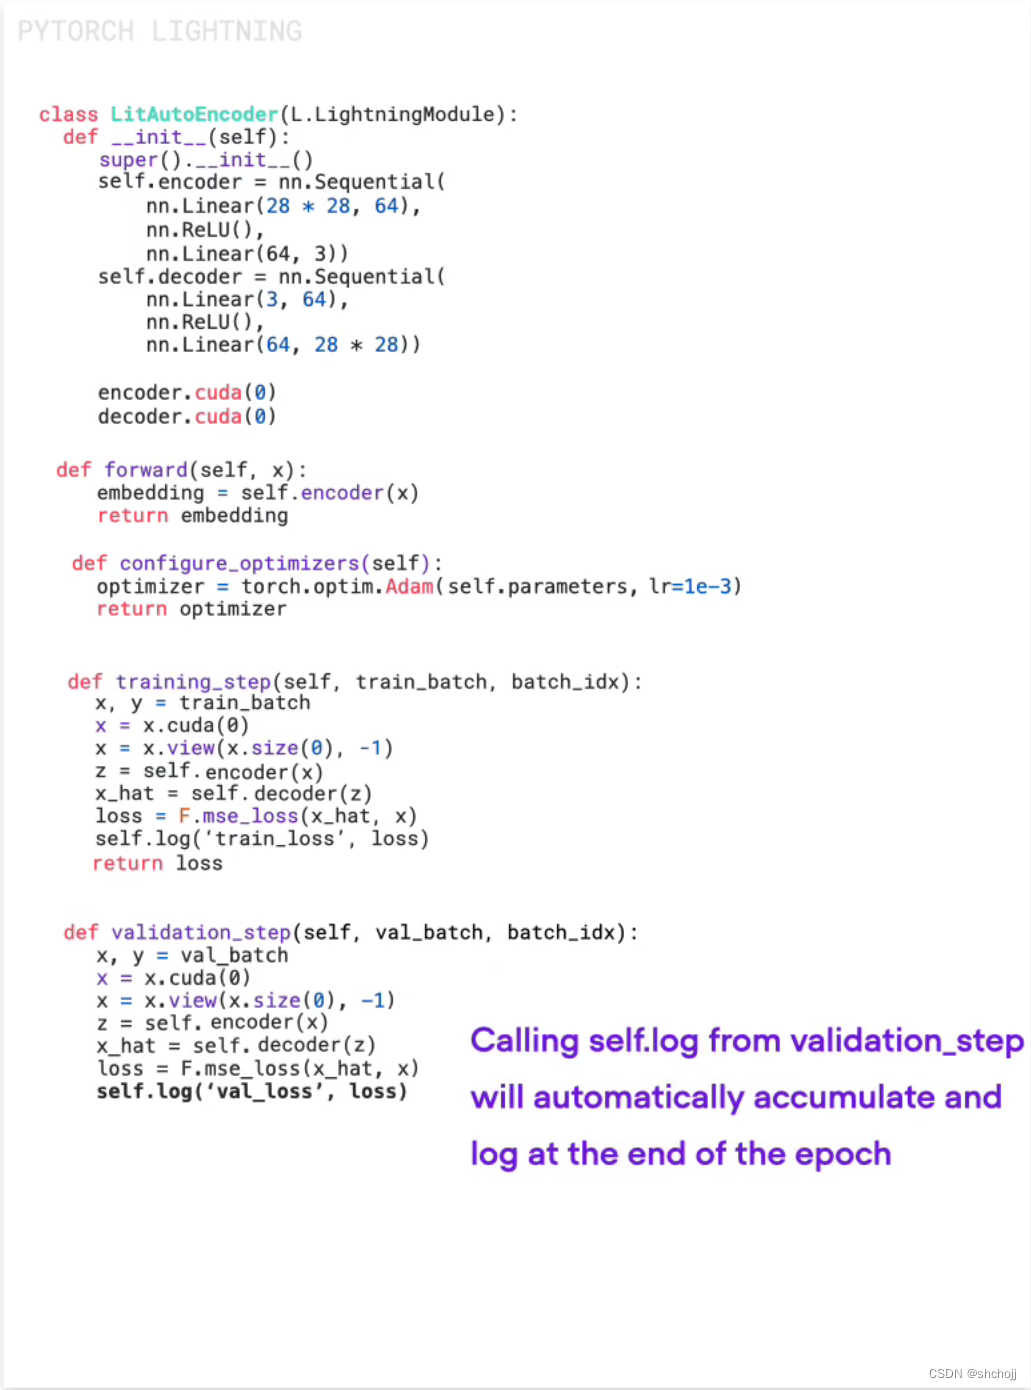
定义LightningModel,当然validation_step和test_step也是一样的
import os from torch import optim, nn, utils, Tensor from torchvision.datasets import MNIST from torchvision.transforms import ToTensor import lightning as L # define any number of nn.Modules (or use your current ones) encoder = nn.Sequential(nn.Linear(28 * 28, 64), nn.ReLU(), nn.Linear(64, 3)) decoder = nn.Sequential(nn.Linear(3, 64), nn.ReLU(), nn.Linear(64, 28 * 28)) # define the LightningModule class LitAutoEncoder(L.LightningModule): def __init__(self, encoder, decoder): super().__init__() self.encoder = encoder self.decoder = decoder def training_step(self, batch, batch_idx): # training_step defines the train loop. # it is independent of forward x, y = batch x = x.view(x.size(0), -1) z = self.encoder(x) x_hat = self.decoder(z) loss = nn.functional.mse_loss(x_hat, x) # Logging to TensorBoard (if installed) by default self.log("train_loss", loss) return loss def configure_optimizers(self): optimizer = optim.Adam(self.parameters(), lr=1e-3) return optimizer # init the autoencoder autoencoder = LitAutoEncoder(encoder, decoder) -
定义一个dataload
# setup data dataset = MNIST(os.getcwd(), download=True, transform=ToTensor()) train_loader = utils.data.DataLoader(dataset) -
开启train
# train the model (hint: here are some helpful Trainer arguments for rapid idea iteration)
trainer = L.Trainer(limit_train_batches=100, max_epochs=1)
trainer.fit(model=autoencoder, train_dataloaders=train_loader)
trainer里面有很多的小技巧
- Epoch and batch iteration
optimizer.step(),loss.backward(),optimizer.zero_grad()calls- Calling of
model.eval(), enabling/disabling grads during evaluation - Checkpoint Saving and Loading
- Tensorboard (see loggers options)
- Multi-GPU support
- TPU
- 16-bit precision AMP support
-
模型预测
# load checkpoint checkpoint = "./lightning_logs/version_0/checkpoints/epoch=0-step=100.ckpt" autoencoder = LitAutoEncoder.load_from_checkpoint(checkpoint, encoder=encoder, decoder=decoder) # choose your trained nn.Module encoder = autoencoder.encoder encoder.eval() # embed 4 fake images! fake_image_batch = torch.rand(4, 28 * 28, device=autoencoder.device) embeddings = encoder(fake_image_batch) print("⚡" * 20, "\nPredictions (4 image embeddings):\n", embeddings, "\n", "⚡" * 20) -
训练可视化,如果有tensorboard的话,直接打开网页http://localhost:6006/
tensorboard --logdir . -
改变训练参数
# train on 4 GPUs
trainer = L.Trainer(
    devices=4,
    accelerator="gpu",
 )

# train 1TB+ parameter models with Deepspeed/fsdp
trainer = L.Trainer(
    devices=4,
    accelerator="gpu",
    strategy="deepspeed_stage_2",
    precision=16
 )

# 20+ helpful flags for rapid idea iteration
trainer = L.Trainer(
    max_epochs=10,
    min_epochs=5,
    overfit_batches=1
 )

# access the latest state of the art techniques
trainer = L.Trainer(callbacks=[StochasticWeightAveraging(...)])
其他使用技巧
-
自定义的train loop
-
Trainer的扩展
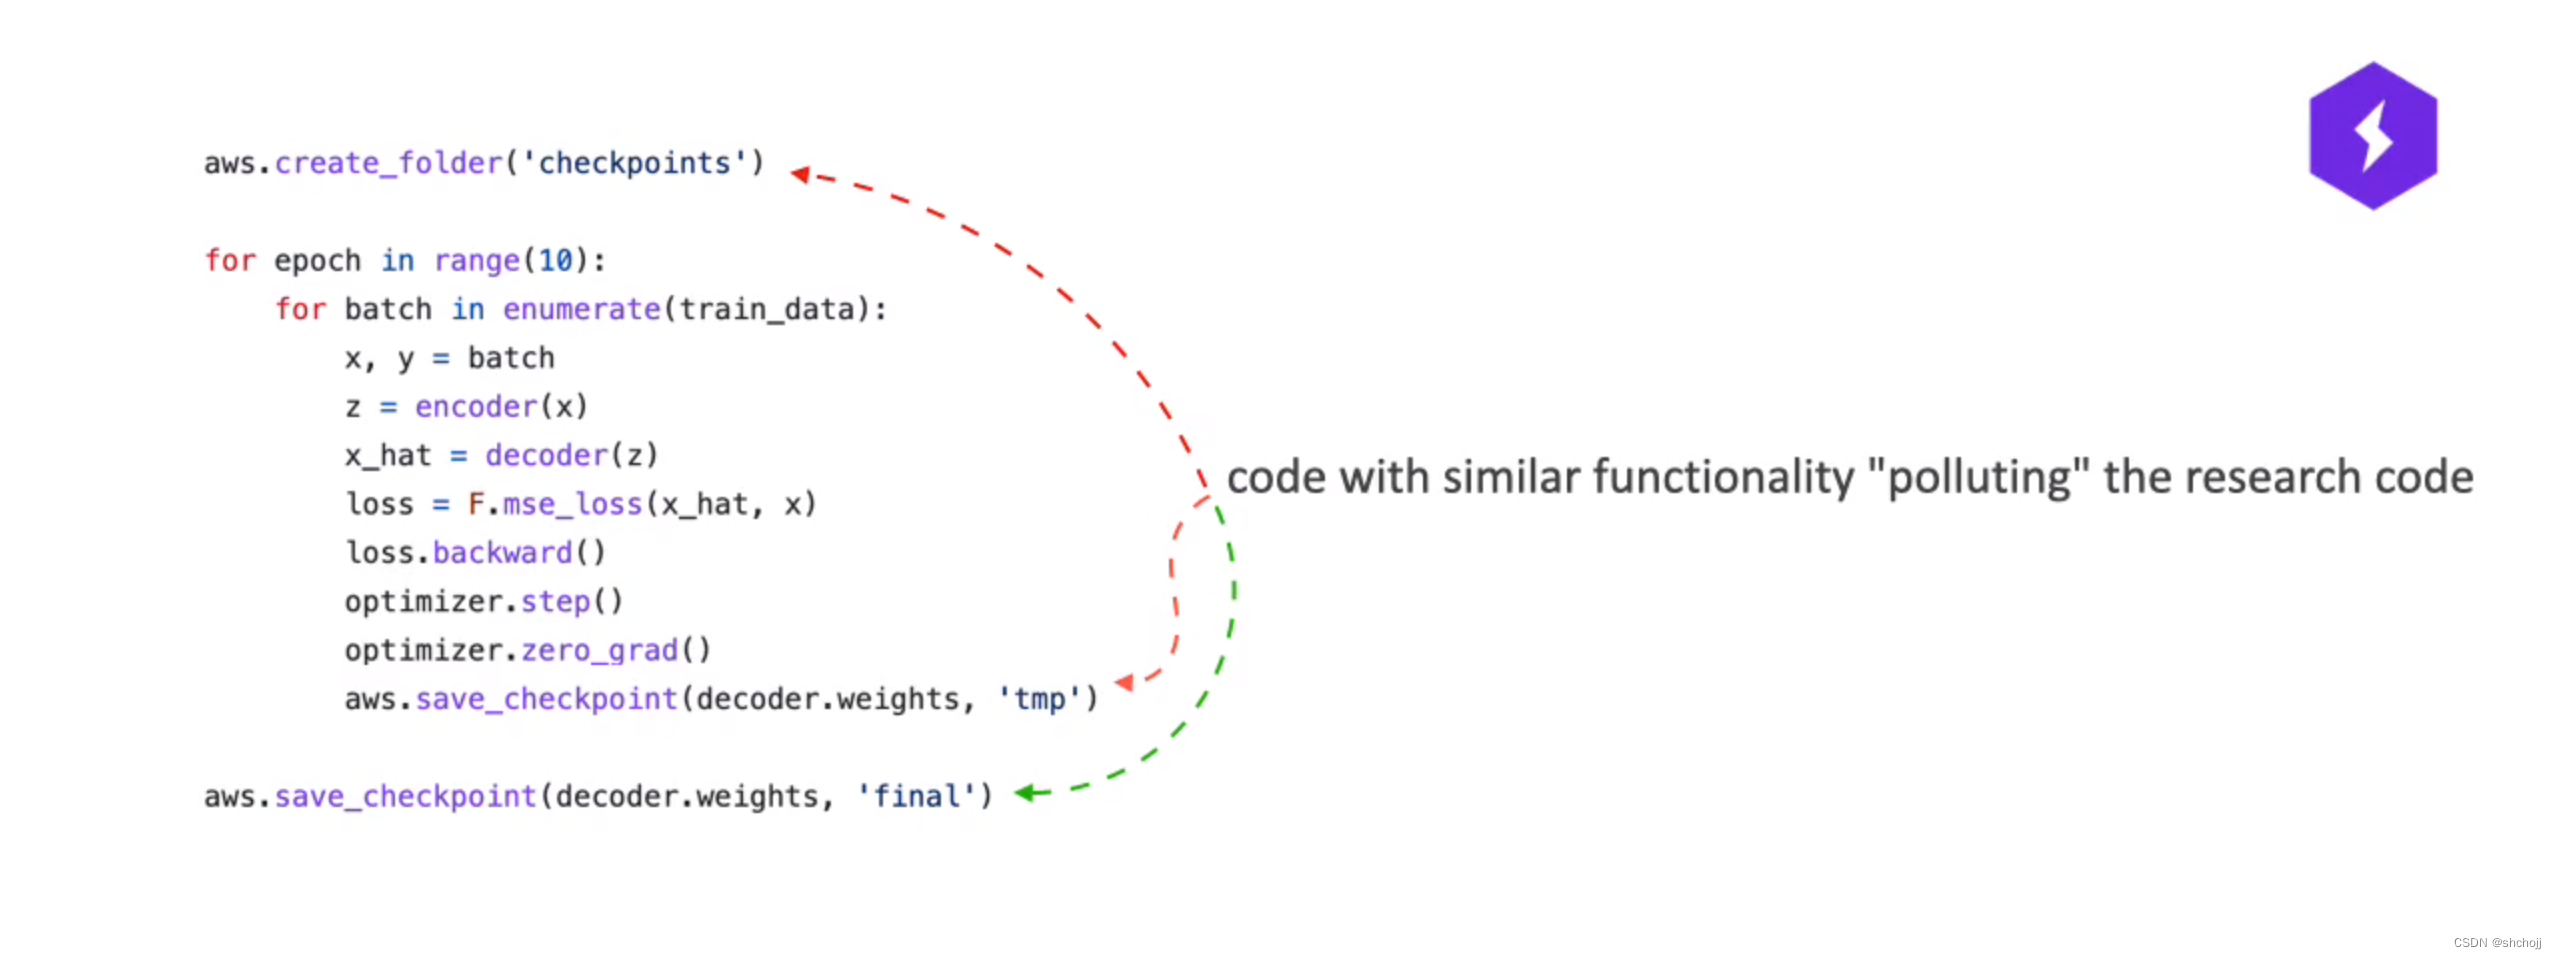
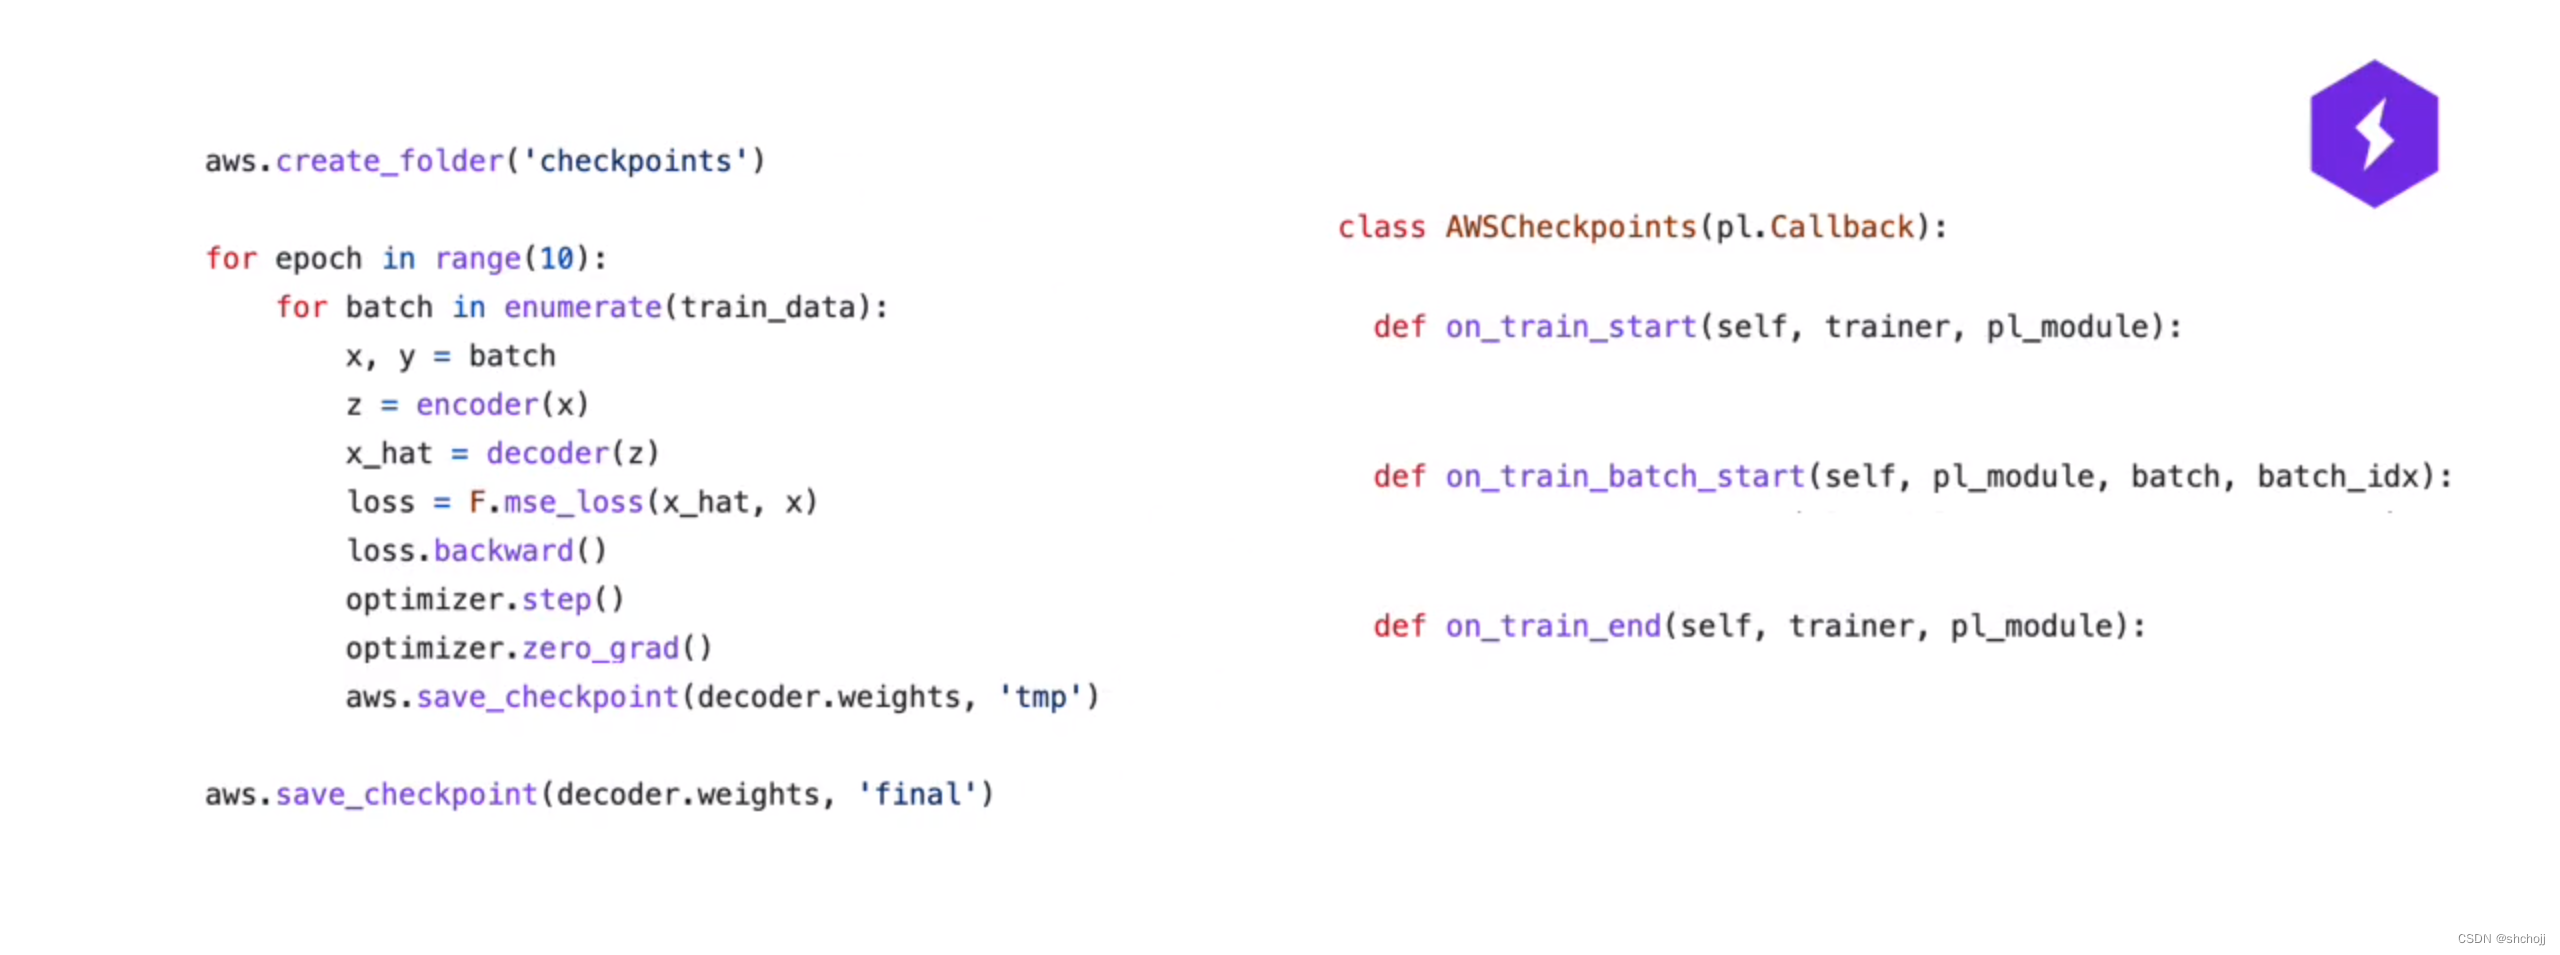
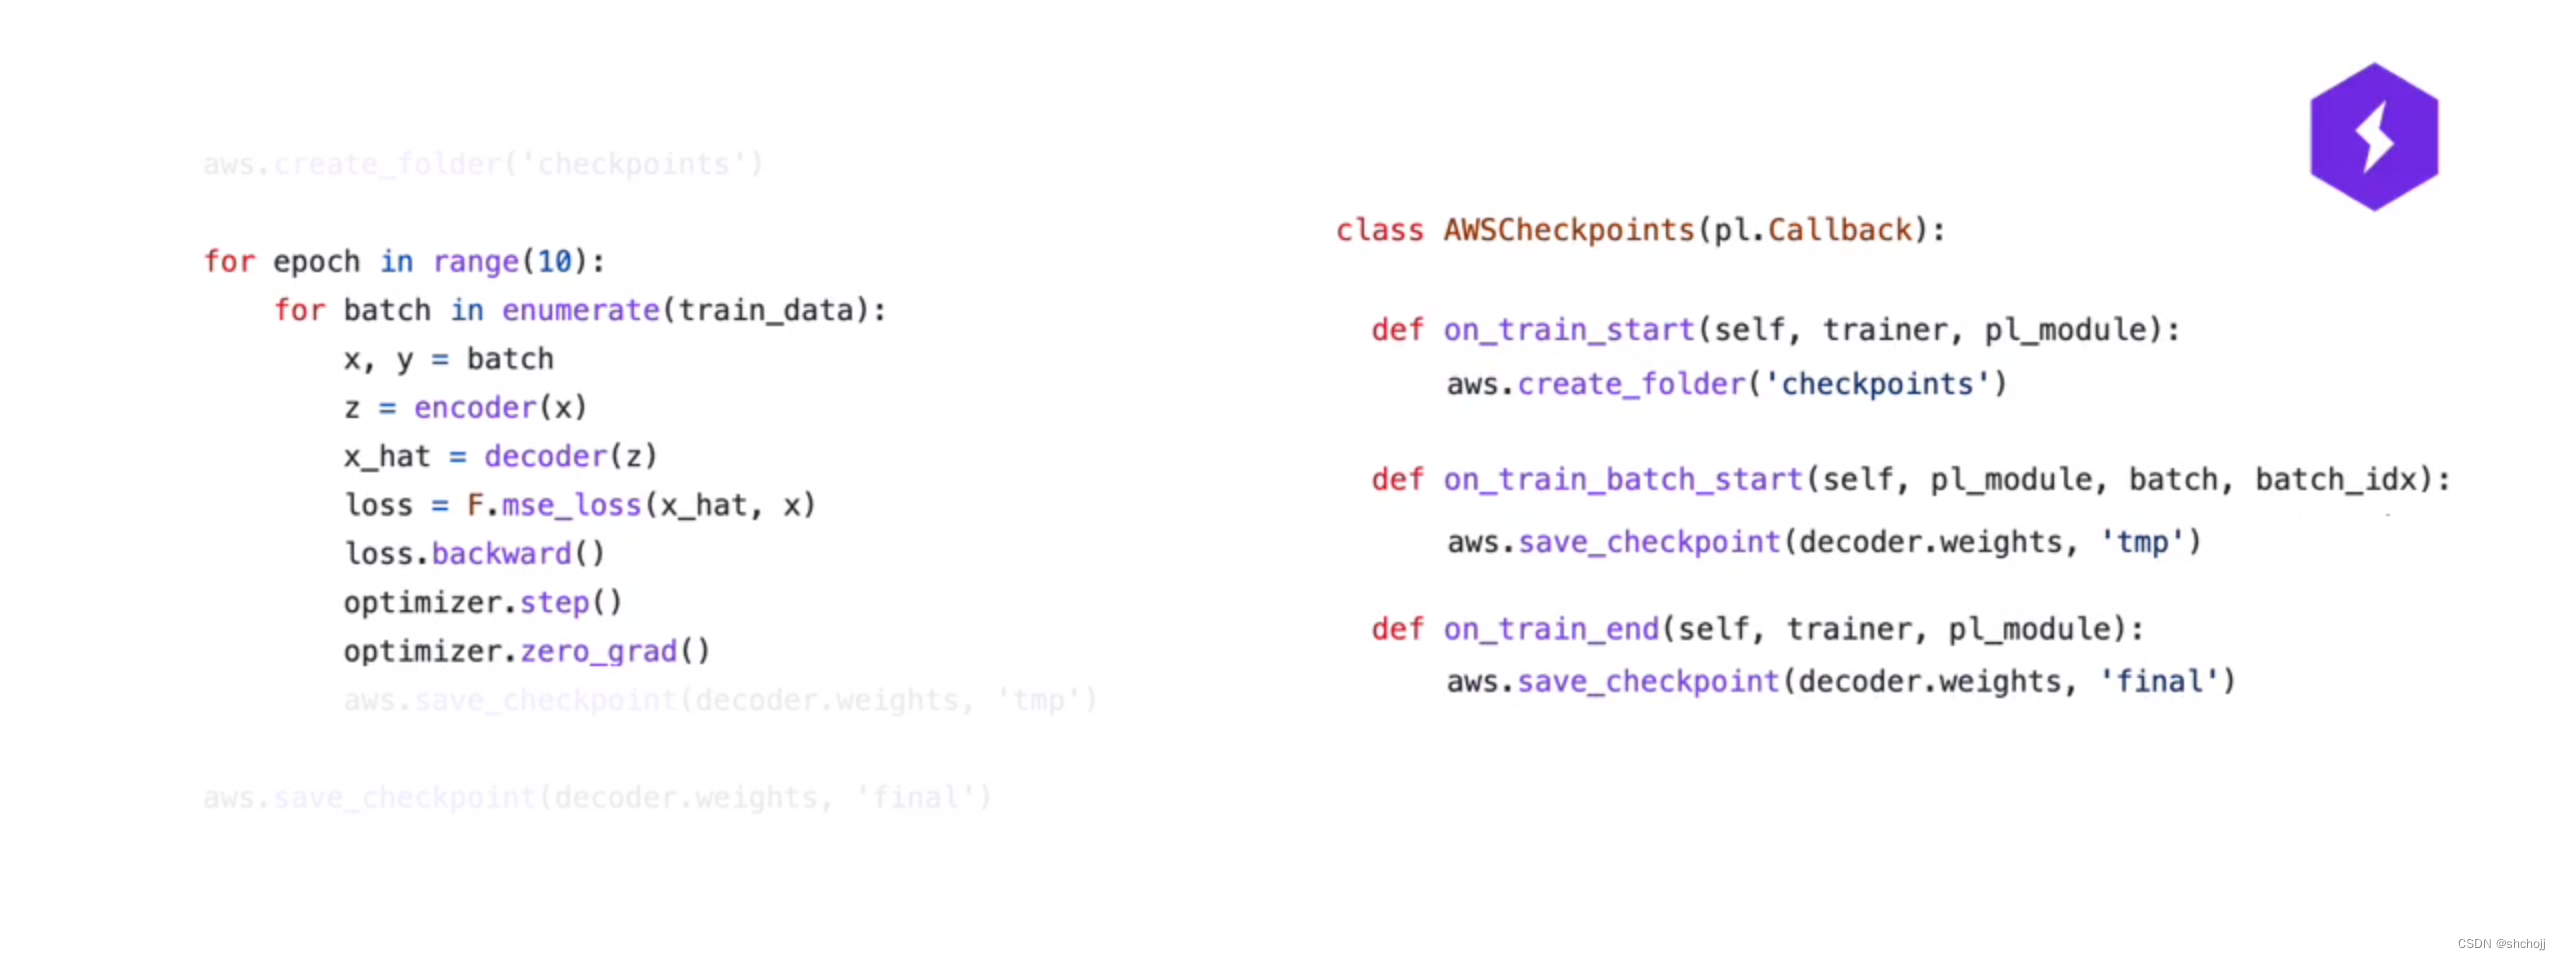
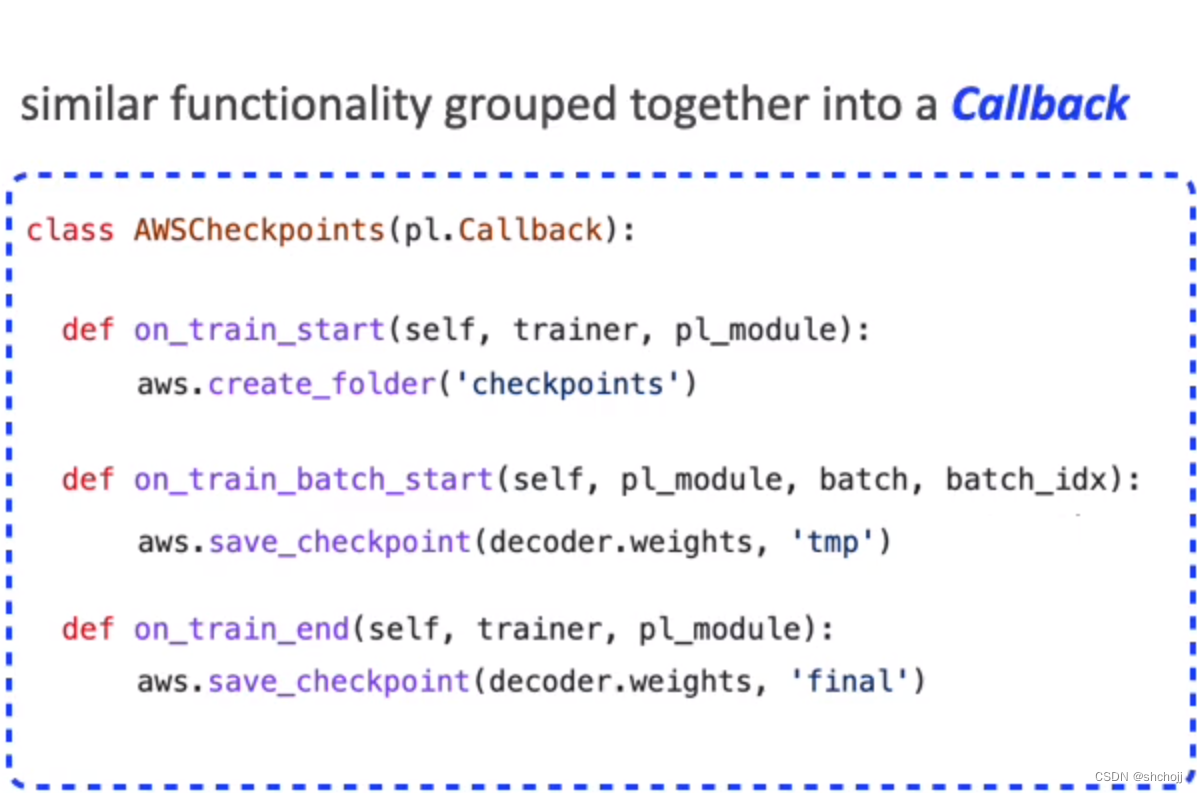
如果您有多行具有相似功能的代码,您可以使用回调将它们轻松地分组在一起,并同时打开或关闭所有这些行。
-
使用pytorch的原始循环


 2984
2984

 被折叠的 条评论
为什么被折叠?
被折叠的 条评论
为什么被折叠?
 到【灌水乐园】发言


