


 本文展示了Vue 3.x中父子组件的交互方式,通过一个简单的例子演示了如何使用`ref`在父组件中控制子组件的显示。同时,详细比较了Vue 2.x和3.x的生命周期钩子,探讨了从2.x到3.x的变化,包括`setup`函数的使用以及新的生命周期钩子如`onBeforeMount`, `onMounted`, `onBeforeUpdate`等。
1、父组件
<template>
    <h2>APP父级组件</h2>
    <button @click="isShow=!isShow">切换显示</button>
    <hr/>
    <Child v-if="isShow"/>
</template>
<script lang="ts">
import Child from './components/Child.vue'
import { defineComponent, ref} from 'vue'
export default defineComponent({
  name: 'App',
  components:{
    Child
  },
  setup(){
    const isShow = ref(true)
    return{
      isShow
    }
  }
})
</script>
<style>
</style>
2、子组件
<template>
    <h2>Child子级组件</h2>
    <h4>msg:{{msg}}</h4>
    <button @click="update">更新数据</button>
</template>
<script lang="ts">
import { defineComponent, onBeforeMount, onBeforeUpdate, onMounted, onUnmounted, onUpdated, ref} from 'vue'
export default defineComponent({
    name: 'Child',
    //vue2.x中的生命周期钩子
    beforeCreate(){
        console.log('2.x中的beforecreate')
    },
    created(){
        console.log('2.x中的created')
    },
    beforeMount(){
        console.log('2.x中的beforeMount')
    },
    mounted(){
        console.log('2.x中的mounted')
    },
    beforeUpdate(){
        console.log('2.x中的beforeUpdate')
    },
    updated(){
        console.log('2.x中的updated')
    },
    beforeUnmount(){
        console.log('2.x中的beforeUnmount')
    },
    unmounted(){
        console.log('2.x中的unmounted')
    },
    // beforeDestroy(){
    //     console.log('2.x中的beforeDestroy')
    // },
    // destroyed(){
    //     console.log('2.x中的destroyed')
    // },

    setup(){
        console.log("3.x中的setup")
        const msg = ref('abc')
        // const update = ()=> {
        //     msg.value += '==='
        // }
        onBeforeMount(()=>{
            console.log('3.x中的onBeforeMount')
        })
        onMounted(()=>{
            console.log('3.x中的onMounted')
        })
        onBeforeUpdate(()=>{
            console.log('3.x中的onBeforeUpdate')
        })
        onUpdated(()=>{
            console.log('3.x中的onUpdated')
        })
        onUnmounted(()=>{
            console.log('3.x中的onUnmounted')
        })

        function update(){
            msg.value += '==='
        }
        return{
            msg,
            update
        }

    }

})
</script>
<style>
</style>
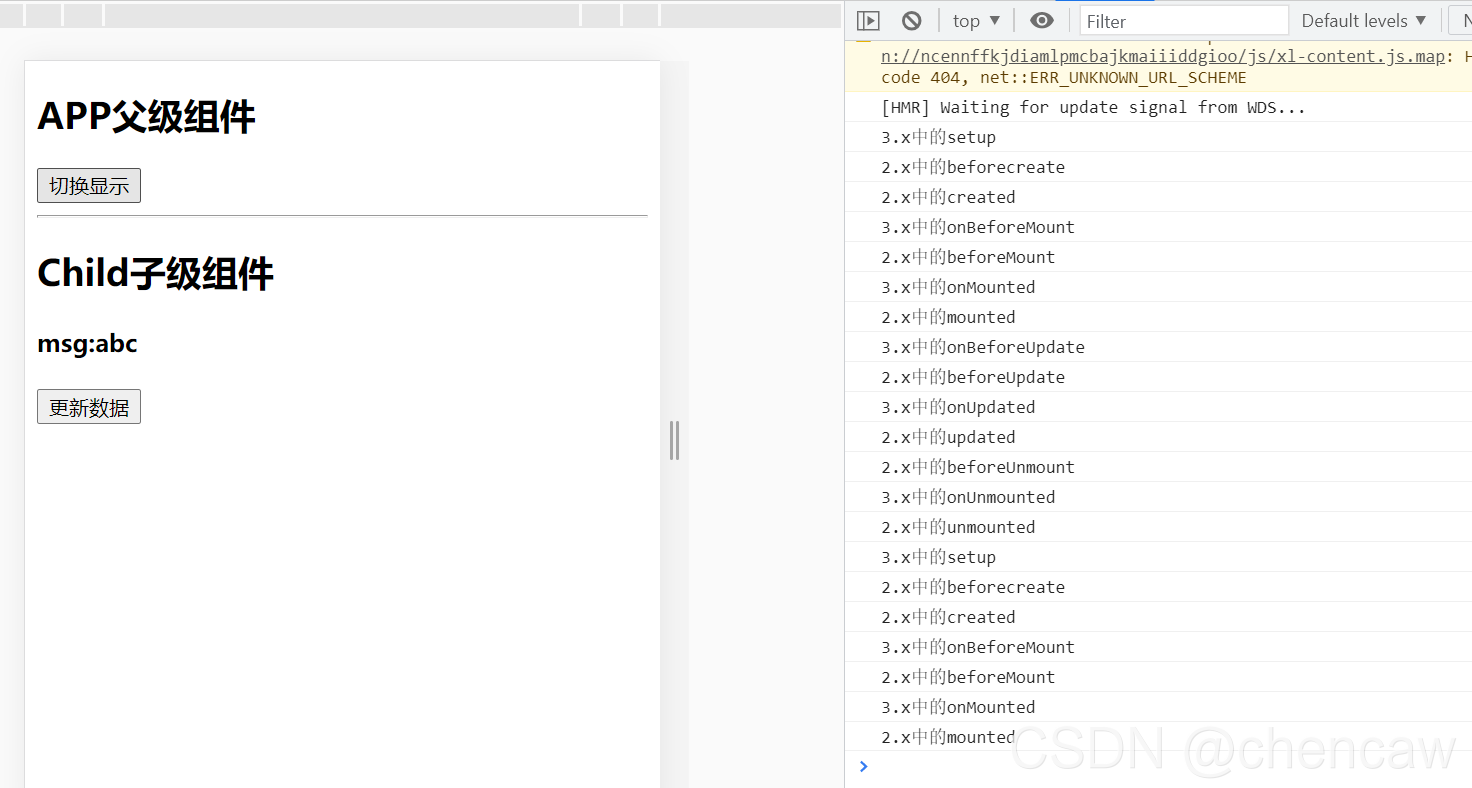
3、显示结果


 4458
4458

 被折叠的 条评论
为什么被折叠?
被折叠的 条评论
为什么被折叠?
 到【灌水乐园】发言


