


 本文介绍如何利用Unity3D的Shader技术实现图片的灰度效果,通过修改Shader代码并结合代码逻辑控制,可以有效地减少资源包大小,并展示了具体的实现步骤。
我们平时在做项目时,经常遇到按钮的点击而且还要区分悬浮,点击,禁用的状态,美术要针对一张图片做多个状态图片,资源图片的数量也就增大了,那么打出的包的大小也就跟着上去了,所以我们可以针对原始图片进行Shader处理,得到我们想要的效果!
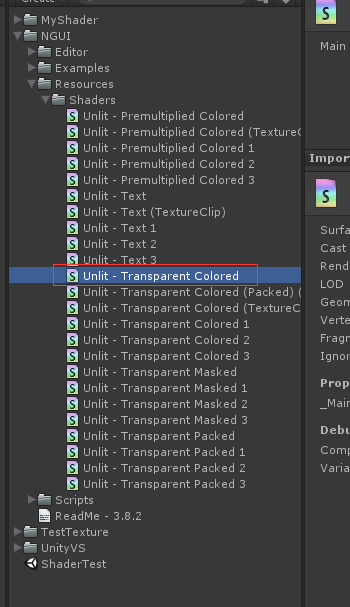
实现原理:Unity3d中所有的渲染都是基于Shader的,而Shader绑定在Material上,打开一个NGUI例子中自带的Material,得到其使用Shader的文件NGUI中大部分材质都使用的Unlit/Transparent Colored(PS:虽然在Unlit下,但并不是Unity3d内置的,而是NGUI扩展的)找到其片段着色器,在Unity中的路径:
代码如下:
Shader "Custom/graycolor_shader" {
	Properties
	{
		_MainTex ("Base (RGB), Alpha (A)", 2D) = "black" {}
	}

	SubShader
	{
		LOD 200

		Tags
		{
			"Queue" = "Transparent"
			"IgnoreProjector" = "True"
			"RenderType" = "Transparent"
		}

		Pass
		{
			Cull Off
			Lighting Off
			ZWrite Off
			Fog { Mode Off }
			Offset -1, -1
			Blend SrcAlpha OneMinusSrcAlpha

			CGPROGRAM
			#pragma vertex vert
			#pragma fragment frag
			#include "UnityCG.cginc"

			sampler2D _MainTex;
			float4 _MainTex_ST;

			struct appdata_t
			{
				float4 vertex : POSITION;
				float2 texcoord : TEXCOORD0;
				fixed4 color : COLOR;
			};

			struct v2f
			{
				float4 vertex : SV_POSITION;
				half2 texcoord : TEXCOORD0;
				fixed4 color : COLOR;
			};

			v2f o;

			v2f vert (appdata_t v)
			{
				o.vertex = mul(UNITY_MATRIX_MVP, v.vertex);
				o.texcoord = v.texcoord;
				o.color = v.color;
				return o;
			}

			fixed4 frag (v2f i) : COLOR
			{
				 fixed4 col;
				if (i.color.r < 0.001)
				{
					col = tex2D(_MainTex, i.texcoord);
					float grey = dot(col.rgb, float3(0.299, 0.587, 0.114));
					col.rgb = float3(grey, grey, grey);
				}
				else
				{
					col = tex2D(_MainTex, i.texcoord) * i.color;
				}
				return col;
			}
			ENDCG
		}
	}

	SubShader
	{
		LOD 100

		Tags
		{
			"Queue" = "Transparent"
			"IgnoreProjector" = "True"
			"RenderType" = "Transparent"
		}

		Pass
		{
			Cull Off
			Lighting Off
			ZWrite Off
			Fog { Mode Off }
			Offset -1, -1
			ColorMask RGB
			Blend SrcAlpha OneMinusSrcAlpha
			ColorMaterial AmbientAndDiffuse

			SetTexture [_MainTex]
			{
				Combine Texture * Primary
			}
		}
	}


}
fixed4 frag (v2f i) : COLOR
{
    fixed4 col = tex2D(_MainTex, i.texcoord) * i.color;
    return col;
}
我们对其做下修改:
fixed4 frag (v2f i) : COLOR
{
    fixed4 col;
    if (i.color.r < 0.001)
    {
        col = tex2D(_MainTex, i.texcoord);
        float grey = dot(col.rgb, float3(0.299, 0.587, 0.114));
        col.rgb = float3(grey, grey, grey);
    }
    else
    {
        col = tex2D(_MainTex, i.texcoord) * i.color;
    }
    return col;
}
至于为什么是(0.299,0.587,0.114),PS:(0.299,0.587,0.114)为灰度公式的参数。
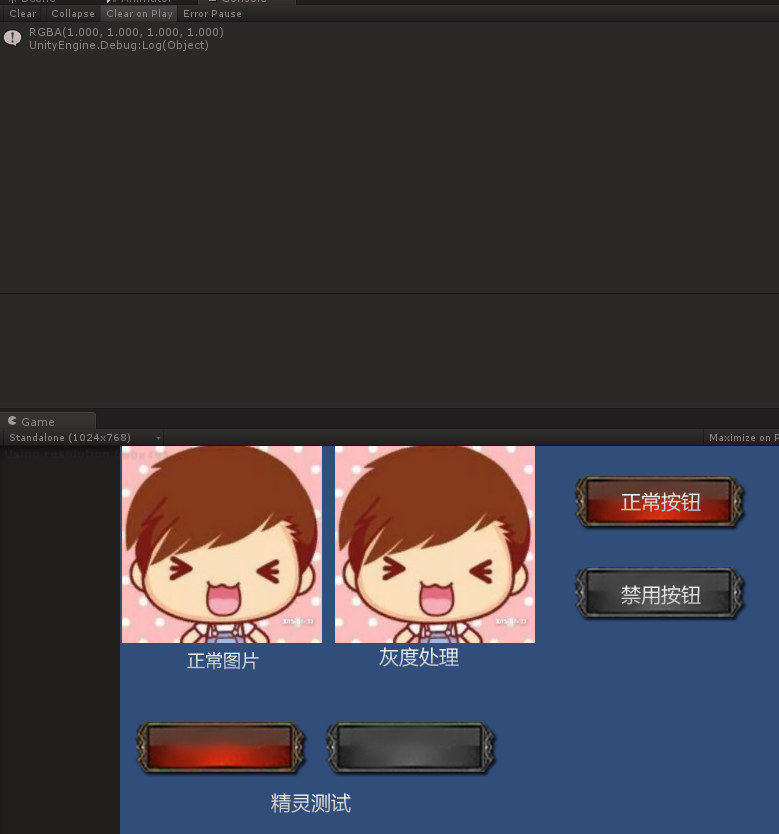
那么接下来就要验证这一结论了,建立测试工程,导入NGUI插件:
我们添加测试规资源,Unity3D支持的图形文件格式有 PSD, TIFF, JPG, TGA, PNG, GIF, BMP, IFF, PICT。但是我们要测试的对象主要是Texture,Sprite,但是在游戏中图片出现的格式也就这么两种。
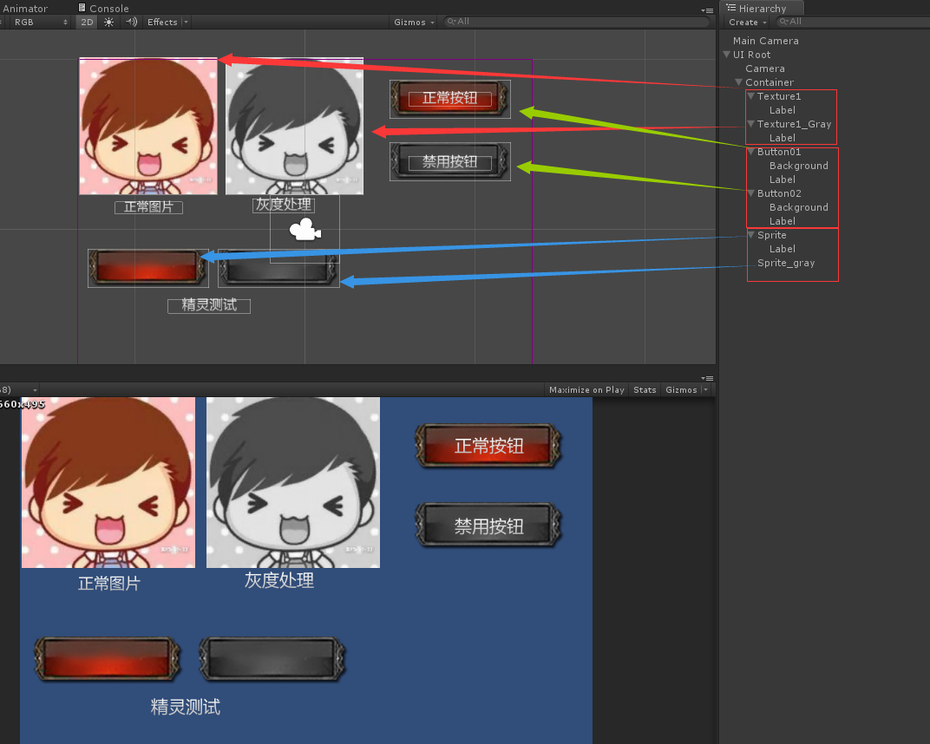
Shder修改过了,我怎么才能实现灰度效果呢?往下看。。。。
只需要这样就OK了。那么接下来有人会疑问了,我在代码里该怎么做呢,实际的逻辑控制怎么写?
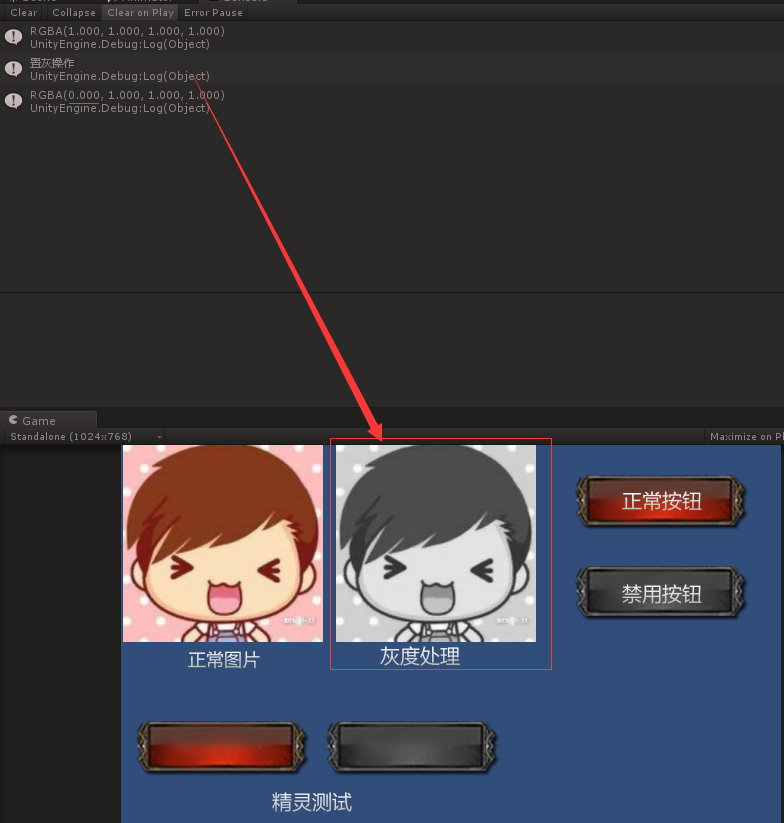
那么我们就在代码里测试一下:
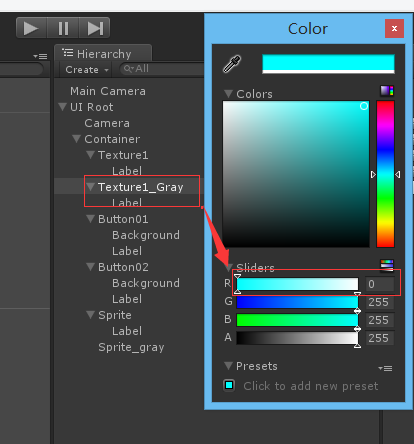
usingUnityEngine;usingSystem.Collections;publicclassTestFadeGray : MonoBehaviour{ UITexture texture; // Use this for initialization voidStart () { texture =this.GetComponent<UITexture>(); Debug.Log(texture.color); } // Update is called once per frame voidUpdate () { if(Input.GetMouseButtonDown(0)) { FadeGray(texture); } } voidFadeGray(UITexture texture) { Debug.Log("置灰操作"); texture.color =newColor(0, 1, 1, 1); Debug.Log(texture.color); }} 运行后,输出Texture的RGBA的值:
点击之后,效果如下:
好了本篇unity3d教程到此结束,下篇我们再会!


 6642
6642

 被折叠的 条评论
为什么被折叠?
被折叠的 条评论
为什么被折叠?
 到【灌水乐园】发言


