


 SpringCloud提供工具快速构建分布式系统中的配置管理、服务发现、断路器等功能。通过服务注册中心如Eureka或Nacos,实现服务的统一管理。使用SpringCloudGateway作为网关,处理跨域问题并实现智能路由。项目中,使用Layui作为前端框架,与后端API交互,实现增删改查操作。核心概念包括路由、断言和过滤器,确保服务间的高效通信。
什么是Spring Cloud
正如Spring官方所言:Spring Cloud为开发人员提供工具,用于快速构建分布式系统中的一些常见模式(例如配置管理、服务发现、断路器、智能路由、微代理、控制总线、一次性令牌、全局锁、领导选举、分布式会话、集群状态)。分布式系统的协调导致锅炉板模式,使用Spring云开发人员可以快速建立实现这些模式的服务和应用程序。它们在任何分布式环境中都能很好地工作,包括开发人员自己的笔记本电脑、裸机数据中心和云铸造等托管平台。
Spring Cloud 将现在非常流行的一些技术整合到一起,实现了诸如:配置管理,服务发现,智能路由,负载均衡,熔断器,控制总线,集群状态等等功能。
Spring Cloud完整体系架构图
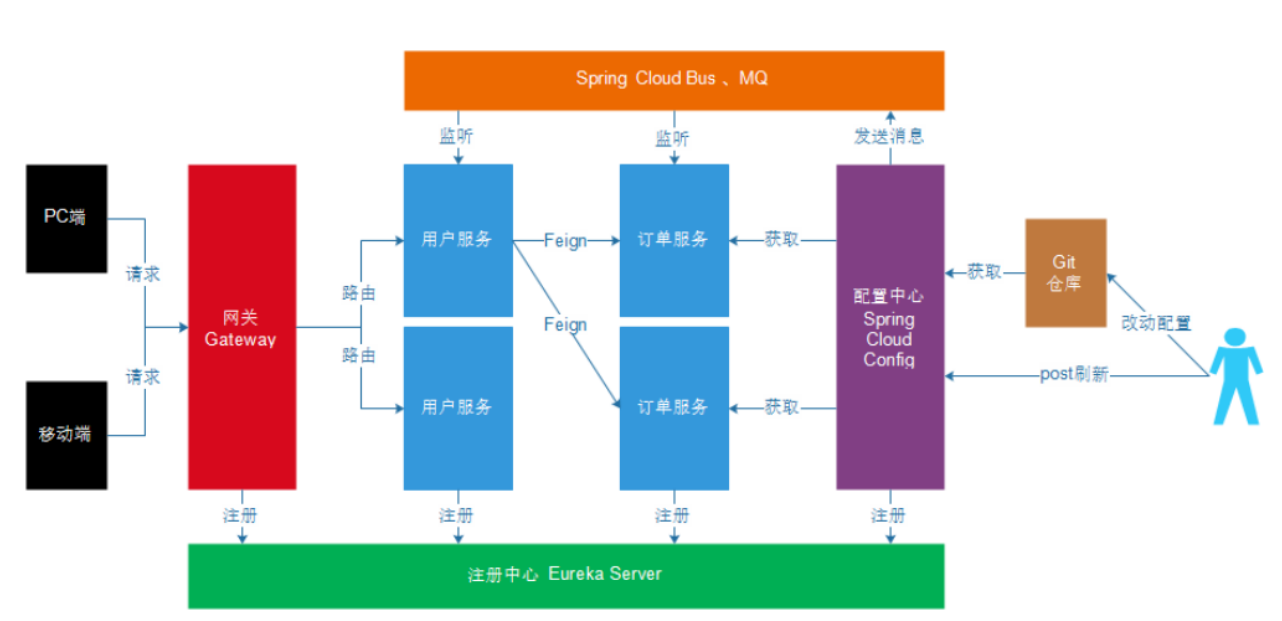
Spring Cloud 将一个项目分成多个模块,每个模块就是一个独立的服务,而这些服务就是一个个Spring Boot 应用。当这些服务想要相互访问时,就需要注册到注册中心,由注册中心统一管理这些服务,让这些服务相互调用。当然注册中心也是一个独立的应用,目前主流的注册中心有nacos,Eureka等。
GateWay网关
网关服务负责调用服务给用户:当用户发送请求时,Gateway网关会根据用户请求,调用相关的服务接口,同时能够拦截用户的一些非法请求。
在前后端分离的项目中,跨域问题总是不可避免的,这时候就需要解决跨域的问题,可做如下配置:
spring:
  application:
    name: bill-gateway
  cloud:
    gateway:
      discovery:
        locator:
          enabled: true
          lower-case-service-id: true #使用小写service-id
      routes: #配置路由路径
        - id: bill-service
          uri: lb://bill-service
          predicates:
            - Path=/bill-service/**
          filters:
            - StripPrefix=1
      globalcors:
        corsConfigurations:
          '[/**]':
            allowedOrigins:
              - "http://localhost:63343" #允许跨越域名
            allowedMethods:
              #允许跨域请求类型
              - GET
              - POST
核心概念
路由(route): 路由信息的组成:由一个ID、一个目的URL、一组断言工厂、一组Filter组成。如果路由断言为真,说明请求URL和配置路由匹配。
断言(Predicate): Spring Cloud Gateway中的断言函数输入类型是Spring 5.0框架中的ServerWebExchange。Spring Cloud Gateway的断言函数允许开发者去定义匹配来自于HTTP Request中的任何信息比如请求头和参数。
过滤器(Filter) :一个标准的Spring WebFilter。 Spring Cloud Gateway中的Filter分为两种类型的Filter,分别是Gateway Filter和Global Filter。过滤器Filte将会对请求和响应进行修改处理
服务注册与发现
服务注册与发现建议使用如今很流行的nacos:
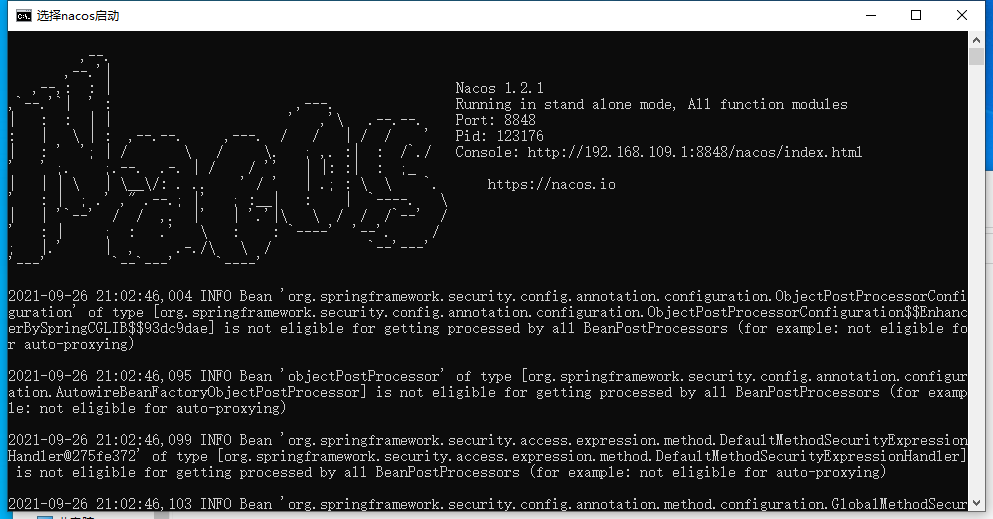
它本质也是一个Spring Boot 应用:

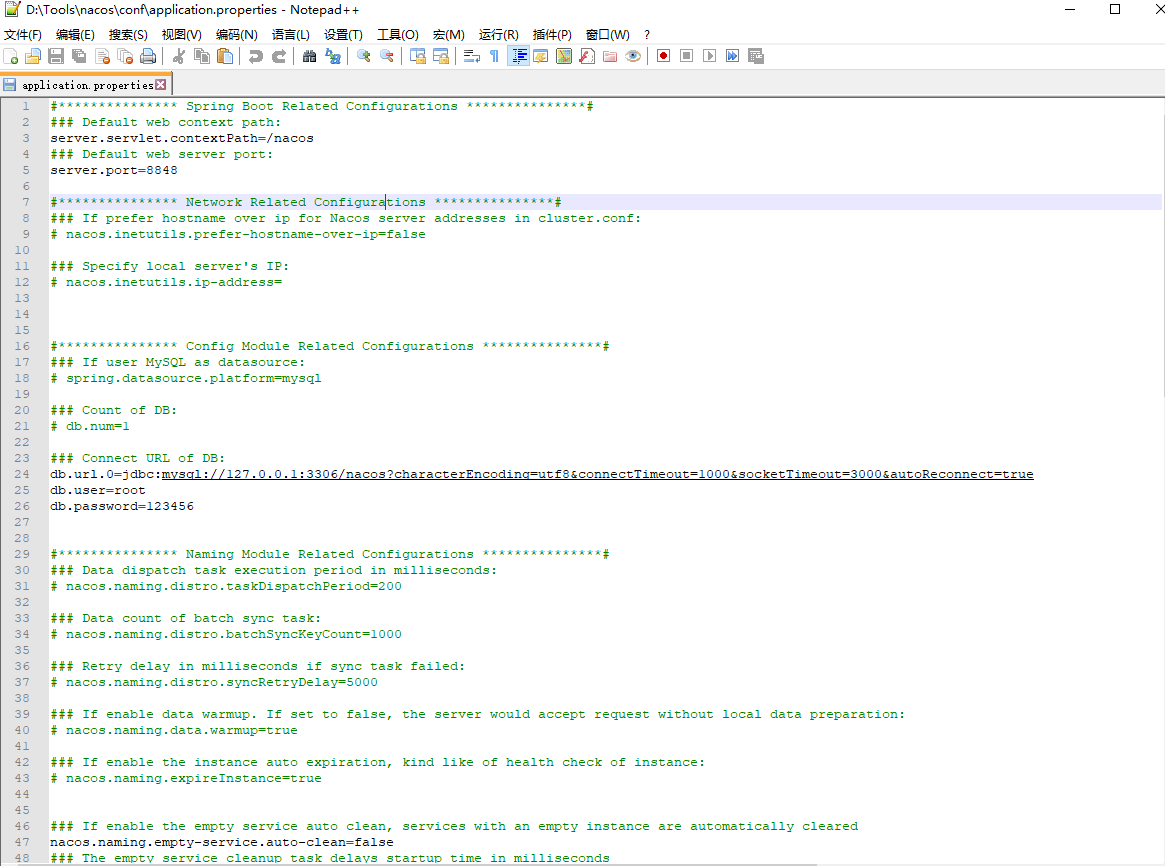
application配置文件:
当一个分布式项目启动时,最先启动的服务就是服务注册中心了。
注意各个服务都需要加上服务发现的注解:
@SpringBootApplication
@EnableFeignClients //开启feign功能
@EnableDiscoveryClient
public class Service {
    public static void main(String[] args) {
        SpringApplication.run(Service.class, args);
    }
}
Confifig分布式配置中心
在分布式系统中,由于服务数量非常多,配置文件分散在不同的微服务项目中,管理不方便。为了方便配置文件集中管理,需要分布式配置中心组件。在SpringCloud中,提供了Spring Cloud Confifig,它支持配置文件放在配置服务的本地,也支持放在远程Git仓库(GitHub、码云)。
如在码云上构建一个配置:
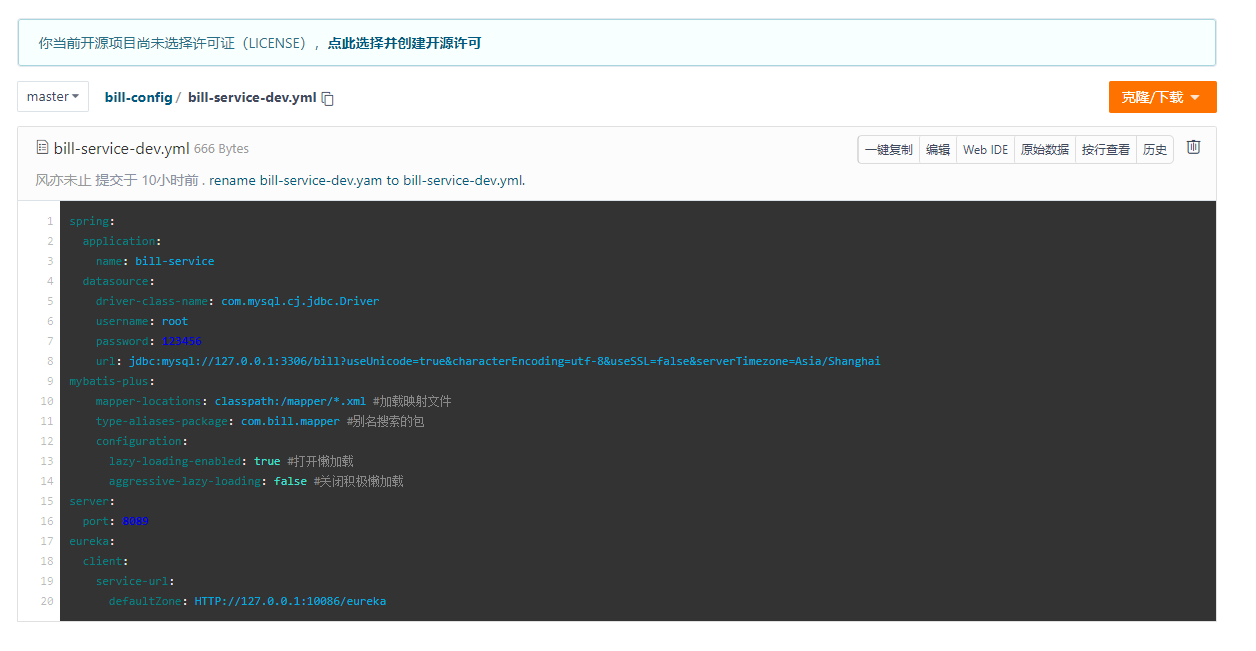
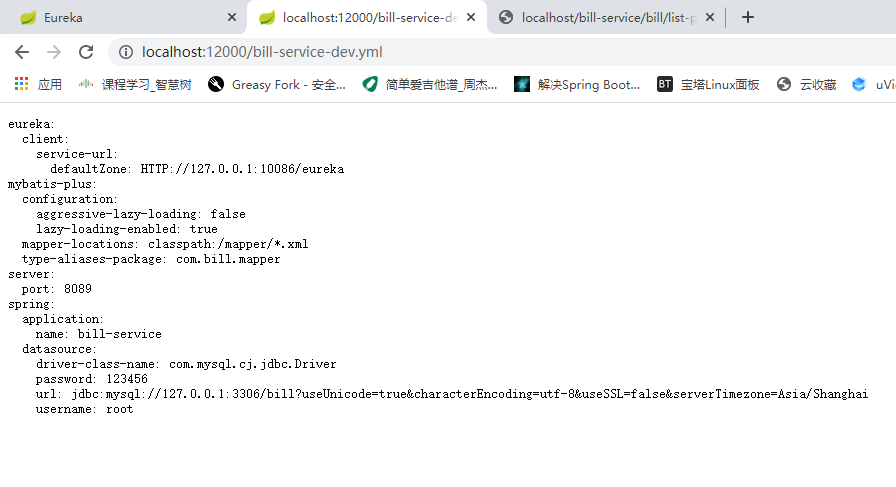
本地配置bootstrap.yml:
spring:
  cloud:
    config:
      #配置文件名
      name: bill-service
      #配置文件profile
      profile: dev
      # 仓库分支
      label: master
      discovery:
        #使用配置中心
        enabled: true
        # 配置中心服务名
        service-id: config-server
server:
  port: 8089
eureka:
  client:
    service-url:
      defaultZone: HTTP://127.0.0.1:10086/eureka
运行结果(本项目采用的服务注册是Eureka):
基于Spring Cloud 写一个简单的前后端分离项目
本项目为账单的管理:实现简单的增删改查。
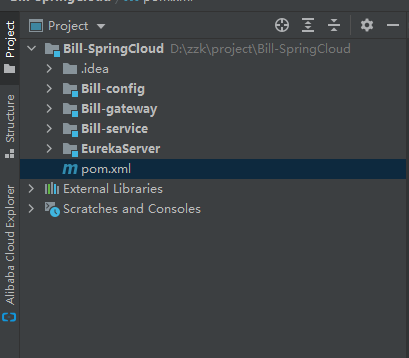
目录结构
数据库
账单表
CREATE TABLE `bill_` (
  `id_` bigint(20) NOT NULL AUTO_INCREMENT,
  `title_` varchar(100) DEFAULT NULL,
  `bill_time_` date DEFAULT NULL,
  `type_id_` bigint(20) DEFAULT NULL,
  `price_` double(10,2) DEFAULT NULL,
  `explain_` varchar(100) DEFAULT NULL,
  PRIMARY KEY (`id_`),
  KEY `fk_type_bill` (`type_id_`),
  CONSTRAINT `fk_type_bill` FOREIGN KEY (`type_id_`) REFERENCES `bill_type_` (`id_`)
) ENGINE=InnoDB AUTO_INCREMENT=134 DEFAULT CHARSET=utf8;
账单类型表:
CREATE TABLE `bill_type_` (
  `id_` bigint(20) NOT NULL AUTO_INCREMENT,
  `name_` varchar(100) DEFAULT NULL,
  PRIMARY KEY (`id_`)
) ENGINE=InnoDB AUTO_INCREMENT=5 DEFAULT CHARSET=utf8;
依赖
 <groupId>org.example</groupId>
    <artifactId>Bill-SpringCloud</artifactId>
    <packaging>pom</packaging>
    <version>1.0-SNAPSHOT</version>
    <modules>
        <module>Bill-gateway</module>
        <module>Bill-config</module>
        <module>Bill-service</module>
        <module>EurekaServer</module>
    </modules>
    <parent>
        <groupId>org.springframework.boot</groupId>
        <artifactId>spring-boot-starter-parent</artifactId>
        <version>2.1.5.RELEASE</version>
        <relativePath/>
    </parent>

    <properties>
        <java.version>1.8</java.version>
        <spring-cloud.version>Greenwich.SR1</spring-cloud.version>
        <mapper.starter.version>3.1.0</mapper.starter.version>
    </properties>
    <dependencyManagement>
        <dependencies>
            <!-- springCloud -->
            <dependency>
                <groupId>org.springframework.cloud</groupId>
                <artifactId>spring-cloud-dependencies</artifactId>
                <version>${spring-cloud.version}</version>
                <type>pom</type>
                <scope>import</scope>
            </dependency> <!-- 通用Mapper启动器 -->
            <dependency>
                <groupId>com.baomidou</groupId>
                <artifactId>mybatis-plus-boot-starter</artifactId>
                <version>${mapper.starter.version}</version>
            </dependency>
        </dependencies>
    </dependencyManagement>
    <dependencies>
        <dependency>
            <groupId>org.projectlombok</groupId>
            <artifactId>lombok</artifactId>
            <version>1.18.20</version>
        </dependency>

    </dependencies>
    <build>
        <plugins>
            <plugin>
                <groupId>org.springframework.boot</groupId>
                <artifactId>spring-boot-maven-plugin</artifactId>
                <version>2.1.5.RELEASE</version>
            </plugin>
        </plugins>
    </build>
    <repositories>
        <repository>
            <id>maven-ali</id>
            <url>http://maven.aliyun.com/nexus/content/groups/public/</url>
            <releases>
                <enabled>true</enabled>
            </releases>
            <snapshots>
                <enabled>true</enabled>
                <updatePolicy>always</updatePolicy>
                <checksumPolicy>fail</checksumPolicy>
            </snapshots>
        </repository>
    </repositories>
返回数据类
因本前端数据表格采用的是layui的,为贴合其官方要求,先这么写:
@Data
public class Result {
    private String msg;
    private Integer code;
    private Integer count;
    private Object data;

    public Result(String msg, Integer code, Integer count, Object data) {
        this.msg = msg;
        this.code = code;
        this.count = count;
        this.data = data;
    }

    public Result(String msg, Integer code) {
        this.msg = msg;
        this.code = code;
    }

    public Result(String msg, Integer code, Object data) {
        this.msg = msg;
        this.code = code;
        this.data = data;
    }
}
接口
@RestController
@RequestMapping("bill")
@Api(tags = "bill接口")
public class BillController {
    @Autowired
    private BillTypeService billTypeService;
    @Autowired
    private BillService billService;

    @ApiOperation(value = "获取bill类型")
    @GetMapping("/getTypes")
    public Result toAdd() {
        List<BillType> types = billTypeService.list();
        Result result = new Result("操作成功!", 200, types);
        return result;
    }

    @ApiOperation(value = "获取bill列表,分页")
    @GetMapping("/list-page")
    public Result listPage(@RequestParam(value = "page",defaultValue = "1") @ApiParam(value = "页码") int pageNum,
                           @RequestParam(value = "limit",defaultValue = "10") @ApiParam(value = "每页条数") int pageSize, Bill b) {
        List<Bill> list = billService.select(b);
        PageInfo<Bill> billPageInfo = billService.listPage(b, pageNum, pageSize);
        return new Result("", 0,list.size(), billPageInfo.getList());
    }
    @ApiOperation(value = "更新bill")
    @PostMapping("/update")
    public Result update(Bill bill) {
        boolean b = billService.updateById(bill);
        if (b){
            return new Result("操作成功!", 200);
        }
        return new Result("操作失败!", 400);
    }
    @ApiOperation(value = "添加bill")
    @PostMapping("/add")
    public Result add(Bill bill){
        boolean save = billService.save(bill);
        if (save){
            return new Result("操作成功!", 200);
        }
        return new Result("操作失败!", 400);
    }
    @ApiOperation(value = "删除bill")
    @PostMapping("/delete/{id}")
    public Result delete(@PathVariable("id")@ApiParam(value = "bill的Id") long id){
        boolean b = billService.removeById(id);
        if (b){
            return new Result("操作成功!", 200);
        }
        return new Result("操作失败!", 400);
    }
    @ApiOperation(value = "获取bill")
    @GetMapping("/getBillInfo/{id}")
    public Result toUpdate(@PathVariable("id")@ApiParam(value = "bill的Id") long id){
        Bill bill = billService.getById(id);
        return new Result("操作成功!", 200,bill);
    }

}
前端
目录结构:
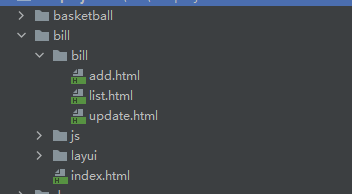
项目使用的是layui后台快开脚手架:
<!DOCTYPE html>
<html lang="en">
<head>
    <meta charset="utf-8">
    <meta name="viewport" content="width=device-width, initial-scale=1, maximum-scale=1">
    <title>账单管理系统</title>
    <link rel="stylesheet" href="./layui/css/layui.css">
</head>
<body>
<div class="layui-layout layui-layout-admin ">
    <div class="layui-header layui-bg-cyan">
        <div class="layui-logo layui-hide-xs layui-bg-cyan">账单管理系统</div>
        <!-- 头部区域(可配合layui 已有的水平导航) -->
        <ul class="layui-nav layui-layout-left ">
            <!-- 移动端显示 -->
            <li class="layui-nav-item" lay-header-event="menuLeft"><i class="layui-icon layui-icon-shrink-right"></i></li>

            <li class="layui-nav-item layui-show-xs-inline-block layui-hide-sm">
                <i class="layui-icon layui-icon-spread-left"></i>
            </li>
        </ul>
        <ul class="layui-nav layui-layout-right">
            <li class="layui-nav-item layui-hide layui-show-md-inline-block">
                <a href="javascript:;">
                    <img src="https://www.52zzk.cn/content/uploadfile/topimg/15958547428704.png" class="layui-nav-img">
                    风亦未止
                </a>
            </li>
            <li class="layui-nav-item" lay-header-event="menuRight" lay-unselect>
                <a href="javascript:;">
                    <i class="layui-icon layui-icon-more-vertical"></i>
                </a>
            </li>
        </ul>
    </div>
    <div class="layui-side layui-bg-cyan">
        <div class="layui-side-scroll">
            <!-- 左侧导航区域(可配合layui已有的垂直导航) -->
            <ul class="layui-nav layui-nav-tree layui-bg-cyan">
                <li class="layui-nav-item layui-nav-itemed">
                    <a class="" href="javascript:;">主页</a>
                    <dl class="layui-nav-child">
                        <dd><a href="../bill/bill/list.html" target="iframe">账单列表</a></dd>
                        <dd><a href="../bill/bill/add.html" target="iframe">添加账单</a></dd>
<!--                        <dd><a href="../bill/bill/update.html" target="iframe">修改账单</a></dd>-->
                    </dl>
                </li>
            </ul>
        </div>
    </div>
    <div class="layui-body">
        <iframe src="../bill/bill/list.html" style="padding: 10px;" width="100%" height="115%" name="iframe" framborder="0"></iframe>
    </div>

    <div class="layui-footer">
        <!-- 底部固定区域 -->
        Copyright © 2021 风亦未止
    </div>
</div>
</body>
<script src="./layui/layui.js"></script>
<script>
    //JS
    layui.use(['element', 'layer', 'util'], function(){
        var element = layui.element
            ,layer = layui.layer
            ,util = layui.util
            ,$ = layui.$;

        //头部事件
        util.event('lay-header-event', {
            //左侧菜单事件
            menuLeft: function(othis){

                layer.msg('展开左侧菜单的操作', {icon: 0});
            }
            ,menuRight: function(){
                layer.open({
                    type: 1
                    ,content: '<div style="padding: 15px;">处理右侧面板的操作</div>'
                    ,area: ['260px', '100%']
                    ,offset: 'rt' //右上角
                    ,anim: 5
                    ,shadeClose: true
                });
            }
        });

    });
</script>
</html>
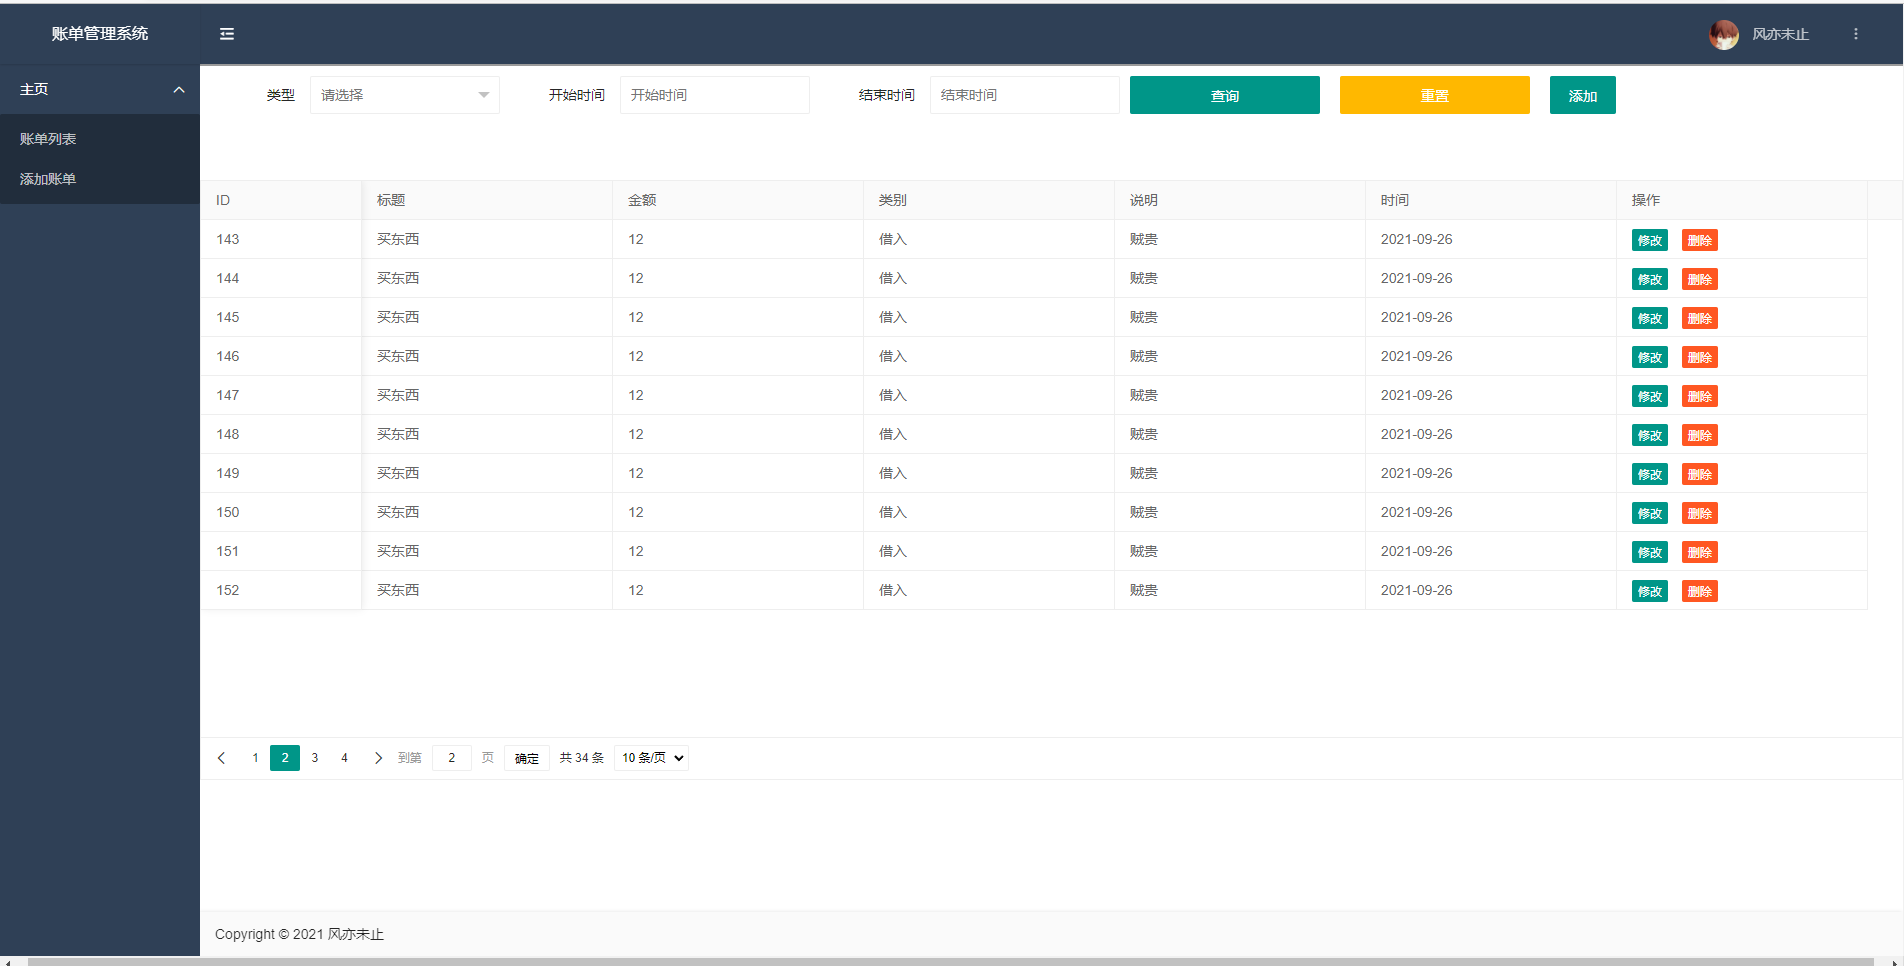
前端的js
获取数据:
 layui.use('table', function () {
        var table = layui.table;
        //第一个实例
        table.render({
            elem: '#list'
            , height: 600
            , url: 'http://localhost/bill-service/bill/list-page' //数据接口
            , cols: [[ //表头
                {field: 'id', title: 'ID', width: 160, fixed: 'left'}
                , {field: 'title', title: '标题', width: 250}
                , {field: 'price', title: '金额', width: 250}
                , {field: 'typeName', title: '类别', width: 250}
                , {field: 'explain', title: '说明', width: 250}
                , {field: 'billTime', title: '时间', width: 250,templet: "<div>{{layui.util.toDateString(d.billTime, 'yyyy-MM-dd')}}</div>"
                }
                , {fixed: 'right', title: '操作', width: 250, toolbar: '#bar'}
            ]]
            ,id:'list'
            , page: true //开启分页
        });
删除:
        table.on('tool', function (obj) {
            var data = obj.data;
            //console.log(obj)
            if (obj.event === 'del') {
                layer.confirm('真的删除吗?', function (index) {
                    var deleteUrl='http://localhost/bill-service/bill/delete/'+data.id;
                    $.post(deleteUrl,null,function (res){
                        layer.msg(res.msg);
                        if (res.code==200){
                            obj.del();
                            layer.close(index);
                        }
                    });
                });
            } else if (obj.event === 'edit') {
                var billId=data.id;
                location.href='update.html'+"?id="+billId;
            }
        });
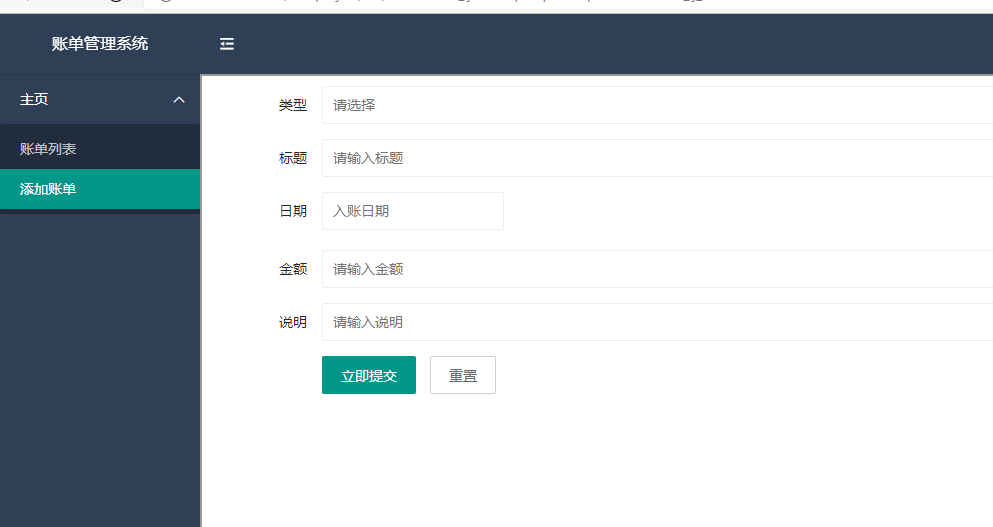
添加:
 add = function (obj){
        $.post('http://localhost/bill-service/bill/add',obj,function (res) {
            layer.msg(res.msg);
            if (res.code==200){
                $("select[name='typeId']").val("");
                $("input[name='title']").val("");
                $("input[name='billTime']").val("");
                $("input[name='price']").val("");
                $("input[name='explain']").val("");
            }
        });
    }
更新大致也如此。
总结
前后端分离项目的数据传输一般都为json格式,并且需要考虑到跨域的问题。


 168万+
168万+

 被折叠的 条评论
为什么被折叠?
被折叠的 条评论
为什么被折叠?
 到【灌水乐园】发言


