V-rep运动学仿真笔记(三)——固定四轮小车,lua脚本控制及Custom UIs

本文详细介绍了在V-REP仿真环境中,如何通过编写Lua脚本实现小车的精确控制,包括利用自定义UI设置各轮速度,并通过添加Graph组件实时监测小车的运动轨迹。

摘要生成于 C知道 ,由 DeepSeek-R1 满血版支持, 前往体验 >

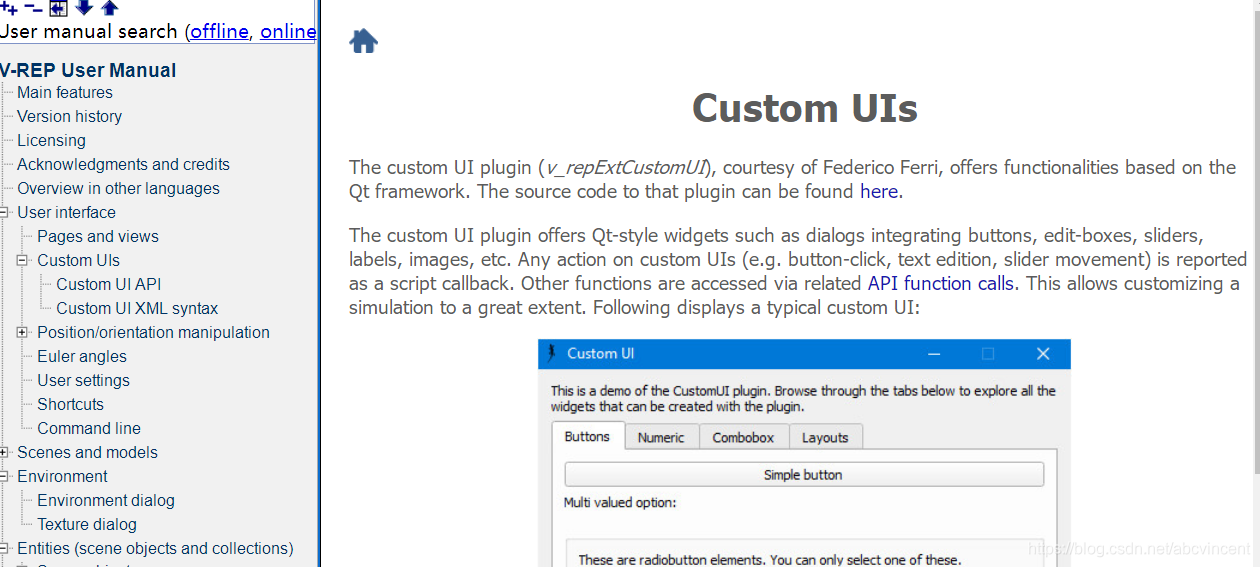
接着前一章的继续,导入小车后,做小车的控制;这里先说一下v-rep的uiAPI脚本,打开v-rep帮助文档,可以找到Custom UIs的介绍,包括对应的API等,如下:

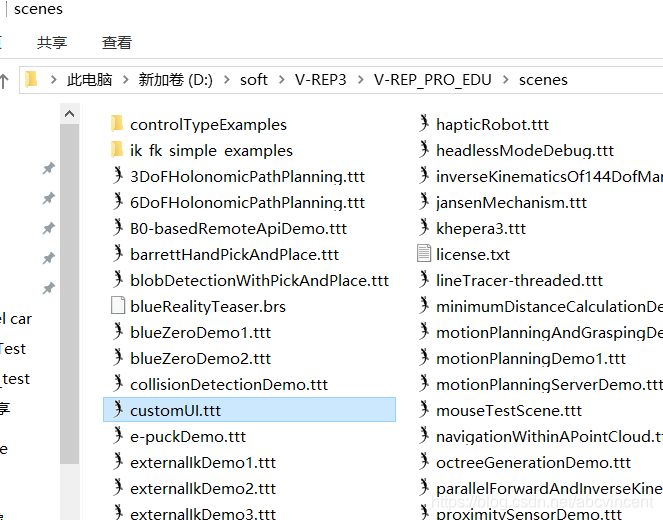
然后我们可以在v-rep安装文档里找到,对应的demo文件,V-REP3\V-REP_PRO_EDU\scenes,如下:

打开后,在就可以看到有这样的一个UI:

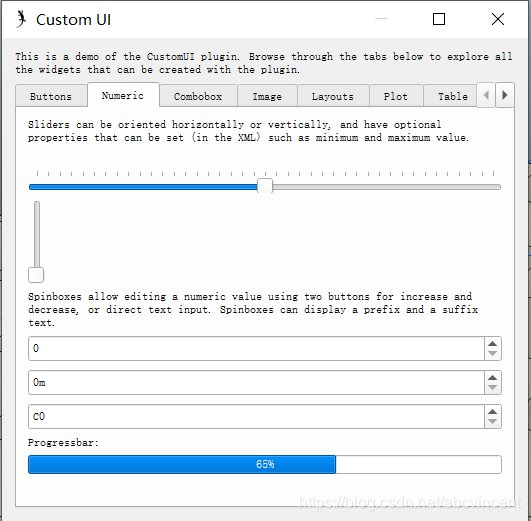
基本的控件都包含了,我可以查看里面的script文件,v-rep的UI是用xml写的,其中截取了一部分样式如下:

 xml = [[
<ui closeable="true" on-close="closeEventHandler" resizable="true">
    <label text="This is a demo of the CustomUI plugin. Browse through the tabs below to explore all the widgets that can be created with the plugin." wordwrap="true" />
    <tabs>
        <tab title="Buttons">
            <button text="Simple button" on-click="buttonClick" />
            <label text="Multi valued option:" />
            <group>
                <label text="These are radiobutton elements. You can only select one of these." wordwrap="true" />
                <label text="No item has been selected" id="1000" wordwrap="true" />
                <radiobutton text="A" on-click="radiobuttonClick" id="1001" />
                <radiobutton text="B" on-click="radiobuttonClick" id="1002" />
                <radiobutton text="C" on-click="radiobuttonClick" id="1003" />
            </group>
  <..............删除了一部分> 
        </tab>
    </tabs>
</ui>
]]
    ui=simUI.create(xml)

好了,有了以上我们就可以给小车写一些代码,让小车可以控制动起来,添加如下代码:

function sysCall_init()
--系统函数下添加xml
xml = [[
<ui closeable="true" onclose="closeEventHandler" resizable="true" size="220,200">
    <label text="Car control pan" wordwrap="true" />
    <group>
        <label text="Red wheel speed(0.1deg/s):"  wordwrap="true" />
        <spinbox minimum="-5000" maximum="5000" onchange = "Red_speed_set" />

        <label text="Green wheel speed(0.1deg/s)" wordwrap="true" />
        <spinbox minimum="-5000" maximum="5000" onchange = "Green_speed_set" />

        <label text="Blue wheel speed(0.1deg/s)" wordwrap="true" />
        <spinbox minimum="-5000" maximum="5000" onchange = "Blue_speed_set" />

        <label text="Yellow wheel speed(0.1deg/s)" wordwrap="true" />
        <spinbox minimum="-5000" maximum="5000" onchange = "Yellow_speed_set" />
        <stretch />
    </group>
    
    <group>
        <button text="Start move" onclick = "Start_move" />
        <button text="Stop move" onclick = "Stop_move" />
        <stretch />
    </group>   
</ui>
]] 
    --启动动UI
    ui=simUI.create(xml)
    --设置各个关节的句柄
    Red_wheel=sim.getObjectHandle('joint12')
    Green_wheel=sim.getObjectHandle('joint22')
    Blue_wheel=sim.getObjectHandle('joint32')
    Yellow_wheel=sim.getObjectHandle('joint42')
    --ui=simUI.create(xml) --这句也可以启动UI

    --设置转速变量
    Red_vel = 0
    Green_vel = 0
    Blue_vel = 0
    Yellow_vel = 0

    --开始标志
    Start_flag = false
end

--关闭窗口时候触发
function closeEventHandler(h)
    sim.addStatusbarMessage('Window '..h..' is closing...')
--隐藏窗口
    simUI.hide(h)
end

--添加开始函数,对应onclick 
function Start_move(h)
    Start_flag = true  
end

--添加停止函数,对应onclick 
function Stop_move(h)
    Start_flag = false    
end

--添加速度函数,对应onclick 
function Red_speed_set(ui,id,newVal)
    Red_vel = newVal
end

--添加速度函数,对应onclick 
function Green_speed_set(ui,id,newVal)
    Green_vel = newVal
end

--添加速度函数,对应onclick 
function Blue_speed_set(ui,id,newVal)
    Blue_vel = newVal
end

--添加速度函数,对应onclick 
function Yellow_speed_set(ui,id,newVal)
    Yellow_vel = newVal
end

--系统函数内
function sysCall_actuation()

   --添加处理函数,如果启动了,设置关节的速度,每启动则设置速度为0
    if Start_flag then
        --sim.setJointTargetVelocity设置速度api
        sim.setJointTargetVelocity(Red_wheel,Red_vel/10)
        sim.setJointTargetVelocity(Green_wheel,Green_vel/10)
        sim.setJointTargetVelocity(Blue_wheel,-Blue_vel/10)
        sim.setJointTargetVelocity(Yellow_wheel,-Yellow_vel/10)      
    else
        sim.setJointTargetVelocity(Red_wheel,0)
        sim.setJointTargetVelocity(Green_wheel,0)
        sim.setJointTargetVelocity(Blue_wheel,0)
        sim.setJointTargetVelocity(Yellow_wheel,0)
    end

end

function sysCall_cleanup()
    -- do some clean-up here
    simUI.destroy(ui) --清除ui

end

效果如下,档设置好速度后小车就开始按照设定运行:

测试时候,想查看小车运动轨迹,这时候可以添加graph来查看轨迹,先新建一个dummy和graph,然后双击graph,添加dummy的相对世界坐标的绝对位置:

将xyz数据都添加好后,电机Edit 3d curves:

将graph与dummy放在car body下面,如下结构:

再次运行后,就可看到如下,小车后面会有一条轨迹:

评论
添加红包

请填写红包祝福语或标题

红包个数最小为10个

红包金额最低5元

当前余额3.43前往充值 >
需支付:10.00
成就一亿技术人!
领取后你会自动成为博主和红包主的粉丝 规则
hope_wisdom
发出的红包
实付
使用余额支付
点击重新获取
扫码支付
钱包余额 0

抵扣说明:

1.余额是钱包充值的虚拟货币,按照1:1的比例进行支付金额的抵扣。
2.余额无法直接购买下载,可以购买VIP、付费专栏及课程。

余额充值