


前言
在课堂检测中,可以明显的发现,人虽然可以检测出来,但是人却不能被框全,比如举手的人,手框不到,如下图:
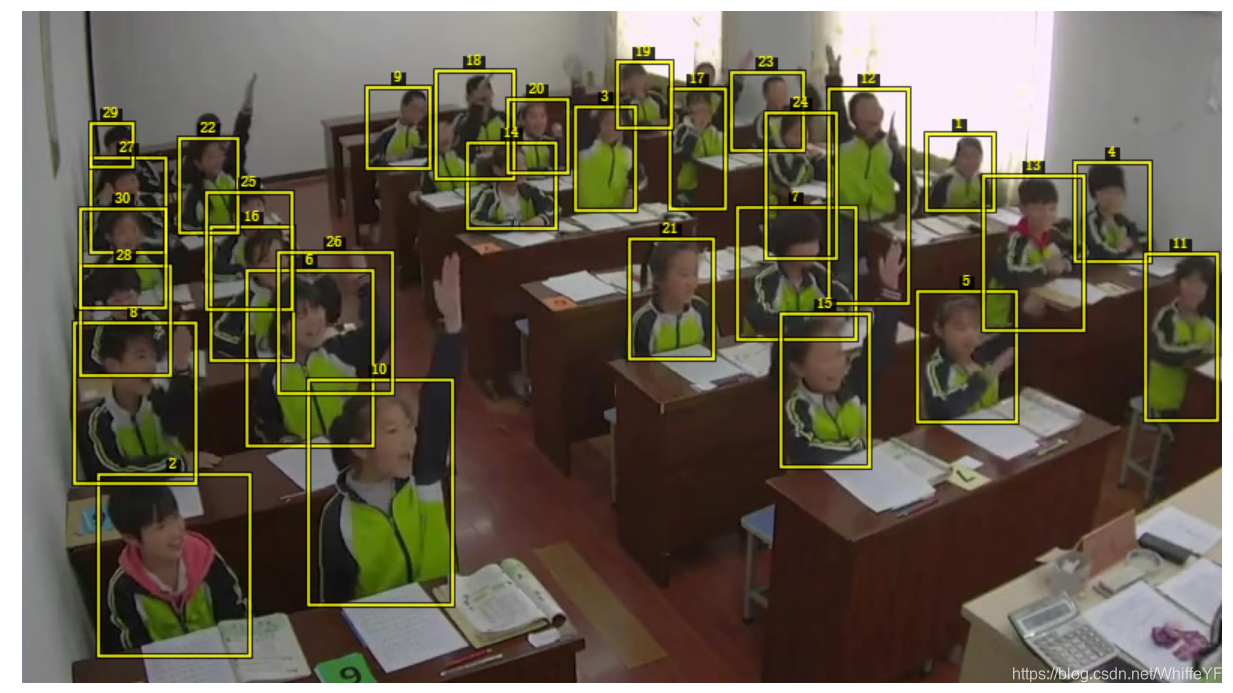
上图就可以明显看到,人是框出来的,但是手臂没框出来,这就会给行为分类造成影响。
下图是本文使用detectron2 faster rcnn 训练自己的数据集后的结果
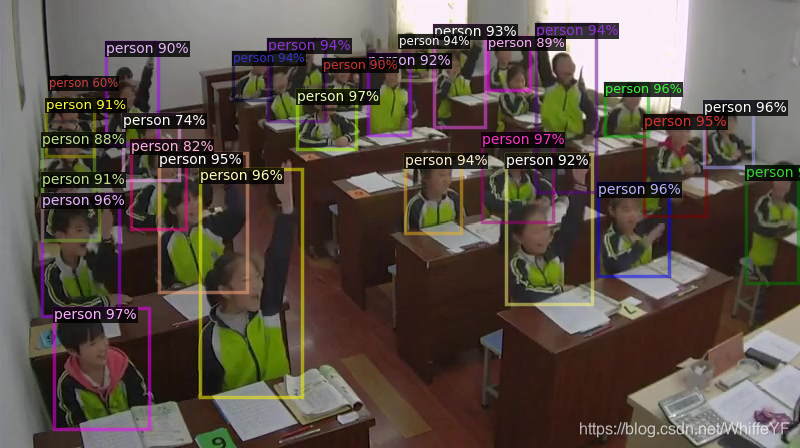
从上面的对比可以看出,改进点有如下:
1,举手的人,原来框不到手,改进后的能框到手
2,在人重叠的地方,原来的地方会出现框重叠,改进后不会出现
3,遮挡严重的人,原来的检测不出,改进后可以检测出。
下面就写一下,代码的实现过程:
我是参考的B站的一个博主的视频,他是windows系统,我是ubuntu系统
【扫盲】Detectron2训练Faster-RCNN&RetinaNet
一,在ubuntu安装detectron2
1.1 官网
1.2 安装步骤
安装:
pip install -U torch torchvision cython
pip install -U 'git+https://github.com/facebookresearch/fvcore.git' 'git+https://github.com/cocodataset/cocoapi.git#subdirectory=PythonAPI'
git clone https://github.com/facebookresearch/detectron2 detectron2_repo
pip install -e detectron2_repo
1.3 Faster RCNN目标检测
在终端输入:
python3 demo.py --config-file ../configs/COCO-Detection/faster_rcnn_R_50_FPN_3x.yaml \
  --input ../img/1.JPG \
  --output ../img/1_1.jpg \
  --opts MODEL.WEIGHTS detectron2://COCO-Detection/faster_rcnn_R_50_FPN_3x/137849458/model_final_280758.pkl
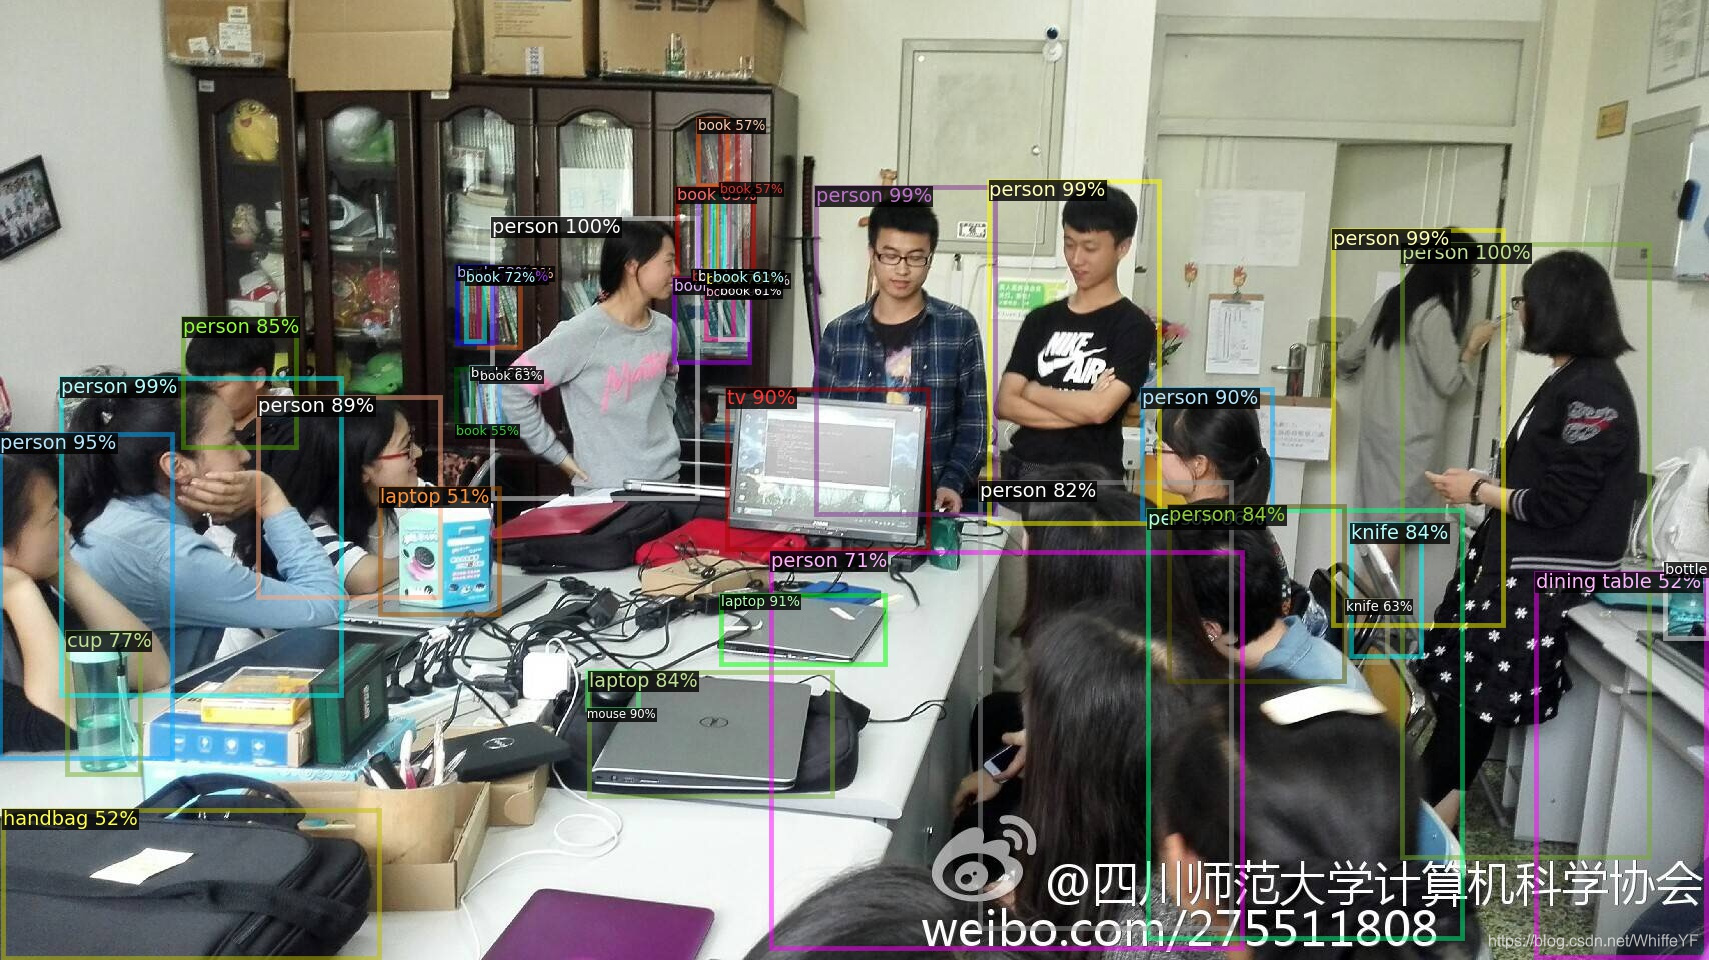
1.4 效果
1.5 错误解决
运行过程中可能会出现
Traceback (most recent call last):
File “demo.py”, line 7, in
import cv2
File “/opt/conda/lib/python3.7/site-packages/cv2/init.py”, line 5, in
from .cv2 import *
ImportError: libGL.so.1: cannot open shared object file: No such file or directory
解决方案:
在终端运行:
apt update
apt install libgl1-mesa-glx
二,使用detectron2的faster rcnn将人给框出来,并转化为labelme可识别格式
2.1 fasterRcnn2Labelme.py
在目录 /detectron2_repo/demo/ 下创建fasterRcnn2Labelme.py
代码如下:
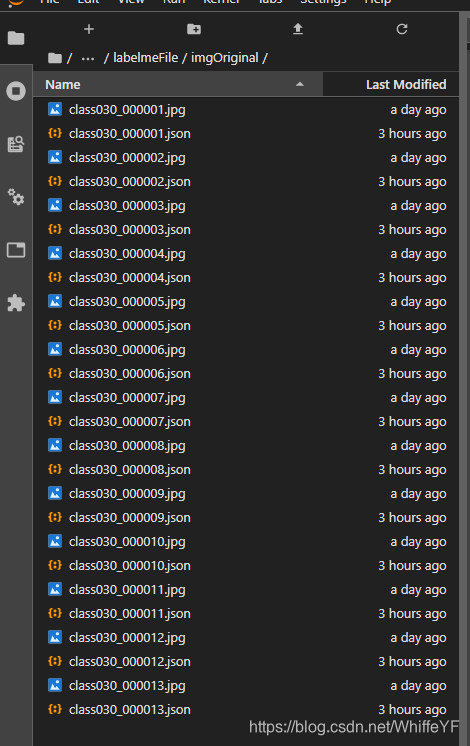
代码的作用就是将一组图片进行标注,并且将每张图片标注内容转化为labelme可识别的json文件
#Copyright (c) Facebook, Inc. and its affiliates.
import argparse
import glob
import multiprocessing as mp
import os
import time
import cv2
import tqdm
import os
from detectron2.config import get_cfg
from detectron2.data.detection_utils import read_image
from detectron2.utils.logger import setup_logger
from predictor import VisualizationDemo
import csv
import pandas as pd #导入pandas包
import re
import base64
import json
# constants
WINDOW_NAME = "COCO detections"
# 这里是三个路径:
#原始图片输入的路径
imgOriginalPath = '/home/lxn/0yangfan/labelmeFile/imgOriginal/'
#检测后的图片存放的位置
imgDetectionPath= '/home/lxn/0yangfan/labelmeFile/imgDetection/'
#检测后json文件存放的位置
detectiCsvPath = "/home/lxn/0yangfan/labelmeFile/imgOriginal/"
# 运行命令
# python3 ./demo/fasterRcnn2Labelme.py --config-file configs/COCO-Detection/faster_rcnn_R_50_FPN_3x.yaml --opts MODEL.WEIGHTS detectron2://COCO-Detection/faster_rcnn_R_50_FPN_3x/137849458/model_final_280758.pkl
def setup_cfg(args):
# load config from file and command-line arguments
cfg = get_cfg()
# To use demo for Panoptic-DeepLab, please uncomment the following two lines.
# from detectron2.projects.panoptic_deeplab import add_panoptic_deeplab_config # noqa
# add_panoptic_deeplab_config(cfg)
cfg.merge_from_file(args.config_file)
cfg.merge_from_list(args.opts)
# Set score_threshold for builtin models
cfg.MODEL.RETINANET.SCORE_THRESH_TEST = args.confidence_threshold
cfg.MODEL.ROI_HEADS.SCORE_THRESH_TEST = args.confidence_threshold
cfg.MODEL.PANOPTIC_FPN.COMBINE.INSTANCES_CONFIDENCE_THRESH = args.confidence_threshold
cfg.freeze()
return cfg
def get_parser():
parser = argparse.ArgumentParser(description="Detectron2 demo for builtin configs")
parser.add_argument(
"--config-file",
default="configs/quick_schedules/mask_rcnn_R_50_FPN_inference_acc_test.yaml",
metavar="FILE",
help="path to config file",
)
parser.add_argument("--webcam", action="store_true", help="Take inputs from webcam.")
parser.add_argument("--video-input", help="Path to video file.")
parser.add_argument(
"--input",
nargs="+",
help="A list of space separated input images; "
"or a single glob pattern such as 'directory/*.jpg'",
)
parser.add_argument(
"--output",
help="A file or directory to save output visualizations. "
"If not given, will show output in an OpenCV window.",
)
parser.add_argument(
"--confidence-threshold",
type=float,
default=0.5,
help="Minimum score for instance predictions to be shown",
)
parser.add_argument(
"--opts",
help="Modify config options using the command-line 'KEY VALUE' pairs",
default=[],
nargs=argparse.REMAINDER,
)
return parser
if __name__ == "__main__":
mp.set_start_method("spawn", force=True)
args = get_parser().parse_args()
setup_logger(name="fvcore")
logger = setup_logger()
logger.info("Arguments: " + str(args))
#图片的输入和输出文件夹
#imgOriginalPath = '/home/lxn/0yangfan/labelmeFile/imgOriginal/'
#imgDetectionPath= '/home/lxn/0yangfan/labelmeFile/imgDetection/'
imgInputPaths=[]
# 读取文件下的图片名字
for i,j,k in os.walk(imgOriginalPath):
# k 存储了图片的名字
#imgInputPaths用于存储图片完整地址
#使用.sort()防止乱序
k.sort()
for namek in k:
#正则匹配 json 文件,发现json文件跳过
suffix_namek = re.findall(r'\.[^.\\/:*?"<>|\r\n]+$', namek)
if suffix_namek[0] != '.json':
#循环将图片的完整地址加入imgInputPaths中
imgInputPath = imgOriginalPath + namek
imgInputPaths.append(imgInputPath)
break
#修改args里输入图片的里路径
args.input = imgInputPaths
#修改args里输出图片的路径
args.output = imgDetectionPath
cfg = setup_cfg(args)
demo = VisualizationDemo(cfg)
if args.input:
if len(args.input) == 1:
args.input = glob.glob(os.path.expanduser(args.input[0]))
assert args.input, "The input path(s) was not found"
for path in tqdm.tqdm(args.input, disable=not args.output):
print("----------path--------")
print(path)
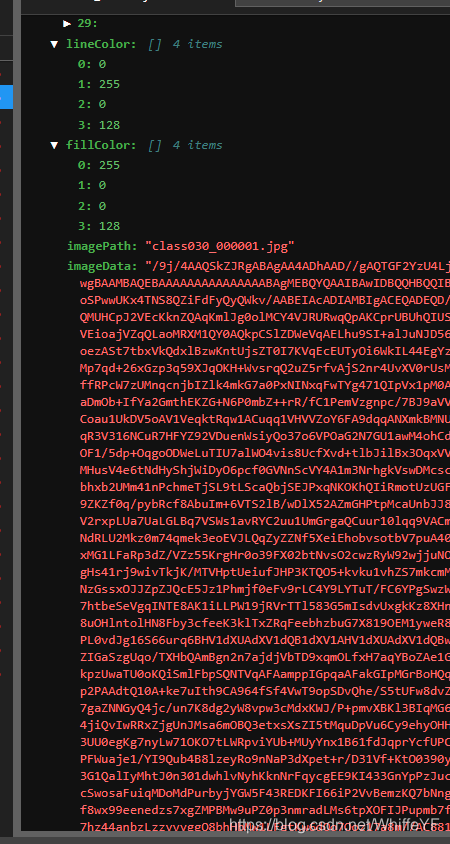
#将图片转化为base64
imageData = ""
with open(path, 'rb') as f:
base64_data = base64.b64encode(f.read())
imageData = base64_data.decode()
#print('data:image/jpeg;base64,%s'%s)
#在路径中正则匹配图片的名称
ImgNameT = re.findall(r'[^\\/:*?"<>|\r\n]+$', path)
ImgName = ImgNameT[0]
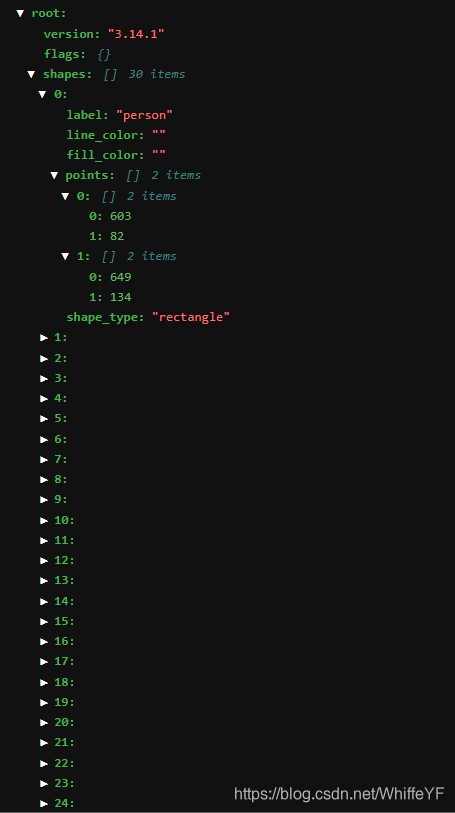
#创建labelme的json
LabelmeJson = {
"version": "3.14.1",
"flags": {},
"shapes": [],
"lineColor": [
0,
255,
0,
128
],
"fillColor": [
255,
0,
0,
128
],
"imagePath": ImgName,
"imageData": imageData,
"imageHeight": 0,
"imageWidth": 0
}
# use PIL, to be consistent with evaluation
img = read_image(path, format="BGR")
start_time = time.time()
predictions,visualized_output = demo.run_on_image(img)
#只要图片名的前缀
ImgNameT2=re.findall(r'(.+?)\.',ImgName)
ImgName = ImgNameT2[0]
#只要检测结果是人的目标结果
mask = predictions["instances"].pred_classes == 0
pred_boxes = predictions["instances"].pred_boxes.tensor[mask]
#获取图片大小(字节)
ImgSize = os.path.getsize(path)
#下面的为空(属性不管)
img_file_attributes="{"+"}"
#每张图片检测出多少人
img_region_count = len(pred_boxes)
#region_id表示在这张图中,这是第几个人,从0开始数
region_id = 0
#region_attributes 为空
img_region_attributes = "{"+"}"
#循环图中检测出的人的坐标,然后做修改,以适应labelme
for i in pred_boxes:
#将i中的数据类型转化为可以用的数据类型(list)
iList = i.cpu().numpy().tolist()
#person_shape用于存放标签,坐标等信息
x1 = int(iList[0])
y1 = int(iList[1])
x2 = int(iList[2])
y2 = int(iList[3])
person_shape = {
"label": "person",
"line_color": "",
"fill_color": "",
"points": [
[
x1,
y1
],
[
x2,
y2
]
],
"shape_type": "rectangle"
}
LabelmeJson["shapes"].append(person_shape)
region_id = region_id + 1
jsonPath ="/home/lxn/0yangfan/labelmeFile/imgOriginal/" + ImgName + '.json'
with open(jsonPath,'w') as file_obj:
json.dump(LabelmeJson,file_obj)
logger.info(
"{}: {} in {:.2f}s".format(
path,
"detected {} instances".format(len(predictions["instances"]))
if "instances" in predictions
else "finished",
time.time() - start_time,
)
)
if args.output:
if os.path.isdir(args.output):
assert os.path.isdir(args.output), args.output
out_filename = os.path.join(args.output, os.path.basename(path))
else:
assert len(args.input) == 1, "Please specify a directory with args.output"
out_filename = args.output
visualized_output.save(out_filename)
else:
cv2.namedWindow(WINDOW_NAME, cv2.WINDOW_NORMAL)
cv2.imshow(WINDOW_NAME, visualized_output.get_image()[:, :, ::-1])
if cv2.waitKey(0) == 27:
break # esc to quit
2.2 运行结果
在 /detectron2_repo/下运行:
python3 ./demo/fasterRcnn2Labelme.py --config-file configs/COCO-Detection/faster_rcnn_R_50_FPN_3x.yaml --opts MODEL.WEIGHTS detectron2://COCO-Detection/faster_rcnn_R_50_FPN_3x/137849458/model_final_280758.pkl

三,labelme安装与标注
3.1 安装labelme命令:
conda create --name=labelme python=3.7
source activate labelme
conda install pyqt
pip install labelme
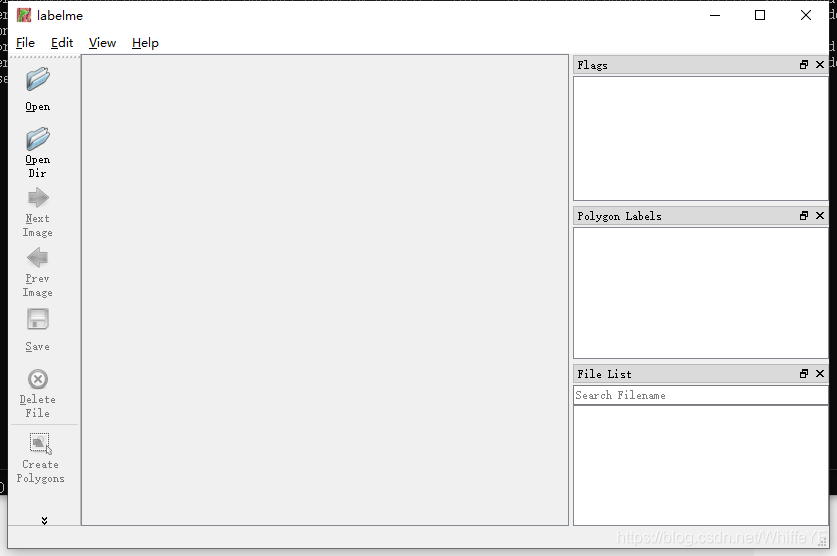
3.2 启动labelme
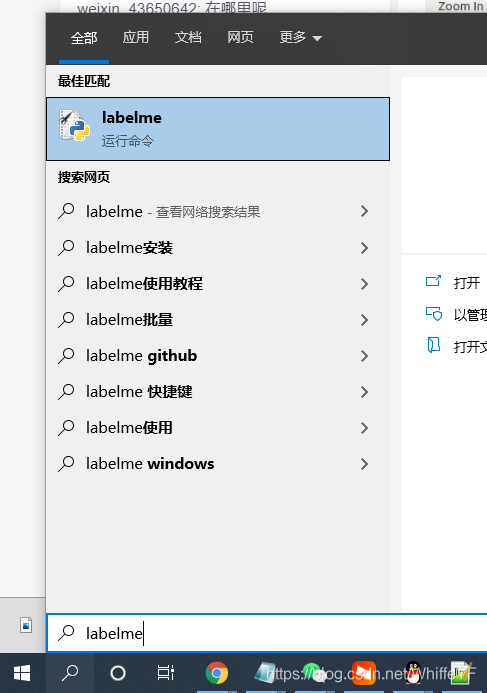
使用教程自己网上查
3.3 标注
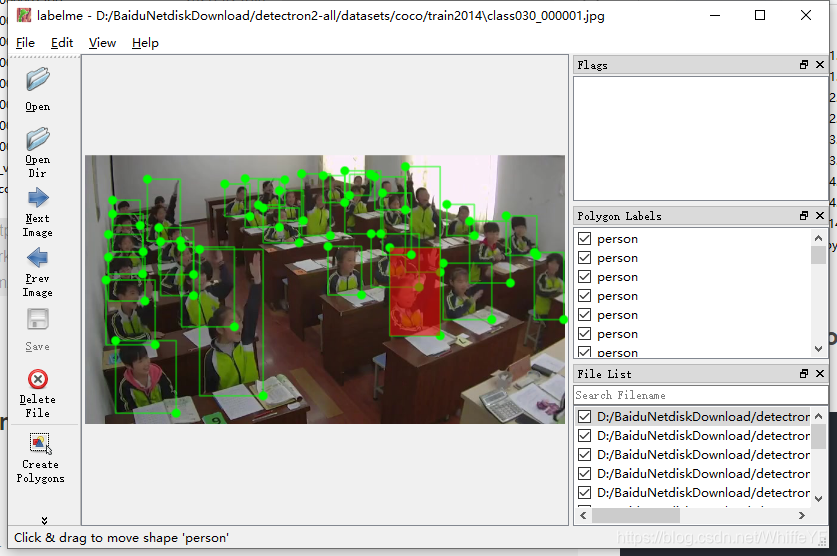
打开处理的文件,可以看到标注是没问题的,要做的就是把人的框框做调整,让每隔框能框到手,遮挡的地方有框,框不出现重叠。
四,制作coco数据集
4.1 labelme导入标注好的文件
在第二节,我们使用faster rcnn处理后的文件,将其分别放在下图的文件中:

4.2 运行labelme2coco.py
代码如下:
# -*- coding:utf-8 -*-

import argparse
import json
import matplotlib.pyplot as plt
import skimage.io as io
# import cv2
from labelme import utils
import numpy as np
import glob
import PIL.Image


class MyEncoder(json.JSONEncoder):
    def default(self, obj):
        if isinstance(obj, np.integer):
            return int(obj)
        elif isinstance(obj, np.floating):
            return float(obj)
        elif isinstance(obj, np.ndarray):
            return obj.tolist()
        else:
            return super(MyEncoder, self).default(obj)


class labelme2coco(object):
    def __init__(self, labelme_json=[], save_json_path='./tran.json'):
        self.labelme_json = labelme_json
        self.save_json_path = save_json_path
        self.images = []
        self.categories = []
        self.annotations = []
        # self.data_coco = {}
        self.label = []
        self.annID = 1
        self.height = 0
        self.width = 0

        self.save_json()

    def data_transfer(self):

        for num, json_file in enumerate(self.labelme_json):
            with open(json_file, 'r') as fp:
                data = json.load(fp)  # 加载json文件
                self.images.append(self.image(data, num))
                for shapes in data['shapes']:
                    label = shapes['label']
                    if label not in self.label:
                        self.categories.append(self.categorie(label))
                        self.label.append(label)
                    points = shapes['points']  # 这里的point是用rectangle标注得到的,只有两个点,需要转成四个点
                    points.append([points[0][0], points[1][1]])
                    points.append([points[1][0], points[0][1]])
                    self.annotations.append(self.annotation(points, label, num))
                    self.annID += 1

    def image(self, data, num):
        image = {}
        img = utils.img_b64_to_arr(data['imageData'])  # 解析原图片数据
        # img=io.imread(data['imagePath']) # 通过图片路径打开图片
        # img = cv2.imread(data['imagePath'], 0)
        height, width = img.shape[:2]
        img = None
        image['height'] = height
        image['width'] = width
        image['id'] = num + 1
        image['file_name'] = data['imagePath'].split('/')[-1]

        self.height = height
        self.width = width

        return image

    def categorie(self, label):
        categorie = {}
        categorie['supercategory'] = 'Cancer'
        categorie['id'] = len(self.label) + 1  # 0 默认为背景
        categorie['name'] = label
        return categorie

    def annotation(self, points, label, num):
        annotation = {}
        annotation['segmentation'] = [list(np.asarray(points).flatten())]
        annotation['iscrowd'] = 0
        annotation['image_id'] = num + 1
        # annotation['bbox'] = str(self.getbbox(points)) # 使用list保存json文件时报错(不知道为什么)
        # list(map(int,a[1:-1].split(','))) a=annotation['bbox'] 使用该方式转成list
        annotation['bbox'] = list(map(float, self.getbbox(points)))
        annotation['area'] = annotation['bbox'][2] * annotation['bbox'][3]
        # annotation['category_id'] = self.getcatid(label)
        annotation['category_id'] = self.getcatid(label)  # 注意,源代码默认为1
        annotation['id'] = self.annID
        return annotation

    def getcatid(self, label):
        for categorie in self.categories:
            if label == categorie['name']:
                return categorie['id']
        return 1

    def getbbox(self, points):
        # img = np.zeros([self.height,self.width],np.uint8)
        # cv2.polylines(img, [np.asarray(points)], True, 1, lineType=cv2.LINE_AA)  # 画边界线
        # cv2.fillPoly(img, [np.asarray(points)], 1)  # 画多边形 内部像素值为1
        polygons = points

        mask = self.polygons_to_mask([self.height, self.width], polygons)
        return self.mask2box(mask)

    def mask2box(self, mask):
        '''从mask反算出其边框
        mask:[h,w]  0、1组成的图片
        1对应对象,只需计算1对应的行列号(左上角行列号,右下角行列号,就可以算出其边框)
        '''
        # np.where(mask==1)
        index = np.argwhere(mask == 1)
        rows = index[:, 0]
        clos = index[:, 1]
        # 解析左上角行列号
        left_top_r = np.min(rows)  # y
        left_top_c = np.min(clos)  # x

        # 解析右下角行列号
        right_bottom_r = np.max(rows)
        right_bottom_c = np.max(clos)

        # return [(left_top_r,left_top_c),(right_bottom_r,right_bottom_c)]
        # return [(left_top_c, left_top_r), (right_bottom_c, right_bottom_r)]
        # return [left_top_c, left_top_r, right_bottom_c, right_bottom_r]  # [x1,y1,x2,y2]
        return [left_top_c, left_top_r, right_bottom_c - left_top_c,
                right_bottom_r - left_top_r]  # [x1,y1,w,h] 对应COCO的bbox格式

    def polygons_to_mask(self, img_shape, polygons):
        mask = np.zeros(img_shape, dtype=np.uint8)
        mask = PIL.Image.fromarray(mask)
        xy = list(map(tuple, polygons))
        PIL.ImageDraw.Draw(mask).polygon(xy=xy, outline=1, fill=1)
        mask = np.array(mask, dtype=bool)
        return mask

    def data2coco(self):
        data_coco = {}
        data_coco['images'] = self.images
        data_coco['categories'] = self.categories
        data_coco['annotations'] = self.annotations
        return data_coco

    def save_json(self):
        self.data_transfer()
        self.data_coco = self.data2coco()
        # 保存json文件
        json.dump(self.data_coco, open(self.save_json_path, 'w'), indent=4, cls=MyEncoder)  # indent=4 更加美观显示


labelme_json = glob.glob(r'./*.json')
# labelme_json=['./1.json']

labelme2coco(labelme_json, '.\\instances_val2014.json')
运行labelme2coco.py:
python labelme2coco.py
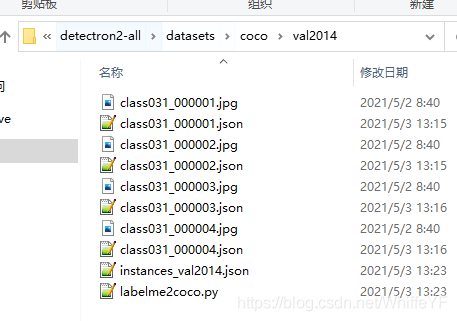
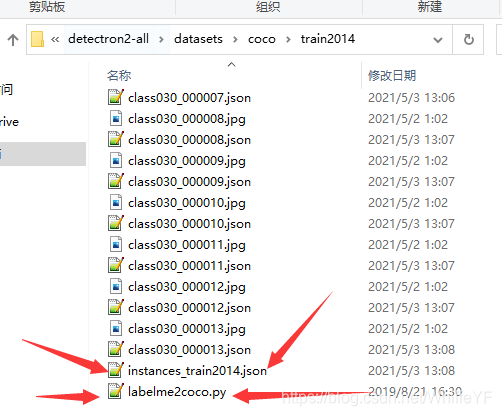
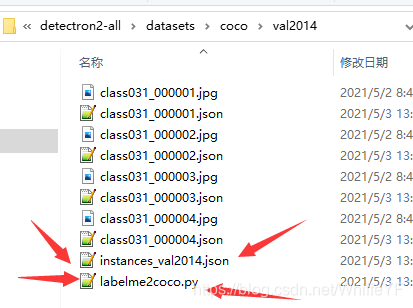
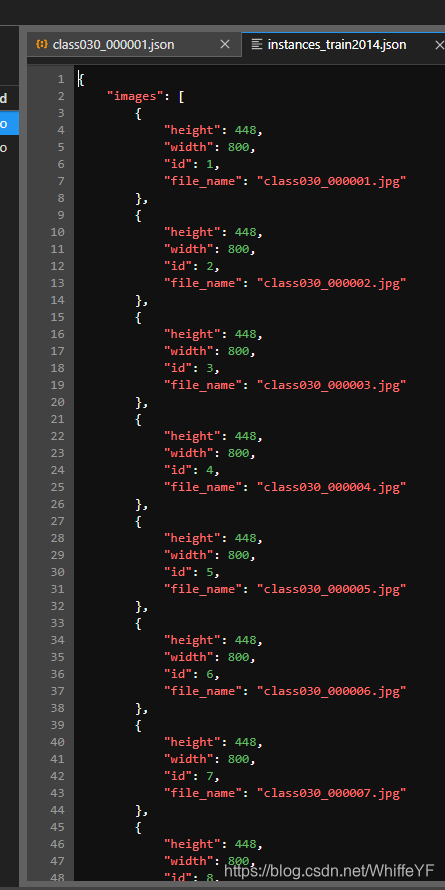
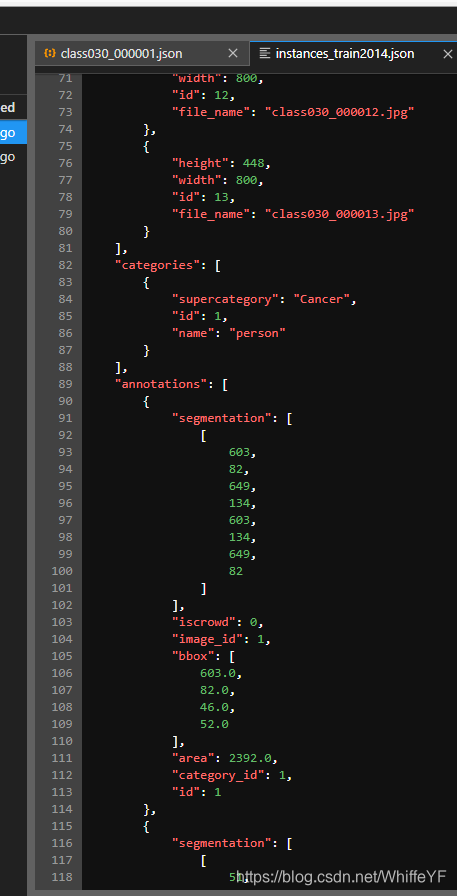
结果如下,会在产生文件instances_val2014.json或者instances_train2014.json
如下图:
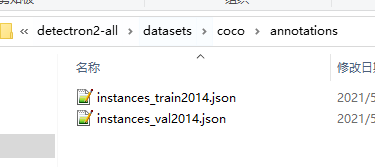
4.3 annotations
将instances_val2014.json和instances_train2014.json复制到\datasets\coco\annotations下,如下图:
五,修改权重文件
5.1 权重文件
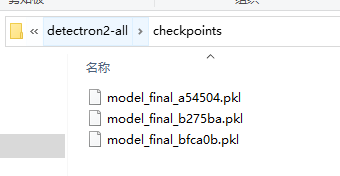
上图的这几个权重文件官网或者B站的UP处下载
其中model_final_b275ba.pkl这个权重文件位于:
MODEL_ZOO.md
其属于faster rcnn的R50-FPN 1x

5.2 changefasterrcnn.py
运行changefasterrcnn.py,代码如下:
import torch
import numpy as np
import pickle
num_class = 1
with open('checkpoints/model_final_b275ba.pkl', 'rb') as f:
    obj = f.read()
weights = pickle.loads(obj, encoding='latin1')

weights['model']['roi_heads.box_predictor.cls_score.weight']=np.zeros([num_class+1,1024], dtype='float32')
weights['model']['roi_heads.box_predictor.cls_score.bias']=np.zeros([num_class+1], dtype='float32')

weights['model']['roi_heads.box_predictor.bbox_pred.weight']=np.zeros([num_class*4,1024], dtype='float32')
weights['model']['roi_heads.box_predictor.bbox_pred.bias']=np.zeros([num_class*4], dtype='float32')


f = open('model_final_faster.pkl', 'wb')
pickle.dump(weights, f)
f.close()
运行结束后,权重文件会保存在下图所示:
六 训练与预测
6.1 运行TrainAndPredict_Faster-RCNN.py
import detectron2
from detectron2.utils.logger import setup_logger
setup_logger()

# import some common libraries
import numpy as np
import cv2
import random
import datetime
import time
import os

from detectron2 import model_zoo
from detectron2.engine import DefaultPredictor
from detectron2.config import get_cfg
from detectron2.utils.visualizer import Visualizer
from detectron2.data import MetadataCatalog
from detectron2.data.datasets import register_coco_instances
from detectron2.data import DatasetCatalog, MetadataCatalog
from detectron2.engine import DefaultTrainer
from detectron2.config import get_cfg
from detectron2.utils.visualizer import ColorMode

def Train():
    register_coco_instances("custom", {}, "../datasets/coco/annotations/instances_train2014.json", "../datasets/coco/train2014/")
    custom_metadata = MetadataCatalog.get("custom")
    dataset_dicts = DatasetCatalog.get("custom")

    for d in random.sample(dataset_dicts, 3):
        img = cv2.imread(d["file_name"])

        visualizer = Visualizer(img[:, :, ::-1], metadata=custom_metadata, scale=1)
        vis = visualizer.draw_dataset_dict(d)
        cv2.imshow('Sample',vis.get_image()[:, :, ::-1])
        cv2.waitKey()


    cfg = get_cfg()
    cfg.merge_from_file(
        "../configs/COCO-Detection/faster_rcnn_R_50_FPN_1x.yaml"
    )
    cfg.DATASETS.TRAIN = ("custom",)
    cfg.DATASETS.TEST = ()
    cfg.DATALOADER.NUM_WORKERS = 4
    cfg.MODEL.WEIGHTS = 'model_final_faster.pkl'
    cfg.SOLVER.IMS_PER_BATCH = 2
    cfg.SOLVER.BASE_LR = 0.02
    cfg.SOLVER.MAX_ITER = (
        100
    )
    cfg.MODEL.ROI_HEADS.BATCH_SIZE_PER_IMAGE = (
        128
    )
    cfg.MODEL.ROI_HEADS.NUM_CLASSES = 1

    os.makedirs(cfg.OUTPUT_DIR, exist_ok=True)
    trainer = DefaultTrainer(cfg)
    trainer.resume_or_load(resume=False)
    trainer.train()


def Predict():
    register_coco_instances("custom", {}, "../datasets/coco/annotations/instances_train2014.json", "datasets/coco/train2014")
    custom_metadata = MetadataCatalog.get("custom")
    DatasetCatalog.get("custom")


    im = cv2.imread("class030_000002.jpg")
    cfg = get_cfg()
    cfg.merge_from_file("../configs/COCO-Detection/faster_rcnn_R_50_FPN_1x.yaml")
    cfg.DATASETS.TEST = ("custom", )
    cfg.MODEL.WEIGHTS = os.path.join(cfg.OUTPUT_DIR, "model_final.pth")
    cfg.MODEL.ROI_HEADS.SCORE_THRESH_TEST = 0.5
    cfg.MODEL.ROI_HEADS.BATCH_SIZE_PER_IMAGE = (
        128
    )
    cfg.MODEL.ROI_HEADS.NUM_CLASSES = 1
    predictor = DefaultPredictor(cfg)
    outputs = predictor(im)
    v = Visualizer(im[:, :, ::-1],
                   metadata=custom_metadata,
                   scale=1,
                   instance_mode=ColorMode.IMAGE_BW   # remove the colors of unsegmented pixels
    )
    #print(outputs["instances"])
    v = v.draw_instance_predictions(outputs["instances"].to("cpu"))
    cv2.imshow('Result',v.get_image()[:, :, ::-1])
    cv2.waitKey()


if __name__ == "__main__":
    Train()
    #Predict()
6.2 预测
修改如下:TrainAndPredict_Faster-RCNN.py,并运行
if __name__ == "__main__":
    #Train()
    Predict()
最后结果:


 208
208

 被折叠的 条评论
为什么被折叠?
被折叠的 条评论
为什么被折叠?
 到【灌水乐园】发言


