


文章目录
提示: 如果读者因网络环境受限,无法正常下载相关资料,可以从文章最后提供的网盘链接下载资源。
1. 环境准备
- 基础环境: Python >= 3.8 (64-bit);PyTorch >= 2.0 + CUDA;
- diffusers: [必需],实现 stable diffusion 的主库;
- transformers: [必需],用于自然语言处理(NLP)任务;
- accelerate: [可选], 优化加速器,允许用户在较低内存的环境下,初始化网络模型;
- peft: [可选], 用于对大模型进行适配和微调,是应用 LoRA 时的必需模块,详见下文。
- 以上 Python 库均由 Hugging Face 提供。由于网络问题,推荐使用阿里云的镜像源进行下载安装,如下:
pip install diffusers    -i https://mirrors.aliyun.com/pypi/simple/
pip install transformers -i https://mirrors.aliyun.com/pypi/simple/
pip install accelerate   -i https://mirrors.aliyun.com/pypi/simple/
pip install peft         -i https://mirrors.aliyun.com/pypi/simple/
2. 快速入门
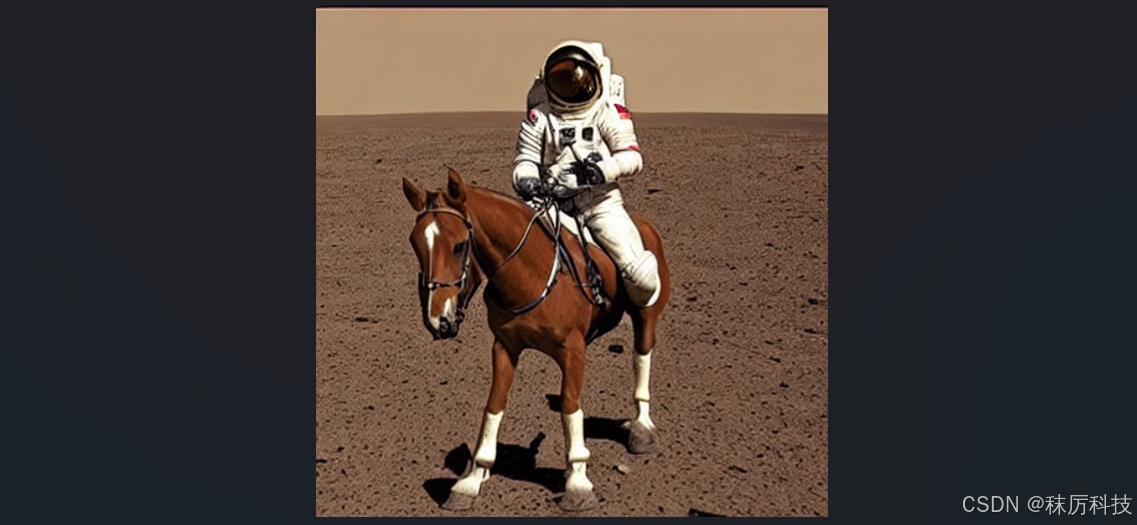
- 例2-1:采用 SD1.5 版模型,进行简单的“文生图”,推理30步。
(首次运行时,将自动从 Hugging Face 下载 repo_id 对应的模型到缓存路径。若您无法下载,请参考文章最后的网盘资料。)
import torch
from diffusers import StableDiffusionPipeline

repo_id = "stable-diffusion-v1-5/stable-diffusion-v1-5"
pipe = StableDiffusionPipeline.from_pretrained(repo_id)
pipe = pipe.to("cuda")

prompt = "a photo of an astronaut riding a horse on mars"
image = pipe(prompt=prompt, num_inference_steps=30).images[0]
image.save("ai_photo_1.png")
- SD1.5 – from_pretrained() 参数
pipe = StableDiffusionPipeline.from_pretrained(
	   pretrained_model_name_or_path,	# 预训练模型的本地路径(文件夹),或 Hub 服务器上某个模型的id,
	   									# 后者在首次运行时,将自动下载对应 id 模型到缓存路径。
	   torch_dtype,						# torch张量数据类型,默认为torch.float32。若设为torch.float16,可以提高速度,
	   									# 并降低显存占用,但须确保你的显卡能够支持FP16运算模式。
	   custom_pipeline,					# 用户自定义模型的id或路径。
	   force_download,					# 是否强制重新下载模型(无视缓存),默认为False。
	   cache_dir,						# 下载模型的缓存路径,默认为 "C:/Users/<用户名>/.cache/huggingface/hub"
	   proxies,							# 网络代理。
	   output_loading_info,				# 是否打印载入错误信息,默认为False。
	   local_files_only,				# 是否仅载入本地模型,默认为False。
	   token,							# 网络令牌,不设不用,若设为True,则使用。
	   revision,						# 指定模型的修订版本,默认为 "main" 。
	   custom_revision,					# 指定用户自定义模型的修订版本。
	   mirror,							# 自定义镜像源,特别指明是为某国设计的,真贴心。
	   device_map,						# pipeline 组件的放置策略,目前仅支持 "balanced" 。
	   max_memory,						# 最大内存限制,默认设为最大 GPU 显存和最大 CPU 内存。
	   offload_folder,					# 权重转存路径。
	   offload_state_dict,				# 是否在内存耗尽时将状态值转存到硬盘中,默认为True。
	   low_cpu_mem_usage,				# 是否使用低 CPU 内存载入模式,默认为True。
	   use_safetensors,					# 是否使用 safetensors 格式的权重文件,默认为None,代表根据情况自动选择。
	   use_onnx,						# 是否使用 onnx 格式的权重文件,默认为None,代表根据情况自动选择。
	   kwargs,							# 其他关键词参数。
	   variant,							# 从特定变体文件载入权重,比如 "fp16" 或 "ema" 。
	   dduf_file						# 从特定 dduf 文件载入权重。
	   )
- SD1.5 – pipeline 调用参数
image = pipe(
		prompt,						# 提示语句,用于指导图片生成。可以是一个字符串,或者多个字符串组成的List。
        height,						# 图片高度,如不设置,将由模型配置文件决定。
        width,						# 图片宽度,如不设置,将由模型配置文件决定。
        num_inference_steps,		# 推理步数,默认 50 步。
        timesteps,					# 自定义时间步长,如不设置,将根据 num_inference_steps 自动计算生成。
        sigmas,						# 自定义时间步长的 sigmas 参数,如不设置,将根据 num_inference_steps 自动计算生成。
        guidance_scale,				# 调节 prompt 对生成图片的影响力,越大影响越强,默认7.5。
        negative_prompt,			# 反向提示语句,指定图片中不应该包含的元素,可以是一个字符串,或者多个字符串组成的List,默认为空。
        num_images_per_prompt,		# 每个 prompt 对应生成的图片数量,默认1。
        eta,						# 仅在 DDIMScheduler 下使用的参数,在其他调度器下忽略。
        generator,					# 自定义的 torch 生成器,默认为None。
        latents,					# 自定义的 “潜在层” 随机输入图像,如不设置,则自动随机生成。
        prompt_embeds,				# 已编码的提示词向量,如不设置,则自动由 prompt 进行编码。
        negative_prompt_embeds,		# 已编码的反向提示词向量,如不设置,则自动由 negative_prompt 进行编码。
        ip_adapter_image,			# 用于 IP-Adapter 的输入图像。
        ip_adapter_image_embeds,	# 用于 IP-Adapter 的输入编码图像。
        output_type,				# 输出图像的数据类型,默认为 "pil", 代表 PIL.Image 。
        return_dict,				# 是否返回一个 Dict 结果,默认为True。
        cross_attention_kwargs,		# 交叉注意力参数,默认为None。
        guidance_rescale,			# 影响力修正系数,默认为0。
        clip_skip,					# 提示词编码器的跳跃层数。
        callback_on_step_end,		# 每个时间步结束时执行的回调函数。
        callback_on_step_end_tensor_inputs,	# 向 callback_on_step_end 传递的张量输入。
        **kwargs					# 其他关键词参数。
		).images[0]
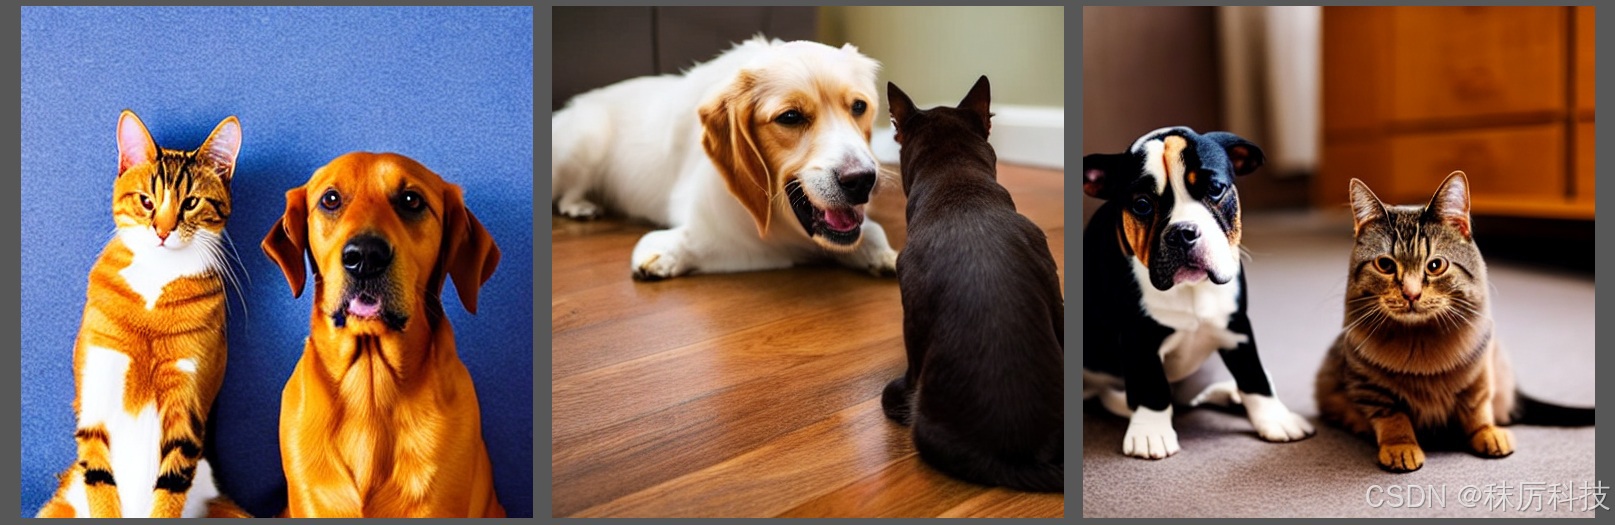
- 例2-2:采用 SD1.5 版模型,通过正、反提示词和其它参数进行“文生图”,并且同时生成多张。
import torch
from diffusers import StableDiffusionPipeline

repo_id = "stable-diffusion-v1-5/stable-diffusion-v1-5"
pipe = StableDiffusionPipeline.from_pretrained(repo_id,
                                               torch_dtype=torch.float16,
                                               use_safetensors=True)
pipe = pipe.to("cuda")

prompt = "a dog and a cat, sitting side by side on floor"
negative_prompt = "lowres, bad anatomy, monochrome, cartoon"

images = pipe(prompt=prompt,
              negative_prompt=negative_prompt,
              num_inference_steps=40,
              guidance_scale=9.5,
              num_images_per_prompt=3
              ).images

images[0].save("ai_photo_2.png")
images[1].save("ai_photo_3.png")
images[2].save("ai_photo_4.png")
3. 结构与原理
3.1 整体流程
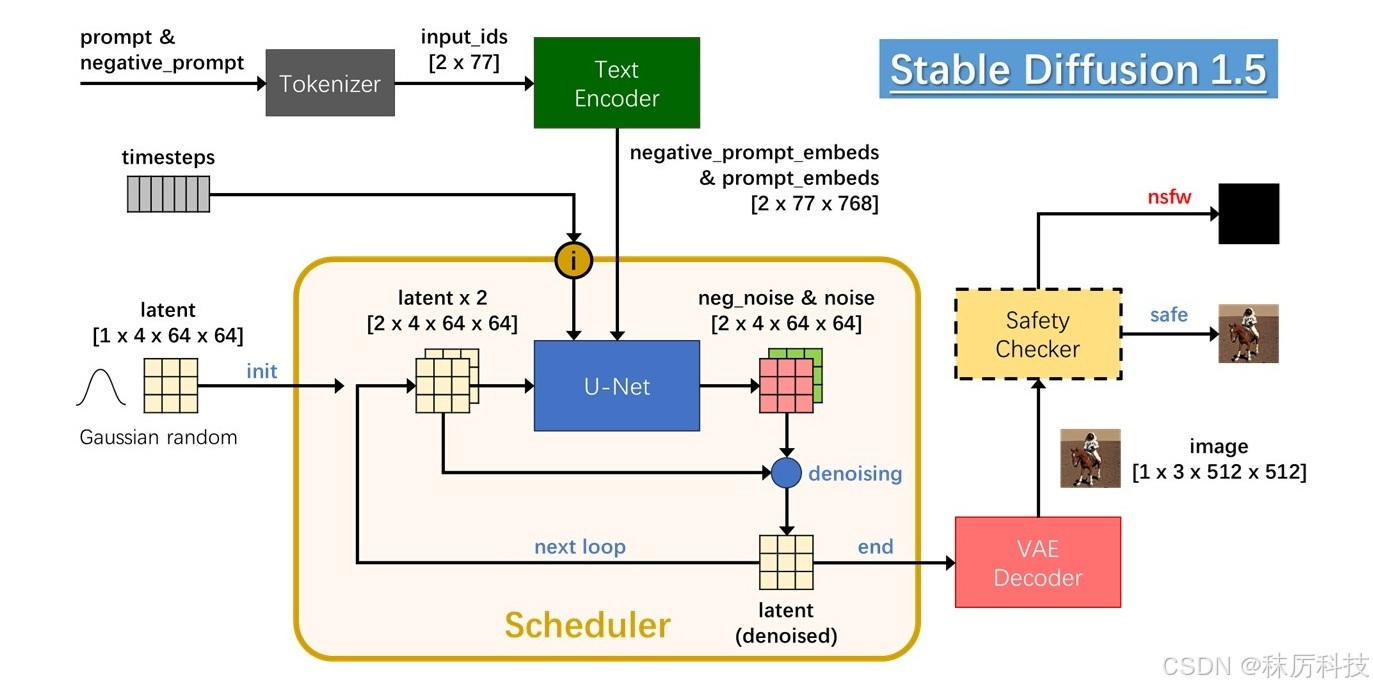
Stable Diffusion (1.5版)的 AI 生图过程如下图所示。
用户输入的正、反提示词,首先经过 Tokenizer 变成数字序列,再经过 Text Encoder 编译成词向量,最终送入 UNet 用于指导生图。UNet 过程在 “潜在层图像” latent 上进行,初始值为随机高斯噪声。生图的过程,其实就是对 latent 循环降噪的过程,该过程由 Scheduler 遵照 timesteps 进行指挥调度。最终降噪的 latent 经过 VAE Decoder 解码成 RGB 图像。
在正式输出之前,使用 Safety Checker 对 image 进行安全检查,确定不包含敏感内容后再输出该图像,否则输出一张纯黑图像。
3.2 模块解析
- Tokenizer
分词器,将文本字符串转换成数字id序列,长度77(长截短补)。
举例:A dog and a cat.
首先删除多余空白并转换成小写,然后添加句头句尾词尾标识,再用 BPE 算法分割单词,最后查询词汇表得到id序列。长度不足77,用句尾标识补位,结果如下表。
| <|startoftext|> | a</w> | dog</w> | and</w> | a</w> | cat</w> | .</w> | <|endoftext|> | (padding) |
|---|---|---|---|---|---|---|---|---|
| 49406 | 320 | 1929 | 537 | 320 | 2368 | 269 | 49407 | [ 49407 ] x 69 |
-
Text Encoder
词向量编码器,将 Tokenizer 输出的 id 序列编译成词向量,输出尺寸为 [ batch_size x 77 x 768 ]
该编码器也是一种网络模型,带有预训练的权重参数。 -
UNet
U型网络,通过对称的下采样与上采样过程,预测输入 latent 中的噪声成分 noise 并输出。
noise 与 latent 具有同样的尺寸 :[ batch_size x 4 x 64 x 64 ] 。
当参数 guidance_scale>1 时,SD1.5 将采用 2 个 batch 的 UNet 过程。输入的 2 个 latent 完全相同,但分别用正、反提示词向量进行 Unet 过程,输出的 2个 batch 分别为正噪声 noise 和反噪声 neg_noise,二者经过运算:neg_noise + guidance_scale * (noise - neg_noise),才算得到本次 Unet 过程预测的噪声。
假如用户没有输入反提示词,那么按照空字符串编码成词向量,作为 negative_prompt_embeds 参与上述运算。
调度器 Scheduler 记录上述噪声结果,再按照一定算法对输入 latent 进行降噪,得到本次循环的 denoised latent。在下一次循环时,将 denoised latent 拷贝成 2 个 batch,作为新一轮 UNet 的输入。 -
VAE
即 Variational Autoencoder,变分自编码器。它分为编码器与解码器两部分,可以实现 latent 与 image 的互相转换。SD1.5 只使用了解码器,将最终降噪的 latent 转换成 RGB image。
VAE 也是一种网络模型,带有预训练的权重参数。 -
Safety Checker
安全检查器,用于对图片进行安全审核。如果图片中包含不宜展示的敏感内容,即 “Not Safe/Suitable For Work,简称 NSFW ”,检查器将拦截该图片并输出一张纯黑图片。Safety Checker 也是一种网络模型,带有预训练的权重参数。
注意,并非所有 NSFW 警报都是敏感内容导致的,其他技术原因也可能造成 “假报警”。比如,当你设置 torch_dtype=torch.float16 ,但你的显卡不支持 FP16 模式,其异常的计算结果就可能误触警报。
禁用 Safety Checker 的方法,只需在 from_pretrained() 之后,再加上两行设置:
pipe.safety_checker = None
pipe.requires_safety_checker = False
3.3 文件布局
在前面的范例中,模型文件默认下载到 “C:/Users/<用户名>/.cache/huggingface/hub” 缓存路径下。用户也可以通过 cache_dir 参数,修改成其他的缓存路径。
进入缓存路径,并展开对应 repo_id 的子目录,观察到 Stable Diffusion 的文件布局如下图。每一个模块单独建立一个文件夹,存放各自的权重文件(默认 safetensors 格式)和 config 配置文件等。

- 通过本地路径载入 Stable Diffusion 模型。
注意,from_pretrained() 第一个参数是文件夹,而非某个具体文件的路径。
import torch
from diffusers import StableDiffusionPipeline

dir_path = r"C:\Users\10495\.cache\huggingface\hub\models--stable-diffusion-v1-5--stable-diffusion-v1-5\snapshots\451f4fe16113bff5a5d2269ed5ad43b0592e9a14"

pipe = StableDiffusionPipeline.from_pretrained(dir_path, torch_dtype=torch.float16)
pipe = pipe.to("cuda")
4. 底模与LoRA
4.1 底模版本、格式与布局
底模,又叫基础算法,或 checkpoint,是实现 AI 生图的基础网络框架。
前面范例使用的 SD1.5 就是一种底模,采用多文件布局,格式为 safetensors。除此之外,还有其他形式的底模。
- 常用版本
| 底模 | 描述 | repo_id |
|---|---|---|
| SD1.5 | 第一代 SD 的稳定版本,体积较小,生态良好。 | stable-diffusion-v1-5/stable-diffusion-v1-5 |
| SD2 | 第二代 SD,使用 OpenCLIP 作为 Text Encoder。 | stabilityai/stable-diffusion-2-base (512 x 512) stabilityai/stable-diffusion-2 (768 x 768) |
| SDXL | 加强版SD,体积更大,但生图质量也得到极大提高,图片尺寸可达 1024 x 1024。 | stabilityai/stable-diffusion-xl-base-1.0 stabilityai/stable-diffusion-xl-refiner-1.0 |
| SD3 | 第三代 SD,更大更强,支持生成视频、3D以及更多类型的内容创作。 | stabilityai/stable-diffusion-3-medium-diffusers |
| 其他 | 以某个版本的SD为基础,经过微调和再训练的底模,比如:ChilloutMix 、RealVisXL 等。 | — |
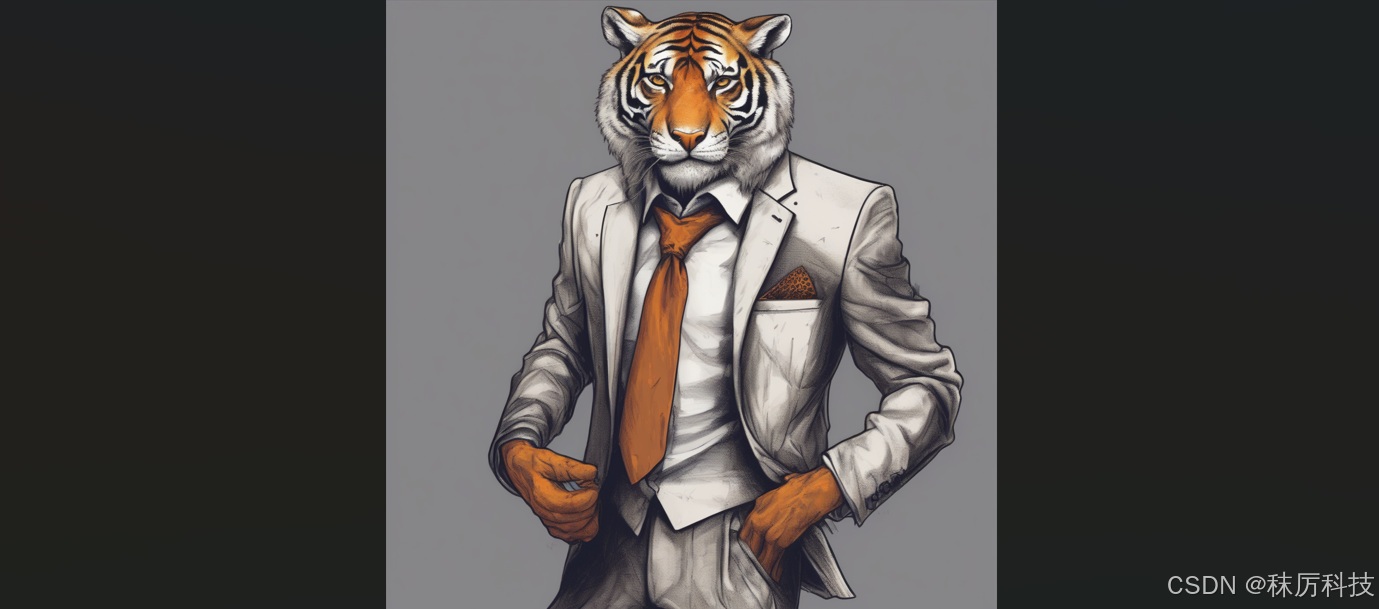
- 例4-1:采用 SDXL 模型进行 AI 生图。
(首次使用 SDXL,依然会尝试下载模型。无法下载的,请参考后面的网盘资料。)
SDXL 模型的载入,需要使用 StableDiffusionXLPipeline 类,其接口参数与 StableDiffusionPipeline 大同小异。具体请查询 diffusers 库的相关源码。不同主版的SD,需要使用不同的类进行初始化。
import torch
from diffusers import StableDiffusionXLPipeline

repo_id = "stabilityai/stable-diffusion-xl-base-1.0"

pipe = StableDiffusionXLPipeline.from_pretrained(repo_id,
                                                 torch_dtype=torch.float16,
                                                 use_safetensors=True)
pipe = pipe.to("cuda")

prompt = "An anthropomorphic tiger dressing a suit with a tie."
image = pipe(prompt=prompt, num_inference_steps=30).images[0]
image.save("ai_photo_sdxl.png")
-
文件格式
官方推荐的格式为 safetensors。而使用 PyTorch 再训练的模型,往往保存成 ckpt 或 bin 格式。
之所以推荐使用 safetensors 格式,是因为 ckpt 与 bin 文件容易被植入恶意代码,引发安全问题。
避免混淆: 并非只有 ckpt 格式文件才能叫做 checkpoint,任何格式的底模都属于 checkpoint 。 -
布局:多文件与单文件
以上范例采用的都是多文件布局的底模,包含多个单独存放的模块。
另有一种底模,采用单文件布局,即一个 ckpt 或 safetensors 文件就包含了所有模块。
多文件布局的底模,使用 from_pretrained() 来载入,其第一个参数是 repo_id 或 本地模型所在文件夹的路径。
单文件布局的底模,使用 from_single_file() 来载入,其第一个参数是模型文件路径。 -
例4-2:从单个 safetensors 文件载入底模,进行 AI 生图。
本例使用的 checkpoint 模型是 AbyssOrangeMix,基于SD1.5,所以使用 StableDiffusionPipeline 载入。该模型擅长绘制风景和人物,并且带有油光质感。(后面网盘里有模型文件)
import torch
from diffusers import StableDiffusionPipeline

file_name = "D:/myCache/AbyssOrangeMix.safetensors"

pipe = StableDiffusionPipeline.from_single_file(file_name, torch_dtype=torch.float16)
pipe = pipe.to("cuda")

prompt = "a photo of forest and river under sunset."
image = pipe(prompt=prompt, num_inference_steps=50).images[0]
image.save("ai_photo_AbyssOrangeMix.png")
- 例4-3:从单个 ckpt 文件载入底模,进行 AI 生图。
注意: 本范例已不可用!
截至到目前,diffusers 对 ckpt 或 bin 文件的态度,已经从 “不推荐” 变为 “不支持”,因此下面的代码通常会报错退出。
import torch
from diffusers import StableDiffusionPipeline

file_name = "D:/myCache/v1-5-pruned-emaonly.ckpt"

pipe = StableDiffusionPipeline.from_single_file(file_name, torch_dtype=torch.float16)
pipe = pipe.to("cuda")

prompt = "an orange cat on grass."
image = pipe(prompt=prompt, num_inference_steps=30).images[0]
image.save("ai_photo_ckpt.png")
如果您执意要加载 ckpt 格式的模型,其实也有两种办法,任选其一操作后,再尝试运行上例。
一、将 torch 降级到 1.12 及以下版本;
二、修改源码 …/diffusers/models/model_loading_utils.py 中的 load_state_dict 函数,将 “weights_only” 键值改为 False,同时安装: pip install pytorch_lightning ;
4.2 LoRA的应用
LoRA,即 Low-Rank Adaptation of Large Language Models,译为大语言模型的低秩适应。
LoRA 是一种快速、轻量化的大模型微调方法,通过分解交叉注意力层的权重矩阵为两个低秩矩阵,仅修改少量参数即可实现模型调整。其权重文件比底模 (checkpoint) 要小得多,通常只有几百兆。
通过 LoRA 的微调,可以让大模型生图呈现特殊风格,或者加强某些主题对象的展示细节。
但 LoRA 无法独立生图,必须与它依赖的底模 (checkpoint) 配套使用。
- 例4-4:采用 SD1.5 搭配 “盲盒玩具” 风格的 LoRA 进行AI生图
(使用 LoRA 需要安装 peft 库。后面网盘提供 blindbox_v1_mix.safetensors 下载)
import torch
from diffusers import StableDiffusionPipeline

repo_id = "stable-diffusion-v1-5/stable-diffusion-v1-5"
pipe = StableDiffusionPipeline.from_pretrained(repo_id, torch_dtype=torch.float16)
pipe = pipe.to("cuda")

lora_dir = "D:/myCache/loras/"		# The base path of LoRA safetensors
pipe.load_lora_weights(lora_dir, weight_name="blindbox_v1_mix.safetensors")

prompt = "fullbody, chibi, girl, blue clothes, pink hair"
negative_prompt = "ugly, scary, lowres, bad anatomy"

image = pipe(prompt=prompt, negative_prompt=negative_prompt, num_inference_steps=40).images[0]
image.save("ai_photo_lora.png")

4.3 开发者社区
那么,从哪里可以获取官方或第三方分享的模型文件呢?这里推荐给大家几个网站。
(1)Hugging Face
网址:https://huggingface.co/models
(2)Civitai
网址:https://civitai.com/
(3)哩布哩布AI
网址:https://www.liblib.art
下载模型时,请注意区分它是底模 (checkpoint) 还是 LoRA,以及依赖的基础模型版本。
5. 拓展:图生图
Stable Diffusion 还支持 “图生图” 模式,即根据现有的图片进行修补或再创作。
下面是几个常用的范例。
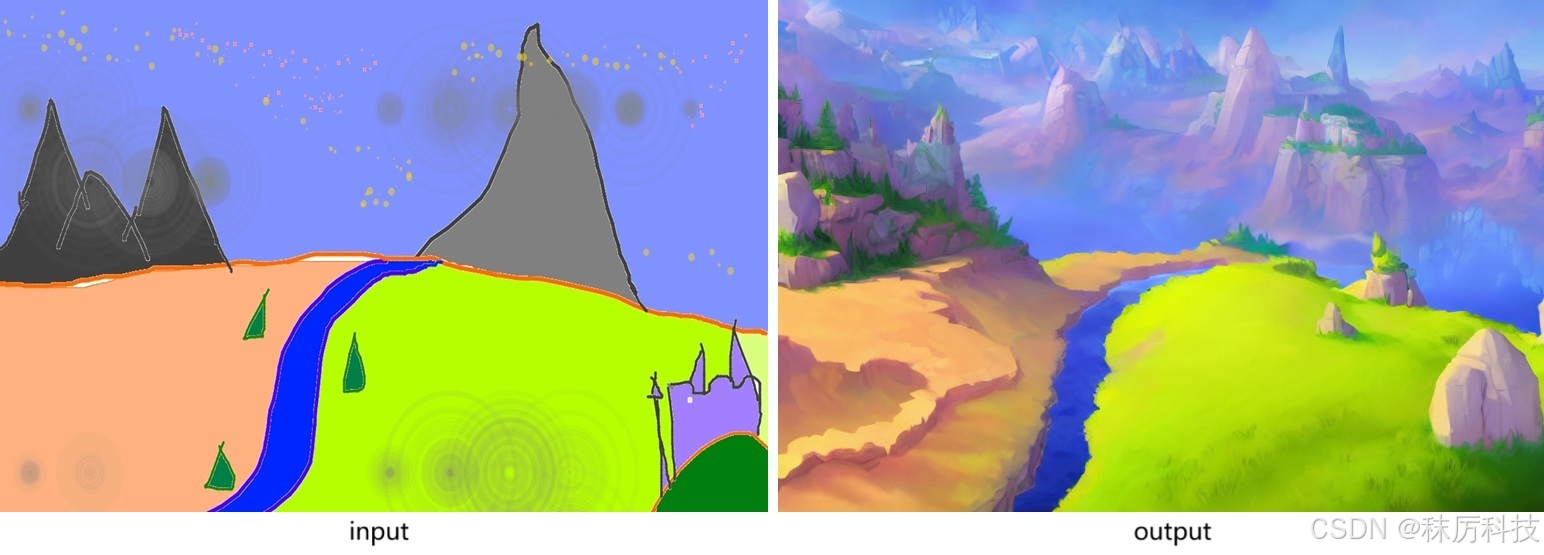
- 例5-1:使用 StableDiffusionImg2ImgPipeline 对输入图片进行再创作。
(实际推理步数,由 strength * num_inference_steps 计算得到。)
import torch
from PIL import Image
from diffusers import StableDiffusionImg2ImgPipeline

repo_id = "stable-diffusion-v1-5/stable-diffusion-v1-5"

pipe = StableDiffusionImg2ImgPipeline.from_pretrained(repo_id, torch_dtype=torch.float16)
pipe = pipe.to("cuda")

init_image = Image.open("D:/myCache/sketch-mountains-input.jpg").convert("RGB")
init_image = init_image.resize((768, 512))

prompt = "A fantasy landscape, trending on artstation"

# The real steps equal (strength * num_inference_steps)
image = pipe(prompt=prompt, image=init_image, strength=0.75, num_inference_steps=30).images[0]
image.save("ai_photo_img2img.png")
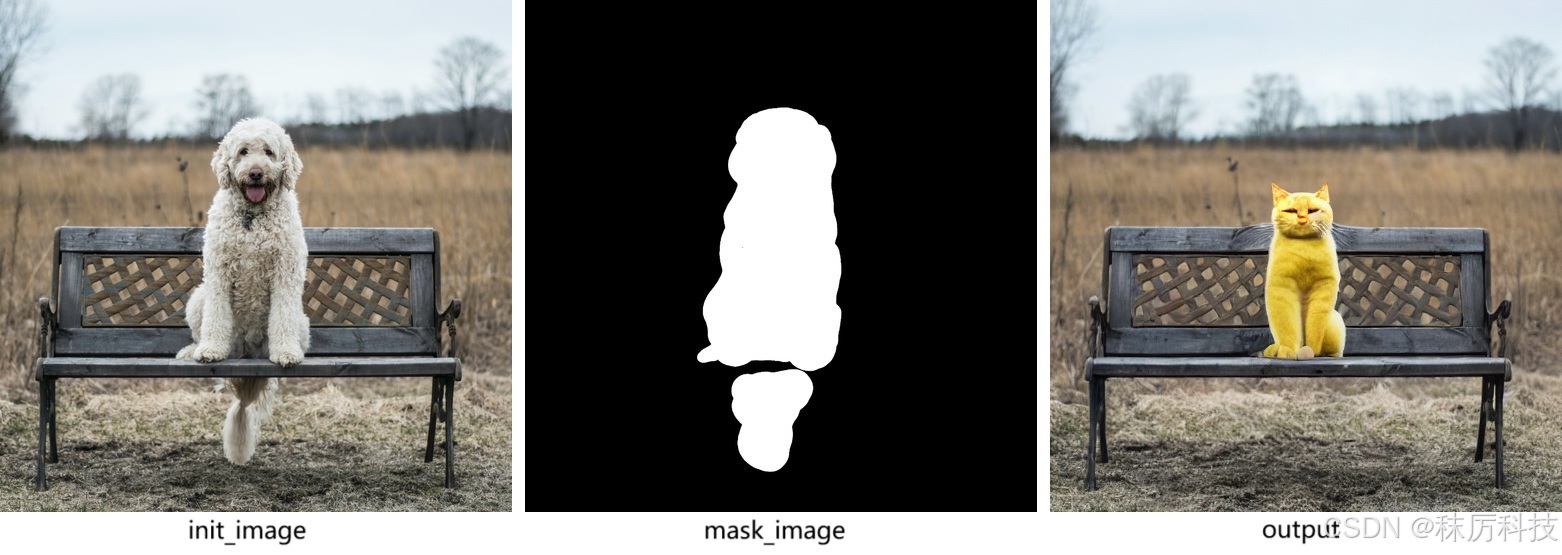
- 例5-2:使用 StableDiffusionInpaintPipeline 对输入图片的局部进行修改。
import torch
from PIL import Image
from diffusers import StableDiffusionInpaintPipeline

repo_id = "stable-diffusion-v1-5/stable-diffusion-inpainting"

pipe = StableDiffusionInpaintPipeline.from_pretrained(repo_id,
                                                      torch_dtype=torch.float16,
                                                      variant="fp16",
                                                      use_safetensors=True)
pipe = pipe.to("cuda")

init_image = Image.open("D:/myCache/input_img.png").convert("RGB").resize((512, 512))
mask_image = Image.open("D:/myCache/input_mask.png").convert("RGB").resize((512, 512))

prompt = "Face of a yellow cat, high resolution, sitting on a park bench"
image = pipe(prompt=prompt, image=init_image, mask_image=mask_image).images[0]
image.save("ai_photo_inpaint.png")
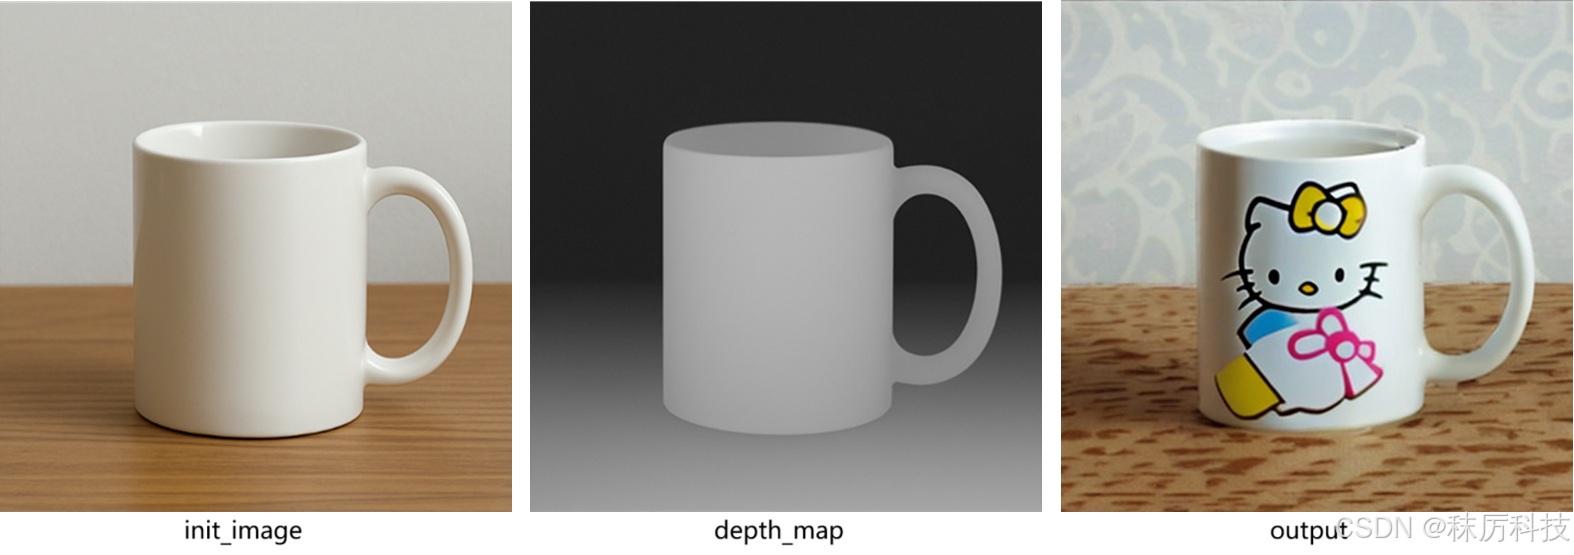
- 例5-3:使用 StableDiffusionDepth2ImgPipeline 修改图片,并且通过结合深度信息,保持结构一致。
(若不设置 depth_map 参数,将由内部方法自动预测深度信息)
import torch
import numpy as np
from PIL import Image
from diffusers import StableDiffusionDepth2ImgPipeline

repo_id = "stabilityai/stable-diffusion-2-depth"

pipe = StableDiffusionDepth2ImgPipeline.from_pretrained(repo_id,
                                                        torch_dtype=torch.float16,
                                                        variant="fp16",
                                                        use_safetensors=True)
pipe = pipe.to("cuda")

init_image = Image.open("D:/myCache/input_img2.png").convert("RGB").resize((512, 512))
depth_map  = Image.open("D:/myCache/depth_map.png").convert("L").resize((512, 512))
depth_map  = torch.tensor(np.array(depth_map)).unsqueeze(0)

prompt = "A logo of hello kitty"
image = pipe(prompt=prompt, image=init_image, depth_map=depth_map, strength=0.7).images[0]
image.save("ai_photo_depth2Img.png")
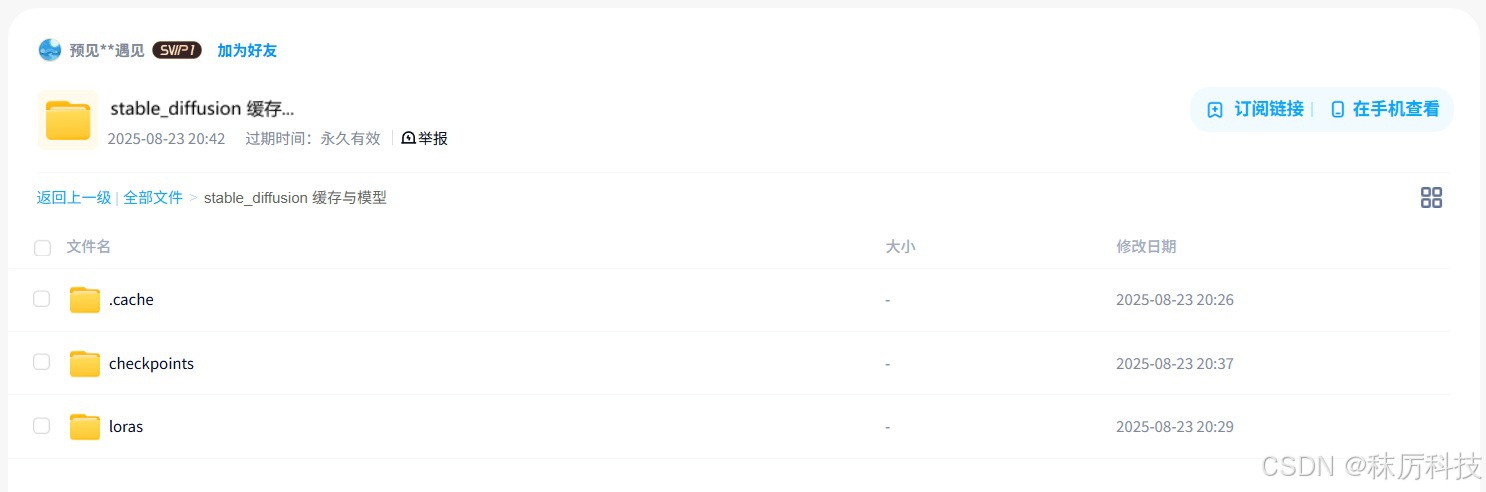
6. 网盘资料
资料链接:
https://pan.baidu.com/s/1_wPAjBvZmfEl4vM4zxNE0w?pwd=nxcc
其中 .cache 是从 Hugging Face 下载的缓存,包含 SD1.5 与 SDXL 两种底模,可以直接拷贝到您的用户目录下并使用。
checkpoints 文件夹下是几个单文件的底模,loras 文件夹下是 LoRA 模型。


 342
342

 被折叠的 条评论
为什么被折叠?
被折叠的 条评论
为什么被折叠?
 到【灌水乐园】发言


