


1.安装miniconda,访问miniconda官网下载安装包,下载后通过conda --version python --version进行验证
安装conda的目的在于管理python的运行时环境,它可以为每个python项目分配一个单独的空间用于项目开发,保证每个项目的python环境能够隔离开,每个项目的python及相关依赖可以不受影响
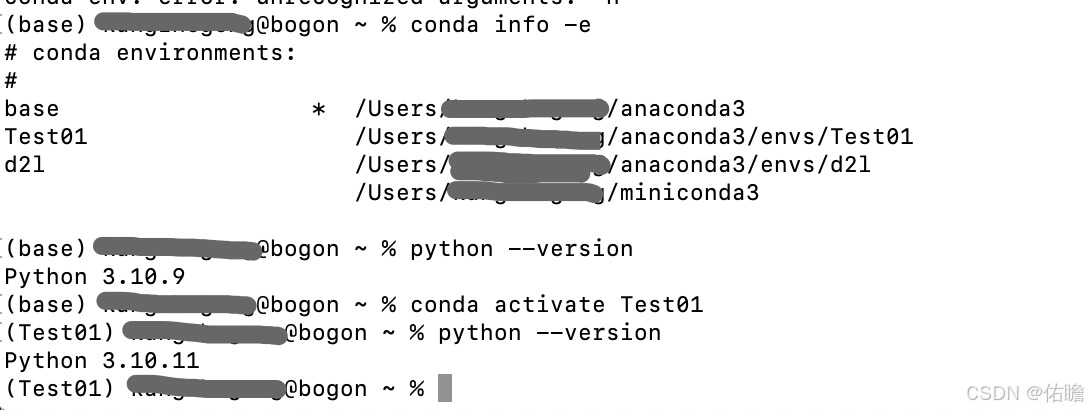
如下图所示,使用conda info -e查看当前的环境列表,使用conda activate xxx切换环境并查看当前环境python 版本.
另外可以使用conda create -n xxx python=3.12.1 新建一个python环境并切换到新虚拟环境
2.安装vscode作为本地开发工具,并在扩展中安装Chinese,Python,Jupyter,GitHub Copilot几个插件
3.安装向量库Chroma
在终端运行命令 pip install chromadb
启动chroma数据库: chroma run --path./chroma_db
具体的chroma数据库在python中的用法参考官网文档:
https://docs.trychroma.com/docs/overview/getting-started
4.安装PostgreSQL
PostgreSQL是一个关系型数据库,pgvector是基于postgreSQL数据存储与检索向量的扩展插件
通过官网方式安装
2)安装完成后会自动启动数据库,之后设置环境变量,以mac系统为例:
echo 'export PATH="/Library/PostgreSQL/15/bin:$PATH"'  >> ~/.zshrc

source ~/.zshrc
3)使用psql -U postgres命令登录数据库,登录时设置密码,如果登录正常,证明数据库安装与运行正常
使用brew安装
1)brew install postgresql@15
2)设置环境变量:
echo 'export PATH="opt/homebrew/opt/postgresql@15/bin:$PATH”'  >>  ~/.zshrc
source ~/.zshrc
echo 'export PATH="opt/homebrew/opt/postgresql@15/bin:$PATH”' >> ~/.zshrc
这行代码的意思是将 export PATH="opt/homebrew/opt/postgresql@15/bin:$PATH“ 内容添加到zshrc文件的末尾,>>是 输出重定向符号,作用是把一个命令的输出结果添加到指定文件的末尾
source ~/.zshrc 重新加载zshrc文件
3)启动数据库服务:
brew services start postgresql@15tips: brew --prefix postgresql@15 使用这个命令查看postgresql被安装到了哪个目录下,替换环境变量的路径后重新加载zshrc文件;检查当前系统环境变量:echo $PATH;登录数据库时如果提示角色不存在,createuser -s -r postgres创建一个角色后重新登录
5.安装pgvector
pgvector 是postgres数据库的扩展,可以让其可以存储与检索向量
依次在终端中执行以下命令
cd /tmp

git clone --branch v0.8.0 https://github.com/pgvector/pgvector.git

cd pgvector

make

make install # may need sudo
然后在终端中登录数据库,安装扩展并测试是否可用
psql -U postgres
create extension vector;
create table mystore(id bigserial PRIMARY KEY,embedding vector(3));
insert into mystore(embedding) VALUES('[1.1,0.2,3.8]');
select * from mystore;
如果查询到了数据代表大功告成。
6.安装Llamaindex框架
pip install llama-index总结一下开发llm本地需要准备的有:基础大模型,嵌入模型,python虚拟运行环境,ide开发工具与插件,向量库,关系型数据库与扩展,llamaindex框架等


 795
795

 被折叠的 条评论
为什么被折叠?
被折叠的 条评论
为什么被折叠?
 到【灌水乐园】发言


