


 本文介绍如何使用Android平台构建一个基本的聊天应用界面,包括使用9-Patch图片优化背景图、设置RecyclerView显示聊天记录、实现消息发送功能等。
这里编写一个聊天界面。
制作9-Patch图片
9-Patch图片是一种被特殊处理过的png图片,能够指定哪些区域可以被拉伸,哪些区域不可以。

比如上面的图片,如果直接设置为背景图:
<?xml version="1.0" encoding="utf-8"?>
<LinearLayout xmlns:android="http://schemas.android.com/apk/res/android"
    android:layout_width="match_parent"
    android:layout_height="50dp"
    android:background="@drawable/message_left_original">

</LinearLayout>
程序运行结果为:
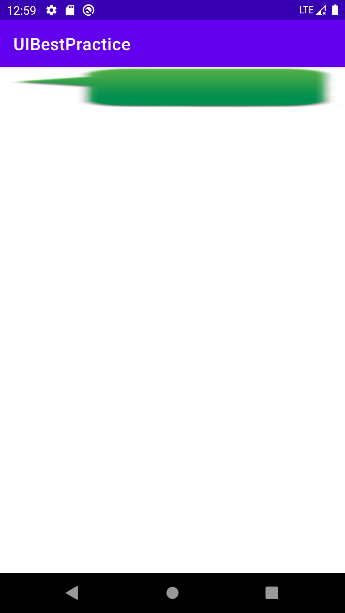
可以看到,由于图片宽度不足以填满整个屏幕的宽度,因此整张图片被拉伸了,这种显示效果肯定是不行的,此时需要用到9-Patch图片。
在该图片右击,选择Create 9-Patch file,然后保存,保存后双击图片会出现如下编辑界面:
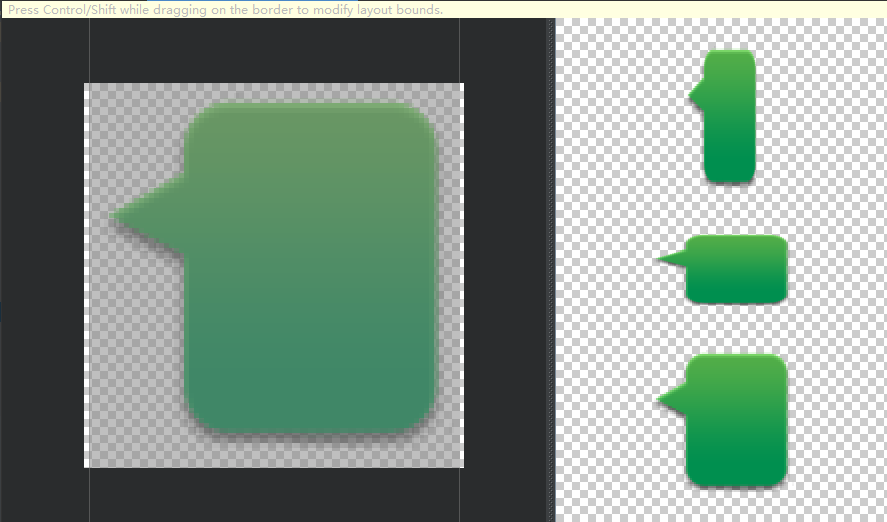
此时可以在图片的4个边框绘制一个个的小黑点,在上边框和左边框绘制的部分表示当图片需要拉伸时就拉伸黑点标记的区域,在下边框和右边框绘制的部分表示内容允许被放置的区域,使用鼠标在图片的边缘拖动就可以进行绘制了,按住shift键可进行擦除。绘制完成后为:

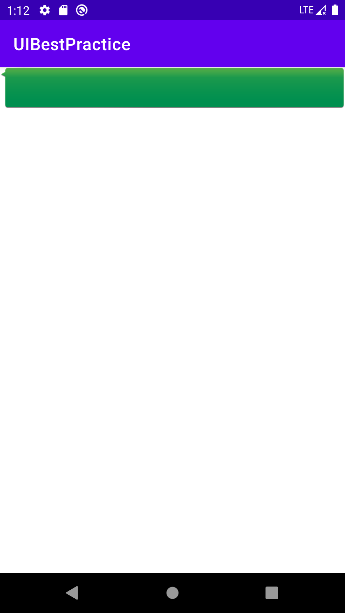
重新运行程序的结果为:
编写聊天界面
首先在app/build.gradle中添加依赖:
dependencies {

    implementation 'androidx.core:core-ktx:1.3.2'
    implementation 'androidx.appcompat:appcompat:1.2.0'
    implementation 'com.google.android.material:material:1.3.0'
    implementation 'androidx.constraintlayout:constraintlayout:2.0.4'
    implementation 'androidx.recyclerview:recyclerview:1.2.0'
    testImplementation 'junit:junit:4.+'
    androidTestImplementation 'androidx.test.ext:junit:1.1.2'
    androidTestImplementation 'androidx.test.espresso:espresso-core:3.3.0'
}
然后修改activity_main.xml:
<?xml version="1.0" encoding="utf-8"?>
<LinearLayout xmlns:android="http://schemas.android.com/apk/res/android"
    xmlns:tools="http://schemas.android.com/tools"
    android:orientation="vertical"
    android:layout_width="match_parent"
    android:layout_height="match_parent"
    android:background="#d8e0e8">

    <androidx.recyclerview.widget.RecyclerView
        android:id="@+id/recyclerView"
        android:layout_width="match_parent"
        android:layout_height="0dp"
        android:layout_weight="1"/>

    <LinearLayout
        android:layout_width="match_parent"
        android:layout_height="wrap_content">

        <EditText
            android:id="@+id/inputText"
            android:layout_width="0dp"
            android:layout_height="wrap_content"
            android:layout_weight="1"
            android:hint="Type something here"
            android:maxLines="2"
            tools:ignore="Suspicious0dp" />

        <Button
            android:id="@+id/send"
            android:layout_width="wrap_content"
            android:layout_height="wrap_content"
            android:text="Send"/>

    </LinearLayout>
</LinearLayout>
上面的代码中,使用RecyclerView用于显示聊天内容,使用EditText输入消息,Button用于发送消息。
然后定义消息实体类,新建Msg:
class Msg(val content:String, val type:Int) {
    companion object {
        const val TYPE_RECEIVED = 0
        const val TYPE_SENT = 1
    }
}
上面Msg类中只有两个字段,content表示消息内容,type表示消息类型,其中消息类型有两个值:TYPE_RECEIVED表示收到的消息,TYPE_SENT表示发送的消息。
然后编写RecyclerView子项布局,新建msg_left_item.xml:
<?xml version="1.0" encoding="utf-8"?>
<FrameLayout xmlns:android="http://schemas.android.com/apk/res/android"
    android:layout_width="match_parent"
    android:layout_height="wrap_content"
    android:padding="10dp">

    <LinearLayout
        android:layout_width="wrap_content"
        android:layout_height="wrap_content"
        android:layout_gravity="left"
        android:background="@drawable/message_left">

        <TextView
            android:id="@+id/leftMsg"
            android:layout_width="wrap_content"
            android:layout_height="wrap_content"
            android:layout_gravity="center"
            android:layout_margin="10dp"
            android:textColor="#fff"/>

    </LinearLayout>
</FrameLayout>
收到的消息是左对齐的。类似的,还要编写一个发送消息的子项布局,新建msg_right_item.xml:
<?xml version="1.0" encoding="utf-8"?>
<FrameLayout xmlns:android="http://schemas.android.com/apk/res/android"
    android:layout_width="match_parent"
    android:layout_height="wrap_content"
    android:padding="10dp">

    <LinearLayout
        android:layout_width="wrap_content"
        android:layout_height="wrap_content"
        android:layout_gravity="right"
        android:background="@drawable/message_right">

        <TextView
            android:id="@+id/rightMsg"
            android:layout_width="wrap_content"
            android:layout_height="wrap_content"
            android:layout_gravity="center"
            android:layout_margin="10dp"
            android:textColor="#000"/>

    </LinearLayout>
</FrameLayout>
发送的消息是右对齐的。然后创建RecyclerView的适配器类,新建类MsgAdapter:
class MsgAdapter(val msgList: List<Msg>):
    RecyclerView.Adapter<RecyclerView.ViewHolder>(){

    inner class LeftViewHolder(view:View):RecyclerView.ViewHolder(view) {
        val leftMsg: TextView = view.findViewById(R.id.leftMsg)
    }

    inner class RightViewHolder(view:View):RecyclerView.ViewHolder(view) {
        val rightMsg: TextView = view.findViewById(R.id.rightMsg)
    }

    override fun getItemViewType(position: Int): Int {
        val msg = msgList[position]
        return msg.type
    }

    override fun onCreateViewHolder(parent: ViewGroup, viewType: Int) = if (viewType == Msg.TYPE_RECEIVED) {
        val view = LayoutInflater.from(parent.context).inflate(R.layout.msg_left_item, parent, false)
        LeftViewHolder(view)
    } else {
        val view = LayoutInflater.from(parent.context).inflate(R.layout.msg_right_item, parent, false)
        RightViewHolder(view)
    }

    override fun onBindViewHolder(holder: RecyclerView.ViewHolder, position: Int) {
        val msg = msgList[position]
        when (holder) {
            is LeftViewHolder -> holder.leftMsg.text = msg.content
            is RightViewHolder -> holder.rightMsg.text = msg.content
            else -> throw IllegalArgumentException()
        }
    }
    override fun getItemCount() = msgList.size
}
上面代码中根据不同的viewType创建不同的界面。首先定义了LeftViewHolder和RightViewHolder这两个ViewHolder,分别用于缓存msg_left_item.xml和msg_right_item.xml布局中的控件。然后重写getItemViewType方法并返回当前position对应的消息类型。
然后在onCreateViewHolder方法总根据不同的viewType来加载不同的布局并创建不同的ViewHolder,然后在onBindViewHolder方法中判断ViewHolder的类型,如果是LeftViewHolder,就将内容显示到左边的消息布局,如果是RightViewHolder,就将内容显示到右边的消息布局。
然后修改Activity,为RecyclerView初始化数据,并加入按钮点击事件:
class MainActivity : AppCompatActivity(), View.OnClickListener {

    private val msgList = ArrayList<Msg>()

    private var adapter:MsgAdapter ?= null

    override fun onCreate(savedInstanceState: Bundle?) {
        super.onCreate(savedInstanceState)
        setContentView(R.layout.activity_main)
        initMsg()
        val layoutManager = LinearLayoutManager(this)
        recyclerView.layoutManager = layoutManager
        adapter = MsgAdapter(msgList)
        recyclerView.adapter = adapter
        send.setOnClickListener(this)
    }

    override fun onClick(v: View?) {
        when (v) {
            send -> {
                val content = inputText.text.toString()
                if (content.isNotEmpty()) {
                    val msg = Msg(content, Msg.TYPE_SENT)
                    msgList.add(msg)
                    adapter?.notifyItemInserted(msgList.size - 1)
                    recyclerView.scrollToPosition(msgList.size - 1)
                    inputText.setText("")
                }
            }
        }
    }

    private fun initMsg() {
        val msg1 = Msg("Hello,guy:", Msg.TYPE_RECEIVED)
        msgList.add(msg1)
        val msg2 = Msg("Hello,who is that?", Msg.TYPE_SENT)
        msgList.add(msg2)
        val msg3 = Msg("This is Tom. Nice to meet you.", Msg.TYPE_RECEIVED)
        msgList.add(msg3)
    }
}
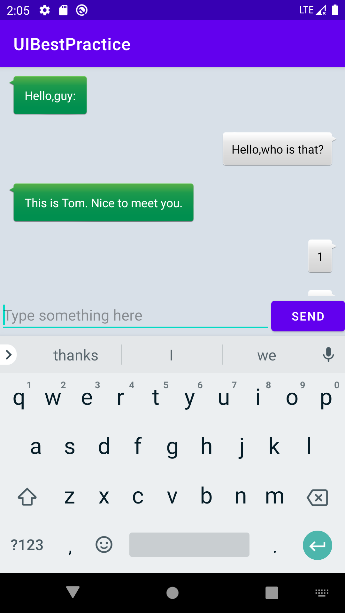
上面代码中,现在initMsg方法中初始化了几条数据用于在RecyclerView中显示,然后按照标准方式构建RecyclerView,并为其指定了LayoutManager和适配器。
然后再发送按钮的点击事件中获取了EditText中的内容,如果内容不为空,就创建一个新的Msg对象添加到msgList列表中,然后调用适配器的notifyItemInserted方法用于通知列表有新的数据插入,这样新增的消息才能够在RecyclerView中显示出来。或者可以使用notifyDataSetChanged方法将所有可见元素刷新,不过该方法效率较差。然后调用scrollToPosition方法将显示的数据定位到最后一行,以保证一定可以看得到最后发出的一条消息。最后清空EditText的内容。
程序运行后的结果为:


 1695
1695

 被折叠的 条评论
为什么被折叠?
被折叠的 条评论
为什么被折叠?
 到【灌水乐园】发言


