


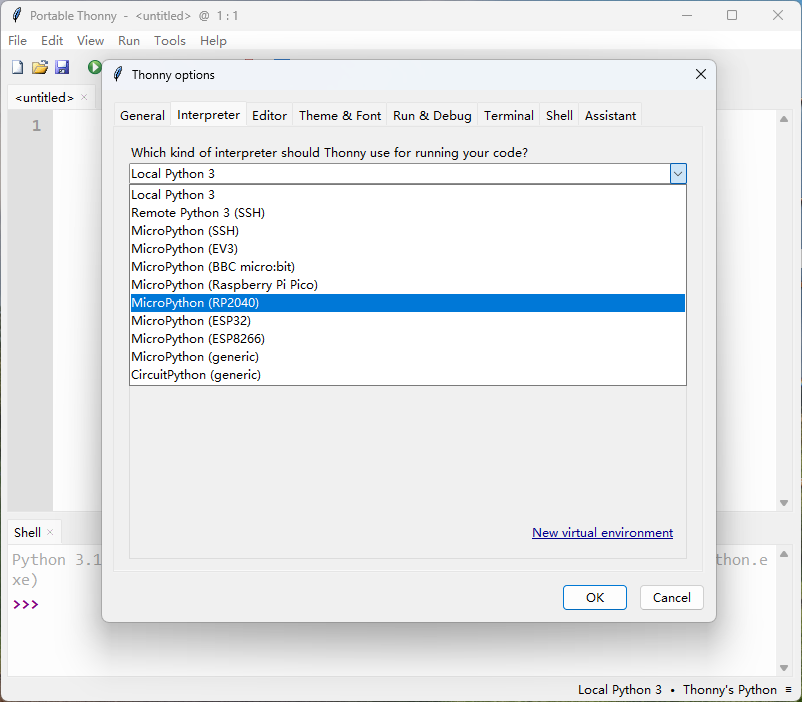
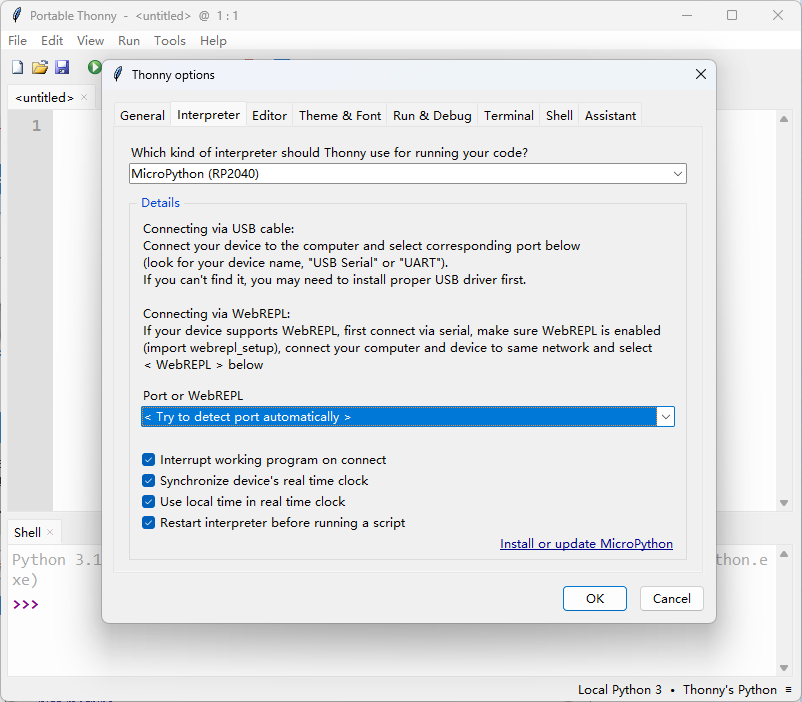
开发环境配置
GPIO点灯
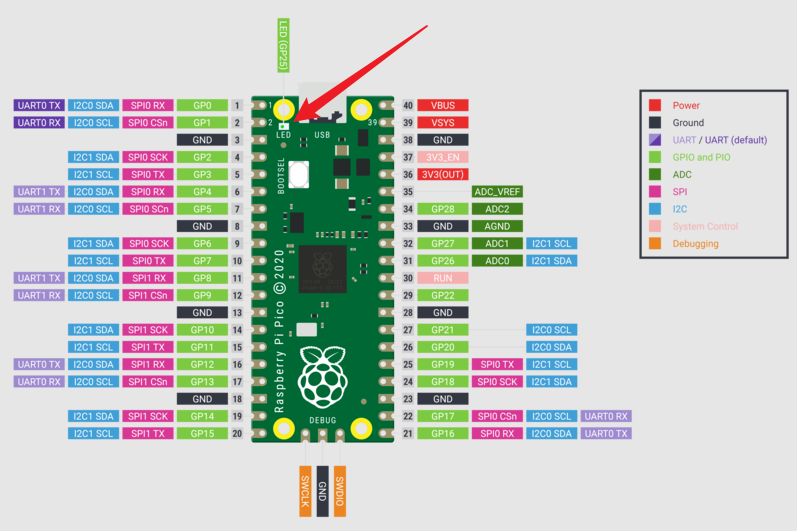
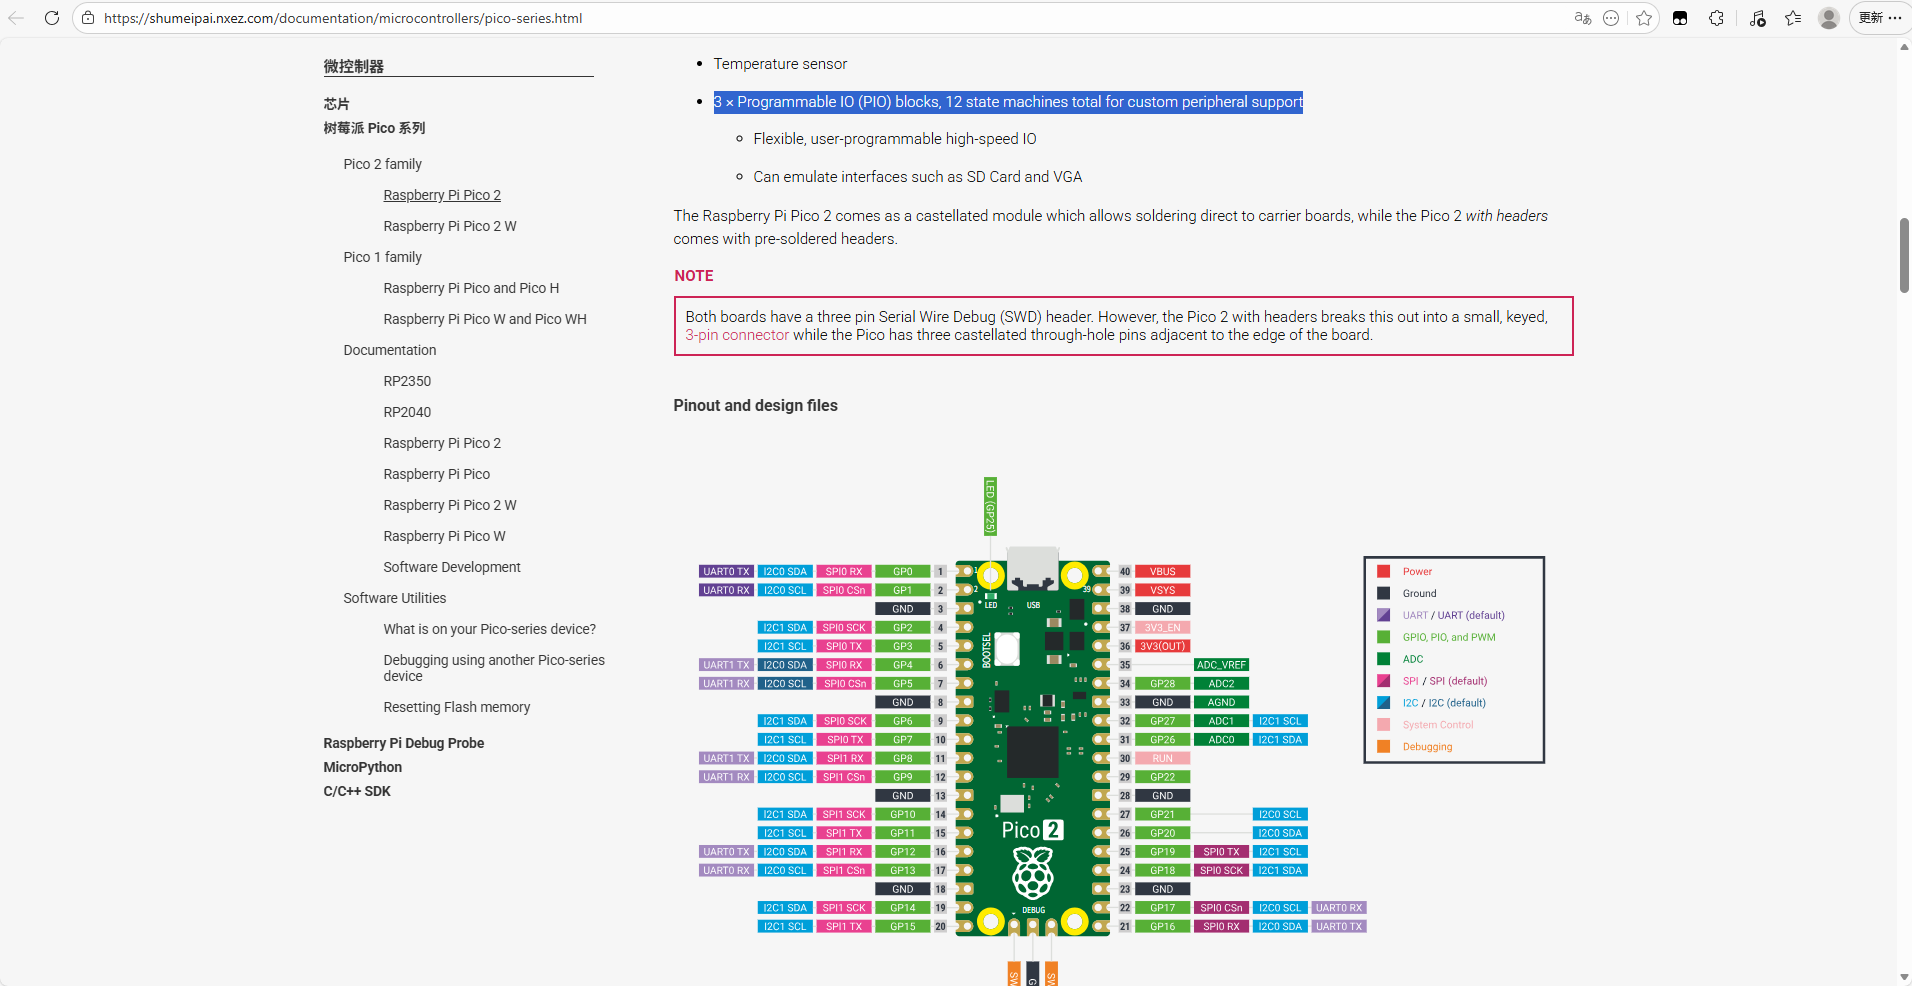
- RP2 快速参考中给出了灯的位置:
- 需要先改变当前的解释器(右下角),然后将pyton代码保存到单片机上去:
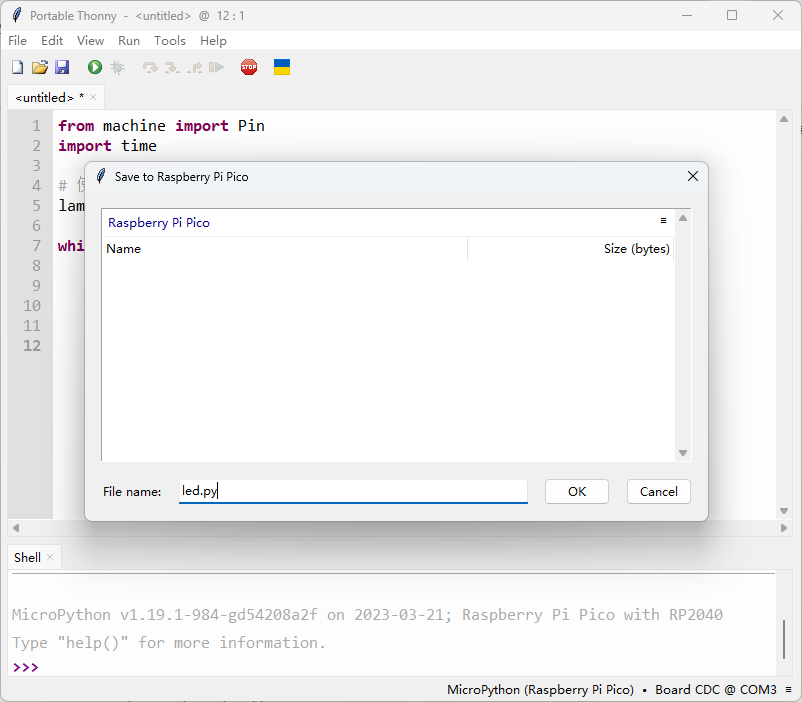
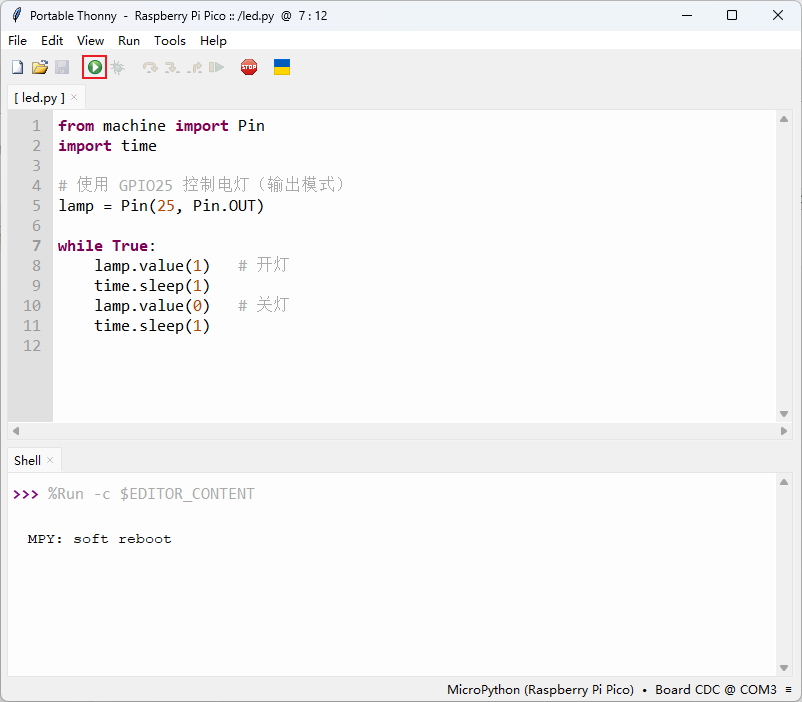
- 程序如下:
from machine import Pin
import time

lamp = Pin(25, Pin.OUT)

while True:
    lamp.value(1)   # 开灯
    time.sleep(1)
    lamp.value(0)   # 关灯
    time.sleep(1)
- 点击运行即可:
PIO点灯
- Python 直接控制 GPIO,延时靠 time.sleep()不精确.如果 Python 在做别的事,就会卡顿,不能做高速或严格时序信号。
- 通过可编程IO(Programmable Input/Output),开发人员可以自定义IO端口的功能和行为,可以实现高精度的输入和输出控制。官方给出了PIO形式的电灯程序( For protocols where there is no hardware support, or where there is a requirement of custom I/O behaviour, Programmable Input Output (PIO) comes into play. )
# Example using PIO to blink an LED and raise an IRQ at 1Hz.

import time
from machine import Pin
import rp2


@rp2.asm_pio(set_init=rp2.PIO.OUT_LOW)
def blink_1hz():
    # Cycles: 1 + 1 + 6 + 32 * (30 + 1) = 1000
    irq(rel(0))
    set(pins, 1)
    set(x, 31)                  [5]
    label("delay_high")
    nop()                       [29]
    jmp(x_dec, "delay_high")

    # Cycles: 1 + 7 + 32 * (30 + 1) = 1000
    set(pins, 0)
    set(x, 31)                  [6]
    label("delay_low")
    nop()                       [29]
    jmp(x_dec, "delay_low")


# Create the StateMachine with the blink_1hz program, outputting on Pin(25).
sm = rp2.StateMachine(0, blink_1hz, freq=2000, set_base=Pin(25))

# Set the IRQ handler to print the millisecond timestamp.
sm.irq(lambda p: print(time.ticks_ms()))

# Start the StateMachine.
sm.active(1)
- 完整周期 = 2000 cycles → 1Hz 严格精准


 1907
1907

 被折叠的 条评论
为什么被折叠?
被折叠的 条评论
为什么被折叠?
 到【灌水乐园】发言


