


1、前提
- Ubuntu 环境版本 (
18.04)
Linux ubuntu 5.4.0-131-generic #147~18.04.1-Ubuntu SMP Sat Oct 15 13:10:18 UTC 2022 x86_64 x86_64 x86_64 GNU/Linux
- ARM GCC版本
gcc version 7.2.1 20171011 (Linaro GCC 7.2-2017.11)
- F1C100S Linux版本 (
linux-nano-5.2-tf) 链接
Linux buildroot 5.2.0-licheepi-nano #5 Sun Oct 23 18:25:54 PDT 2022 armv5tejl GNU/Linux
- I2C 引脚注意上拉电阻
2、Linux配置
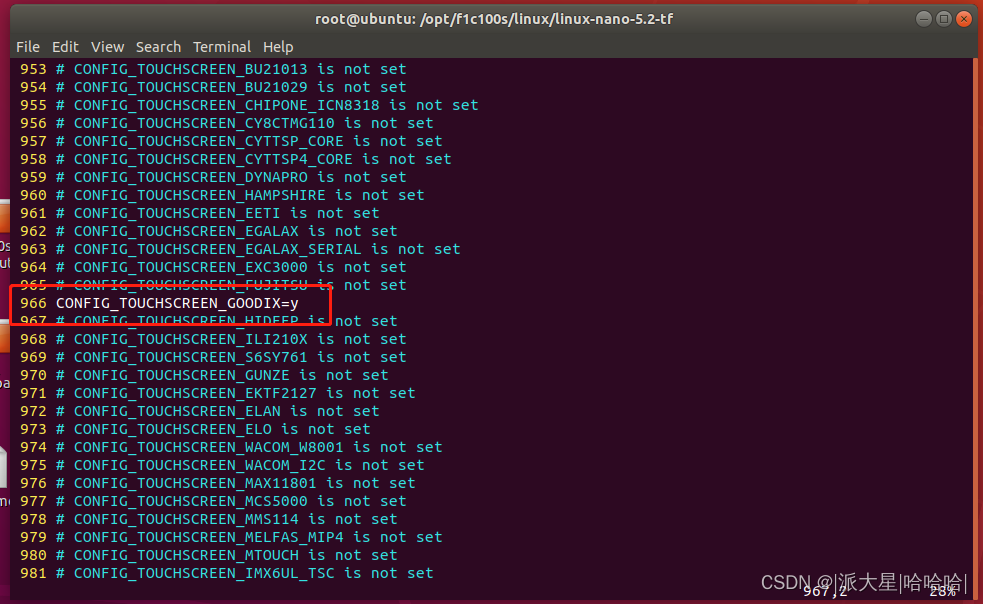
2.1 打开 Gooidx (make menuconfig)
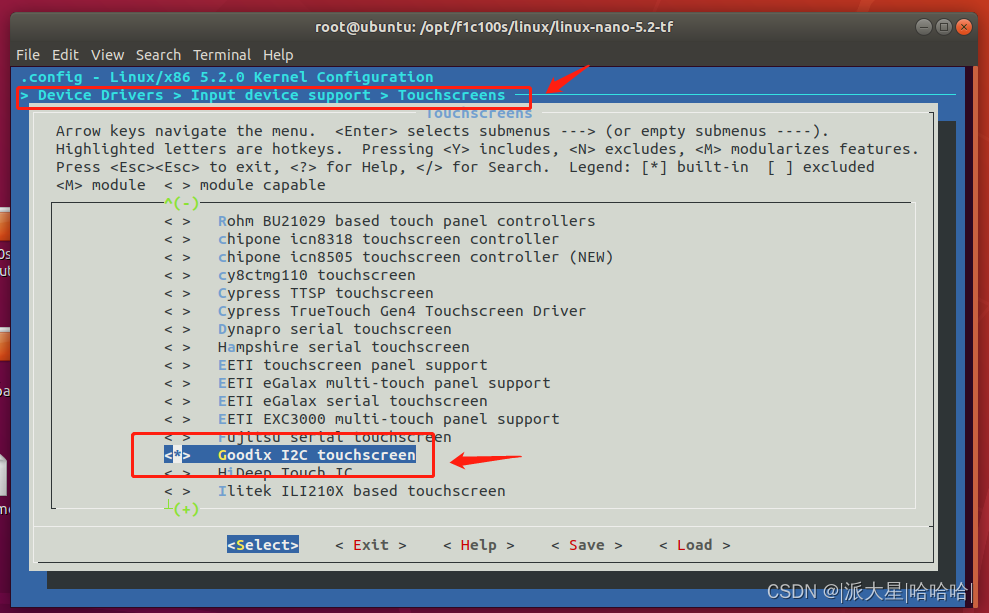
或者手工在 .config中改为y
2.2 在子文件路径中添加驱动文件
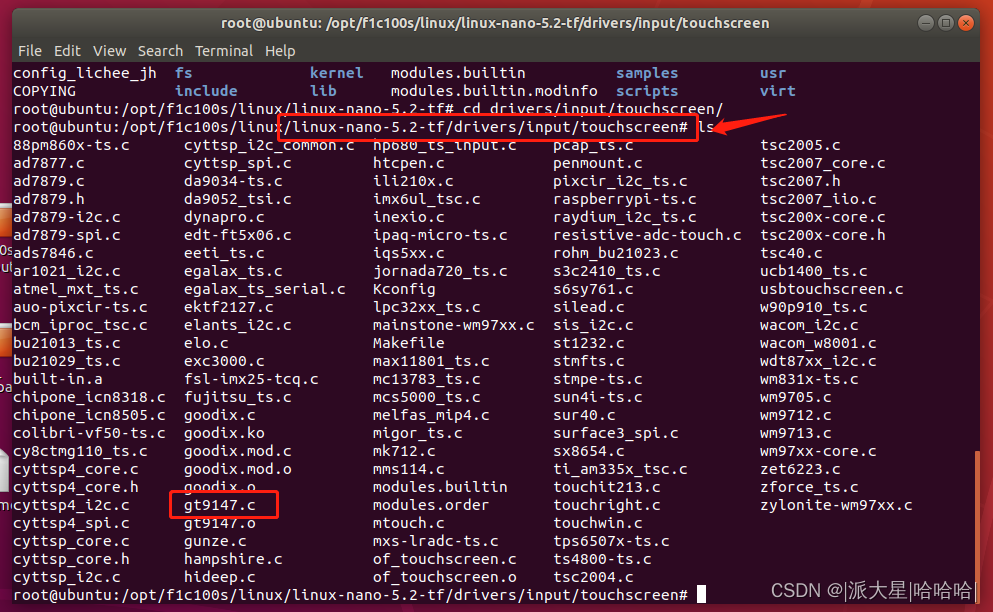
gt9147.c 源码链接:
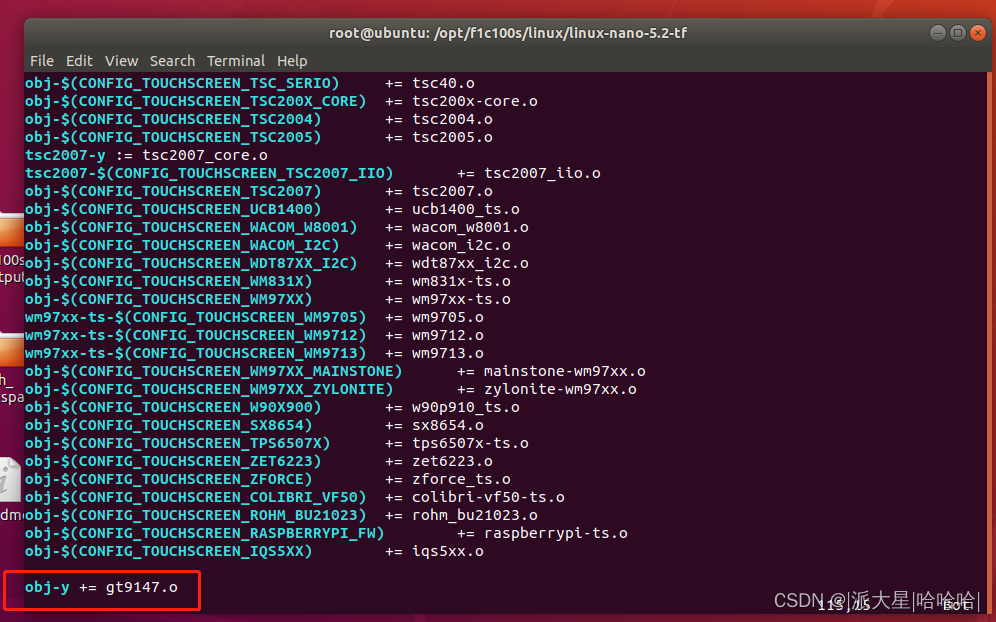
2.3 修改Makefile
文件路径 drivers/input/touchscreen/Makefile
2.4 修改设备树
子文件路径 arch/arm/boot/dts/suniv-f1c100s.dtsi
- 在pio 中接入 i2c0_pins:
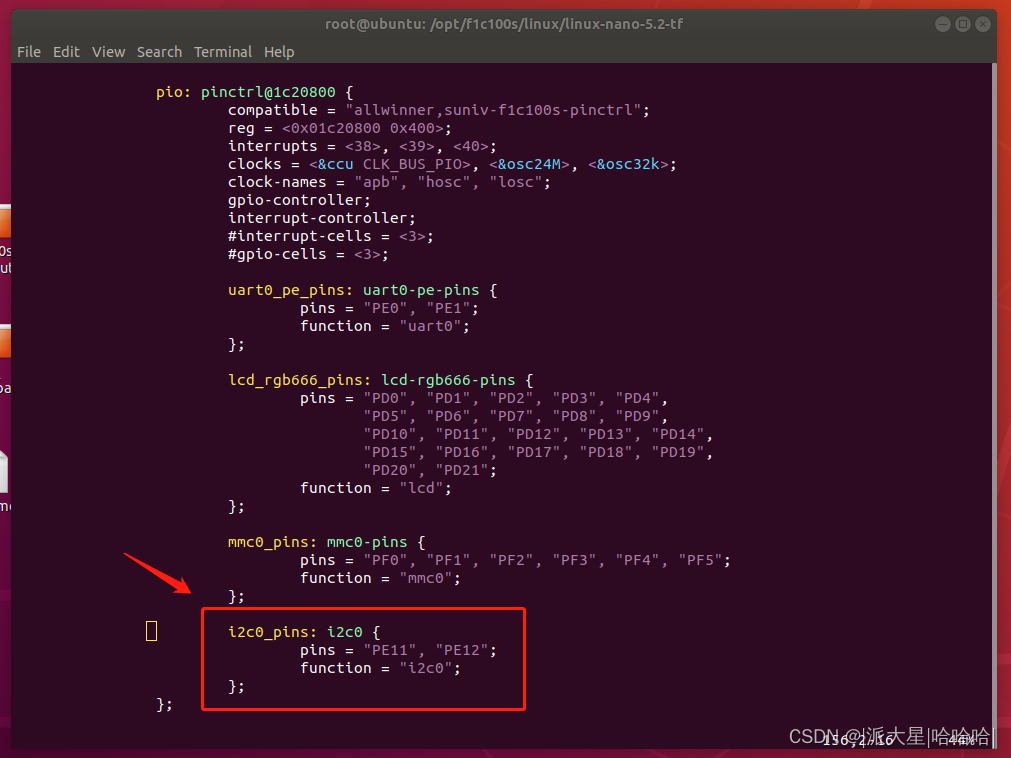
 i2c0_pins: i2c0 {
            pins = "PE11", "PE12";
            function = "i2c0";
 };
- 在后面插入i2c0节点,比如在uart2后面:
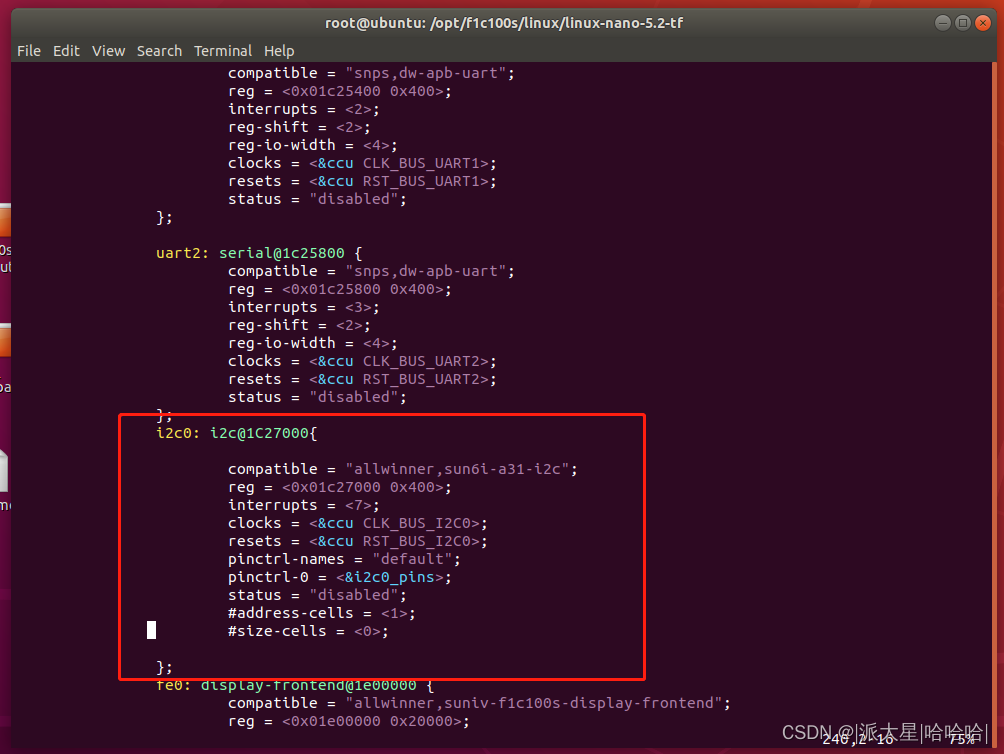
                i2c0: i2c@1C27000{

                        compatible = "allwinner,sun6i-a31-i2c";
                        reg = <0x01c27000 0x400>;
                        interrupts = <7>;
                        clocks = <&ccu CLK_BUS_I2C0>;
                        resets = <&ccu RST_BUS_I2C0>;
                        pinctrl-names = "default";
                        pinctrl-0 = <&i2c0_pins>;
                        status = "disabled";
                        #address-cells = <1>;
                        #size-cells = <0>;

                };
子文件路径 arch/arm/boot/dts/suniv-f1c100s-licheepi-nano.dts
- 引入头文件
#include <dt-bindings/input/input.h>
#include <dt-bindings/interrupt-controller/irq.h>
- 插入&i2c0 节点。
注意: gt9147地址有时候是0x14有时候是0x5d, 需要使用 I2cdetect 指令检查地址。启动信息也会提示
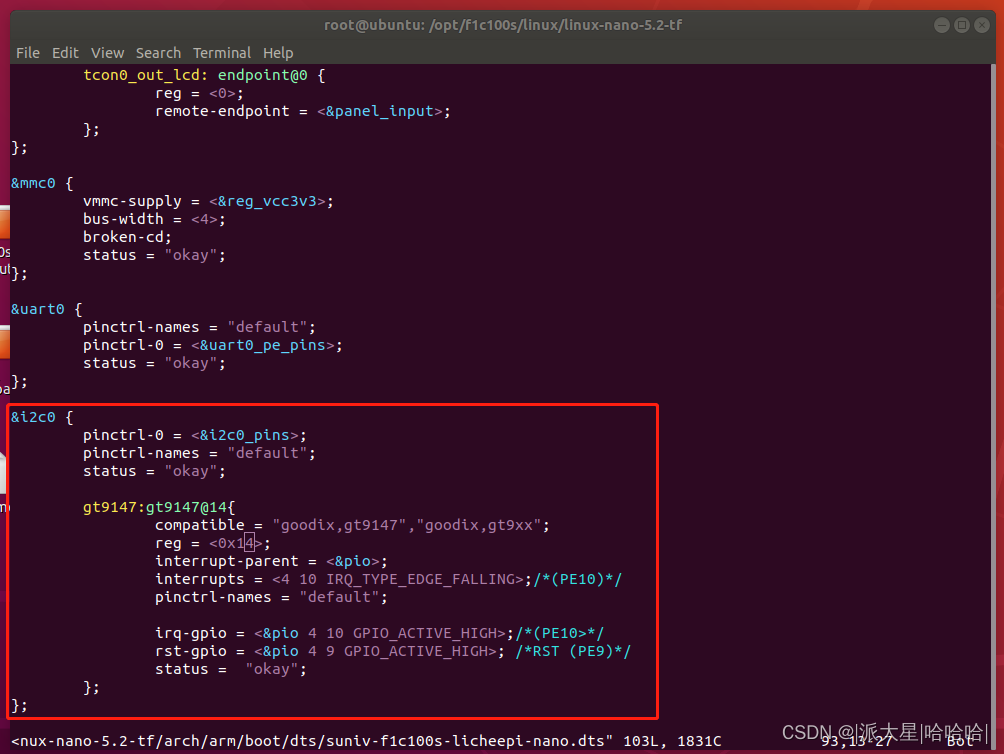
&i2c0 {
        pinctrl-0 = <&i2c0_pins>;
        pinctrl-names = "default";
        status = "okay";

        gt9147:gt9147@14{
                compatible = "goodix,gt9147","goodix,gt9xx";
                reg = <0x14>;
                interrupt-parent = <&pio>;
                interrupts = <4 10 IRQ_TYPE_EDGE_FALLING>;/*(PE10)*/
                pinctrl-names = "default";

                irq-gpio = <&pio 4 10 GPIO_ACTIVE_HIGH>;/*(PE10>*/
                rst-gpio = <&pio 4 9 GPIO_ACTIVE_HIGH>; /*RST (PE9)*/
                status =  "okay";
        };
};
2.5 编译并自行复制到TF卡中
编译
make ARCH=arm CROSS_COMPILE=arm-linux-gnueabi- -j16
zImage (路径:arch/arm/boot)

dtb (路径:arch/arm/boot/dts)

3、Linux启动
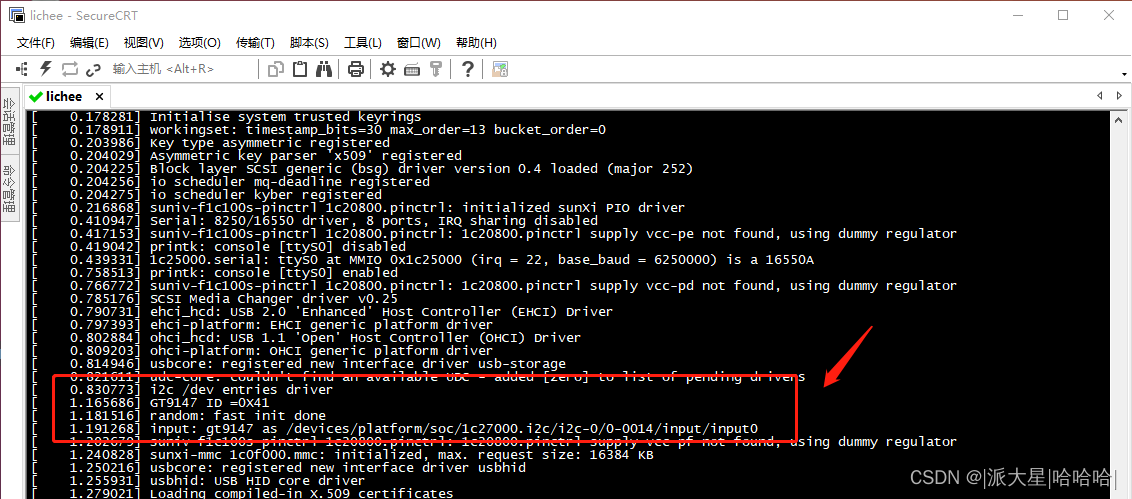
3.1 检查启动信息
正常如下所示。如果报错(-6 -110 等),要检查I2C引脚电气连接、设备树地址配置等等。
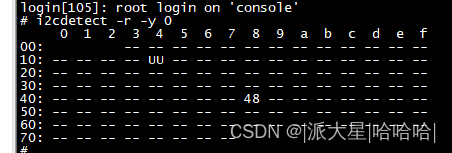
3.2 i2cdetect 测试
正常的话对应地址应该是UU(驱动已占用)。48是荔枝派自带的,不用电阻屏就不用管他。
- 如果3.1启动信息报错,这里又检查出个5d地址,就得回到设备树改地址为5d(见下方示例)
- 如果提示 lock , 一般是缺上拉电阻,改硬件试试?
        gt9147:gt9147@5d{
                compatible = "goodix,gt9147","goodix,gt9xx";
                reg = <0x5d>;
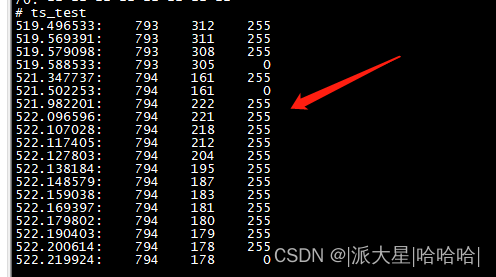
3.3 tslib 测试
运行 ts_test ,正常触摸屏蔽后就会输出如下坐标信息


 3001
3001


 到【灌水乐园】发言


