


目录
1.按钮控件Button
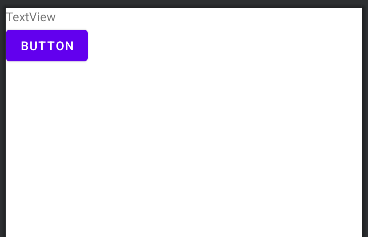
之前介绍过文本视图TextView,而本章介绍的按钮控件Button则是由文本视图派生而来的,所以TextView拥有的属性以及方法Button都可以使用。与文本视图不同,按钮控件有默认的背景以及内部文本默认居中对齐。下面代码实例。
<?xml version="1.0" encoding="utf-8"?>
<LinearLayout xmlns:android="http://schemas.android.com/apk/res/android"
    xmlns:app="http://schemas.android.com/apk/res-auto"
    xmlns:tools="http://schemas.android.com/tools"
    android:layout_width="match_parent"
    android:layout_height="match_parent"
    tools:context=".ButtonActivity"
    android:orientation="vertical">

    <TextView
        android:id="@+id/textView"
        android:layout_width="wrap_content"
        android:layout_height="wrap_content"
        android:text="TextView" />

    <Button
        android:id="@+id/button"
        android:layout_width="wrap_content"
        android:layout_height="wrap_content"
        android:text="Button" />
</LinearLayout>
下面是效果图。可以看到文本视图是没有背景且文本靠左对齐而按钮则有背景且文字居中对齐。但发现按钮中的文字不想文本视图那样原样输出而是将英文字母全部大写。这就是按钮的另一个不同之处。
1.1 textAllCaps属性
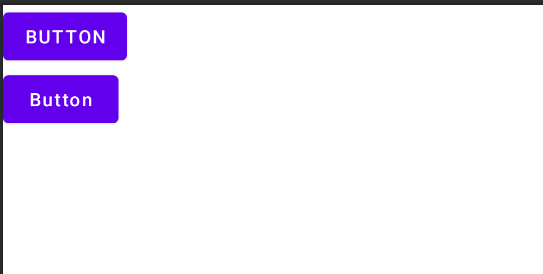
对于文本视图而言,text属性设置什么内容它都原样输出,而按钮无论text属性设置的文本中的字母是否大小写一律转换为大写。那么该怎么让它与文本视图一样呢?对此按钮有一个属性android:textAllCaps来控制是否大小写,按钮默认为true即大写。如果想要原样输出则将该属性设置为false即不要转换为大写。下面为示例代码。两个按钮的区别只有在textAllCaps属性上的不同。
<?xml version="1.0" encoding="utf-8"?>
<LinearLayout xmlns:android="http://schemas.android.com/apk/res/android"
    xmlns:app="http://schemas.android.com/apk/res-auto"
    xmlns:tools="http://schemas.android.com/tools"
    android:layout_width="match_parent"
    android:layout_height="match_parent"
    tools:context=".ButtonActivity"
    android:orientation="vertical">

    <Button
        android:id="@+id/button_1"
        android:layout_width="wrap_content"
        android:layout_height="wrap_content"
        android:text="Button"/>

    <Button
        android:id="@+id/button_2"
        android:layout_width="wrap_content"
        android:layout_height="wrap_content"
        android:text="Button"
        android:textAllCaps="false"/>
</LinearLayout>
下面是效果图。第一个按钮为大写,第二个原样输出。
1.2 onClick属性
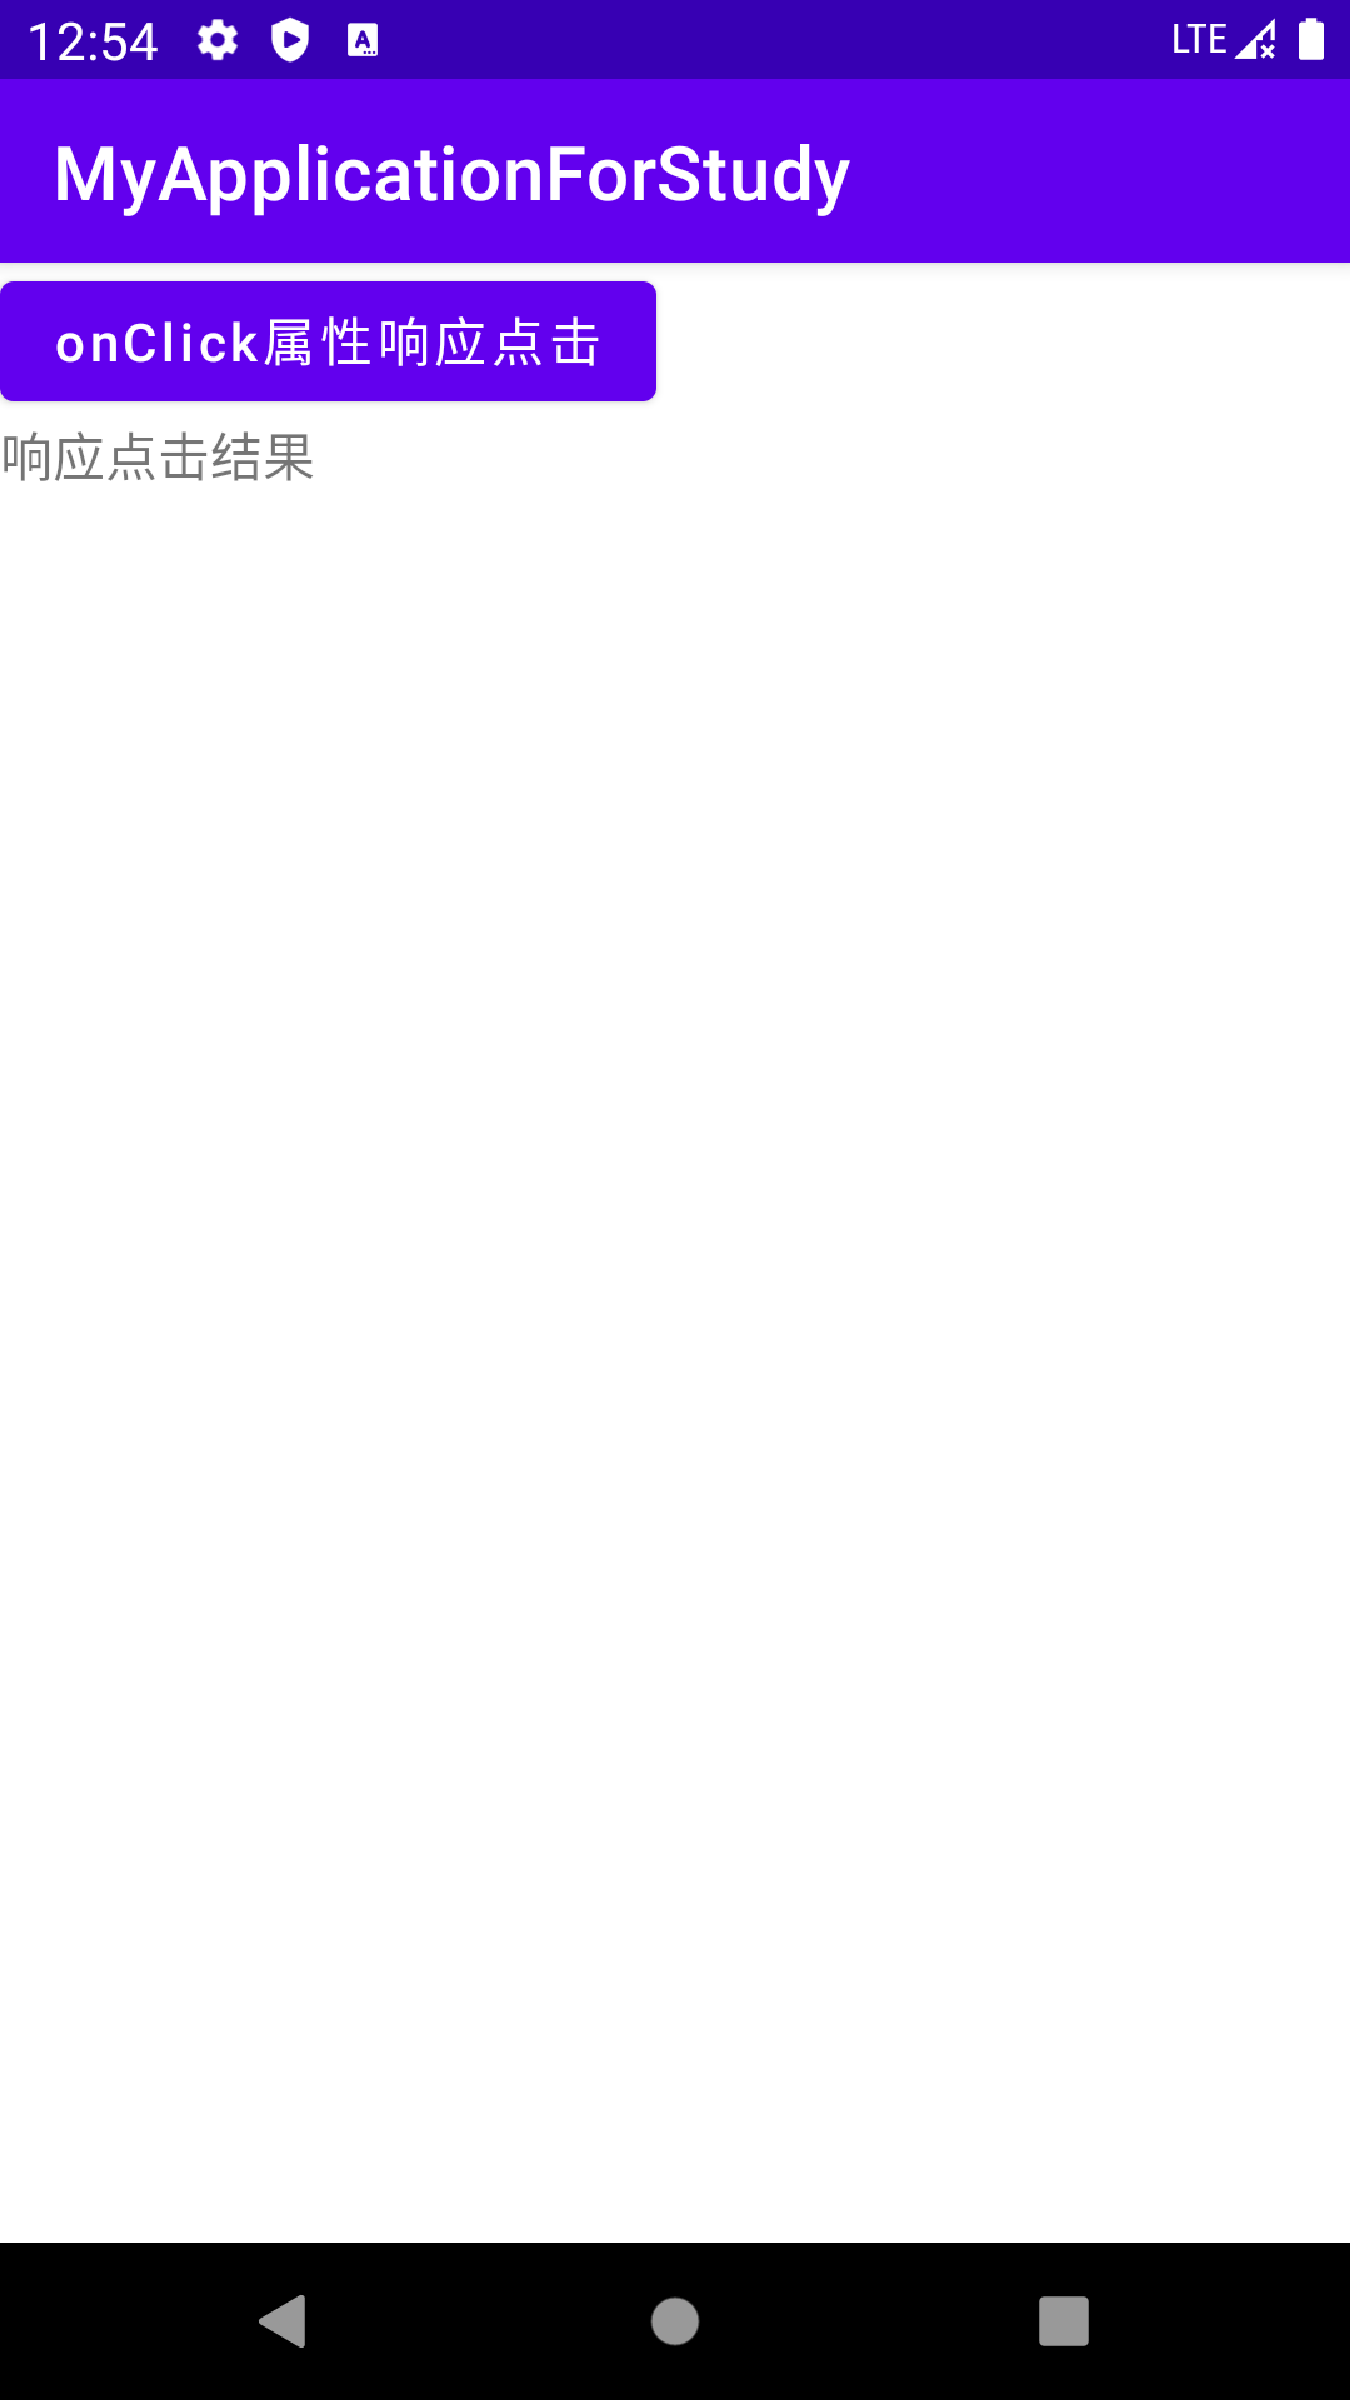
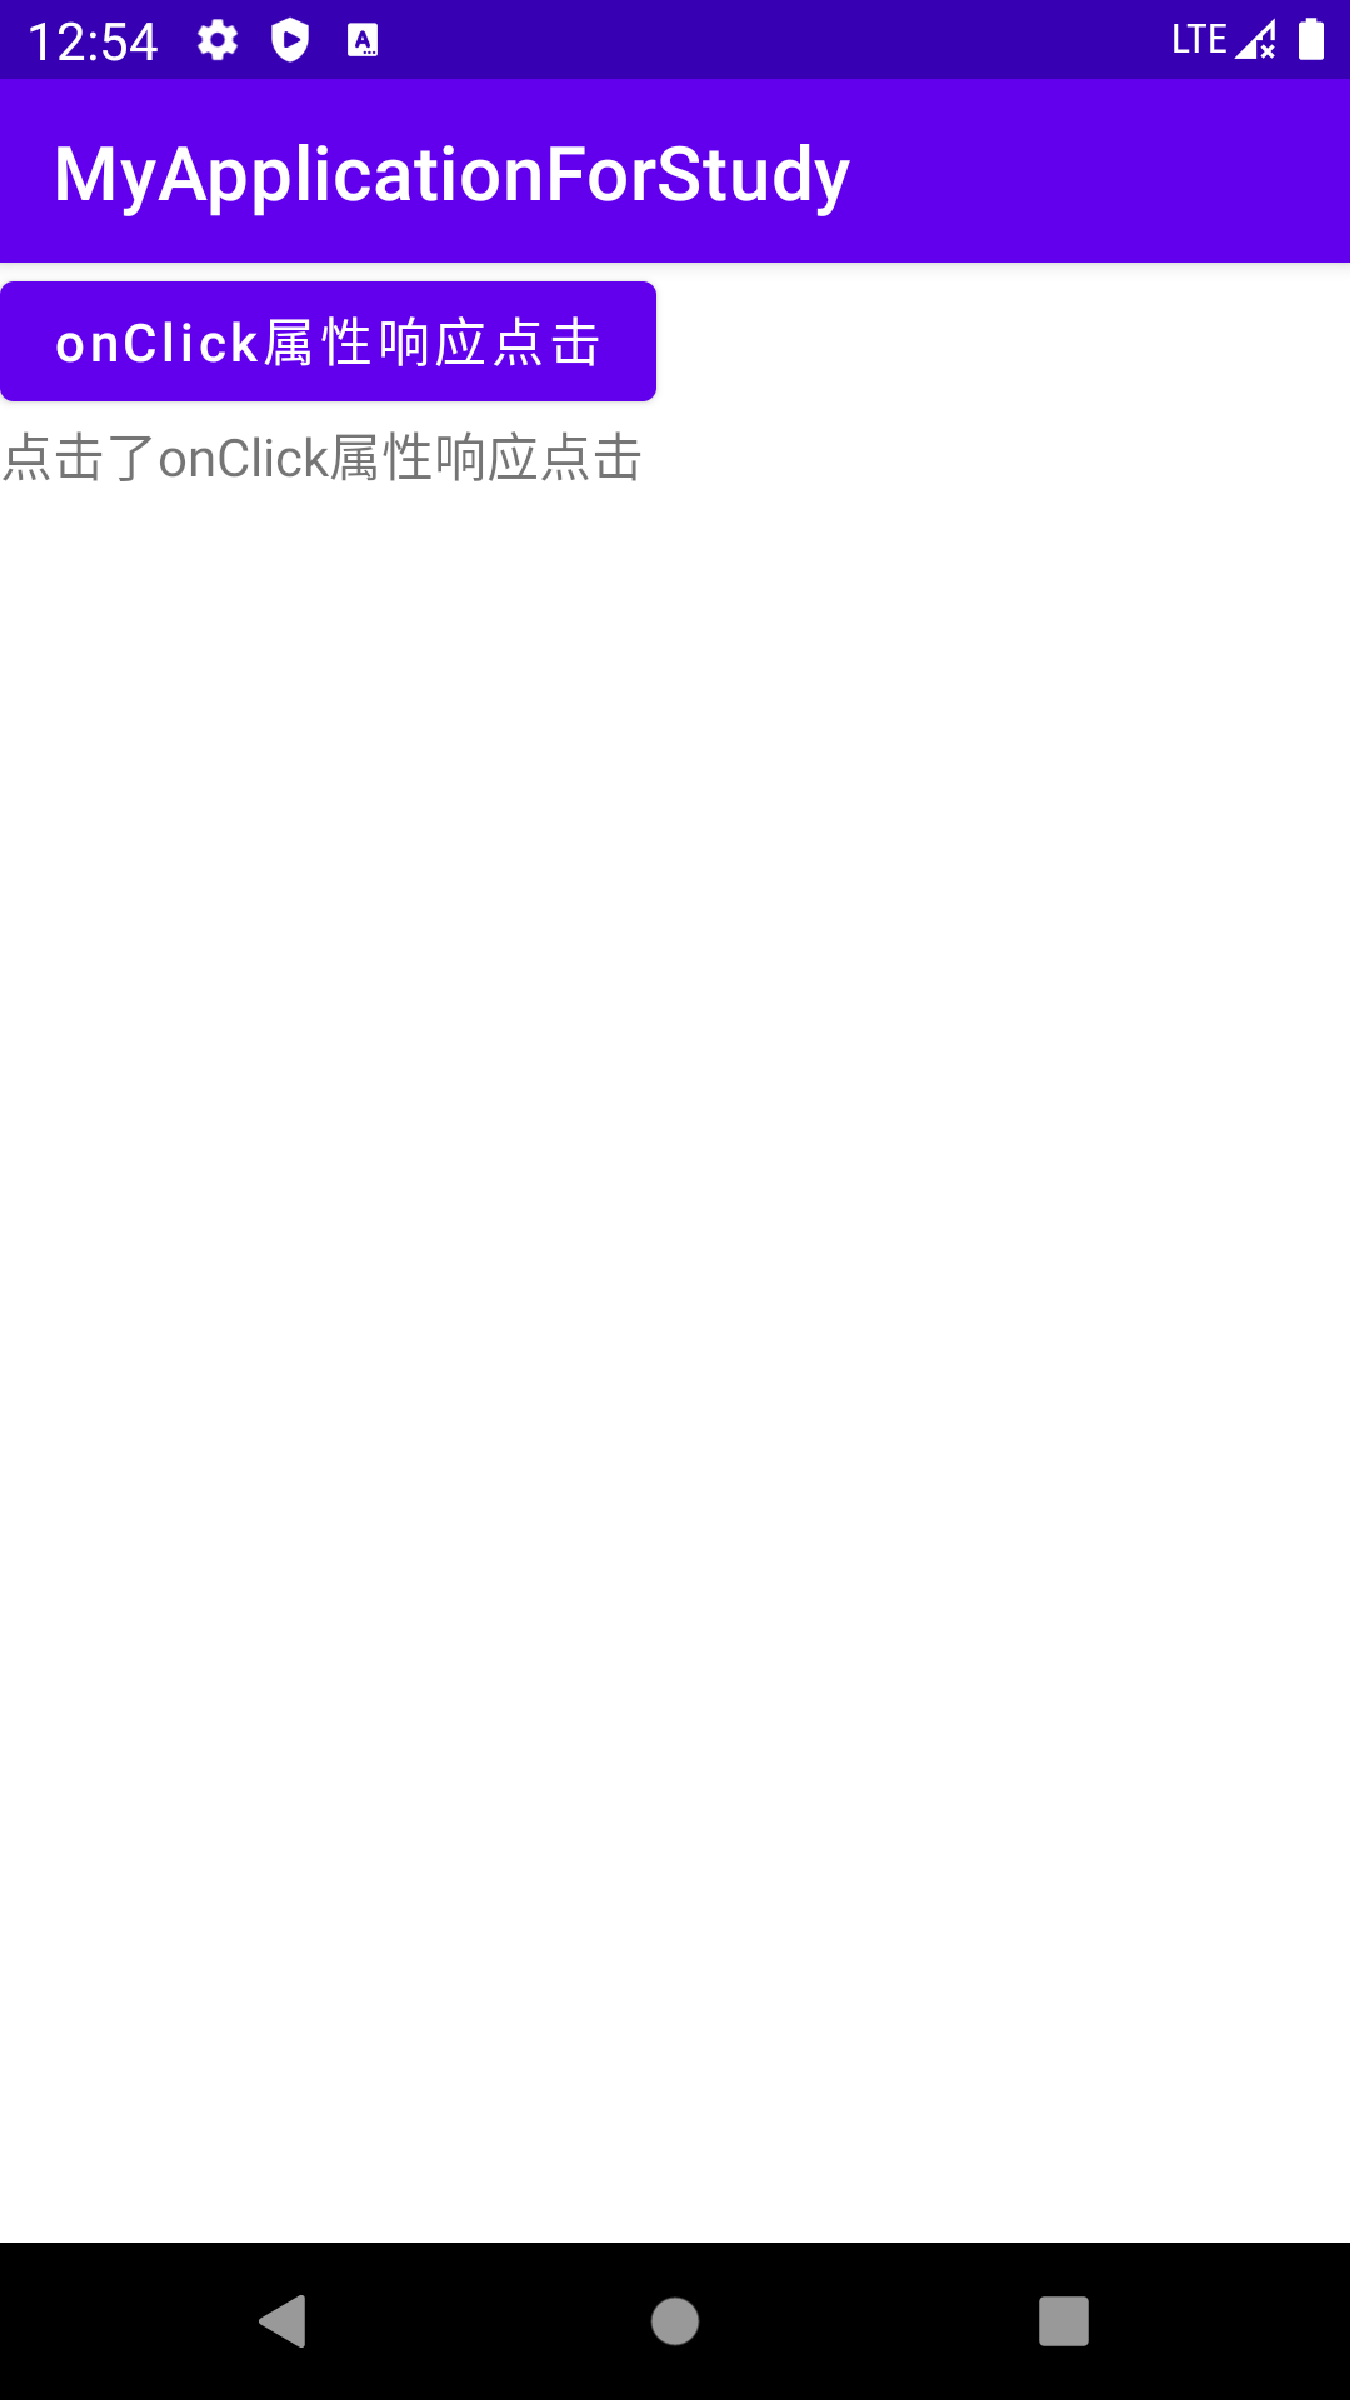
按钮之所以成为按钮是因为它会响应按下动作。而按下按钮后要做的事情则交给APP来处理。onClick属性就是用来响应点击动作的。它的值是一个方法名,该方法名定义在Java代码中。当用户点击按钮时就会自动调用该方法响应点击动作。下面是示例代码。
//xml中的代码
<?xml version="1.0" encoding="utf-8"?>
<LinearLayout xmlns:android="http://schemas.android.com/apk/res/android"
    xmlns:app="http://schemas.android.com/apk/res-auto"
    xmlns:tools="http://schemas.android.com/tools"
    android:layout_width="match_parent"
    android:layout_height="match_parent"
    tools:context=".ButtonActivity"
    android:orientation="vertical">

    <Button
        android:id="@+id/button_1"
        android:layout_width="wrap_content"
        android:layout_height="wrap_content"
        android:text="onClick属性响应点击"
        android:onClick="respondClick"
        android:textAllCaps="false"/>

    <TextView
        android:id="@+id/textView_1"
        android:layout_width="wrap_content"
        android:layout_height="wrap_content"
        android:text="响应点击结果" />
</LinearLayout>
//Java中的部分代码
public void respondClick(View view){
TextView textView_1 = findViewById(R.id.textView_1);
String result = String.format("点击了%s",((Button) view).getText());
textView_1.setText(result);
}下面是效果图。第一张为点击前,第二张为点击后。
2.点击事件与长按事件
虽然能够直接通过onClick属性指定点击方法,但方法名是一个字符串容易拼错方法名而且方法名可以随便起这样不利于代码维护,可能不知道这个方法名是干什么的。此外若要修改方法名则要同时修改两个地方才可以,操作起来稍微复杂。对此可以单纯地在Java代码中实现按钮事件响应。
点击监听器顾名思义这是用来监听点击事件的。在代码中给按钮对象注册一个点击监听器,当只有控件发生指定动作时才会触发开关去执行对应的代码逻辑。除了点击监听器外还有一种长按监听器,它是用来监听长按事件的。它的使用方法与点击监听器类似,也需要注册监听器。
2.1点击事件与点击监听器
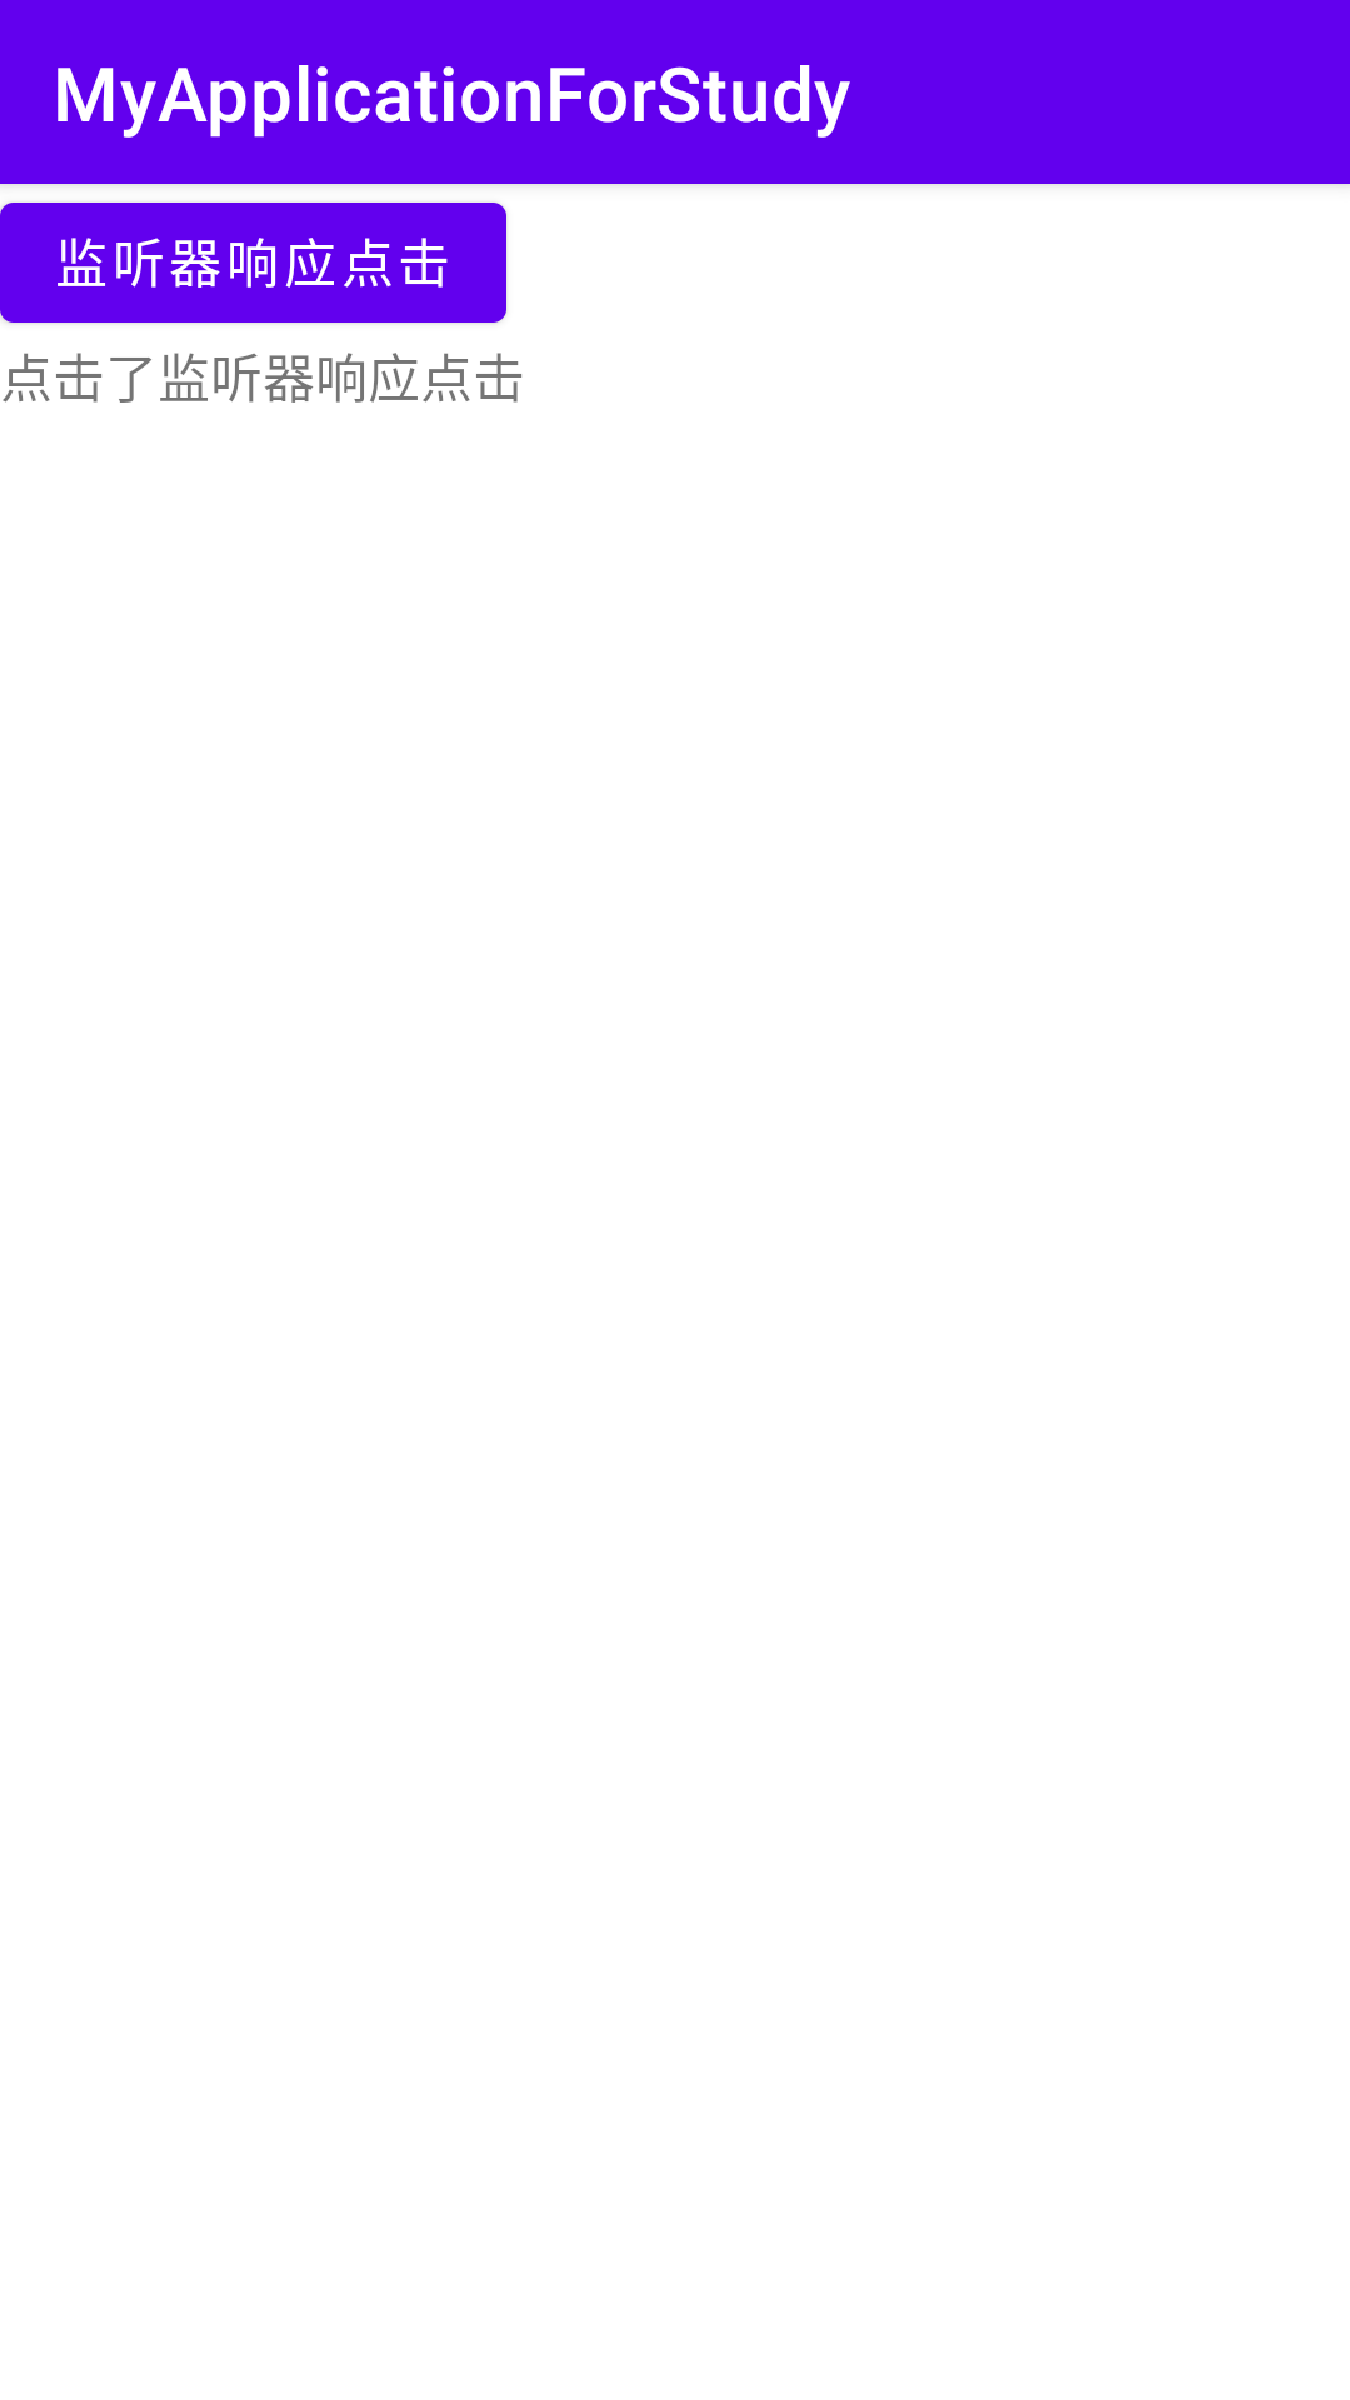
点击监听器需要实现接口View.OnClickListener并重写onClick方法编写对应的处理代码即点击按扭后要干什么,在由按钮调用方法setOnClickListener设置监听器对象。下面是示例代码。
//xml中的代码
<?xml version="1.0" encoding="utf-8"?>
<LinearLayout xmlns:android="http://schemas.android.com/apk/res/android"
    xmlns:app="http://schemas.android.com/apk/res-auto"
    xmlns:tools="http://schemas.android.com/tools"
    android:layout_width="match_parent"
    android:layout_height="match_parent"
    tools:context=".ButtonActivity"
    android:orientation="vertical">

    <Button
        android:id="@+id/button_1"
        android:layout_width="wrap_content"
        android:layout_height="wrap_content"
        android:text="监听器响应点击" />

    <TextView
        android:id="@+id/textView_1"
        android:layout_width="wrap_content"
        android:layout_height="wrap_content"
        android:text="响应点击结果" />
</LinearLayout>
//部分Java代码
@Override
protected void onCreate(Bundle savedInstanceState) {
super.onCreate(savedInstanceState);
setContentView(R.layout.activity_button);
Button button_1 = findViewById(R.id.button_1);
button_1.setOnClickListener(new ButtonListener());
}
class ButtonListener implements View.OnClickListener {
@Override
public void onClick(View view) {
TextView textView_1 = findViewById(R.id.textView_1);
String result = String.format("点击了%s",((Button) view).getText());
textView_1.setText(result);
}
}下面是代码效果图。第一张为点击前,第二张为点击后。

2.2长按事件与长按监听器
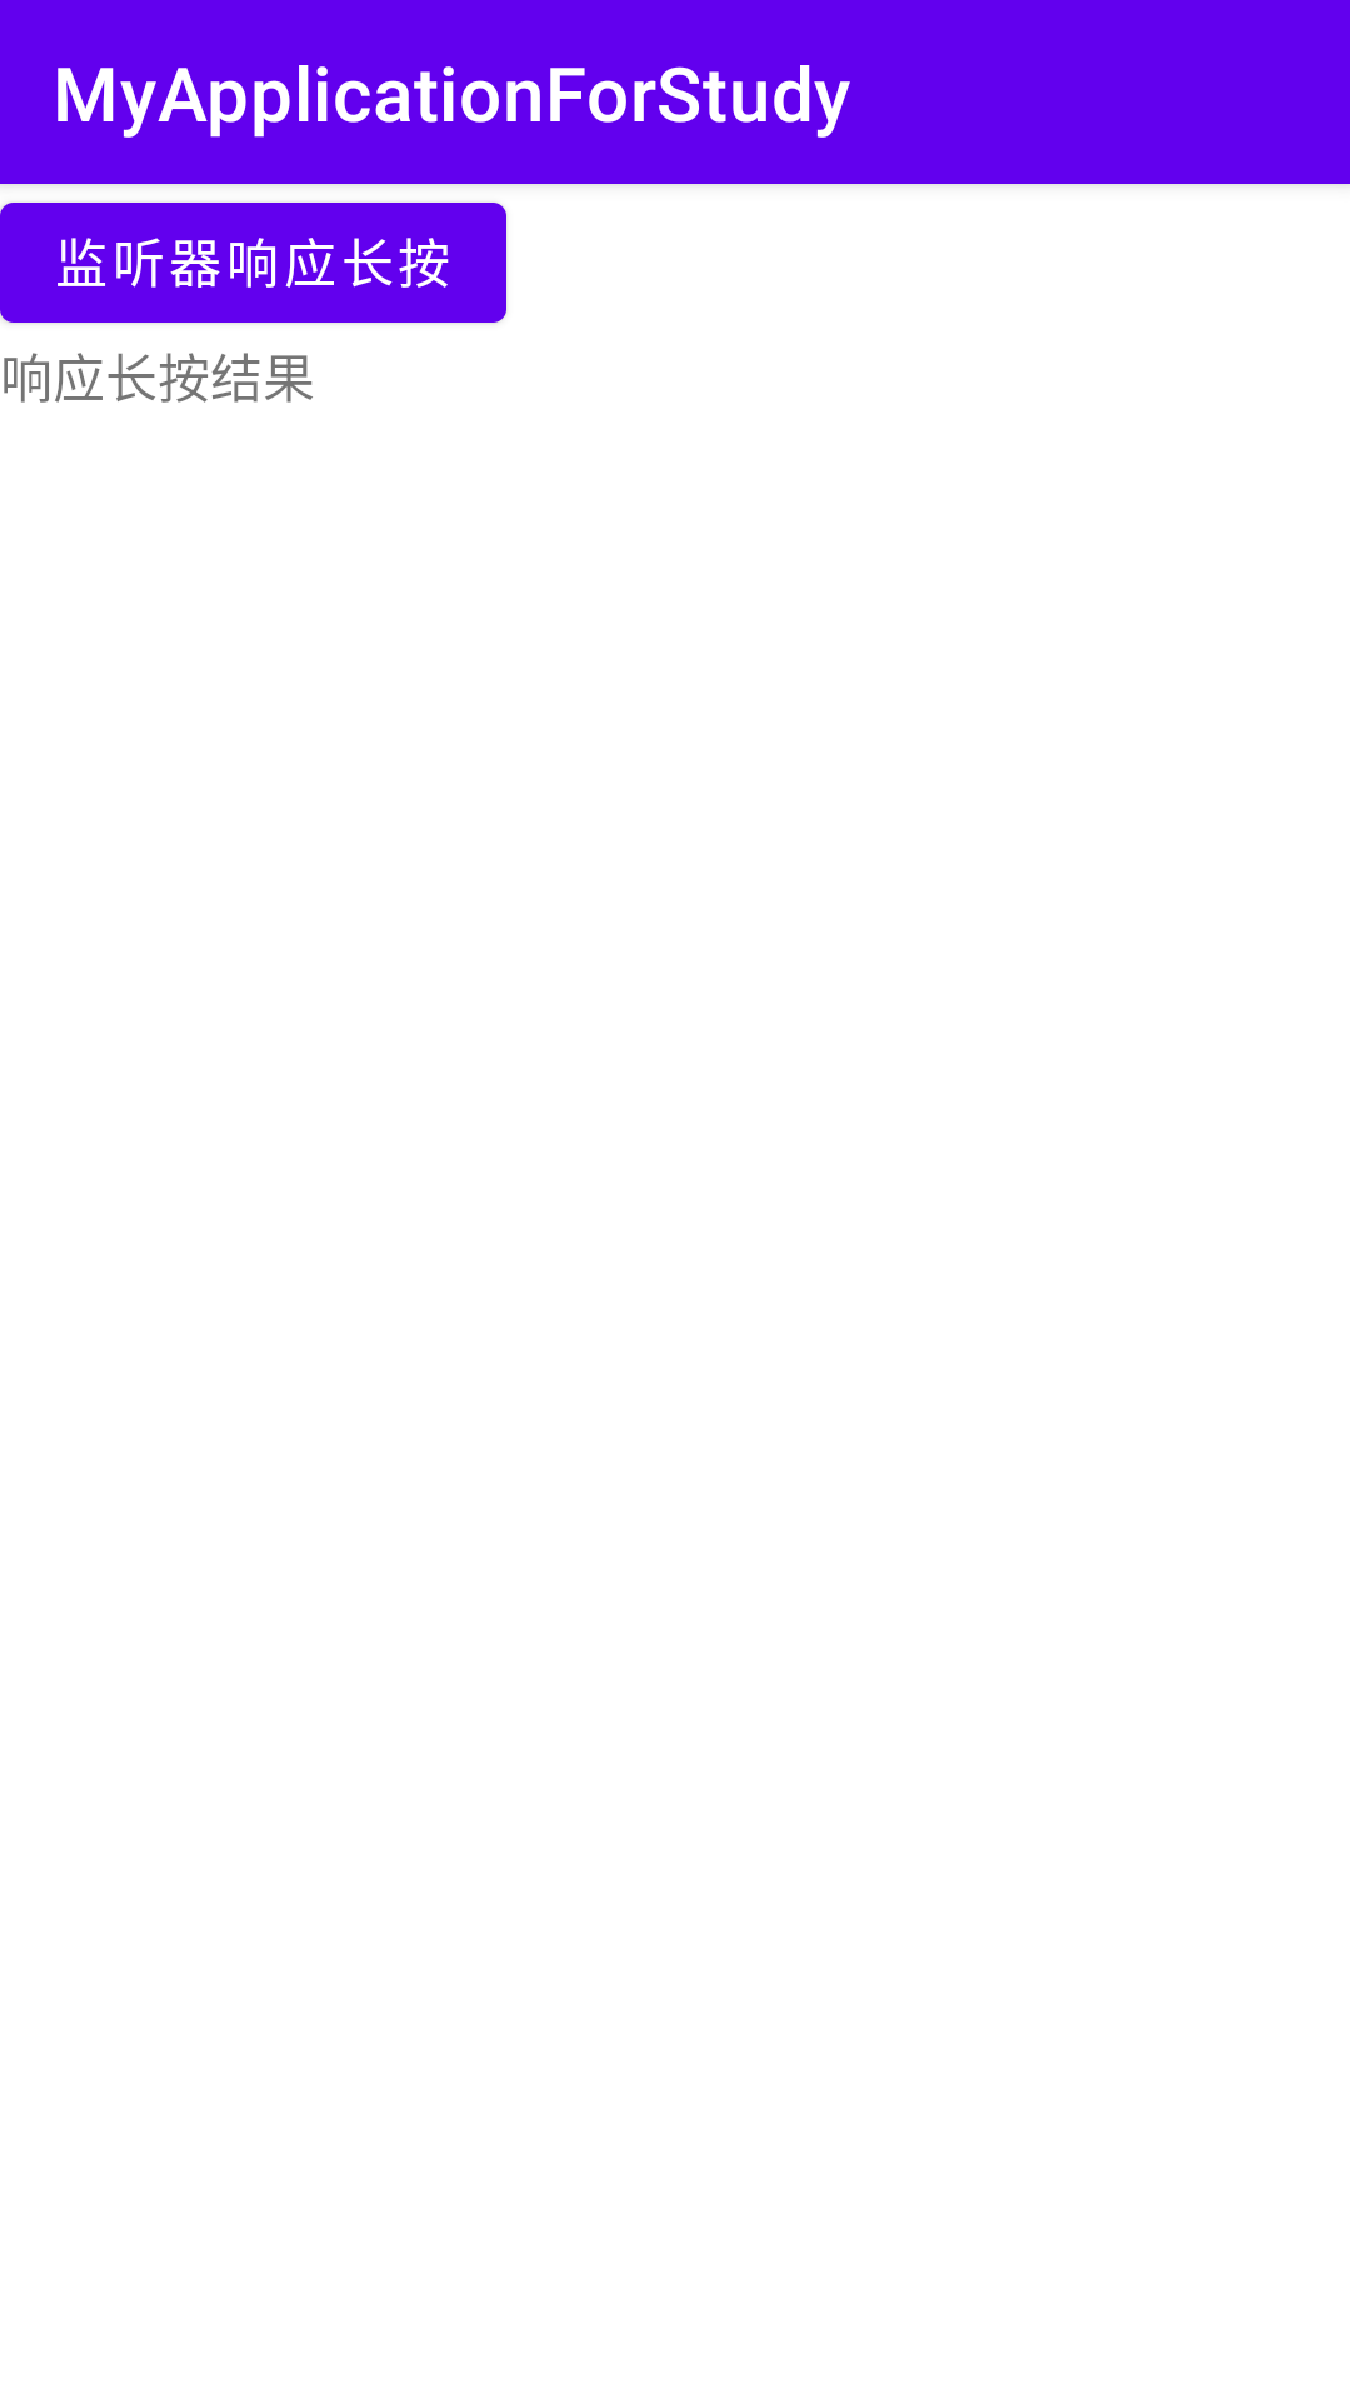
长按监听器需要实现接口View.OnLongClickListener并重写onLongClick方法编写对应的处理代码即长按按扭后要干什么,在由按钮调用方法setOnLongClickListener设置监听器对象。下面是示例代码。xml代码与点击一样。
//部分Java代码
    @Override
    protected void onCreate(Bundle savedInstanceState) {
        super.onCreate(savedInstanceState);
        setContentView(R.layout.activity_button);
        Button button_1 = findViewById(R.id.button_1);
        button_1.setOnLongClickListener(new ButtonListener());
    }

    class ButtonListener implements  View.OnLongClickListener {


        @Override
        public boolean onLongClick(View view) {
            TextView textView_1 = findViewById(R.id.textView_1);
            String result = String.format("长按了%s",((Button) view).getText());
            textView_1.setText(result);
            return true;
        }
    }
效果图如下。第一张为长按前,第二张为长按后。

点击与长按监听器不仅仅按钮才有,凡是由View派生而来的控件都可以注册点击监听器与长按监听器。例如TextView也可以使用对应的方法注册监听器。
3.禁用与恢复按钮
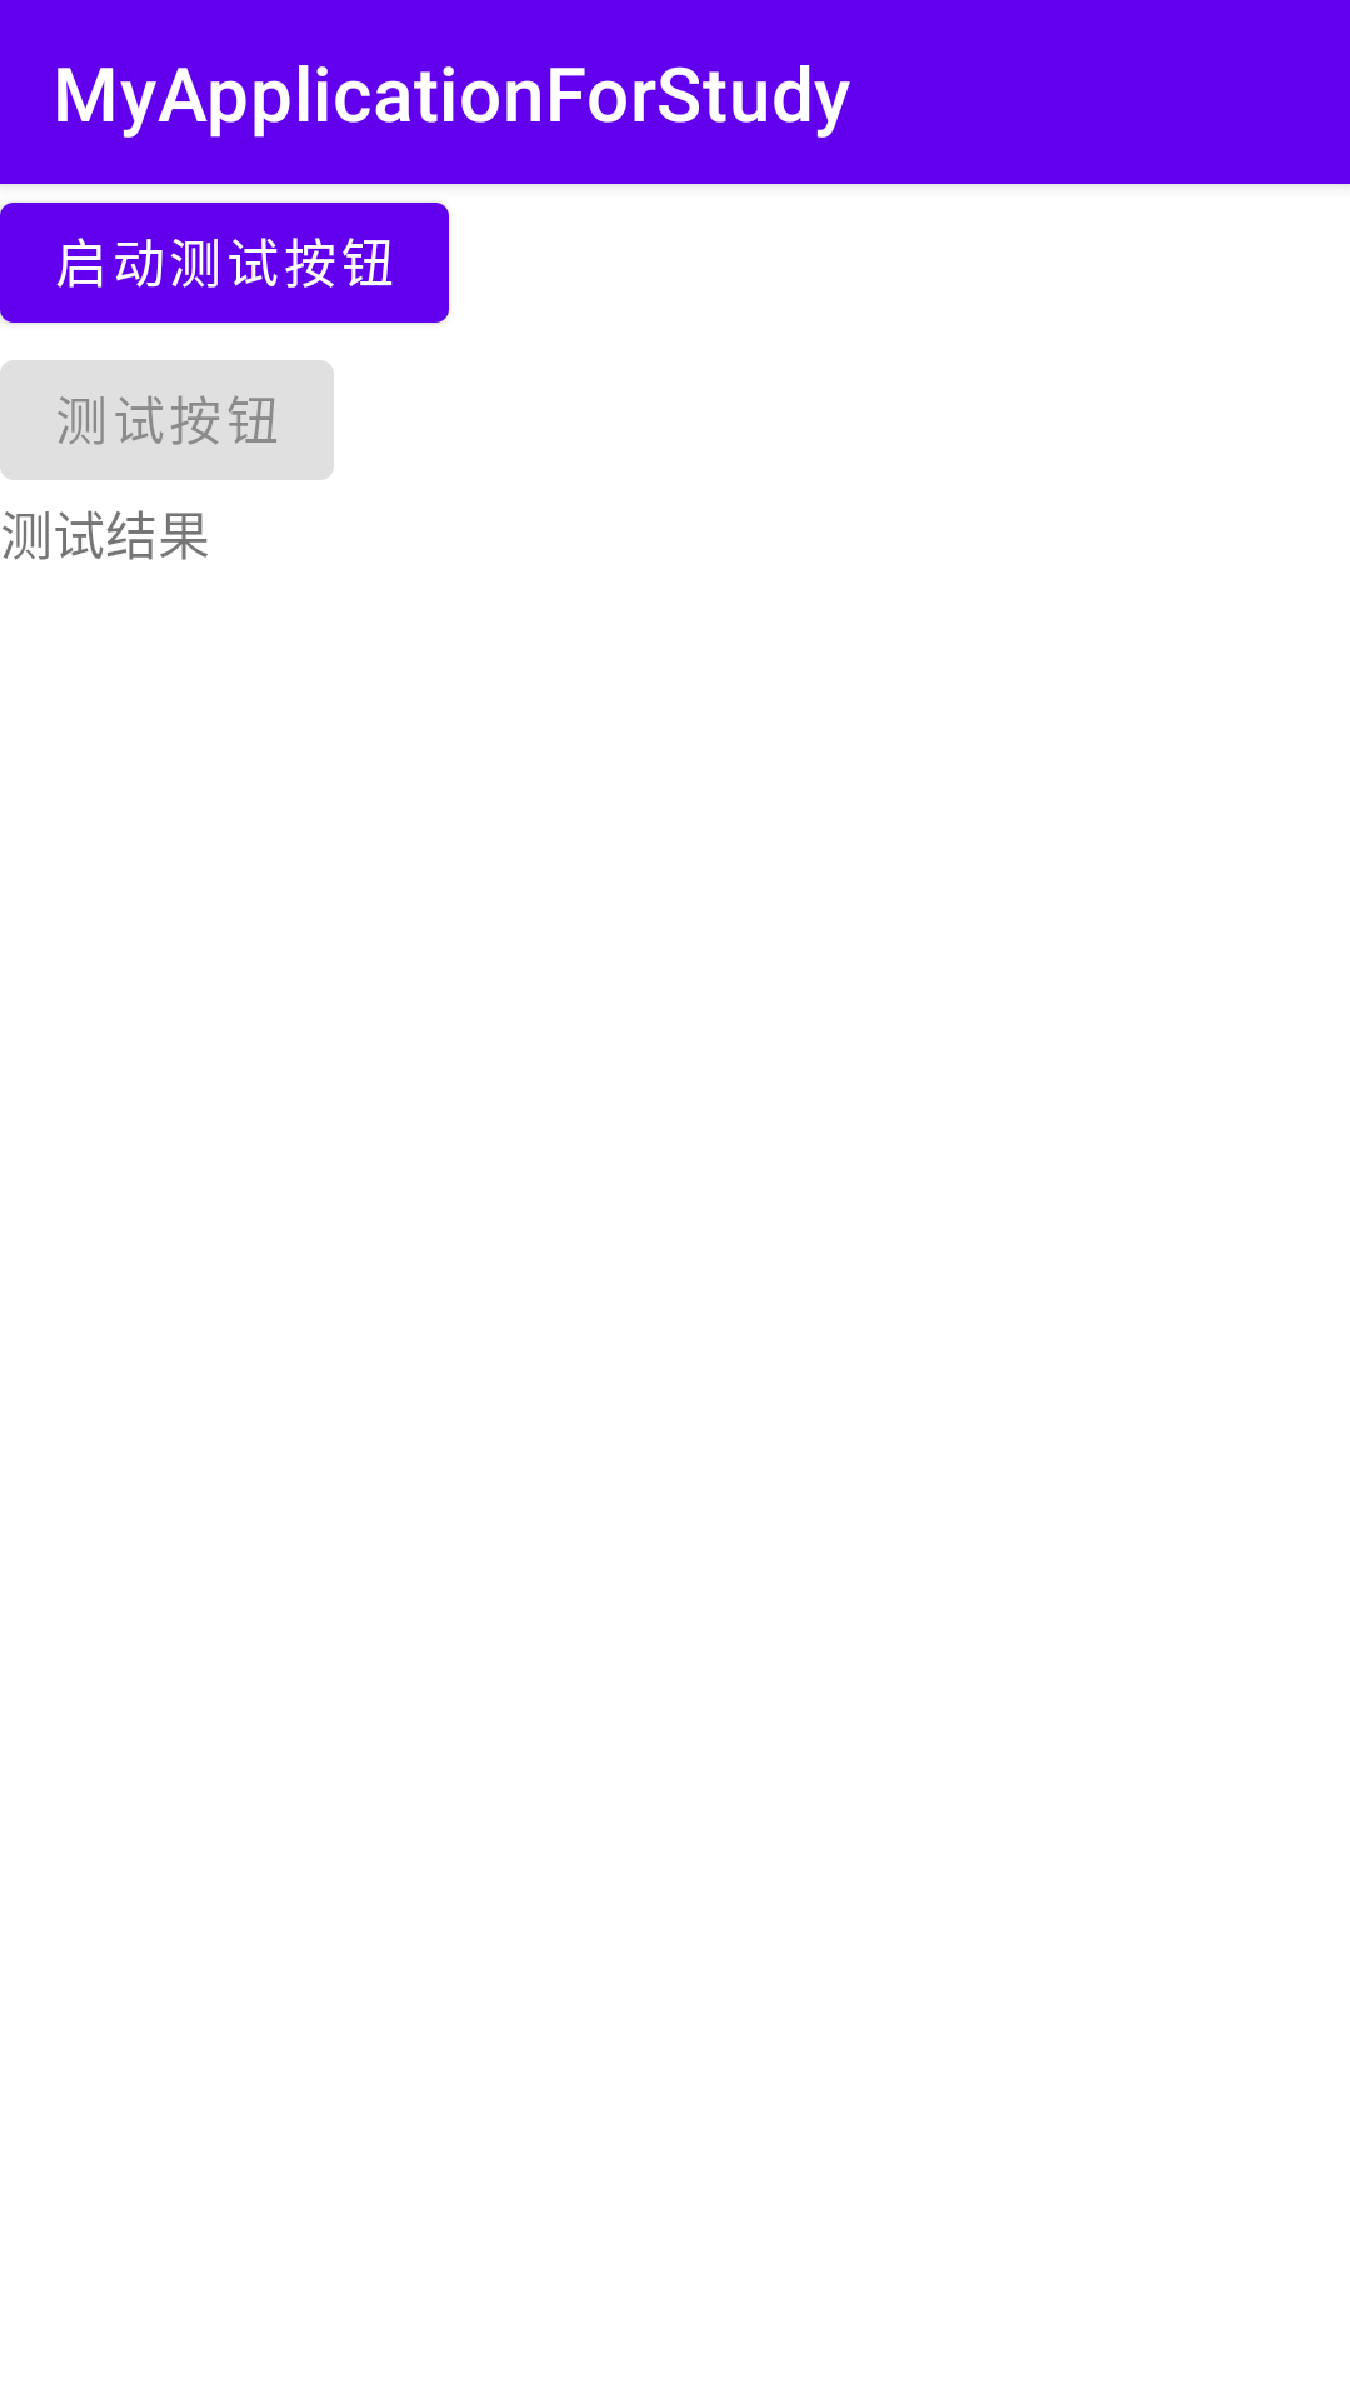
在按钮中有一个属性android:enabled,它能够设置按钮能否被点击或长按,当它的值为true是表示能够点击,false时则不能。在Java代码中可以调用按钮的方法setEnabled来设置属性enabled的值。下面是代码实例。
<?xml version="1.0" encoding="utf-8"?>
<LinearLayout xmlns:android="http://schemas.android.com/apk/res/android"
    xmlns:app="http://schemas.android.com/apk/res-auto"
    xmlns:tools="http://schemas.android.com/tools"
    android:layout_width="match_parent"
    android:layout_height="match_parent"
    tools:context=".ButtonActivity"
    android:orientation="vertical">

    <Button
        android:id="@+id/button_1"
        android:layout_width="wrap_content"
        android:layout_height="wrap_content"
        android:text="启动测试按钮" />

    <Button
        android:id="@+id/button_2"
        android:layout_width="wrap_content"
        android:layout_height="wrap_content"
        android:text="测试按钮"
        android:enabled="false"/>
    <TextView
        android:id="@+id/textView_1"
        android:layout_width="wrap_content"
        android:layout_height="wrap_content"
        android:text="测试结果" />
</LinearLayout>
//部分Java代码
@Override
protected void onCreate(Bundle savedInstanceState) {
super.onCreate(savedInstanceState);
setContentView(R.layout.activity_button);
Button button_1 = findViewById(R.id.button_1);
button_1.setOnClickListener(new ButtonListener());
}
class ButtonListener implements View.OnClickListener {
@Override
public void onClick(View view) {
TextView textView_1 = findViewById(R.id.textView_1);
Button button_2 = findViewById(R.id.button_2);
//设置enabled属性值为true
button_2.setEnabled(true);
String result = String.format("点击了%s使测试按钮恢复",((Button) view).getText());
textView_1.setText(result);
}
}下面是效果图,第一张为点击前,第二张是点击后。


 被折叠的 条评论
为什么被折叠?
被折叠的 条评论
为什么被折叠?
 到【灌水乐园】发言


