 Android图像控件详解


目录
之前介绍过显示文本的视图TextView,这一次来介绍能够显示图像的视图ImageView以及ImageButton。
1.图像视图ImageView
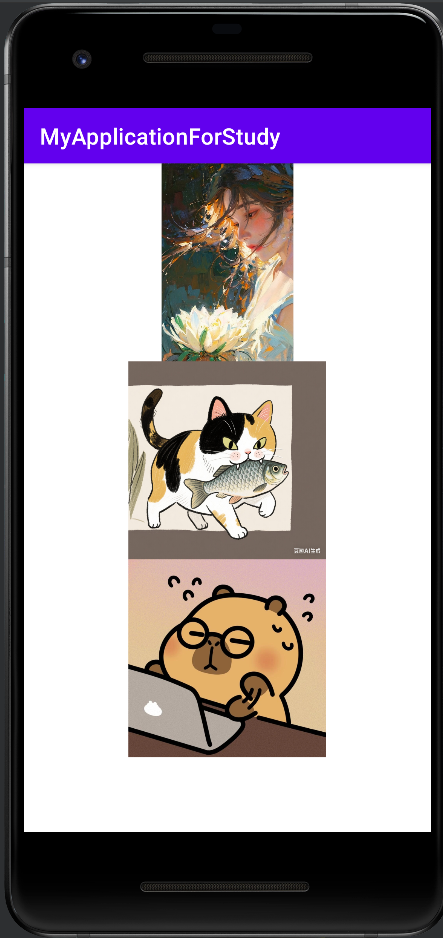
ImageView是专门用于显示图片资源的视图,而一般的图片资源通常会存放在res/drawable目录下。当要对图像视图设置图片资源时有两种方式,一种是通过图像视图的属性android:src来设置,它的值的格式一般是"@drawable/不含扩展名的图片资源名称",例如有一张图片全称为A.png,那么该属性的值为"@drawable/A"。另一种方式则是在Java代码中设置。下面是代码示例。
<?xml version="1.0" encoding="utf-8"?>
<LinearLayout xmlns:android="http://schemas.android.com/apk/res/android"
    xmlns:app="http://schemas.android.com/apk/res-auto"
    xmlns:tools="http://schemas.android.com/tools"
    android:layout_width="match_parent"
    android:layout_height="match_parent"
    android:orientation="vertical"
    tools:context=".ImageActivity">

    <ImageView
        android:id="@+id/imageView_1"
        android:layout_width="wrap_content"
        android:layout_height="200dp"
        android:src="@drawable/image_1" />

    <ImageView
        android:id="@+id/imageView_2"
        android:layout_width="wrap_content"
        android:layout_height="200dp" />

    <ImageView
        android:id="@+id/imageView_3"
        android:layout_width="wrap_content"
        android:layout_height="200dp" />
</LinearLayout>
//部分Java代码
    @Override
    protected void onCreate(Bundle savedInstanceState) {
        super.onCreate(savedInstanceState);
        setContentView(R.layout.activity_image);
        ImageView imageView_2 = findViewById(R.id.imageView_2);
        ImageView imageView_3 = findViewById(R.id.imageView_3);

        imageView_2.setImageResource(R.drawable.image_2);

        Drawable drawable = AppCompatResources.getDrawable(this,R.drawable.image_3);
        imageView_3.setImageDrawable(drawable);

//        Bitmap bitmap = BitmapFactory.decodeResource(getResources(),R.drawable.image_1);
//        imageView_3.setImageBitmap(bitmap);
//报错信息:Canvas: trying to draw too large(109687952bytes) bitmap.
    }
下面是效果图,第一张是通过属性设置,第二张通过方法setImageResource设置,第三张通过方法setImageDrawable设置。通过setImageBitmap方法设置图片需要图片不能过大否则可能会造成内存不足的错误。本次使用的第一张图片比较大,当使用Bitmap设置时会报错Canvas: trying to draw too large(109687952bytes) bitmap.意思是尝试去画过大的bitmap。如果要显示非常大的图片(如高清照片),建议先对图片进行按采样率压缩,或者使用专门的图片加载库(如Glide、Picasso)来高效处理大图的加载和显示。
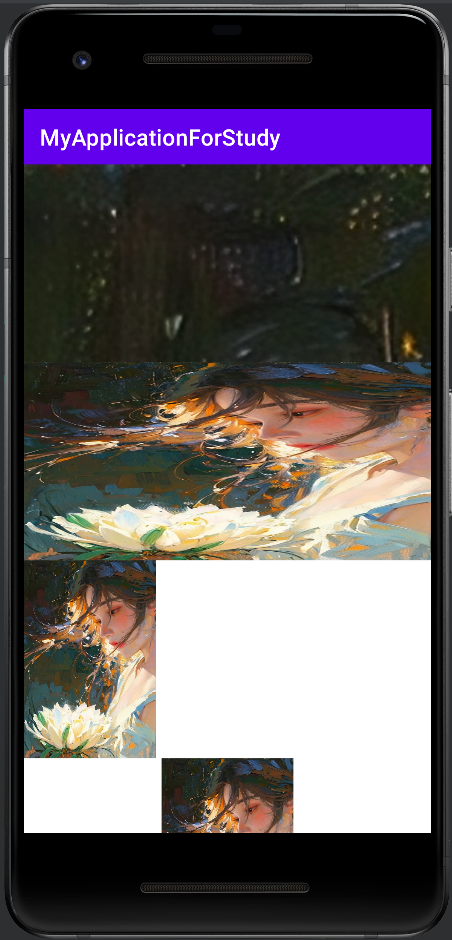
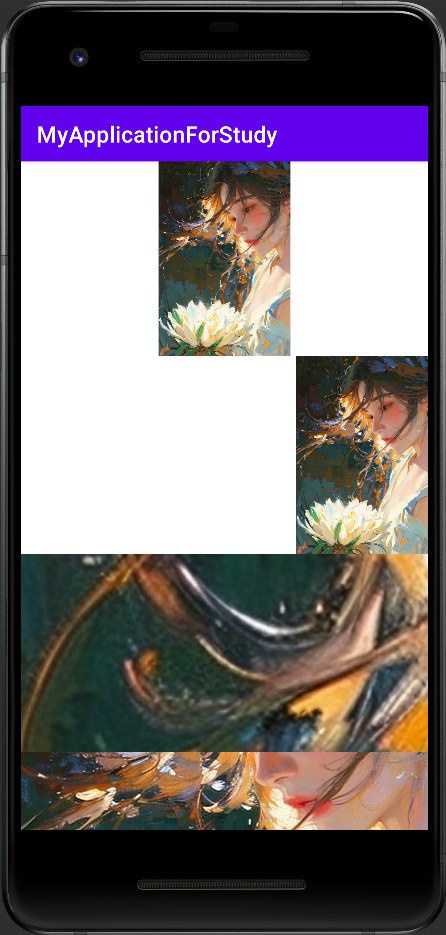
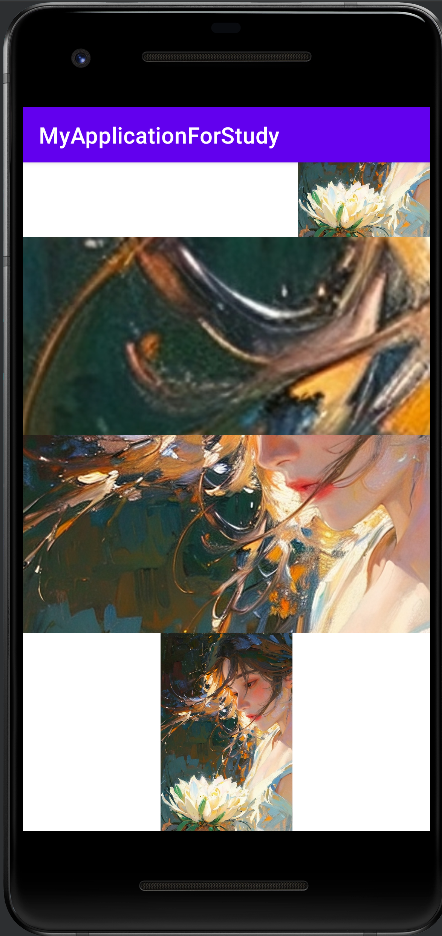
上面提到第一张图片是比较大的,那么为什么它显示效果却比较小呢?这是因为ImageView有一个属性android:scaleType,它是用来决定图片如何缩放和定位的。它的默认值为fitCenter,表示让图像缩放后居中显示。
| 属性值 | 核心行为 | 是否保持比例 | 是否可能裁剪 | 适用场景 |
|---|---|---|---|---|
matrix | 从左上角(0,0)开始绘制原图,不缩放。 | 是 | 是 | 需要精确控制图片矩阵变换时使用,普通开发极少使用。 |
fitXY | 不按比例拉伸图片,以完全填满整个View。 | 否 | 否 | 当图片宽高比与View完全一致,或不介意图片变形时。 |
fitStart | 等比例缩放图片,直到图片的宽或高与View匹配,并对齐左上角。 | 是 | 否 | 需要完整显示图片并希望它贴在左上角时。 |
fitCenter | 等比例缩放图片,直到图片的宽或高与View匹配,并居中显示。 | 是 | 否 | 最常用。需要完整显示整张图片且居中的场景。 |
fitEnd | 等比例缩放图片,直到图片的宽或高与View匹配,并对齐右下角。 | 是 | 否 | 需要完整显示图片并希望它贴在右下角时。 |
center | 不缩放,将原图居中显示。 | 是 | 是 | 当图片尺寸与View相同,或需要居中显示原图(可能被裁剪)时。 |
centerCrop | 等比例缩放图片,直到完全覆盖View的宽和高,然后居中显示,超出部分裁剪。 | 是 | 是 | 极其常用。需要图片填满整个View且不留空白,不介意裁剪时(如头像、Banner图)。 |
centerInside | 等比例缩放图片,以确保整张图片都能完整显示在View内部。 | 是 | 否 | 需要完整显示图片,且希望图片在View内居中(无论图片大小)。 |
下面是示例代码。
<?xml version="1.0" encoding="utf-8"?>
<LinearLayout xmlns:android="http://schemas.android.com/apk/res/android"
    xmlns:app="http://schemas.android.com/apk/res-auto"
    xmlns:tools="http://schemas.android.com/tools"
    android:layout_width="match_parent"
    android:layout_height="match_parent"
    android:orientation="vertical"
    tools:context=".ImageActivity">

    <ScrollView
        android:layout_width="wrap_content"
        android:layout_height="wrap_content">

        <LinearLayout
            android:layout_width="wrap_content"
            android:layout_height="wrap_content"
            android:orientation="vertical">

            <ImageView
                android:id="@+id/imageView_1"
                android:layout_width="wrap_content"
                android:layout_height="200dp"
                android:src="@drawable/image_1"
                android:scaleType="matrix"/>

            <ImageView
                android:id="@+id/imageView_2"
                android:layout_width="wrap_content"
                android:layout_height="200dp"
                android:src="@drawable/image_1"
                android:scaleType="fitXY"/>

            <ImageView
                android:id="@+id/imageView_3"
                android:layout_width="wrap_content"
                android:layout_height="200dp"
                android:src="@drawable/image_1"
                android:scaleType="fitStart"/>

            <ImageView
                android:id="@+id/imageView_4"
                android:layout_width="wrap_content"
                android:layout_height="200dp"
                android:src="@drawable/image_1"
                android:scaleType="fitCenter"
                />

            <ImageView
                android:id="@+id/imageView_5"
                android:layout_width="wrap_content"
                android:layout_height="200dp"
                android:src="@drawable/image_1"
                android:scaleType="fitEnd"/>

            <ImageView
                android:id="@+id/imageView_6"
                android:layout_width="wrap_content"
                android:layout_height="200dp"
                android:src="@drawable/image_1"
                android:scaleType="center"/>

            <ImageView
                android:id="@+id/imageView_7"
                android:layout_width="wrap_content"
                android:layout_height="200dp"
                android:src="@drawable/image_1"
                android:scaleType="centerCrop"/>

            <ImageView
                android:id="@+id/imageView_8"
                android:layout_width="wrap_content"
                android:layout_height="200dp"
                android:src="@drawable/image_1"
                android:scaleType="centerInside"/>

        </LinearLayout>

    </ScrollView>

</LinearLayout>
下面是效果图,顺序分别对应上面的表格。
除了通过修改属性值外,也可以在Java代码中设置图像视图的缩放类型。图像视图的setScaleType方法修改缩放类型。如下方代码所示。缩放类型分别对应上面的表格中的类型。
//部分Java代码
imageView_1.setScaleType(ImageView.ScaleType.CENTER);
//ScaleType类中的缩放类型:MATRIX,FIT_XY,FIT_START,FIT_CENTER,FIT_END,CENTER,CENTER_CROP,CENTER_INSIDE;
2.图像按钮ImageButton
一般的Button只能显示文字而不能显示图片,若需要单纯地实现图片具有按钮的效果可以使用图像按钮ImageButton。虽然图像按钮有按钮两字但是它并不是继承自Button而是ImageView,因此ImageView拥有的属性及方法ImageButton都有。同时它也拥有点击事件与长按事件。下面是示例代码。Java中的代码与之前Button监听器的用法类似,只需要将Button类型改为ImageButton类型即可。
//xml中的部分代码
    <ImageButton
        android:id="@+id/imageButton_1"
        android:layout_width="100dp"
        android:layout_height="100dp"
        android:src="@drawable/image_2"
        android:scaleType="fitCenter"/>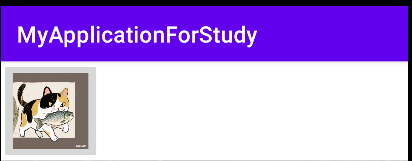


 被折叠的 条评论
为什么被折叠?
被折叠的 条评论
为什么被折叠?
 到【灌水乐园】发言


