


目标:
上一篇文章可能有的同学觉得不是很方便,有些不好下手去实现,或者说如果要展示的信息中有图片的话应该如果处理,那么,接下里我就用另外一种方法为大家讲述如何去完成信息的加载以及图片的展示
代码部分:
①这次我们在回顾一下Json的解析,那么我再上一段解析Json的代码
[
  {
    "workshopTreeDtos": {
      "id": "ccc",
      "pid": "bbb",
      "name": "晶圆减薄",
      "steps": "物料领取",
      "workshop": "芯片封装车间",
      "submit": 0,
      "fraction": 9,
      "batch": "74HC132"
    }
  },
  {
    "workshopTreeDtos": {
      "id": "dc0713eb-78a2-47df-a03d-f5e3a09bb533",
      "pid": "bbb",
      "name": "晶圆划片",
      "steps": "参数设置",
      "workshop": "芯片封装车间",
      "submit": 0,
      "fraction": 5,
      "batch": "74HC132"
    }
  },
  {
    "workshopTreeDtos": {
      "id": "cfbf73f6-5091-49f3-9479-e7901776fdb6",
      "pid": "bbb",
      "name": "芯片粘接",
      "steps": "设备运行",
      "workshop": "芯片封装车间",
      "submit": 0,
      "fraction": 6,
      "batch": "74HC132"
    }
  },
  {
    "workshopTreeDtos": {
      "id": "64479655-df71-49ae-a4e6-4695eb72f69a",
      "pid": "bbb",
      "name": "引线键合",
      "steps": "作业结批",
      "workshop": "芯片封装车间",
      "submit": 0,
      "fraction": 9,
      "batch": "74HC132"
    }
  },
  {
    "workshopTreeDtos": {
      "id": "2ec73c42-f472-477e-a92b-5e42afd54eb8",
      "pid": "bbb",
      "name": "塑封",
      "steps": "故障模拟一",
      "workshop": "芯片封装车间",
      "submit": 0,
      "fraction": 4,
      "batch": "74HC132"
    }
  },
  {
    "workshopTreeDtos": {
      "id": "f8c90ba5-610a-4a6a-8658-18ad6f6f267b",
      "pid": "bbb",
      "name": "激光打标",
      "steps": "物料信息识读",
      "workshop": "芯片封装车间",
      "submit": 0,
      "fraction": 8,
      "batch": "74HC132"
    }
  },
  {
    "workshopTreeDtos": {
      "id": "1ef5f008-7778-4c19-8c0f-d19f9fc2d4a0",
      "pid": "bbb",
      "name": "电镀",
      "steps": "参数设置",
      "workshop": "芯片封装车间",
      "submit": 0,
      "fraction": 7,
      "batch": "74HC132"
    }
  },
  {
    "workshopTreeDtos": {
      "id": "1228fb05-b54b-4432-b89d-7d006c3dea4b",
      "pid": "bbb",
      "name": "切筋成型",
      "steps": "辅料领取",
      "workshop": "芯片封装车间",
      "submit": 0,
      "fraction": 5,
      "batch": "74HC132"
    }
  }
]
②,还是需要我们先命对应的字段
public class Workshop
{
    //试卷界面
    public WorkshopTreeDtosItem workshopTreeDtos;
}

public class WorkshopTreeDtosItem
{
    public string id;
    public string pid;
    //工艺名称
    public string name;
    //工艺步骤
    public string steps;
    //工艺车间
    public string workshop;
    //是否提交
    public int submit;
    //分数
    public int fraction;
    //批次
    public string batch;
}
③解析上面的文档
 private List<Workshop> _workshops;
    public List<Workshop> workshops
    {
        get
        {
            if (_workshops == null)
            {
                _workshops = new List<Workshop>();
                string str = Resources.Load<TextAsset>("Data/KaoheStandAlone").text;
                List<Workshop> list = JsonMapper.ToObject<List<Workshop>>(str);
                _workshops = list;
            }

            return _workshops;
        }
    }
④,我们需要根据具体的信息来获取对应的图片,我在这里写了一个字典
/// <summary>
/// 数据对应关系
/// </summary>
public class DataMap
{
    //根据工艺名字获得对应图片
    public static Dictionary<string, string> NamePath = new Dictionary<string, string>()
    {
        { "晶圆减薄","GongYiImage/晶圆减薄"},
        { "晶圆划片","GongYiImage/晶圆划片"},
        { "芯片粘接","GongYiImage/装片机"},
        { "引线键合","GongYiImage/引线键合"},
        { "塑封","GongYiImage/塑封"},
        { "激光打标","GongYiImage/激光打标"},
        { "电镀","SheBei/电镀/UI/电镀"},
        { "切筋成型","SheBei/切筋成型/UI/切筋成型"},
    };
}
⑤,接下来我们只需要一夜代码就可以实现信息的加载
using System.Collections;
using System.Collections.Generic;
using TMPro;
using UnityEngine;
using UnityEngine.UI;

public class Populate : MonoBehaviour
{
    public static Populate Instance;
    //需要加载的预制体
    public GameObject Prefab;
    //需要加载的个数
    public int numberTocreate;
    //考试时间
    public TextMeshProUGUI _kaoshitime;
    //考试时长
    public TextMeshProUGUI _kaoshishich;
    //题目数量
    public TextMeshProUGUI _timunumber;
    //试卷名称
    public TextMeshProUGUI _shijuantxt;
    //注意事项
    public TextMeshProUGUI _shixaing;
    //提交界面
    public GameObject _tijiaoIma1;
    public GameObject _tijiaoIma2;
    //当前点击的题目ID
    public PrefabUI _dxID;

    // Start is called before the first frame update
    void Start()
    {
        Instance = this;
        Loadthedata();

    }

    void Loadthedata()
    {
        //记载倒计时信息
        JsonJiexi.Instance.Daoshitime();

        Debug.Log(JsonJiexi.Instance.shijuan_id);
        //加载基础信息
        for (int i = 0; i <  JsonJiexi.Instance.testcenterses.data.Count; i++)
        {
            if (JsonJiexi.Instance.testcenterses.data[i].id == JsonJiexi.Instance.shijuan_id)
            {
                Debug.Log(JsonJiexi.Instance.testcenterses.data[i].id);
                _kaoshitime.text = JsonJiexi.Instance.testcenterses.data[i].beginTime + "-" +
                                   JsonJiexi.Instance.testcenterses.data[i].overTime;
                _kaoshishich.text = JsonJiexi.Instance.testcenterses.data[i].examTime.ToString()+"min";
                _timunumber.text = JsonJiexi.Instance.workshops.Count.ToString();
                _shijuantxt.text = JsonJiexi.Instance.testcenterses.data[i].examName;
                _shixaing.text = JsonJiexi.Instance.testcenterses.data[i].examDesc;
            }
        }


        //记载试卷信息
        numberTocreate = JsonJiexi.Instance.workshops.Count;
        for (int i = 0; i < numberTocreate; i++)
        {
          PrefabUI  newobj = Instantiate(Prefab, transform).AddComponent<PrefabUI>();
          newobj.name = JsonJiexi.Instance.workshops[i].workshopTreeDtos.name;
          if (i <= 9)
          {
              newobj.transform.Find("bianhao").GetComponent<TextMeshProUGUI>().text ="0"+(i+1).ToString();
          }
          else
          {
              newobj.transform.Find("bianhao").GetComponent<TextMeshProUGUI>().text = (i+1).ToString();
          }
          newobj.transform.Find("name").GetComponent<TextMeshProUGUI>().text = JsonJiexi.Instance.workshops[i].workshopTreeDtos.steps;
          newobj.transform.Find("neirong").GetComponent<Image>().sprite = Resources.Load<Sprite>(DataMap.NamePath[newobj.name]);

        }
    }

}
界面展示:
那么看看界面的展示
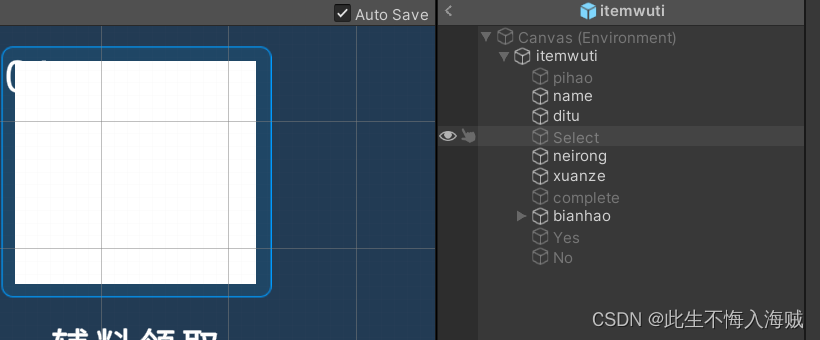
首先我们需要一个预制体,大家可以根据自身的情况进行设置
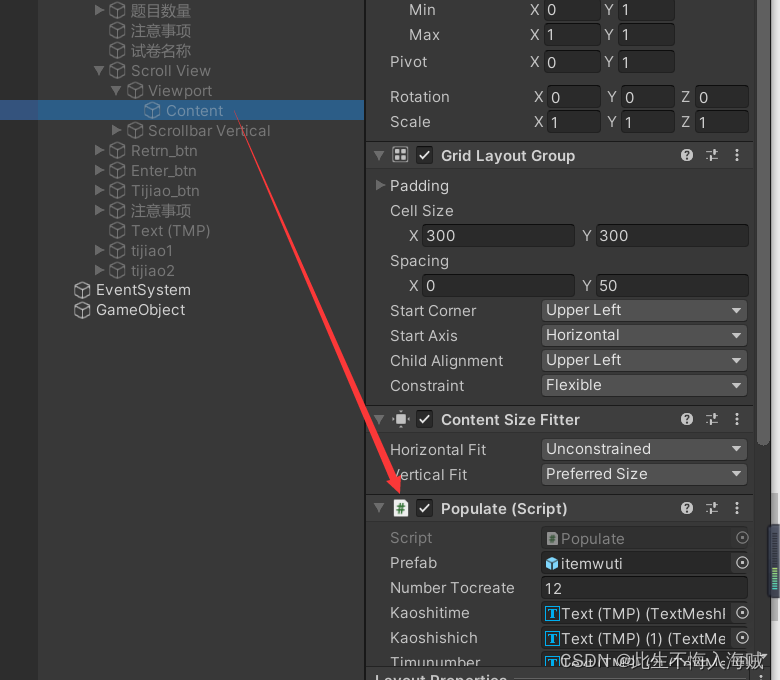
接下来是界面上的信息,只需要按情况设置就可以了,没有过多的要求
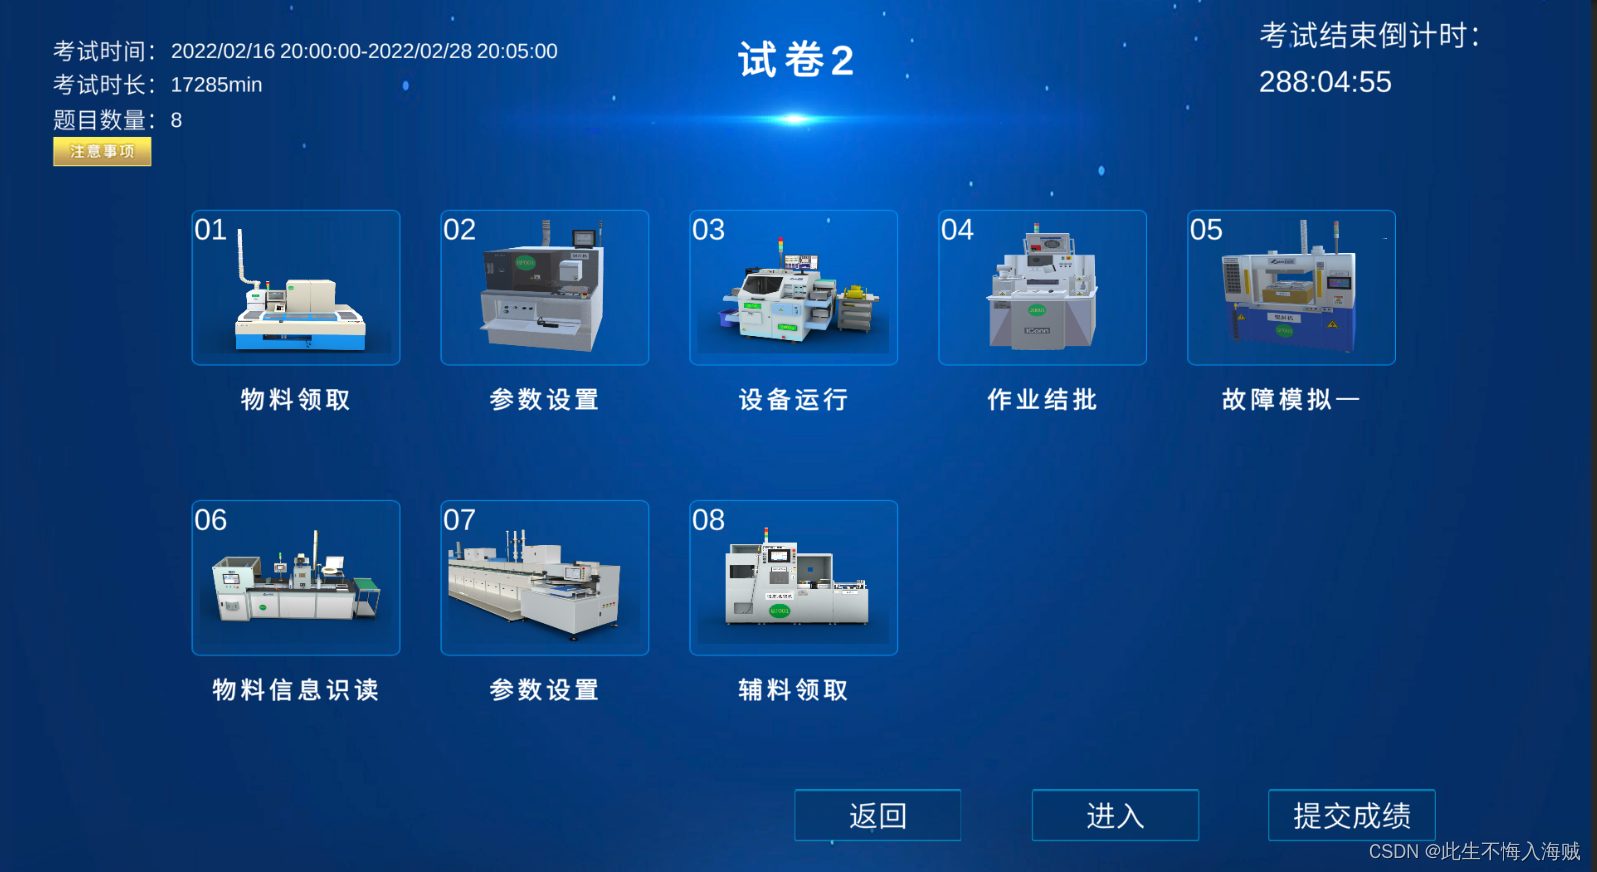
效果展示:
那么接下来就是效果的展示了,
好的,今天的Json动态加载显示信息就到这里了,希望可以帮助更多的人,有不懂的或者想知道的大家都可以私信我


 被折叠的 条评论
为什么被折叠?
被折叠的 条评论
为什么被折叠?
 到【灌水乐园】发言


