免费且强大的DeepSeek R1 Vscode插件来了

🚀 特色功能

  • 💻 代码操作:一键复制、插入代码到当前文件或新文件
  • 🔍 智能分析:代码解释、错误检测、重构建议、测试生成
  • 📝 自定义提示:支持添加和管理预定义提示词,提高提问效率
  • 💾 本地存储:会话记录保存在本地,随时回放、继续和管理
  • 🌐 代理支持:可配置自己的代理服务器,灵活访问 API
  • 🔒 隐私保护:所有信息本地存储,不上传任何数据
  • 🌍 多语言:支持中文、英文等多种语言界面
  • 🎯 模型选择:支持多种 DeepSeek 模型,满足不同需求
  • 🖥️ 本地部署:支持通过Ollama在本地部署DeepSeek R1,支持知识库,无需联网即可使用

📦 安装方式

1.打开 VS Code
2.按下 Ctrl+Shift+P 打开命令面板
3.删除>后输入 ext install colourafredi.vscode-deepseek
4.按回车键进行安装

或者直接访问 VS Code 市场 安装

🛠️ 主要功能

1. 代码分析和优化

  • 代码解释:详细讲解代码逻辑和实现
  • 错误检测:发现并修复代码中的 BUG
  • 代码重构:优化代码结构,提升代码质量
  • 测试生成:自动生成单元测试代码

2. 智能对话

  • 上下文对话:支持多轮对话,理解上下文
  • 流式响应:实时显示 AI 回答
  • 会话管理:保存、导出、清理会话记录
  • 自定义提示:支持预设常用提示词

3. 个性化配置

  • API Key 管理:支持绑定自己的 API Key
  • 代理设置:可配置自定义代理服务器
  • 模型选择:支持多种 DeepSeek 模型
  • 界面语言:可切换多种界面语言

💡 使用指南

快速开始

  1. 安装插件后,点击 VS Code 左侧的 DeepSeek 图标
  2. 在输入框中输入问题,按回车发送
  3. 等待 AI 响应,可以:
    • 复制回答内容
    • 插入到当前文件
    • 创建新文件保存

代码相关功能

  1. 选中代码片段
  2. 右键选择 DeepSeek 相关命令:
    • 解释代码
    • 检查错误
    • 重构优化
    • 生成测试

自定义设置

  • API Key:可绑定自己的 API Key 获取更多功能
  • 代理服务器:配置代理地址实现更稳定的访问
  • 模型选择:根据需求选择不同的 AI 模型
  • 提示词管理:添加、编辑、选择预定义提示词
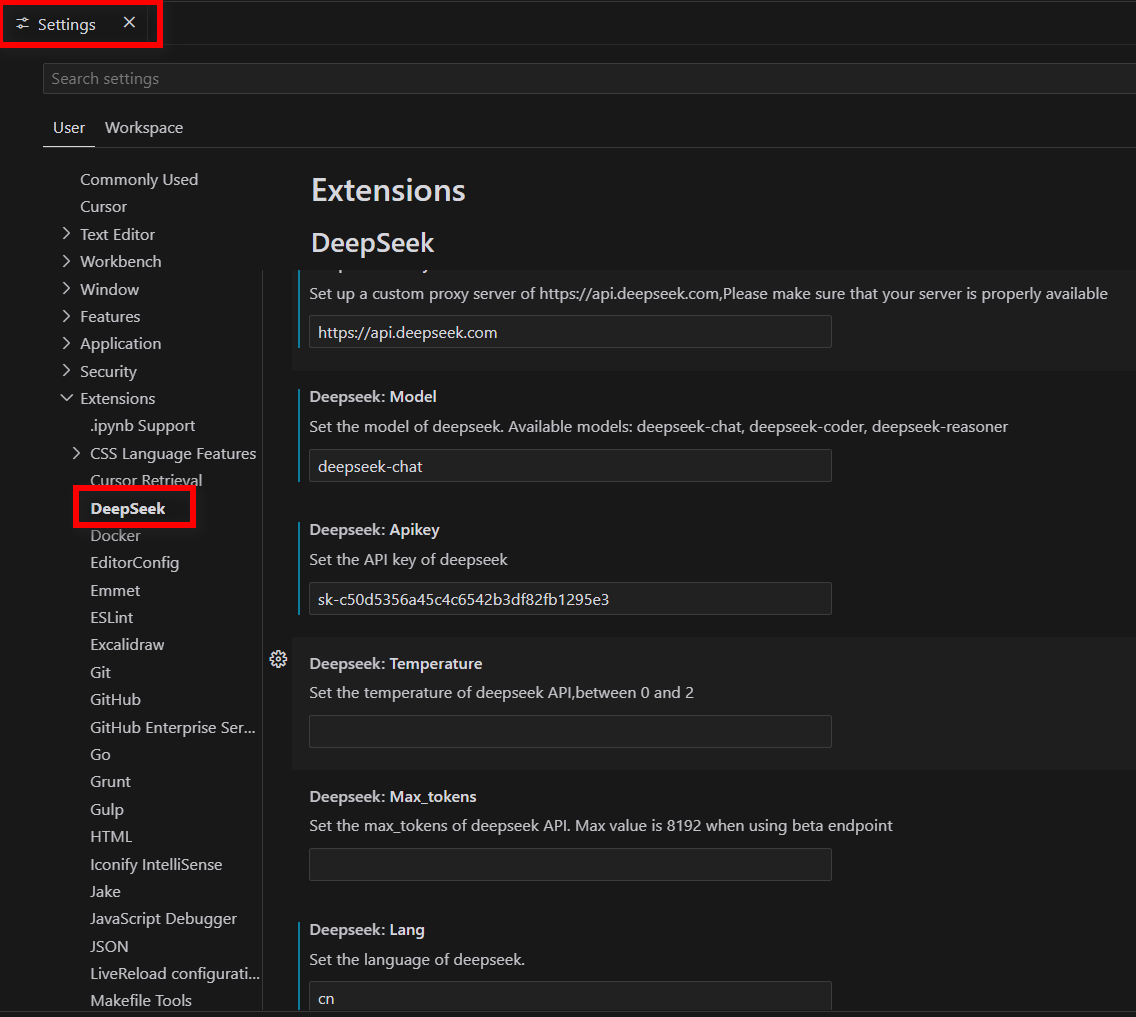
⚙️ 配置说明

可配置参数:

  • deepseek.proxy:设置代理服务器
  • deepseek.model:选择使用的模型
  • deepseek.apikey:设置 API Key
  • deepseek.temperature:设置模型温度(0-2)
  • deepseek.max_tokens:设置最大 token 数
  • deepseek.lang:设置界面语言

配置方式:

  1. 点击File->Preferences->Settings->Extensions->DeepSeek
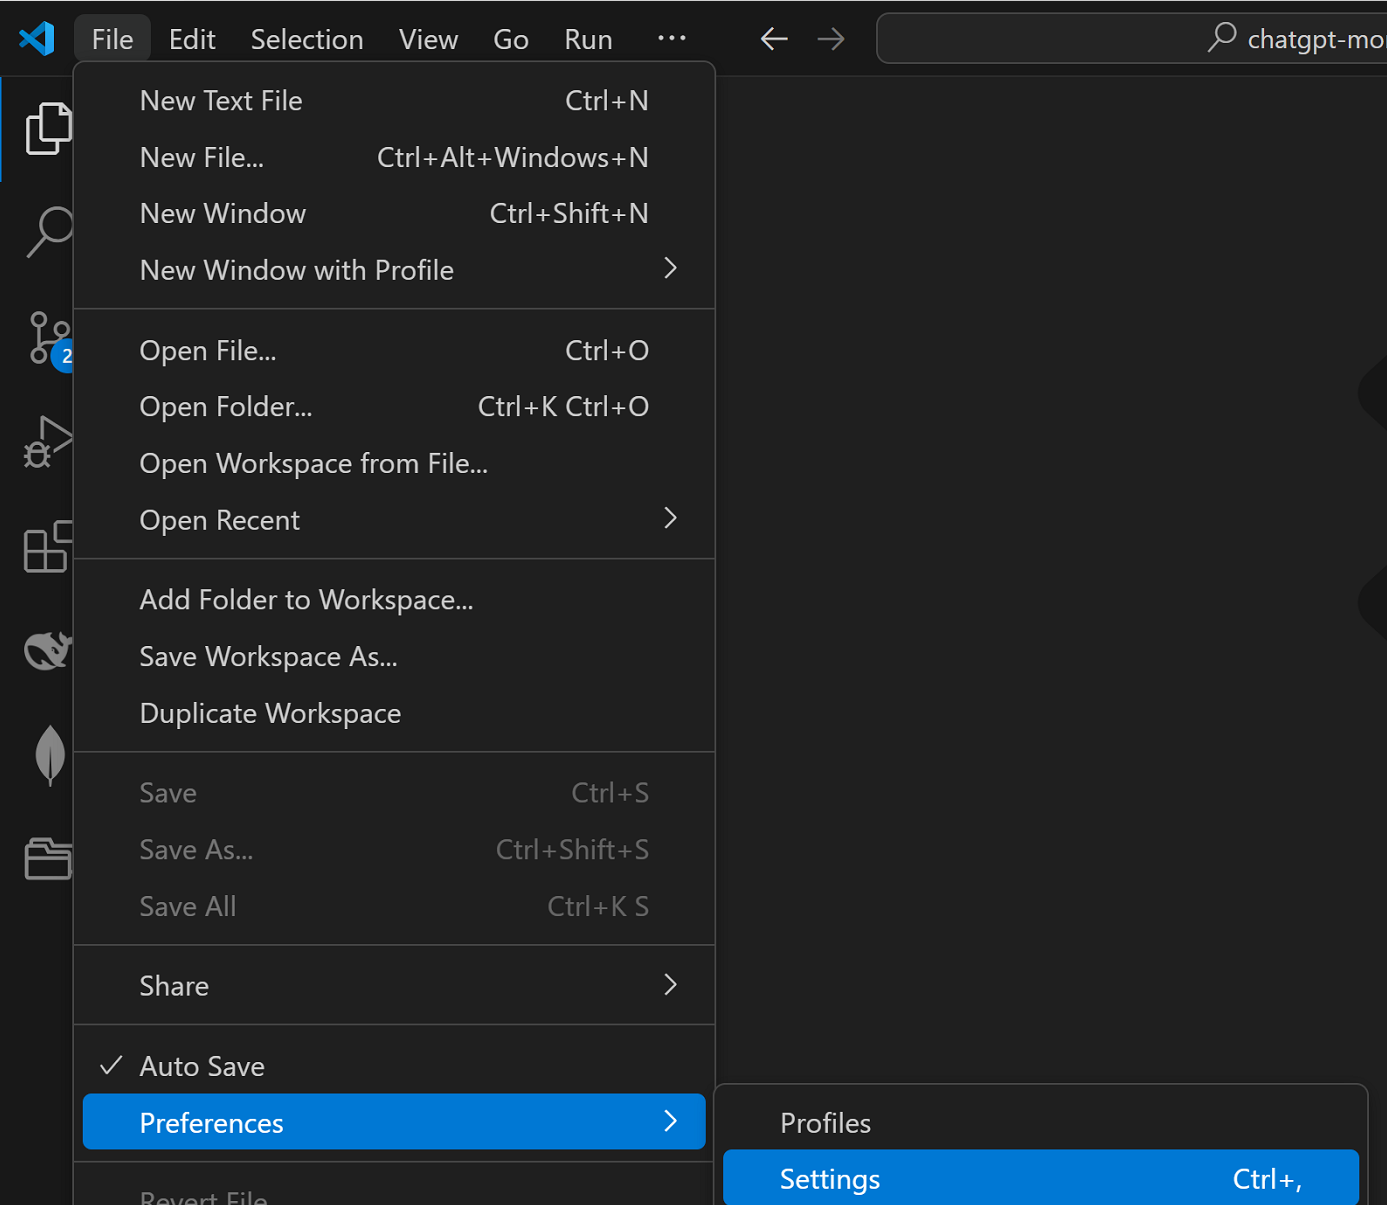
  1. 输入配置参数
    如果你拥有官方的API Key,可以按如下配置

官方API Key申请
可用模型

配置项
DeepSeek:Proxyhttps://api.deepseek.com
Deepseek:Apikeysk-c50d5356a45c4c7988b3df82fb1295e3
DeepseekModeldeepseek-chat, deepseek-reasoner

如果你使用硅基流动的API Key,可以按如下配置

硅基流动的API Key申请
可用模型

配置项
DeepSeek:Proxyhttps://api.siliconflow.cn
Deepseek:Apikeysk-kgahvlalrbfjyftxrcoiiliopeblhxsgrxtrrwgiqwwxwxth
DeepseekModeldeepseek-ai/DeepSeek-V3, deepseek-ai/DeepSeek-R1

在这里插入图片描述

配置本地部署的DeepSeek R1

配置项
DeepSeek:Proxyhttp://localhost:11434
DeepseekModeldeepseek-r1:1.5b
### DeepSeek R1 Extension for VSCode Installation and Usage Guide For users interested in installing and using the DeepSeek R1 extension within Visual Studio Code (VSCode), a comprehensive guide is provided here, ensuring that all necessary steps are covered. #### Prerequisites Before proceeding with the installation of any extensions or plugins such as DeepSeek R1, ensure that an updated version of VSCode is installed on the system. This ensures compatibility and access to the latest features offered by both VSCode and its extensions[^2]. #### Installation Process To install the DeepSeek R1 extension: 1. Open VSCode. 2. Navigate to the Extensions view by clicking on the Extensions icon in the Activity Bar on the side of the window or selecting **View -> Extensions** from the menu bar. 3. In the search box at the top of the Extensions view, type `DeepSeek R1`. 4. Click on the `Install` button next to the correct extension listing. Once installed, restart VSCode if prompted to complete setup. #### Basic Usage Instructions After successful installation, accessing core functionalities involves utilizing specific commands available through the command palette (`Ctrl+Shift+P` or `Cmd+Shift+P` on macOS). Key operations include initiating searches across projects, managing configurations, and integrating results directly into development workflows. Additional configuration options can be accessed via settings.json file located under `.vscode/settings.json`. Customizing these parameters allows tailoring behavior according to personal preferences or project requirements. ```json { "deepseekR1.someSetting": true, } ```
评论
添加红包

请填写红包祝福语或标题

红包个数最小为10个

红包金额最低5元

当前余额3.43前往充值 >
需支付:10.00
成就一亿技术人!
领取后你会自动成为博主和红包主的粉丝 规则
hope_wisdom
发出的红包
实付
使用余额支付
点击重新获取
扫码支付
钱包余额 0

抵扣说明:

1.余额是钱包充值的虚拟货币,按照1:1的比例进行支付金额的抵扣。
2.余额无法直接购买下载,可以购买VIP、付费专栏及课程。

余额充值