Pytorch进阶-timm库-00快速开始

什么是timm?

timm, 别称 pytorch-vision-model 库,是一个包含了各种计算机视觉任务中各种

  • SOTA模型
  • 常用层
  • 实用小工具
  • 优化器
  • 调度器
  • 数据加载器
  • 数据增强工具
  • 训练/评估脚本

的一个无所不包的库。它一共有700多个预训练的视觉模型,你可以直接通过几行代码把他们的架构或者权重直接拿过来为你所用。

什么人可能需要使用timm库?

  1. 需要快速复现SOTA论文模型的研究生/原型设计工程师
  2. 需要进行迁移学习的开发者
  3. 对视觉模型原理感兴趣,想找到模型优秀工业实现代码进行阅读的学生。

timm快速入门

1. 安装timm

pip install timm

2. 加载网络结构/预训练模型

你可以使用timm.create_model()来快速加载网络模型或者预训练权重。

import timm

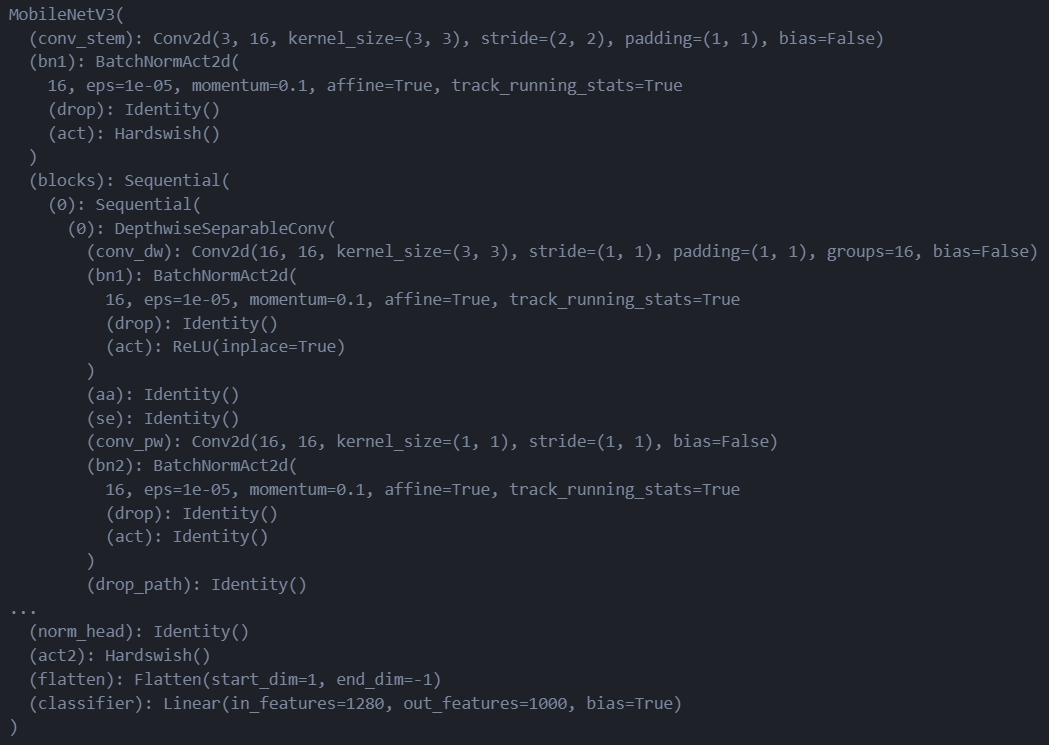
m = timm.create_model('mobilenetv3_large_100', pretrained=True) # 后面指定为True则加载预训练权重,False则不加载权重并随机初始网络参数。、
m.eval()

在这里插入图片描述

注意:timm.create_model()返回的Pytorch模型默认设置为训练模型,因此如果你打算使用它进行推理,务必先把模型的模型用.eval()改成评估模式。

3. 列出具有与训练权重的模型

要列出timm已经打包好的网络模型,可以使用timm.list_models()方法。

  • 过滤方法1:如果指定了pretrained=True,还能只列出有预训练模型权重的模型。
from pprint import pprint

model_names = timm.list_models(pretrained=True)
pprint(model_names)

# 以下是输出
['aimv2_1b_patch14_224.apple_pt',
 'aimv2_1b_patch14_336.apple_pt',
 'aimv2_1b_patch14_448.apple_pt',
 'aimv2_3b_patch14_224.apple_pt',
 'aimv2_3b_patch14_336.apple_pt',
 'aimv2_3b_patch14_448.apple_pt',
 'aimv2_huge_patch14_224.apple_pt',
 'aimv2_huge_patch14_336.apple_pt',
 'aimv2_huge_patch14_448.apple_pt',
 'aimv2_large_patch14_224.apple_pt',
 'aimv2_large_patch14_224.apple_pt_dist',
 'aimv2_large_patch14_336.apple_pt',
 'aimv2_large_patch14_336.apple_pt_dist',
 'aimv2_large_patch14_448.apple_pt',
 'bat_resnext26ts.ch_in1k',
 'beit3_base_patch16_224.in22k_ft_in1k',
 'beit3_base_patch16_224.indomain_in22k_ft_in1k',
 'beit3_base_patch16_224.indomain_pt',
 'beit3_base_patch16_224.pt',
 'beit3_large_patch16_224.in22k_ft_in1k',
 'beit3_large_patch16_224.indomain_in22k_ft_in1k',
 'beit3_large_patch16_224.indomain_pt',
 'beit3_large_patch16_224.pt',
 'beit_base_patch16_224.in22k_ft_in22k',
 'beit_base_patch16_224.in22k_ft_in22k_in1k',
...
 'xcit_tiny_24_p8_384.fb_dist_in1k',
 'xcit_tiny_24_p16_224.fb_dist_in1k',
 'xcit_tiny_24_p16_224.fb_in1k',
 'xcit_tiny_24_p16_384.fb_dist_in1k']

可以看到就算指定了有权重的网络,也有一大堆模型。

  • 过滤方法2:字符串匹配,你可以使用字符串匹配的方法来找对应的模型,比如说你想找vit相关的模型:
model_names = timm.list_models('*vit*')
pprint(model_names)

# 输出,也还是有一大堆
['convit_base',
 'convit_small',
 'convit_tiny',
 'crossvit_9_240',
 'crossvit_9_dagger_240',
 'crossvit_15_240',
 'crossvit_15_dagger_240',
 'crossvit_15_dagger_408'
<think>我们被要求回答关于timm的国内镜像安装方法。用户之前询问的是torchinfo的安装,现在转向timm。 根据用户上一次的问题和回答,我们已经展示了几种镜像源(清华大学、阿里云、中科大)。同样,我们可以用类似的方法安装timm。 同时,参考引用[1]中提到的国内镜像源,我们可以使用这些镜像来安装timm。 注意:引用[1]提供了几个常用的pip镜像地址: 清华:https://pypi.tuna.tsinghua.edu.cn/simple 阿里云:http://mirrors.aliyun.com/pypi/simple/ 中国科技大学:https://pypi.mirrors.ustc.edu.cn/simple/ 因此,我们可以推荐用户使用这些镜像源之一来安装timm。 另外,用户提到引用[2]是关于Julia的镜像设置,这里不适用。 由于timmPyTorch生态中的一个图像模型,通常使用pip安装。如果用户使用conda,也可以尝试通过conda镜像安装,但通常conda的timm包可能更新不如pip及时,因此推荐pip。 步骤: 1. 使用pip安装,并指定镜像源。 2. 如果遇到SSL证书问题,可以尝试使用http或者添加信任参数。 3. 验证安装。 此外,我们也可以提供配置pip全局镜像的方法,这样以后安装就不用每次指定镜像源。 因此,我们给出以下方法: ### 方法1:使用pip指定镜像源安装timm ```bash # 使用清华大学镜像 pip install timm -i https://pypi.tuna.tsinghua.edu.cn/simple # 或者使用阿里云镜像 pip install timm -i http://mirrors.aliyun.com/pypi/simple/ # 或者使用中科大镜像 pip install timm -i https://pypi.mirrors.ustc.edu.cn/simple/ ``` ### 方法2:信任镜像源(如果遇到SSL错误) 对于使用http的镜像源(如阿里云镜像的http)或某些环境SSL证书验证问题,可以添加`--trusted-host`: ```bash pip install timm -i http://mirrors.aliyun.com/pypi/simple/ --trusted-host mirrors.aliyun.com ``` ### 方法3:设置pip全局镜像(推荐) 为了避免每次安装都要输入镜像地址,可以设置pip的全局镜像源。 **Windows系统**: 在用户目录下(如:C:\Users\你的用户名)创建pip文件夹,并在该文件夹下创建pip.ini文件,内容如下: ```ini [global] index-url = https://pypi.tuna.tsinghua.edu.cn/simple trusted-host = pypi.tuna.tsinghua.edu.cn ``` **Linux/macOS系统**: 在用户目录下创建配置文件~/.pip/pip.conf,内容如下: ```ini [global] index-url = https://pypi.tuna.tsinghua.edu.cn/simple trusted-host = pypi.tuna.tsinghua.edu.cn ``` 设置完成后,以后直接使用`pip install timm`即可。 ### 方法4:使用conda安装(如果conda镜像源提供timm) 首先,配置conda的镜像源(以清华镜像为例): ```bash conda config --add channels https://mirrors.tuna.tsinghua.edu.cn/anaconda/pkgs/main conda config --add channels https://mirrors.tuna.tsinghua.edu.cn/anaconda/pkgs/free conda config --add channels https://mirrors.tuna.tsinghua.edu.cn/anaconda/pkgs/r conda config --add channels https://mirrors.tuna.tsinghua.edu.cn/anaconda/cloud/conda-forge conda config --add channels https://mirrors.tuna.tsinghua.edu.cn/anaconda/cloud/pytorch ``` 然后,尝试安装timm(注意:conda-forge频道中有timm): ```bash conda install timm -c conda-forge ``` 但是,请注意conda源中的timm可能不是最新版本,因此推荐使用pip安装。 ### 安装验证 安装完成后,可以在Python中导入timm并查看版本: ```python import timm print(timm.__version__) ``` ### ✅ 镜像源推荐表 | 镜像名称 | pip镜像地址 | conda配置通道(见方法4) | |----------|--------------------------------------------------|----------------------------------------| | 清华大学 | `https://pypi.tuna.tsinghua.edu.cn/simple` | `https://mirrors.tuna.tsinghua.edu.cn/anaconda/cloud`相关通道 | | 阿里云 | `http://mirrors.aliyun.com/pypi/simple/` | 暂无 | | 中科大 | `https://pypi.mirrors.ustc.edu.cn/simple/` | `https://mirrors.ustc.edu.cn/anaconda`相关通道 | ### §§ 相关问题 §§ 1. 如何升级timm到最新版本? 2. timm中包含哪些预训练模型? 3. 使用timm加载预训练模型时出现下载错误如何解决? 4. 如何为timm配置镜像源以加快模型下载速度? > 引用说明: > [^1]: 国内常用镜像网址参考 </think>以下是 **timm 的国内镜像安装方法**,结合 PyTorch 生态特性和国内镜像源优化方案: --- ### 🔧 镜像安装方法(三选一) #### 方法1:pip + 清华镜像(推荐) ```bash pip install timm -i https://pypi.tuna.tsinghua.edu.cn/simple ``` *适用于所有操作系统,覆盖最新版本[^1]* #### 方法2:pip + 阿里云镜像 ```bash pip install timm -i http://mirrors.aliyun.com/pypi/simple/ ``` *适合阿里云用户,需注意协议为 HTTP[^1]* #### 方法3:conda + 清华镜像 ```bash # 添加conda镜像通道 conda config --add channels https://mirrors.tuna.tsinghua.edu.cn/anaconda/cloud/conda-forge conda config --add channels https://mirrors.tuna.tsinghua.edu.cn/anaconda/pkgs/main # 安装timm conda install timm ``` *适合 Anaconda 环境,版本可能略滞后于 pip[^1]* --- ### 📍 配置永久镜像源(避免重复输入) #### Windows 系统 1. 创建文件 `C:\Users\<用户名>\pip\pip.ini` 2. 写入: ```ini [global] index-url = https://pypi.tuna.tsinghua.edu.cn/simple trusted-host = pypi.tuna.tsinghua.edu.cn ``` #### Linux/macOS 系统 ```bash mkdir -p ~/.pip echo '[global] index-url = https://pypi.tuna.tsinghua.edu.cn/simple trusted-host = pypi.tuna.tsinghua.edu.cn' > ~/.pip/pip.conf ``` --- ### ⚙️ 安装验证 ```python import timm # 查看可用模型列表 print(timm.list_models('*resnet*')) # 测试模型加载 model = timm.create_model('resnet50', pretrained=True) print(f"Success! Model params: {sum(p.numel() for p in model.parameters())/1e6:.1f}M") ``` *输出示例:* ``` ['resnet10t', 'resnet14t', ... 'resnetrs50'] Success! Model params: 25.6M ``` --- ### 🌐 镜像源备份方案 | 镜像站 | pip 安装参数 | 适用场景 | |------------|----------------------------------------------|----------------------| | 清华大学 | `-i https://pypi.tuna.tsinghua.edu.cn/simple` | 主流推荐,更新及时 | | 阿里云 | `-i http://mirrors.aliyun.com/pypi/simple/` | 企业内网兼容性好 | | 中科大 | `-i https://pypi.mirrors.ustc.edu.cn/simple/`| 教育网用户优化 | --- ### ⚠️ 常见问题解决 1. **SSL证书错误**: ```bash pip install timm -i http://mirrors.aliyun.com/pypi/simple/ --trusted-host mirrors.aliyun.com ``` 2. **版本冲突**: 指定兼容版本(如 PyTorch 1.12 环境): ```bash pip install timm==0.6.12 -i https://pypi.tuna.tsinghua.edu.cn/simple ``` 3. **预训练模型下载慢**: 在代码中配置镜像源: ```python import timm timm.config.set_pretrained_cfg_arg('file', 'https://mirror.sjtu.edu.cn/pytorch/models') ``` --- ### 💡 进阶技巧 搭配 Docker 使用镜像加速: ```Dockerfile FROM pytorch/pytorch:1.13.1-cuda11.6 # 设置pip镜像 RUN pip config set global.index-url https://pypi.tuna.tsinghua.edu.cn/simple # 安装timm RUN pip install timm ``` --- ###
评论
成就一亿技术人!
拼手气红包6.0元
还能输入1000个字符
 
红包 添加红包
表情包 插入表情
 条评论被折叠 查看
添加红包

请填写红包祝福语或标题

红包个数最小为10个

红包金额最低5元

当前余额3.43前往充值 >
需支付:10.00
成就一亿技术人!
领取后你会自动成为博主和红包主的粉丝 规则
hope_wisdom
发出的红包
实付
使用余额支付
点击重新获取
扫码支付
钱包余额 0

抵扣说明:

1.余额是钱包充值的虚拟货币,按照1:1的比例进行支付金额的抵扣。
2.余额无法直接购买下载,可以购买VIP、付费专栏及课程。

余额充值