


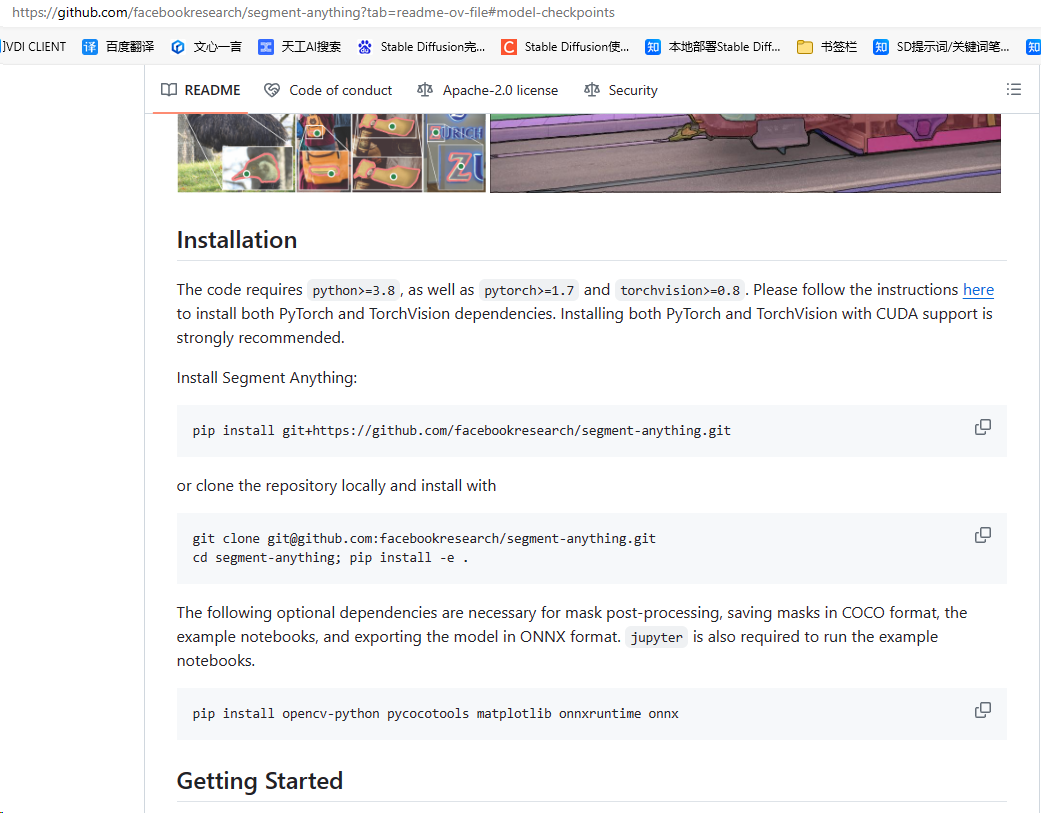
安装
参考链接:
官方code地址:https://github.com/facebookresearch/segment-anything
微调参考链接:https://zhuanlan.zhihu.com/p/627098441(SAM(segment anything model)微调自己的数据集)
使用anaconda环境进行安装的:https://blog.youkuaiyun.com/wzk4869/article/details/130978354(Segment Anything 安装配置及代码测试(含源代码)),官网也有对应的本地安装教程。
- 安装
Anaconda、CUDA等 - 创建
conda虚拟环境、安装torch等依赖包 - 下载
segment-anything源码,在上述环境中cd到目录下后再pip install -e .安装
验证
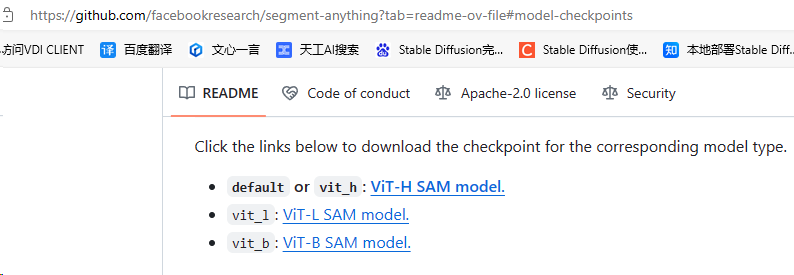
1、在官网下载对应的权重文件,放置到XXX\segment-anything\checkpoint文件夹下
2、将如下代码放置到checkpoint文件夹同级目录(即:segment-anything文件夹下),运行,能输出正常结果即安装成功
from segment_anything import SamPredictor, sam_model_registry,SamAutomaticMaskGenerator
import cv2
import os
import numpy as np


def show_anns(anns):
    if len(anns) == 0:
        return
    sorted_anns = sorted(anns, key=(lambda x: x['area']), reverse=True)
    # ax = plt.gca()
    # ax.set_autoscale_on(False)

    img = np.ones((sorted_anns[0]['segmentation'].shape[0], sorted_anns[0]['segmentation'].shape[1], 4))
    img[:,:,3] = 0
    for ann in sorted_anns:
        m = ann['segmentation']
        color_mask = np.concatenate([np.random.random(3), [0.35]])
        img[m] = color_mask
    # ax.imshow(img)
    return img


device = "cuda"

sam = sam_model_registry["vit_h"](checkpoint="checkpoint/sam_vit_h_4b8939.pth")
sam.to(device=device)
predictor = SamPredictor(sam)

img = cv2.imread("assets/masks2.jpg")
# predictor.set_image(img)
# masks, _, _ = predictor.predict([10,10,50,50])


file_path = r'C:\Users\GIGA\Desktop\initial_img/'
save_path = r'C:\Users\GIGA\Desktop\initial_img_result/'
mask_generator = SamAutomaticMaskGenerator(sam)
for p in os.listdir(file_path):
    file = f"{file_path}/{p}"
    print("file:",file)
    img0 = cv2.imread(file)
    masks = mask_generator.generate(img0)
    img_draw = img0.copy()
    for i,info in enumerate(masks):
        m = info["segmentation"]
        x1,y1,x2,y2 = info["bbox"]
        img_draw[m, :] = i
        # img_draw
    sp = f'{save_path}/{p}'
    sp1 = f'{save_path}/1_{p}'
    cv2.imwrite(sp,img_draw)
    # img_1 = show_anns(masks)
    # cv2.imwrite(sp1, img_1)

    # print(masks)
3、或者conda进入对应环境,执行如下命令,亦可完成测试
python scripts/amg.py --checkpoint sam_vit_h_4b8939.pth --model-type vit_h --input C:\Users\GIGA\Desktop\aaa --output C:\Users\GIGA\Desktop\aaa_result1
微调
微调参考链接:https://zhuanlan.zhihu.com/p/627098441
CV | Segment Anything论文详解及代码实现-优快云博客:
https://blog.youkuaiyun.com/weixin_44649780/article/details/136036217
SAM的训练过程笔记:https://blog.youkuaiyun.com/m0_46690805/article/details/137471008
制作自己的数据集:
如何利用SAM(segment-anything)制作自己的分割数据集
https://blog.csdn.net/weixin_42120861/article/details/138139107

Segment Anything Model (SAM)本地部署,及应用于自己的数据集完成分割
https://blog.csdn.net/MayYou_SSS/article/details/132719786

在自己的数据集微调SAM
https://blog.csdn.net/qq_41234663/article/details/137797197

Meta的最新工作EfficientSAM,微调到自己的数据集,代码
https://blog.csdn.net/cvxiayixiao/article/details/137500344

SAM怎么微调使得其适用于图像分类
https://www.zhihu.com/question/648125765/answer/3427648313

如何微调SAM
https://blog.csdn.net/jcfszxc/article/details/136181686

SAM finetune(sam模型微调)(里面有sam变体,都是sam的微调版本)
https://zhuanlan.zhihu.com/p/622677489

一文了解视觉分割新SOTA: SAM (Segment Anything Model)(有一些sam应用方面的思考)
https://blog.csdn.net/GarryWang1248/article/details/135122569

Segment Anything(SAM)论文杂谈
https://zhuanlan.zhihu.com/p/622572904

 给大家推荐个交互式标注工具,百度的EISeg
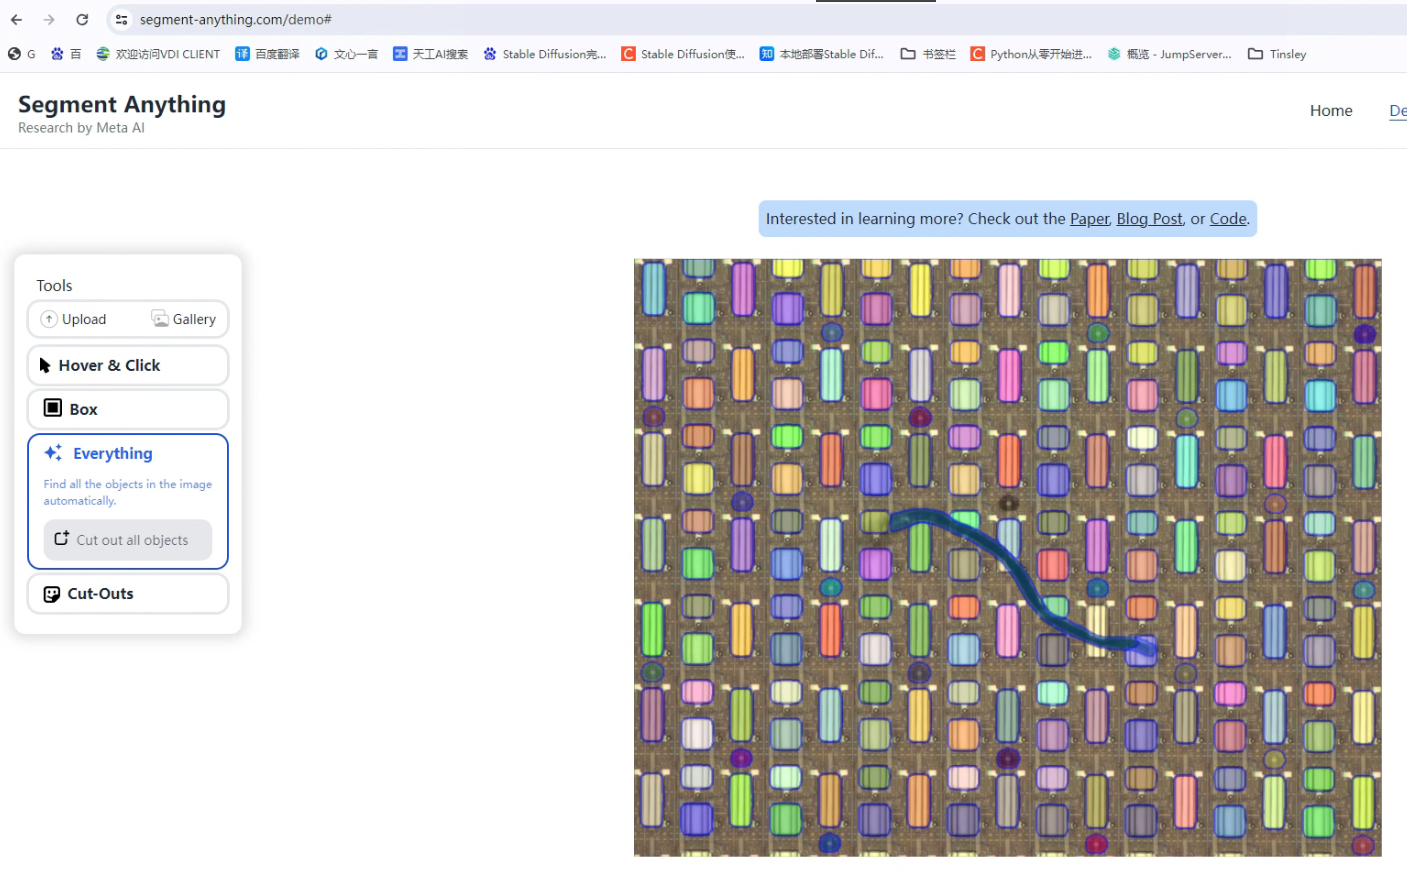
官网演示
该地址是一个web界面,是一个可以用本地数据进行演示的链接:https://segment-anything.com/demo
其他待学习网站:
分割一切模型SAM泛化能力差?域适应策略给解决了
https://www.sohu.com/a/770271242_129720
    项目代码:https://github.com/Zhang-Haojie/WeSAM

Segment Anything(sam)项目整理汇总
https://zhuanlan.zhihu.com/p/676532784

Vision Transformer , 通用 Vision Backbone 超详细解读 (原理分析+代码解读) (目录)
https://zhuanlan.zhihu.com/p/348593638
基于SAM的标注工具:
使用Segment Anything(SAM)模型进行自动标注
https://news.sohu.com/a/694338268_121124011

推荐一款非常好用的数据自动化标注工具Anylabeling
https://blog.csdn.net/dsafefvf/article/details/130380352

分割一切?手把手教你部署SAM+LabelStudio实现自动标注
https://blog.csdn.net/m0_47026232/article/details/130417222

记录segment-anything、SAM及衍生自动标注工具使用
https://blog.csdn.net/weixin_45392674/article/details/130499738


 335
335

 被折叠的 条评论
为什么被折叠?
被折叠的 条评论
为什么被折叠?
 到【灌水乐园】发言


