


基于YOLOv5最新v5.0 release(https://github.com/ultralytics/yolov5/releases/tag/v5.0),和NCNN官方给出example的差别主要有:
-
激活函数hardswish变为siLu;
-
流程和详细记录u版YOLOv5目标检测ncnn实现(https://zhuanlan.zhihu.com/p/275989233?utm_source=qq)略微不同.
项目代码:https://github.com/midasklr/yolov5ncnn
编译运行
动态库用的是官方编译好的ncnn-20210507-ubuntu-1604-shared
mkdir build
cd build
cmake ..
make -j8
./yolov5 ../bus.jpg
可以看到:

流程
以下为yolov5s.pt转NCNN流程,自己训练的模型一样:
pytorch测试和导出onnx
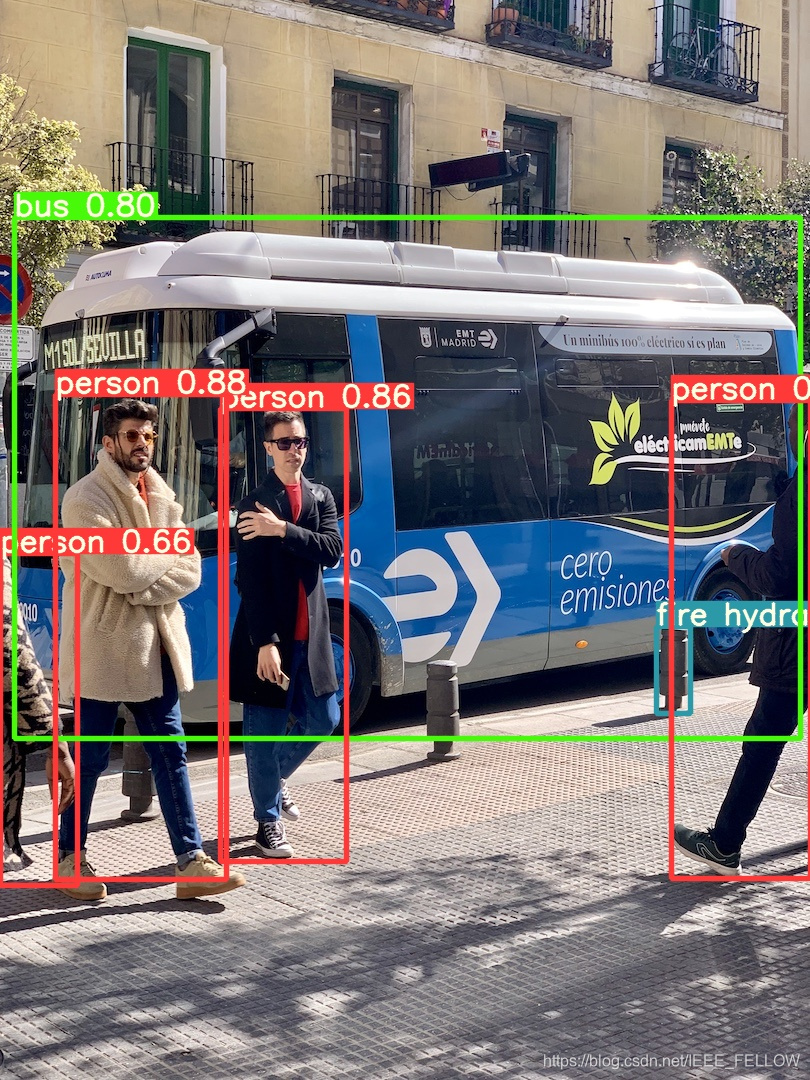
先测试下yolov5s效果:
python detect.py --weights yolov5s.pt --source data/images效果不错:
导出 onnx,并用 onnx-simplifer 简化模型,这里稍微不同,如果按照详细记录u版YOLOv5目标检测ncnn实现(https://zhuanlan.zhihu.com/p/275989233?utm_source=qq),那么直接导出来的模型可以看到输出:
python models/export.py --weights yolov5s.pt --img 640 --batch 1我们用netron查看导出的onnx模型,模型输出那部分节点:
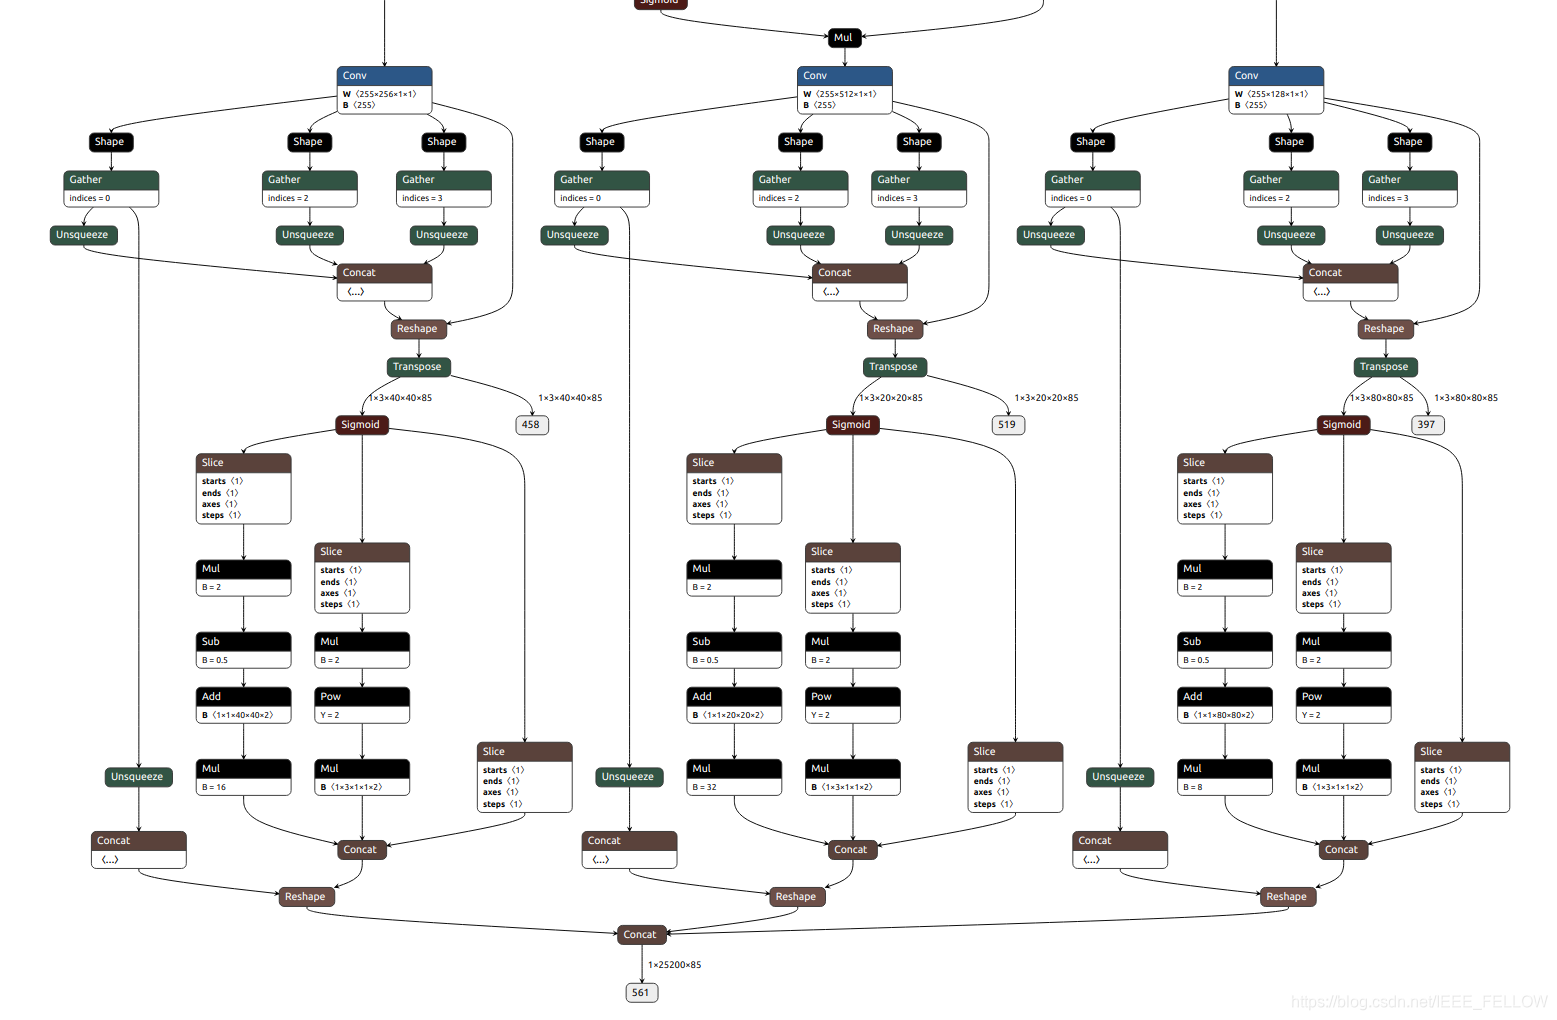
可以看到后处理怎么都出来了???这和nihui大佬转出来的onnx输出不一样。
看看models/yolo.py代码发现:

inference里面不就对应上面onnx模型那部分输出处理后然后torch.cat起来么,这部分处理我们放在代码里面做,所以可以注释这部分:
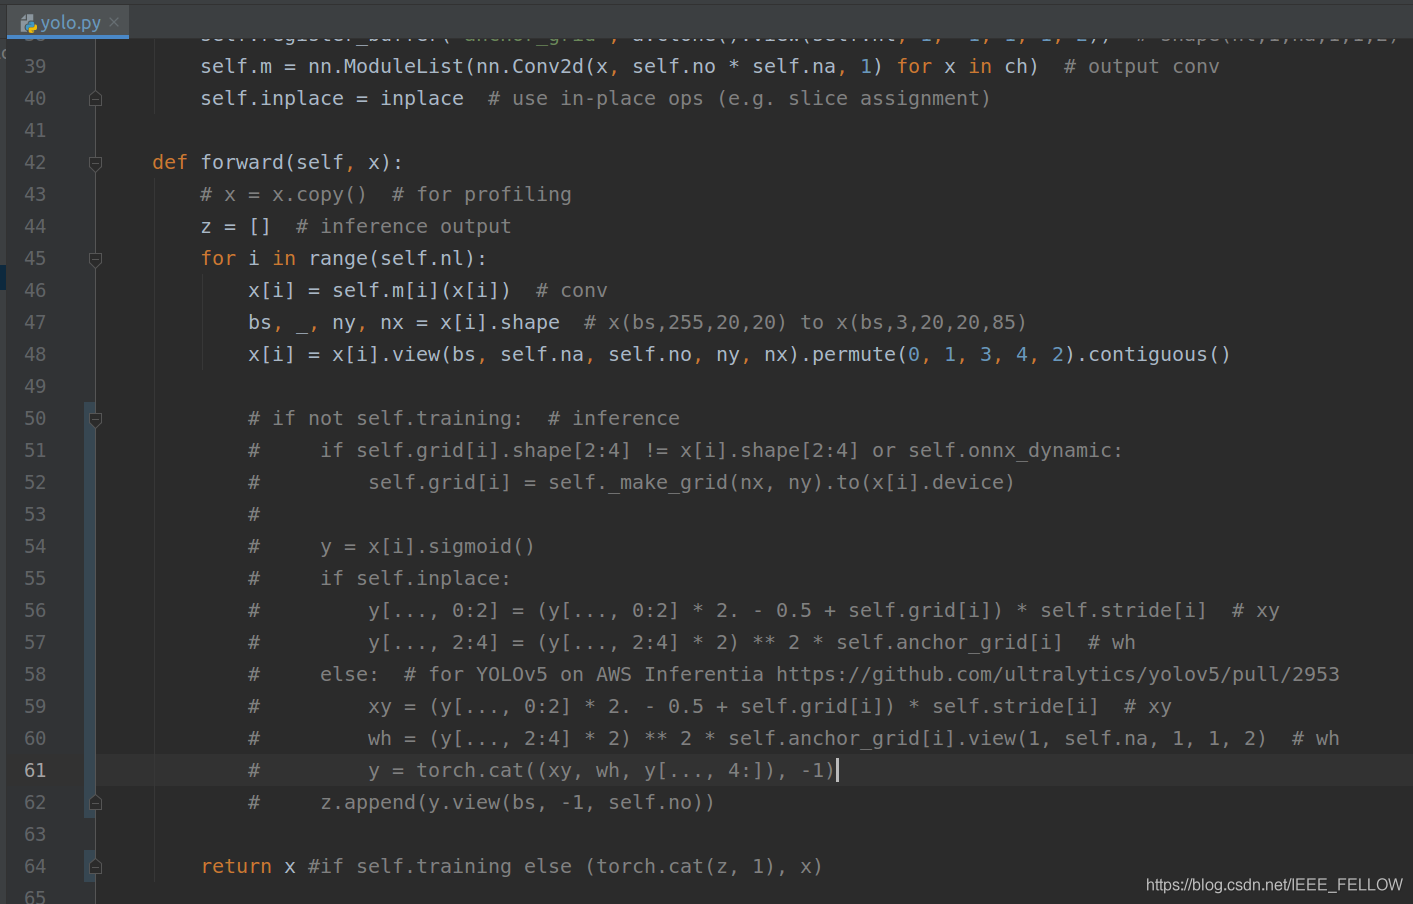
这样导出来的模型就是三个输出了:
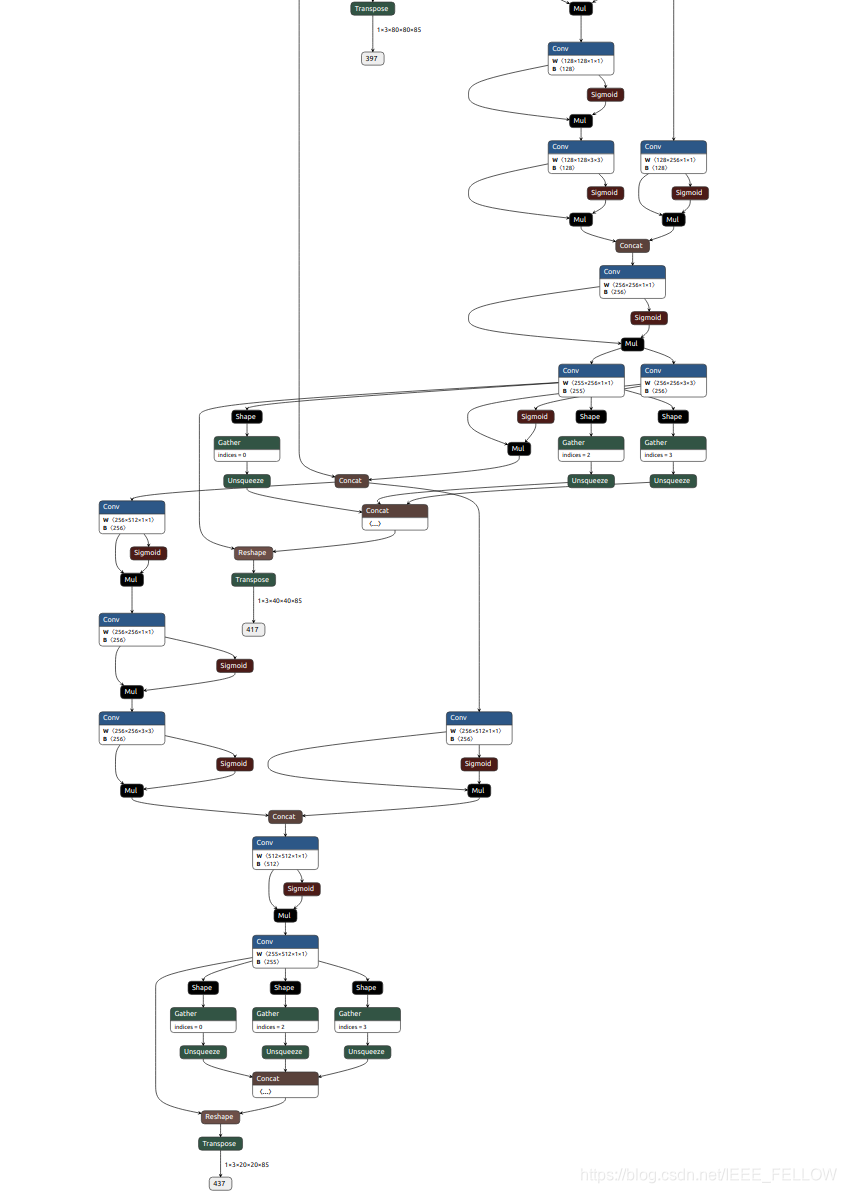
ok,输出和详细记录u版YOLOv5目标检测ncnn实现(https://zhuanlan.zhihu.com/p/275989233?utm_source=qq)对应上了,同时可以看到激活函数silu:
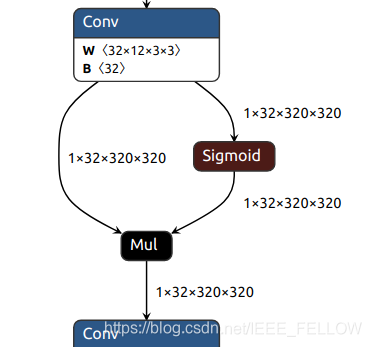
这里silu激活函数被转为了x*sigmoid(x)而不是silu,不过是等价的。
经过onnx-sim简化一下:
python -m onnxsim yolov5s.onnx yolov5s-sim.onnx转换和实现focus模块等
后续和详细记录u版YOLOv5目标检测ncnn实现(https://zhuanlan.zhihu.com/p/275989233?utm_source=qq)一样,ncnn转化后激活函数转为swish,可swish的实现:
Swish::Swish()
{
    one_blob_only = true;
    support_inplace = true;
}

int Swish::forward_inplace(Mat& bottom_top_blob, const Option& opt) const
{
    int w = bottom_top_blob.w;
    int h = bottom_top_blob.h;
    int channels = bottom_top_blob.c;
    int size = w * h;

    #pragma omp parallel for num_threads(opt.num_threads)
    for (int q = 0; q < channels; q++)
    {
        float* ptr = bottom_top_blob.channel(q);

        for (int i = 0; i < size; i++)
        {
            float x = ptr[i];
            ptr[i] = static_cast<float>(x / (1.f + expf(-x)));
        }
    }

    return 0;
}

} // namespace ncnn
和silu一样,那么就可以正常进行推理了,可能需要注意的就是三个输出节点不要弄错就ok。
安卓
参考https://github.com/nihui/ncnn-android-yolov5,替换模型使用这里转的v5.0分支的ncnn模型。


 6769
6769


 到【灌水乐园】发言


