


 本文介绍了如何在SSM框架中使用PageHelper分页插件,包括导入jar包、页面搭建、后台代码实现、配置PageHelper以及展示了最终的页面效果。PageHelper简化了MyBatis的分页操作,支持任何复杂的单表或多表分页。
一、PageHelper分页简介
MyBatis 分页插件 PageHelper,如果你也在用
MyBatis,建议尝试该分页插件,这一定是最方便使用的分页插件。分页插件支持任何复杂的单表、多表分页。
摘自官网,听说是最方便的分页插件。
二、PageHelper使用
2.1 导入jar包
使用maven的直接添加依赖就好了,这次没有使用maven,导入以下两个jar包。

2.2 页面搭建
(一)中使用了很简单的JSP页面,这次使用easyui来做分页页面。需先导入easyui的js和css文件,导入后目录如下。
jsp中放本次所使用的的文件,list为(一)的简单页面。index.jsp为此次简单的主页,product_list.jsp为本次easyui的商品列表页。

index.jsp
<%@ page language="java" contentType="text/html; charset=UTF-8"
    pageEncoding="UTF-8"%>
<!DOCTYPE html>
<html>
<head>
<meta charset="UTF-8">
<title>Insert title here</title>
</head>
<body>
<h1>首页</h1>

	<a href="${pageContext.request.contextPath }/getProductList">商品列表</a>

</body>
</html>
product_list.jsp
<%@ page language="java" contentType="text/html; charset=UTF-8"
pageEncoding="UTF-8"%>
<!DOCTYPE html>
<html>
<head>
<meta charset="UTF-8">
<title>Insert title here</title>
<!-- 引入easyUI的CSS和JS -->
<link rel="stylesheet" type="text/css" href="${pageContext.request.contextPath }/themes/default/easyui.css">
<link rel="stylesheet" type="text/css" href="${pageContext.request.contextPath }/themes/icon.css">
<script type="text/javascript" src="${pageContext.request.contextPath }/js/jquery.min.js"></script>
<script type="text/javascript" src="${pageContext.request.contextPath }/js/jquery.easyui.min.js"></script>
<script type="text/javascript" src="${pageContext.request.contextPath }/locale/easyui-lang-zh_TW.js"></script>
</head>
<script type="text/javascript">
$(function(){
// alert(1);
$('#dg').datagrid({
url:'${pageContext.request.contextPath }/productList',
columns:[[
{field:'pName',title:'商品名称',width:160,sortable:true},
{field:'pPrice',title:'商品单价',width:160,sortable:true},
{field:'xxx',title:'操作',width:180,align:'center',formatter: function(value,row,index){
return "<a href='#'>修改</a> | <a href='#'>删除</a>";
}
}
]],
//显示斑马线
striped:true,
//显示分页工具条
pagination:true,
//自定义pagesize
pageList:[3,5,10],
pageSize:5
});
});
</script>
<body>
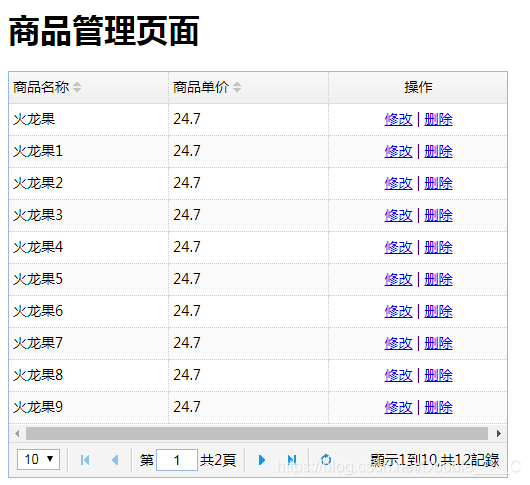
<h1>商品管理页面</h1>
<table id="dg" style="width:500px;"></table>
</body>
</html>
页面效果:
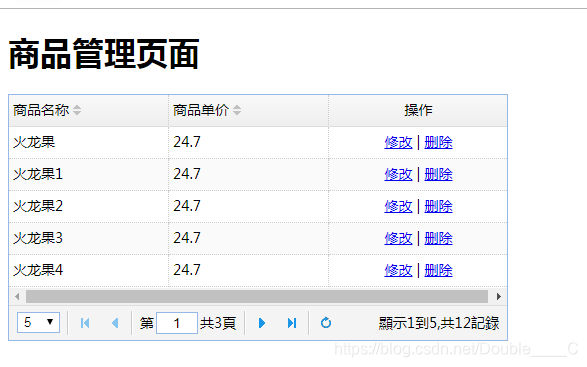
字体引错了,引用了台湾的繁体,图已经截完了,懒得改了。easyui-lang-zh_TW.js换成easyui-lang-zh_CN.js就好了。
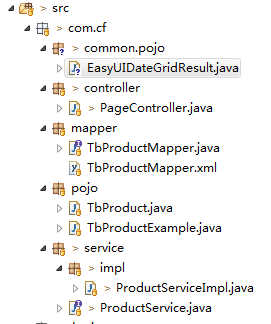
2.3 后台代码
结构如下
EasyUIDateGridResult.java
package com.cf.common.pojo;

import java.util.List;

/**
 * datagrid展示数据的pojo类
 *
 * @author cf
 *
 */
public class EasyUIDateGridResult {
	private Integer total;

	private List<?> rows;

	public Integer getTotal() {
		return total;
	}

	public void setTotal(Integer total) {
		this.total = total;
	}

	public List<?> getRows() {
		return rows;
	}

	public void setRows(List<?> rows) {
		this.rows = rows;
	}

}
ProductService.java
新增以下方法
//easy UI的方式返回数据
public EasyUIDateGridResult getProductList(Integer page, Integer rows);
ProductServiceImpl.java
新增以下方法:
/**
 * 根据当前页面和行数实现分页
 */
@Override
public EasyUIDateGridResult getProductList(Integer page, Integer rows) {
	//使用pageHelper设置分页信息
	if(null == page) page = 1;
	if(null == rows) rows = 5;
	PageHelper.startPage(page, rows);
	//设置example对象,查询所有list
	TbProductExample example = new TbProductExample();
	List<TbProduct> list = mapper.selectByExample(example);
	//获取分页信息
	PageInfo<TbProduct> info = new PageInfo<>(list);
	//分装到EasyUIDateGridResult
	EasyUIDateGridResult result = new EasyUIDateGridResult();
	//设置总纪录数
	result.setTotal((int)info.getTotal());
	//设置list
	result.setRows(info.getList());

	return result;
}
PageController.java
导向今天刚写的jsp页面
package com.cf.controller;

import java.util.List;

import org.springframework.beans.factory.annotation.Autowired;
import org.springframework.stereotype.Controller;
import org.springframework.ui.Model;
import org.springframework.web.bind.annotation.RequestMapping;
import org.springframework.web.bind.annotation.ResponseBody;

import com.cf.common.pojo.EasyUIDateGridResult;
import com.cf.pojo.TbProduct;
import com.cf.service.ProductService;

@Controller

public class PageController {

	@Autowired
	private ProductService productService;

	//导向主页
	@RequestMapping("/")
	public String index() {
		return "index";
	}

	//导向商品页面
	@RequestMapping("/getProductList")
	public String getProductList() {
		return "product_list";
	}

	//无分页的简单jsp商品页面
	@RequestMapping("/list")
	public String list(Model model) {
		List<TbProduct> list = productService.list();
		model.addAttribute("list", list);
		return "list";
	}

	//带分页的JSP页面
	@RequestMapping("/productList")
	@ResponseBody
	public EasyUIDateGridResult getProductList(Integer page, Integer rows) {
		EasyUIDateGridResult result = productService.getProductList(page, rows);
		return result;
	}
}
springmvc.xml
配置中增加以下配置语句,放行静态资源。
	<mvc:resources location="/WEB-INF/css/" mapping="/css/**"/>
	<mvc:resources location="/WEB-INF/js/" mapping="/js/**"/>
	<mvc:resources location="/WEB-INF/locale/" mapping="/locale/**"/>
	<mvc:resources location="/WEB-INF/plugins/" mapping="/plugins/**"/>
	<mvc:resources location="/WEB-INF/themes/" mapping="/themes/**"/>
因为web.xml配置 / 的路径,所有访问全部拦截,所有静态资源也被拦截,但是不包括jsp页面。使用以上配置进行放行。
如果jsp页面有的静态资源被放行有的没有,路径也正确,注意下引入的先后顺序,让jquery先引入

2.4 PageHelper的配置
pagehelper也需要配置,否则查询出来是没有分页效果的。如果页面及分页工具栏均正常展示,但是数据没有被分页。需查看此配置是否正确。
applicationContext-dao.xml
在sqlSessionFactoryBean的bean中添加PageHelper的配置
<!-- 配置sqlsessionfactory -->
<bean id="sqlSessionFactoryBean" class="org.mybatis.spring.SqlSessionFactoryBean">
	<!-- 设置MyBatis核心配置文件 -->
	<property name="configLocation" value="classpath:mybatis/SqlMapConfig.xml"/>
	<!-- 配置数据源 -->
	<property name="dataSource" ref="dataSource"></property>

	<!-- 配置mybatis分页插件PageHelper -->
	<property name="plugins">
		<array>
			<bean class="com.github.pagehelper.PageInterceptor">
				<property name="properties">
					<!-- 什么都不配,使用默认的配置 -->
					<value></value>
				</property>
			</bean>
		</array>
	</property>
</bean>
三、页面效果
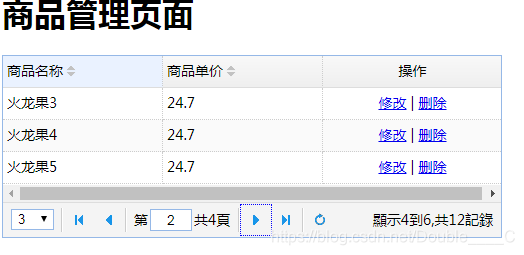
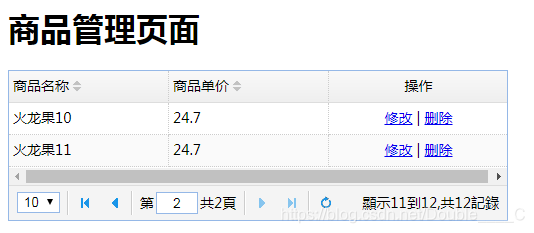
以上是使用PageHelper进行分页。easyui接受的分页json数据是固定格式,详细可以去看easyui的教程。后面慢慢更新CRUD操作


 3399
3399

 被折叠的 条评论
为什么被折叠?
被折叠的 条评论
为什么被折叠?
 到【灌水乐园】发言


