


 本文介绍了SSM(SpringMVC+Spring+Mybatis)框架的项目搭建过程,包括框架简介、详细配置步骤、后台代码结构以及如何运行项目。通过这个实例,读者将学习到如何配置SpringMVC、Spring和Mybatis,以及完成简单的商品列表展示的CRUD操作。
一、框架简介
SSM框架,即SpringMVC+Spring+Mybatis,其中SpringMVC与Spring可以更好的正好。对比SSH框架,Mybatis相比Hibernate更加简单易用,也更轻便,配置也较为简单。
准备做一个显示商品列表,可以进行CRUD操作的小项目,这一节先搭建环境试运行列表显示。CRUD操作后面更新。
二、项目搭建
2.1 包结构如下

jsp页面

2.2 配置详细
2.2.1 mybatis配置
SqlMapConfig.xml
<?xml version="1.0" encoding="UTF-8" ?>
<!DOCTYPE configuration PUBLIC "-//mybatis.org//DTD Config 3.0//EN"
"http://mybatis.org/dtd/mybatis-3-config.dtd">

<configuration>

<!-- 配置别名 -->
	<typeAliases>
		<package name="com.cf.pojo"/>
	</typeAliases>

</configuration>
2.2.2 Spring配置
spring及springmvc配置都进行配置
spring配置可根据不同层次进行拆分
applicationContext-dao.xml
<?xml version="1.0" encoding="UTF-8"?>
<beans xmlns="http://www.springframework.org/schema/beans"
	xmlns:xsi="http://www.w3.org/2001/XMLSchema-instance"
	xmlns:mvc="http://www.springframework.org/schema/mvc"
	xmlns:context="http://www.springframework.org/schema/context"
	xmlns:aop="http://www.springframework.org/schema/aop"
	xmlns:tx="http://www.springframework.org/schema/tx"
	xmlns:task="http://www.springframework.org/schema/task"
	xmlns:dubbo="http://code.alibabatech.com/schema/dubbo"
	xsi:schemaLocation="http://www.springframework.org/schema/beans
		http://www.springframework.org/schema/beans/spring-beans-4.0.xsd
		http://www.springframework.org/schema/mvc
		http://www.springframework.org/schema/mvc/spring-mvc-4.0.xsd
		http://www.springframework.org/schema/context
		http://www.springframework.org/schema/context/spring-context-4.0.xsd
		http://www.springframework.org/schema/aop
		http://www.springframework.org/schema/aop/spring-aop-4.0.xsd
		http://www.springframework.org/schema/tx
		http://www.springframework.org/schema/tx/spring-tx-4.0.xsd
		http://www.springframework.org/schema/task
   		http://www.springframework.org/schema/task/spring-task-4.0.xsd
		http://code.alibabatech.com/schema/dubbo
		http://code.alibabatech.com/schema/dubbo/dubbo.xsd">

	<!-- 配置读取jdbc.properties文件 -->
	<context:property-placeholder location="classpath:jdbc.properties" />

	<!-- 配置数据源 -->
	<bean id="dataSource" class="com.alibaba.druid.pool.DruidDataSource">
		<!-- 驱动 -->
		<property name="driverClassName" value="${jdbc.driver}" />
		<!-- url -->
		<property name="url" value="${jdbc.url}" />
		<!-- 用户名 -->
		<property name="username" value="${jdbc.username}" />
		<!-- 密码 -->
		<property name="password" value="${jdbc.password}" />
	</bean>

	<!-- 配置sqlsessionfactory -->
	<bean id="sqlSessionFactoryBean" class="org.mybatis.spring.SqlSessionFactoryBean">
		<!-- 设置MyBatis核心配置文件 -->
		<property name="configLocation" value="classpath:mybatis/SqlMapConfig.xml"/>
		<!-- 配置数据源 -->
		<property name="dataSource" ref="dataSource"></property>
	</bean>

	<!-- 配置mapper扫描 -->
	<bean class="org.mybatis.spring.mapper.MapperScannerConfigurer">
		<property name="basePackage" value="com.cf.mapper"></property>
	</bean>
</beans>
applicationContext-service.xml
<?xml version="1.0" encoding="UTF-8"?>
<beans xmlns="http://www.springframework.org/schema/beans"
	xmlns:xsi="http://www.w3.org/2001/XMLSchema-instance"
	xmlns:mvc="http://www.springframework.org/schema/mvc"
	xmlns:context="http://www.springframework.org/schema/context"
	xmlns:aop="http://www.springframework.org/schema/aop"
	xmlns:tx="http://www.springframework.org/schema/tx"
	xmlns:task="http://www.springframework.org/schema/task"
	xmlns:dubbo="http://code.alibabatech.com/schema/dubbo"
	xsi:schemaLocation="http://www.springframework.org/schema/beans
		http://www.springframework.org/schema/beans/spring-beans-4.0.xsd
		http://www.springframework.org/schema/mvc
		http://www.springframework.org/schema/mvc/spring-mvc-4.0.xsd
		http://www.springframework.org/schema/context
		http://www.springframework.org/schema/context/spring-context-4.0.xsd
		http://www.springframework.org/schema/aop
		http://www.springframework.org/schema/aop/spring-aop-4.0.xsd
		http://www.springframework.org/schema/tx
		http://www.springframework.org/schema/tx/spring-tx-4.0.xsd
		http://www.springframework.org/schema/task
   		http://www.springframework.org/schema/task/spring-task-4.0.xsd
		http://code.alibabatech.com/schema/dubbo
		http://code.alibabatech.com/schema/dubbo/dubbo.xsd">

	<!-- 配置扫描 -->
	<context:component-scan base-package="com.cf.service"/>
</beans>
springmvc.xml
代码中有对静态资源放行,暂时还没有静态资源,可以忽略
<?xml version="1.0" encoding="UTF-8"?>
<beans xmlns="http://www.springframework.org/schema/beans"
	xmlns:xsi="http://www.w3.org/2001/XMLSchema-instance" xmlns:mvc="http://www.springframework.org/schema/mvc"
	xmlns:context="http://www.springframework.org/schema/context"
	xmlns:aop="http://www.springframework.org/schema/aop"
	xmlns:tx="http://www.springframework.org/schema/tx"
	xmlns:task="http://www.springframework.org/schema/task"
	xmlns:dubbo="http://code.alibabatech.com/schema/dubbo"
	xsi:schemaLocation="http://www.springframework.org/schema/beans
		http://www.springframework.org/schema/beans/spring-beans-4.0.xsd
		http://www.springframework.org/schema/mvc
		http://www.springframework.org/schema/mvc/spring-mvc-4.0.xsd
		http://www.springframework.org/schema/context
		http://www.springframework.org/schema/context/spring-context-4.0.xsd
		http://www.springframework.org/schema/aop
		http://www.springframework.org/schema/aop/spring-aop-4.0.xsd
		http://www.springframework.org/schema/tx
		http://www.springframework.org/schema/tx/spring-tx-4.0.xsd
		http://www.springframework.org/schema/task
   		http://www.springframework.org/schema/task/spring-task-4.0.xsd
		http://code.alibabatech.com/schema/dubbo
		http://code.alibabatech.com/schema/dubbo/dubbo.xsd">

		<!-- 配置controller层的扫描 -->
		<context:component-scan base-package="com.cf.controller"/>


		<!-- 配置注解驱动 -->
		<tx:annotation-driven/>
		<mvc:annotation-driven/>


		<!-- 对静态资源放行 -->
		<mvc:resources location="/css/" mapping="/css/**"/>
		<mvc:resources location="/js/" mapping="/js/**"/>
		<mvc:resources location="/fonts/" mapping="/fonts/**"/>

		<!-- 视图解析器 -->
		<bean class="org.springframework.web.servlet.view.InternalResourceViewResolver">
			<!-- 设置前缀 -->
			<property name="prefix" value="/WEB-INF/jsp/"/>
			<!-- 设置后缀 -->
			<property name="suffix" value=".jsp"/>
		</bean>

</beans>
2.2.3 jdbc.properties
jdbc.properties
数据库配置
jdbc.driver=com.mysql.jdbc.Driver
jdbc.url=jdbc:mysql://localhost:3305/db_supermaket?characterEncoding=utf-8
jdbc.username=root
jdbc.password=root
log4j就自己添加吧
2.3 web.xml 配置
<?xml version="1.0" encoding="UTF-8"?>
<web-app xmlns:xsi="http://www.w3.org/2001/XMLSchema-instance"
	xmlns="http://java.sun.com/xml/ns/javaee"
	xsi:schemaLocation="http://java.sun.com/xml/ns/javaee http://java.sun.com/xml/ns/javaee/web-app_2_5.xsd"
	id="WebApp_ID" version="2.5">
	<display-name>Pro_list</display-name>
	<welcome-file-list>
		<welcome-file>index.html</welcome-file>
		<welcome-file>index.htm</welcome-file>
		<welcome-file>index.jsp</welcome-file>
		<welcome-file>default.html</welcome-file>
		<welcome-file>default.htm</welcome-file>
		<welcome-file>default.jsp</welcome-file>
	</welcome-file-list>

	<!-- 配置spring -->
	<context-param>
		<param-name>contextConfigLocation</param-name>
		<param-value>classpath:spring/applicationContext-*.xml</param-value>
	</context-param>

	<!-- 配置监听器加载spring -->
	<listener>
		<listener-class>org.springframework.web.context.ContextLoaderListener</listener-class>
	</listener>

	<!-- 配置filter过滤器,解决乱码问题 -->
	<filter>
		<filter-name>encoding</filter-name>
		<filter-class>org.springframework.web.filter.CharacterEncodingFilter</filter-class>
		<init-param>
			<param-name>encoding</param-name>
			<param-value>UTF-8</param-value>
		</init-param>
	</filter>

	<filter-mapping>
		<filter-name>encoding</filter-name>
		<url-pattern>/*</url-pattern>
	</filter-mapping>

<!-- 	<servlet-mapping>
		<servlet-name>default</servlet-name>
		<url-pattern>/fonts/*</url-pattern>
	</servlet-mapping>
	<servlet-mapping>
		<servlet-name>default</servlet-name>
		<url-pattern>*.js</url-pattern>
	</servlet-mapping>
	<servlet-mapping>
		<servlet-name>default</servlet-name>
		<url-pattern>*.css</url-pattern>
	</servlet-mapping> -->

	<!-- 配置springmvc -->
	<servlet>
		<servlet-name>product</servlet-name>
		<servlet-class>org.springframework.web.servlet.DispatcherServlet</servlet-class>
		<init-param>
			<param-name>contextConfigLocation</param-name>
			<param-value>classpath:spring/springmvc.xml</param-value>
		</init-param>
		<!-- 配置springmvc什么时候启动,参数必须为整数 -->
		<!-- 如果为0或大于0,则springmvc随着容器启动而启动 -->
		<!-- 如果小于0,则在第一次请求进来的时候启动 -->
		<load-on-startup>1</load-on-startup>
	</servlet>

	<servlet-mapping>
		<servlet-name>product</servlet-name>
		<!-- 所有的请求都进入springmvc -->
		<url-pattern>/</url-pattern>
	</servlet-mapping>
</web-app>
三、后台代码
3.1 mapper&pojo
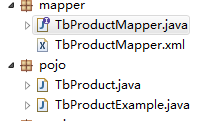
mapper及pojo就不放了,是根据数据库和Mybatis逆向工程生成的。
放一下数据库的代码
CREATE DATABASE db_supermaket;

USE db_supermaket;

CREATE TABLE tb_product(
	p_id INT PRIMARY KEY AUTO_INCREMENT COMMENT '商品id(主键)',
	p_name VARCHAR(20) NOT NULL COMMENT '商品名称',
	p_price DOUBLE NOT NULL COMMENT '商品价格'
);

INSERT INTO tb_product(p_name, p_price) VALUES ("火龙果",24.7);
INSERT INTO tb_product(p_name, p_price) VALUES ("火龙果1",24.7);
INSERT INTO tb_product(p_name, p_price) VALUES ("火龙果2",24.7);
INSERT INTO tb_product(p_name, p_price) VALUES ("火龙果3",24.7);
INSERT INTO tb_product(p_name, p_price) VALUES ("火龙果4",24.7);
INSERT INTO tb_product(p_name, p_price) VALUES ("火龙果5",24.7);
INSERT INTO tb_product(p_name, p_price) VALUES ("火龙果6",24.7);
INSERT INTO tb_product(p_name, p_price) VALUES ("火龙果7",24.7);
INSERT INTO tb_product(p_name, p_price) VALUES ("火龙果8",24.7);
INSERT INTO tb_product(p_name, p_price) VALUES ("火龙果9",24.7);
INSERT INTO tb_product(p_name, p_price) VALUES ("火龙果10",24.7);
INSERT INTO tb_product(p_name, p_price) VALUES ("火龙果11",24.7);
3.2 service层
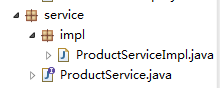
ProductService.java
package com.cf.service;

import java.util.List;

import com.cf.pojo.TbProduct;

public interface ProductService {

	//查询product的list
	public List<TbProduct> list();
}
ProductServiceImpl.java
package com.cf.service.impl;

import java.util.List;

import org.springframework.beans.factory.annotation.Autowired;
import org.springframework.stereotype.Service;

import com.cf.mapper.TbProductMapper;
import com.cf.pojo.TbProduct;
import com.cf.pojo.TbProductExample;
import com.cf.service.ProductService;

@Service
public class ProductServiceImpl implements ProductService {

	//注入mapper
	@Autowired
	private TbProductMapper mapper;

	@Override
	public List<TbProduct> list() {
		//设置查询条件
		TbProductExample example = new TbProductExample();
		//查询
		return mapper.selectByExample(example);
	}

}
3.3 controller层
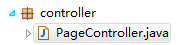
PageController.java
package com.cf.controller;

import java.util.List;

import org.springframework.beans.factory.annotation.Autowired;
import org.springframework.stereotype.Controller;
import org.springframework.ui.Model;
import org.springframework.web.bind.annotation.RequestMapping;

import com.cf.pojo.TbProduct;
import com.cf.service.ProductService;

@Controller
public class PageController {

	@Autowired
	private ProductService productService;

	@RequestMapping("/")
	public String index() {
		return "index";
	}

	@RequestMapping("/list")
	public String list(Model model) {
		List<TbProduct> list = productService.list();

		model.addAttribute("list", list);
		return "list";
	}
}
3.4 JSP页面
list.jsp
页面中的pojo属性名称和数据库的字段名称有些不一样,要注意下。
因为使用逆向工程生成pojo,数据库中的下划线被去掉了。
<%@ page language="java" contentType="text/html; charset=UTF-8"
    pageEncoding="UTF-8"%>
    <%@ taglib uri="http://java.sun.com/jsp/jstl/core" prefix="c"%>
<!DOCTYPE html>
<html>
<head>
<meta charset="UTF-8">
<title>Insert title here</title>
</head>
<body>

<table align='center' border='1' cellspacing='0'>
    <tr>
        <td>序号</td>
        <td>商品</td>
        <td>价格</td>
    </tr>
    <c:forEach items="${list}" var="p" varStatus="s">
        <tr>
        	<td>${s.count}</td>
            <td>${p.pName}</td>
            <td>${p.pPrice}</td>
        </tr>
    </c:forEach>
</table>

</body>
</html>
四、运行项目

SSM搭建OK,可以先运行。


 2676
2676

 被折叠的 条评论
为什么被折叠?
被折叠的 条评论
为什么被折叠?
 到【灌水乐园】发言


