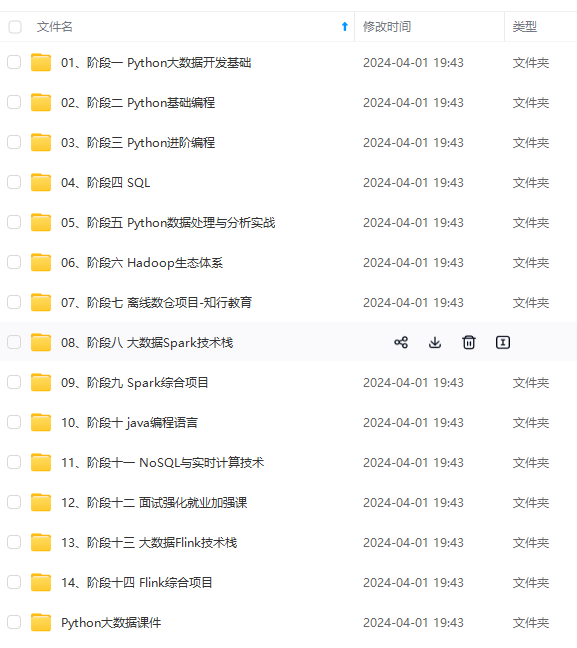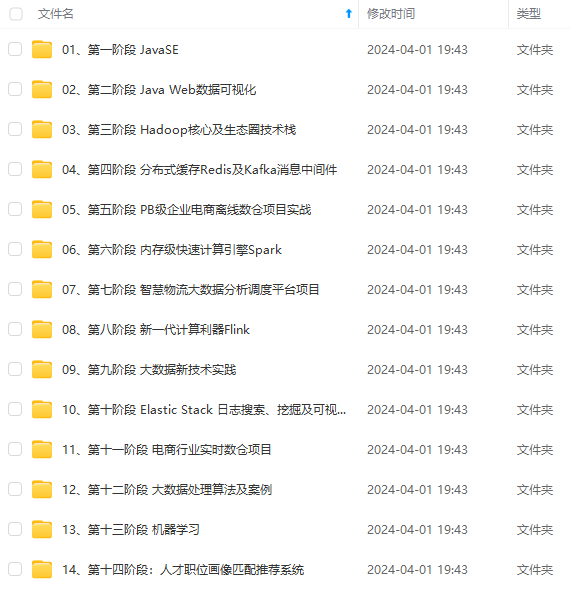


既有适合小白学习的零基础资料,也有适合3年以上经验的小伙伴深入学习提升的进阶课程,涵盖了95%以上大数据知识点,真正体系化!
由于文件比较多,这里只是将部分目录截图出来,全套包含大厂面经、学习笔记、源码讲义、实战项目、大纲路线、讲解视频,并且后续会持续更新
FROM python:3.8-alpine

LABEL maintaier="kobe<118@qq.com>"
LABEL description="Dockerfile demo"

WORKDIR /myapp

COPY . .

RUN pip install -r requirements.txt

CMD python fun.py
🌙4、创建镜像(kobeya/myapp)
zhilong@zhilong-virtual-machine:~/Desktop/shell_text/docker1$ sudo docker build -t kobeya/myapp .
[sudo] zhilong 的密码:
Sending build context to Docker daemon  5.632kB
Step 1/7 : FROM python:3.8-alpine
 ---> 926e859df334
Step 2/7 : LABEL maintaier="kobe<118@qq.com>"
 ---> Using cache
 ---> d77df09a3a66
Step 3/7 : LABEL description="Dockerfile demo"
 ---> Using cache
 ---> 0ffecf31e2c8
Step 4/7 : WORKDIR /myapp
 ---> Using cache
 ---> 82c7391ed055
Step 5/7 : COPY . .
 ---> a9c9ec281098
Step 6/7 : RUN pip install -r requirements.txt
 ---> Running in 383bcce3aa82
Collecting cowpy==1.1.0
  Downloading cowpy-1.1.0.tar.gz (14 kB)
  Preparing metadata (setup.py): started
  Preparing metadata (setup.py): finished with status 'done'
Building wheels for collected packages: cowpy
  Building wheel for cowpy (setup.py): started
  Building wheel for cowpy (setup.py): finished with status 'done'
  Created wheel for cowpy: filename=cowpy-1.1.0-py3-none-any.whl size=10656 sha256=7d634e53dbc90a9945272136b55393e8b6fec0ef3069146c0f076be796be1cfc
  Stored in directory: /root/.cache/pip/wheels/26/23/e0/6d551b2cf42dd0e359edf54fab392e64a3bfb0d197759ef03e
Successfully built cowpy
Installing collected packages: cowpy
Successfully installed cowpy-1.1.0
WARNING: Running pip as the 'root' user can result in broken permissions and conflicting behaviour with the system package manager. It is recommended to use a virtual environment instead: https://pip.pypa.io/warnings/venv
WARNING: You are using pip version 22.0.4; however, version 22.1.2 is available.
You should consider upgrading via the '/usr/local/bin/python -m pip install --upgrade pip' command.
Removing intermediate container 383bcce3aa82
 ---> 8d9ee514385b
Step 7/7 : CMD python fun.py
 ---> Running in e0f5044cd5bc
Removing intermediate container e0f5044cd5bc
 ---> 6a75149dde6d
Successfully built 6a75149dde6d
Successfully tagged kobeya/myapp:latest
5、🌙查看镜像

🌙6、运行镜像
zhilong@zhilong-virtual-machine:~/Desktop/shell_text/docker1$ sudo docker run --rm kobeya/myapp:latest
 _____________
< hello,dev07 >
 -------------
  o
   o    (__)
        $$\
       ('') \---------
          \           \
           |          |\
           ||---(  )_|| \*
           ||    UU  ||
           ==        ==
二、Dockerfile语法
🌙1、注释:
可以使用#指定注释信息,不会当作构建指令
🌙2、往往文件名写成Dockerfile
Dockerfile的作用:可以使用Dockerfile文件自定义镜像
🌙3、一个Dockerfile文件中,至少需要一个FROM,并且在首行
当前FROM有三种类型
1、FROM 镜像名(首先会在本地查看有没有这个镜像,如果没有去docker hub中找latest),最好不要指定最新版本的,因为有版本差异
2、FROM 镜像名:tag(建议使用)
3、FROM 镜像名@digest
🌙4、使用FROM 指定base 镜像
FROM python:3.8-alpine
🌙5、LABEL:指定元素信息和描述,
LABEL key value
或者
LABEL key1=value1 key2=value2(建议使用)
LABEL maintaier="kobe<118@qq.com>"
LABEL description="Dockerfile demo"
🌙6、WORKDIR:WORKDIR 指定进入到容器的特定目录中,相当于linux命令中的cd
🔥运行容器会将Dockerfile中的文件复制到WORKDIR指定的目录
格式:WORKDIR 容器中的目录
如果指定的容器中目录不存在,会自动创建
WORKDIR /myapp
🔥注意1:
WORKDIR /myapp
WORKDIR aa/
相对路径: 如果有2个WORKDIR相当于进入/myapp/aa/
🔥注意2:
WORKDIR /myapp
WORKDIR /aa/
绝对路径:WORKDIR /aa/ 如果有2个WORKDIR相当于进入/aa/
🌙7、COPY:用于将宿主机中(安装docker的机器)的资源复制到容器中,进行容器共享
🔥COPY:用于将宿主机中(安装docker的机器)的资源复制到容器中,进行容器共享
格式:COPY 宿主机文件或者目录 容器中的文件或者目录
COPY . .
. :将Dockerfile同级目录下的文件复制粘贴到容器中的myapp目录中
zhilong@zhilong-virtual-machine:~/桌面$ sudo docker run -it kobeya/myapp:latest /bin/sh
/myapp # ls
Dockerfile        fun.py            requirements.txt
注意1:
COPY fun.py /myapp/:将fun.py文件复制到myapp目录下
注意2:
COPY fun.py /aaa :复制fun.py文件到容器中,并将fun.py复制粘贴并且命名为aaa文件
🔥如果需要复制文件到容器的某个目录中,那么最好在路径后面添加/;不然结果为将fun.py复制粘贴并且命名为aaa文件
🌙8、使用docker build来构建镜像 Makefile
sudo docker build -t kobe/myapp:v1 .
1、-t:指定构建镜像的名称和tag号,如果不指定tag,那么会自动使用latest
2、-f:指定Dockerfile文件的路径,如果命名为Dockerfile并且在当前路径下,那么不指定-f参数
3、. :指定构建时的上下文数据
4、格式:docker build -t 镜像名:tag -f Dockerfile文件 .
🌙9、ADD:ADD与COPY命令功能相似,用于将宿主机或者远程的资源复制到容器中
可以将本地的压缩文件解压之后,复制到容器中
也可以将远程资源路径下载之后(不会解压),复制到容器中
ADD src.tar ./
ubuntu@VM-24-12-ubuntu:~/docker$ sudo docker run -it jimi/myapp:v2 /bin/sh
/myapp # ls
Dockerfile        fun.py            requirements.txt  src.tar
🌙10、RUN :安装运行
RUN命令是在容器中执行的;
在容器中执行requirements.txt,requirements.txt是通过COPY复制过来的;
RUN命令的工作目录一定是WORKDIR指定的工作目录。
🔥是在myapp目录下运行的
如果RUN运行的不止一条命令,不建议写多个RUN,可以拼接到一个RUN中,并且要分行展示
例如
RUN pip install -r requirements.txt && \
        cat fun.py && \
        ls /home
ubuntu@VM-24-12-ubuntu:~/docker$ sudo docker build -t jimi/myapp:v4 .
Sending build context to Docker daemon  14.85kB
Step 1/6 : FROM python:3.7-alpine
 ---> fe33630f7d7a
Step 2/6 : WORKDIR /myapp
 ---> Using cache
 ---> 301da95aced8
Step 3/6 : COPY . .
 ---> a4c046f8af01
Step 4/6 : ADD src.tar ./
 ---> b92b3193caae
Step 5/6 : RUN pip install -r requirements.txt &&       cat fun.py &&   ls /root
 ---> Running in a5302a40e091
Collecting cowpy==1.1.0
  Downloading cowpy-1.1.0.tar.gz (14 kB)
  Preparing metadata (setup.py): started
  Preparing metadata (setup.py): finished with status 'done'
Building wheels for collected packages: cowpy
  Building wheel for cowpy (setup.py): started
  Building wheel for cowpy (setup.py): finished with status 'done'
  Created wheel for cowpy: filename=cowpy-1.1.0-py3-none-any.whl size=10655 sha256=c2dfa4fefd1c5f80bc4cd440862a14a6c8f6a22aa33ca1ae4d68bf5d53c0bc34
  Stored in directory: /root/.cache/pip/wheels/4d/db/fc/21216e4bfe68a6edd7dbfd3dc0dc34263a96cacbf1e0ee5c56
Successfully built cowpy
Installing collected packages: cowpy
Successfully installed cowpy-1.1.0
WARNING: Running pip as the 'root' user can result in broken permissions and conflicting behaviour with the system package manager. It is recommended to use a virtual environment instead: https://pip.pypa.io/warnings/venv

[notice] A new release of pip is available: 23.0.1 -> 23.2.1
[notice] To update, run: pip install --upgrade pip
from cowpy import cow
print(cow.milk_random_cow("hello,dev07"))

Removing intermediate container a5302a40e091
 ---> b88569957b21
Step 6/6 : CMD python fun.py
 ---> Running in 7ffc0de38d71
Removing intermediate container 7ffc0de38d71
 ---> 2c8479fc1671
Successfully built 2c8479fc1671
Successfully tagged jimi/myapp:v4
🌙11、ENV:指定环境变量
FROM python:3.8-alpine

LABEL maintaier="kobe<118@qq.com>"
LABEL description="Dockerfile demo"

WORKDIR /myapp

COPY . .

ENV myuser=zhikong \
        myage=18

RUN pip install -r requirements.txt && \
        cat fun.py && \
        ls /home


CMD python fun.py
构建,创建镜像
zhilong@zhilong-virtual-machine:~/Desktop/shell_text/docker1$ sudo docker build -t kobe/myapp:v1 .
Sending build context to Docker daemon  5.632kB
Step 1/8 : FROM python:3.8-alpine
 ---> 926e859df334
Step 2/8 : LABEL maintaier="kobe<118@qq.com>"
 ---> Using cache
 ---> d77df09a3a66
Step 3/8 : LABEL description="Dockerfile demo"
 ---> Using cache
 ---> 0ffecf31e2c8
Step 4/8 : WORKDIR /myapp
 ---> Using cache
 ---> 82c7391ed055
Step 5/8 : COPY . .
 ---> 6d9bb3cb0b8d
Step 6/8 : ENV myuser=zhikong 	myage=18
 ---> Running in 643df7e12cf0
Removing intermediate container 643df7e12cf0
 ---> 99b33e3abaad
Step 7/8 : RUN pip install -r requirements.txt && 	cat fun.py && 	ls /home
 ---> Running in 476df4d1e83f
Collecting cowpy==1.1.0
  Downloading cowpy-1.1.0.tar.gz (14 kB)
  Preparing metadata (setup.py): started
  Preparing metadata (setup.py): finished with status 'done'
Building wheels for collected packages: cowpy
  Building wheel for cowpy (setup.py): started
  Building wheel for cowpy (setup.py): finished with status 'done'
  Created wheel for cowpy: filename=cowpy-1.1.0-py3-none-any.whl size=10656 sha256=f19df94a3979606a4a78661667a031949e185b6eb90d10bc883452f7e133f971
  Stored in directory: /root/.cache/pip/wheels/26/23/e0/6d551b2cf42dd0e359edf54fab392e64a3bfb0d197759ef03e
Successfully built cowpy
Installing collected packages: cowpy
Successfully installed cowpy-1.1.0
WARNING: Running pip as the 'root' user can result in broken permissions and conflicting behaviour with the system package manager. It is recommended to use a virtual environment instead: https://pip.pypa.io/warnings/venv
WARNING: You are using pip version 22.0.4; however, version 22.1.2 is available.
You should consider upgrading via the '/usr/local/bin/python -m pip install --upgrade pip' command.
from cowpy import cow
print(cow.milk_random_cow("hello,dev07"))
Removing intermediate container 476df4d1e83f
 ---> 4f53a90478a3
Step 8/8 : CMD python fun.py
 ---> Running in eeeca0281985
Removing intermediate container eeeca0281985
 ---> c005edf44c7c
Successfully built c005edf44c7c
Successfully tagged kobe/myapp:v1
运行容器:
sudo docker run -it kobe/myapp:v1 env
zhilong@zhilong-virtual-machine:~/Desktop/shell_text/docker1$ sudo docker run -it kobe/myapp:v1 env
PATH=/usr/local/bin:/usr/local/sbin:/usr/local/bin:/usr/sbin:/usr/bin:/sbin:/bin
HOSTNAME=85b6000b4128
TERM=xterm
LANG=C.UTF-8
GPG_KEY=E3FF2839C048B25C084DEBE9B26995E310250568
PYTHON_VERSION=3.8.13
PYTHON_PIP_VERSION=22.0.4
PYTHON_SETUPTOOLS_VERSION=57.5.0
PYTHON_GET_PIP_URL=https://github.com/pypa/get-pip/raw/6ce3639da143c5d79b44f94b04080abf2531fd6e/public/get-pip.py
PYTHON_GET_PIP_SHA256=ba3ab8267d91fd41c58dbce08f76db99f747f716d85ce1865813842bb035524d
myuser=zhikong
myage=18
HOME=/root
🔥注意:在命令中用-e指定的全局变量优先级高于Dockerfile指定的全局变量
🌙12、EXPOSE:将我们暴露出来的端口添加到Dockerfile文件中
格式:EXPOSE 8005
运行容器只能指定-p 8005:80
sudo docker run -it -p 8005:80 kobe/myapp:v1 /bin/sh
FROM python:3.8-alpine

LABEL maintaier="kobe<118@qq.com>"
LABEL description="Dockerfile demo"

WORKDIR /myapp

COPY . .

ENV myuser=zhikong \
        myage=18

EXPOSE 8005

RUN pip install -r requirements.txt && \
        cat fun.py && \
        ls /home


CMD python fun.py
🌙13、VOLUME:指定数据卷
VOLUME /myapp
FROM python:3.8-alpine

LABEL maintaier="kobe<118@qq.com>"
LABEL description="Dockerfile demo"

WORKDIR /myapp

COPY . .

ENV myuser=zhikong \
        myage=18

EXPOSE 8005
VOLUME /myapp

RUN pip install -r requirements.txt && \
        cat fun.py && \
        ls /home


CMD python fun.py
生成自定义镜像文件
zhilong@zhilong-virtual-machine:~/Desktop/shell_text/docker1$ sudo docker build -t kobe/myapp:v1 .
Sending build context to Docker daemon  5.632kB
Step 1/10 : FROM python:3.8-alpine
 ---> 926e859df334
Step 2/10 : LABEL maintaier="kobe<118@qq.com>"
 ---> Using cache
 ---> d77df09a3a66
Step 3/10 : LABEL description="Dockerfile demo"
 ---> Using cache
 ---> 0ffecf31e2c8
Step 4/10 : WORKDIR /myapp
 ---> Using cache
 ---> 82c7391ed055
Step 5/10 : COPY . .
...
...
...
运行容器
运行命令中指定-v myapp_v6:/myapp
宿主机中的myapp_v6目录与容器中的myapp目录相映射
zhilong@zhilong-virtual-machine:~/Desktop/shell_text/docker1$ sudo docker run -it -p 8005:80 -v myapp_v6:/myapp kobe/myapp:v1 /bin/sh
/myapp # ls
Dockerfile        fun.py            requirements.txt
/myapp #
到宿主机中查看映射的数据卷:
sudo docker volume ls
zhilong@zhilong-virtual-machine:~/Desktop/shell_text/docker/docker_888$ sudo docker volume ls
DRIVER VOLUME NAME
local 4f47bec7346a7eb6c9aa649a106d04659510f03e8b4703c458fa9f2a42789433
local 5faa504dd145732e6d4e4df20029c68251ecc1caecd1ab852053d1ec36b3aec9
local 8c9f9fd267a96b952fe55c3003dfa465b4f03be8f03e4fad5ec8351c14571ea8
local 97fff49444e3bb0e0d645acb4e58dd4d858adf0602c0e1a148611b8fa2c41489
local 781caa242336789da568505678c8993526b06dcaae8838c44825daf8a715c54d
local 937eb5f474823192d093ee01a42fdf44e2ef0b4945583dc3b85f0c807d6dccbb
local 19386203fc92fe20cf84aa4bc25c59714af8ce0341192360a1fee3d8fcd90c69
local c70b1dddf7f1fc2081beb035466b2086a1f595eb8cd5bc3feddda83e3d74a741
local ce7599f23cc77c08cc3138a4acc6837211a3c3c011cf522fc9db29c6bc8ed6f9
local deb359cde637d5df17b745130ce7a0cbacc01337df9413523eb24f72e8753c30
local e579bcfef5dabdc55f7618e60fe0df72fd922e2f94759db2e988d0e70d00f76c


**既有适合小白学习的零基础资料,也有适合3年以上经验的小伙伴深入学习提升的进阶课程,涵盖了95%以上大数据知识点,真正体系化!**
**由于文件比较多,这里只是将部分目录截图出来,全套包含大厂面经、学习笔记、源码讲义、实战项目、大纲路线、讲解视频,并且后续会持续更新**
**[需要这份系统化资料的朋友,可以戳这里获取](https://bbs.youkuaiyun.com/forums/4f45ff00ff254613a03fab5e56a57acb)**
1fee3d8fcd90c69
local c70b1dddf7f1fc2081beb035466b2086a1f595eb8cd5bc3feddda83e3d74a741
local ce7599f23cc77c08cc3138a4acc6837211a3c3c011cf522fc9db29c6bc8ed6f9
local deb359cde637d5df17b745130ce7a0cbacc01337df9413523eb24f72e8753c30
local e579bcfef5dabdc55f7618e60fe0df72fd922e2f94759db2e988d0e70d00f76c
[外链图片转存中...(img-32ICnnOR-1715347500171)]
[外链图片转存中...(img-gliKB4yv-1715347500172)]
[外链图片转存中...(img-1ZgupXcW-1715347500172)]
**既有适合小白学习的零基础资料,也有适合3年以上经验的小伙伴深入学习提升的进阶课程,涵盖了95%以上大数据知识点,真正体系化!**
**由于文件比较多,这里只是将部分目录截图出来,全套包含大厂面经、学习笔记、源码讲义、实战项目、大纲路线、讲解视频,并且后续会持续更新**
**[需要这份系统化资料的朋友,可以戳这里获取](https://bbs.youkuaiyun.com/forums/4f45ff00ff254613a03fab5e56a57acb)**


 被折叠的 条评论
为什么被折叠?


