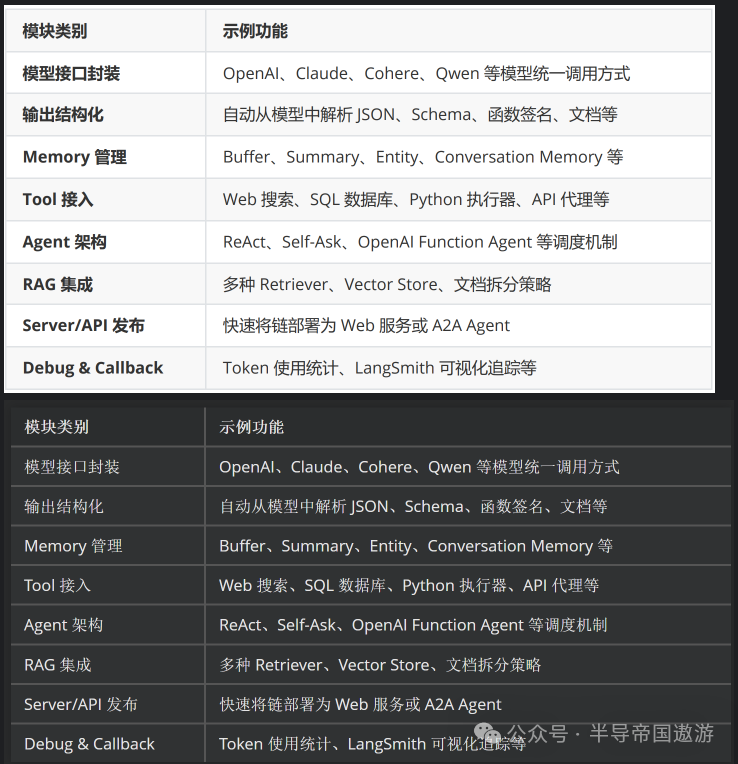
 DeepSeek-OCR:多模态RAG文档理解引擎


简介:仅仅识别文字远远不够,机器还需要理解整个文档的结构与语义。于是,新的 OCR 模型开始引入:
- 视觉 Transformer(Vision Transformer, ViT)结构;
- 布局分析(Layout Analysis)
- 视觉语言对齐(Vision-Language Alignment)
而在OCR 2.0(也就是VLM模型时代)中,OCR模型已经能够实现:
- 语义级解析:不仅识别文字,还能理解其上下文逻辑(如表头对应数据、公式与变量的关联);
- 结构级还原:能够自动将PDF文档转化为结构化的Markdown或HTML格式,保留段落层次、标题、列表等格式信息;
- 视觉语义融合:能看懂图像与文字的关系,比如“图1展示了实验流程”、“左图为原始图像、右图为结果对比”;
- 内容理解能力:不仅能提取表格数据,还能识别图表趋势、理解图像含义、甚至生成解释性描述。
PDF文档 → OCR/VLM解析 → Markdown/JSON结构化结果 → 向量化编码 → 检索/召回 → 大模型回答
DeepSeek-OCR 不仅继承了传统OCR的文本识别能力,更在“文档理解”层面进行了全方位升级。它融合了视觉语言模型(VLM)的多模态感知能力,能够同时“看懂文字”“理解布局”“分析图表”,真正实现了从“看见文字”到“理解内容”的跨越。具体而言,DeepSeek-OCR 模型可实现以下几大核心功能:
-
OCR纯文字提取: 支持对任意图像进行自由式文字识别(Free OCR),快速提取图片中的全部文本信息,不依赖版面结构,适合截图、票据、合同片段等轻量场景的快速文本获取。
-
保留版面格式的OCR提取: 模型可自动识别并重建文档中的排版结构,包括段落、标题、页眉页脚、列表与多栏布局,实现“结构化文字输出”。此功能可直接将扫描文档还原为可编辑的排版文本,方便二次编辑与归档。
-
图表 & 表格解析: DeepSeek-OCR 不仅识别文本,还能解析图像中的结构化信息,如表格、流程图、建筑平面图等,自动识别单元格边界、字段对齐关系及数据对应结构,支持生成可机读的表格或文本描述。
-
图片信息描述: 借助其多模态理解能力,模型能够对整张图片进行语义级分析与详细描述,生成自然语言总结,适用于视觉报告生成、科研论文图像理解以及复杂视觉场景说明。
-
指定元素位置锁定: 支持通过“视觉定位”(Grounding)功能,在图像中准确定位特定目标元素。例如,输入“Locate signature in the image”,模型即可返回签名区域的坐标,实现基于语义的图像检索与目标检测。
-
Markdown文档转化: 可将完整的文档图像直接转换为结构化 Markdown 文本,自动识别标题层级、段落结构、表格与列表格式,是实现文档数字化、知识库构建和多模态RAG场景的重要基础模块。
-
目标检测(Object Detection)
在多模态扩展任务中,DeepSeek-OCR 还能够识别并定位图片中的多个物体。通过输入如下提示词,模型会为每个目标生成带标签的边界框(bounding boxes),从而实现精准的视觉识别与标注。
模型权重下载:
国内:https://www.modelscope.cn/models/deepseek-ai/DeepSeek-OCR/summary国外:https://github.com/deepseek-ai/DeepSeek-OCR
一、本地部署
1、权重下载
pip install modelscopemkdir ./deepseek-ocrmodelscope download --model deepseek-ai/DeepSeek-OCR --local_dir ./deepseek-ocr
2、运行环境
git clone https://github.com/deepseek-ai/DeepSeek-OCR.git
conda create -n deepseek-ocr python=3.12.9 -yconda activate deepseek-ocr
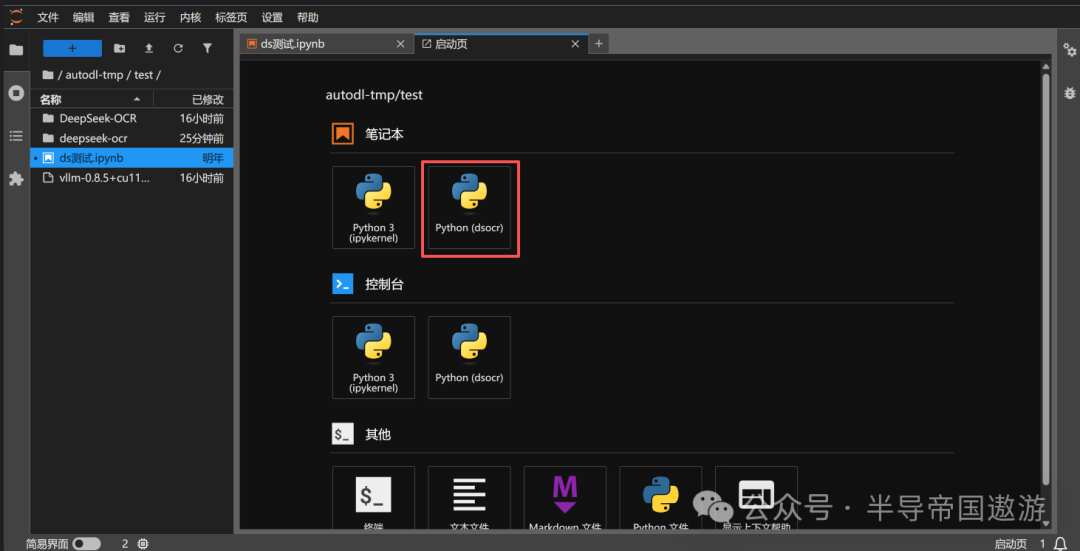
安装jupyter内核:
conda install jupyterlabconda install ipykernelpython -m ipykernel install --user --name dsocr --display-name "Python (dsocr)"
安装pytorch组件:
pip install torch==2.6.0 torchvision==0.21.0 torchaudio==2.6.0 --index-url https://download.pytorch.org/whl/cu118
安装VLLM:
pip install vllm-0.8.5+cu118-cp38-abi3-manylinux1_x86_64.whl
3、进入github主目录,pip install 安装基础依赖:
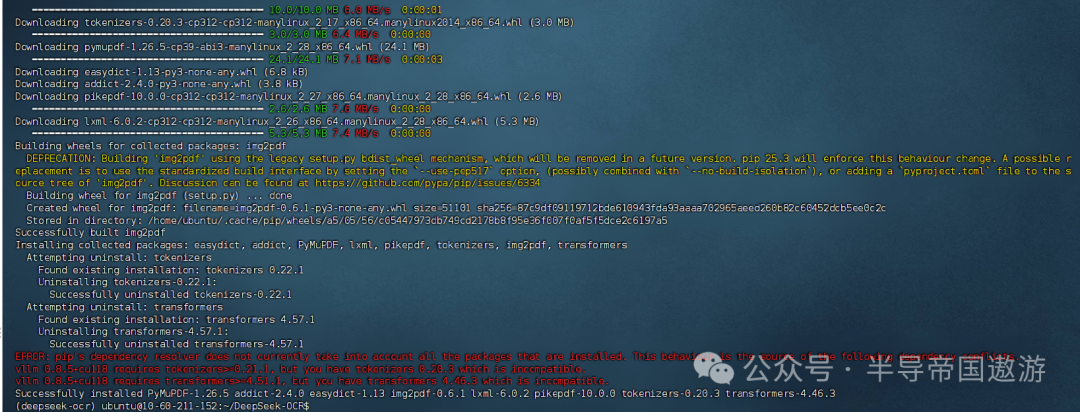
cd ./DeepSeek-OCR/pip install -r requirements.txt
依赖包:
transformers==4.46.3tokenizers==0.20.3PyMuPDFimg2pdfeinopseasydictaddictPillownumpy
再安装flash-attn加速库:
pip install flash-attn==2.7.3 --no-build-isolation
4、使用方式一(DeepSeek-OCR模型transformers调用流程)
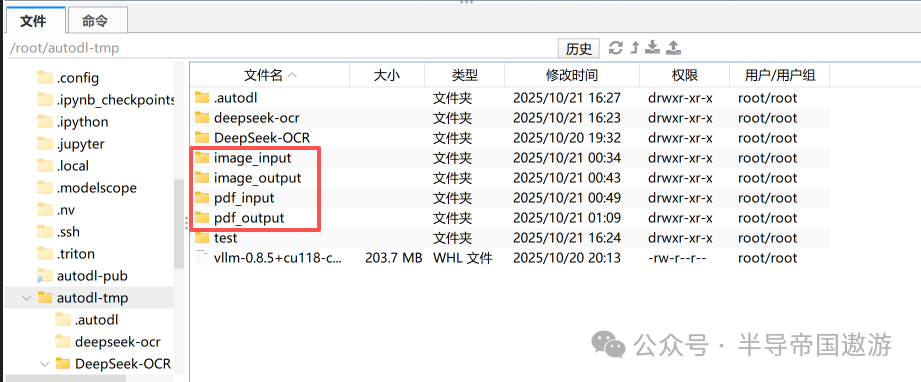
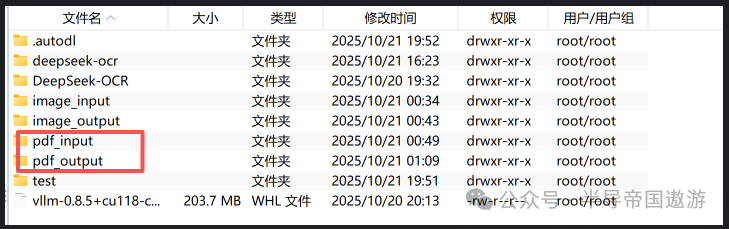
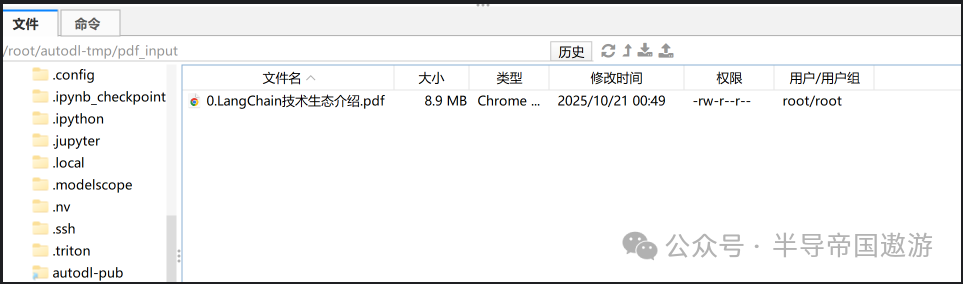
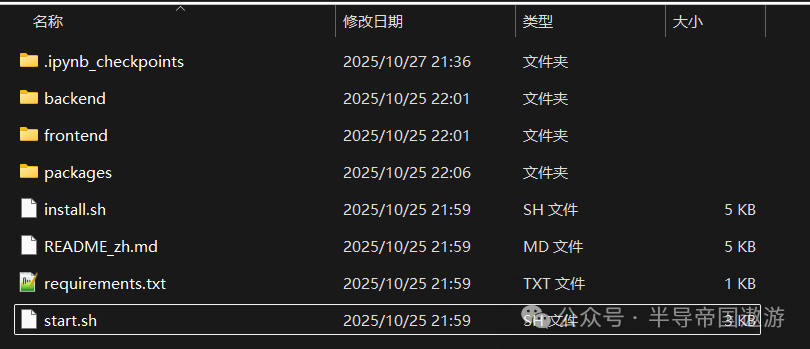
创建4个文件夹,分别用于存储输入和输出的PDF、Images等文件
打开jupyter环境:
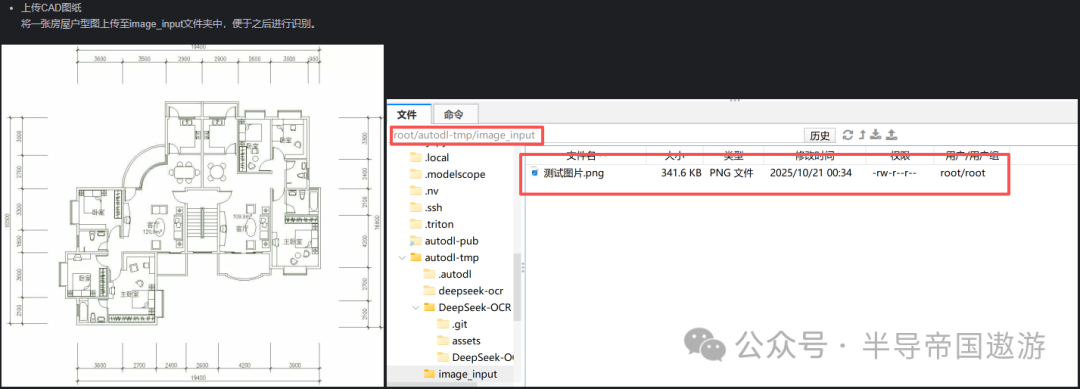
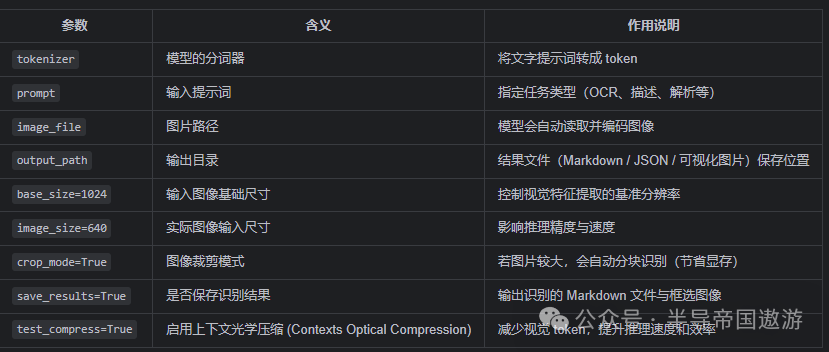
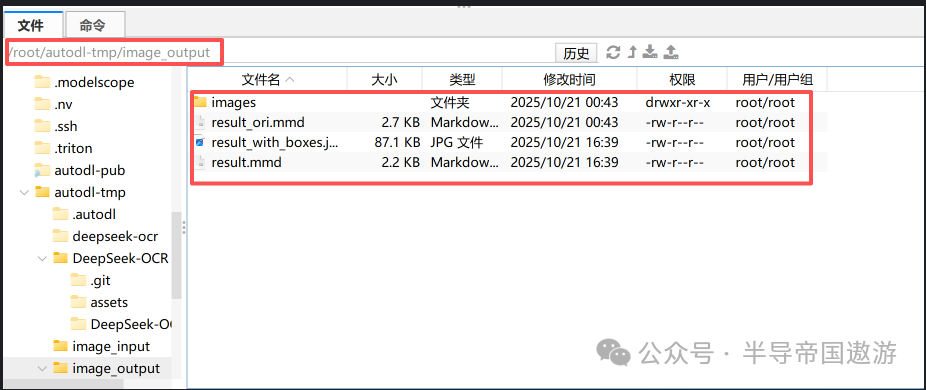
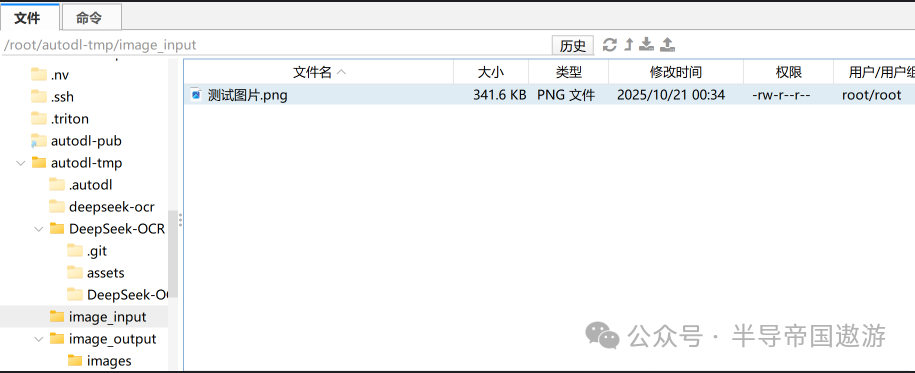
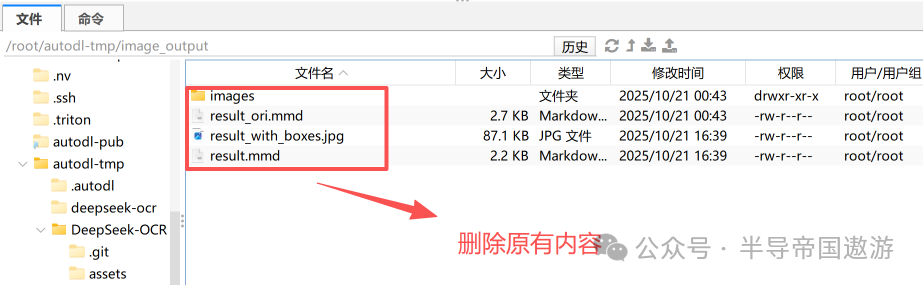
from transformers import AutoModel, AutoTokenizerimport torchimport osos.environ["CUDA_VISIBLE_DEVICES"] = '0'model_name = 'deepseek-ai/DeepSeek-OCR'tokenizer = AutoTokenizer.from_pretrained(model_name, trust_remote_code=True)model = AutoModel.from_pretrained(model_name, _attn_implementation='flash_attention_2', trust_remote_code=True, use_safetensors=True)model = model.eval().cuda().to(torch.bfloat16)prompt = "<image>\nDescribe this image in detail."image_file = '/root/autodl-tmp/image_input/测试图片.png'output_path = '/root/autodl-tmp/image_output'res = model.infer(tokenizer, prompt=prompt, image_file=image_file, output_path = output_path, base_size = 1024, image_size = 640, crop_mode=True, save_results = True, test_compress = True)
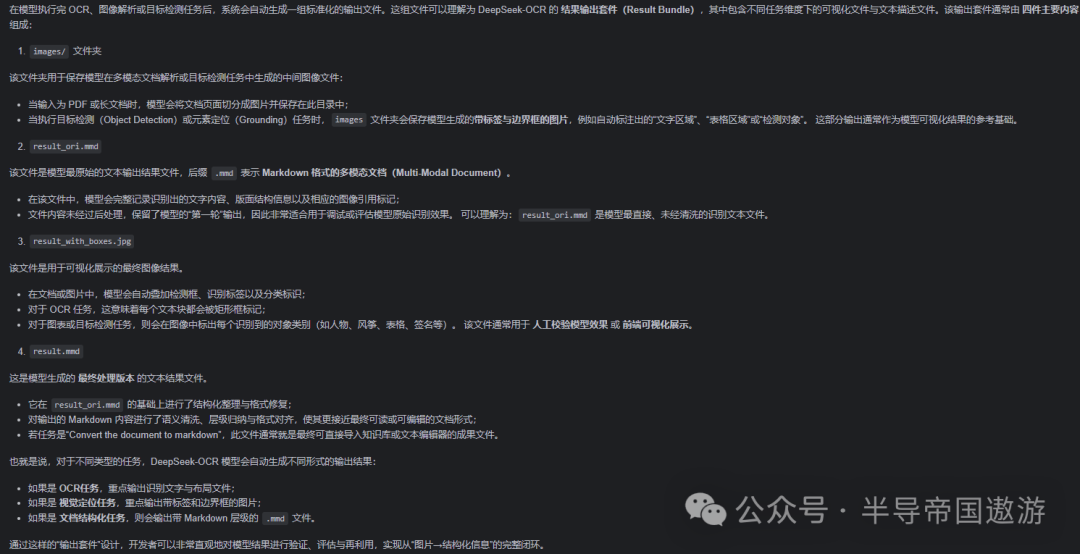
输出结果:
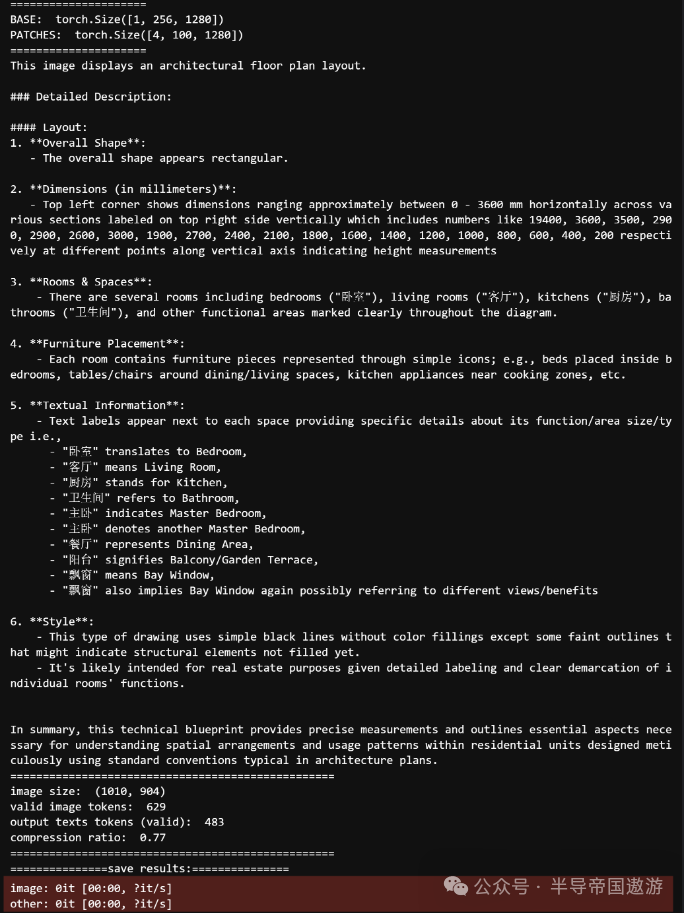
res解析:
返回的 res 通常是一个字典(dict),包含:
-
模型生成的完整文本输出;
-
Markdown 或 LaTeX 格式结构化内容;
-
可选的调试信息(如 token 数、生成时间等)。
5、使用方式二(VLLM调用过程)
具体流程:
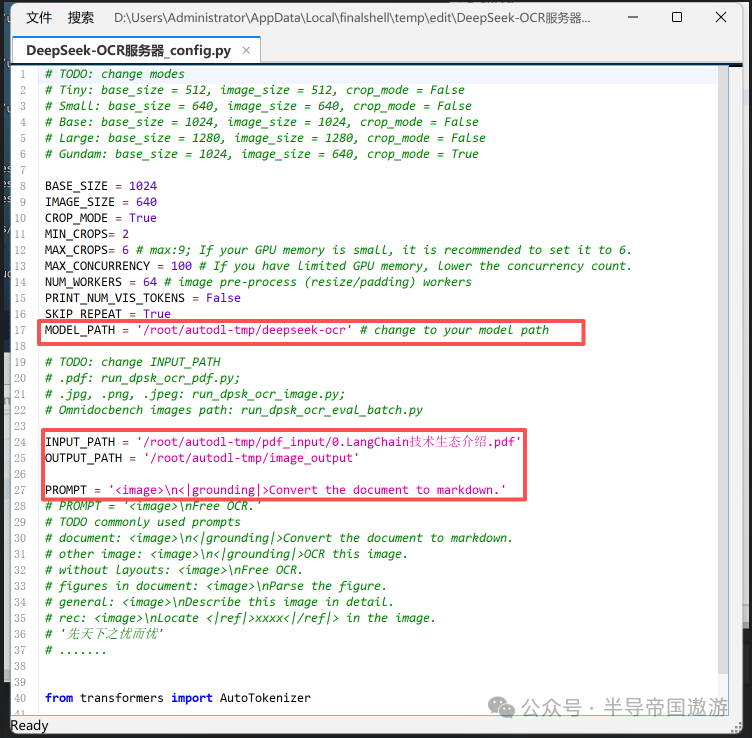
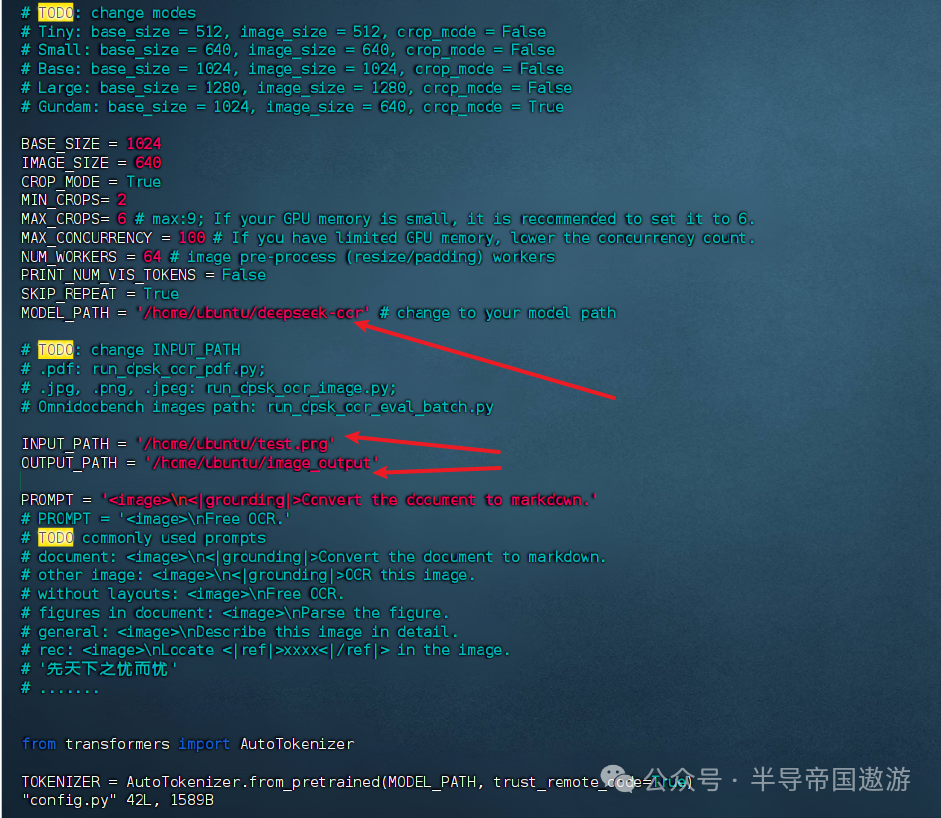
step1:上传CAD图纸到指定文件夹:将待识别的 CAD 图纸(支持 .jpg、.png、.pdf 等格式)放入项目根目录下的 input/ 文件夹中,确保文件路径与 config.py 中的 INPUT_PATH 对应
step2:修改config.py配置文件:在 config.py 中设置模型路径、输入输出目录及提示词(如 <image>\n<|grounding|>Describe this image in detail.)。同时可根据显卡显存调整 BASE_SIZE 与 IMAGE_SIZE 参数,以保证推理顺利运行
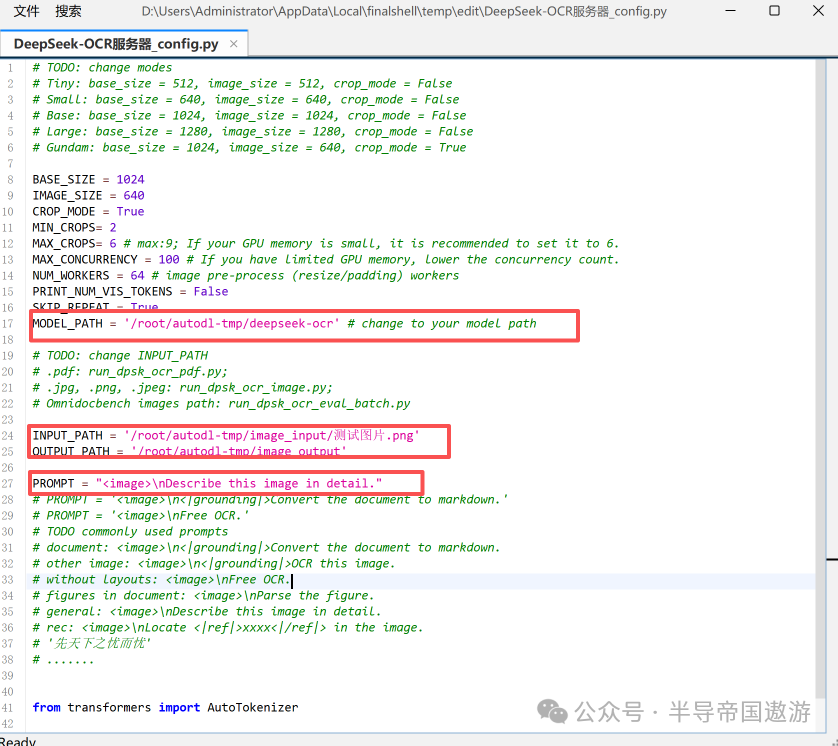
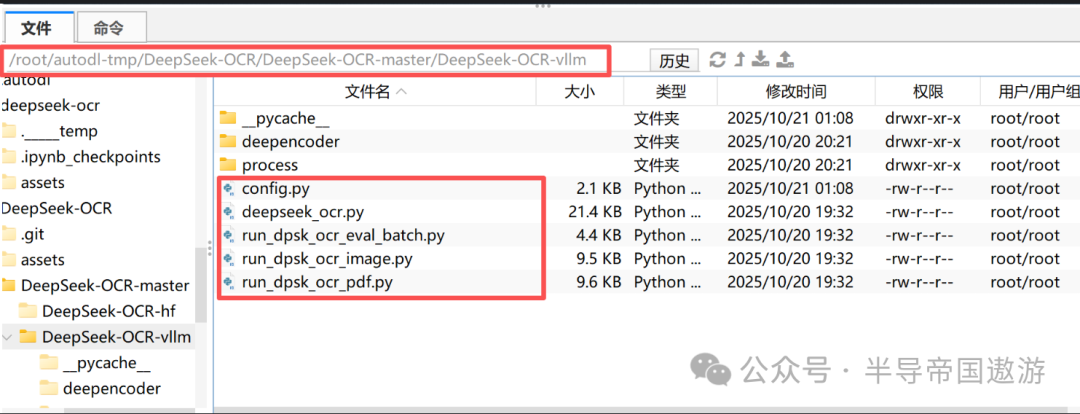
step3:启动运行脚本:执行 python run_dpsk_ocr_image.py 或基于 vLLM 的版本脚本,即可启动推理进程。系统会自动加载模型,对CAD图纸进行内容识别与结构化解析
cd /root/autodl-tmp/DeepSeek-OCR/DeepSeek-OCR-master/DeepSeek-OCR-vllmpython run_dpsk_ocr_image.py
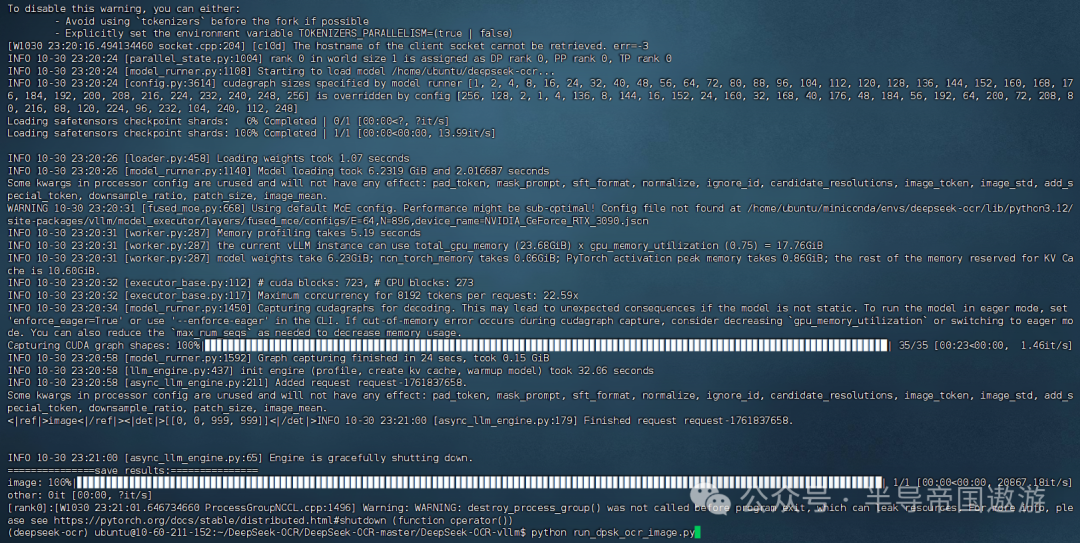
step4:查看结果:识别结果会保存在 output/ 文件夹中,默认输出为 Markdown 格式文件。 可在文本编辑器或浏览器中查看完整的图纸识别与文字提取效果
二、图片和PDF的识别示例
类1【图表类图片识别与解析】
1、图片-【Free OCR】:提取图片信息并转化为MarkDown语法文本
prompt = "<image>\nFree OCR."image_file = './pictures/图1.png'output_path = './image_output/free_OCR'res = model.infer(tokenizer, prompt=prompt, image_file=image_file, output_path = output_path, base_size = 1024, image_size = 640, crop_mode=True, save_results = True, test_compress = True)
效果:
2、【Parse the figure】:提取图片信息并转化为HTML语法文本
prompt = "<image>\nParse the figure."image_file = './pictures/图1.png'output_path = './image_output/free_OCR'res = model.infer(tokenizer, prompt=prompt, image_file=image_file, output_path = output_path, base_size = 1024, image_size = 640, crop_mode=True, save_results = True, test_compress = True)
3、【OCR this image】:只提取文字,不管任何格式
prompt = "<image>\nOCR this image."image_file = './pictures/图1.png'output_path = './image_output/free_OCR'res = model.infer(tokenizer, prompt=prompt, image_file=image_file, output_path = output_path, base_size = 1024, image_size = 640, crop_mode=True, save_results = True, test_compress = True)
4、【Describe this image in detail】Describe this image in detail:采用VLM方式对图片信息进行理解和提炼
prompt = "<image>\nDescribe this image in detail."image_file = './pictures/图1.png'output_path = './image_output/free_OCR'res = model.infer(tokenizer, prompt=prompt, image_file=image_file, output_path = output_path, base_size = 1024, image_size = 640, crop_mode=True, save_results = True, test_compress = True)
类2【可视化图片识别】

prompt = "<image>\nParse the figure."image_file = './pictures/图3.png'output_path = './image_output/free_OCR'res = model.infer(tokenizer, prompt=prompt, image_file=image_file, output_path = output_path, base_size = 1024, image_size = 640, crop_mode=True, save_results = True, test_compress = True)
类3【公式、手写体文字识别】
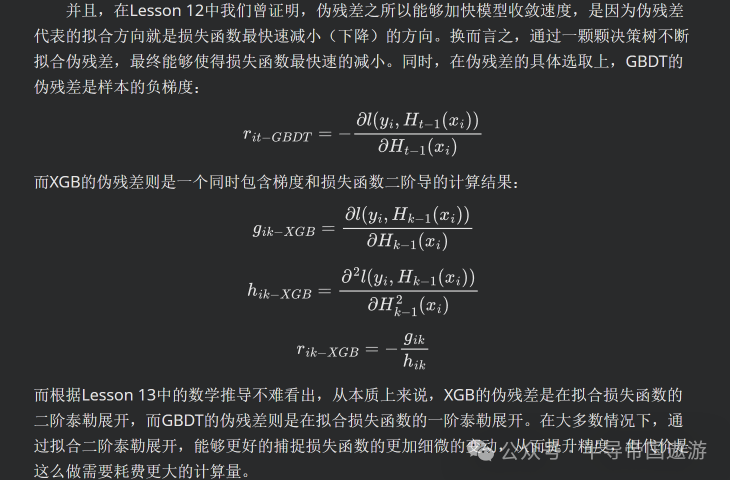
prompt = "<image>\n<|grounding|>Convert the document to markdown."image_file = './pictures/图5.png'output_path = './image_output/free_OCR'res = model.infer(tokenizer, prompt=prompt, image_file=image_file, output_path = output_path, base_size = 1024, image_size = 640, crop_mode=True, save_results = True, test_compress = True)
类4【CAD图纸、装饰图、流程图识别】
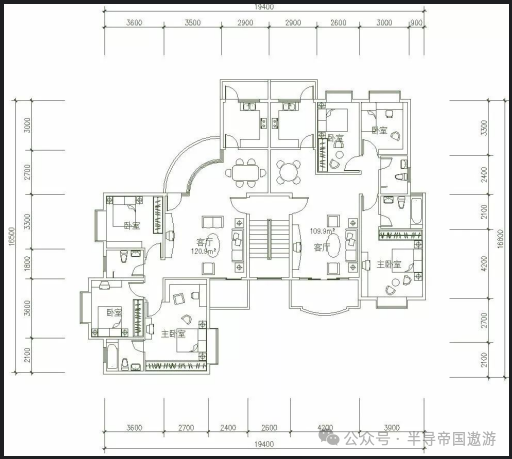
prompt = "<image>\nDescribe this image in detail."image_file = './pictures/图5.png'output_path = './image_output/free_OCR'res = model.infer(tokenizer, prompt=prompt, image_file=image_file, output_path = output_path, base_size = 1024, image_size = 640, crop_mode=True, save_results = True, test_compress = True)
类5【PDF转MarkDown】
练习一下使用方式二
conda activate deepseek-ocrcd /root/autodl-tmp/test/DeepSeek-OCR/DeepSeek-OCR-master/DeepSeek-OCR-vllm
运行:python run_dpsk_ocr_pdf.py
python run_dpsk_ocr_pdf.py
进一步添加图片解析:
import os, re, io, base64, requests, jsonfrom PIL import ImageDEFAULT_PROMPT = ("You are an OCR & document understanding assistant.\n""Analyze this image region and produce:\n""1) ALT: a very short alt text (<=12 words).\n""2) CAPTION: a 1-2 sentence concise caption.\n""3) CONTENT_MD: if the image contains a table, output a clean Markdown table;"" if it contains a formula, output LaTeX ($...$ or $$...$$);"" otherwise provide 3-6 bullet points summarizing key content, in Markdown.\n""Return strictly in the following format:\n""ALT: <short alt>\n""CAPTION: <one or two sentences>\n""CONTENT_MD:\n""<markdown content here>\n")IMG_PATTERN = re.compile(r'!\[[^\]]*\]\(([^)]+)\)')def call_deepseek-ocr_image(vllm_url, model, img_path,temperature=0.2, max_tokens=2048,prompt=DEFAULT_PROMPT):"""调用 vLLM(deepseek-ocr) 进行图片解析,返回 {alt, caption, content_md}"""with Image.open(img_path) as im:bio = io.BytesIO()im.save(bio, format="PNG")img_bytes = bio.getvalue()payload = {"model": model,"messages": [{"role": "user","content": [{"type": "text", "text": prompt},{"type": "image_url","image_url": {"url": f"data:image/png;base64,{base64.b64encode(img_bytes).decode()}", "detail": "auto"}}]}],"temperature": temperature,"max_tokens": max_tokens,}r = requests.post(vllm_url, json=payload, timeout=180)r.raise_for_status()text = r.json()["choices"][0]["message"]["content"].strip()# 解析返回alt, caption, content_md_lines = "", "", []mode = Nonefor line in text.splitlines():l = line.strip()if l.upper().startswith("ALT:"):alt = l.split(":", 1)[1].strip()mode = Noneelif l.upper().startswith("CAPTION:"):caption = l.split(":", 1)[1].strip()mode = Noneelif l.upper().startswith("CONTENT_MD:"):mode = "content"else:if mode == "content":content_md_lines.append(line.rstrip())return {"alt": alt or "Figure","caption": caption or alt or "","content_md": "\n".join(content_md_lines).strip()}def augment_markdown(md_path, out_path,vllm_url="http://localhost:8001/v1/chat/completions",model="deepseek-ocr",temperature=0.2, max_tokens=2048,image_root=".",cache_json=None):with open(md_path, "r", encoding="utf-8") as f:md_lines = f.read().splitlines()cache = {}if cache_json and os.path.exists(cache_json):try:cache = json.load(open(cache_json, "r", encoding="utf-8"))except Exception:cache = {}out_lines = []for line in md_lines:out_lines.append(line)m = IMG_PATTERN.search(line)if not m:continueimg_rel = m.group(1).strip().split("?")[0]img_path = img_rel if os.path.isabs(img_rel) else os.path.join(image_root, img_rel)if not os.path.exists(img_path):out_lines.append(f"<!-- WARN: image not found: {img_rel} -->")continueif cache_json and img_path in cache:result = cache[img_path]else:result = call_deepseek-ocr_image(vllm_url, model, img_path,temperature, max_tokens)if cache_json:cache[img_path] = resultalt, cap, body = result["alt"], result["caption"], result["content_md"]if cap:out_lines.append(f"*{cap}*")if body:out_lines.append("<details><summary>解析</summary>\n")out_lines.append(body)out_lines.append("\n</details>")with open(out_path, "w", encoding="utf-8") as f:f.write("\n".join(out_lines))if cache_json:with open(cache_json, "w", encoding="utf-8") as f:json.dump(cache, f, ensure_ascii=False, indent=2)print(f"✅ 已写入增强后的 Markdown:{out_path}")augment_markdown(md_path="output.md", # 第一步生成的 mdout_path="output_augmented.md", # 增强后的 mdvllm_url="http://localhost:8001/v1/chat/completions", # 你的 vLLM 服务model="deepseek-ocr",image_root=".", # 图片路径相对根目录cache_json="image_cache.json" # 可选,缓存文件)
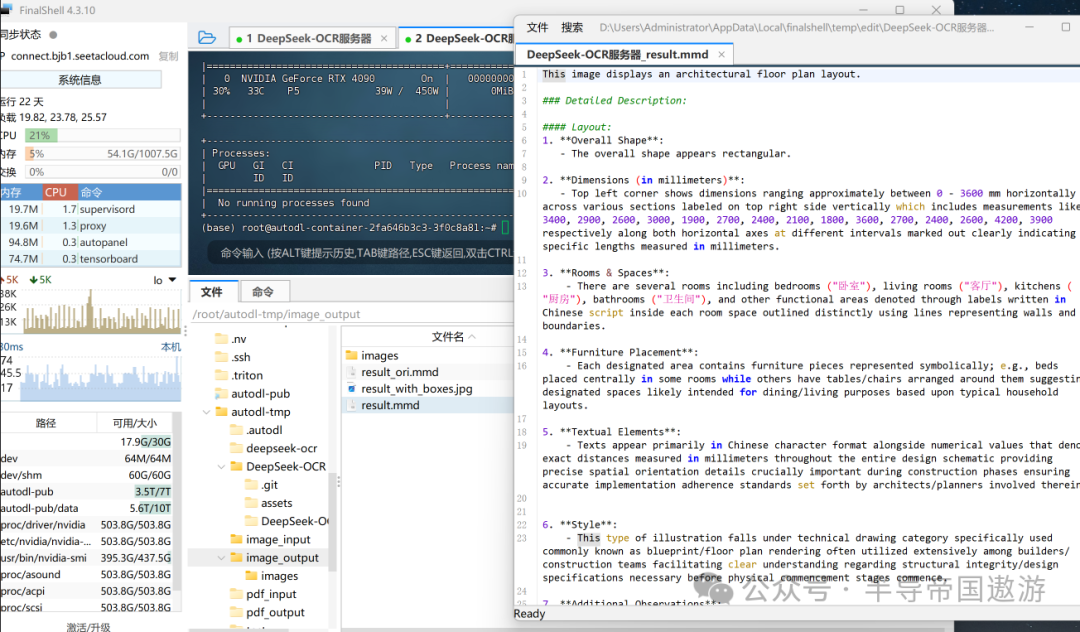
三、Deepseek-OCR 搭建多模态系统
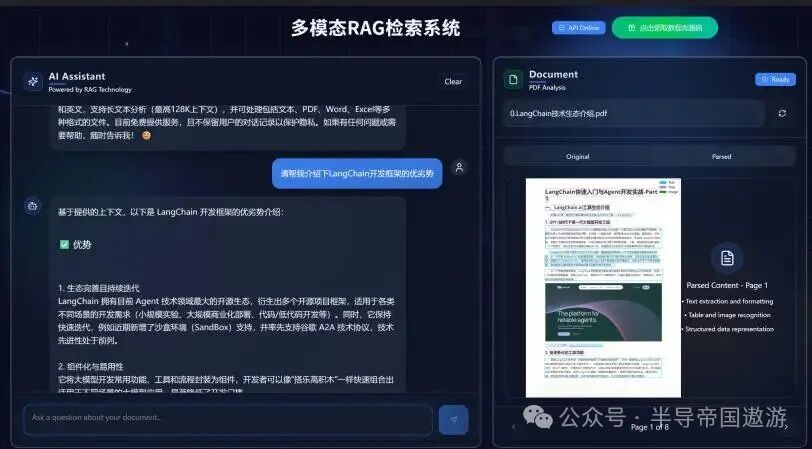
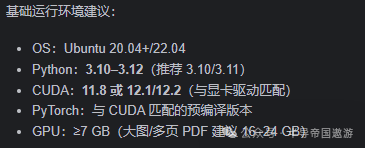
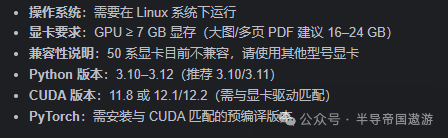
系统要求:
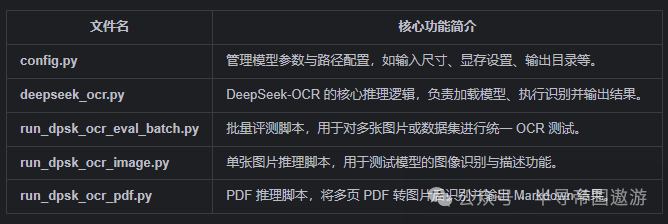
代码结构:
部署过程:
1、模型权重下载
pip install modelscopemkdir ./deepseek-ocrmodelscope download --model deepseek-ai/DeepSeek-OCR --local_dir ./deepseek-ocr
2、运行环境搭建
git clone https://github.com/deepseek-ai/DeepSeek-OCR.gitconda create -n deepseek-ocr python=3.12.9 -yconda activate deepseek-ocr
conda install jupyterlabconda install ipykernelpython -m ipykernel install --user --name dsocr --display-name "Python (dsocr)"
安装pytorch相关组件:
pip install torch==2.6.0 torchvision==0.21.0 torchaudio==2.6.0 --index-url https://download.pytorch.org/whl/cu118
安装指定版本的vLLM才能运行DeepSeek-OCR模型:
wget --content-disposition "https://github.com/vllm-project/vllm/releases/download/v0.8.5/vllm-0.8.5+cu118-cp38-abi3-manylinux1_x86_64.whl"
安装下载的vLLM:
pip install vllm-0.8.5+cu118-cp38-abi3-manylinux1_x86_64.whl
安装项目基础依赖:
cd ./DeepSeek-OCR/pip install -r requirements.txt
安装flash-attn加速库:
pip install flash-attn==2.7.3 --no-build-isolation
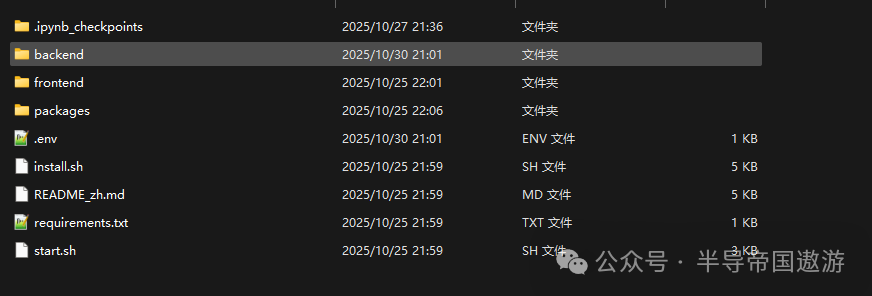
在项目根目录下创建.env文件,并输入模型运行地址
MODEL_PATH=/home/ubuntu/deepseek-ocr
pip install -r requirements.txt
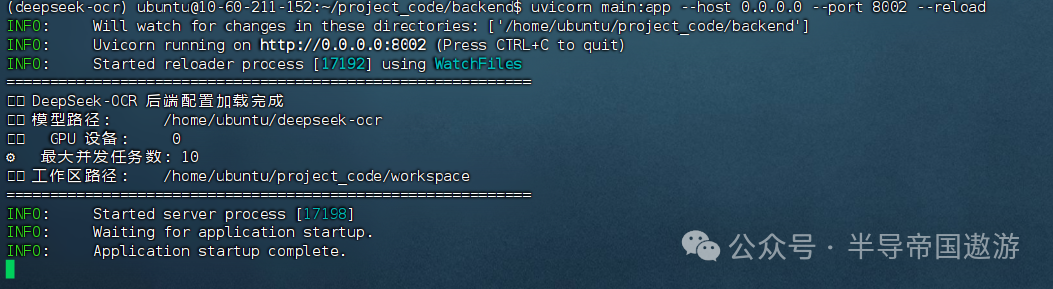
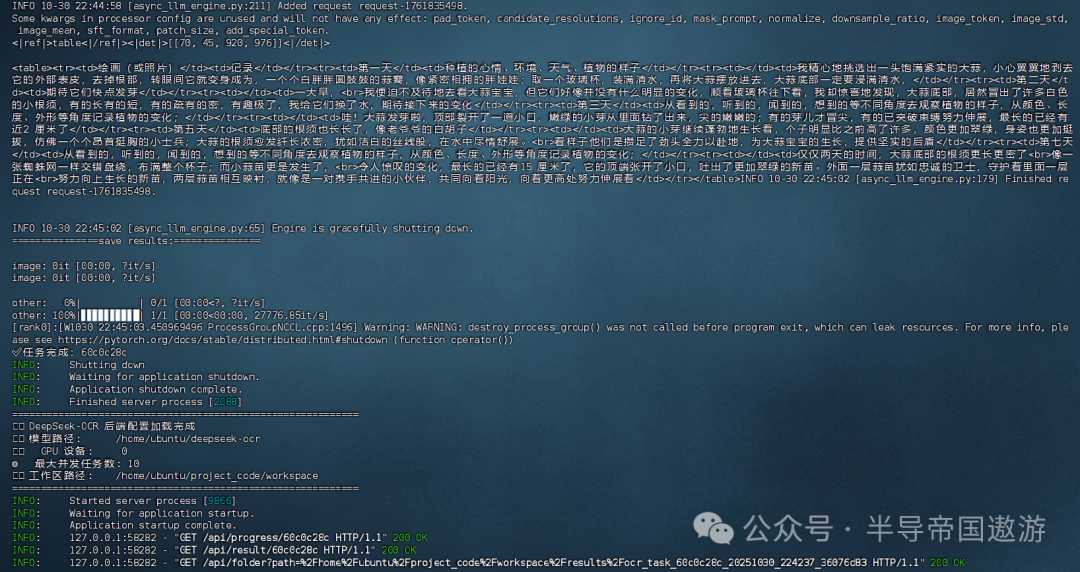
3、启动后端服务:
cd backend/uvicorn main:app --host 0.0.0.0 --port 8002 --reload
4、启动前端服务:
# 使用淘宝镜像npm install --registry=https://registry.npmmirror.com# 使用华为云镜像npm install --registry=https://mirrors.huaweicloud.com/repository/npm/# 使用腾讯云镜像npm install --registry=https://mirrors.cloud.tencent.com/npm/
cd frontendnpm installnpm run dev
5、浏览器访问
http://127.0.0.1:8002

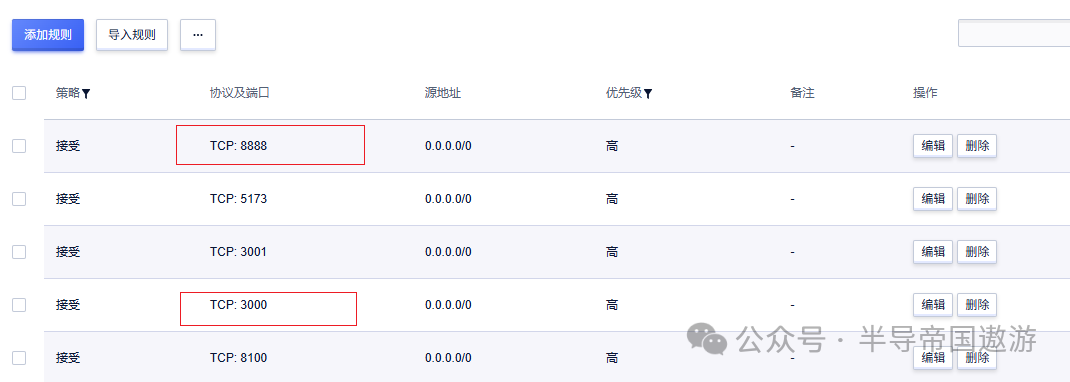
6、端口映射
ssh -CNg -L 8002:127.0.0.1:8002 -L 3000:127.0.0.1:3000 -L 8888:127.0.0.1:8888 ubuntu@117.50.179.41 -p 22I2Td48j5X3pa690N
7、设置防火墙:
最后
我在一线科技企业深耕十二载,见证过太多因技术卡位而跃迁的案例。那些率先拥抱 AI 的同事,早已在效率与薪资上形成代际优势,我意识到有很多经验和知识值得分享给大家,也可以通过我们的能力和经验解答大家在大模型的学习中的很多困惑。
我整理出这套 AI 大模型突围资料包:
- ✅AI大模型学习路线图
- ✅Agent行业报告
- ✅100集大模型视频教程
- ✅大模型书籍PDF
- ✅DeepSeek教程
- ✅AI产品经理入门资料
如果你也想通过学大模型技术去帮助自己升职和加薪,可以扫描下方链接👇👇

为什么我要说现在普通人就业/升职加薪的首选是AI大模型?
人工智能技术的爆发式增长,正以不可逆转之势重塑就业市场版图。从DeepSeek等国产大模型引发的科技圈热议,到全国两会关于AI产业发展的政策聚焦,再到招聘会上排起的长队,AI的热度已从技术领域渗透到就业市场的每一个角落。
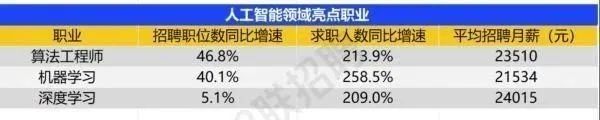
智联招聘的最新数据给出了最直观的印证:2025年2月,AI领域求职人数同比增幅突破200% ,远超其他行业平均水平;整个人工智能行业的求职增速达到33.4%,位居各行业榜首,其中人工智能工程师岗位的求职热度更是飙升69.6%。
AI产业的快速扩张,也让人才供需矛盾愈发突出。麦肯锡报告明确预测,到2030年中国AI专业人才需求将达600万人,人才缺口可能高达400万人,这一缺口不仅存在于核心技术领域,更蔓延至产业应用的各个环节。


资料包有什么?
①从入门到精通的全套视频教程
包含提示词工程、RAG、Agent等技术点

② AI大模型学习路线图(还有视频解说)
全过程AI大模型学习路线

③学习电子书籍和技术文档
市面上的大模型书籍确实太多了,这些是我精选出来的

④各大厂大模型面试题目详解

⑤ 这些资料真的有用吗?
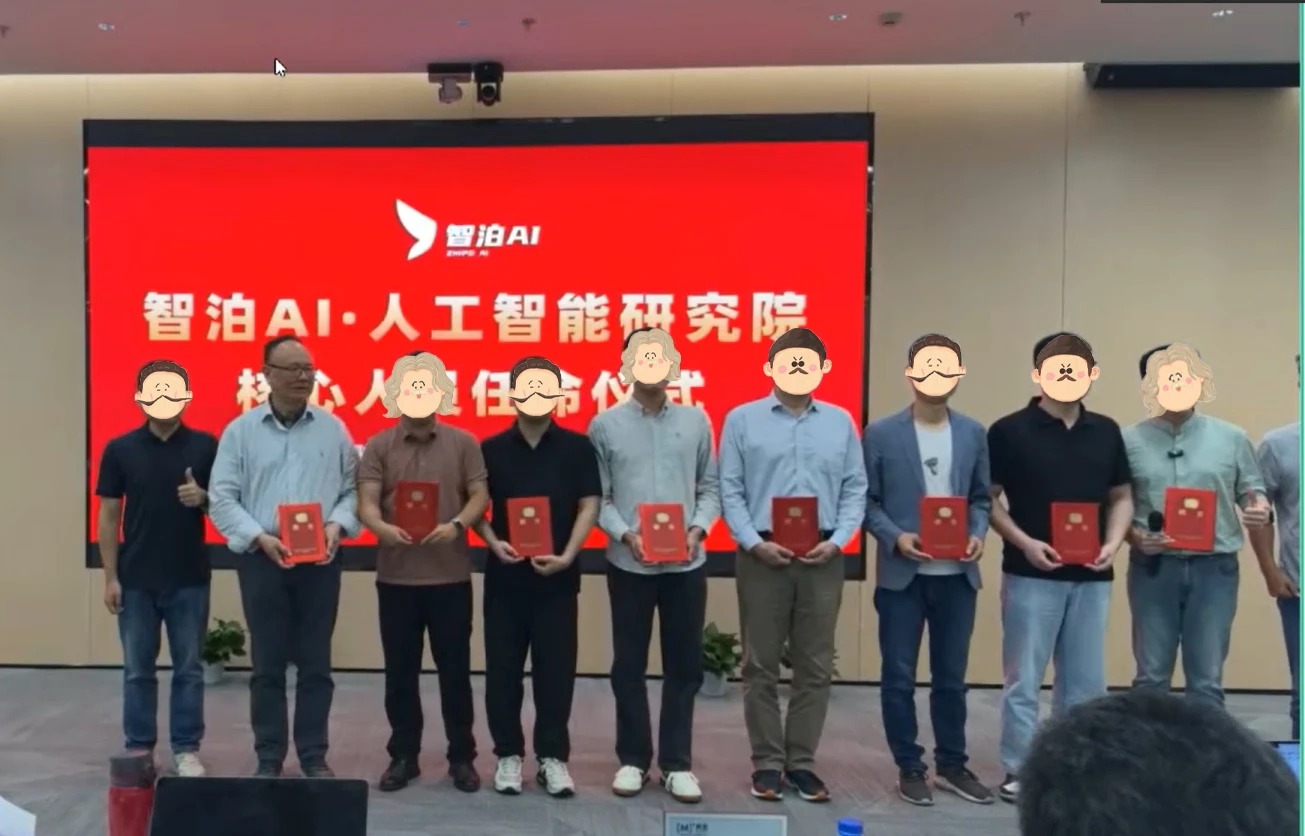
这份资料由我和鲁为民博士共同整理,鲁为民博士先后获得了北京清华大学学士和美国加州理工学院博士学位,在包括IEEE Transactions等学术期刊和诸多国际会议上发表了超过50篇学术论文、取得了多项美国和中国发明专利,同时还斩获了吴文俊人工智能科学技术奖。目前我正在和鲁博士共同进行人工智能的研究。
所有的视频教程由智泊AI老师录制,且资料与智泊AI共享,相互补充。这份学习大礼包应该算是现在最全面的大模型学习资料了。
资料内容涵盖了从入门到进阶的各类视频教程和实战项目,无论你是小白还是有些技术基础的,这份资料都绝对能帮助你提升薪资待遇,转行大模型岗位。

智泊AI始终秉持着“让每个人平等享受到优质教育资源”的育人理念,通过动态追踪大模型开发、数据标注伦理等前沿技术趋势,构建起"前沿课程+智能实训+精准就业"的高效培养体系。
课堂上不光教理论,还带着学员做了十多个真实项目。学员要亲自上手搞数据清洗、模型调优这些硬核操作,把课本知识变成真本事!


如果说你是以下人群中的其中一类,都可以来智泊AI学习人工智能,找到高薪工作,一次小小的“投资”换来的是终身受益!
应届毕业生:无工作经验但想要系统学习AI大模型技术,期待通过实战项目掌握核心技术。
零基础转型:非技术背景但关注AI应用场景,计划通过低代码工具实现“AI+行业”跨界。
业务赋能 突破瓶颈:传统开发者(Java/前端等)学习Transformer架构与LangChain框架,向AI全栈工程师转型。
👉获取方式:
😝有需要的小伙伴,可以保存图片到wx扫描二v码免费领取【保证100%免费】🆓


 2590
2590

 被折叠的 条评论
为什么被折叠?
被折叠的 条评论
为什么被折叠?
 到【灌水乐园】发言


